How to Use Placeholders in Proactive Campaigns
-
Proactive Campaigns

Placeholders (also commonly called mail merges) let you personalize your Proactive Campaigns emails and SMS messages with information from Zendesk. Instead of creating a separate message for every customer, you can add a placeholder and let Proactive Campaigns automatically insert the relevant customer, ticket, or custom field data when the message is sent.
For example:
When the campaign is sent, the placeholder can be replaced with the customer's name:
In this guide, you'll learn where you can use placeholders, how to insert and format them, and how to check whether they're valid.
Where Can You Use Placeholders?
You can use placeholders across different Proactive Campaigns features:
- Email campaigns — in subject lines and email bodies
- Email templates — including HTML/rich-text templates and templates created with Template Builder
- SMS campaigns — in message text
- Automated email sequences
What Information Can You Personalize?
You can use placeholders to add different types of information from Zendesk to your messages.
User, organization, and ticket data — Use available standard customer, organization, and ticket fields, such as the customer's name or email, organization name, ticket ID, subject, status, and other supported information.
Custom fields — Use values stored in your Zendesk custom fields. For example:
You can add these values to your Zendesk custom fields manually or import them from a CSV file when creating a campaign. During CSV import, map the column containing the personalized data to the corresponding Zendesk custom field. Proactive Campaigns then uses that custom field value when replacing the placeholder.
Links — Store a customer-specific URL in a custom field and use its placeholder in your message:
How to Insert a Placeholder?
In the email body and template editors, you can quickly find and insert placeholders without typing their full syntax. There are two methods:
1. Type {{ — After typing two curly brackets, a dropdown with available placeholders will appear. Scroll through the list or continue typing to filter the results, then select the placeholder.
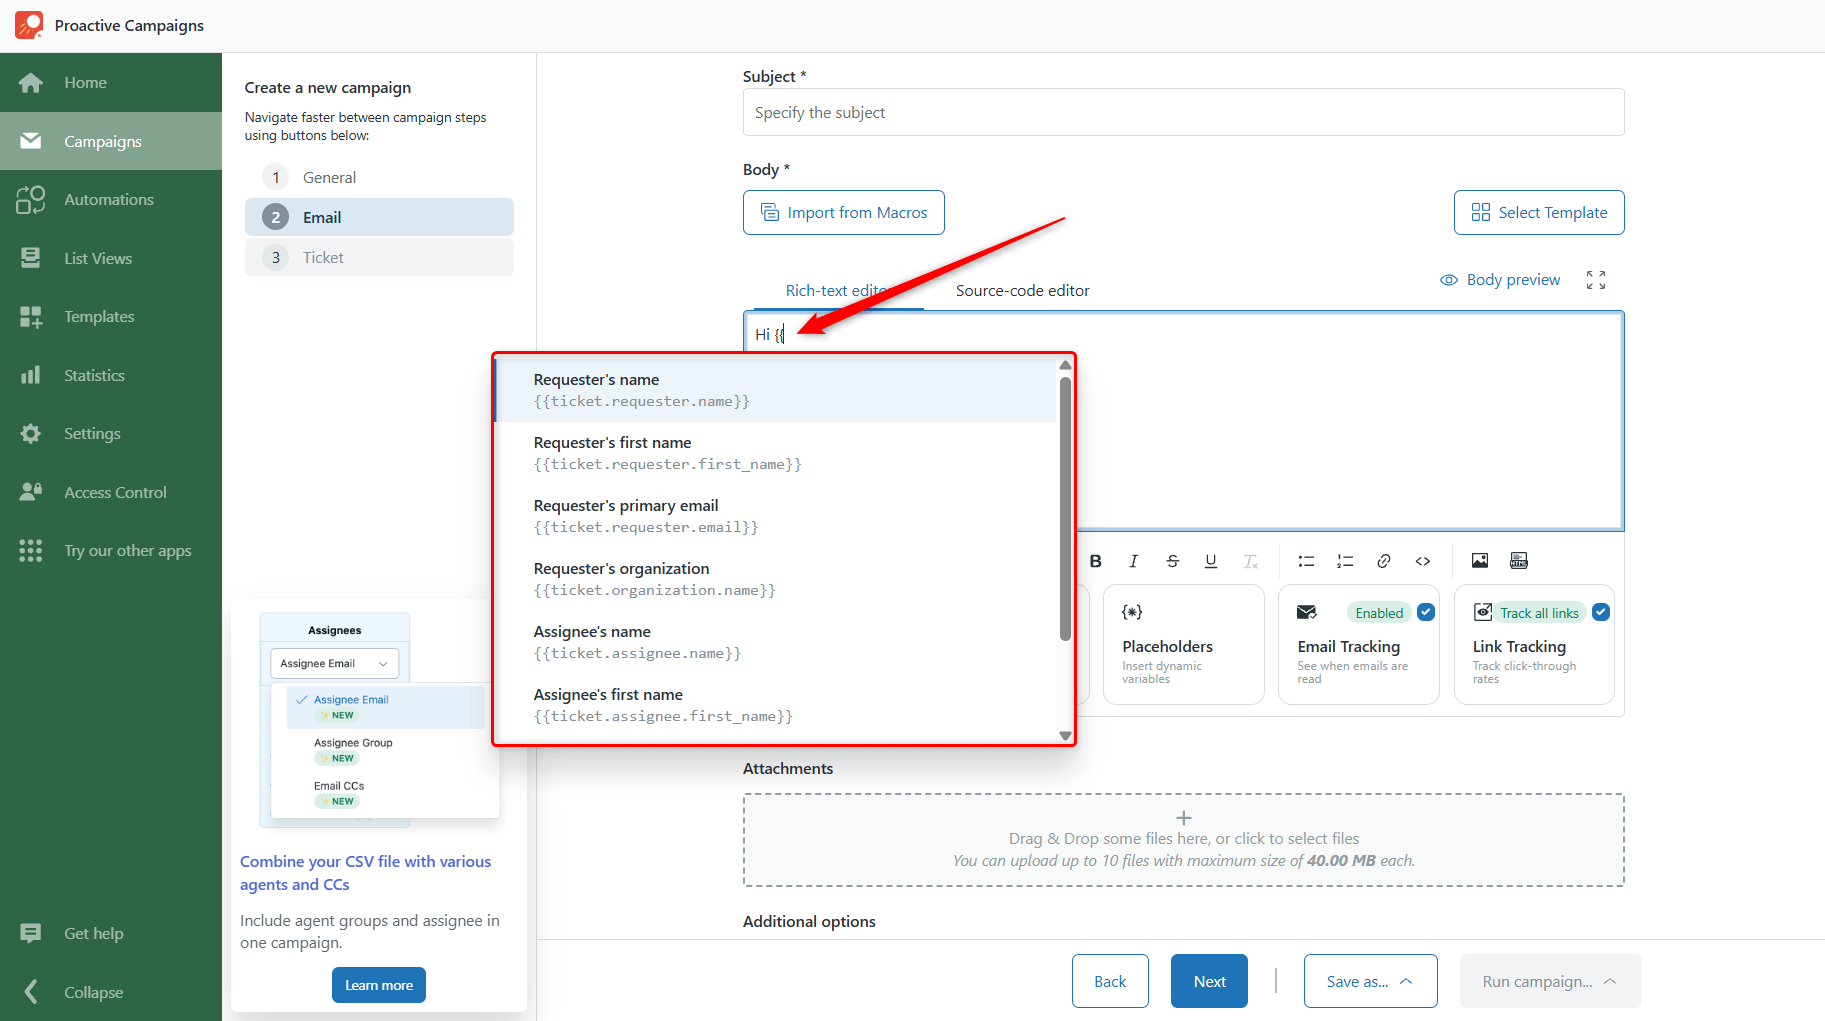
2. Use the Placeholders button — Click Placeholders in the editor toolbar. The window includes two tabs:
- Featured: shows the most relevant placeholders, including recommended Zendesk placeholders and ticket and user fields mapped from CSV data.
- All placeholders: Contains the full list of placeholders supported by the editor.
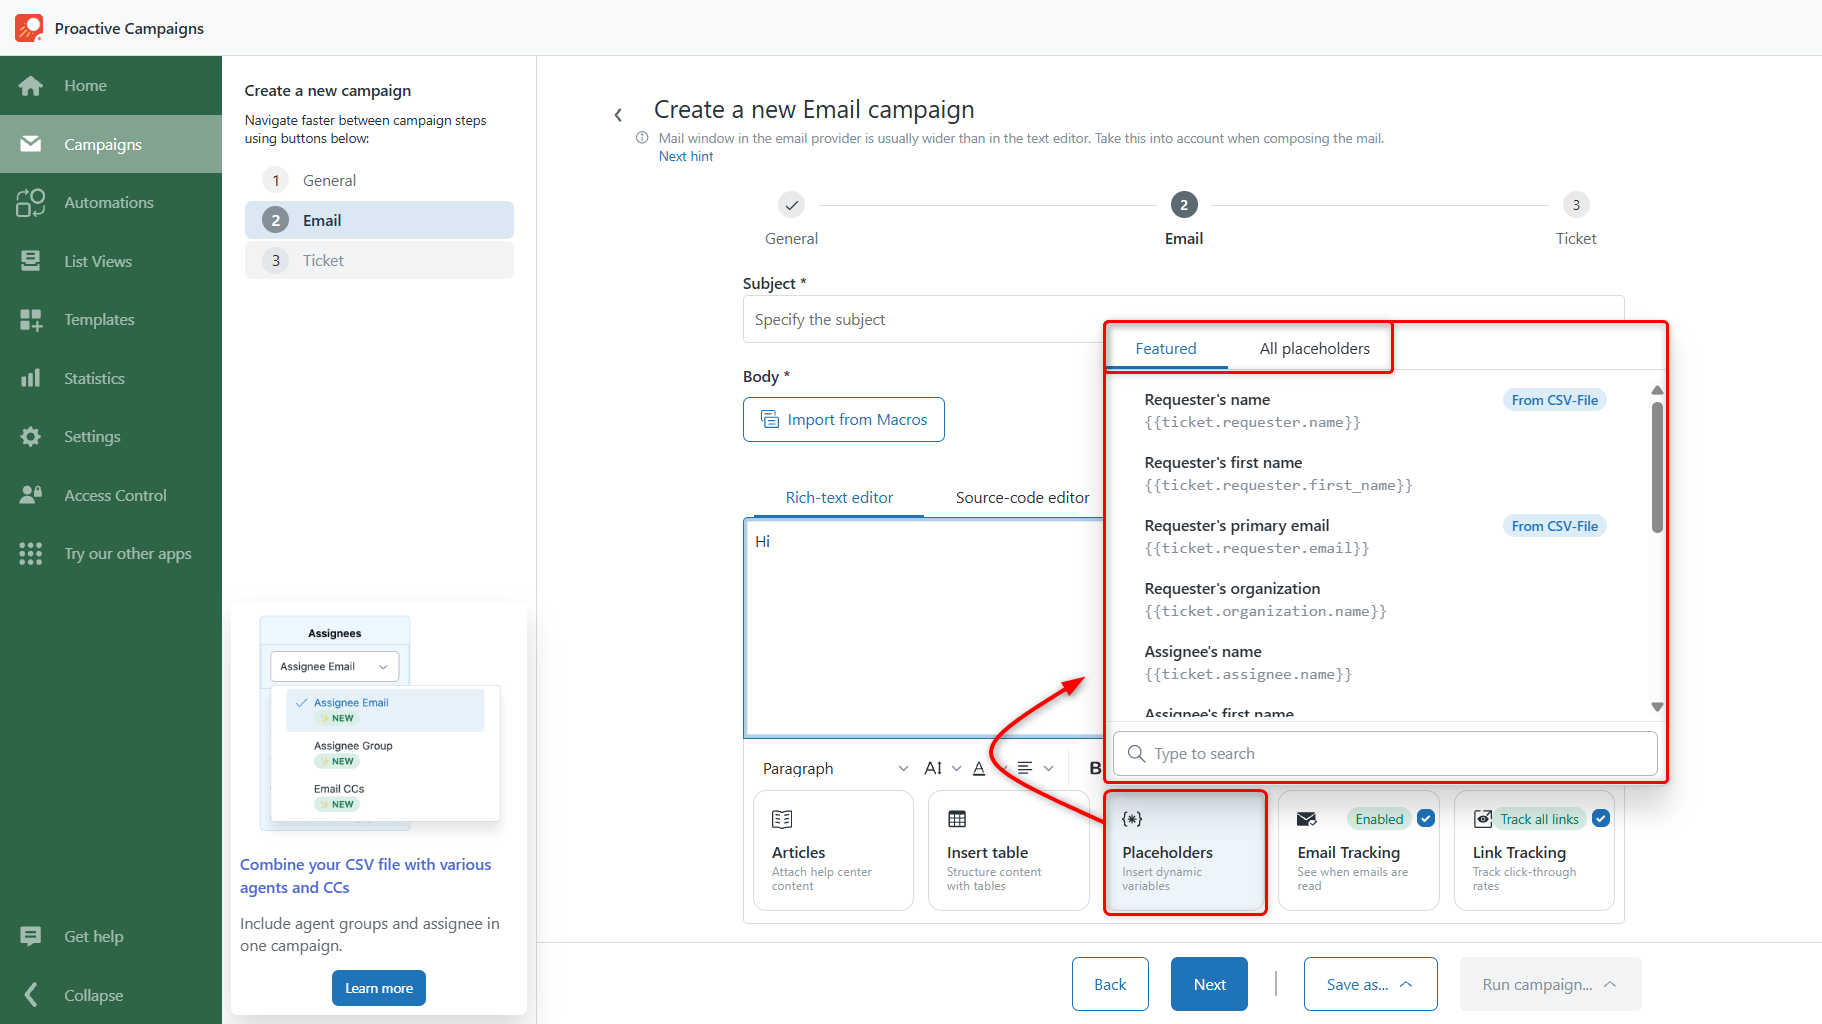
Use the search bar to find the placeholder you need, then click it to insert it into your message.
Both methods include placeholders from custom fields, so you don't need to remember their exact syntax.
Email subject lines
When creating a campaign, you can also type {{ in the subject line to find and insert a placeholder. When working with templates, copy and paste the required placeholder into the subject field. For example:
How to Check Placeholders?
Proactive Campaigns automatically highlights placeholders so you can check whether they are valid before sending your message.
- 🔵 Blue — the placeholder is valid.
- 🔴 Red — the placeholder is invalid.
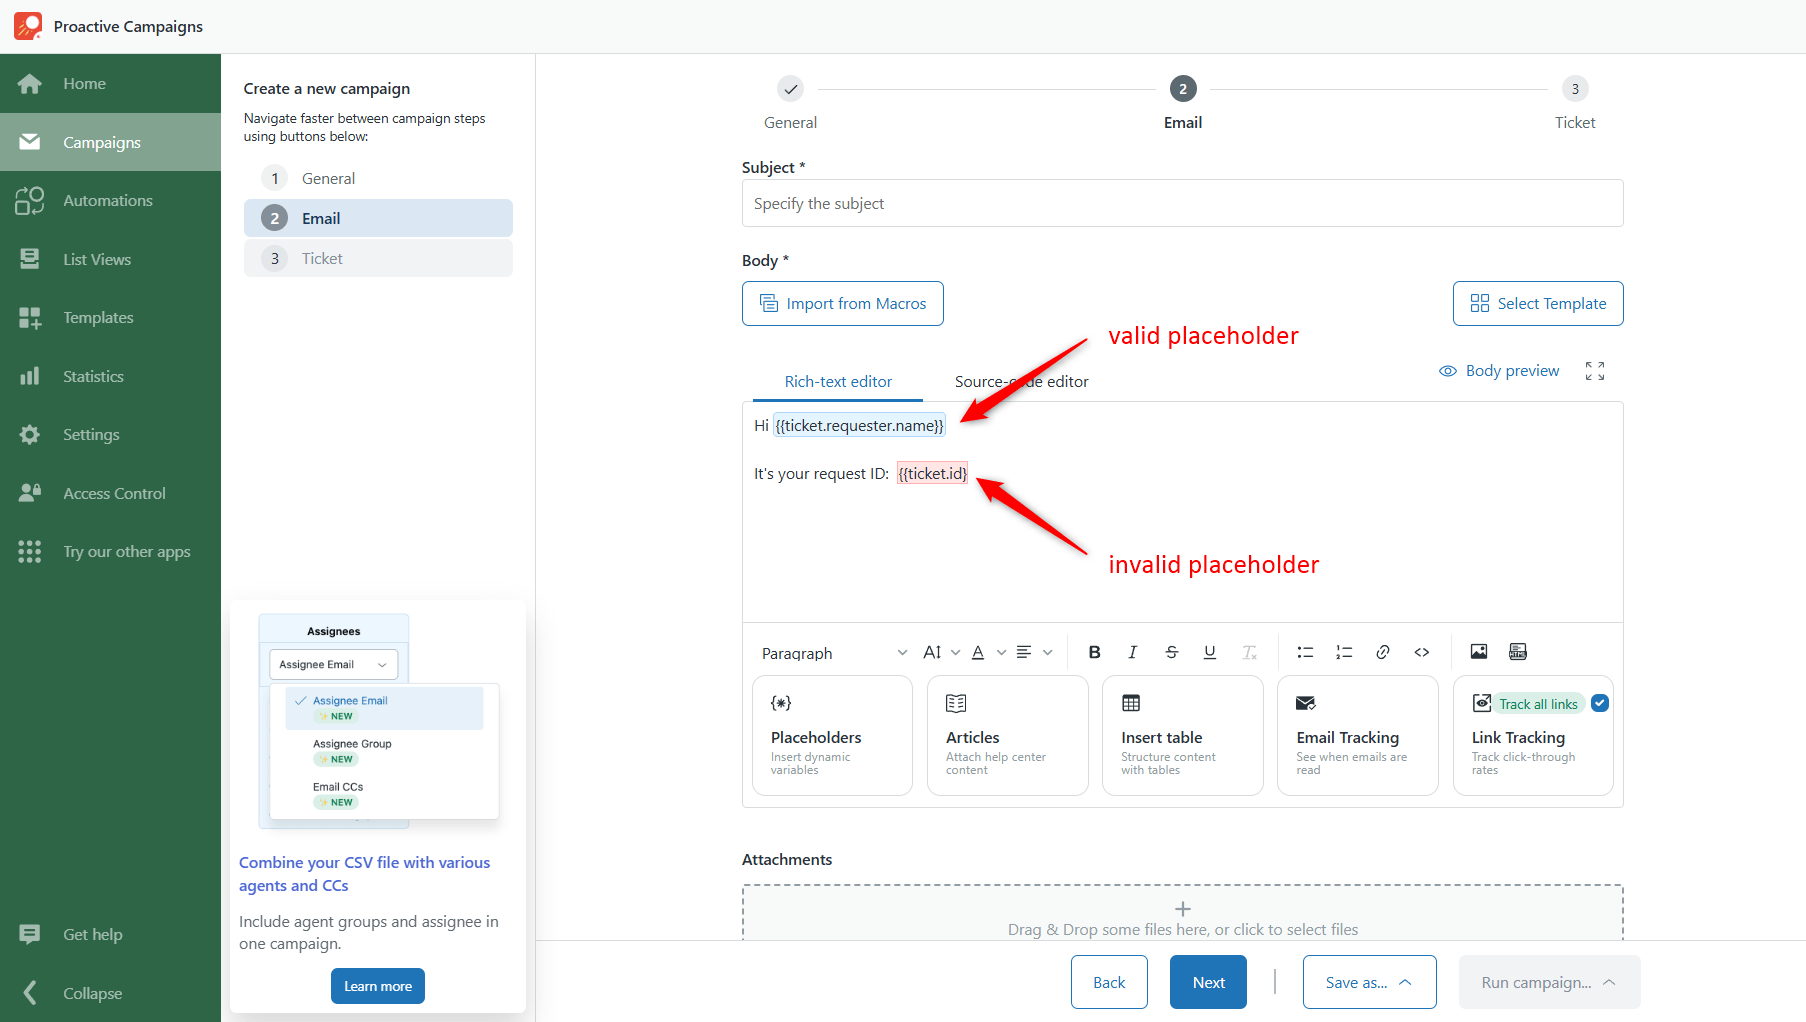
If a placeholder is highlighted in red, check it before sending your campaign. Common reasons for an invalid placeholder include a typo, an incorrect field name or key, missing placeholder syntax, or a custom field that isn't available.
{{ helps prevent these mistakes because Proactive Campaigns inserts the correct placeholder for you.How to Format Placeholders?
You can format placeholders in your email content just like regular text. Apply text styles, colors, headings, and other formatting to personalize how the placeholder appears.
For example, you can make a customer's name bold:
{{...}}).What Happens When a Value Is Missing?
If a placeholder refers to a field that doesn't contain a value for a recipient, Proactive Campaigns leaves that part of the message blank. For example, imagine your message contains a custom field for the customer's account manager:
If the customer doesn't have an account manager assigned, they will see:
The placeholder itself won't appear in the sent message.
We also recommend sending your campaign to test recipients first. This lets you check that the placeholders are working correctly and that the personalized information appears as expected before sending the campaign to your full audience.
If you have any questions or issues with placeholders, feel free to contact our support team.