How to import users with custom fields to Proactive Campaigns
Recently updated Proactive Campaigns includes a Field mapping option with the opportunity to add custom fields during the campaign creation process. It helps to attach additional end users’ information to your new campaign inside your Zendesk instance. Let’s scope the process of field mapping and define what to look out for.
1. First, you should create the needed active fields in your Zendesk instance.
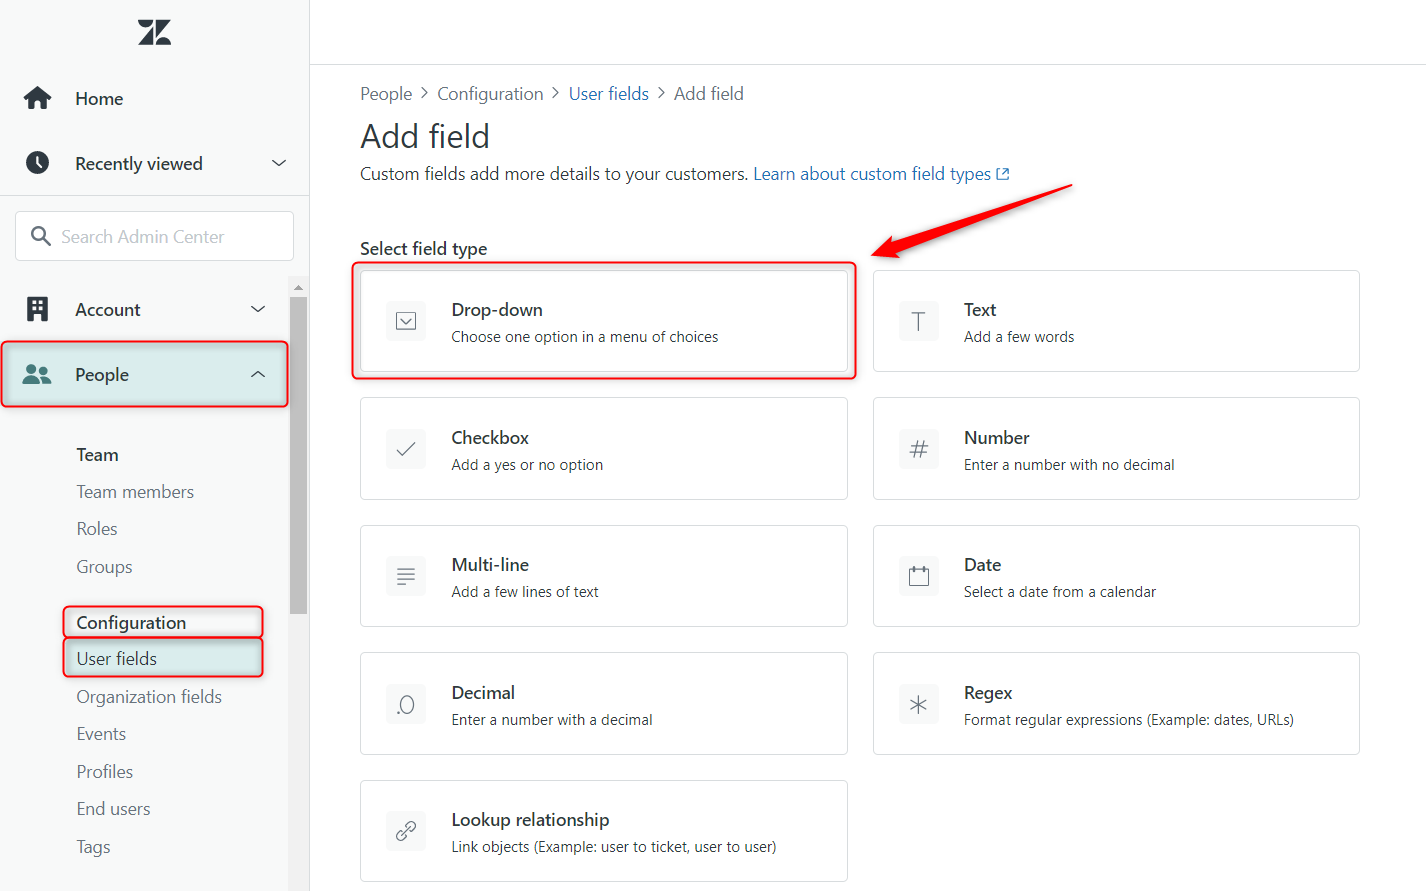
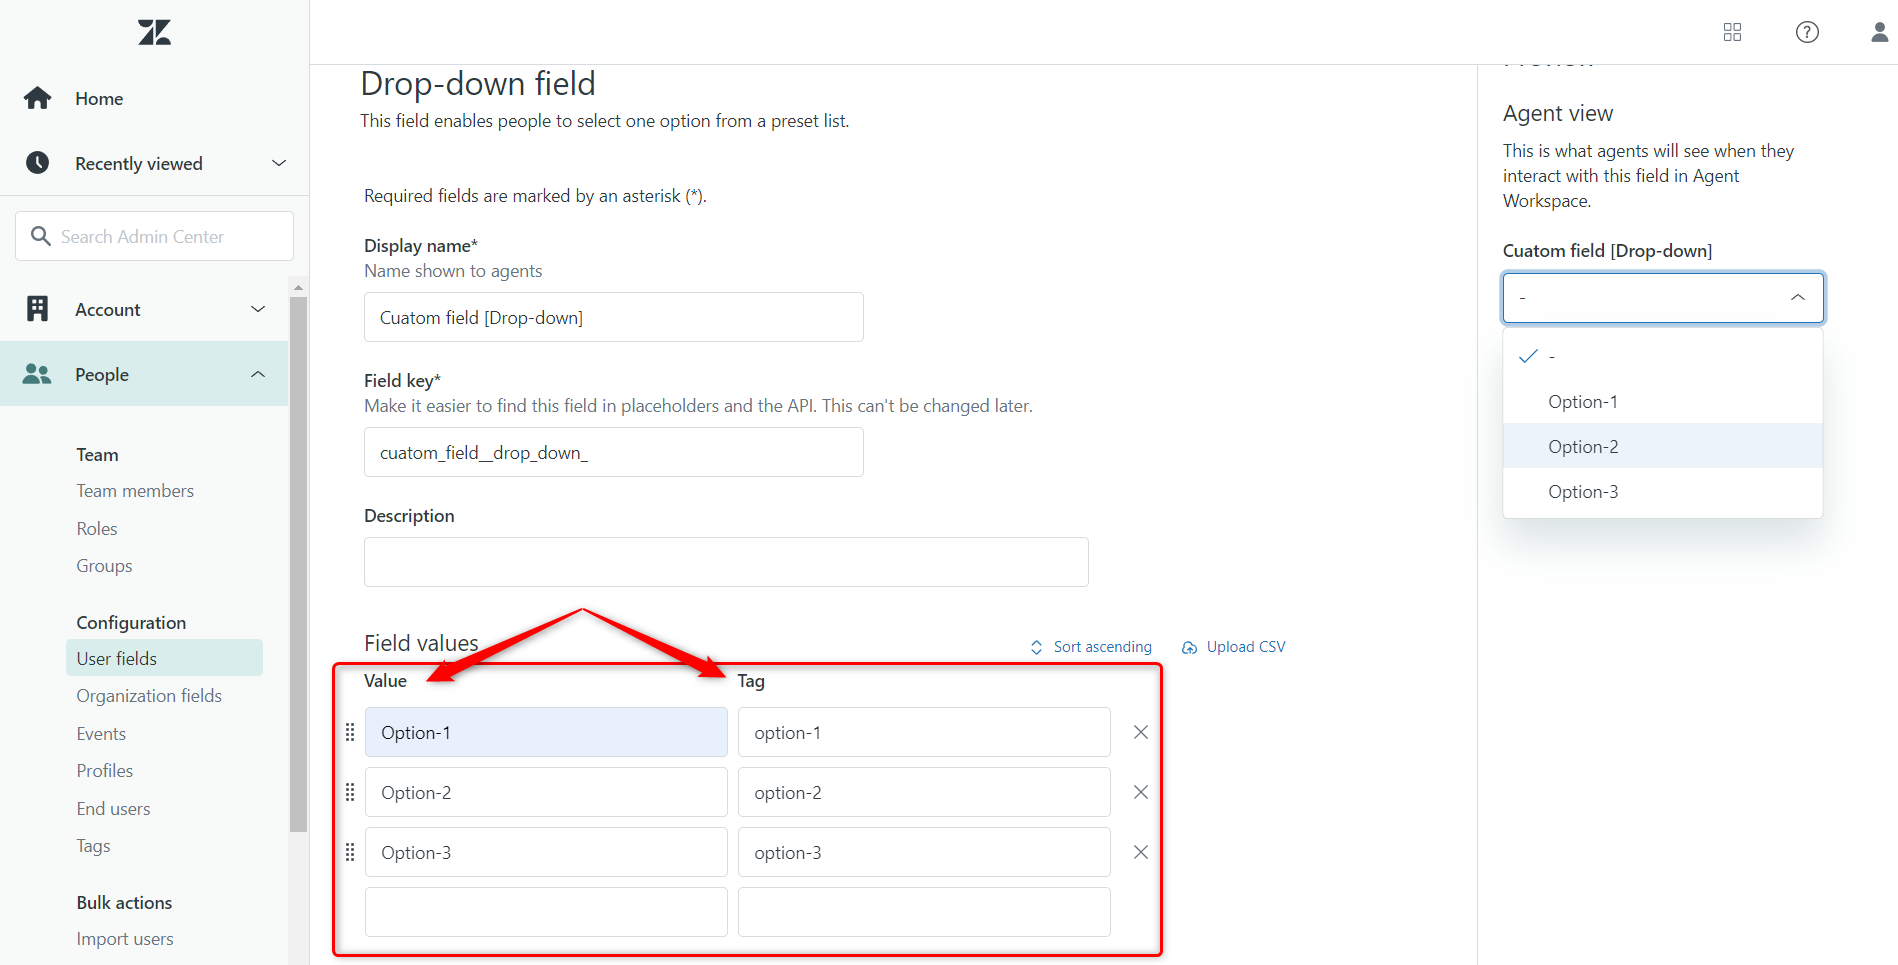
To do it, go to People > Configuration > User fields. Then, click the Add Field button on the right corner of the tab. After, select one of the proposed field types, add requirable information to it, and click Save to create this field.

Note: The field type “Regex” can’t be imported and the field type “Dropdown” is valid when you mention any of the two drop-down options (like “Value” or “Tag” that are shown in the screenshot) in your CSV file.

Consider that User fields in Zendesk must match your fields in the CSV file for the campaign to run correctly.
2. Next, create a CSV file including properties of the same custom fields you have already created in Zendesk. After, add custom field names to the file as new columns. The columns can be named with the same title as the corresponding custom field or with custom names (make sure to give such names that will help you recognize the field properties). By the way, the mapping process will be done automatically if the mapped columns have the same name as the fields. You can also add as many custom fields as you need.
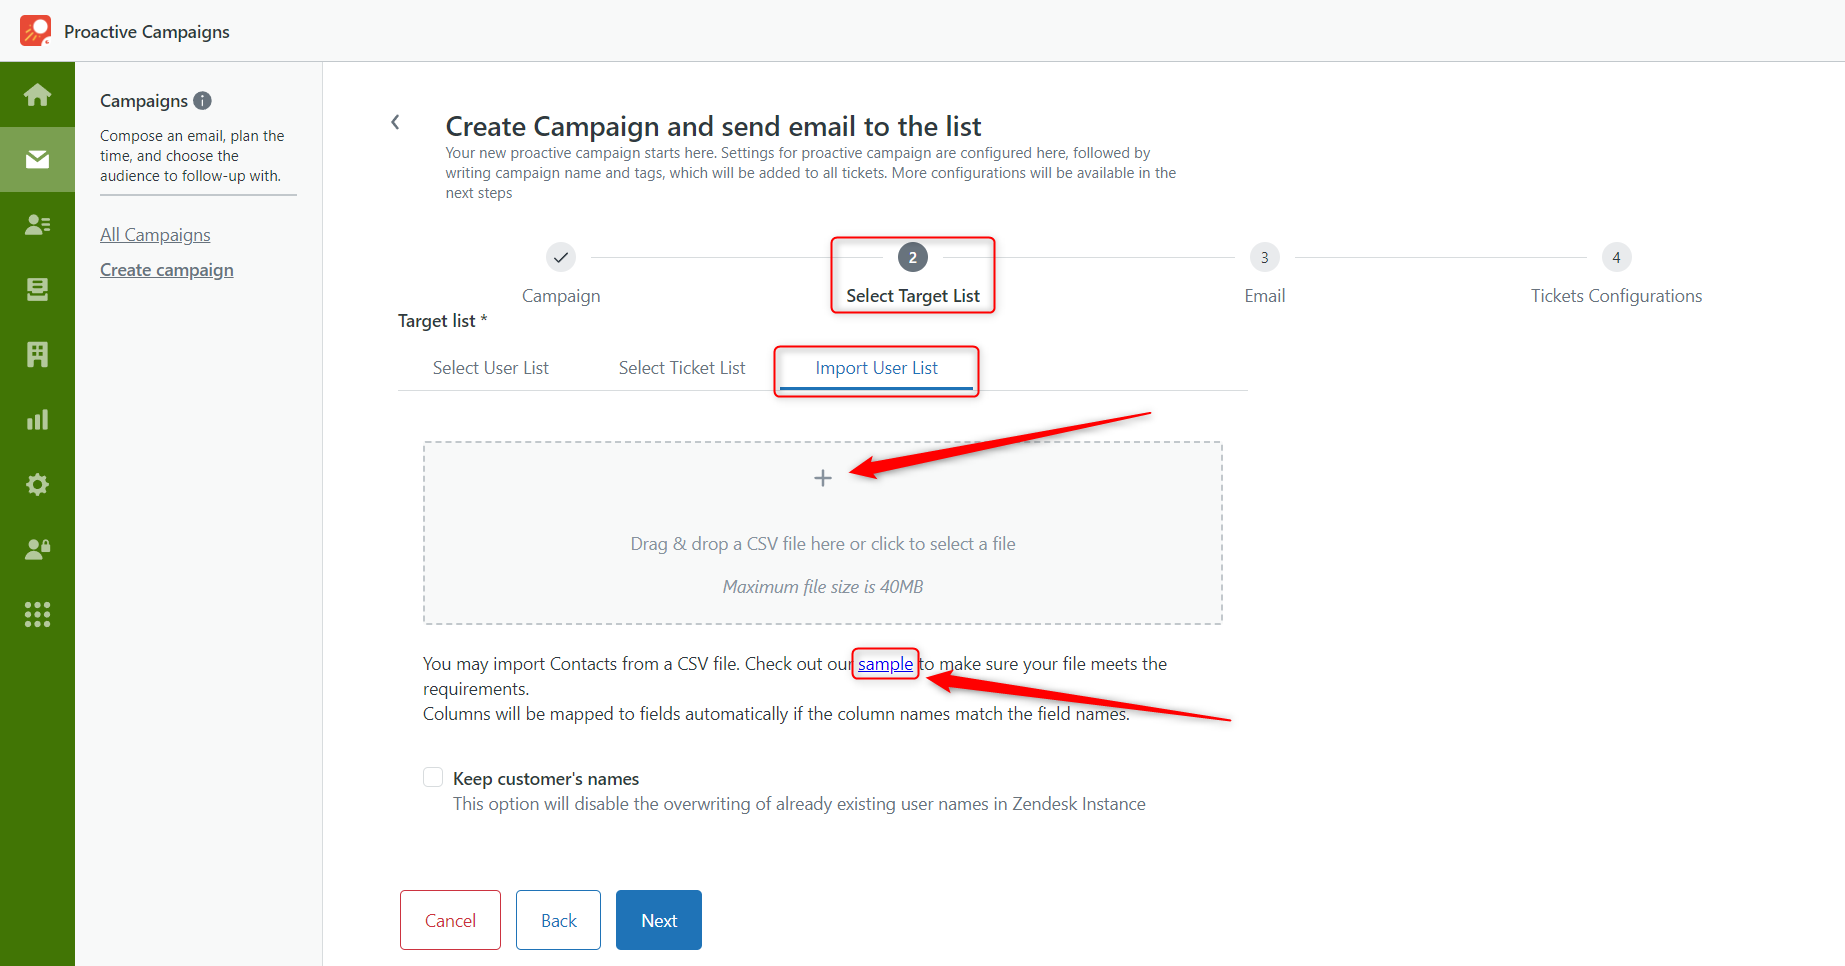
3. Then, go to Proactive Campaigns and start the campaign creation process. On the second stage - “Select Target List” - choose the Import User list tab and select your CSV file.

Need help or a sample before creating a CSV user list? Download a sample of it below the import zone.

As you can see in the example, “Drop-down” field supports two types of data: “tag” and “title”, as we previously mentioned. By the way, the “Checkbox" field becomes marked when the values are “true”, “yes”, “+” or “1”.
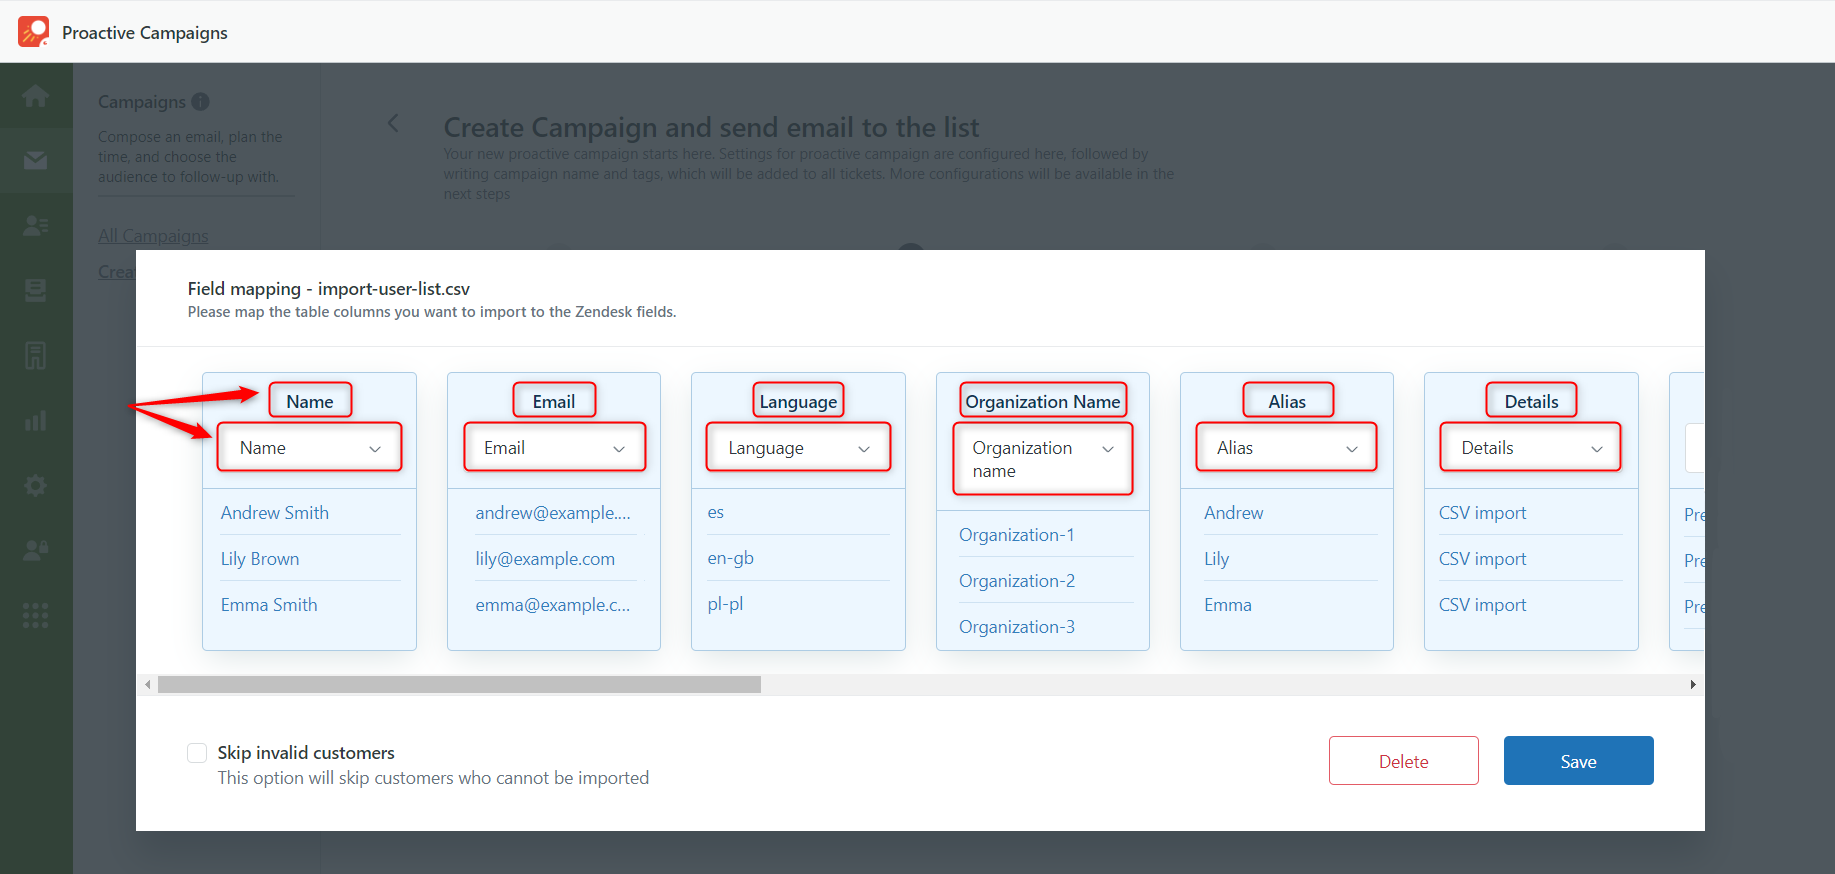
4. After clicking Next, you will see the Field mapping window. Choose “Don’t import” if there are fields that are unnecessary to import at all. For others, select the corresponding type. Make sure that the names in the mapping window match the correct type of your fields. For example, match the Numeric custom field to Numeric or Multi-line custom field to Multi-line field.
Note that fields “Name” and “Email” must be filled in and mapped as these are required fields.

5. Finally, press “Save” and continue creating the campaign.
This is the end of our tutorial. If you have any questions or troubles feel free to contact our support team.
