If you're running customer service through Zendesk, you already have a goldmine of customer data. That means, you deal with ticket history, tags, purchase context, support interactions. Drip campaigns in Zendesk let you turn that data into automated, timed sequences of emails (or SMS) that go out without your team lifting a finger.
This guide walks through what drip campaigns (Zendesk automations) are, how to set them up in Zendesk using Proactive Campaigns, and a few practical use cases to help you get ideas flowing.
What Is a Drip Campaign?
A drip campaign (automated emails) is a series of messages sent automatically over a set period of time, triggered by a specific event or schedule. For example, it can be a new signup, a purchase, a support ticket closing, or simply a calendar date. Instead of sending one email and hoping for the best, you "drip" a sequence of related email copies that build on each other: a welcome message, a follow-up a few days later, a check-in a week after that, and so on.
The appeal is obvious: consistency without manual effort. Once the sequence is built, it runs without human interaction.
Why Build Drip Campaigns In Zendesk?
Native Zendesk doesn't include a built-in drip campaign builder; that's where apps like Proactive Campaigns (by GrowthDot) come in. Instead of exporting your customer list to a separate marketing tool, you can manage automated mass email campaigns directly from Zendesk without clumsy third-party integrations, keeping ticket data, tags, and customer fields all in one place.
A few reasons this matters:
- No duplicate data. Your customer segments already live in Zendesk. No CSV round-tripping between tools.
- Context-aware messaging. Sequences can reference ticket status, tags, or custom fields directly.
- One workflow for support and outreach. Agents don't need to switch between platforms to follow up with customers.
How to Set Up a Drip Campaign in Zendesk (Step by Step)
Here's a general walkthrough using Proactive Campaigns as the example app:
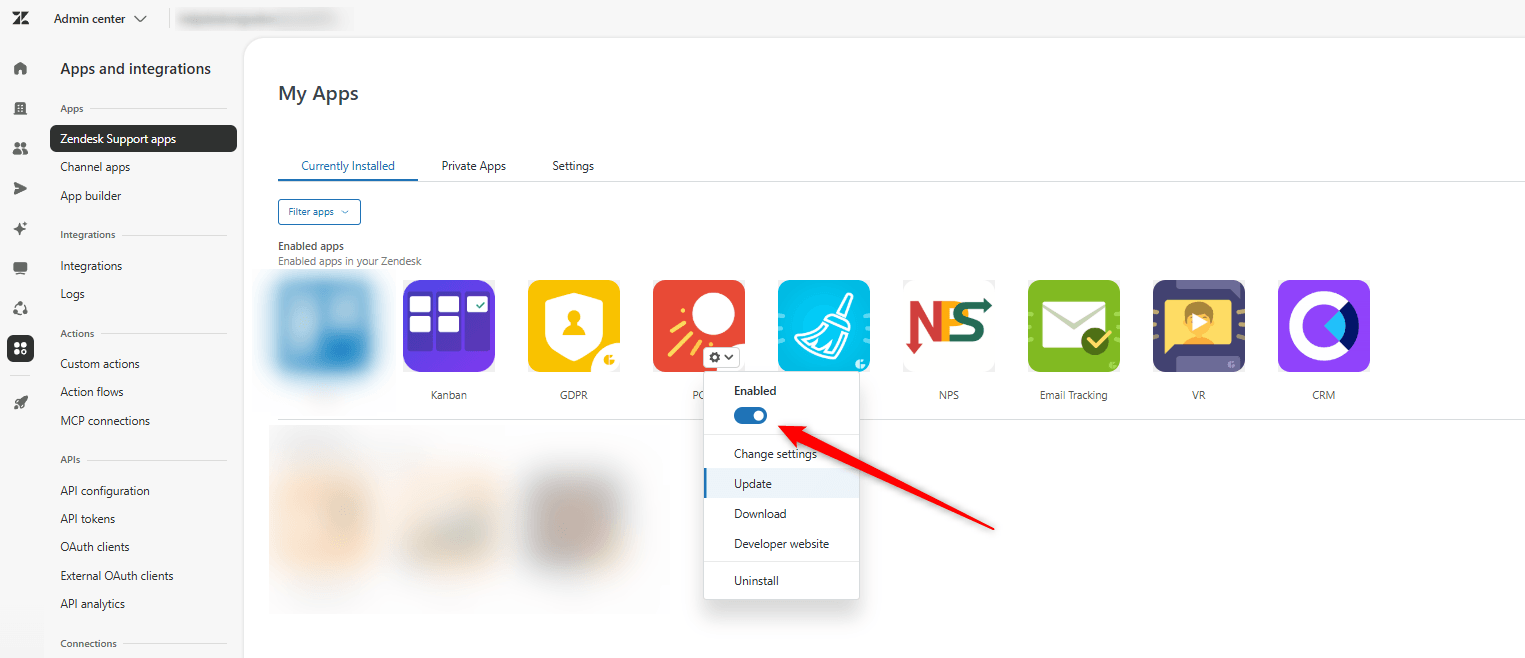
1. Install the app
Head to the Zendesk Marketplace, install Proactive Campaigns, and enable it under Admin → Apps → Manage. There's typically a free trial period, so you can test drip campaigns before committing.
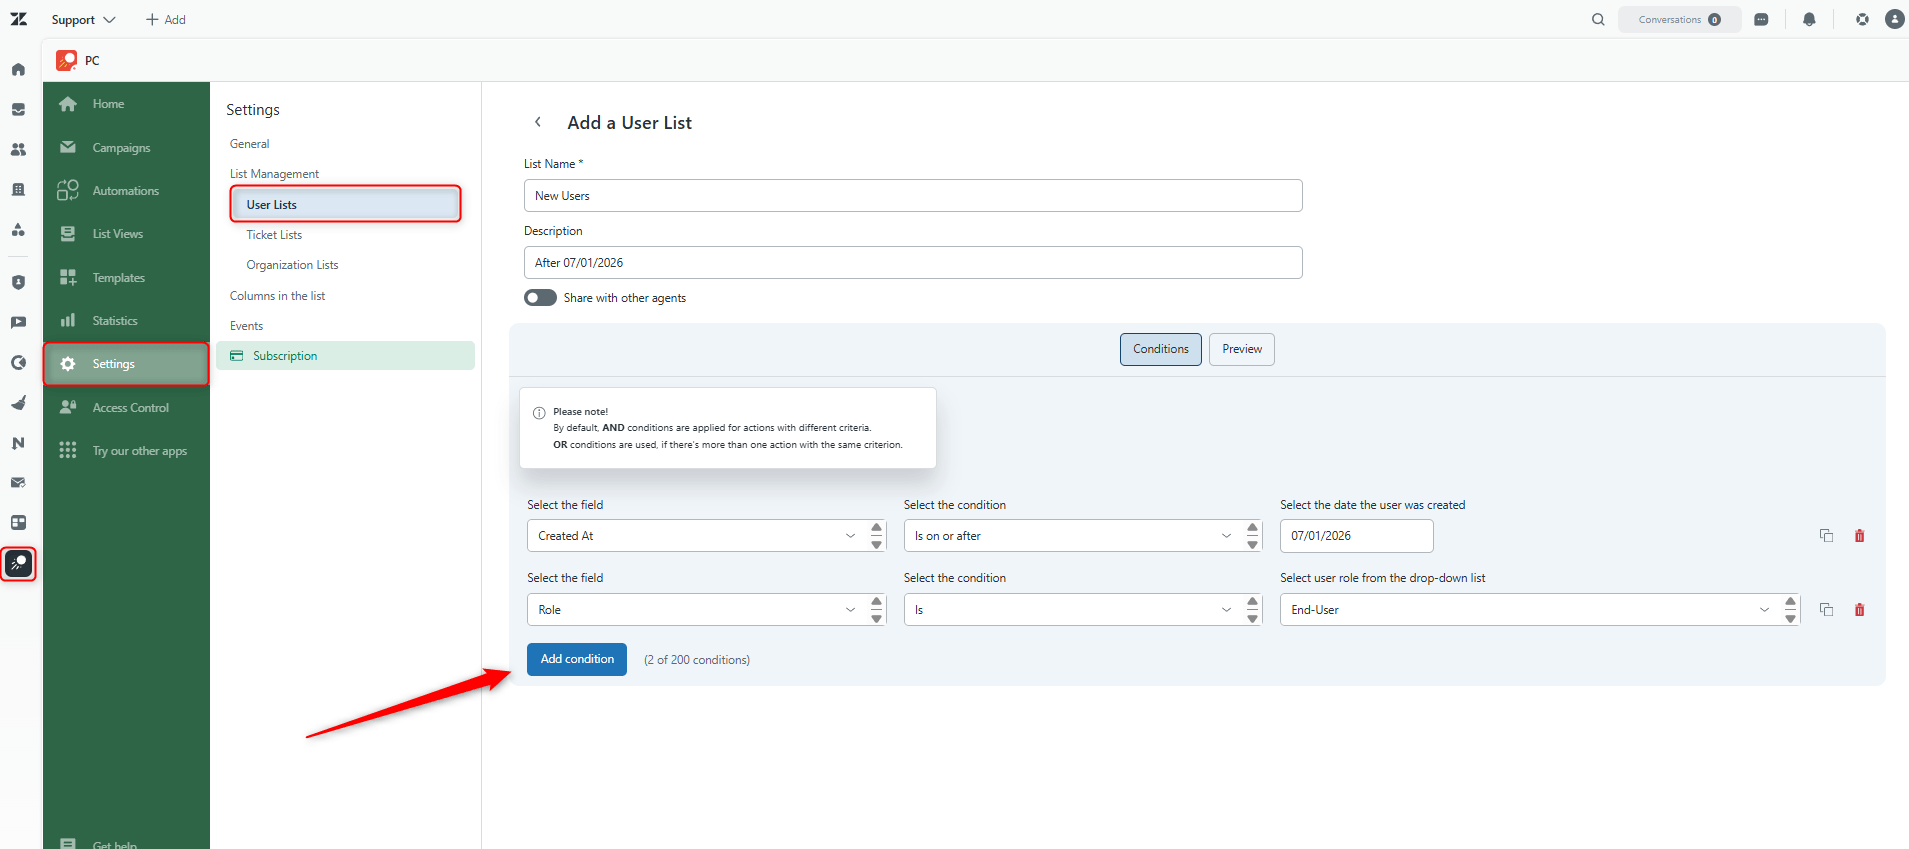
2. Build your audience segment
Create a customer list by filtering on tags, ticket status, or any other custom field, or upload a CSV of contacts if you're targeting a specific group. This becomes the audience for your drip sequence.
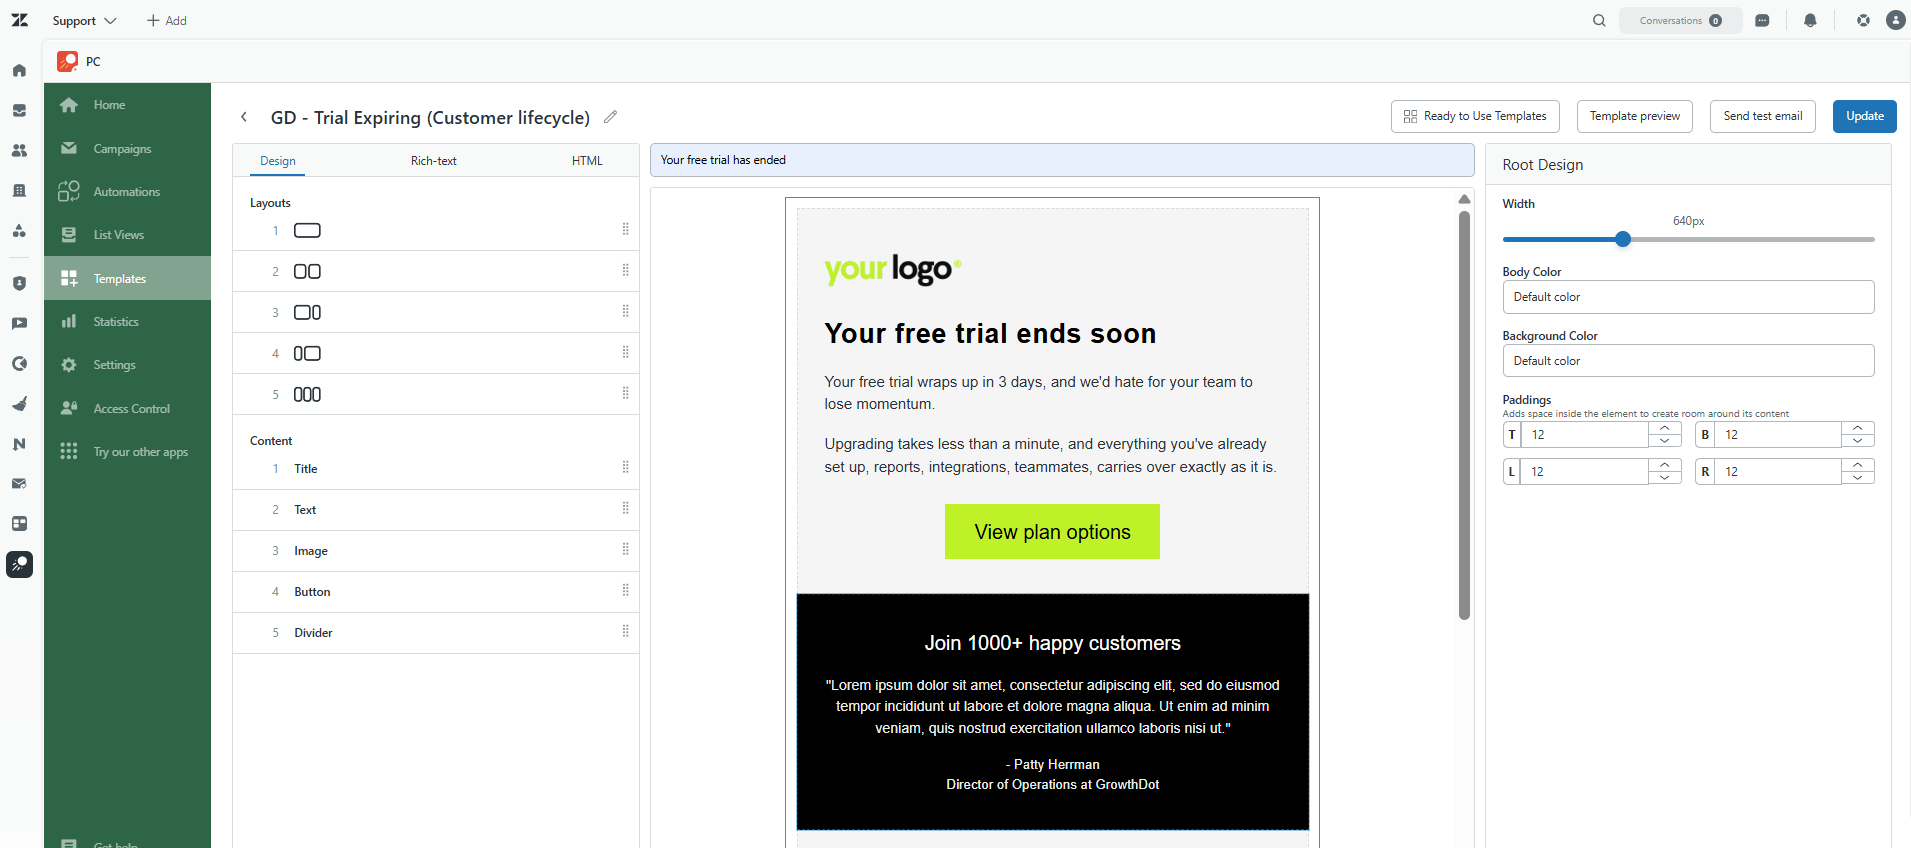
3. Design your email templates
Proactive Campaigns offers an easy-to-use template builder for appealing emails. Use the drag-and-drop template editor (or your own HTML) to build each message in the sequence. Also, keep each email focused on a single goal, and don't try to cram your entire pitch into one email.
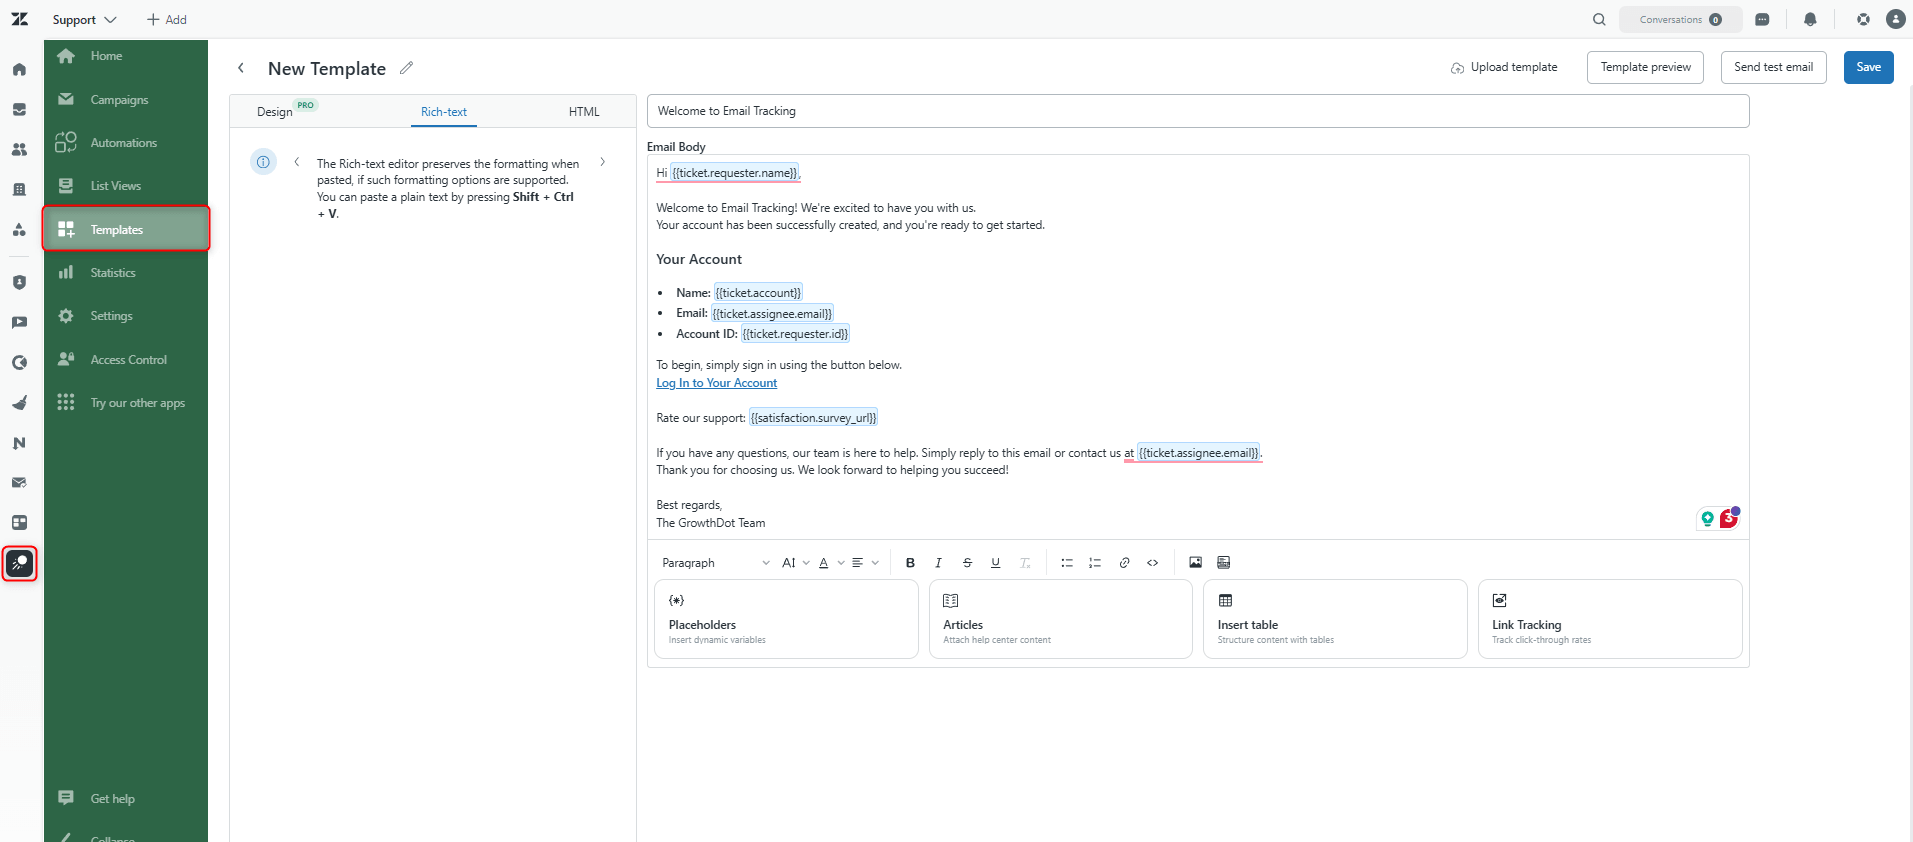
4. Personalize with placeholders
Insert dynamic fields (customer name, ticket number, product purchased) so each email feels individually written rather than mass-blasted.
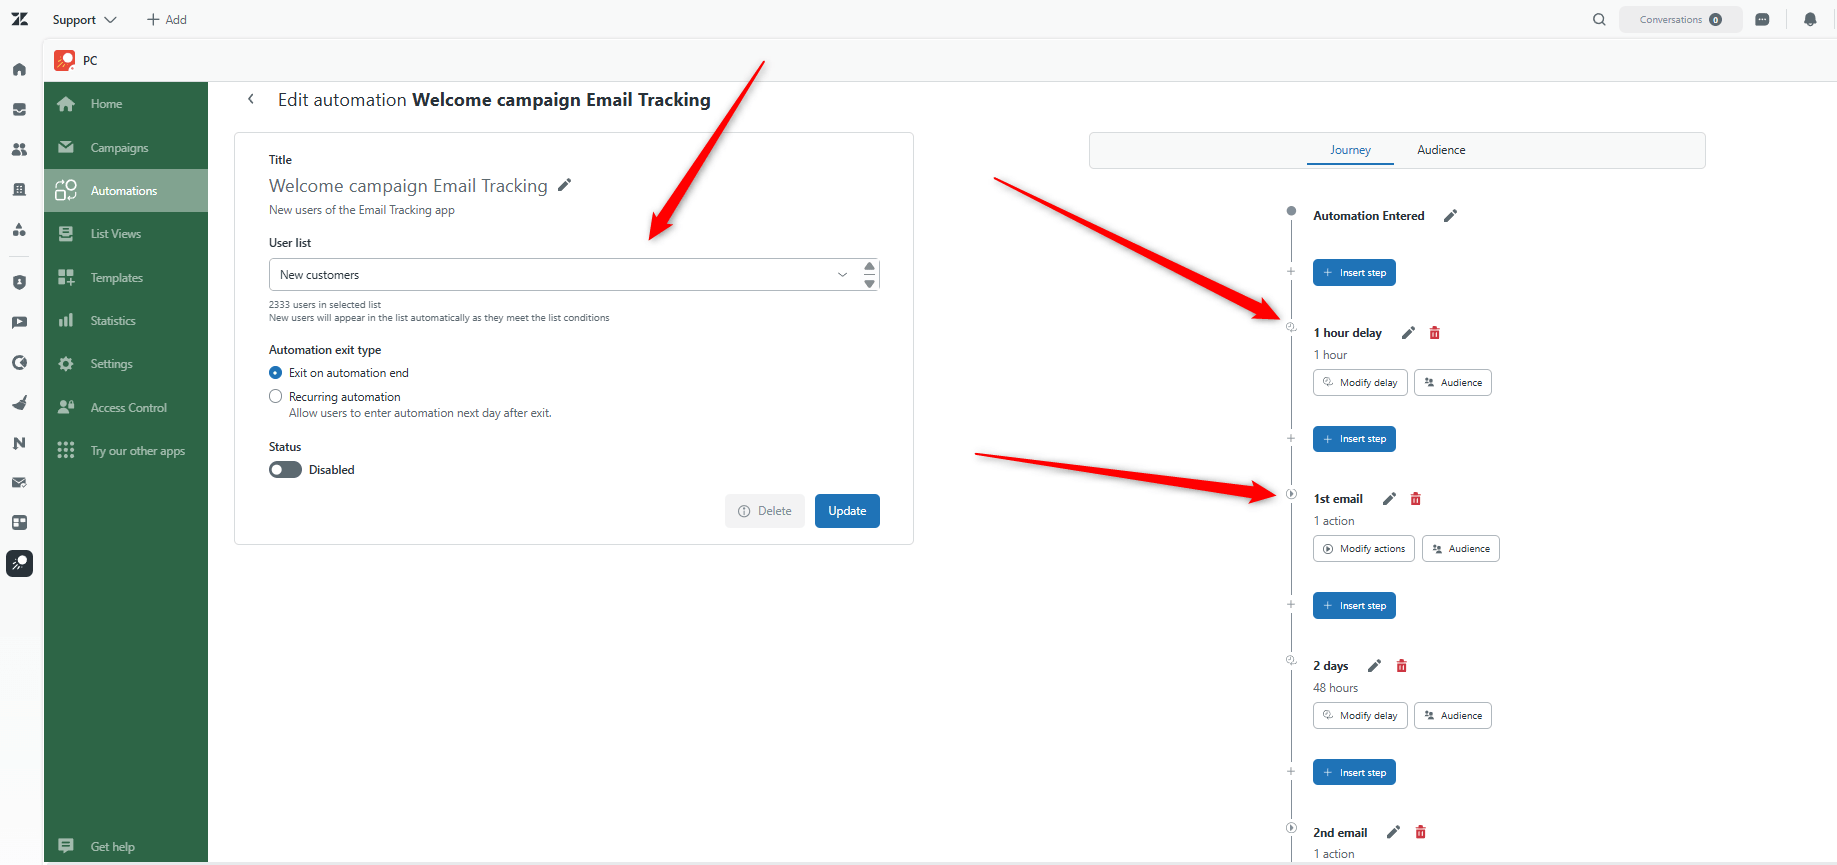
5. Set your sequence and timing
This is the core of the "drip" mechanic: you set up trigger-based automations to send personalized emails based on user behavior, such as a signup, a purchase, or a specific support interaction, and you space out the follow-up messages with delays so each one lands in the best times.
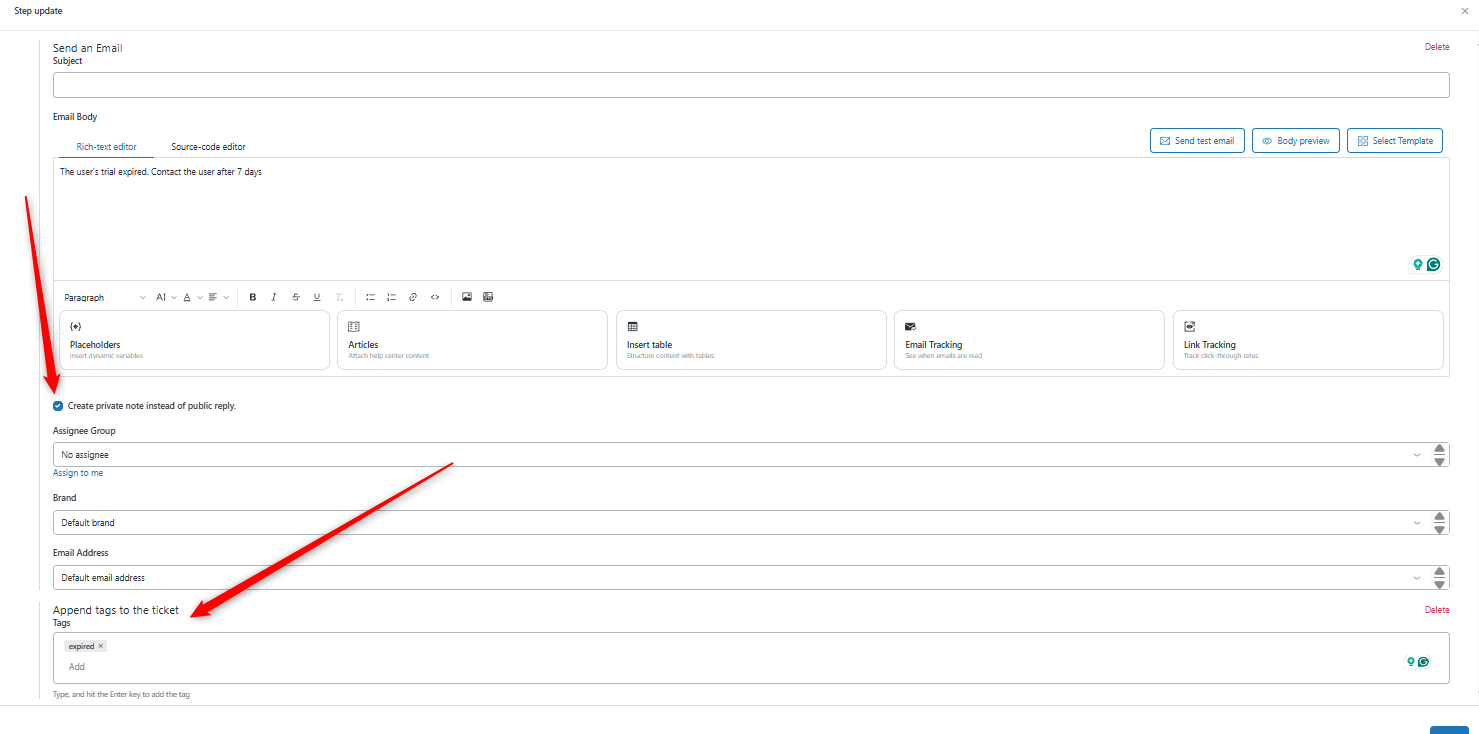
6. Update in bulk as needed
As customers move through the sequence, you can also automate bulk updates — tagging tickets, updating custom fields, or adding internal notes. As a result, your support team always has visibility into where a customer stands.
7. Check statistics
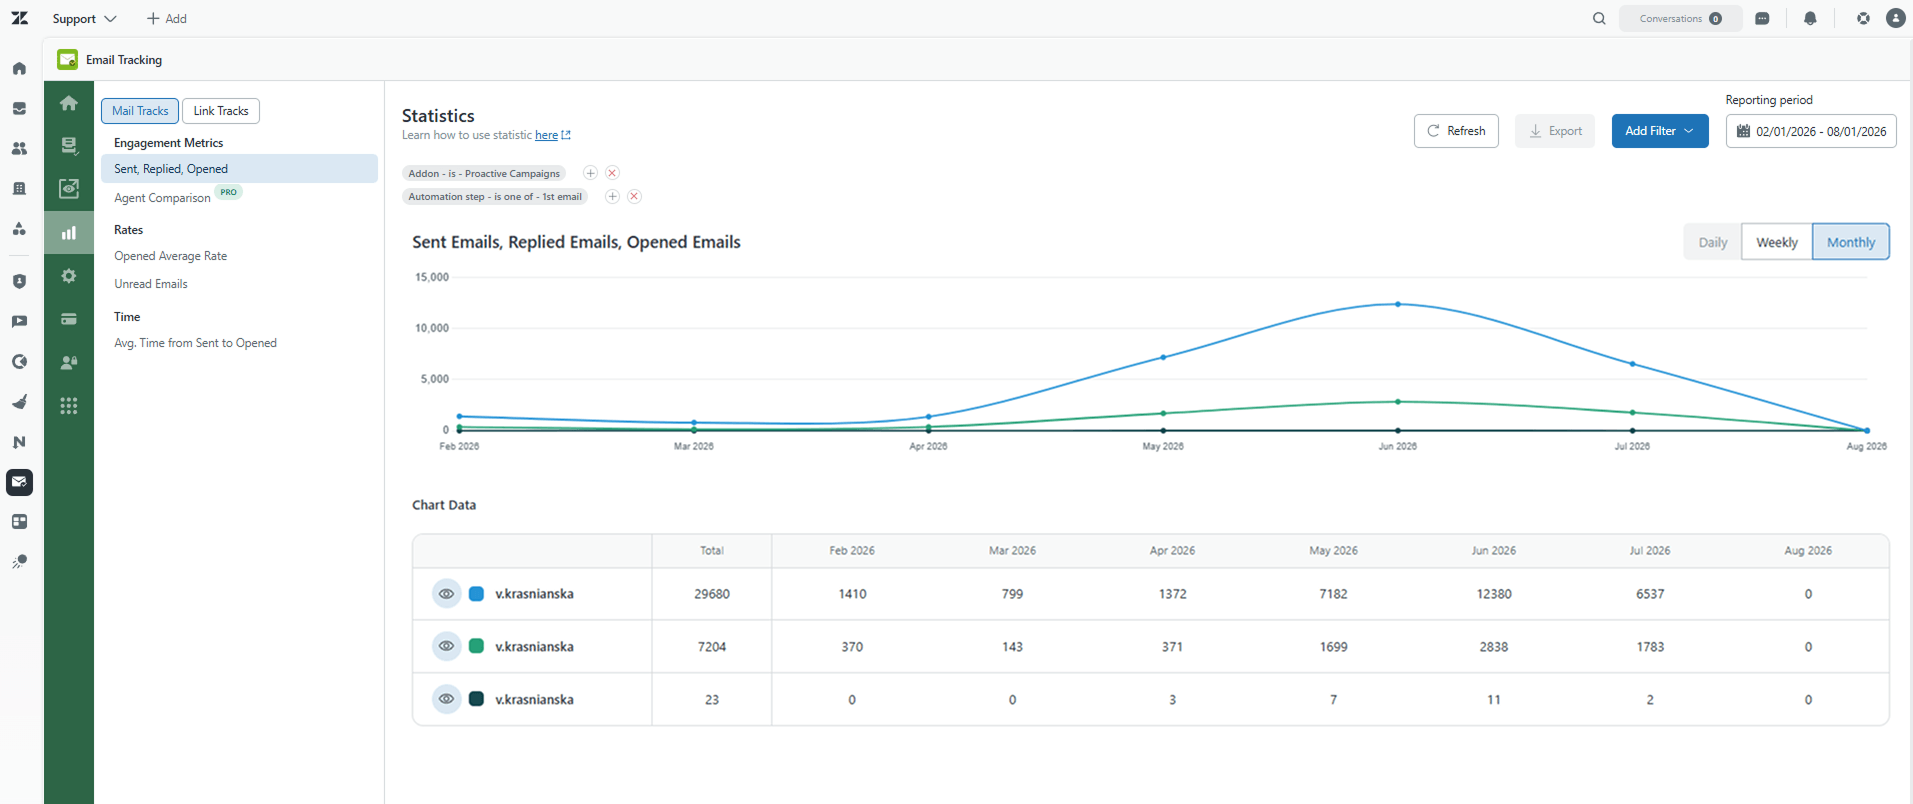
The Email Tracking app, installed together with Proactive Campaigns, helps you track the most important things: open and reply rates, link open rate, average time from sent to open, and more. Use this information to see which step of your automation needs improvement.
Use Cases: What Can You Actually Do With Drip Campaigns in Zendesk?
Customer Onboarding
New signups can be automatically dropped into a welcome sequence: a "getting started" email on day one, a feature highlight on day three, a check-in on day seven. This is especially useful for SaaS teams and Customer Success Managers who want personalized onboarding sequences that guide every new customer through their journey without the CS team lifting a finger.
Abandoned Cart / Incomplete Action Follow-Ups
For retail and e-commerce use cases, drip sequences can nudge customers who have added items to their cart but haven't completed their purchase, often with a reminder followed by a small incentive.
Incident and Downtime Notifications
Support and DevOps teams can use drip logic for a very different purpose: keeping affected users updated during an outage. You can send mass email notifications to affected users, link the campaign directly to the problem ticket, and run automated follow-ups with fixed delays until the issue is resolved.
VIP and Loyalty Nurturing
For accounts you want to retain, a drip sequence can space out special offers, discounts, and event invitations to boost loyalty over weeks or months, rather than sending everything at once.
Re-Engagement for Non-Responders
If a customer hasn't opened or replied to your first message, a drip campaign can automatically send a follow-up. This is a common pattern: if the open rate is low, automate follow-ups to those who didn't reply.
Event or Launch Anticipation
Media, entertainment, and event-based businesses can build anticipation over time — teaser, reminder, day-of email — to drive viewership for a new release or increase ticket sales and engagement for a live event.
Better team collaboration (Bulk ticket update)
Update selected tickets or user lists in bulk. For example, change tags, custom fields, or user data. Moreover, inform your teammates about any changes by leaving internal notes in bulk after a certain step of automation. In practice, it looks like one of your emails is sent to your teammates, but they see an updated ticket with notes, tags, or filled user and ticket fields.
A Few Best Practices
- Space messages intentionally. Don't send three emails in three days unless urgency calls for it, give people room to act.
- Segment before you drip. A one-size-fits-all sequence performs worse than one tailored to a specific list (new users vs. existing customers vs. at-risk accounts).
- Test to avoid your emails appearing in the spam folder. If your tool supports A/B testing, try two subject lines or CTAs on a small sample before sending to your full list.
- Watch your reply and open rates per step, not just for the campaign overall — this tells you exactly where people drop off.
Zendesk Drip Campaigns: Final Thoughts
Drip campaigns in Zendesk turn one-off outreach into a system. Whether you're onboarding new users, recovering abandoned carts, or keeping customers informed during an incident, the mechanics are the same: segment your audience, sequence your messages, add the right delays, and let automation handle the follow-through.
If you're already living in Zendesk for support, keeping your outreach in the same platform — rather than juggling a separate marketing tool — is usually the simpler path.
FAQ
Drip Campaigns in Zendesk