How to Export Tickets from Email Campaign
-
Proactive Campaigns

Proactive Campaigns for Zendesk automatically creates tickets for every customer interaction from your outreach campaigns. It keeps all responses organized and ready for analysis. Exporting these tickets to a CSV file lets your team turn that data into reports, dashboards, and actionable insights.
Below, we answer common questions about exporting campaign tickets and troubleshooting the process.
How do I export tickets from a campaign?
1. Open the campaign details page for the sent campaign you want to analyze.
2. Choose which tab to export from — Tickets, Unsubscribed, or Replied, depending on the data you need.
3. Click Export Tickets, located above the ticket list.
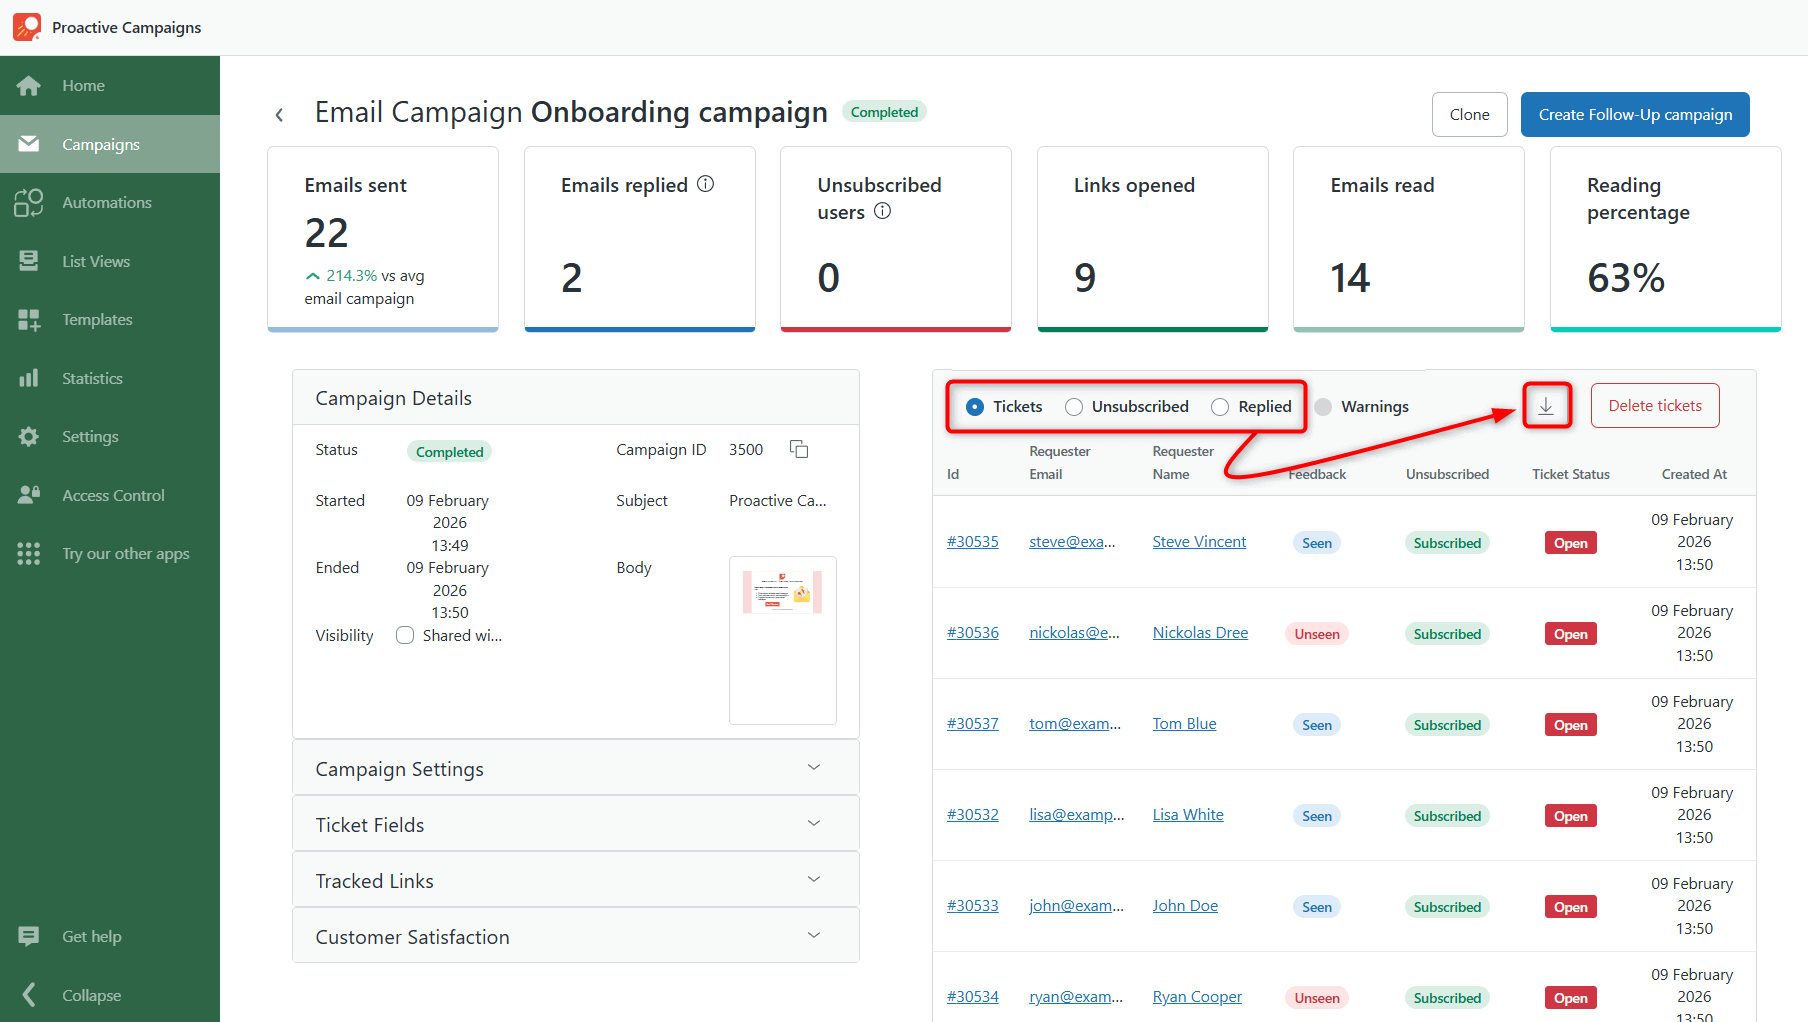
4. Download the CSV file once it's generated. Your tickets will be gathered into a single file.
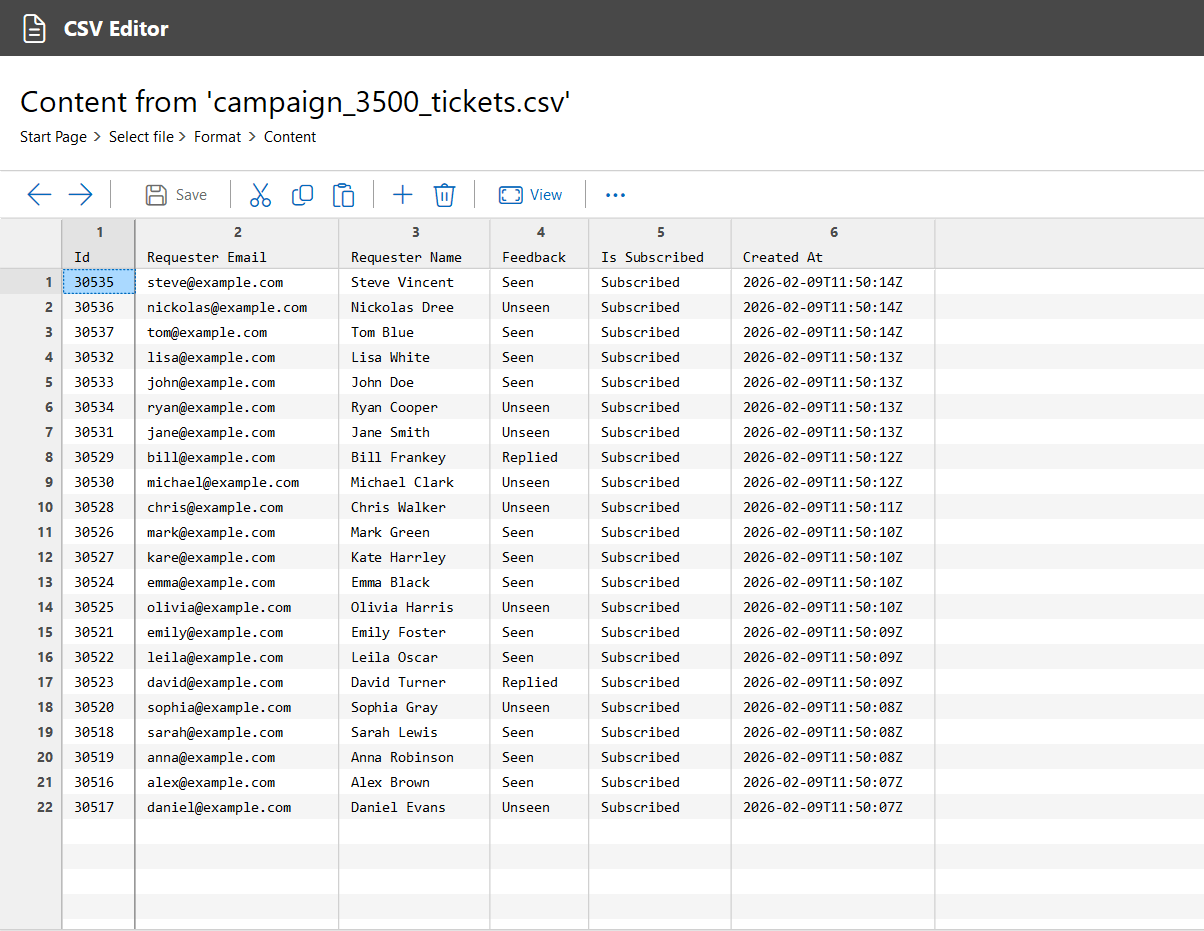
What format does the export come in?
Exports are delivered as a single CSV file, which can be opened in spreadsheet tools (Excel, Google Sheets) or imported directly into analytics and reporting platforms.
Take into account: You can choose between three tabs before exporting:
- Tickets – all tickets generated from the campaign
- Unsubscribed – contacts who opted out
- Replied – contacts who responded
Troubleshooting Common Issues
The "Export Tickets" button isn't visible
Make sure you're on the correct campaign details page and that a tab (Tickets, Unsubscribed, or Replied) is selected. Tthe button appears above the ticket list once a tab is active.
The CSV file didn't download
Check your browser's download settings and pop-up blocker, as these can sometimes prevent the file from saving automatically.
The exported CSV looks empty or incomplete
Confirm you selected the correct tab before exporting — for example, choosing "Unsubscribed" will only include opted-out contacts, not all tickets.
If you have any questions or problems on any stage, contact our support team anytime.