How to use email template builder?
-
Proactive Campaigns
Need to create eye catching email but don't have enough HTML coding skills? That's not a problem anymore! The Proactive Campaigns from Zendesk now come with a powerful template builder, so here we'll show how it works.
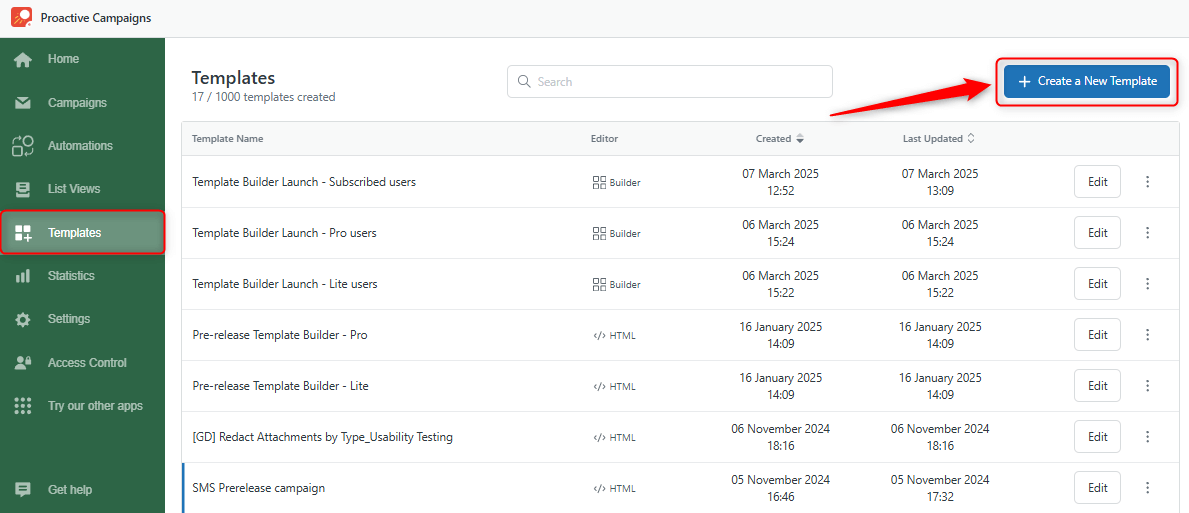
First, go to the Templates tab in the Proactive Campaigns app and click on Create a New template.
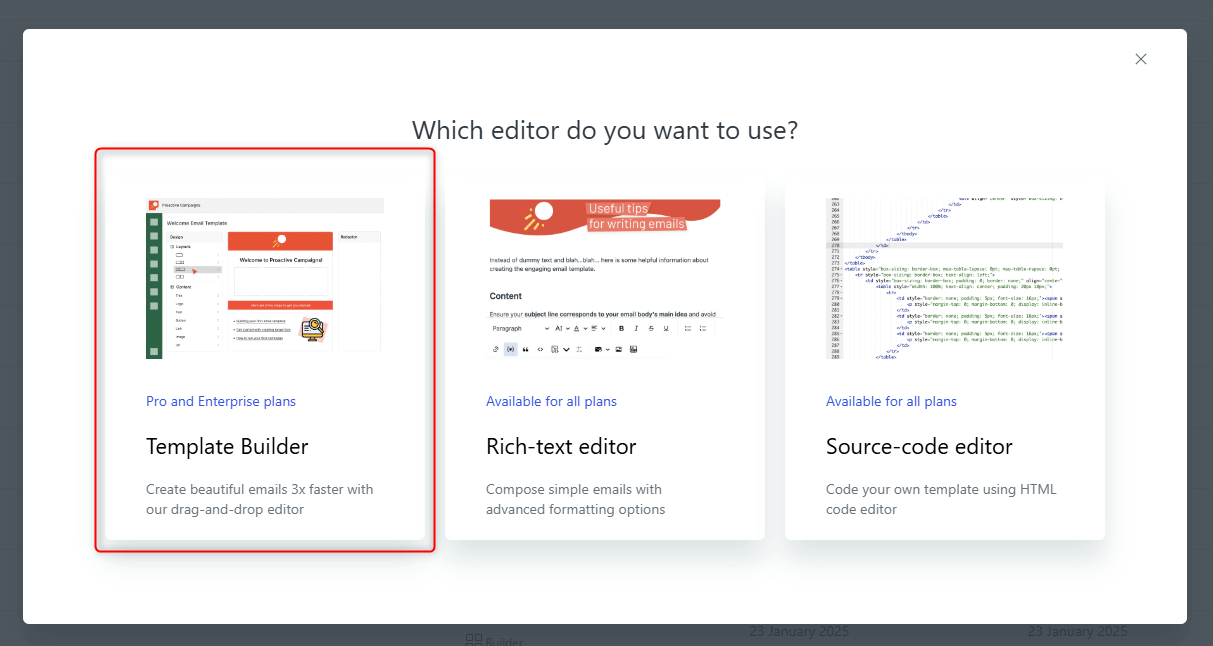
Next, you'll see three options and choose the first one: Template Builder
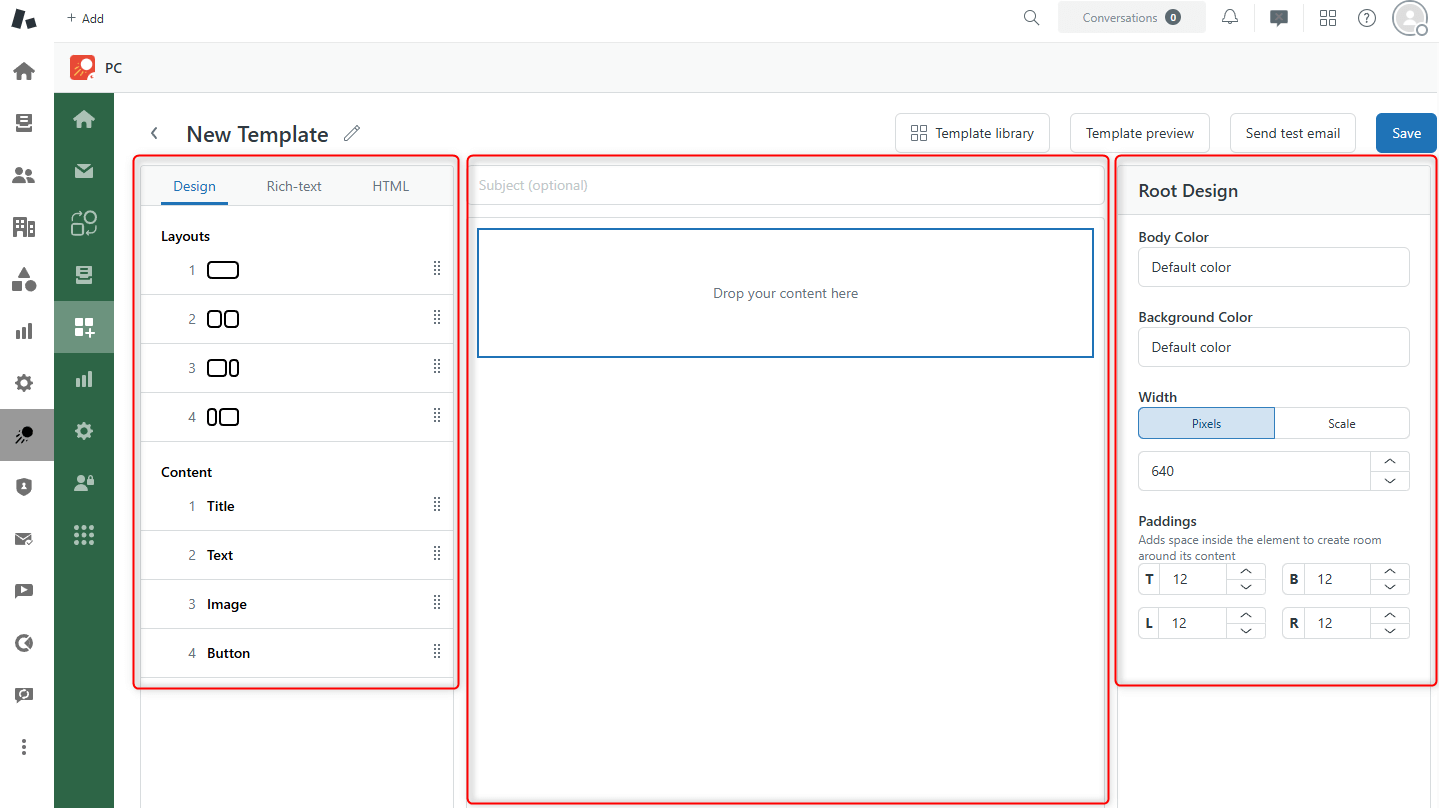
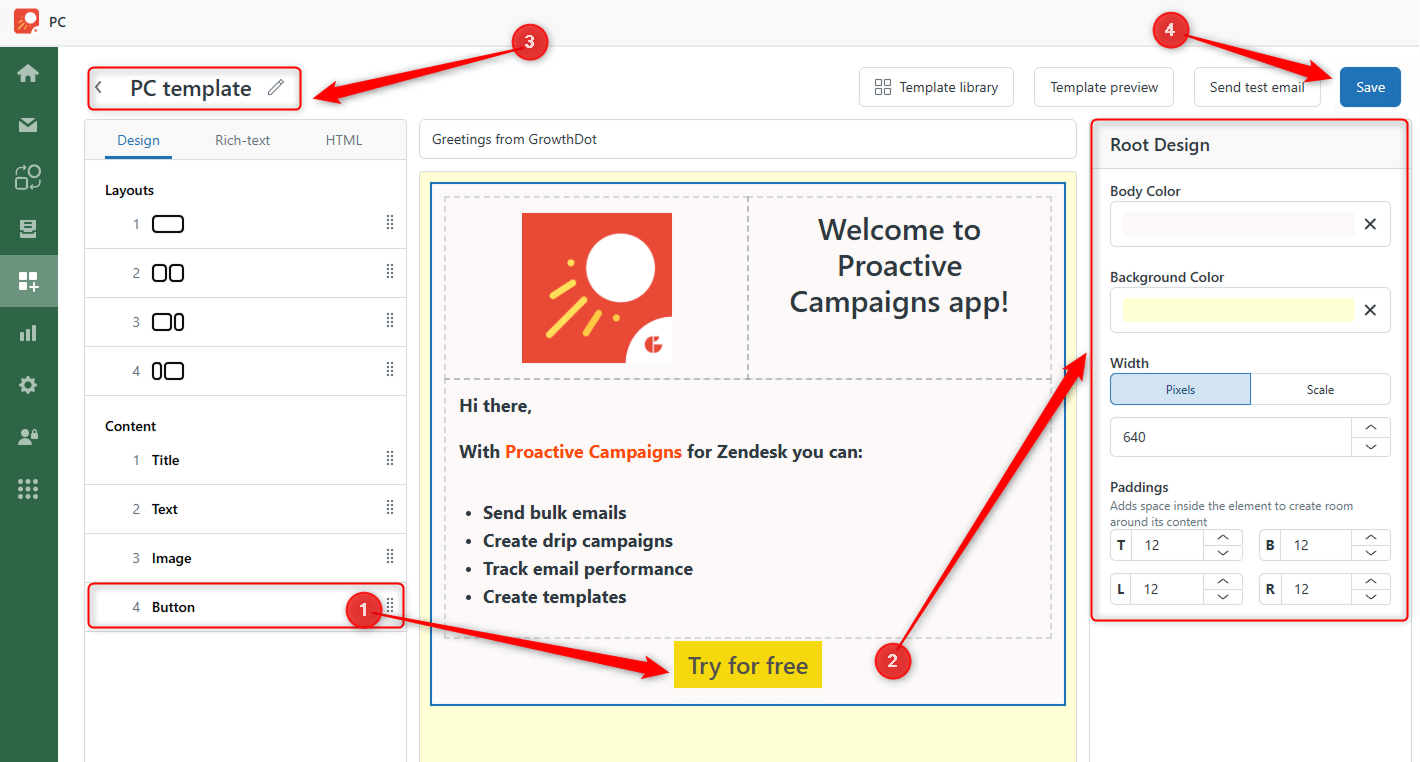
Then, you will be taken to the editor, which is divided into three sections:
- Layout and Content block on the right side
- Template in the center
- Customization settings for your content on the right side
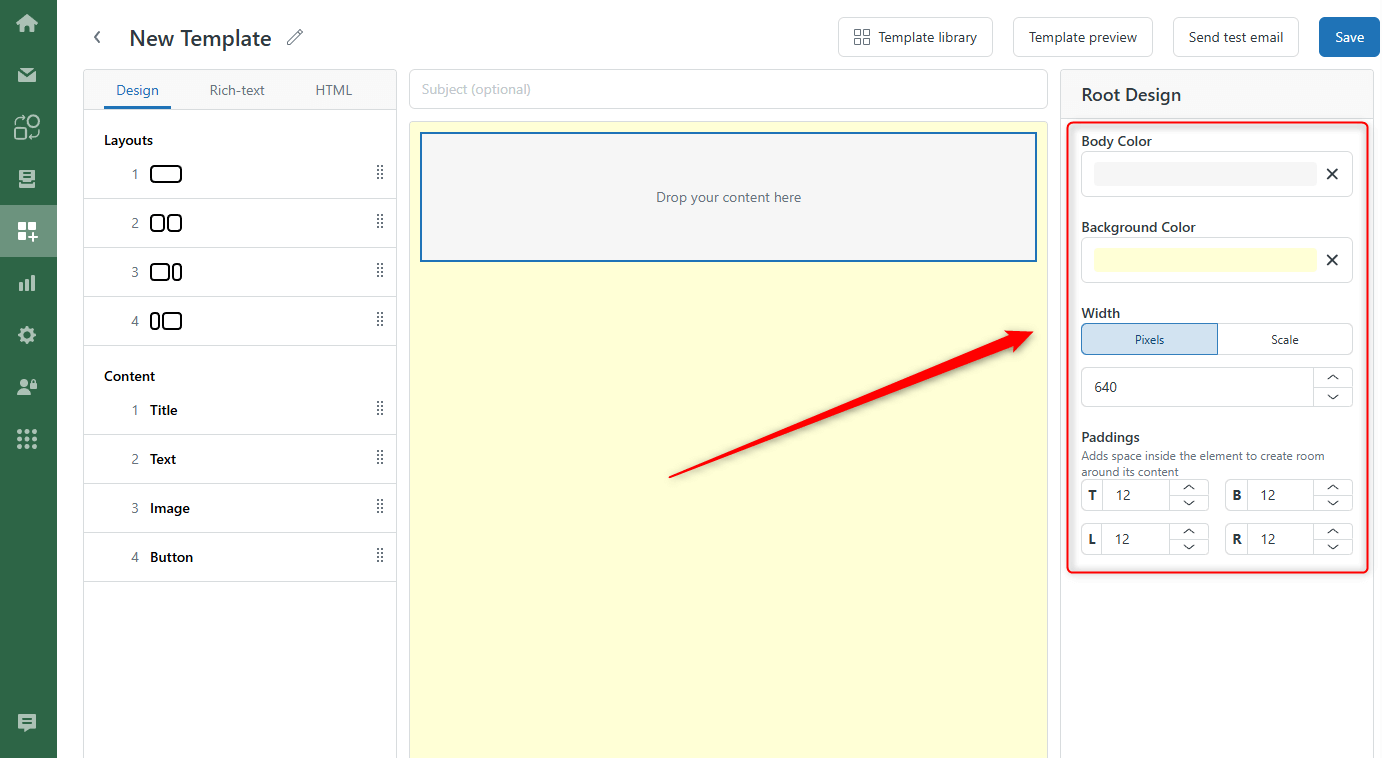
Start your email template with the Root design. Select width, paddings, and the color of your email body and background.
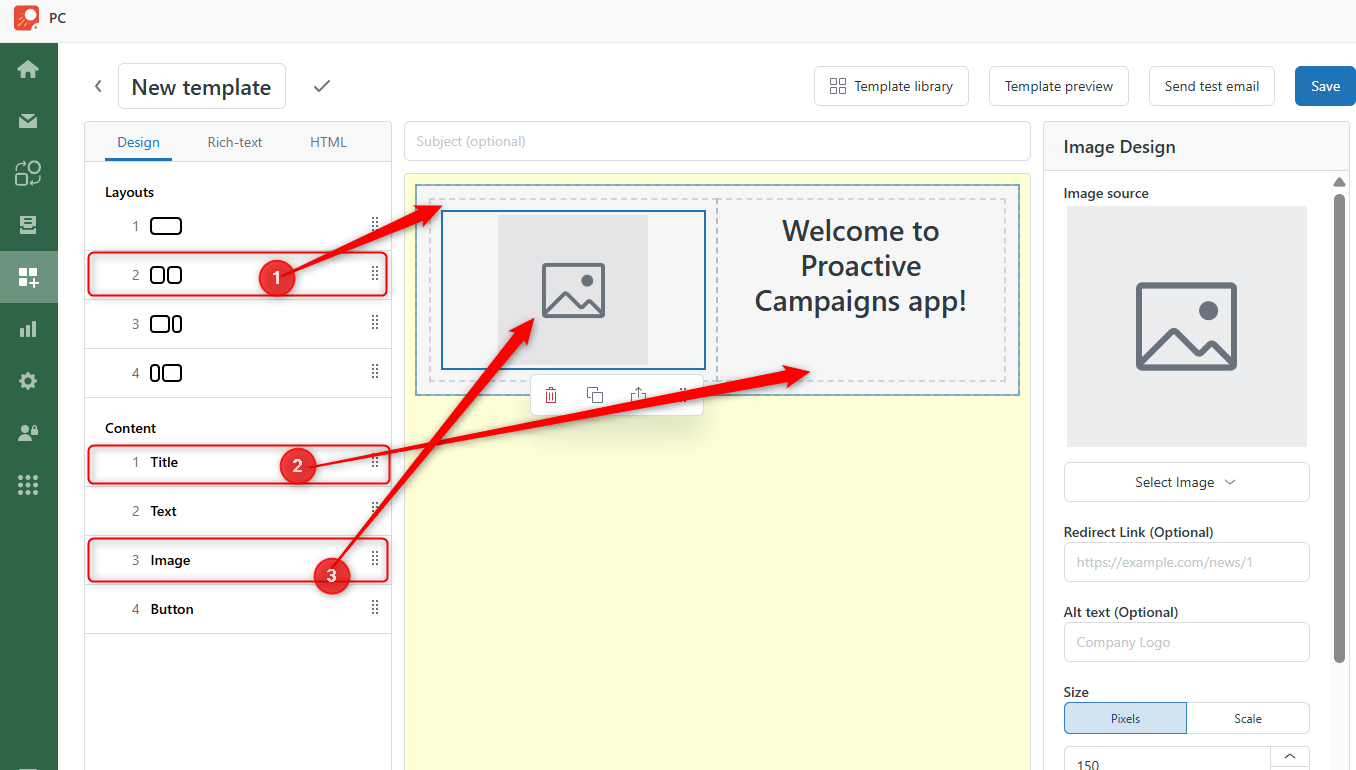
Then, go to the Layout and Content section, where you can drag and drop elements and move them as you need. Here is our example of the template.
We've selected the second layout and dragged and dropped an Image and Title content onto the layout.
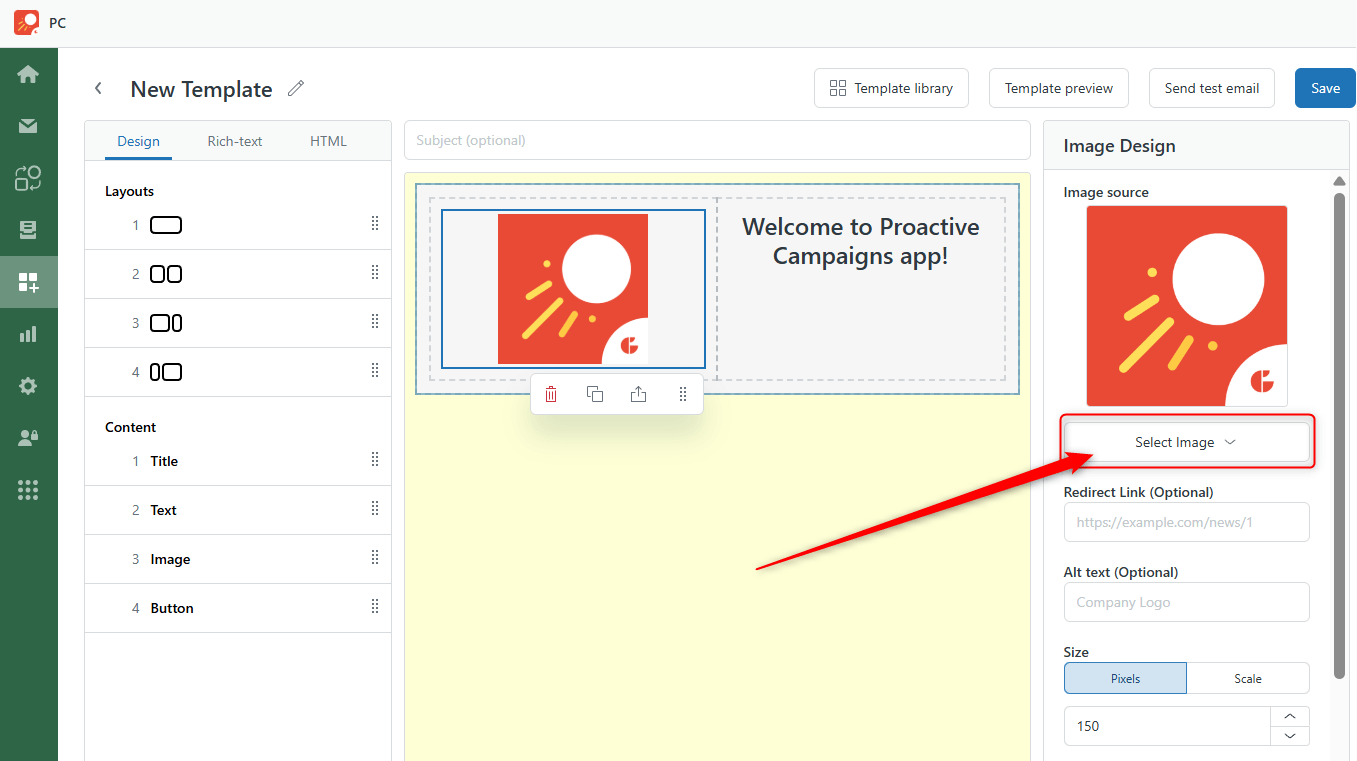
Then, we uploaded our logo. Also, you can embed it using a URL.
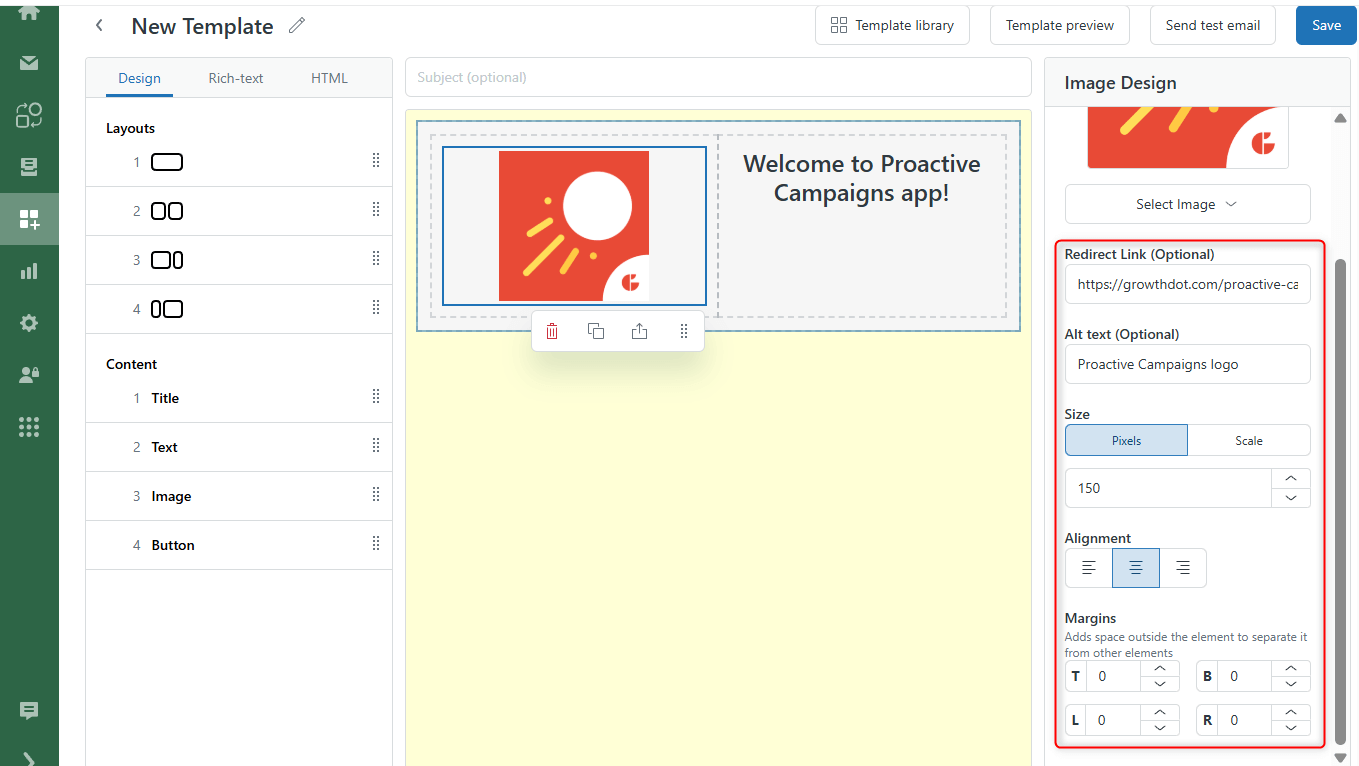
Optionally, you can set redirect links, alt text, size, alignment, and margins.
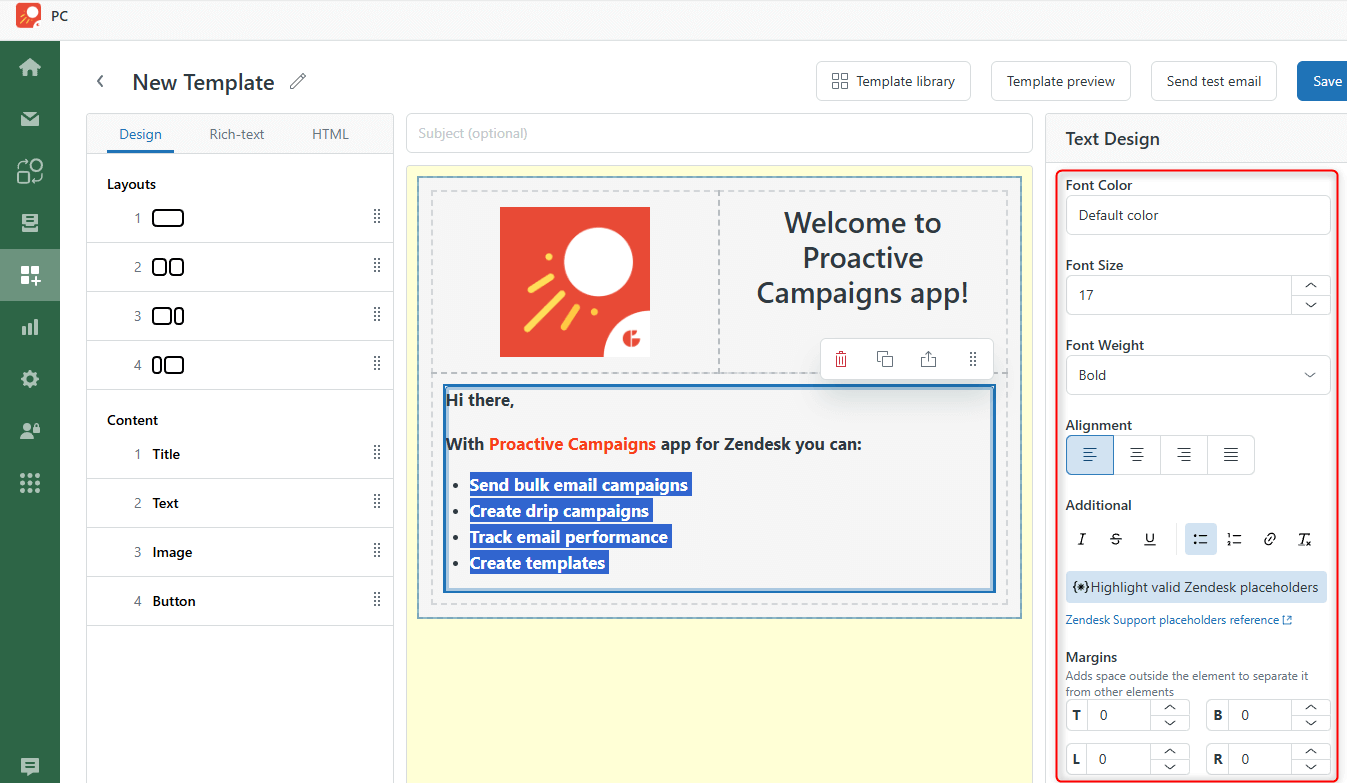
After that, we added some text and used Text Design options to make our email more readable.
Finally, we added a button with a redirect link and selected color and font parameters. Also, don't forget to name your campaign, add and click Save. Moreover, you can return to your template and send test emails to check the deliverability.
So, that's it! Creating an email template has never been so easy!


