How users can enable access to Proactive Campaigns app
-
Proactive Campaigns
If you have a large customer support team, you may want to restrict access to some agents or give them limited access to our app. There are two ways to do this: from the Zendesk Admin Center and the Proactive Campaigns app. Zendesk settings allow admins to restrict particular roles or agent groups from using the app at all.
However, the second way is more appropriate if you need to segment the access for each agent. For example, you can partially restrict the agents' rights in the app. Moreover, you are allowed to give full access to some of your coworkers. Let's see how to do each way in more detail.
Restrict access from Zendesk’s configuration page
To start using the Proactive Campaigns plugin in your Zendesk Support, you should ensure that the application is enabled in your Zendesk instance. To do so:
1. Go to the Admin Center.
2. Then, open Apps and integrations > Apps > Zendesk Support apps.
3. Find Proactive Campaigns in the list of installed integrations and click the Gear icon.
4. Shift the toggle to enable the app if it's not.
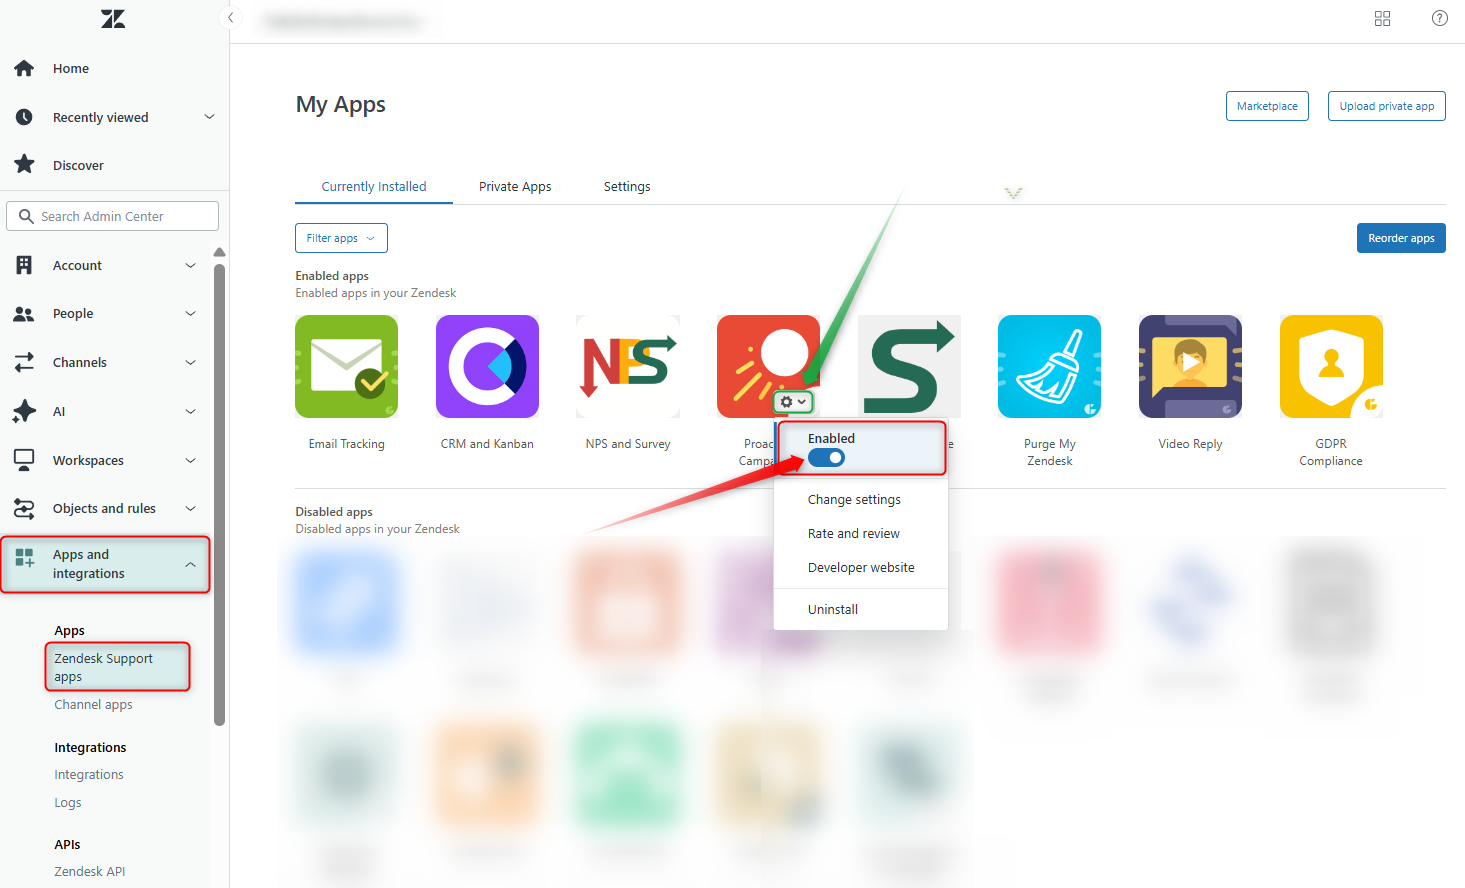
Additionally, if you’re an Admin and you’d like to restrict access to the app for certain roles or groups of agents, you can do this on the Apps settings page. To do so:
1. Go to the Admin Center.
2. Then, open Apps and integrations > Apps > Zendesk Support apps.
3. Find Proactive Campaigns in the list of installed integrations and click the Gear icon.
4. Click the Change Settings button.
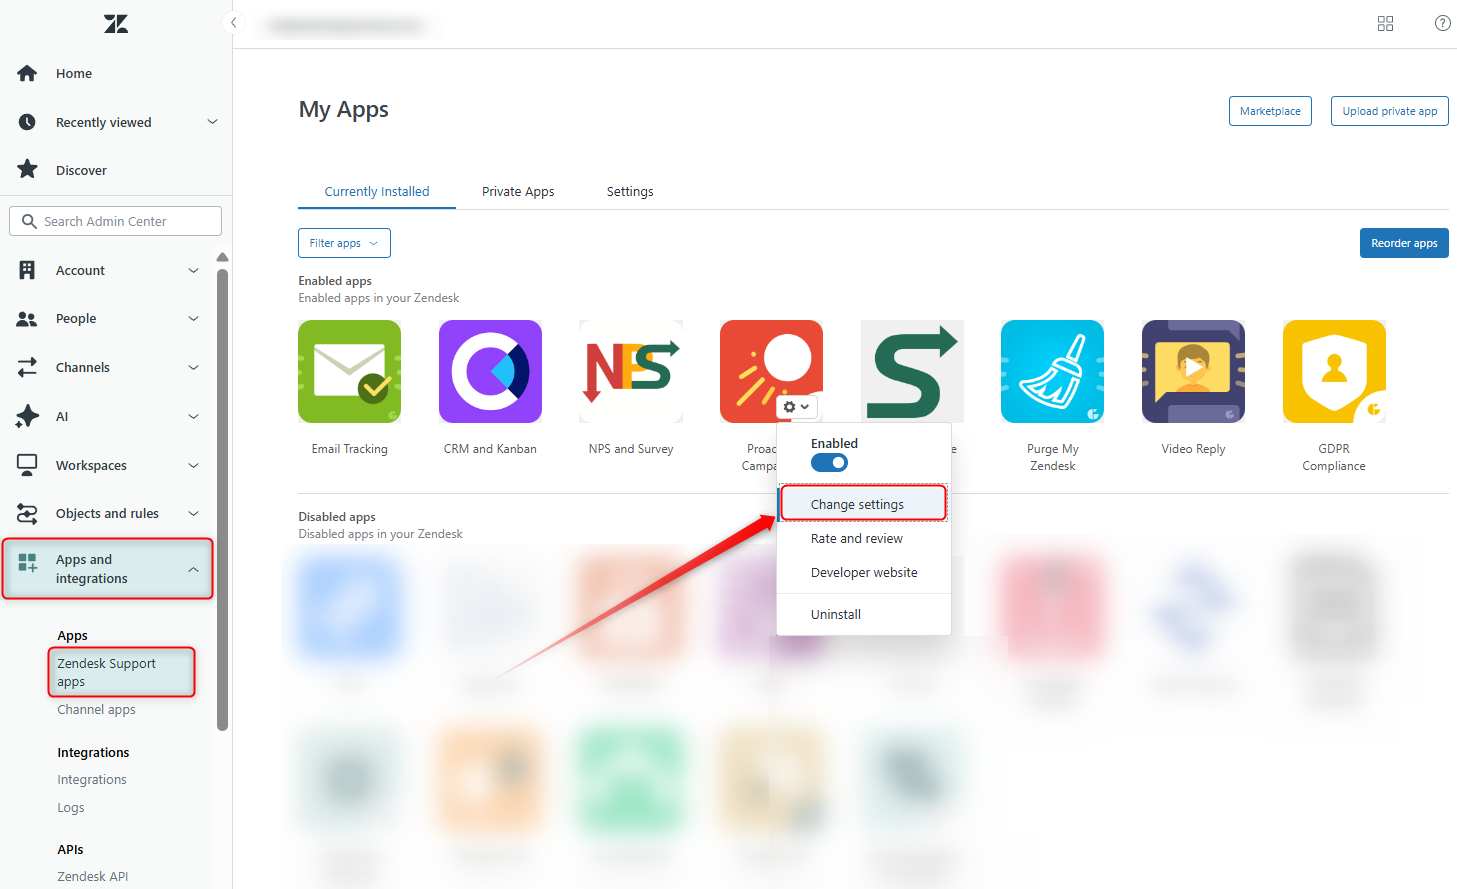
5. Fill out the necessary fields with the roles or group names, and click Update to save the changes.
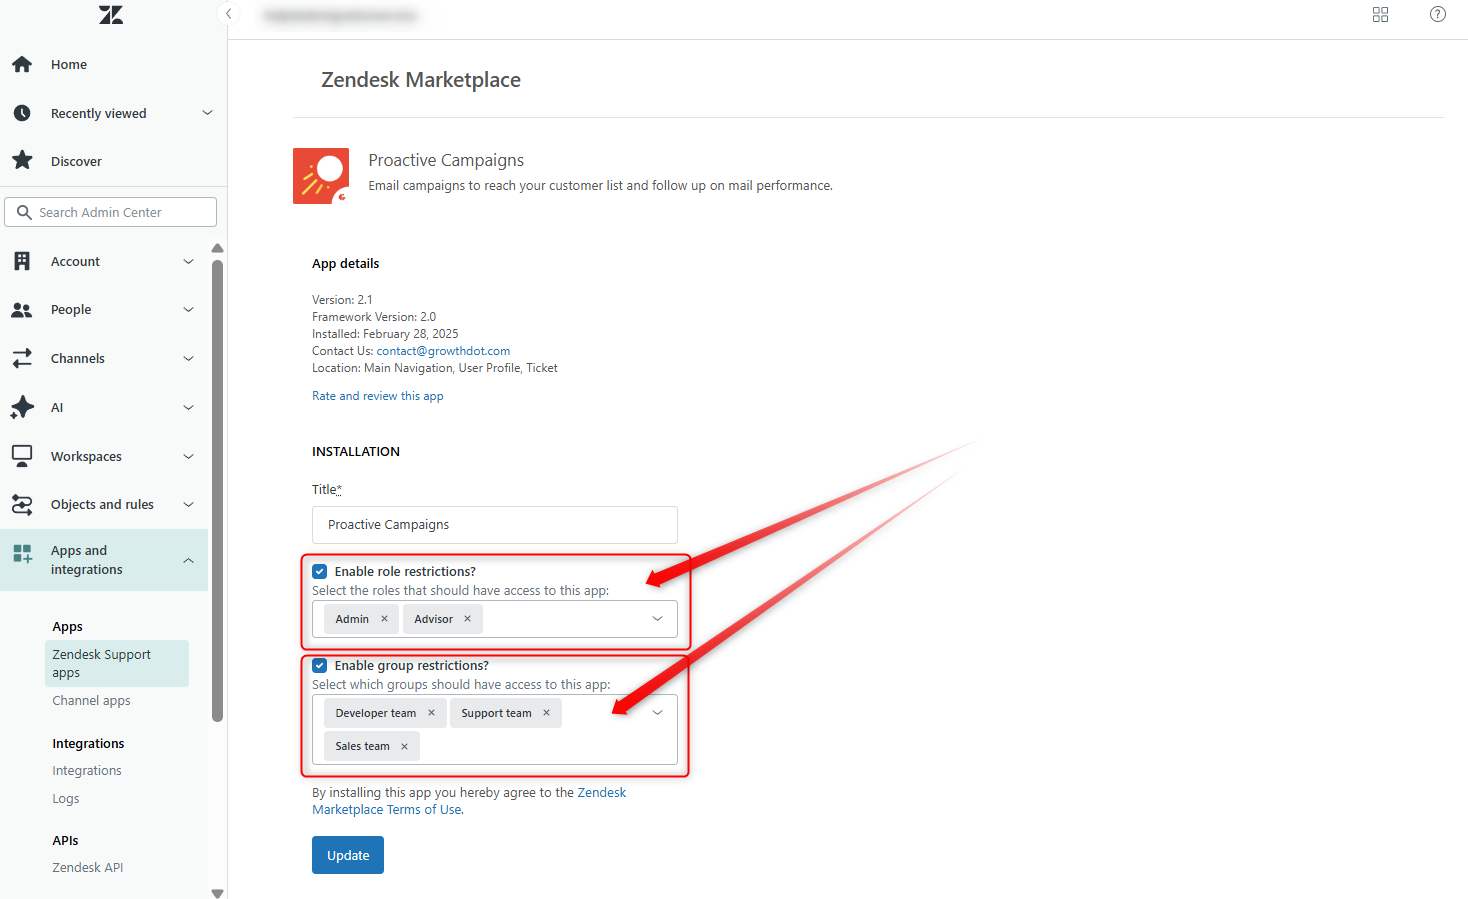
Restrict access from Proactive Campaigns
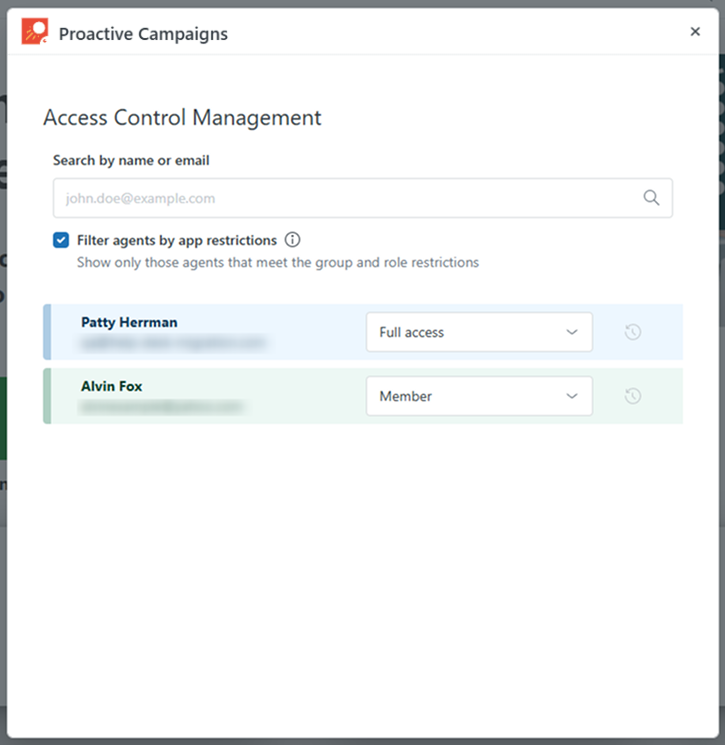
The Access Control Management icon on Proactive Campaigns's sidebar allows you to assign different levels of access to agents.
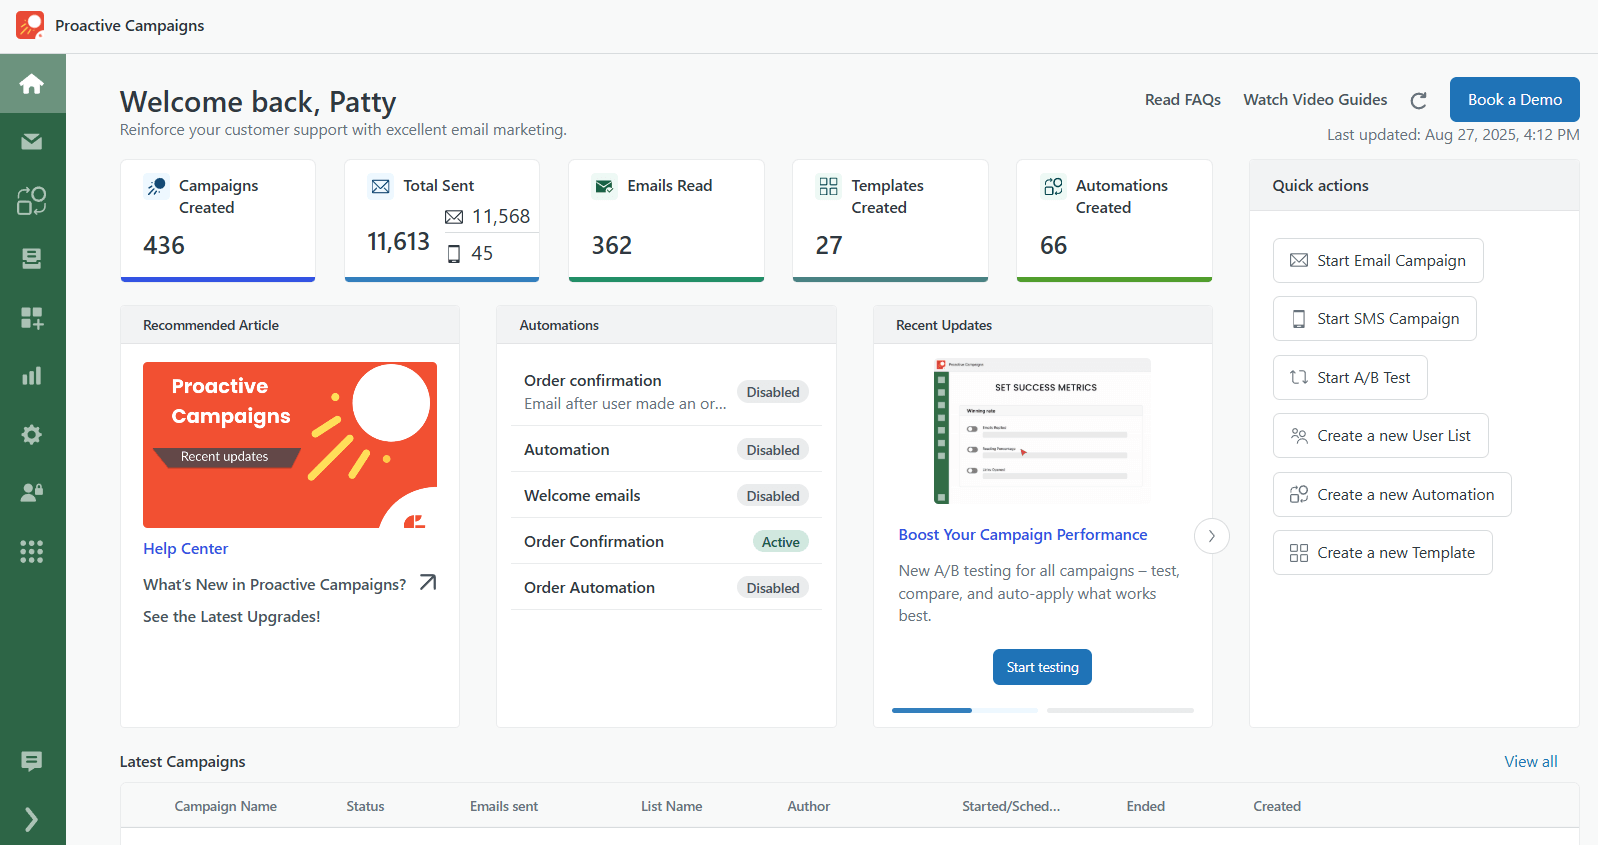
In the app you can assign one of two access levels offered by Proactive Campaigns:
- Full access allows an agent to use the app with no restrictions.
- Member is good to assign to those agents who don't need to work with the application configurations. They will be able to send mass emails as usual, but won't be able to do some settings.
To set the access, click on the drop-down list next to the agent's name and select the type of restriction.
That’s it! Now, you can use Proactive Campaigns to the full extent. If something is unclear or you have any additional questions, make sure to contact our super-helpful support agents.


