How to Create a Campaign with Rates or Feedback in Proactive Campaigns for Zendesk
- Proactive Campaigns
With the help of the Proactive Campaigns app, you can create mass email campaigns with ratings and feedback. Let's see how to start.
1. First, start creating your campaign as usual. Click here if you need to learn how to create a new campaign or how to add the user or ticket list.
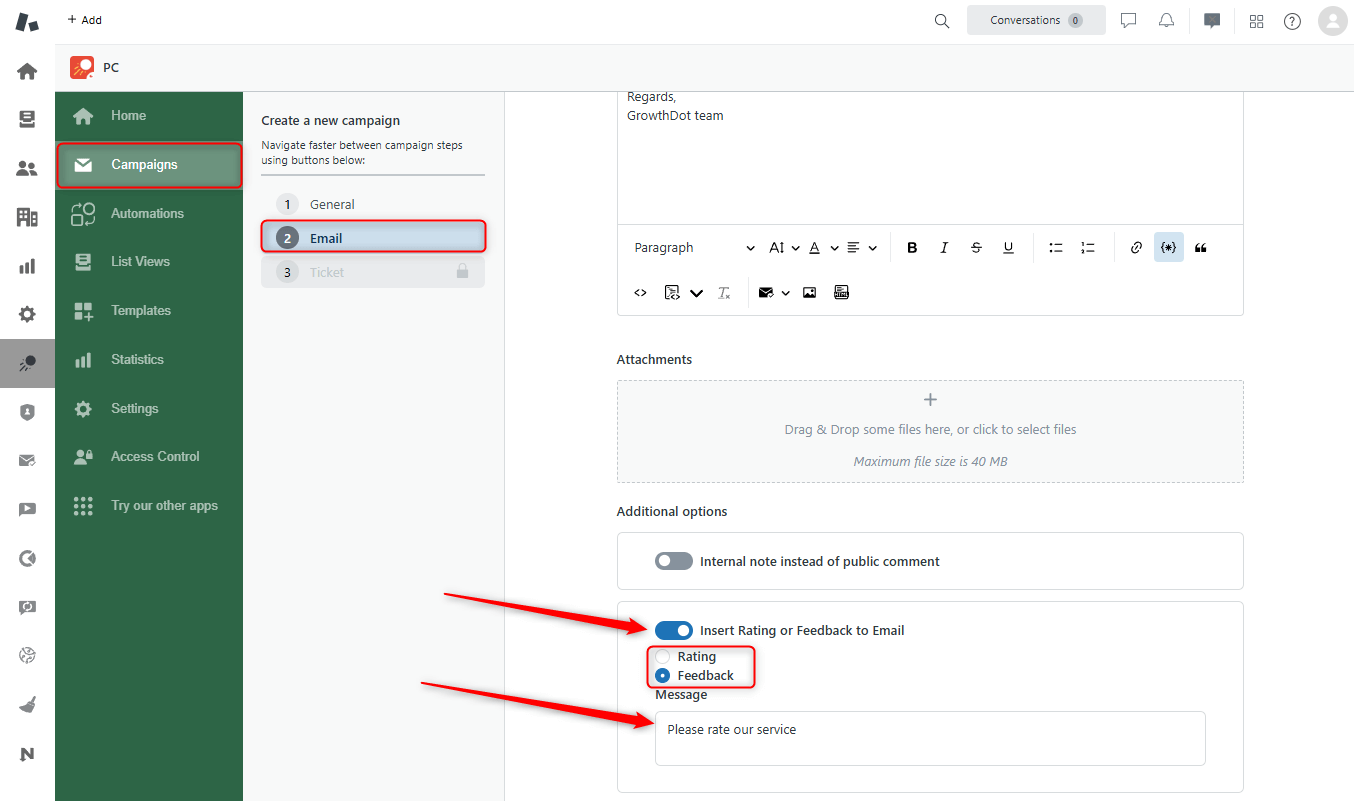
2. Then, when you are in the Email section, fill in all necessary fields and switch the toggle Insert Rating or Feedback to Email.

3. Next, select the type of survey (feedback or rates) and type the message you want your customers to see when they open the letter.
Feedback means that recipients need to type a review.
Rating means they can pick stars to estimate your product or service.
4. Afterward, continue creating a campaign and run or schedule it.
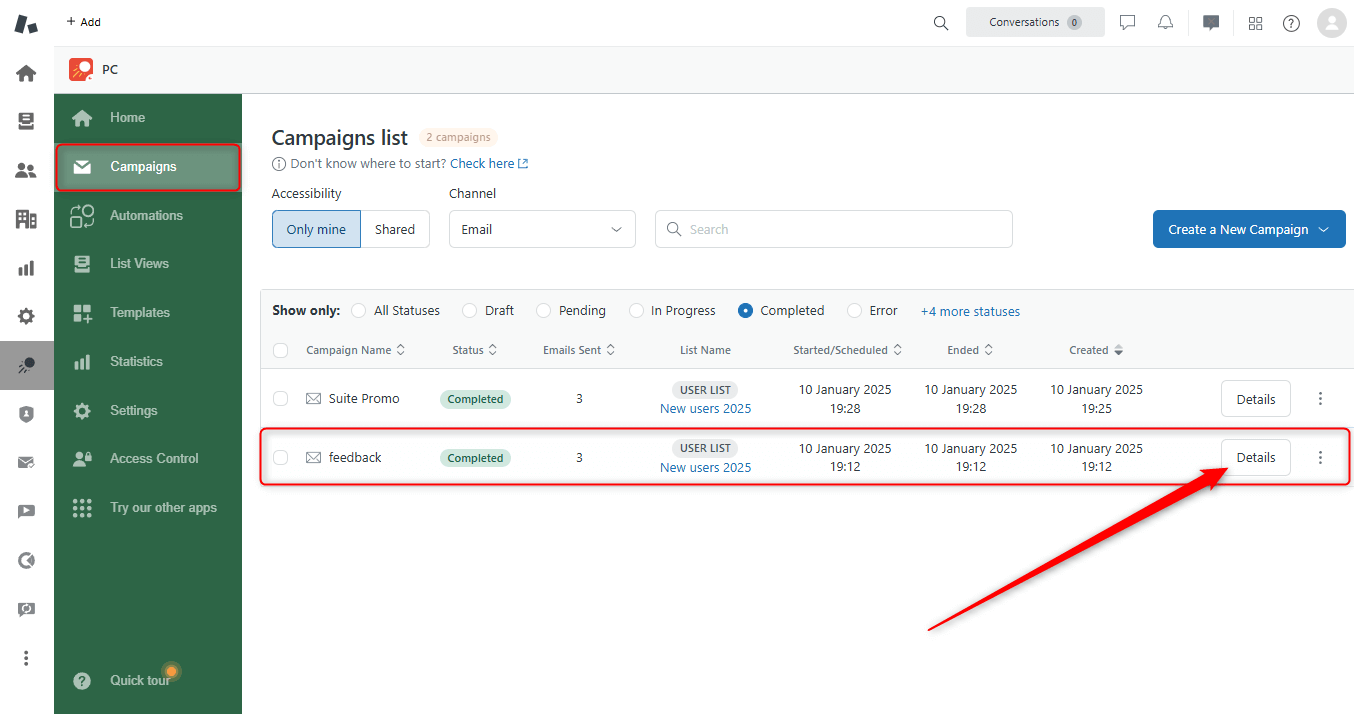
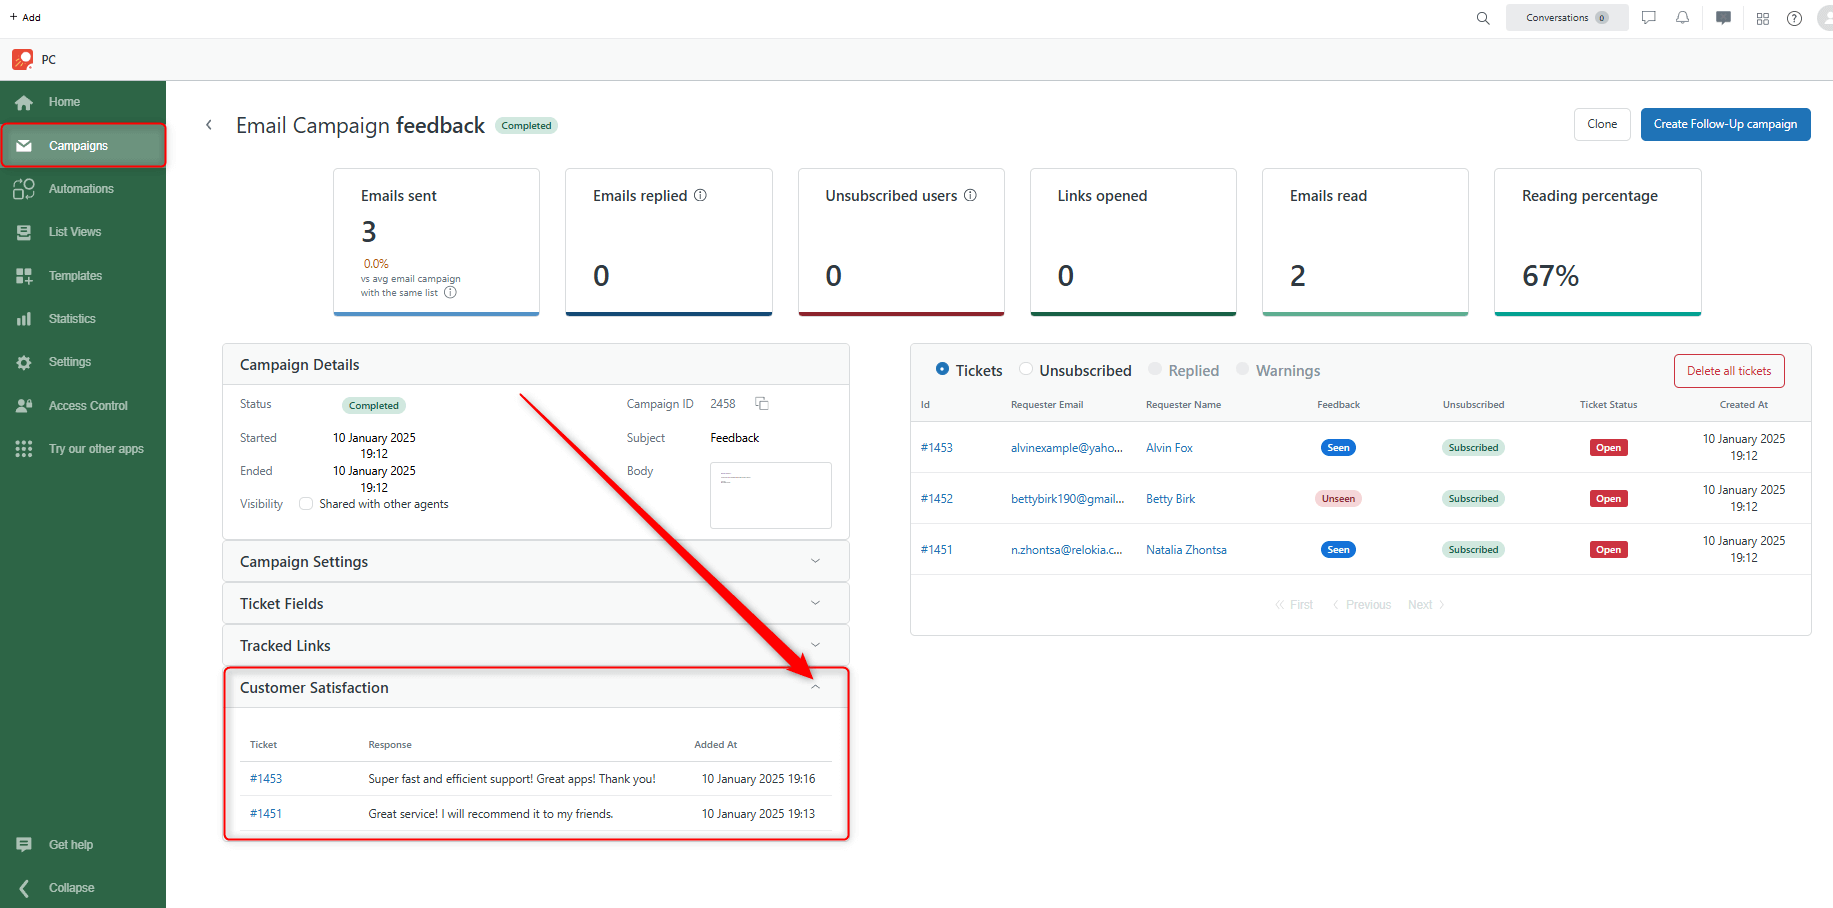
5. Finally, wait a few days for the client's reply. Then go to the Campaigns list page, find your campaign, and click on the Details button on the front of your campaign. You will be taken to another page with Campaign details.

You will see the customers' messages on the new page if you select the Customer satisfaction bar.

As you can see, it's pretty easy and can bring you excellent results. Contact us if you need something to ask, and our responsive agents will help you.


