How to Create a Separate View for Tickets Created in Proactive Campaigns
-
Proactive Campaigns
Need instant access to tickets created via Proactive Campaigns in your Zendesk view? You can sort tickets for one campaign and for all by using tags as the conditions. As a result, you'll get ticket views for email campaigns in one place - Zendesk's View. Follow these steps to create it:
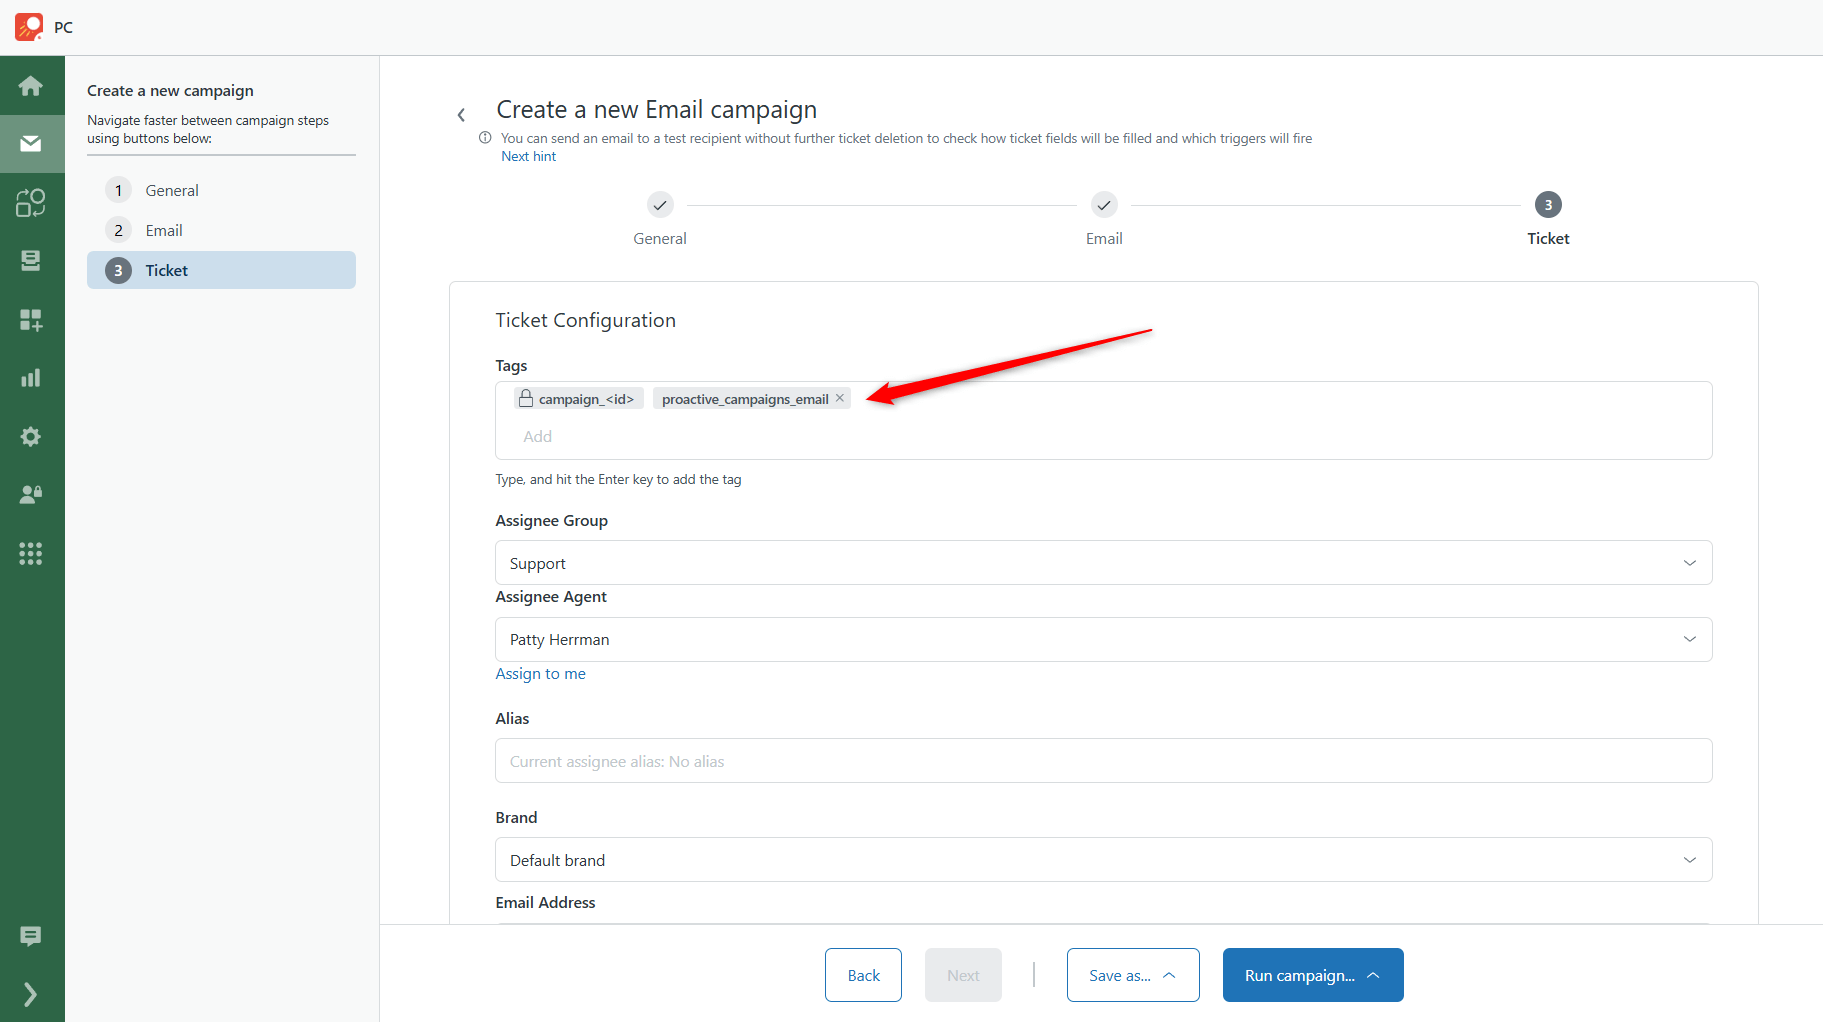
1. First, create a new campaign in Proactive Campaigns and add the tags in the last stage. By the way, the app automatically adds a campaign_<id> tag that you can't delete and a proactive_campaigns_email tag that you can remove if you want, but we'll use it to create a view. Tags act as filters for your future view so you can create as many views as you need using tags.

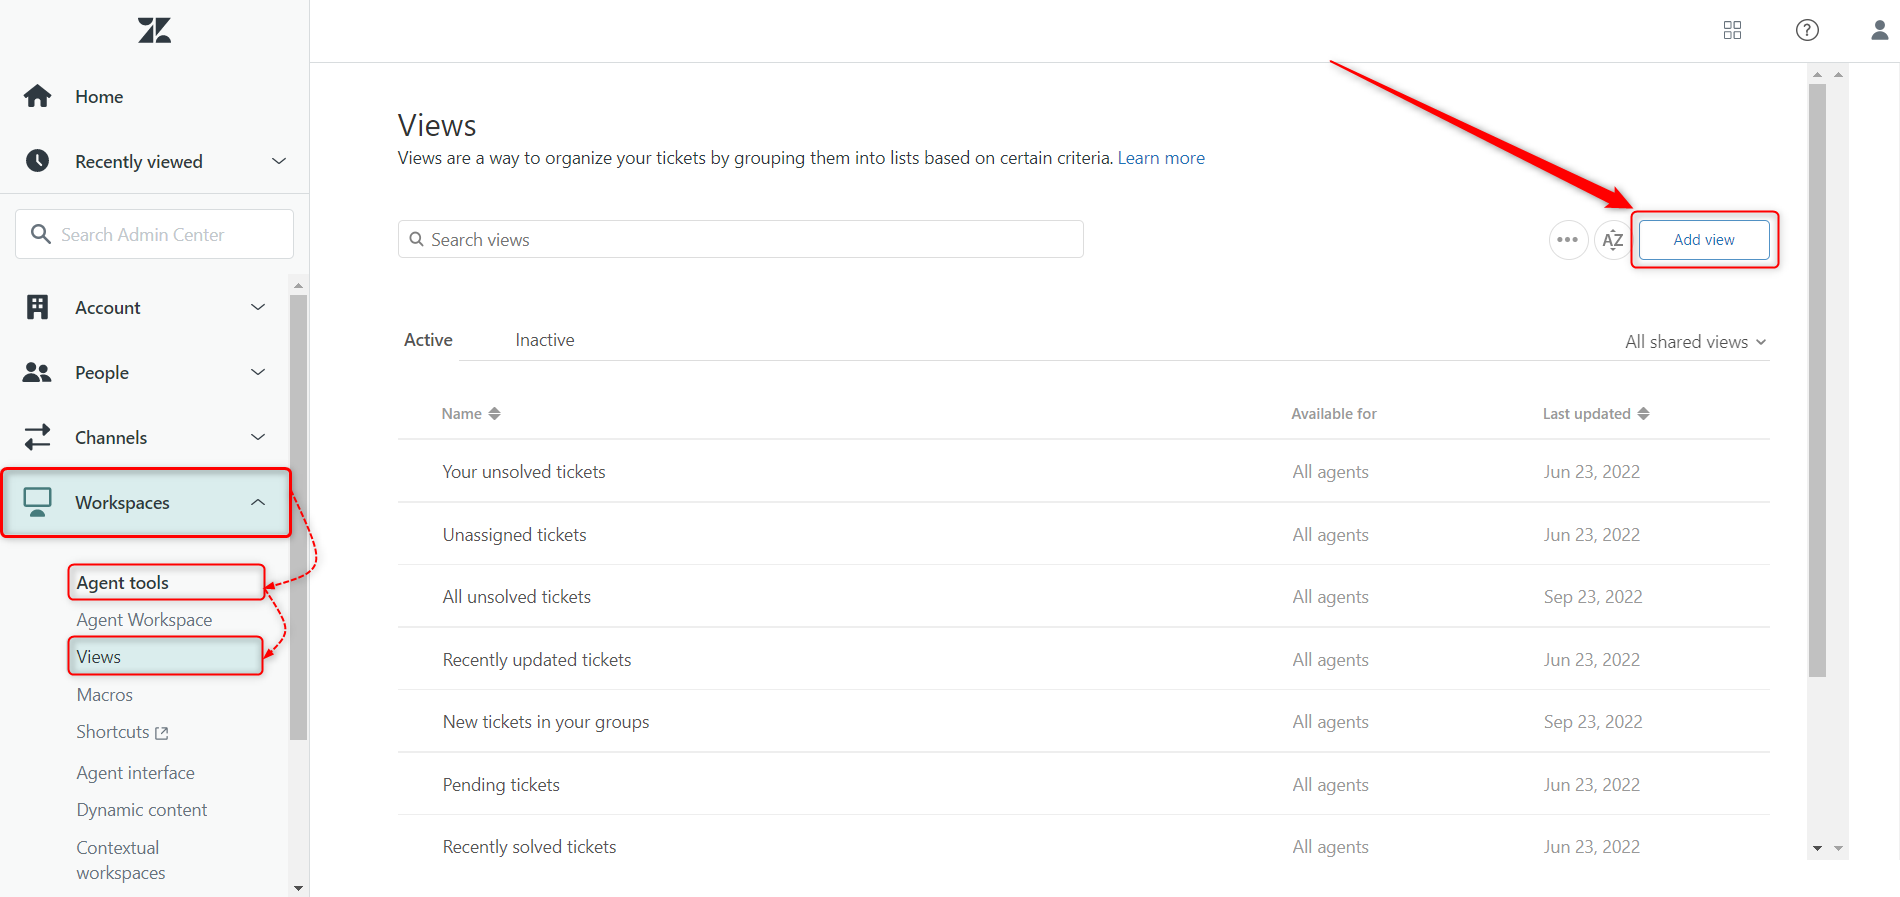
2. Next, run the campaign as usual and then create a ticket view in Zendesk. To do so, go to Admin Center > Workspaces > Agent tools > Views > Add view.

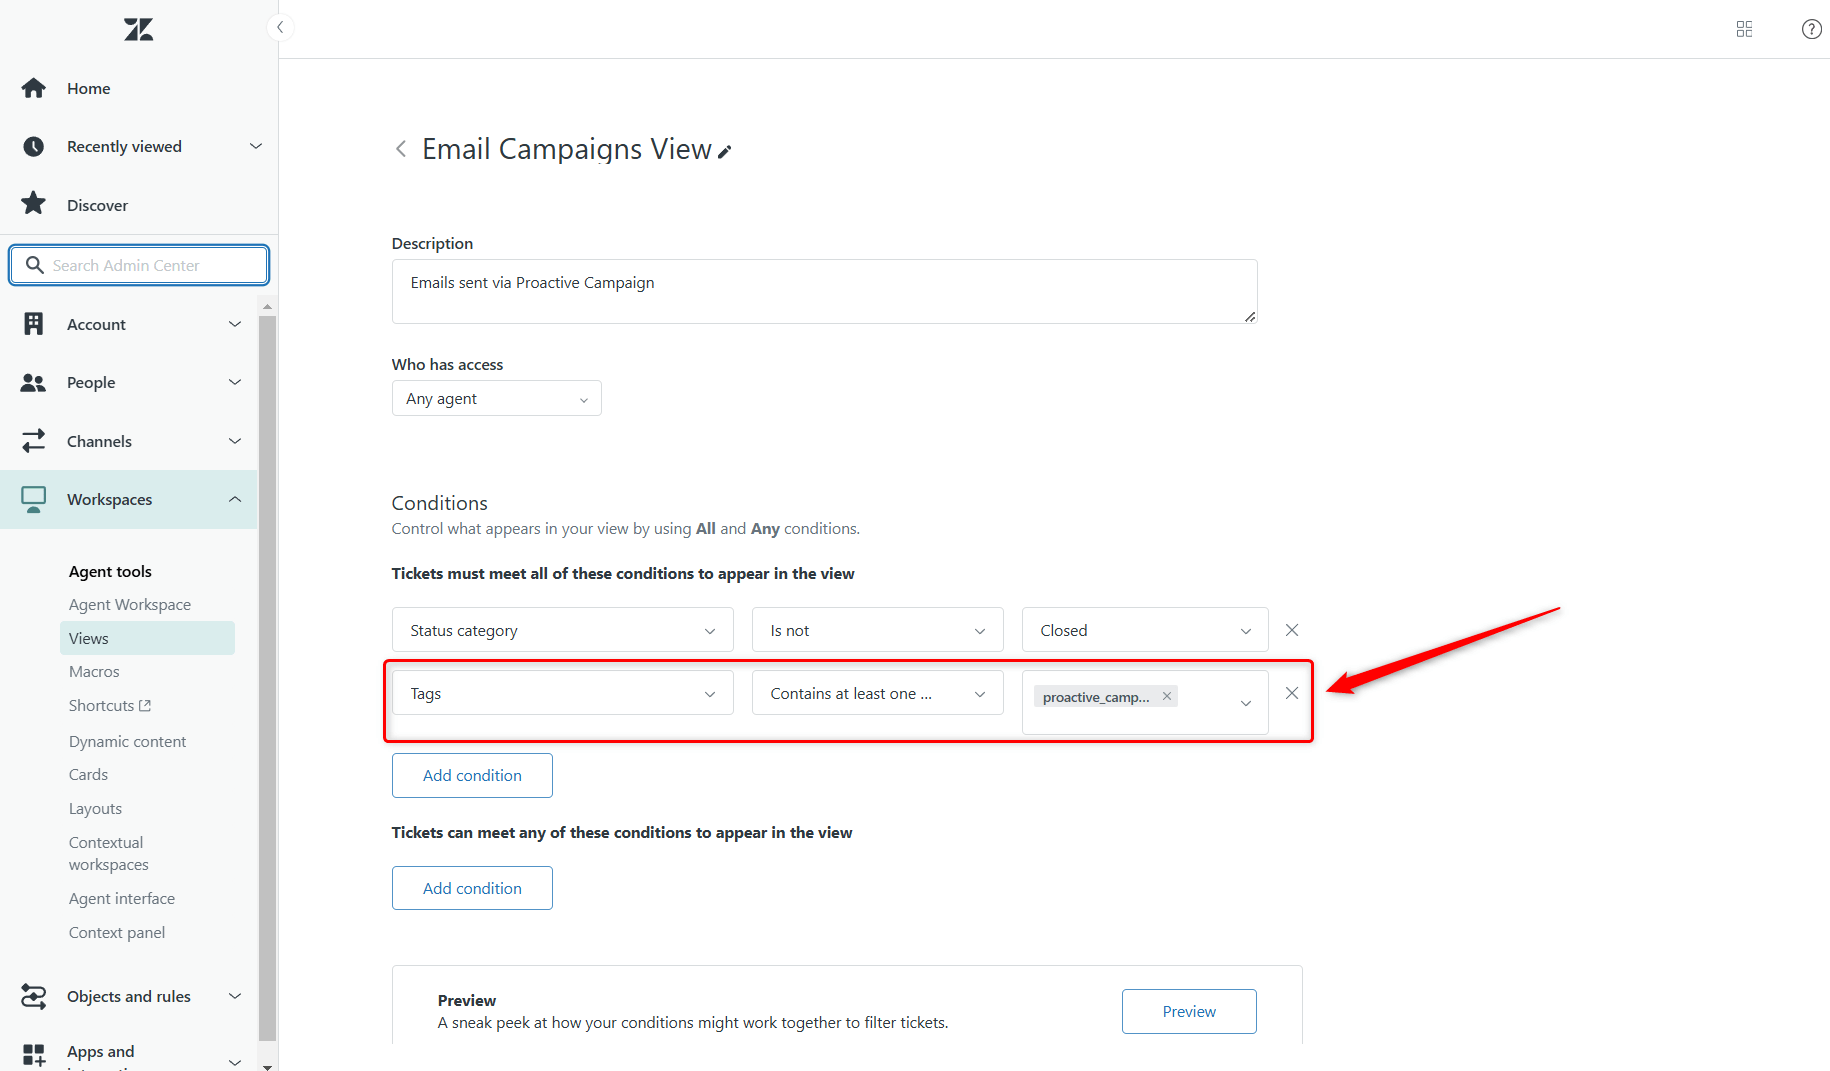
3. Afterward, set the condition with that tag you have set in the campaign or you may also use the campaign_<id> default tag. Take into account, that Zendesk requires adding at least two conditions to create a view, so add another one. We provided the example of ticket view creation below.

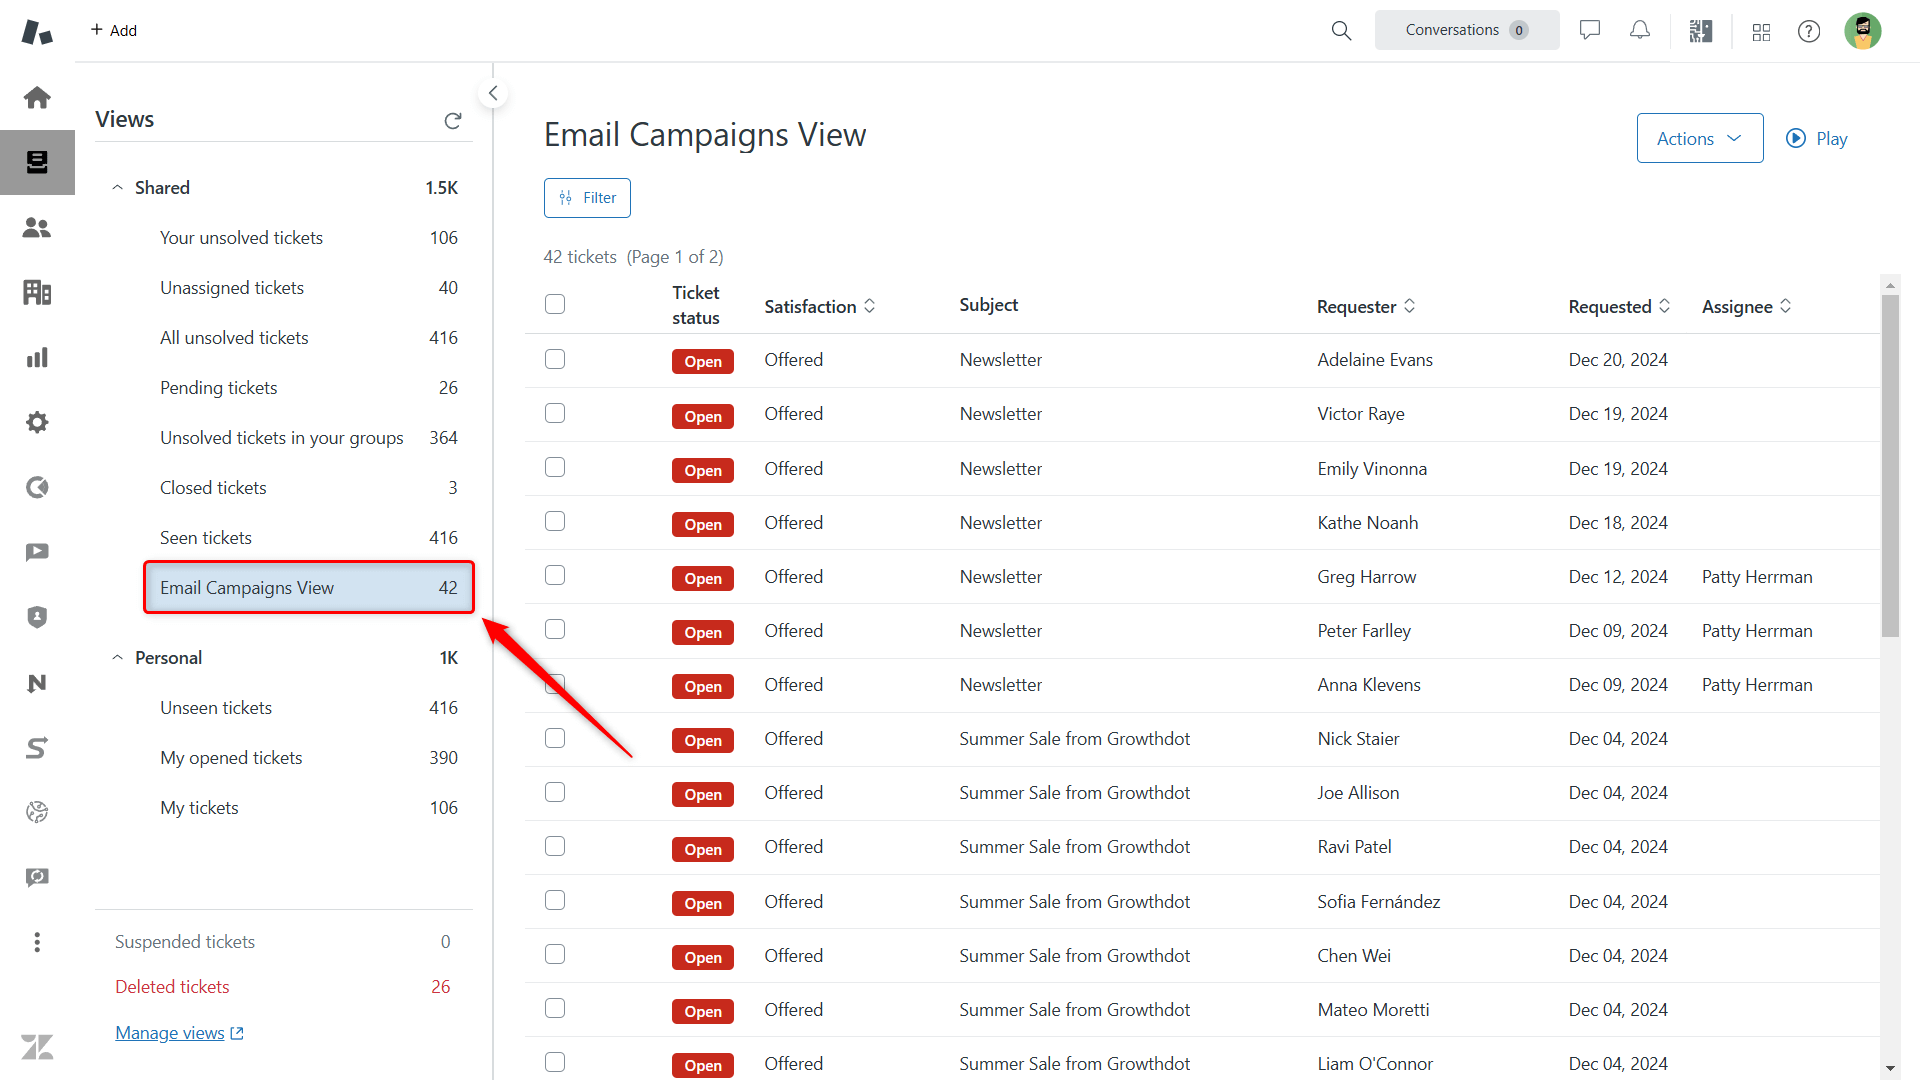
4. Finally, save your view and check out the new category in the "Views" section.

Enjoy a fast and convenient method to organize your tickets and find the needed amount in the eternal flow of clients' requests. And if something goes wrong ask our support team for help.


