How to create a survey in the NPS and Survey app
-
NPS and Survey
Monitoring your customer satisfaction and collecting their feedback is extremely useful for the support team and your business in general. This is where our NPS and Survey app comes in handy. Here, we'll give you step-by-step instructions on how to create a survey in Zendesk.
To start the process, open the Manage surveys page and click + Create survey in the right corner above.
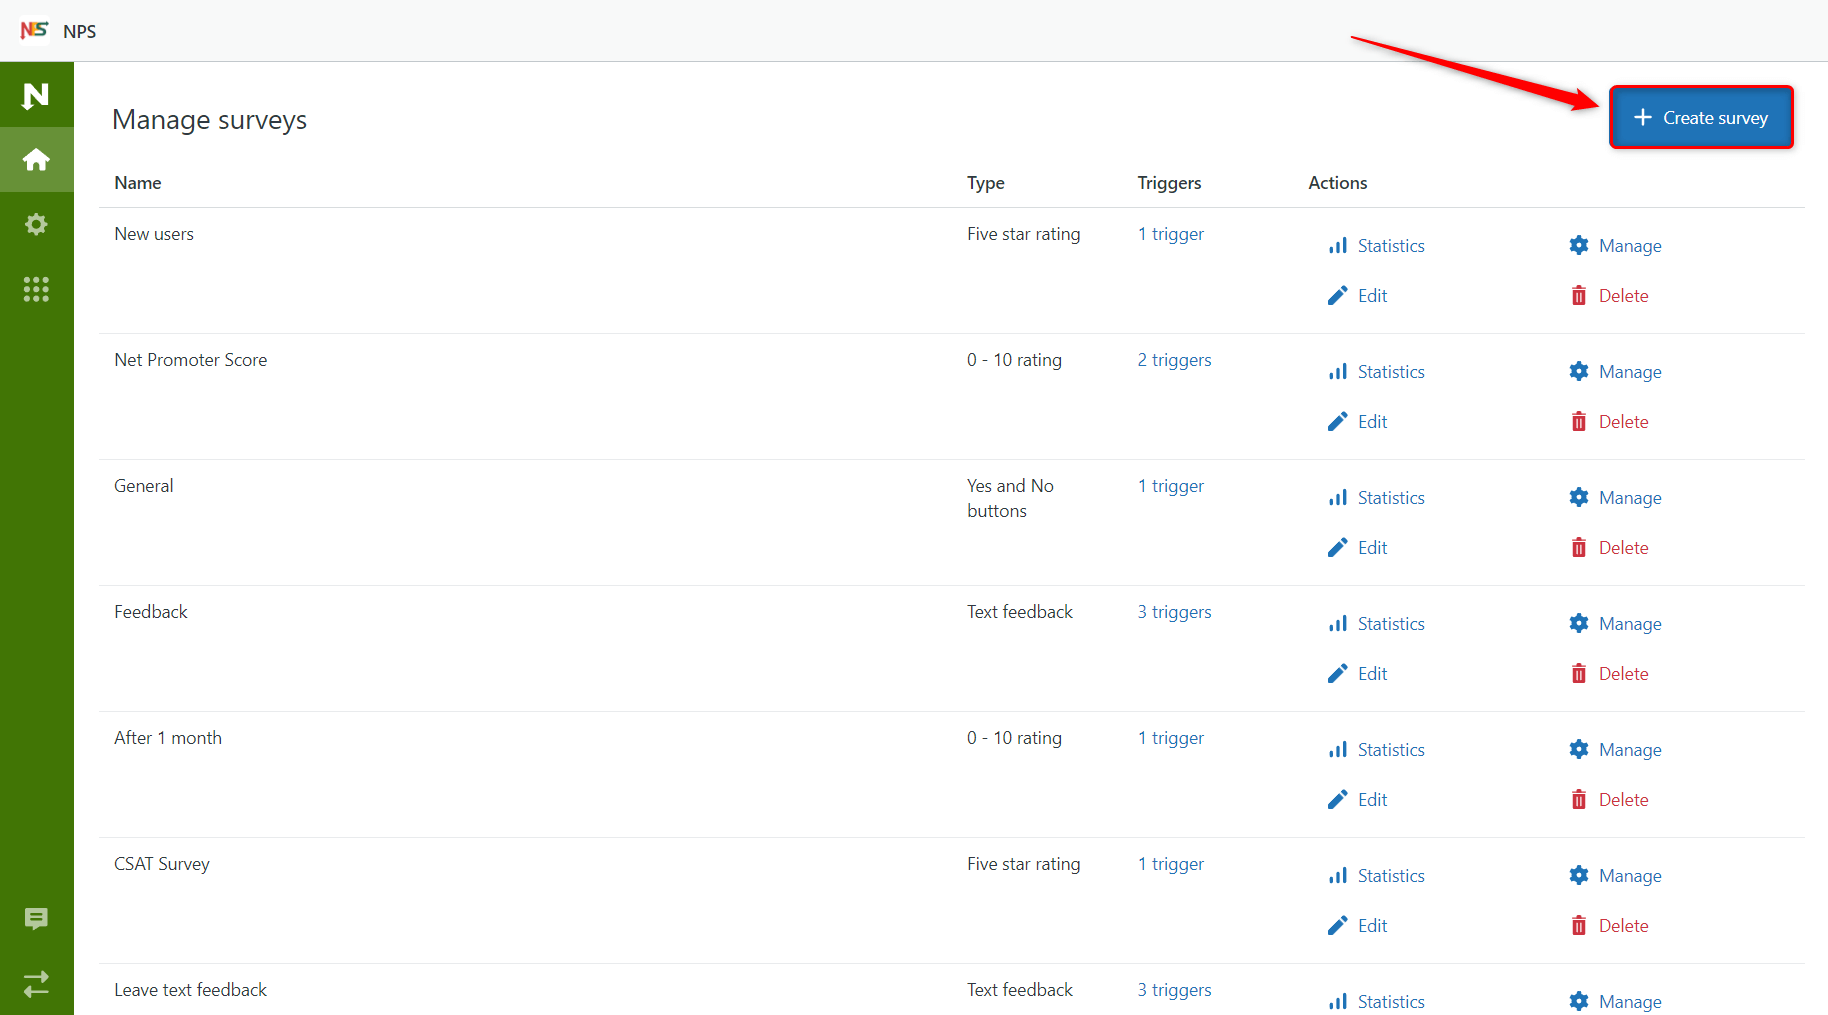
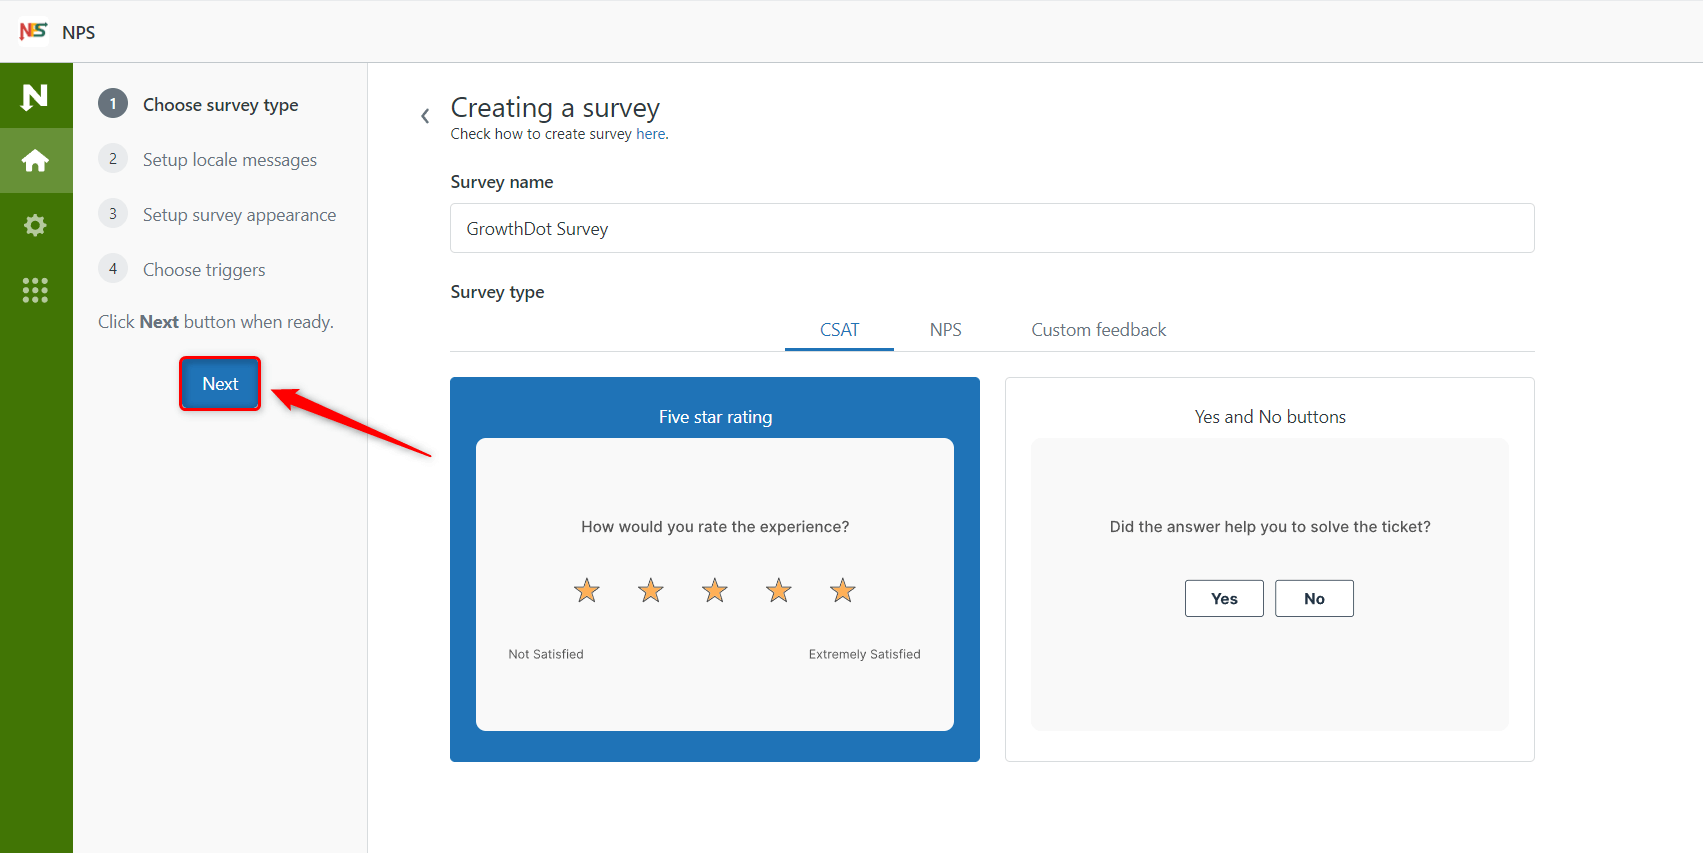
Step 1: Choose survey type
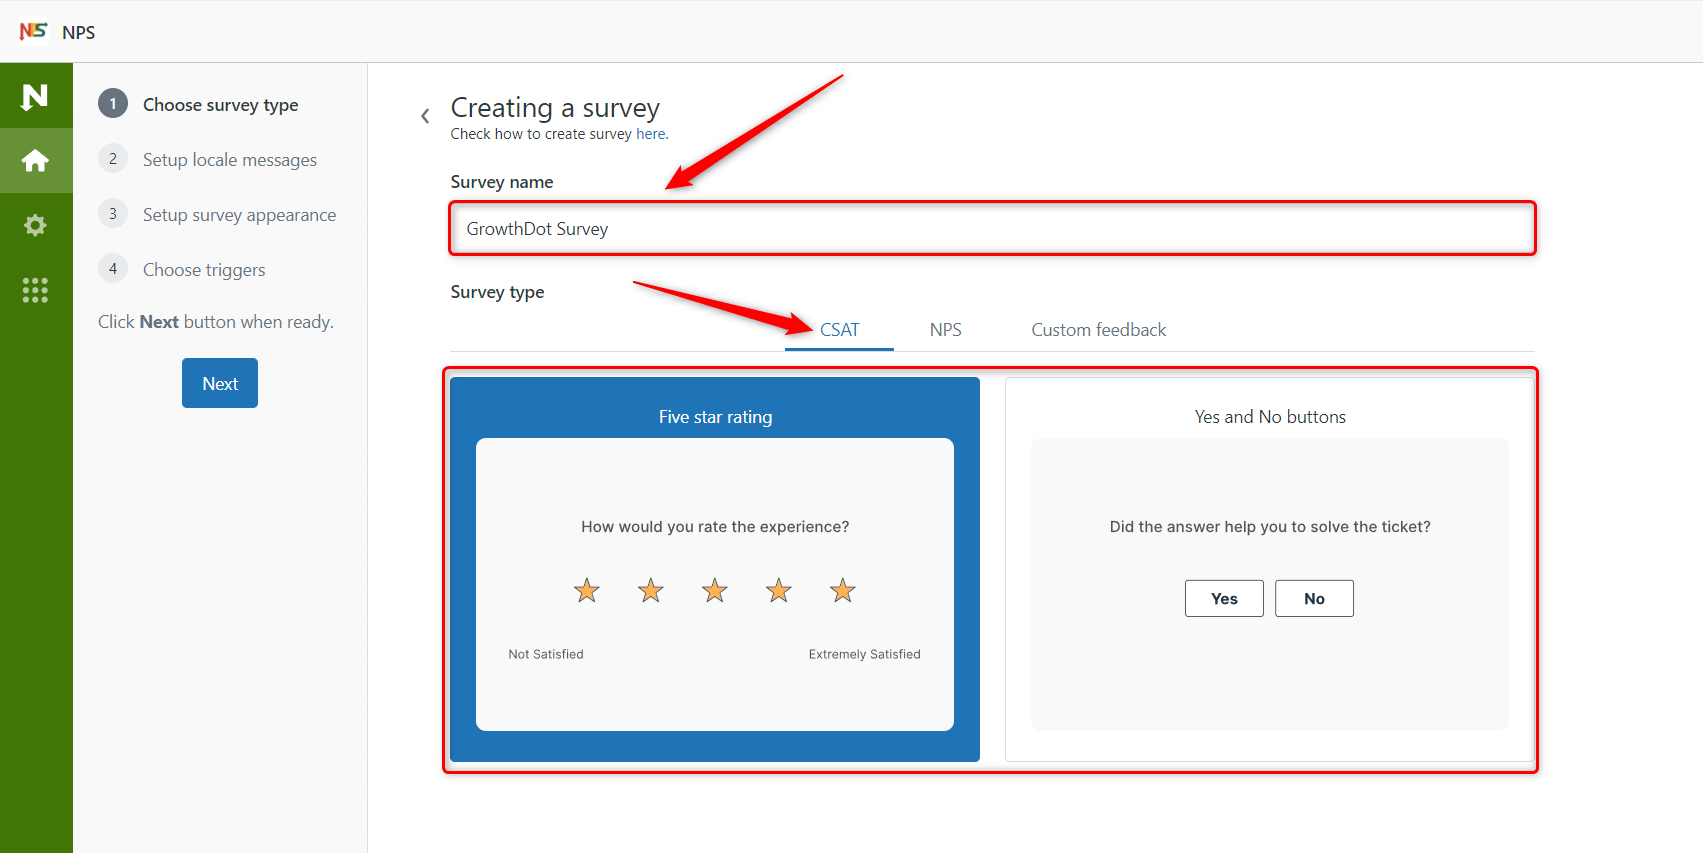
In the first step of survey creation, you should fill in the Survey name and choose the type of survey. There are three groups of surveys:
- CSAT
- NPS
- Custom feedback
CSAT surveys help to measure customer satisfaction. It includes a Five-star rating and Yes and No buttons.
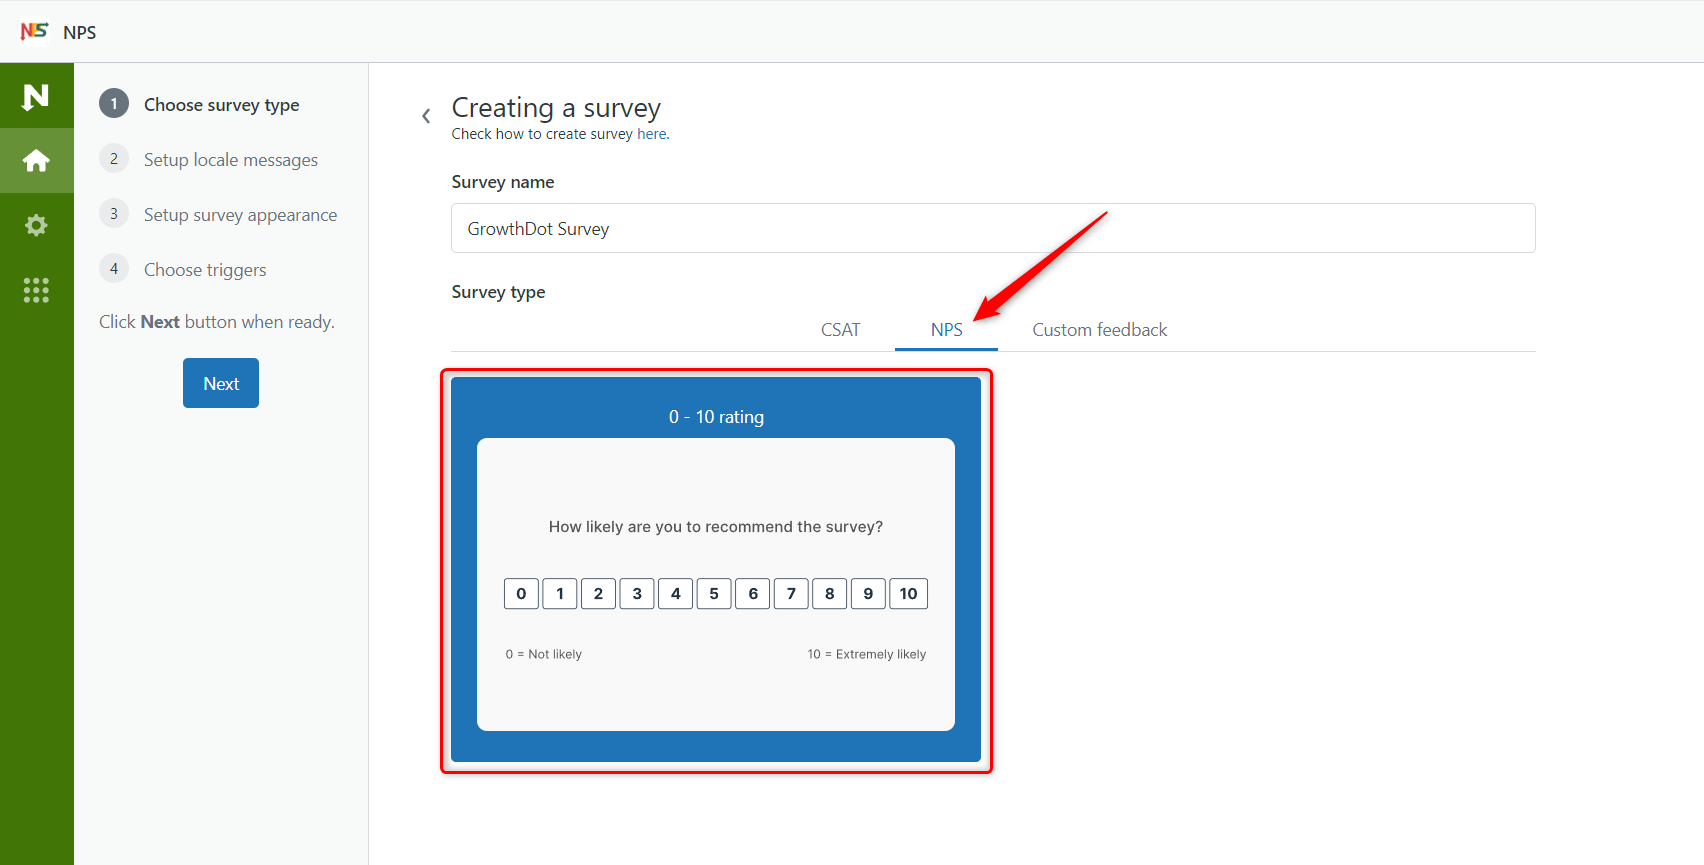
Click on the NPS section if you need to know the likelihood of customers recommending your services to others. There, you will find a 0 - 10 rating survey type.
The last one is Custom feedback with the Text feedback survey for more precise answers.
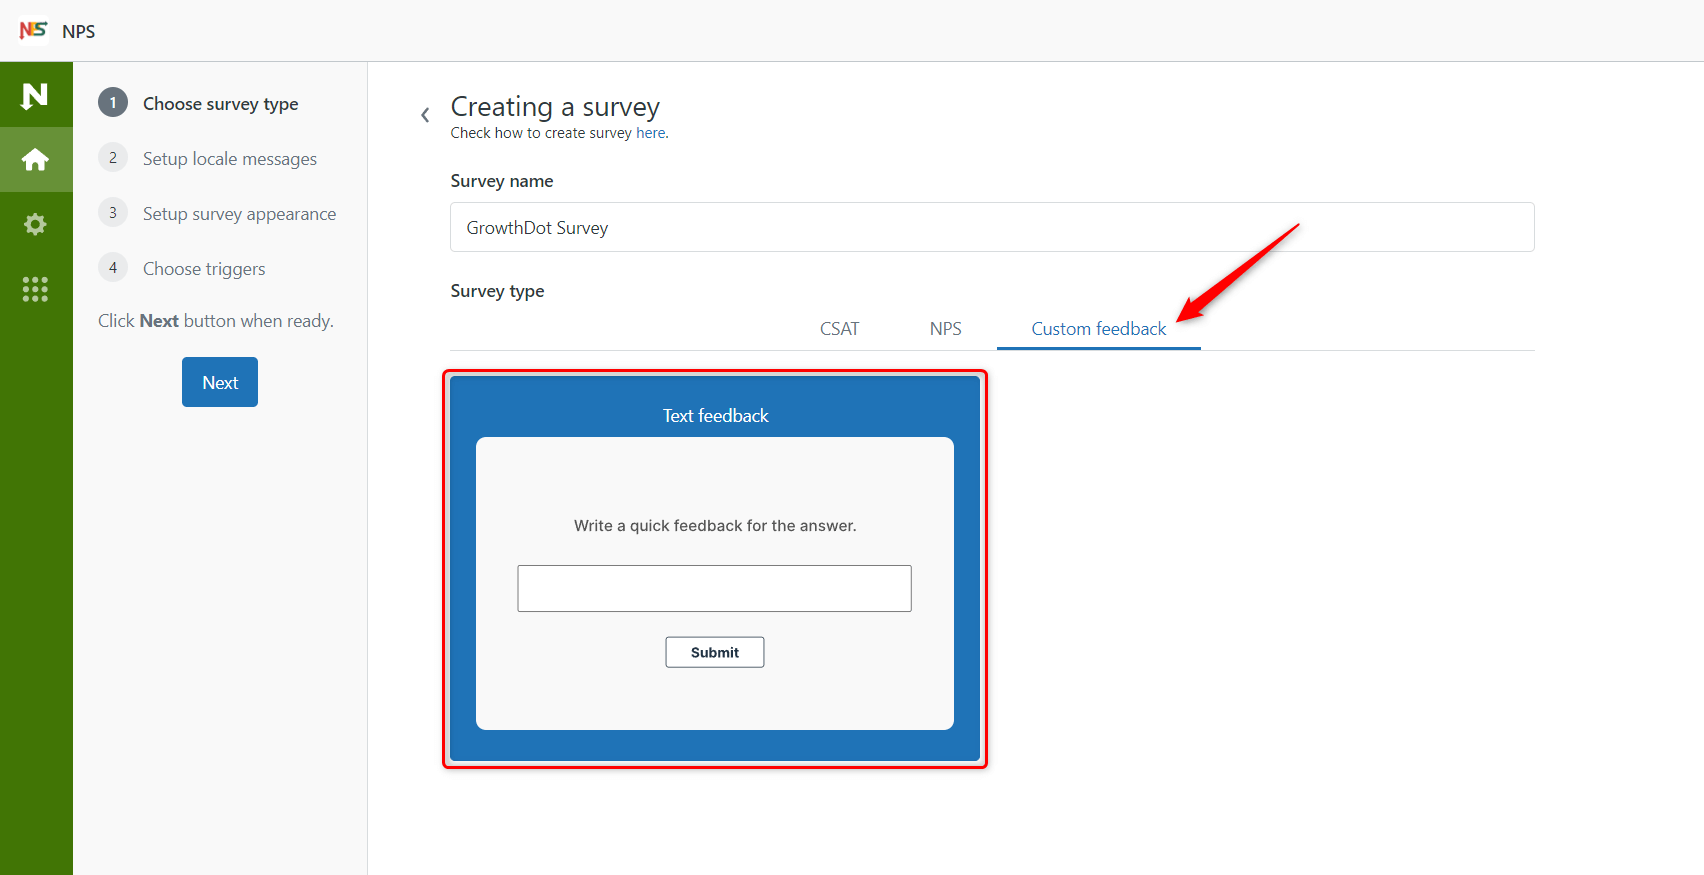
After selecting the appropriate option, click Next on the sidebar.
Step 2: Setup locale messages
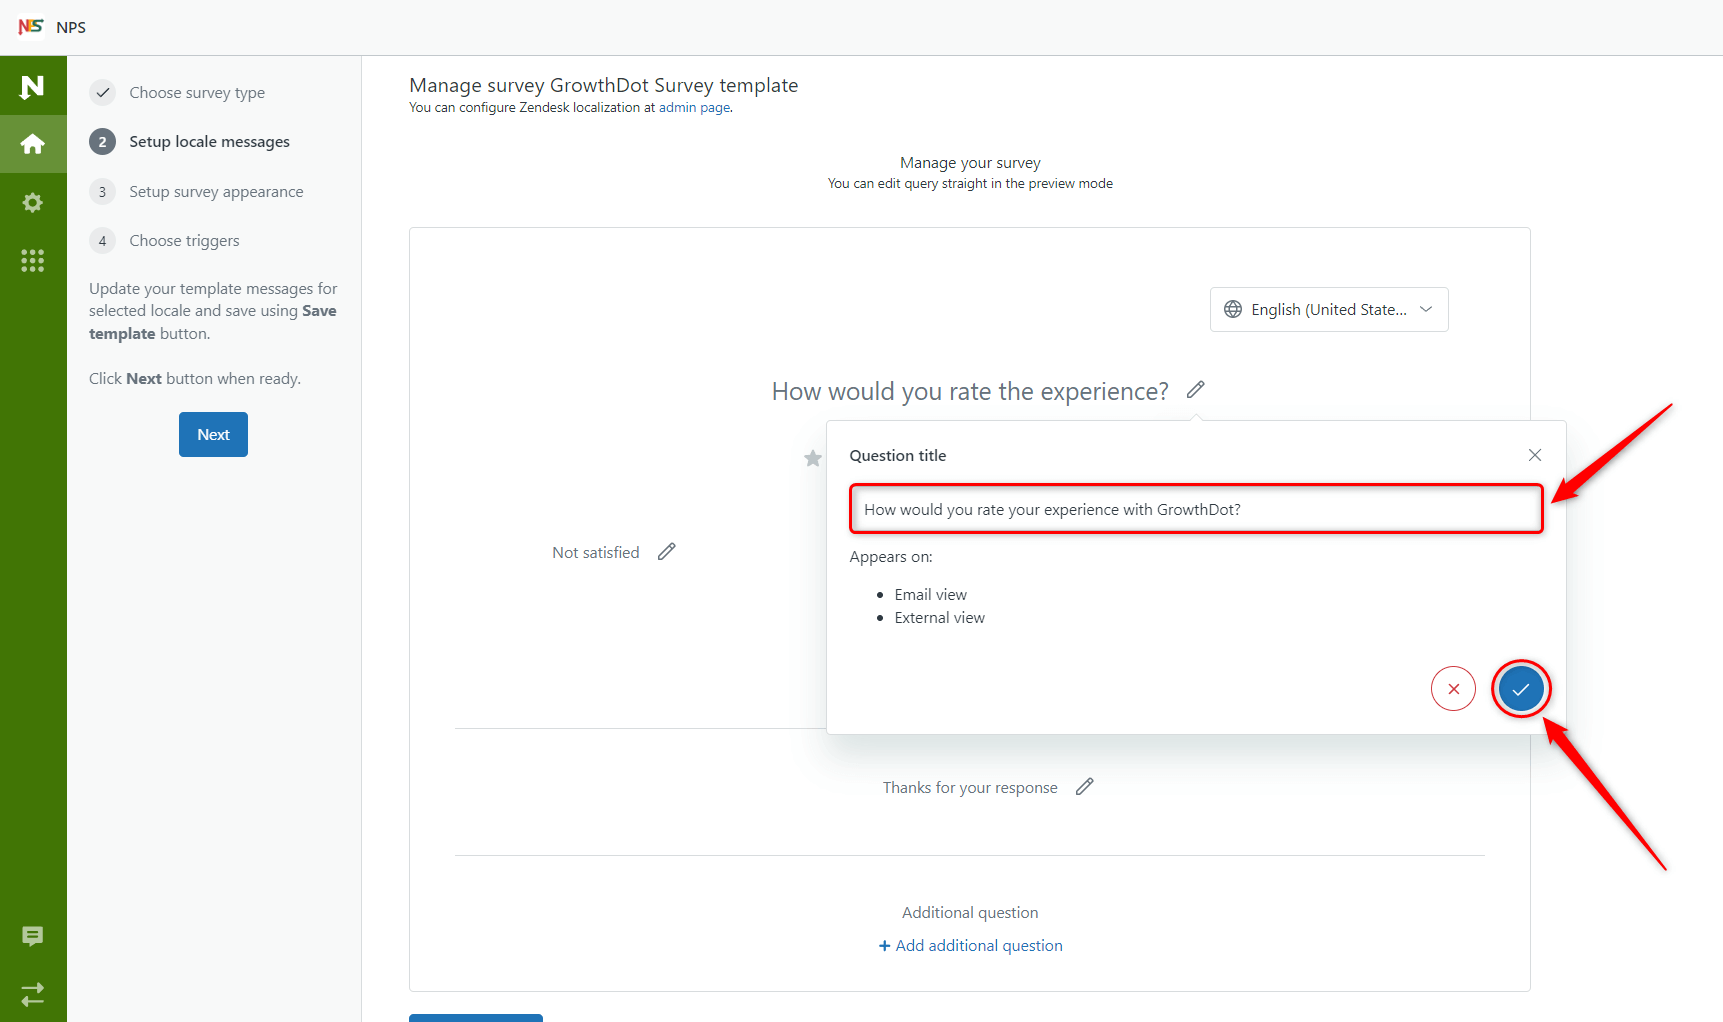
You will proceed to the second step of the survey creation. Here, you have the template page with the default information filled in, but you can manage it based on your needs and see an instant visualization. To do so, click the pen icon next to the necessary message.
![]()
In the modal window, you can enter new text and view information about where that specific message will appear. Remember to save the changes.
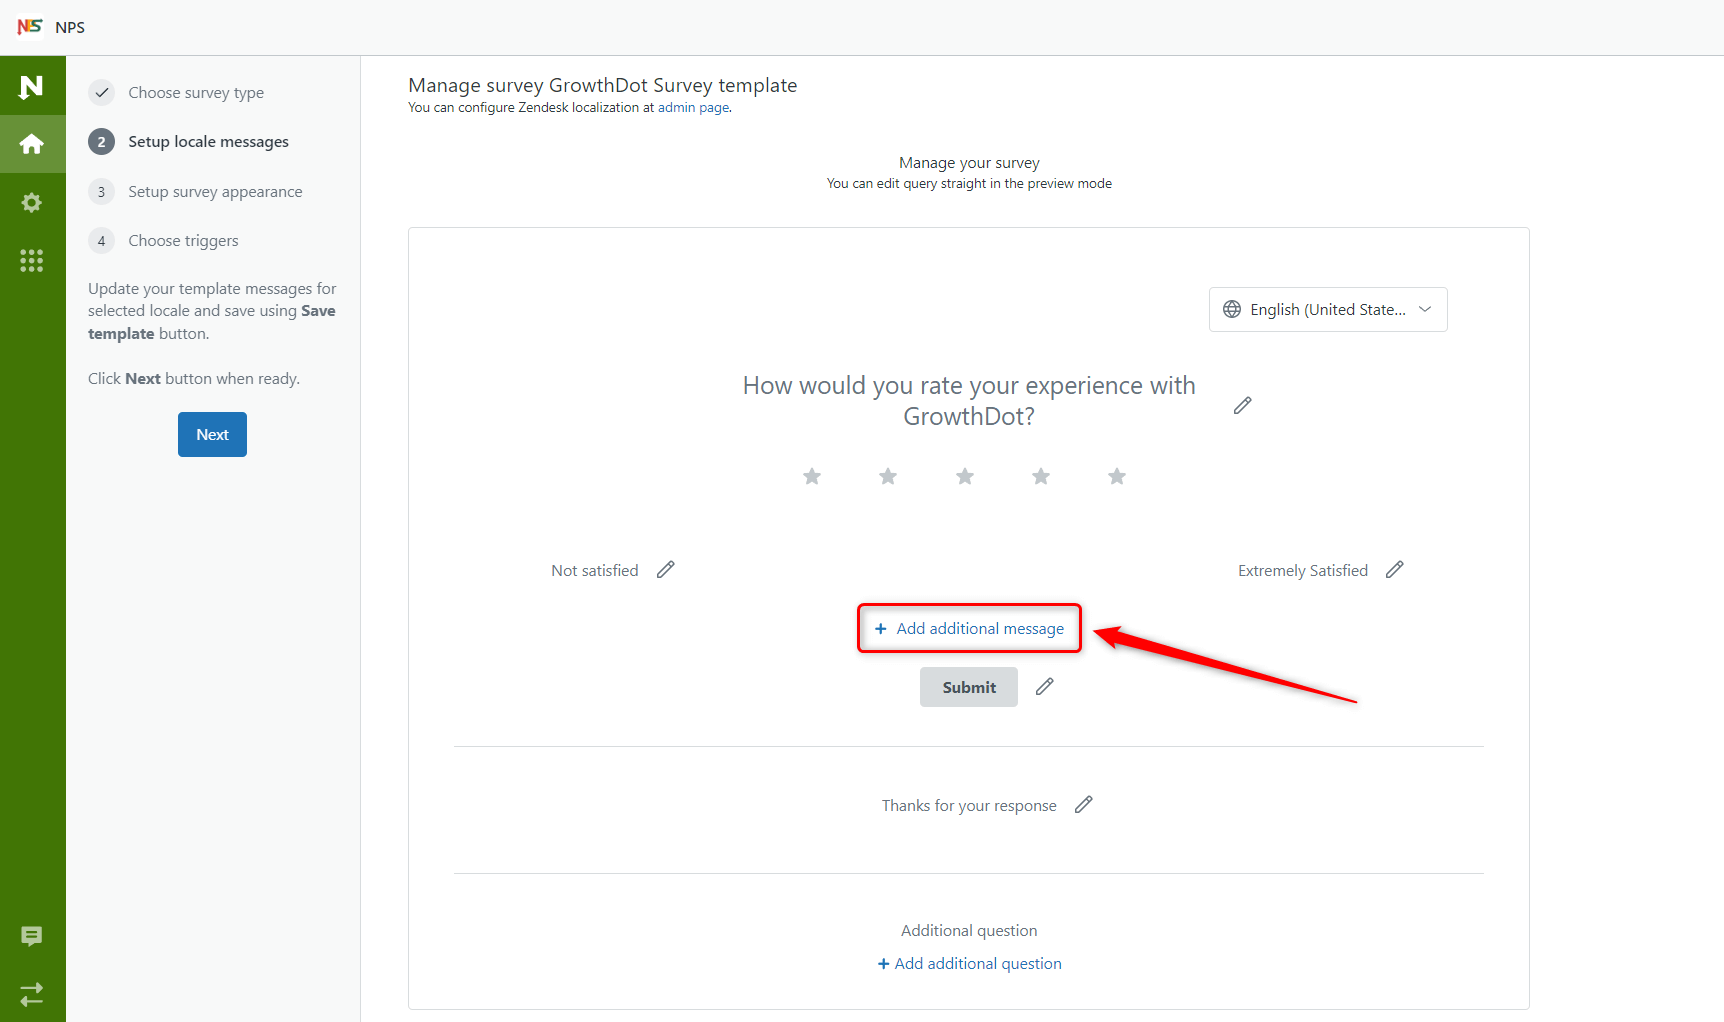
If you want extra details or a deeper context of the user's answer, click + Add additional message.
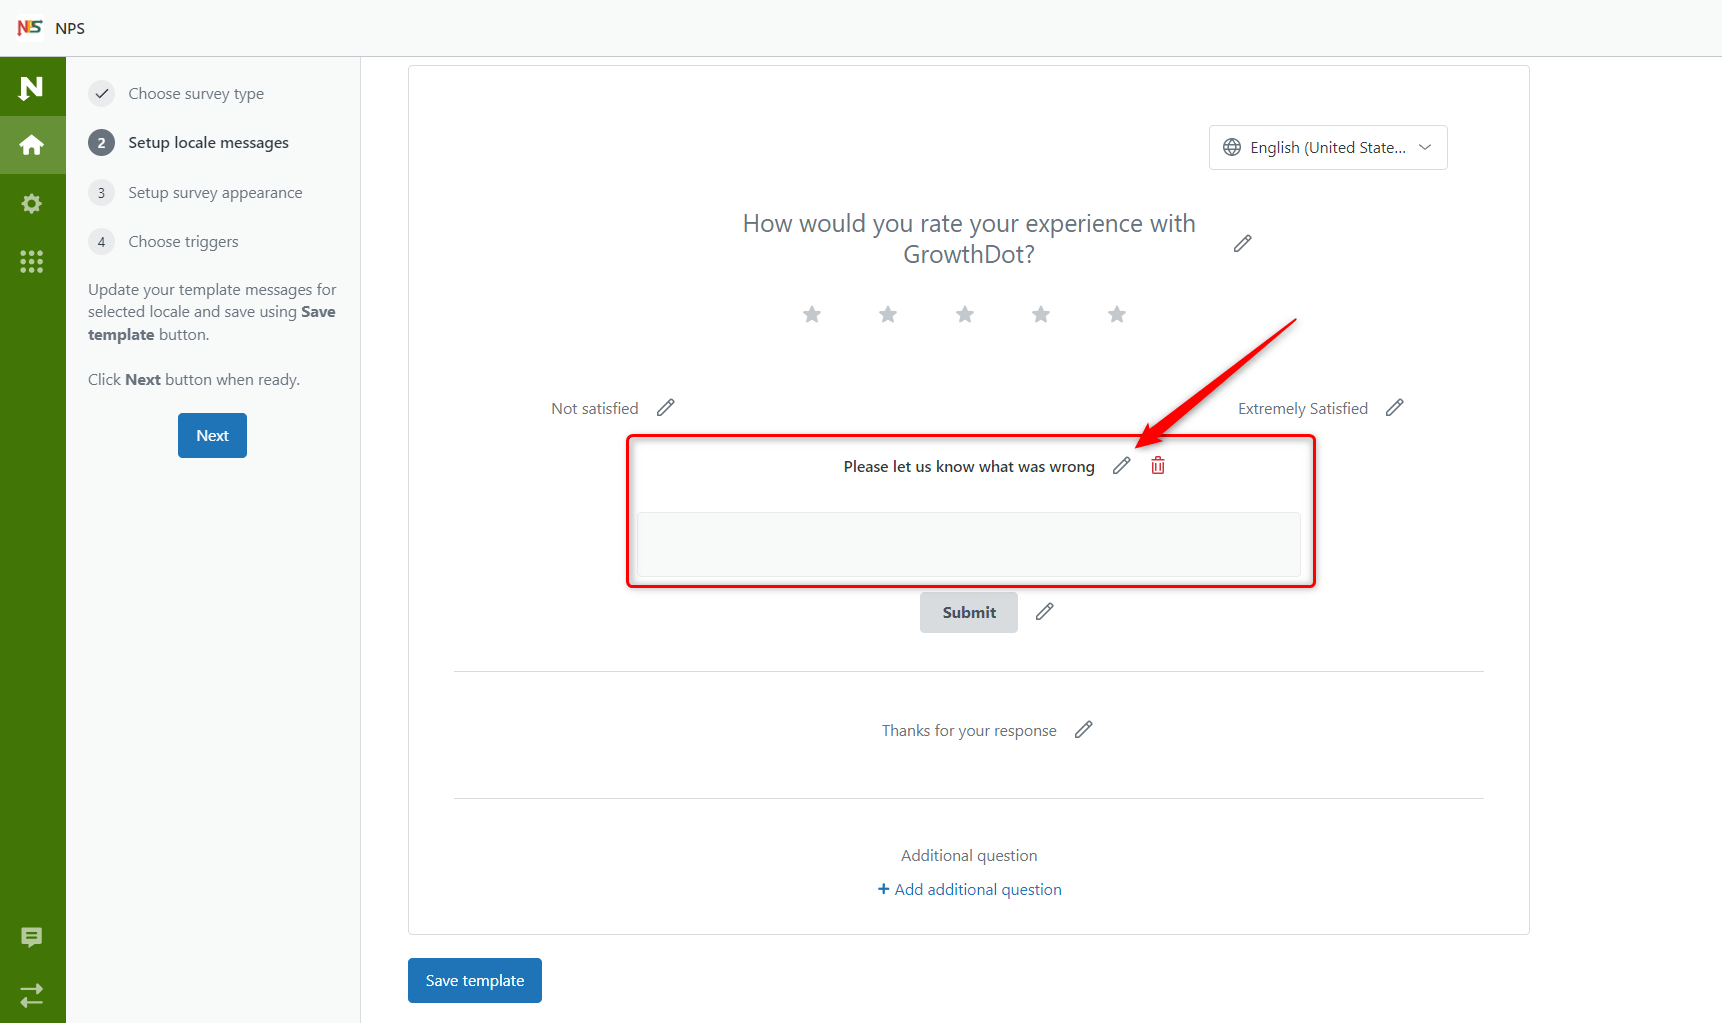
This additional message with text input will be displayed if the response is not the maximum. You can also edit its text by clicking the pen icon.
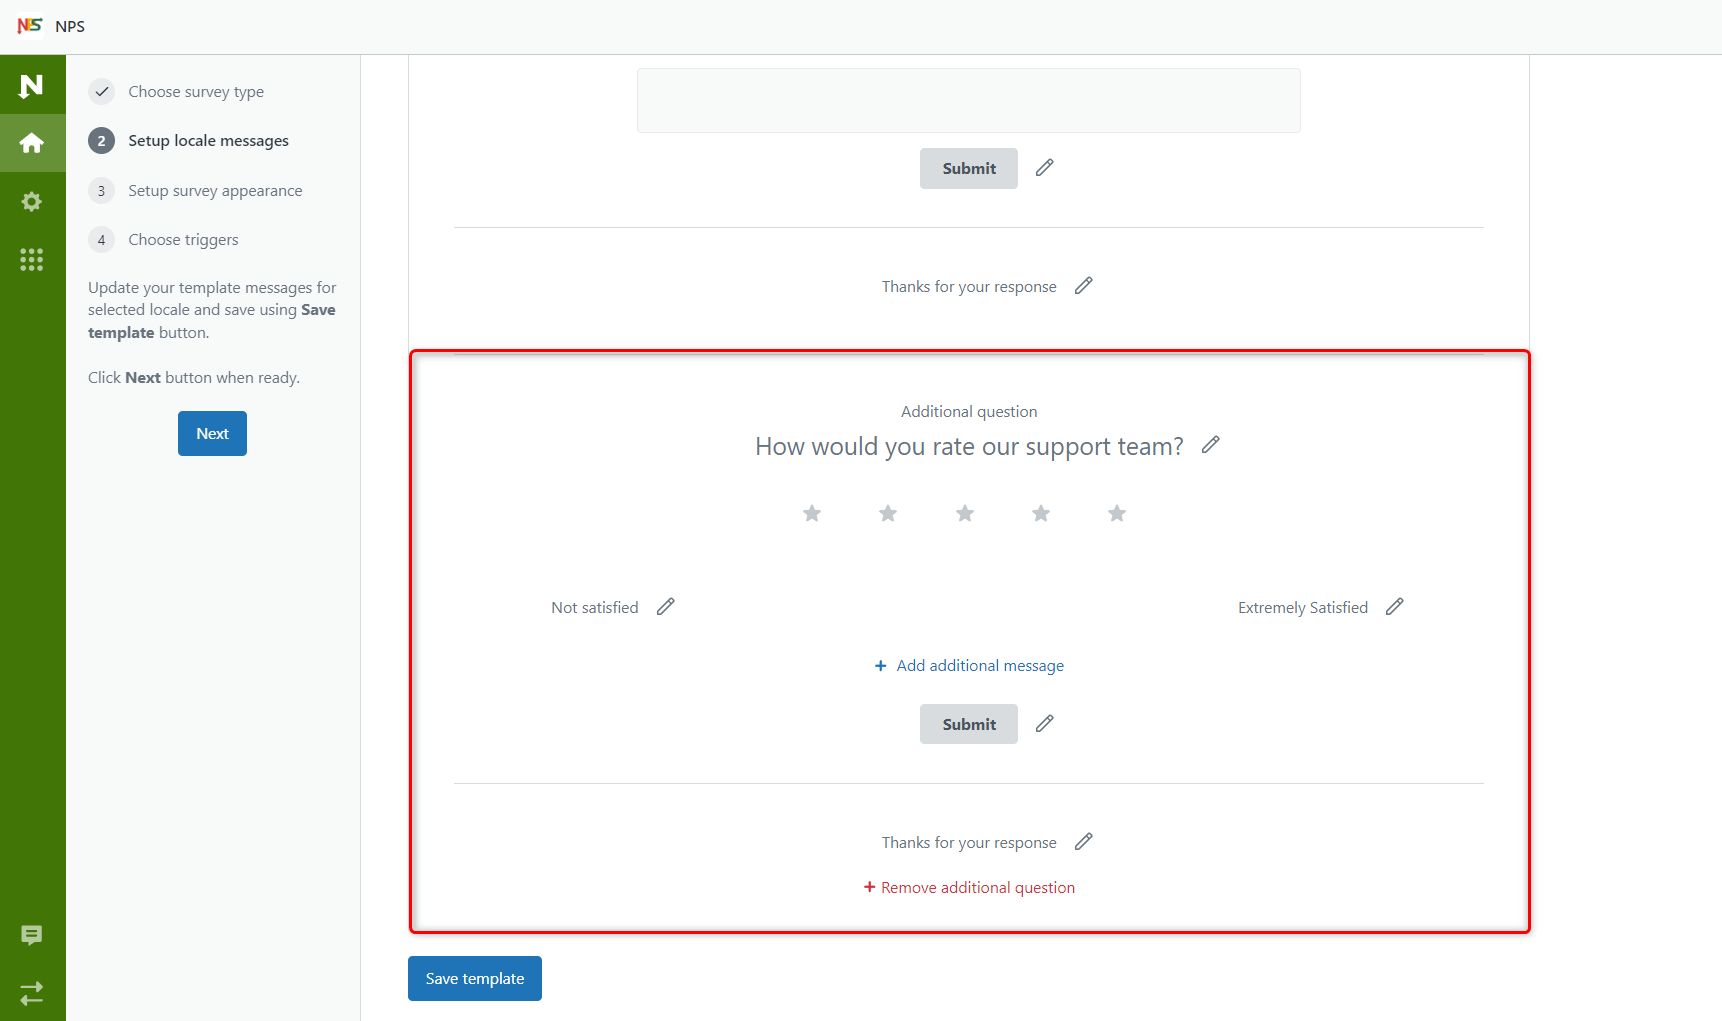
One more helpful thing to get more information from your customers is to add additional question.
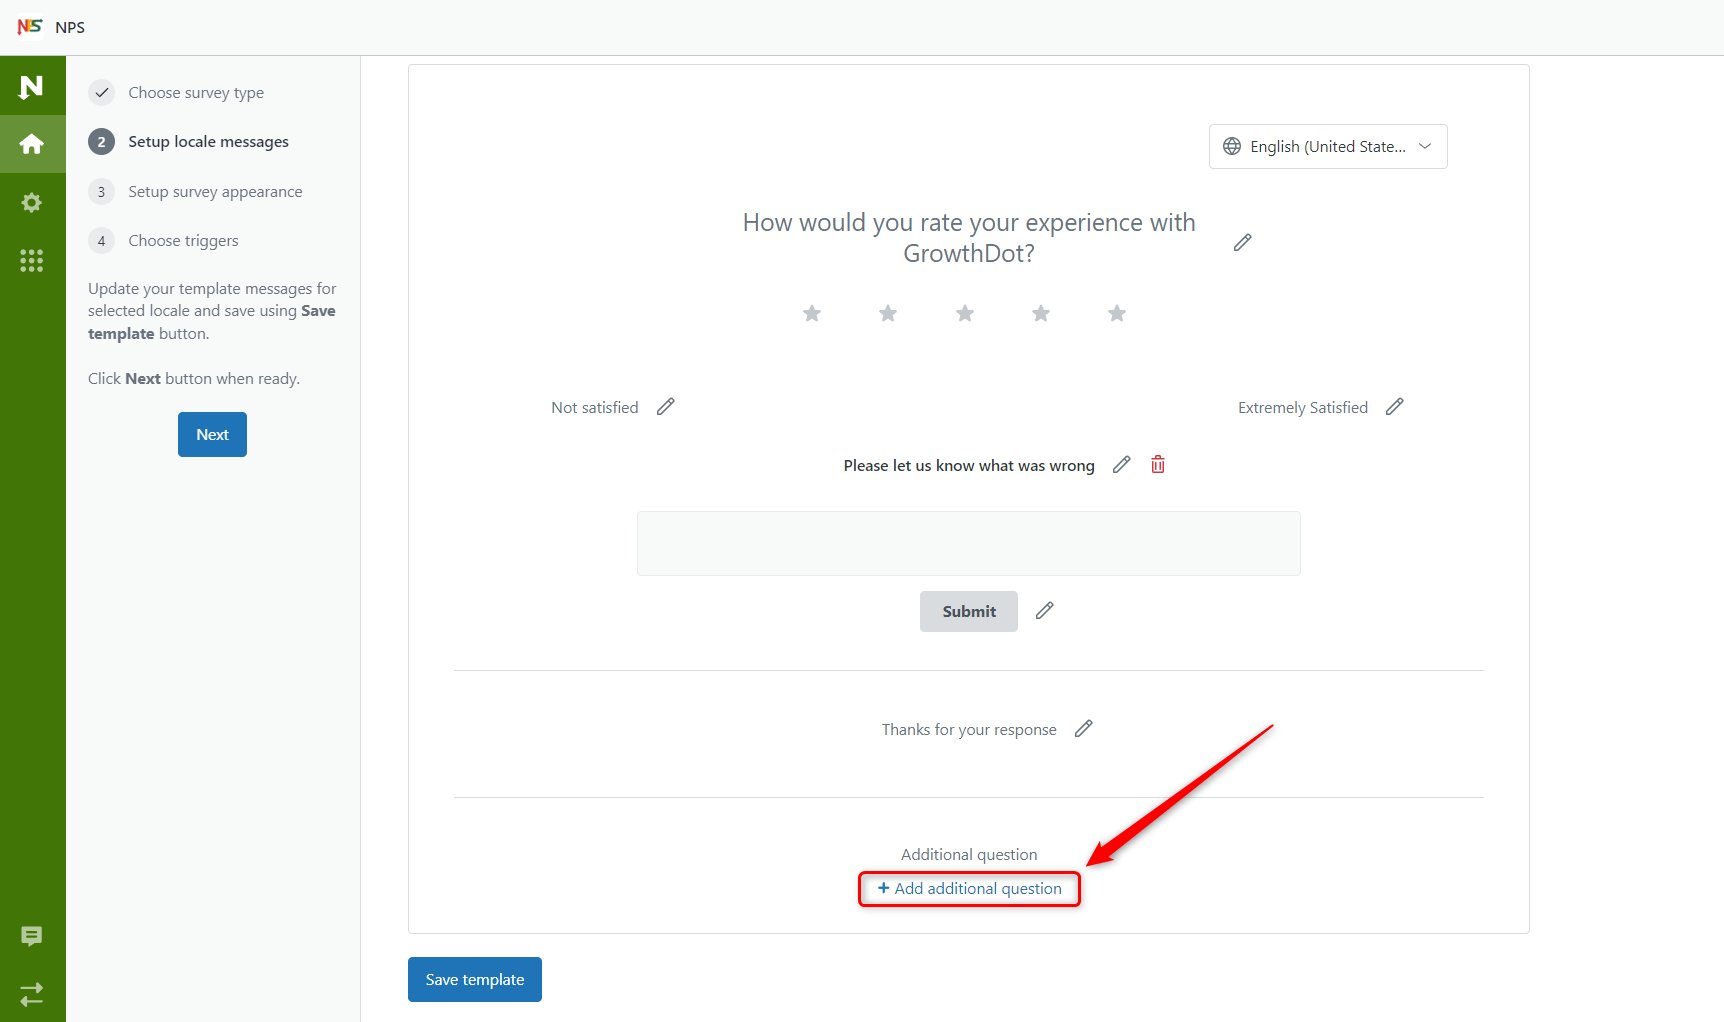
The additional question is always the same type as the main one, but you can modify its content to ask for specific details or insights. It’s possible to include an additional message after this question, too.
If you have an international user base, consider providing translated versions of the surveys. To do so, select your preferred language from the drop-down menu in the right corner and enter translated information in the queries.
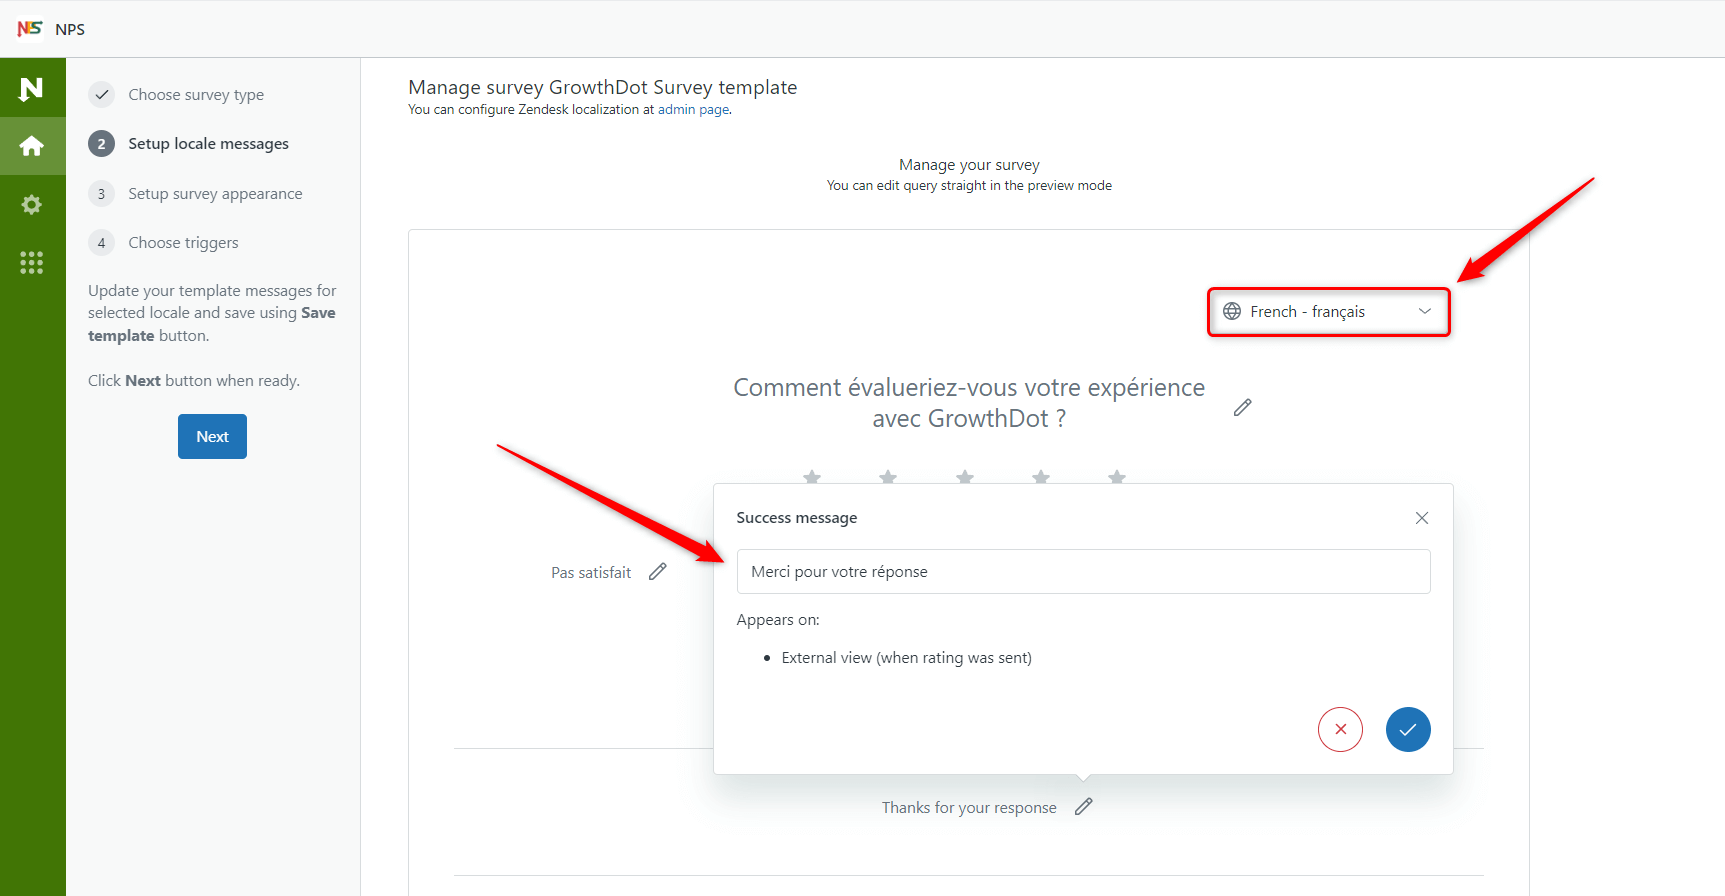
To change the default language or add new ones to your Zendesk account, go to Admin Center > Account > Appearance > Localization.
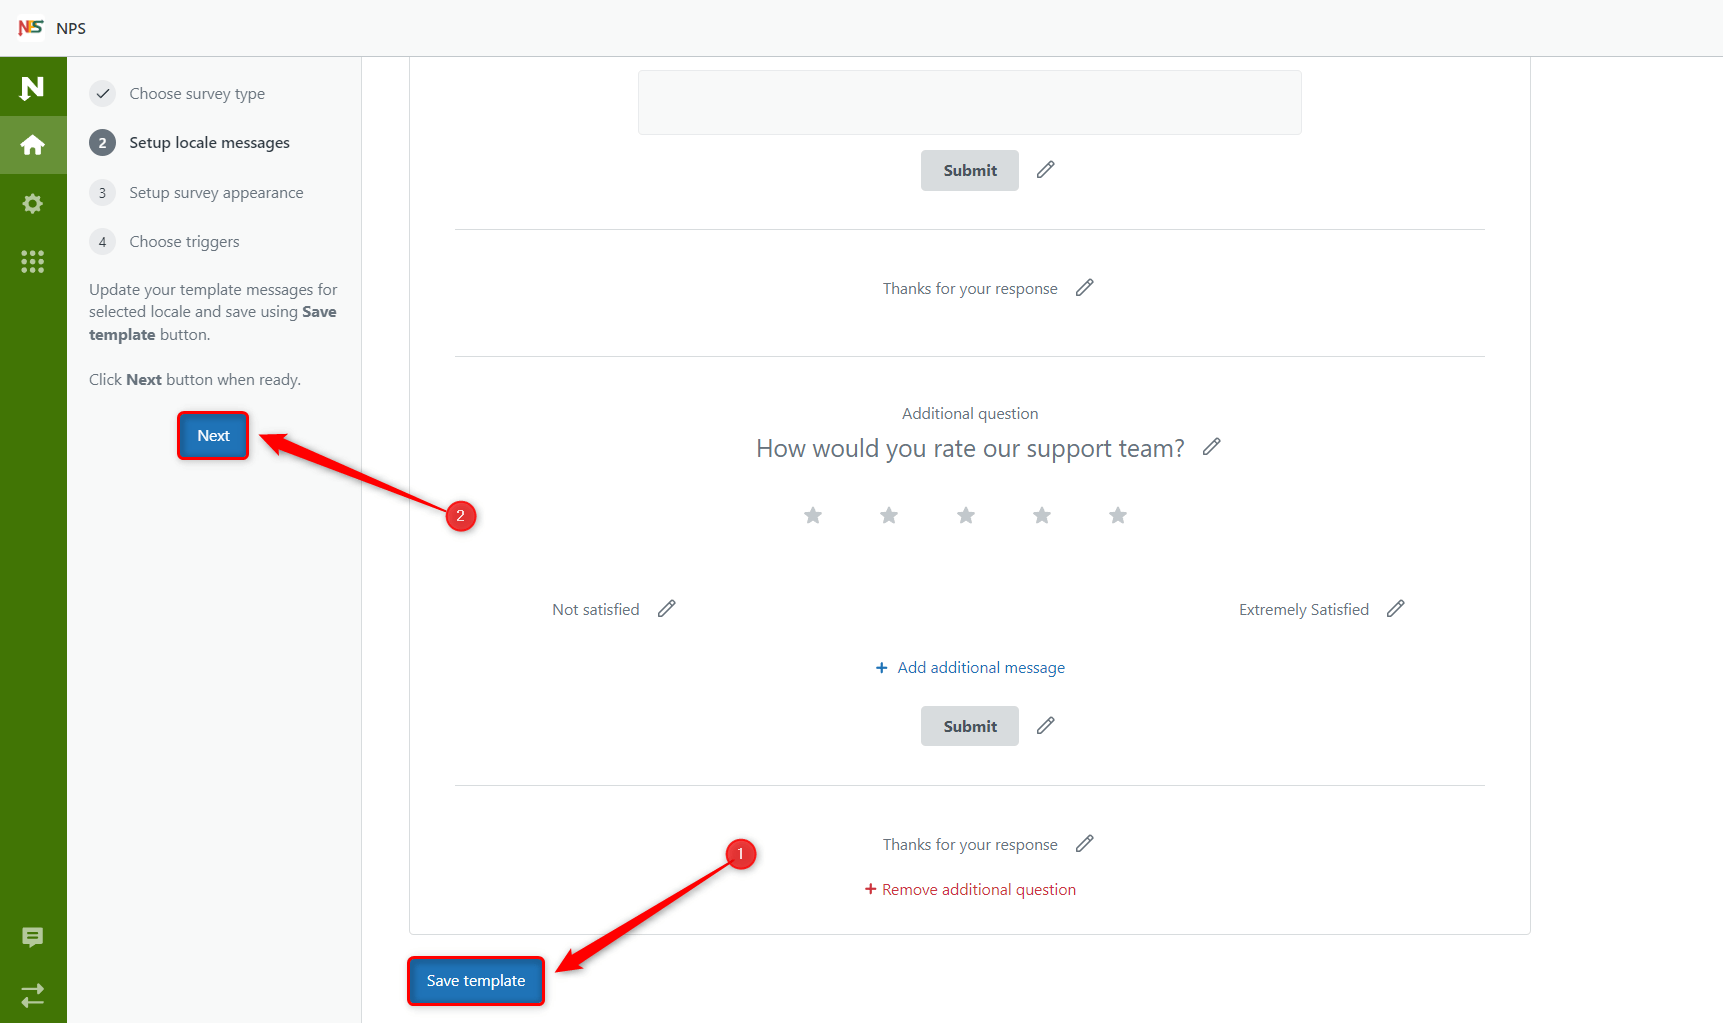
When you're finished managing your survey in the Setup locale message step, click Save template and Next to move on to the third step.
Step 3: Setup survey appearance
This is where branding comes into play. To customize your survey, you can:
- Add logo
- Select the width of your logo from the drop-down menu
- Enable displaying the logo in the email
- Choose the Base (text), Primary (buttons), and Background colors
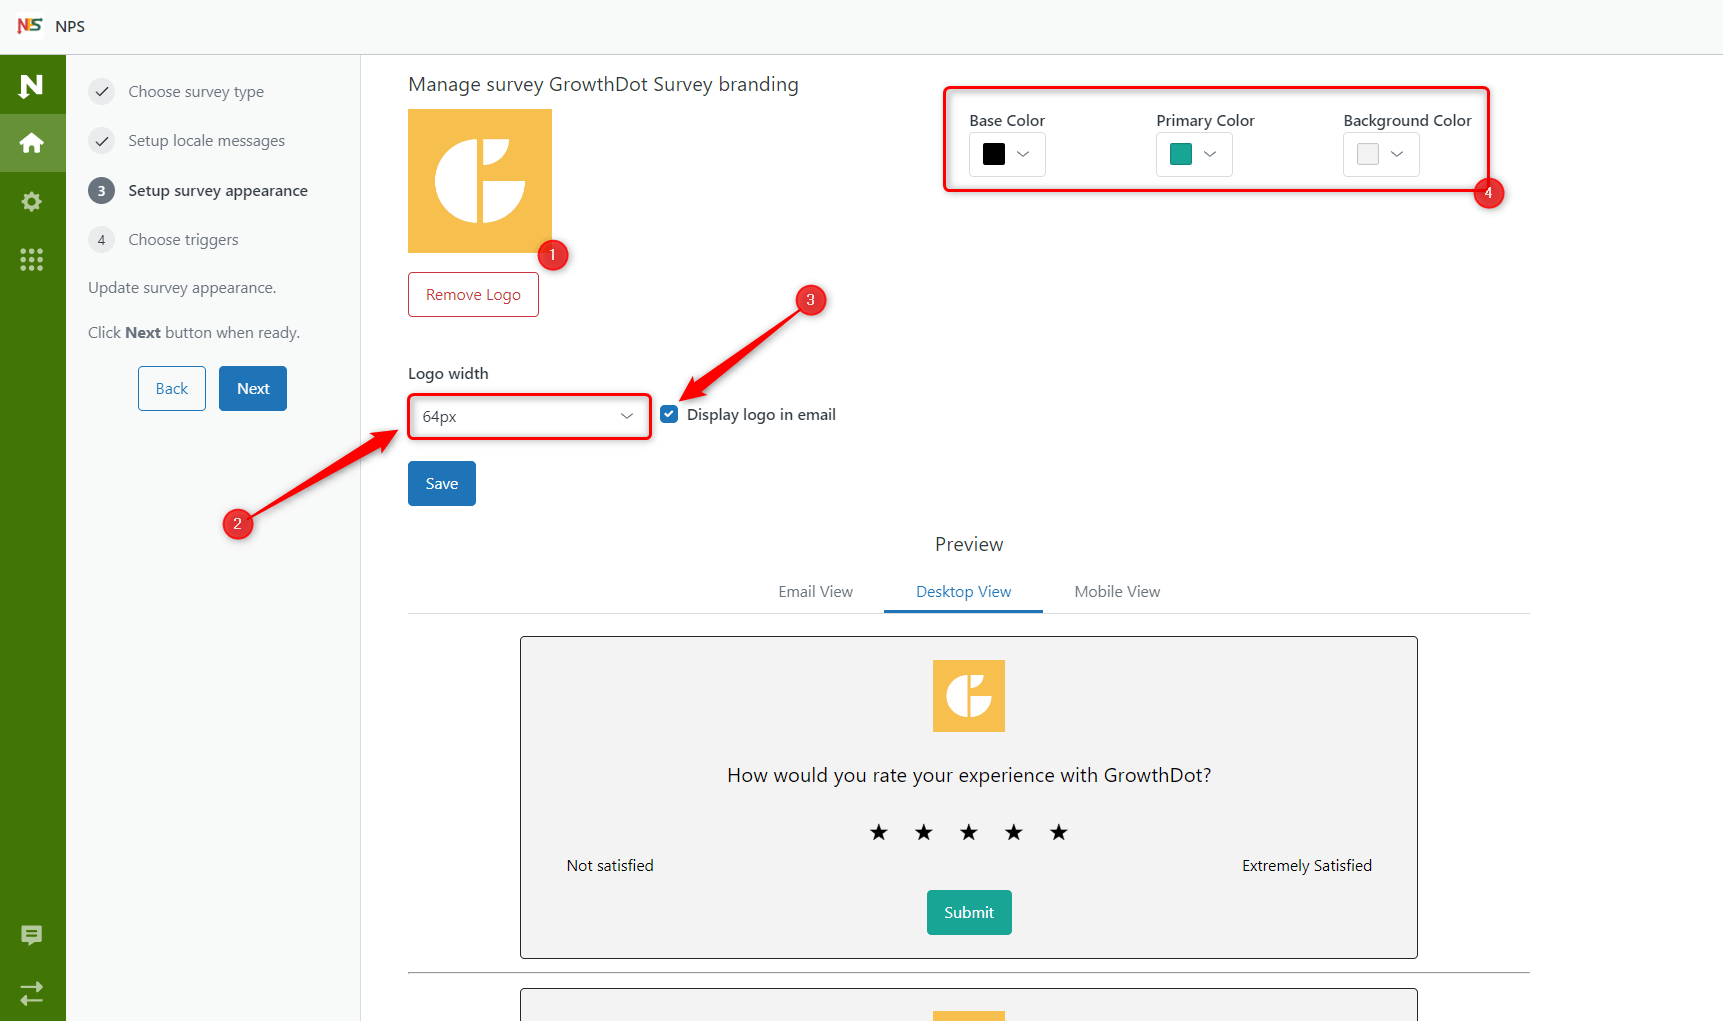
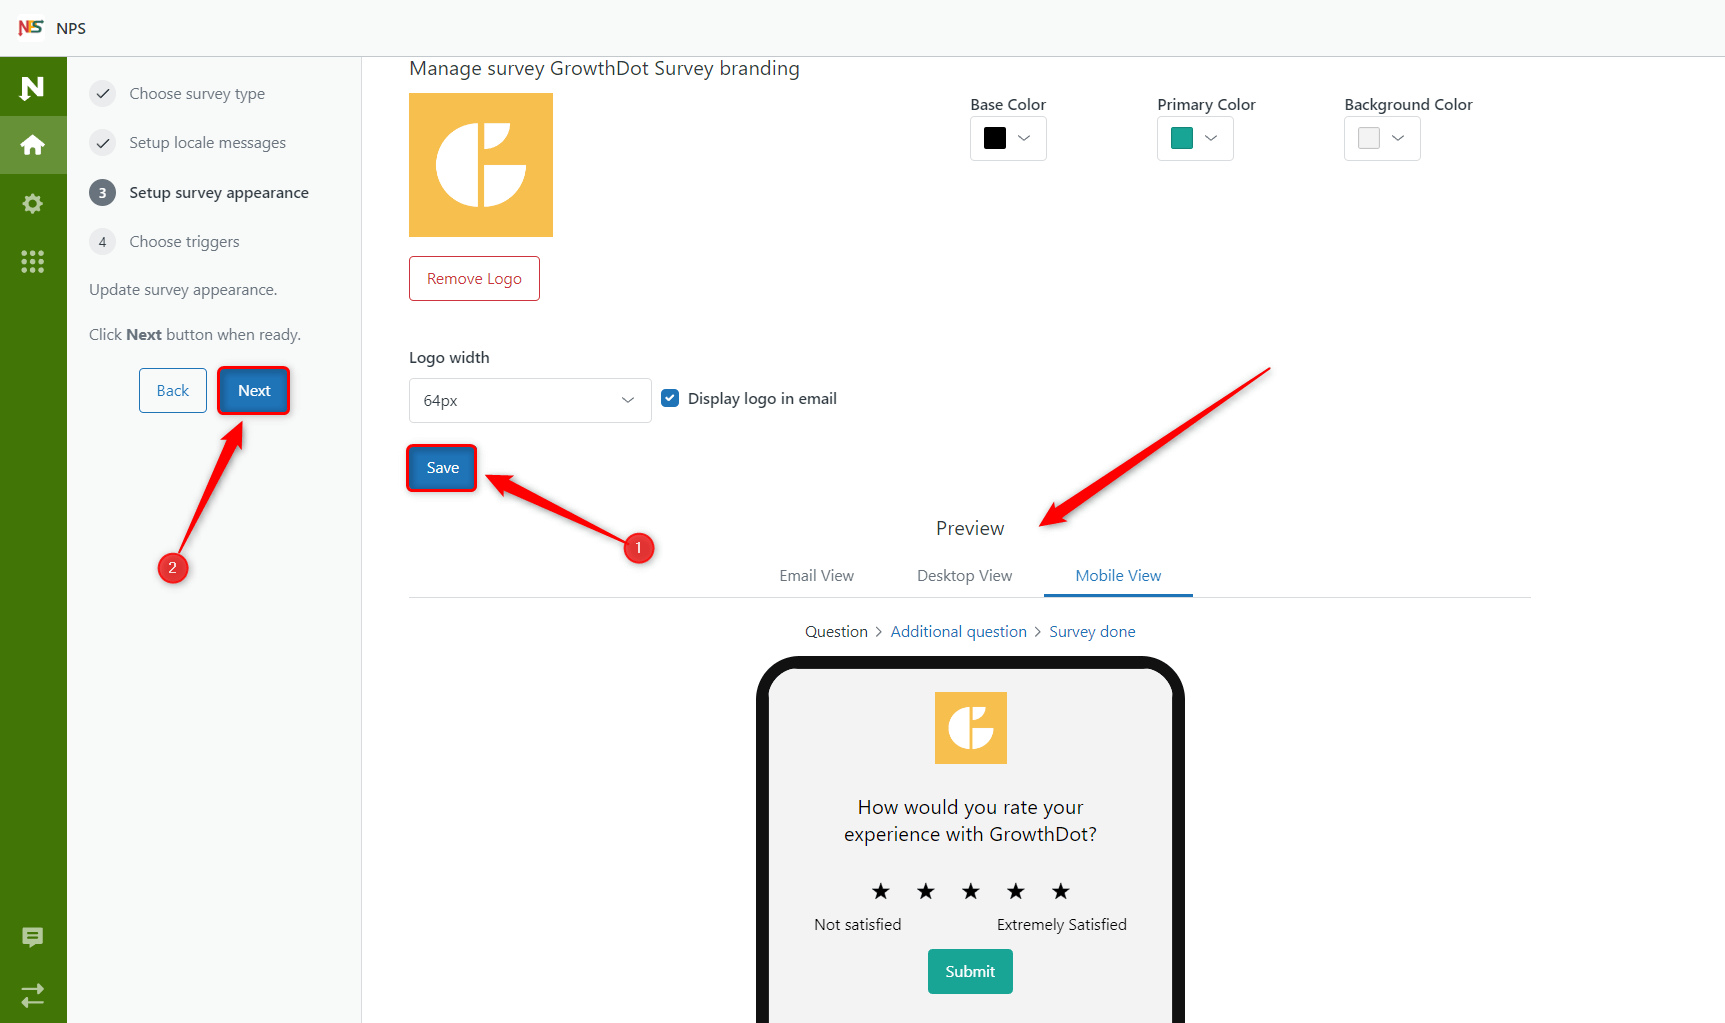
All the changes will be displayed below in the Email, Desktop, and Mobile Views. When you're satisfied with the result, click Save. Then, click Next to proceed to the last stage.
Step 4: Choose triggers
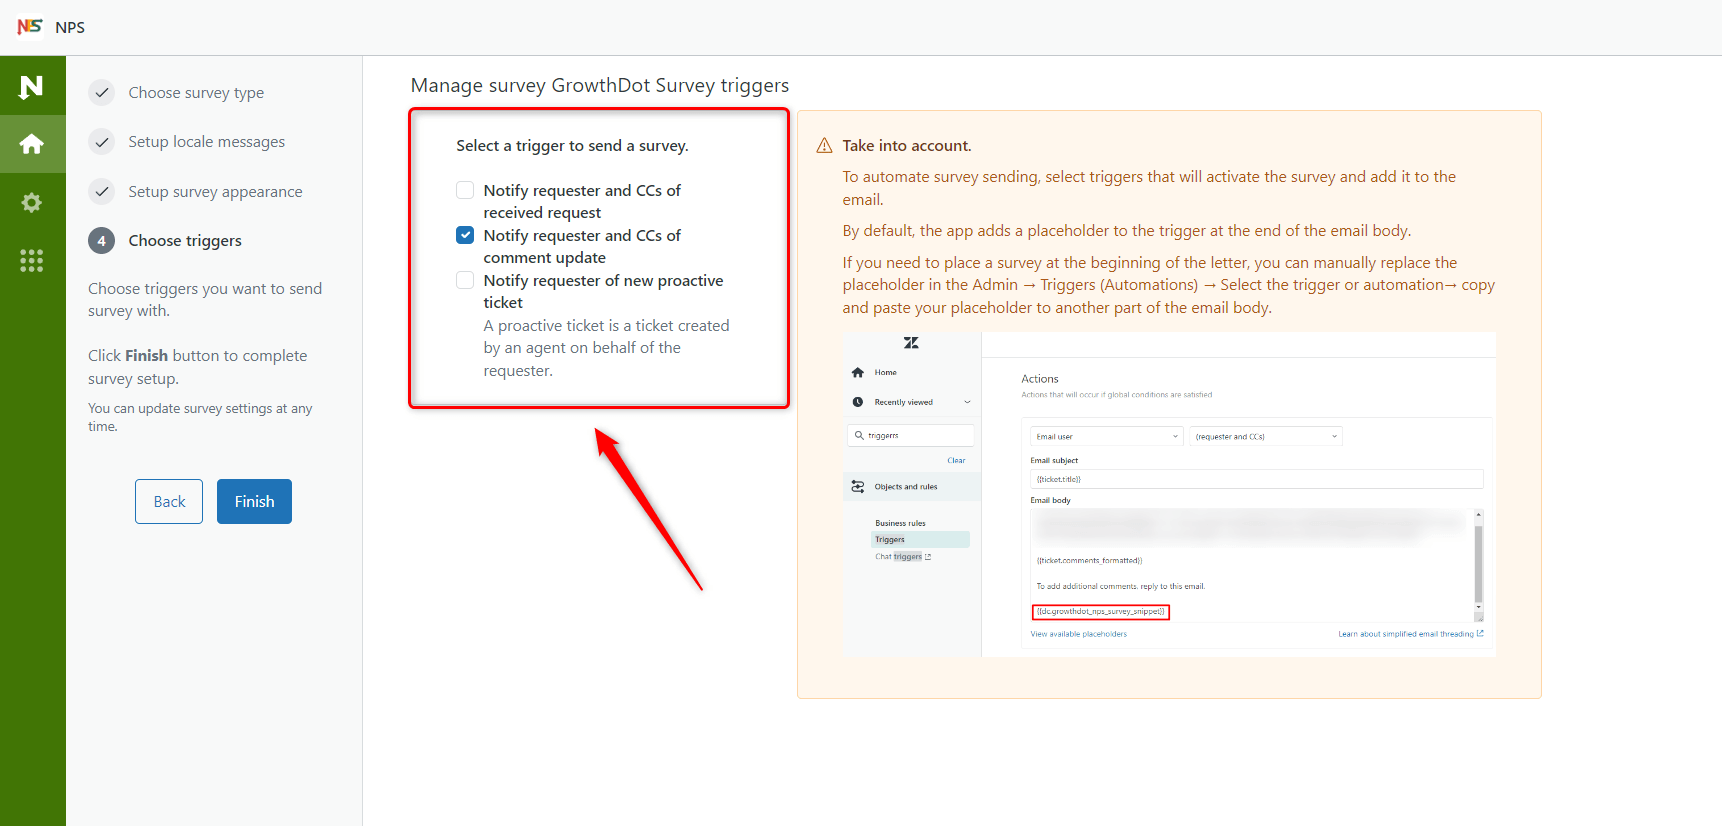
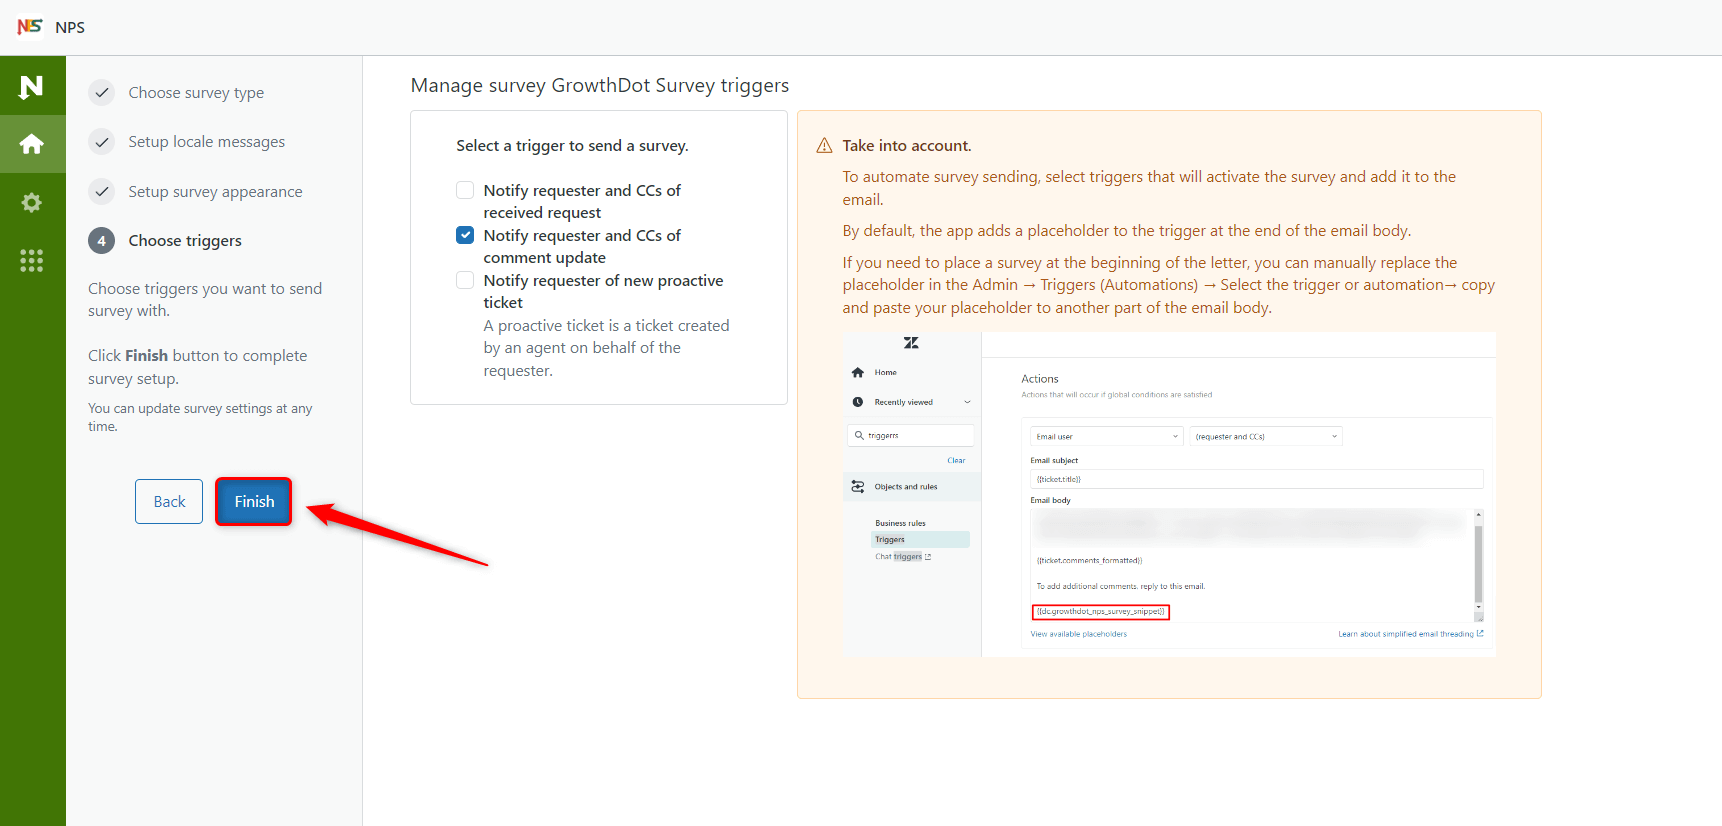
Here, you need to set up triggers to add a template automatically where you need it.
So, put the checkmark next to the triggers that will activate the survey and include it in the body of the email. The changes will be saved automatically, and the chosen trigger will send a survey to the customer.
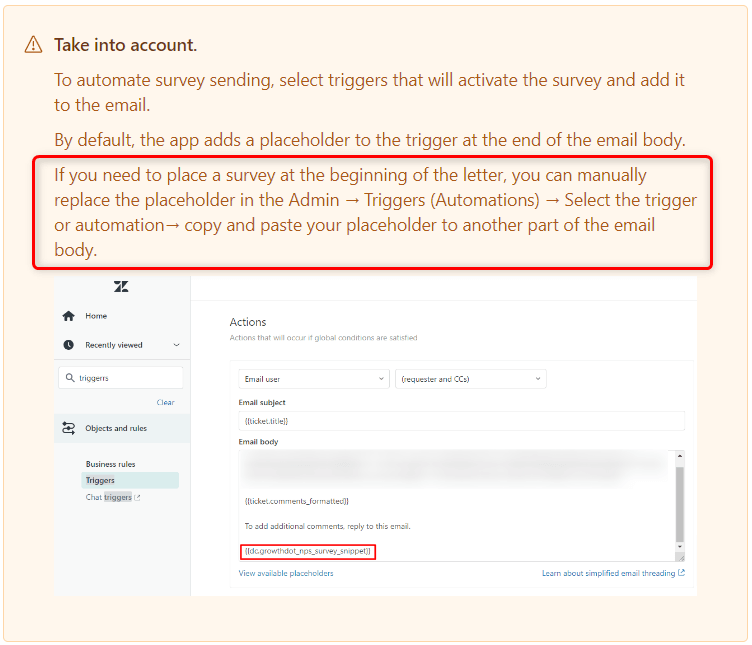
Please note that you can manually change the placement of the survey in the email by following the instructions in the picture.
The last step is to click Finish to complete the survey setup.
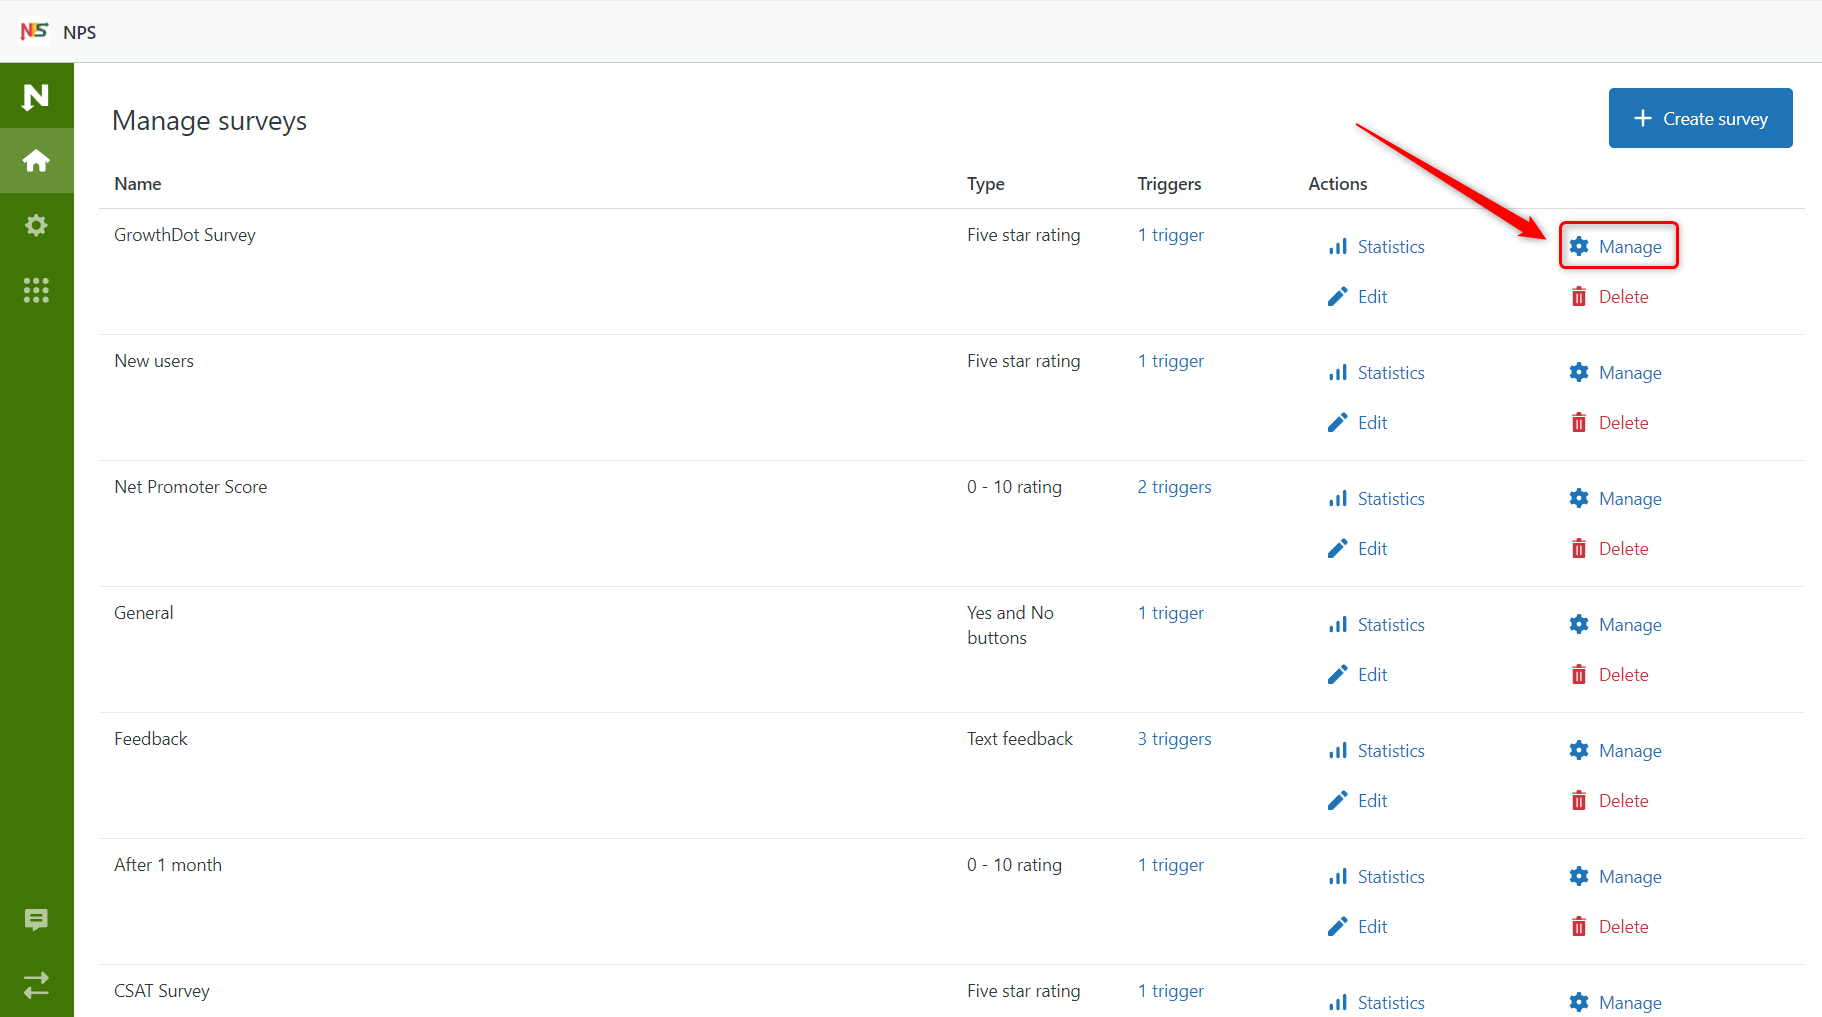
If you need to edit any of the surveys you've created, click Manage next to it on the Manage surveys page. Here, you can also see the number of activated triggers, check survey statistics, edit the name, and delete it.
As you can see, it's quite simple and allows you to collect valuable feedback for your team. If something is unclear or you have any additional questions, just contact us.


