How to Create Automations in GDPR Compliance
- GDPR Compliance
Refusing manual work where possible is the most efficient way to save time and invest it in doing more important things. Therefore, while performing one of the GDPR processes in Zendesk, you would think such operations should have been processed automatically. So, we will help you schedule the data deleting or anonymizing in Zendesk.
Add a New Automation
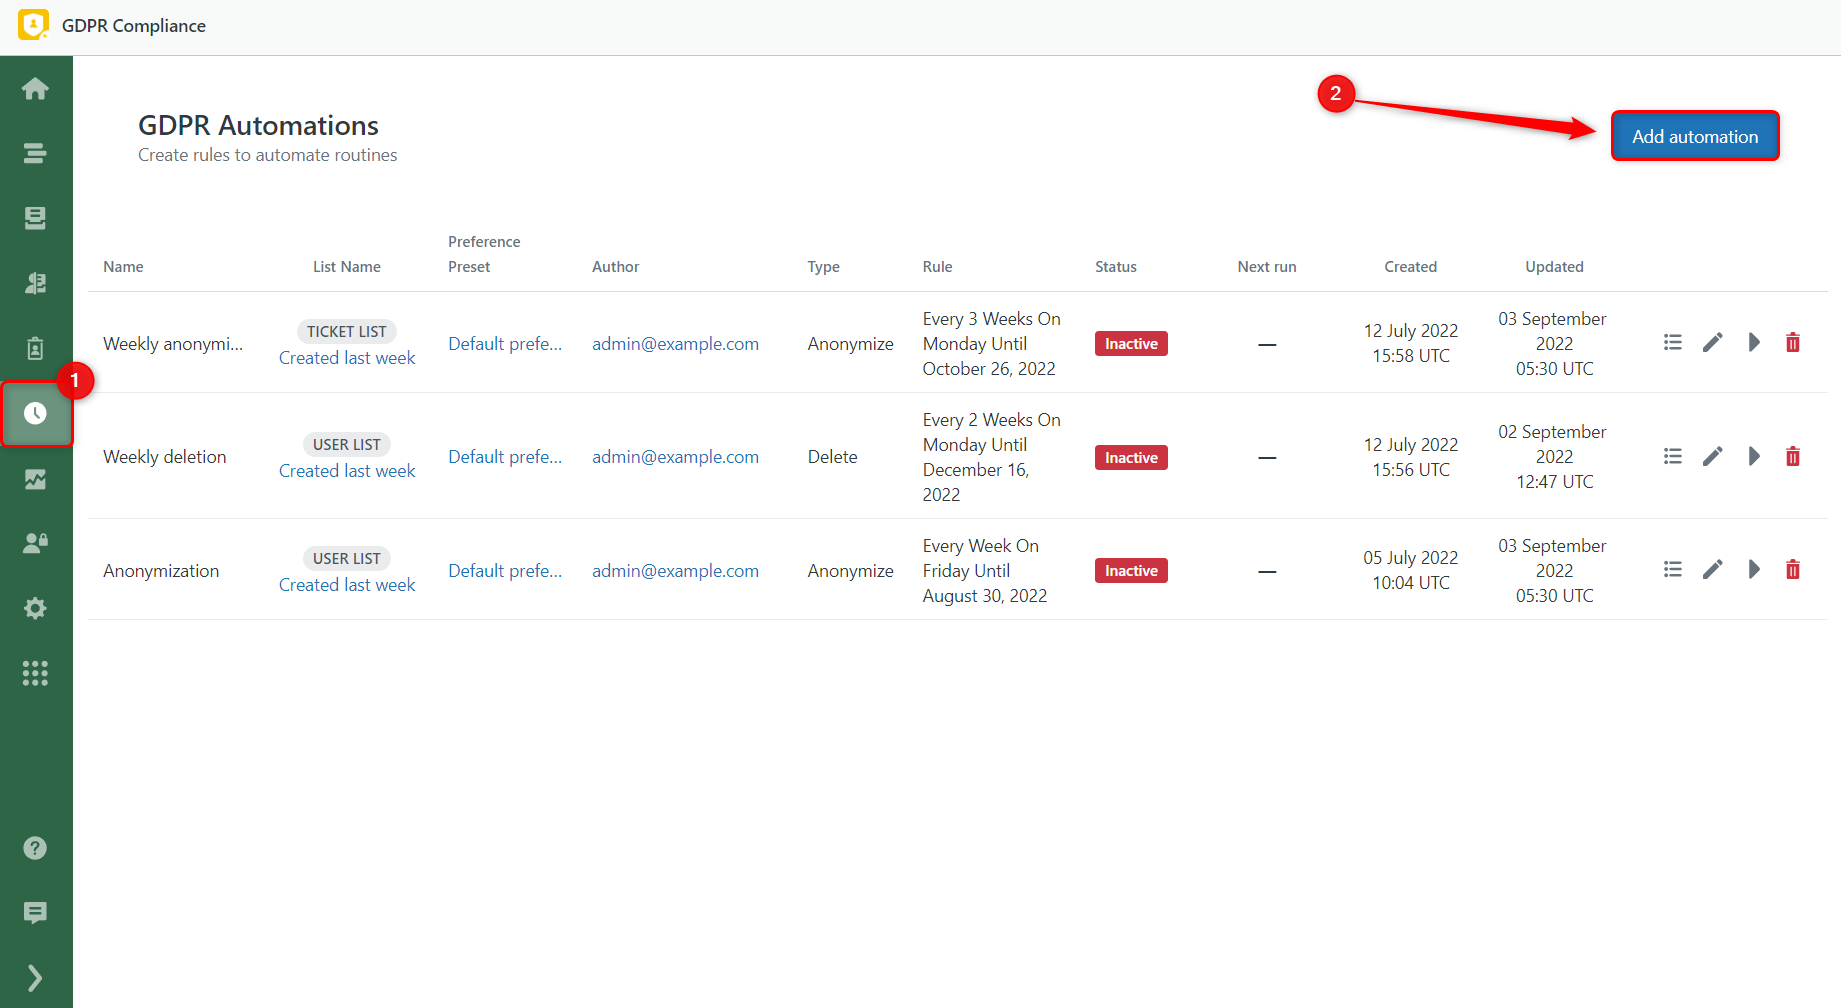
To start scheduling a GDPR process, open the GDPR Automation page and click Add automation in the right corner above.
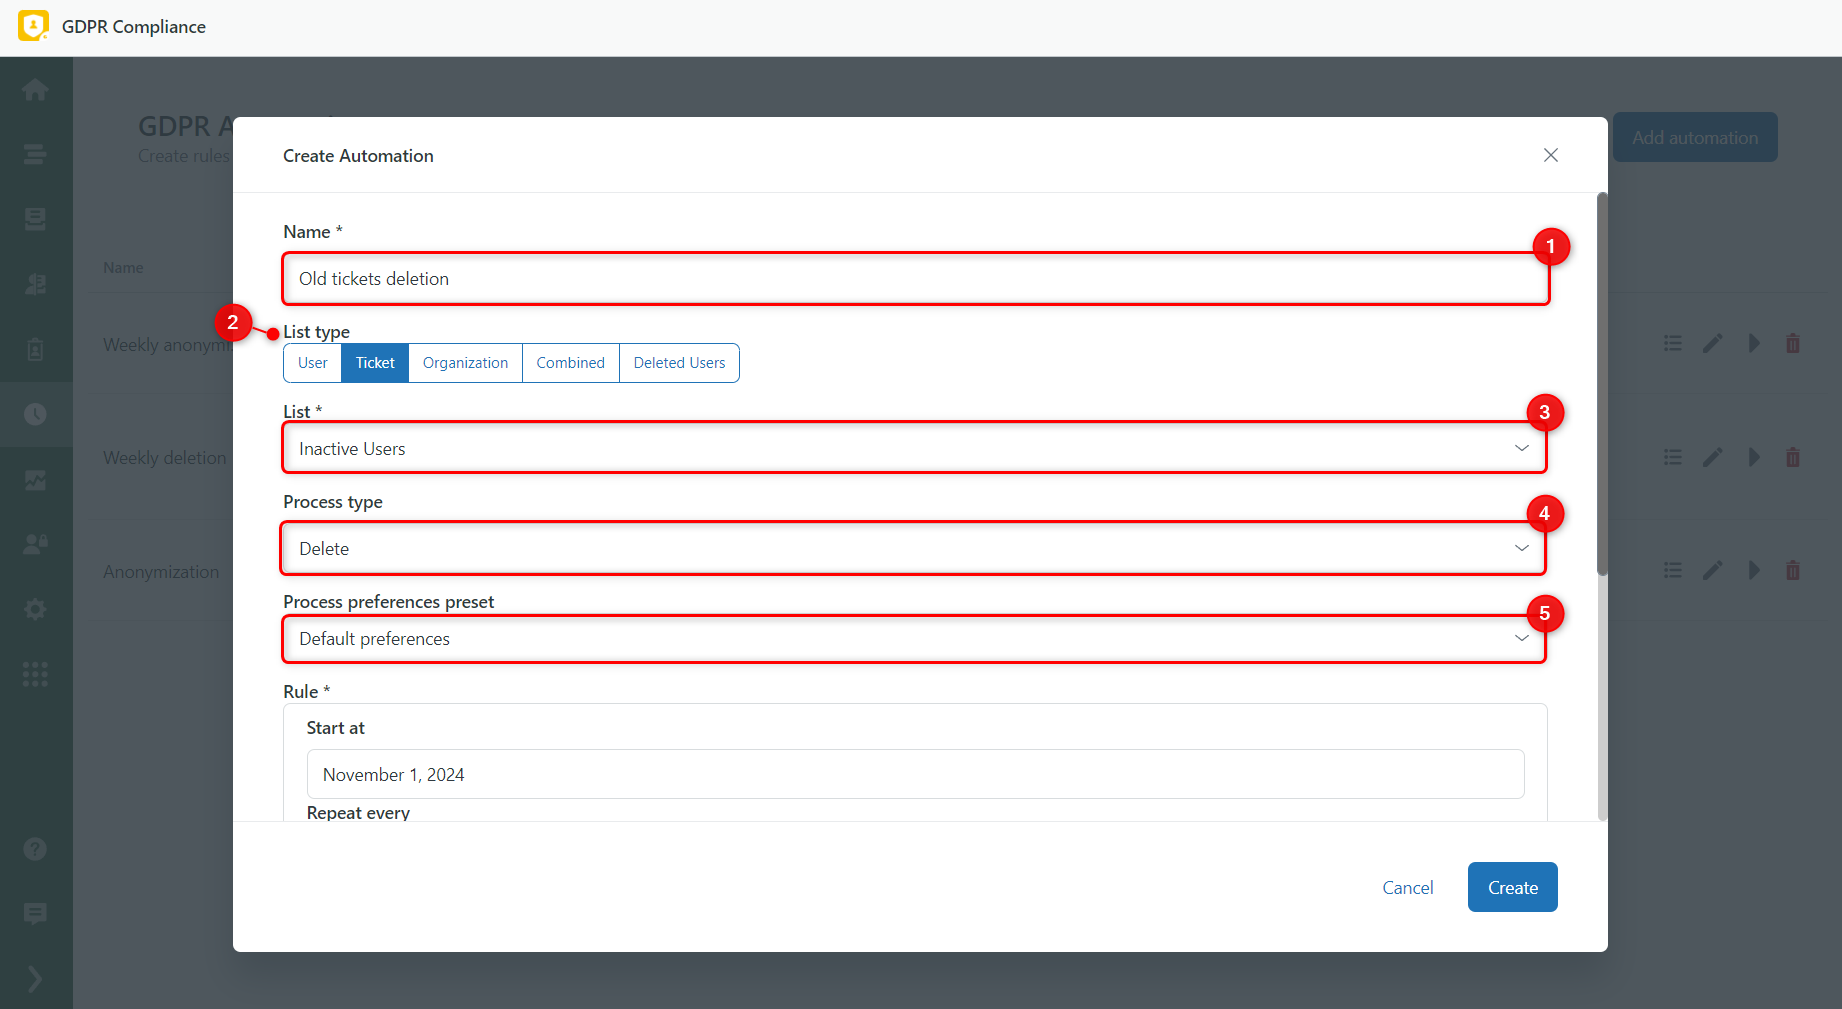
Second, name the automation, select a list you want to proceed and set the process type.
More details about each item:
- Name (obligatory) – the automation name you will see on a GDPR Automation page.
- List type – there are five list types available: User, Ticket, Organization, Combined, and Deleted Users (the Users who were deleted from Zendesk Support but are still findable on the Admin Center). Select User as a List type if you want to anonymize or remove users' data.
- List (obligatory) – changes depending on the selected List type. If you previously chose a ticket list type, now you are presented with all ticket lists stored in the app. Select the list you would like to work with or create a new one with the necessary conditions on the Settings tab.
- Process type – you need to choose which actions you want to apply. So, you can either delete or anonymize data.
- Process preferences preset – the preferences for the process type you've chosen. Leave the default preferences or choose the necessary preset.
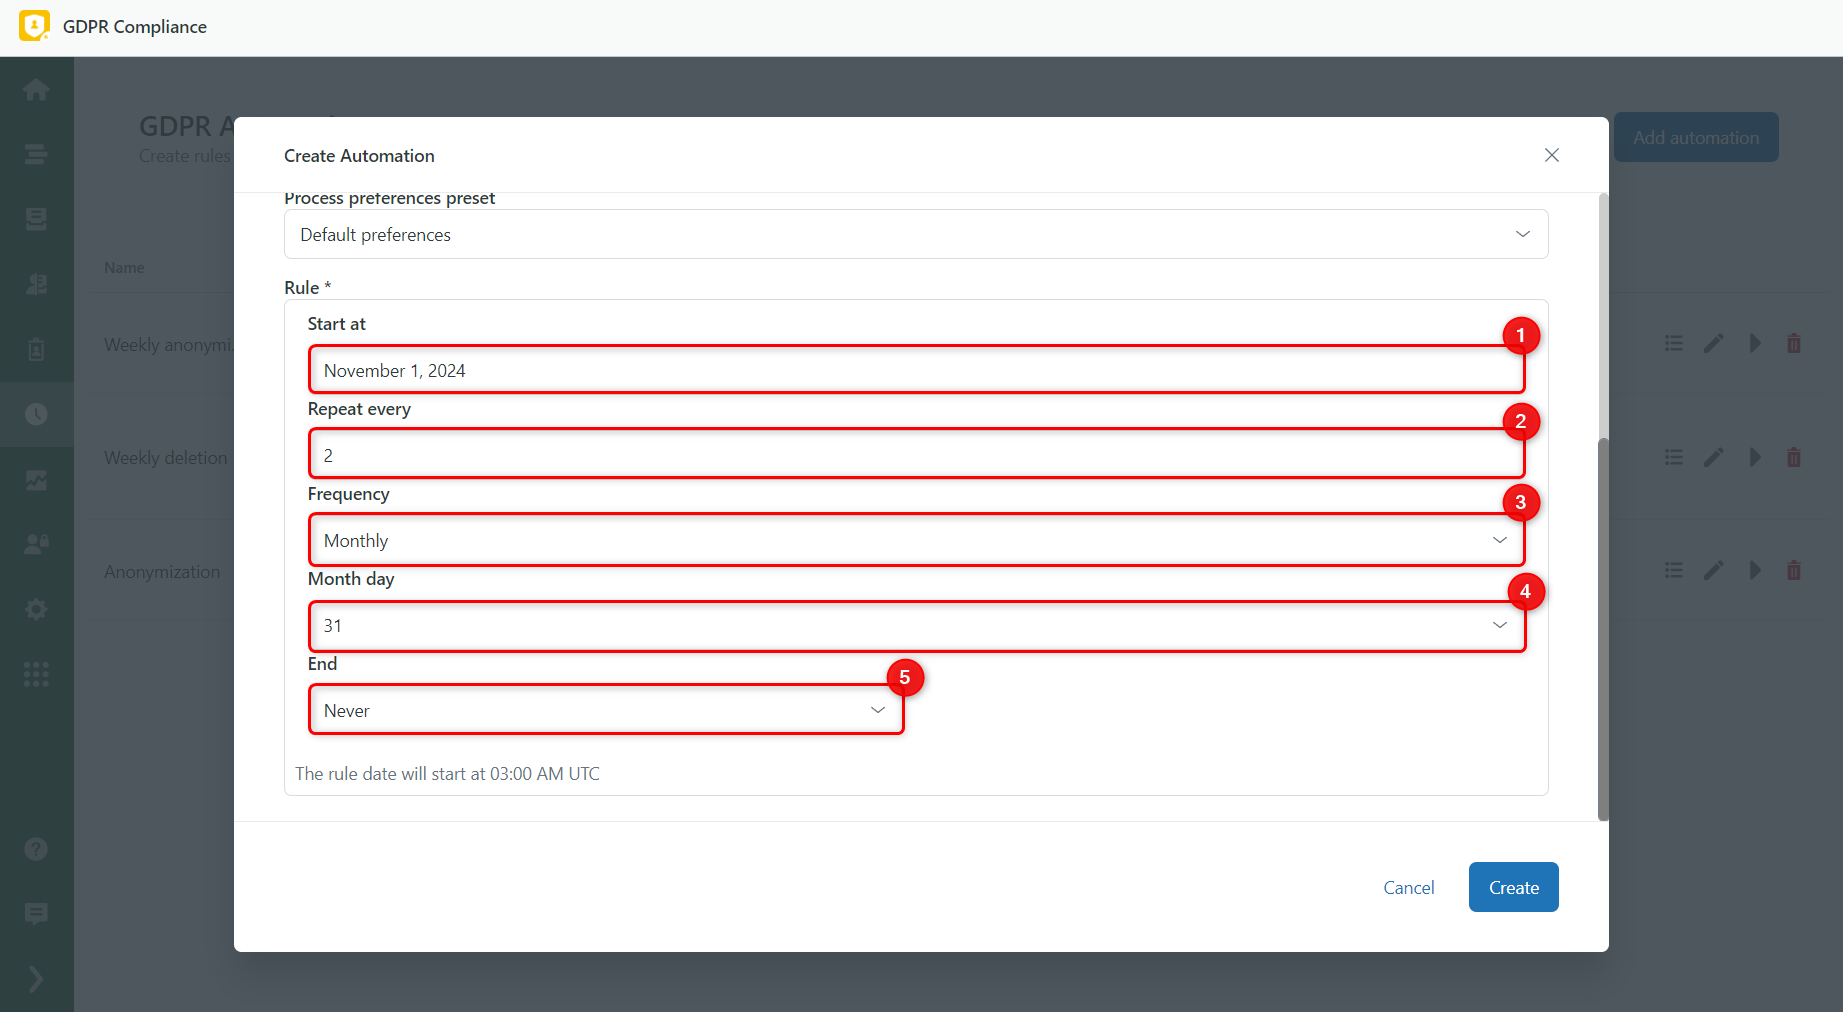
Next, we need to set rules to launch the automations. This way, point out when it starts, ends, and other configurations:
- Start at – the date when the automation launches.
- Repeat every – defines how often the process occurs based on Frequency.
- Frequency – allows selecting how often your data will be performed: Daily, Weekly, Monthly, and Yearly. For example, suppose you want to delete inactive tickets once every two months. Therefore, fill in number 2 in the Repeat every section, and set a Monthly Frequency.
- Month day – specify the day number of the month to run the automation (1-31).
- End – decide when to finish the automation. You can select a specific Date or leave 'Never' as it is. By the way, using the condition After allows us to point out how many times the automation should be performed before it is over.
After filling in all fields, click the Create button to save the new automation.
Activate a Created Automation
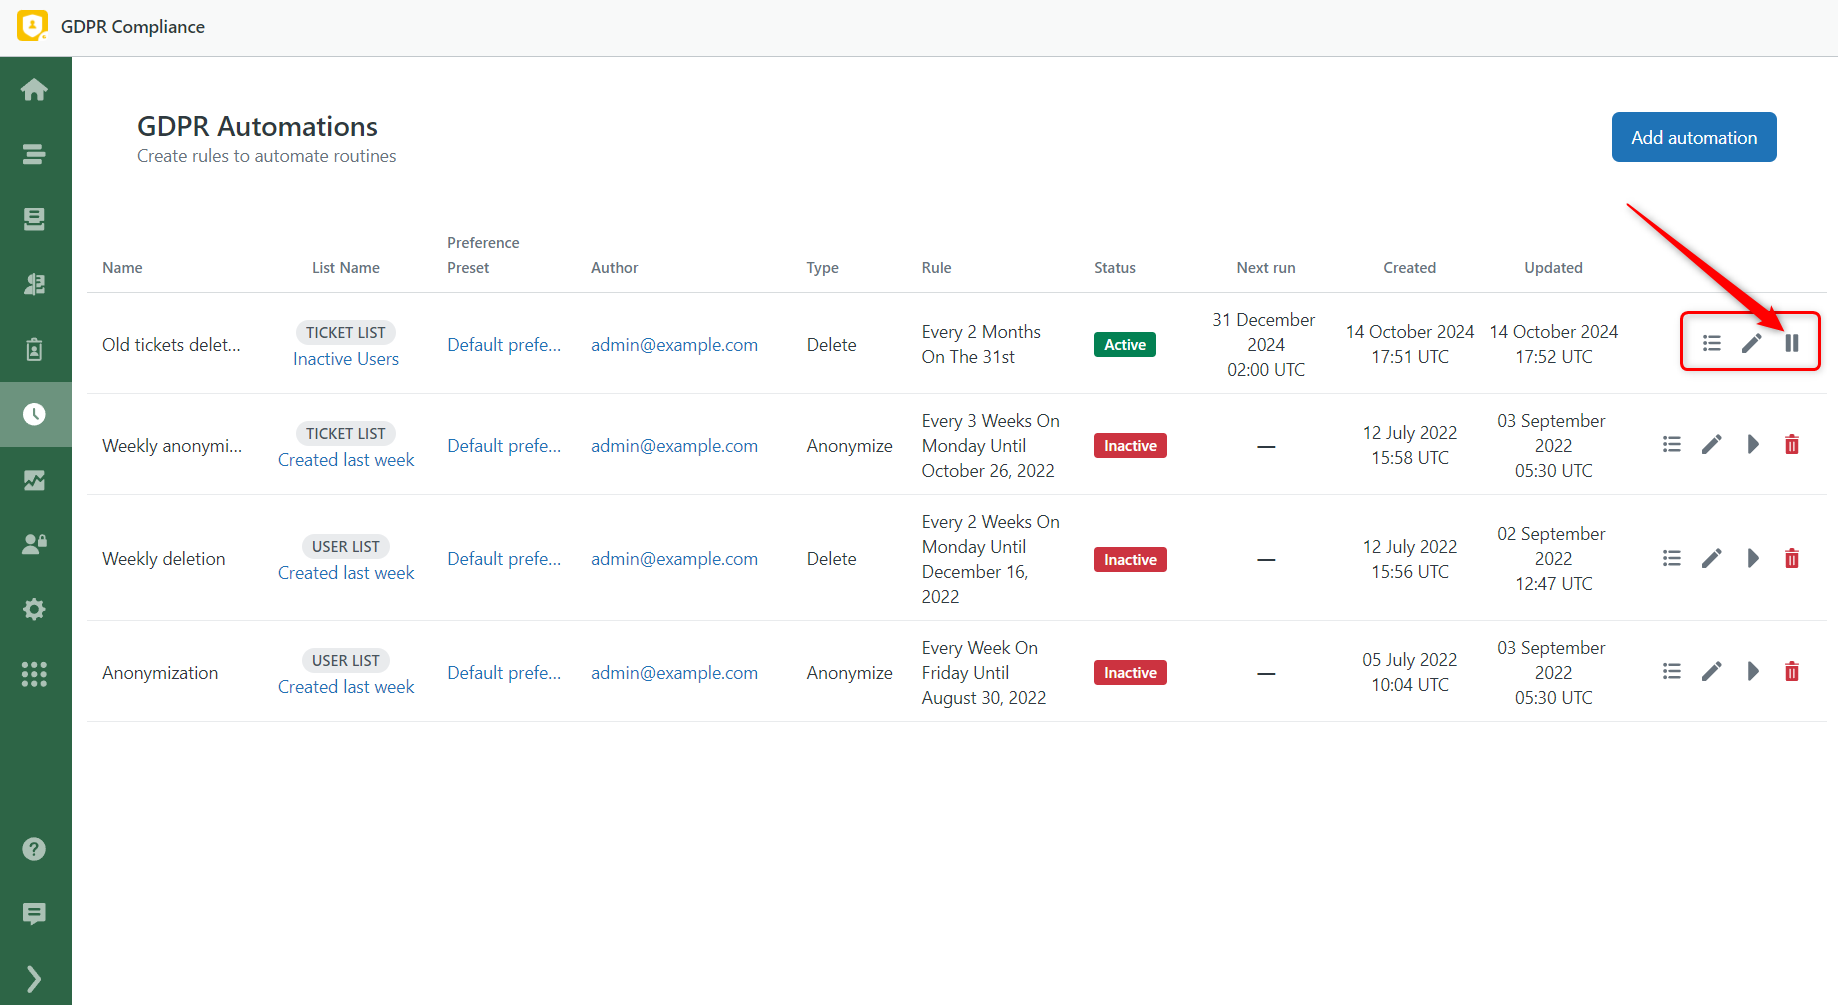
When the automation is ready, you can notice some options on the left side of the GDPR Automations page. These buttons allow editing the automation, viewing the process list, changing the automation’s status, and deleting it. Finally, as our automation is Inactive, we click the third button to turn it on and confirm the activation in the modal window.
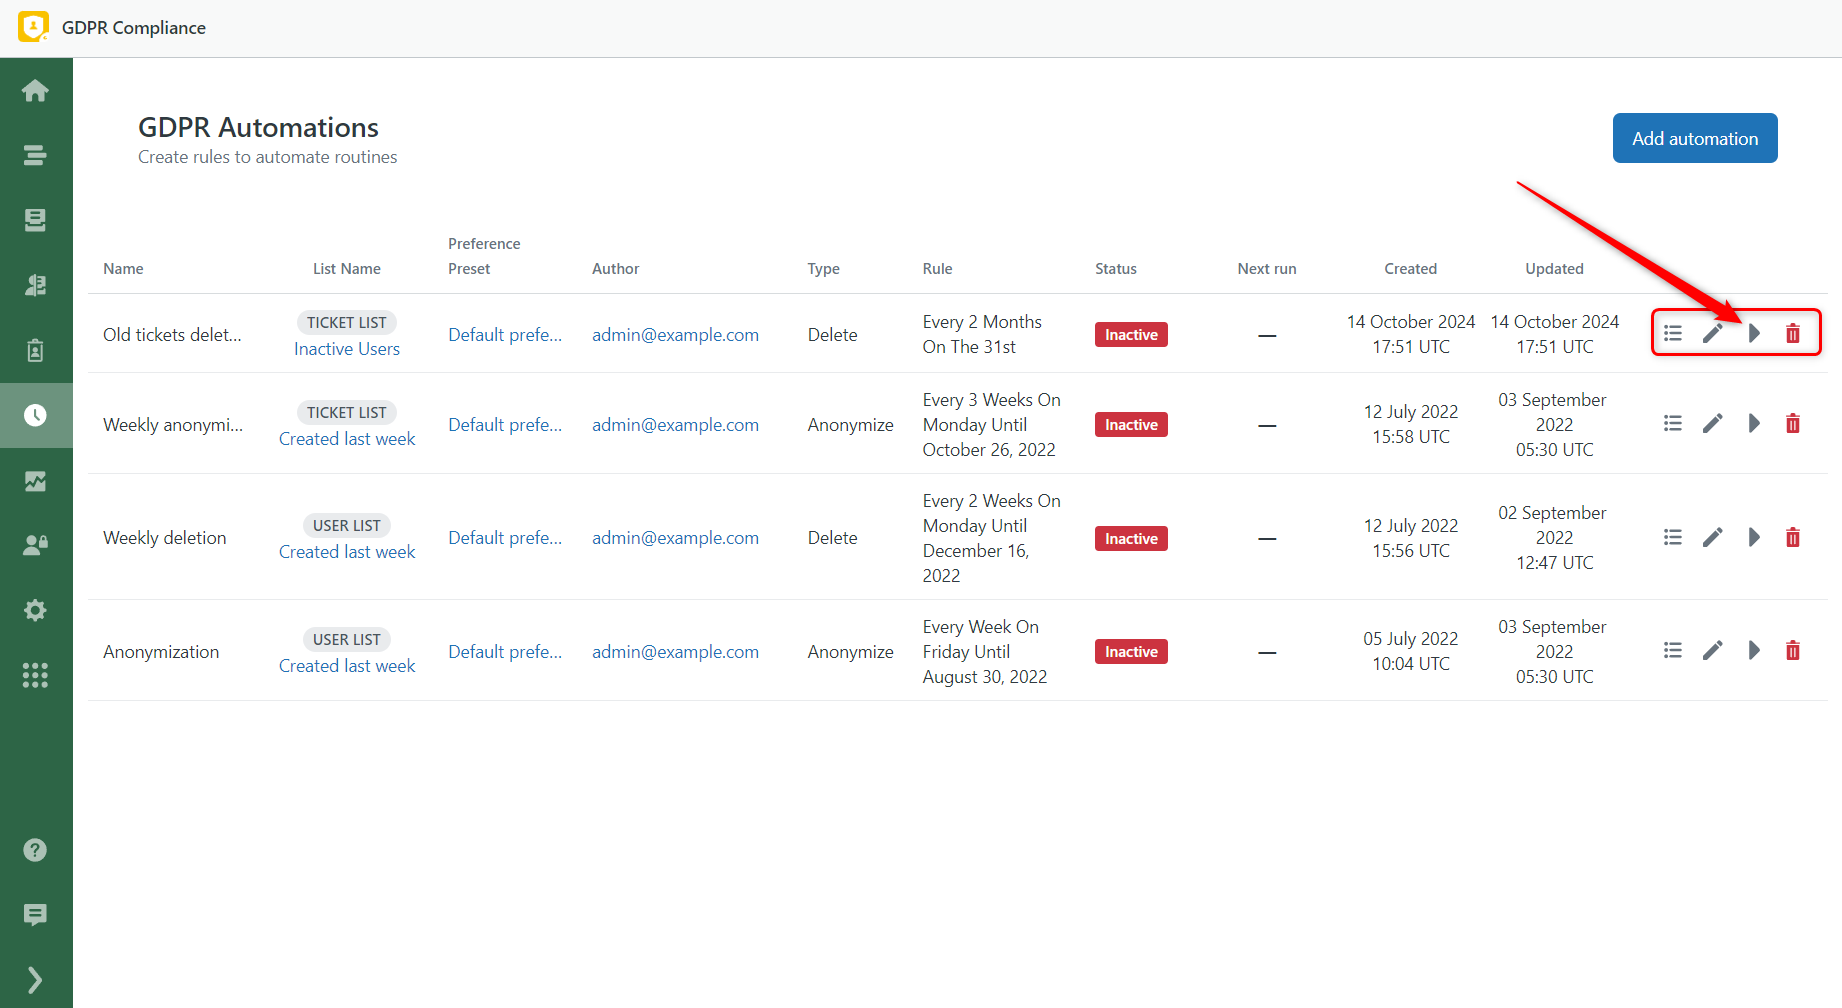
From now, the created automation deletes data from a selected ticket list. You also can stop automation from performing at any time by clicking on the Deactivate button (the last one on a panel).
You have learned how to schedule data deletion and anonymization in Zendesk. Hope it is helpful.
Whenever you have questions or propositions, contact our support team.


