How to delete Zendesk attachments with the GDPR Compliance add-on
-
GDPR Compliance
Managing Zendesk storage is challenging yet essential for keeping costs down. Instead of upgrading your storage plan, the GDPR Compliance app offers a simple and cost-effective way to delete unnecessary attachments. To ensure data compliance and free up space, follow this easy guide on our Attachment Deletion add-on.
1. Check your subscription limits
Before you start, ensure you have enough available storage for redacting attachments.
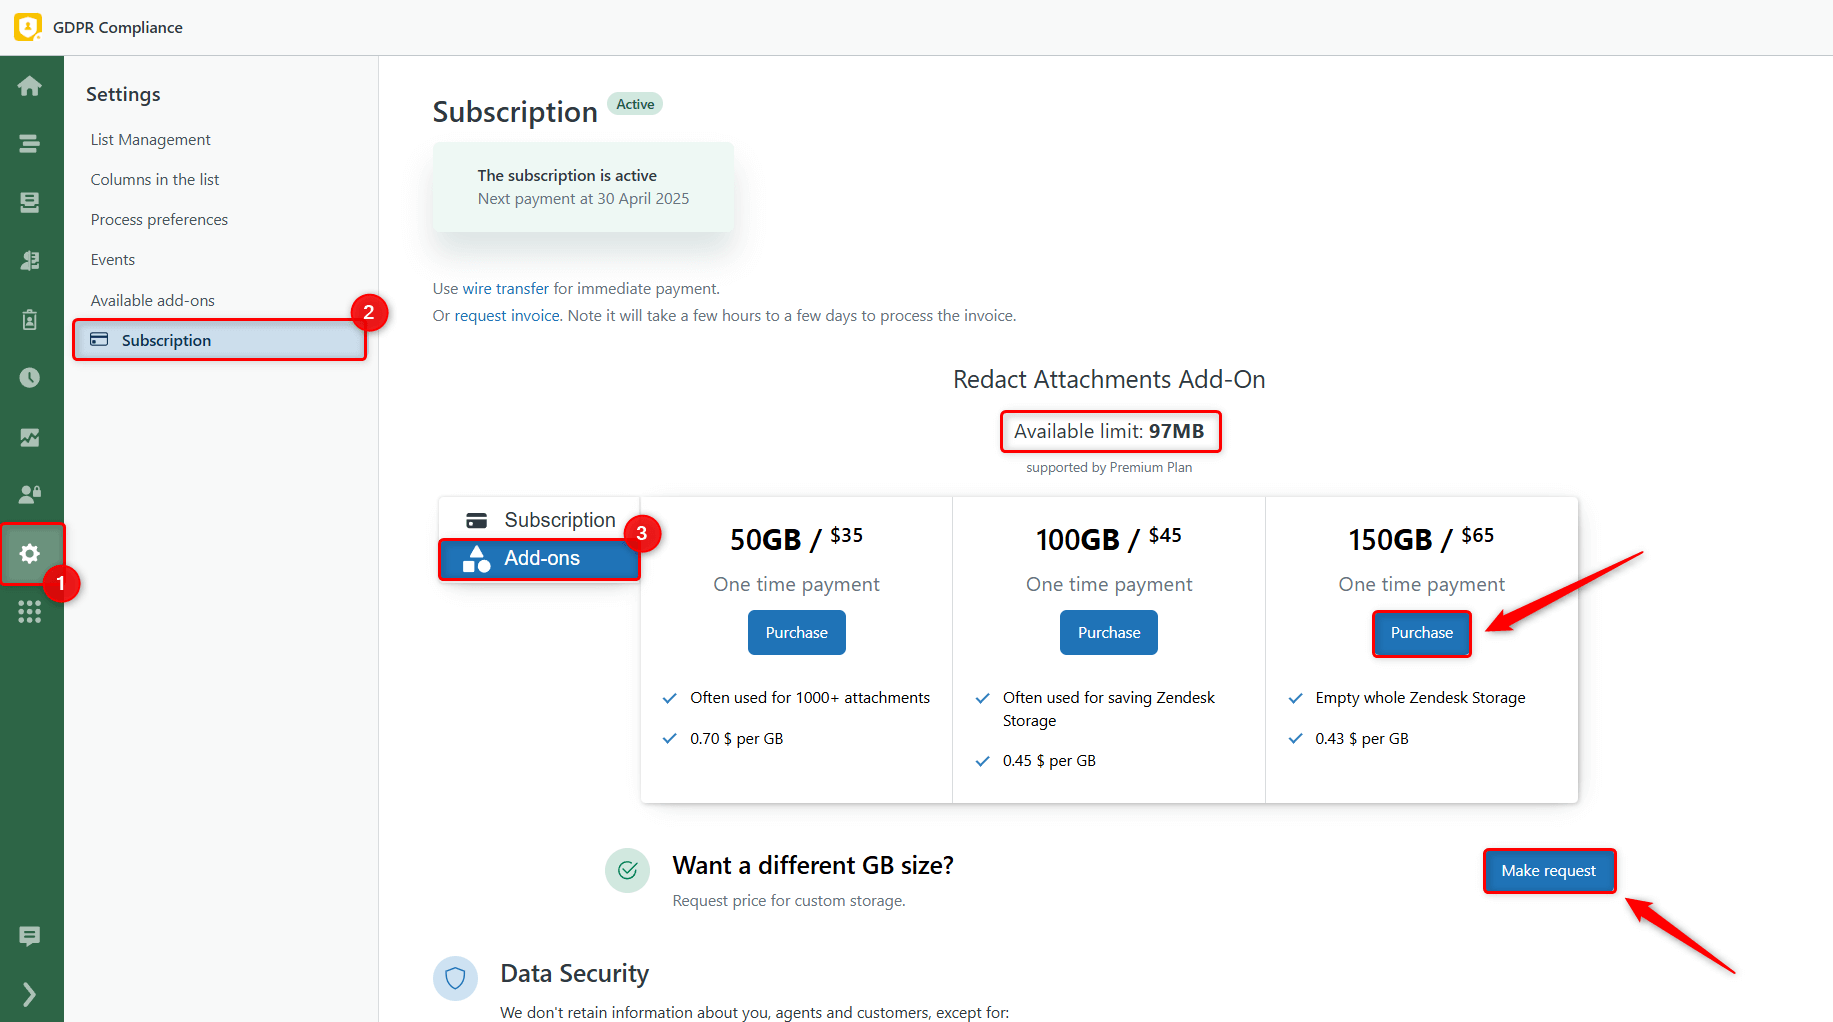
Go to Settings > Subscription > Add-ons.
Review the available limits for attachment redactions. If you've run out of storage, you can easily purchase additional GBs. If the available options don't meet your needs, just request custom storage limits.
2. Configure attachment redaction preferences
Next, set up your preferences for how the GDPR Compliance app will handle attachments.
Go to Settings > Process Preferences > Redact Attachments. Edit the default preset or create a new one.
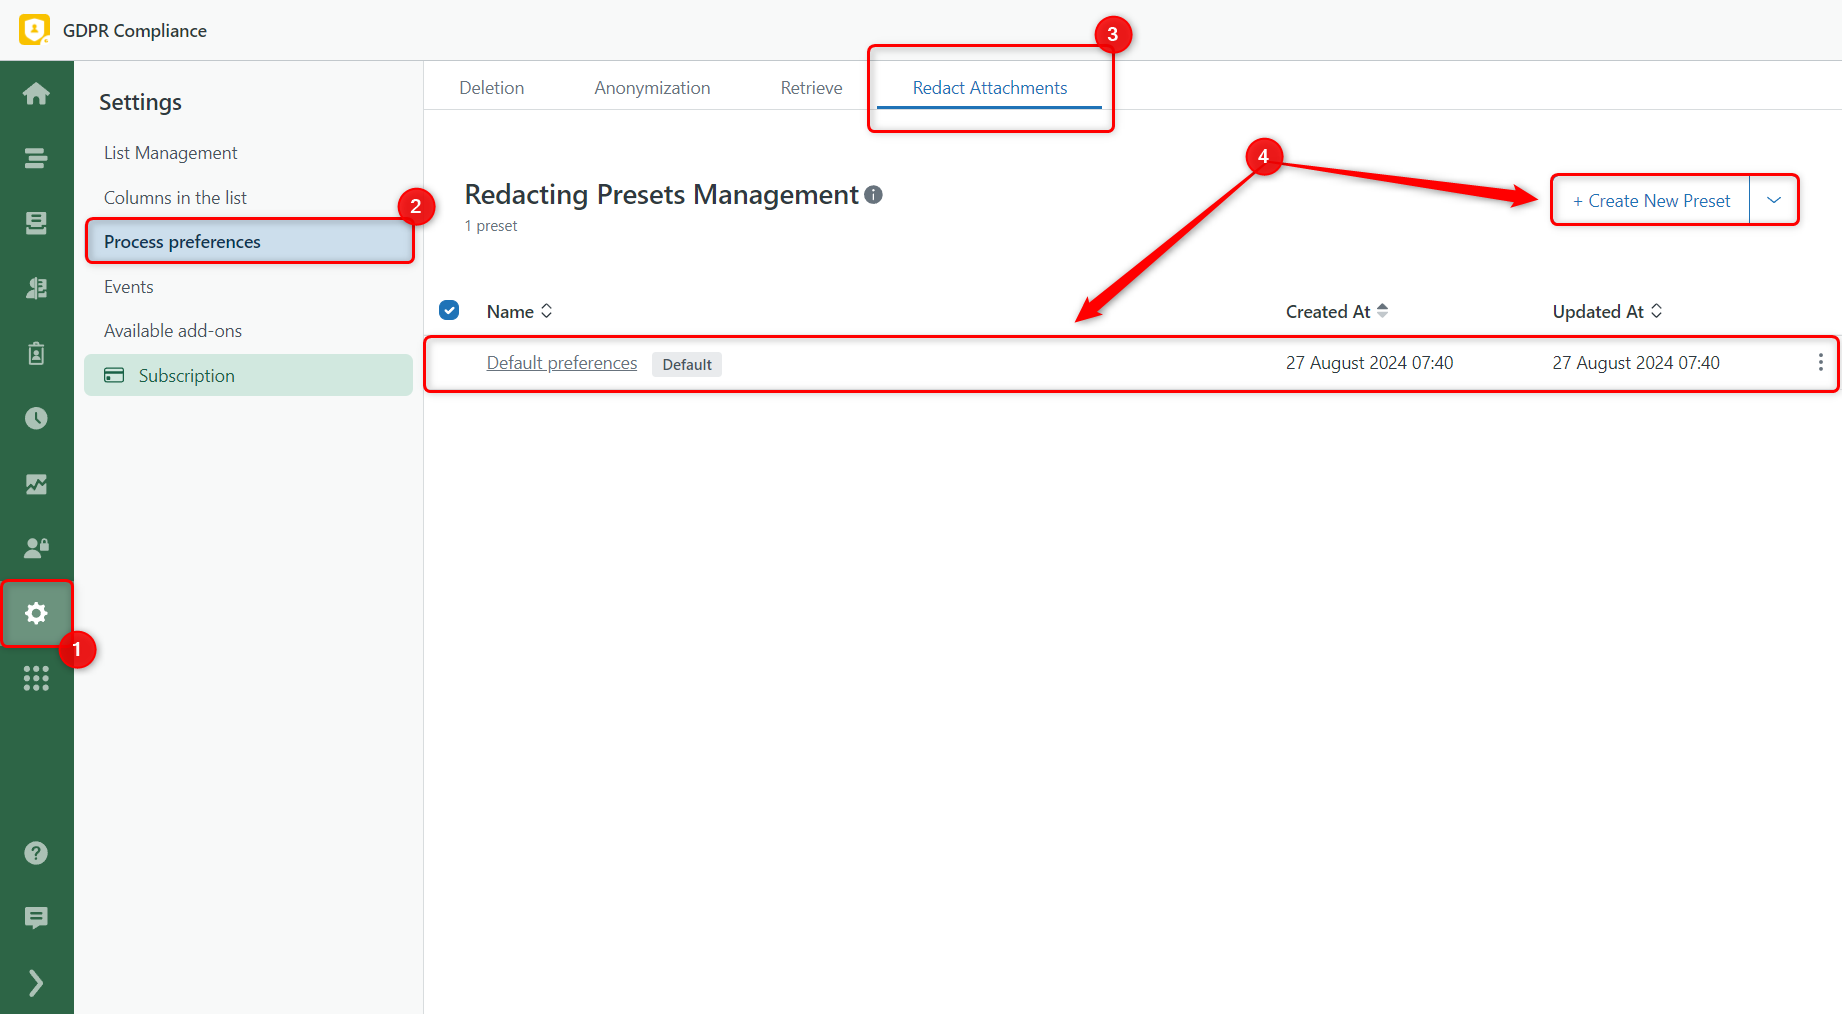
Here, you can configure what attachments to redact. In General preferences, you decide whether to delete all attachments, including inline ones (like images) or skip inline attachments.
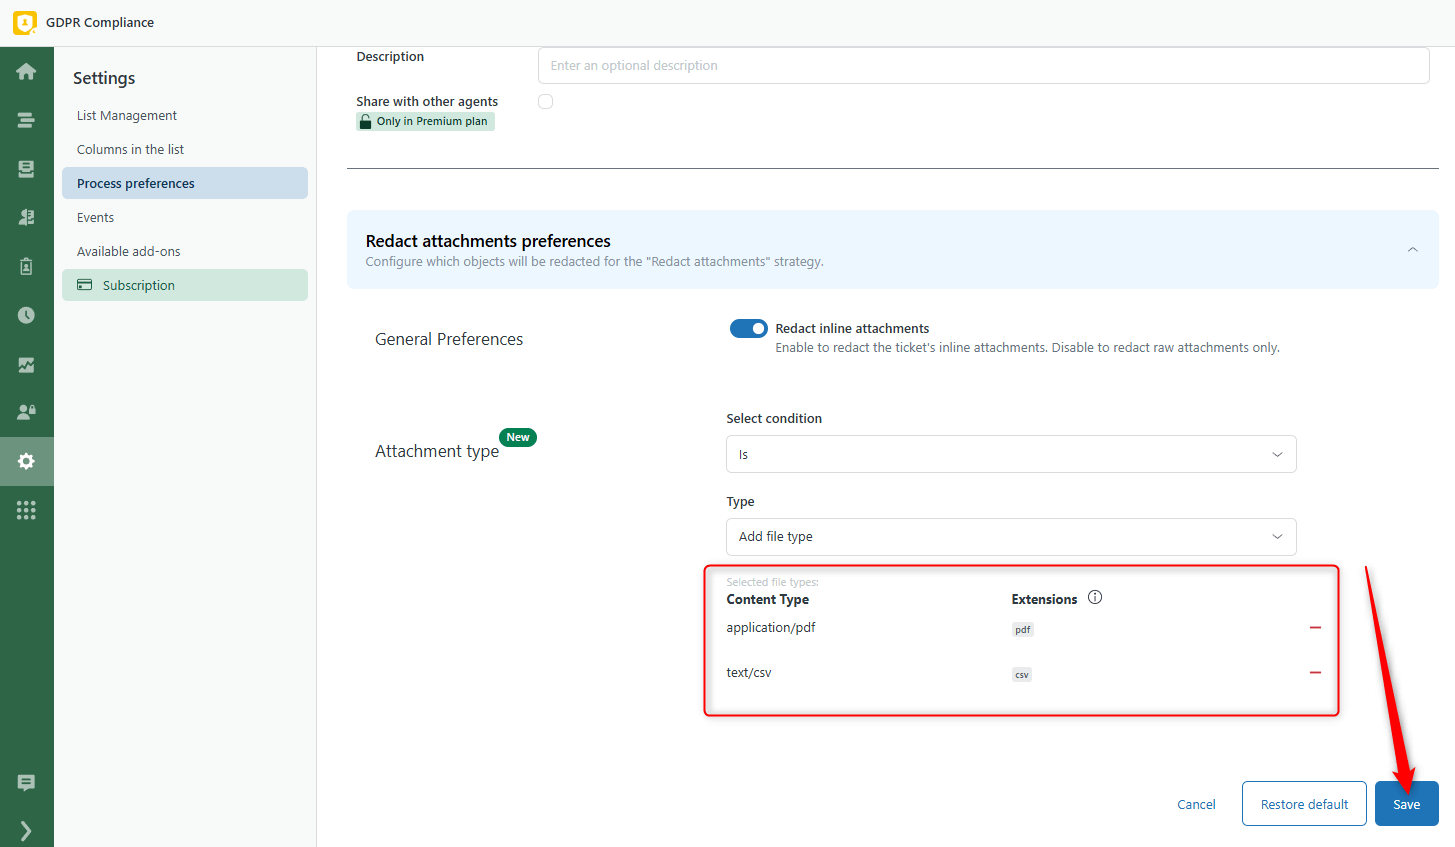
In the second section, you can set a condition to either include or exclude a specific attachment type. For example, choose to redact only PDF files or exclude JPEG and PNG images from the redaction process.
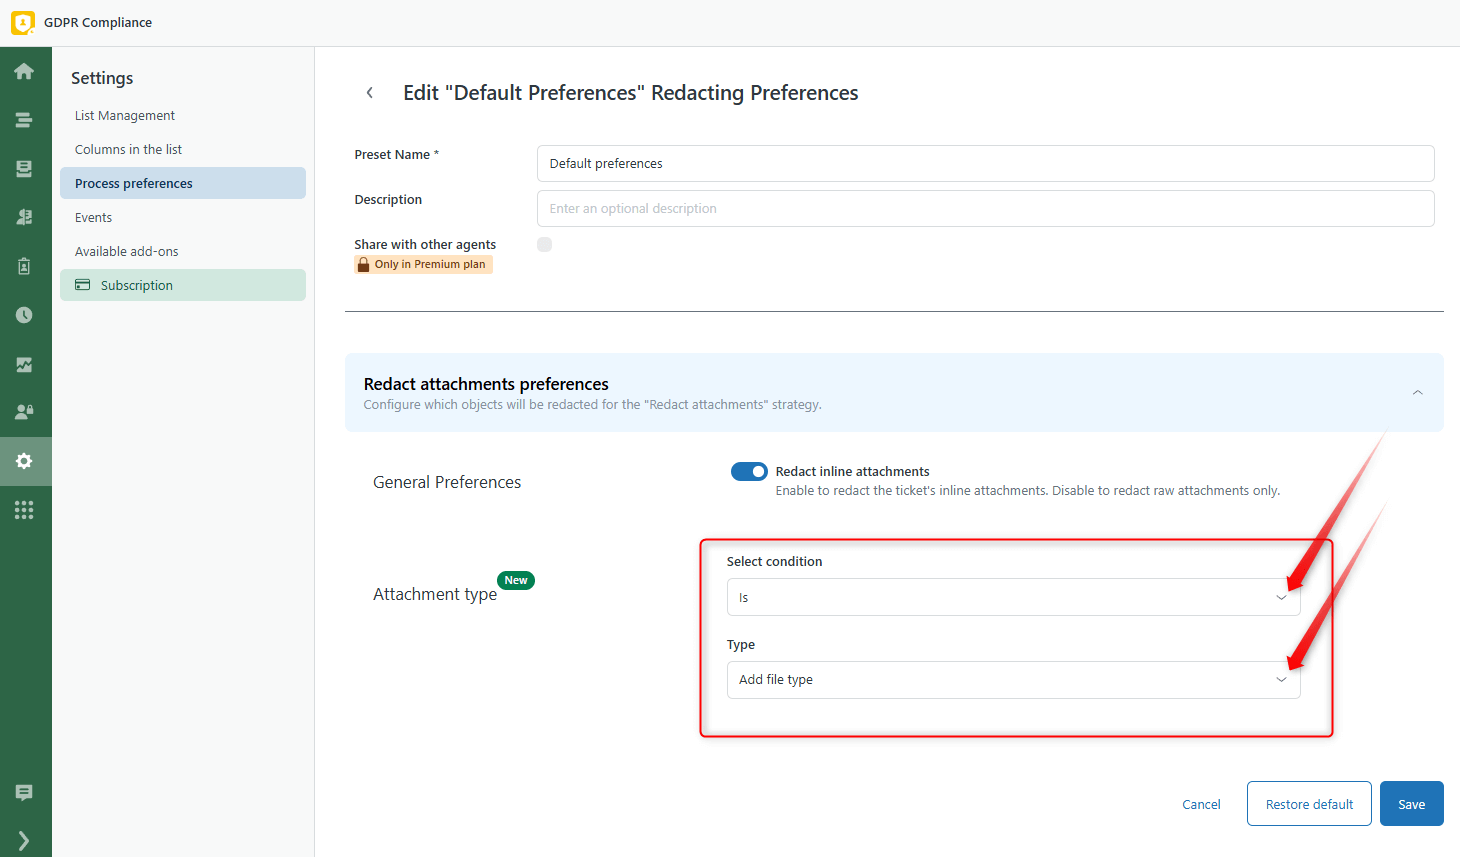
Once you've made your selection, click Save.
3. Remove attachments from a specific ticket or user
You can delete attachments for a specific ticket or all tickets from the requester.
Open the necessary ticket, go to the Apps section on the right, and find the GDPR Compliance.
If you need to delete attachments from one specific ticket, select Process the Ticket. If you want to delete attachments for all tickets associated with this user, select Process the User (you can also do this from the user profile).
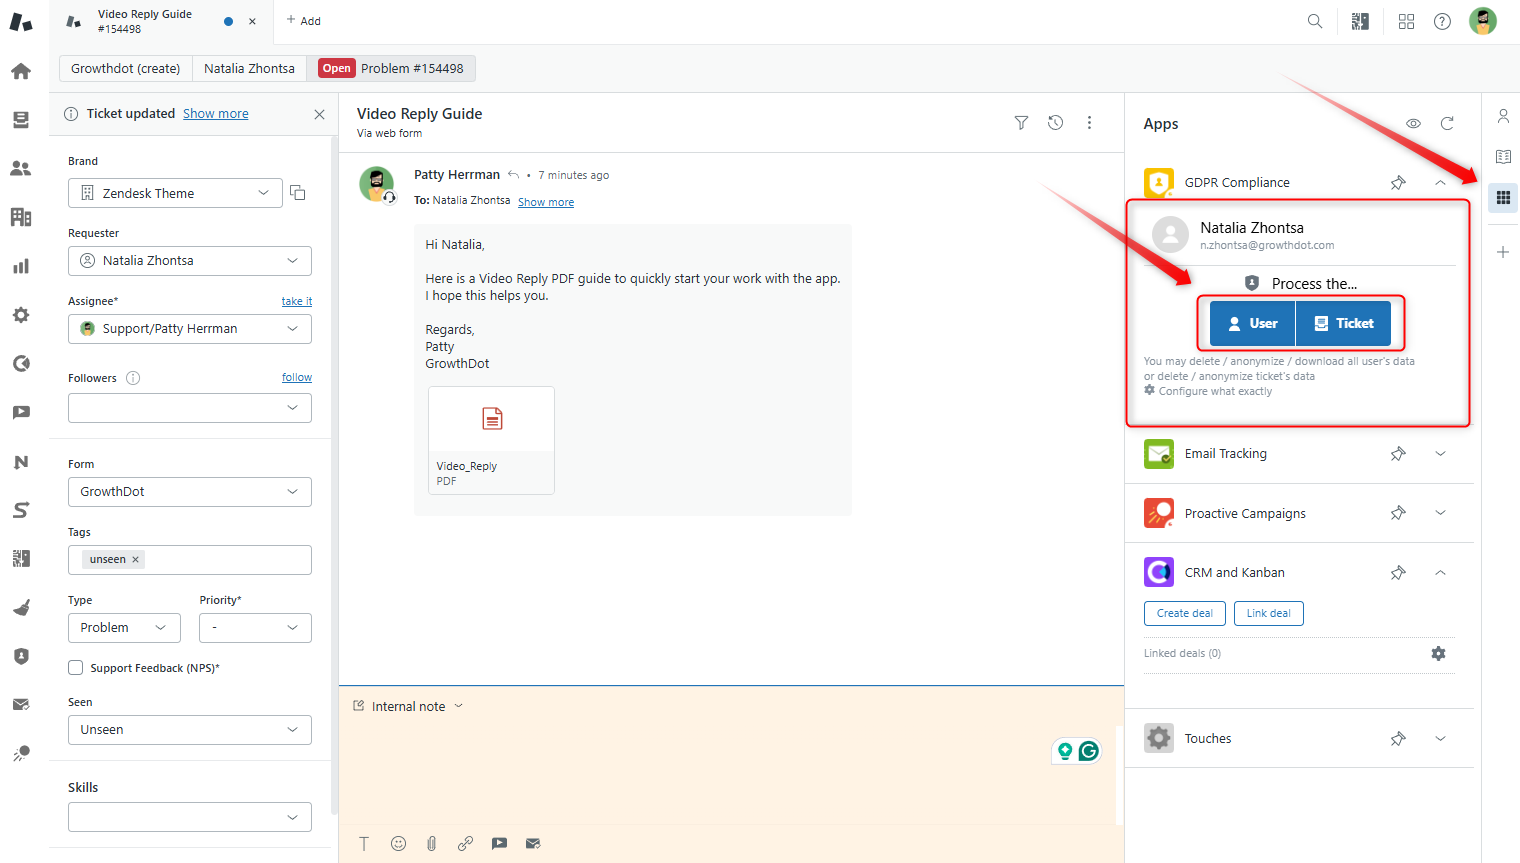
In the new Processes page:
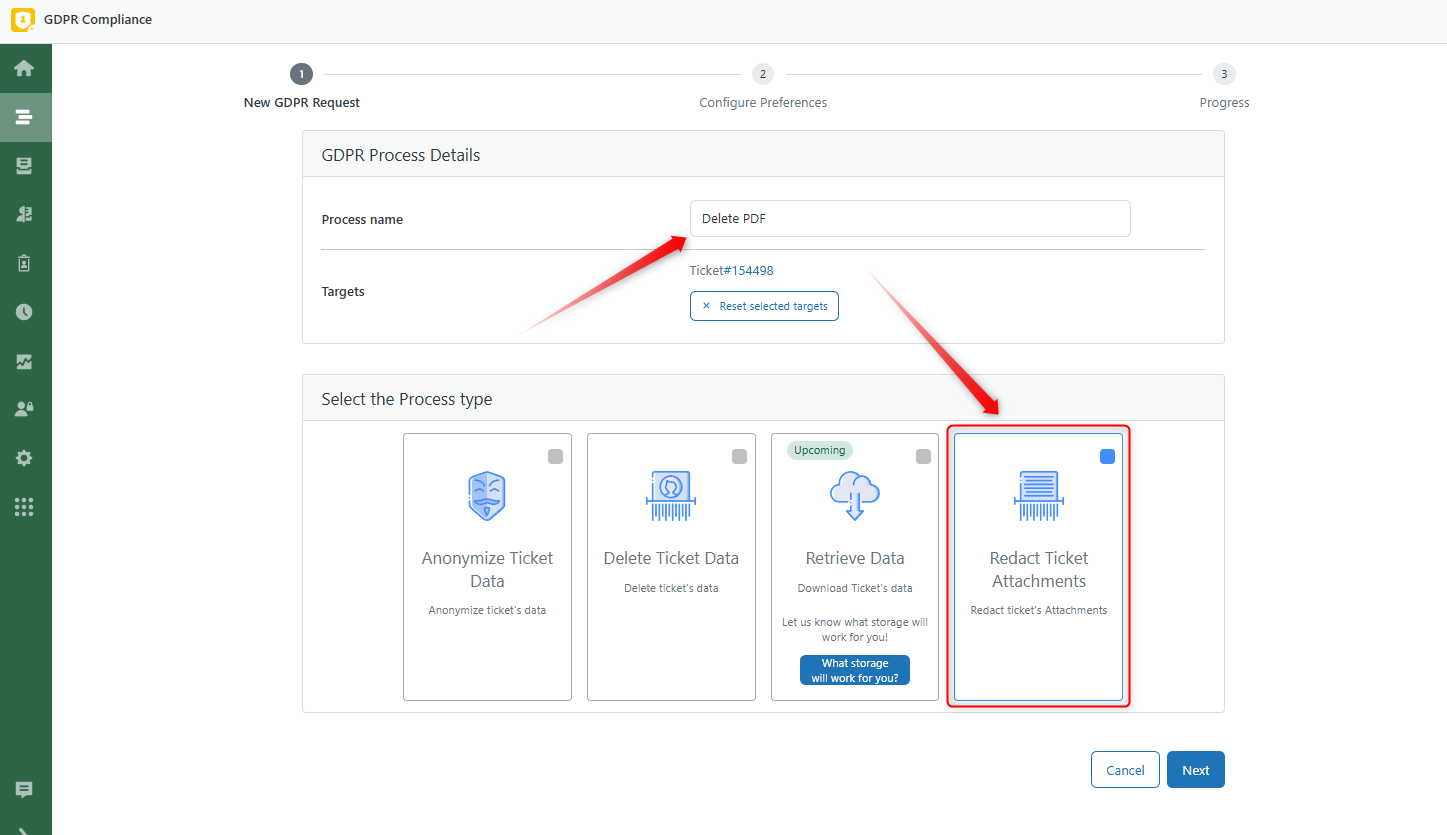
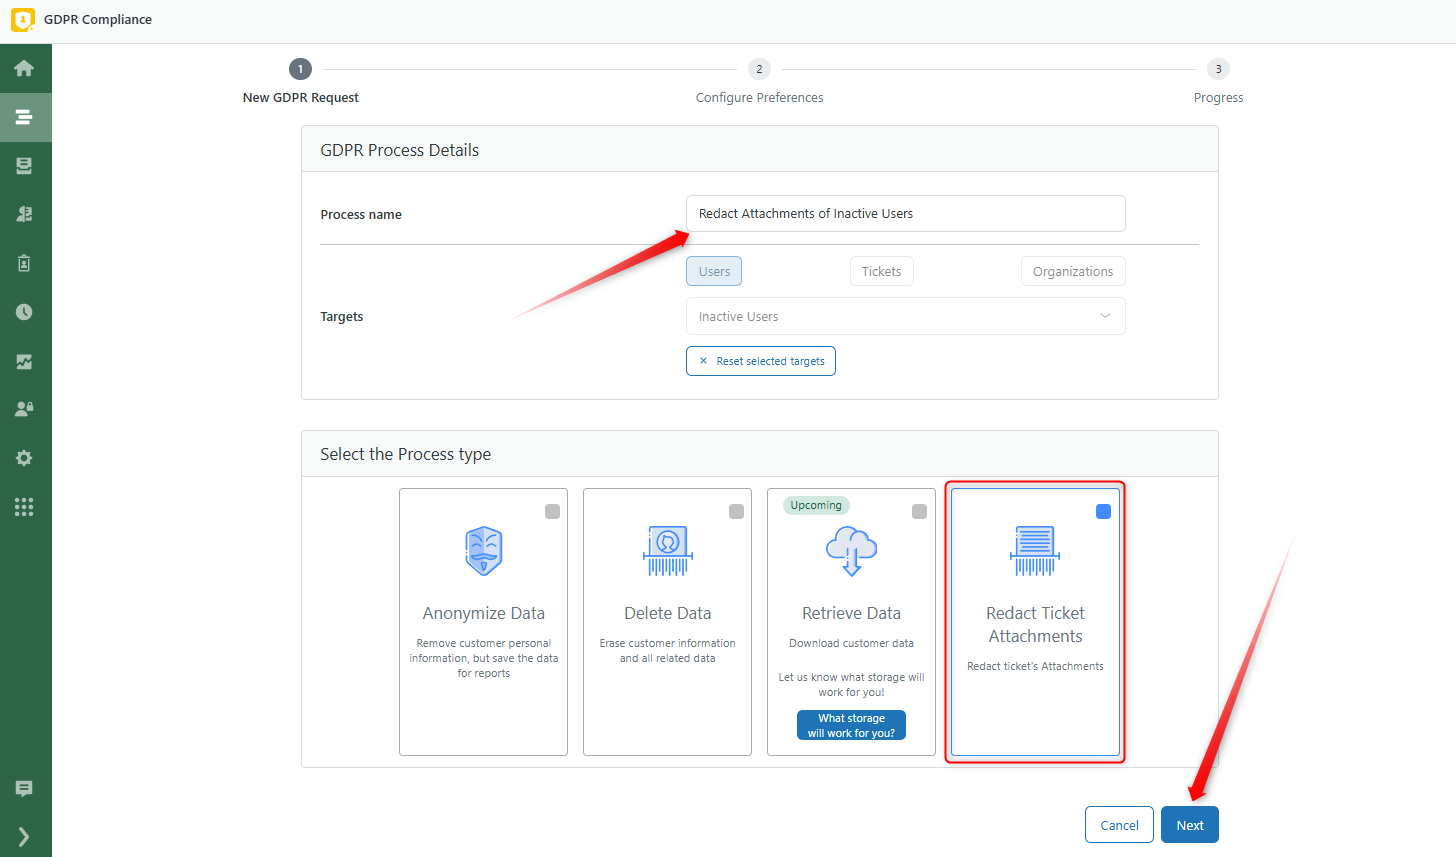
- Choose Redact Ticket Attachments.
- Provide a name for the process and click Next.
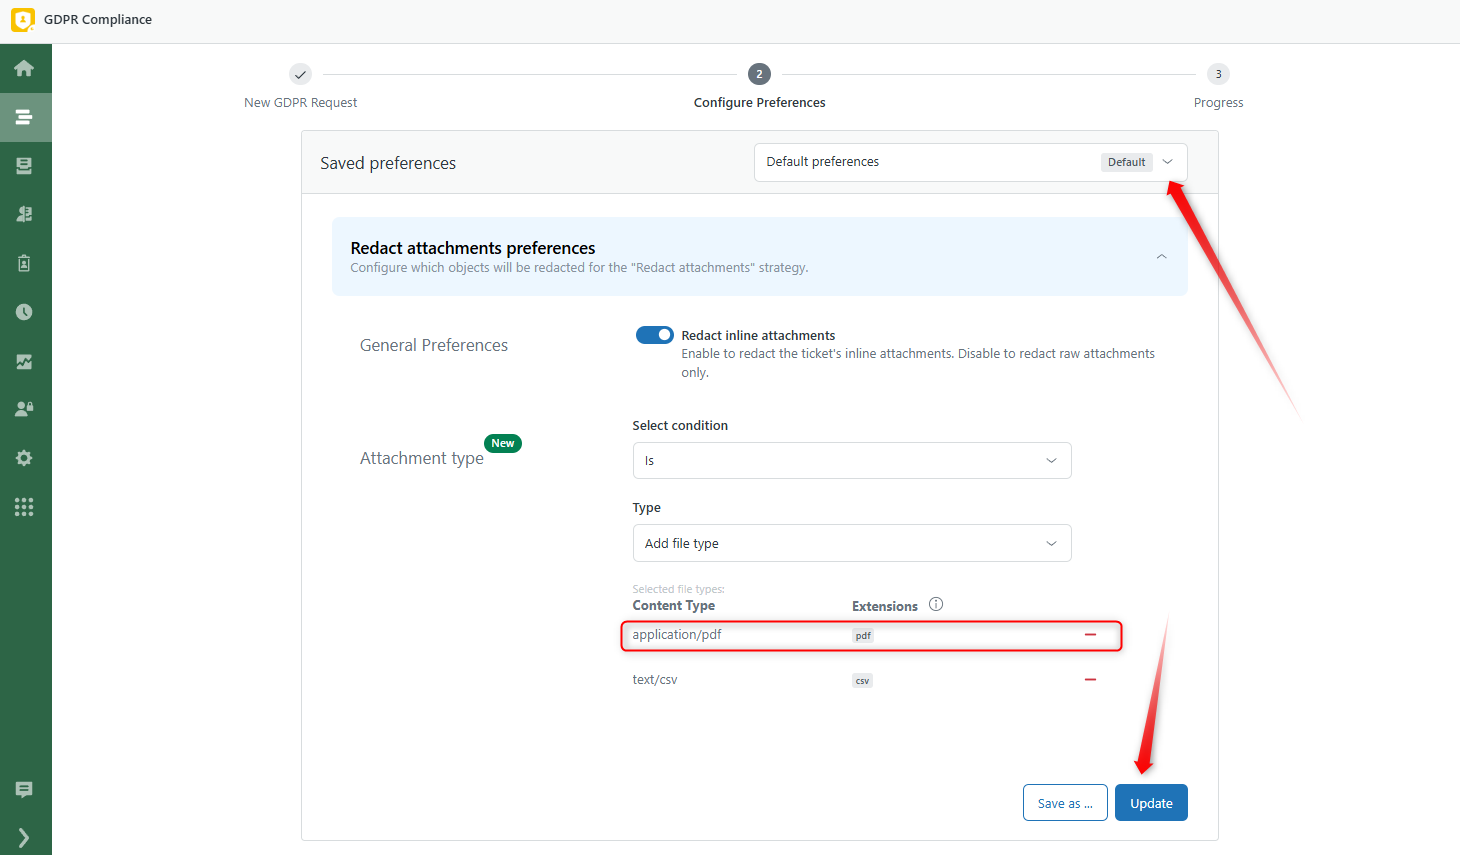
Next, select a preference preset or edit an existing one. Make sure your preset's content type matches the ticket's file format (in our case, PDF format). Update your preset if needed, and click on the Next button.
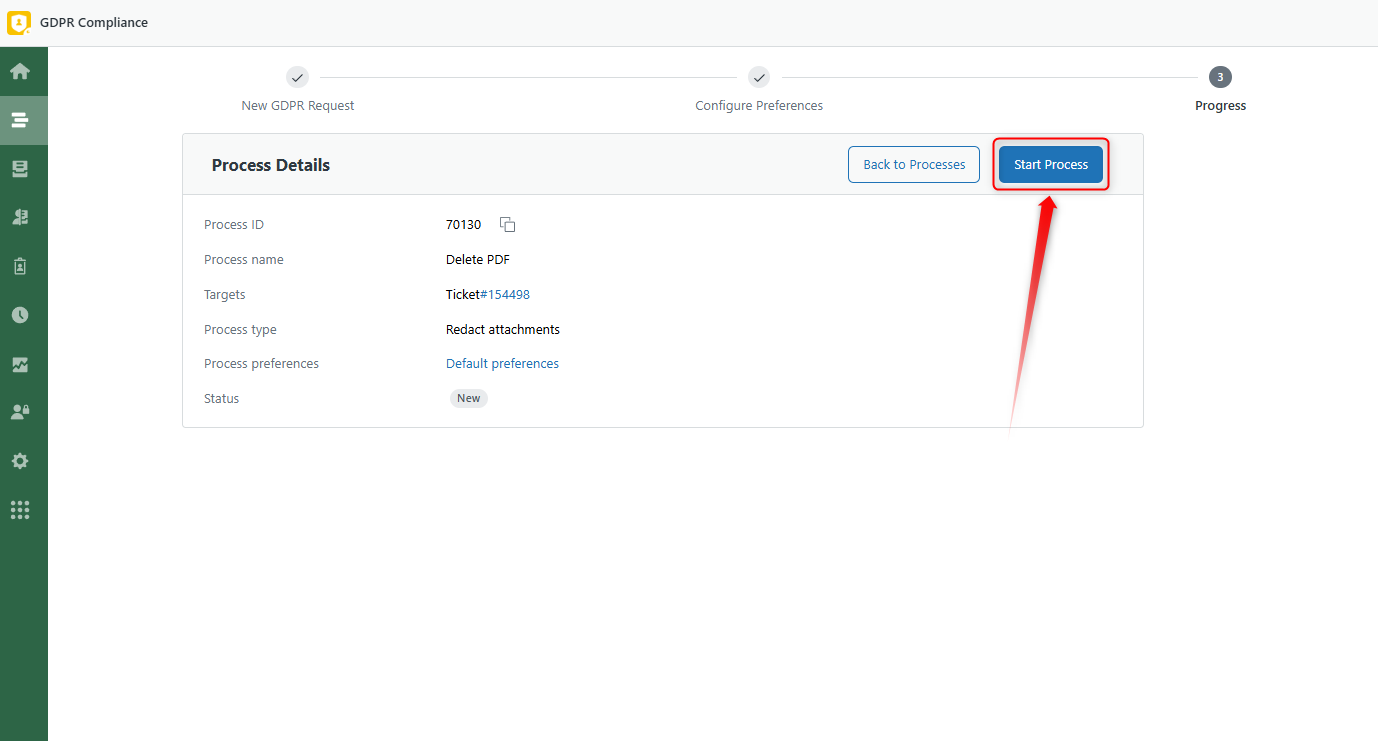
Once the setup process is complete, hit Start Process and Confirm.
After the process is done, you can verify that the attachments have been successfully deleted by checking the ticket.
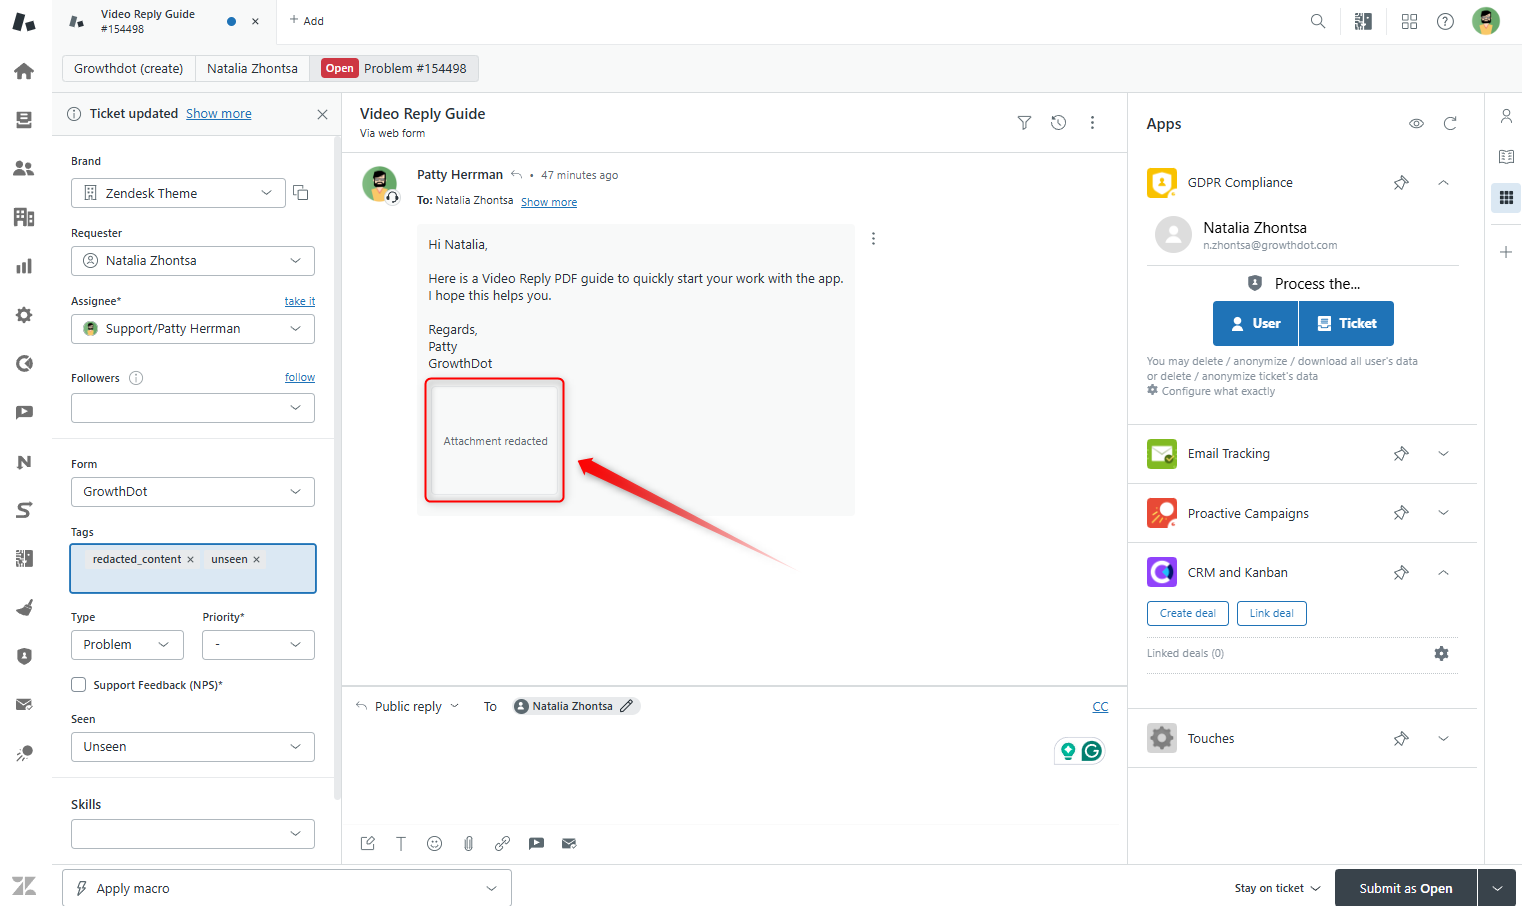
4. Bulk remove ticket attachments
For bulk deletion, start by creating a list of tickets or users.
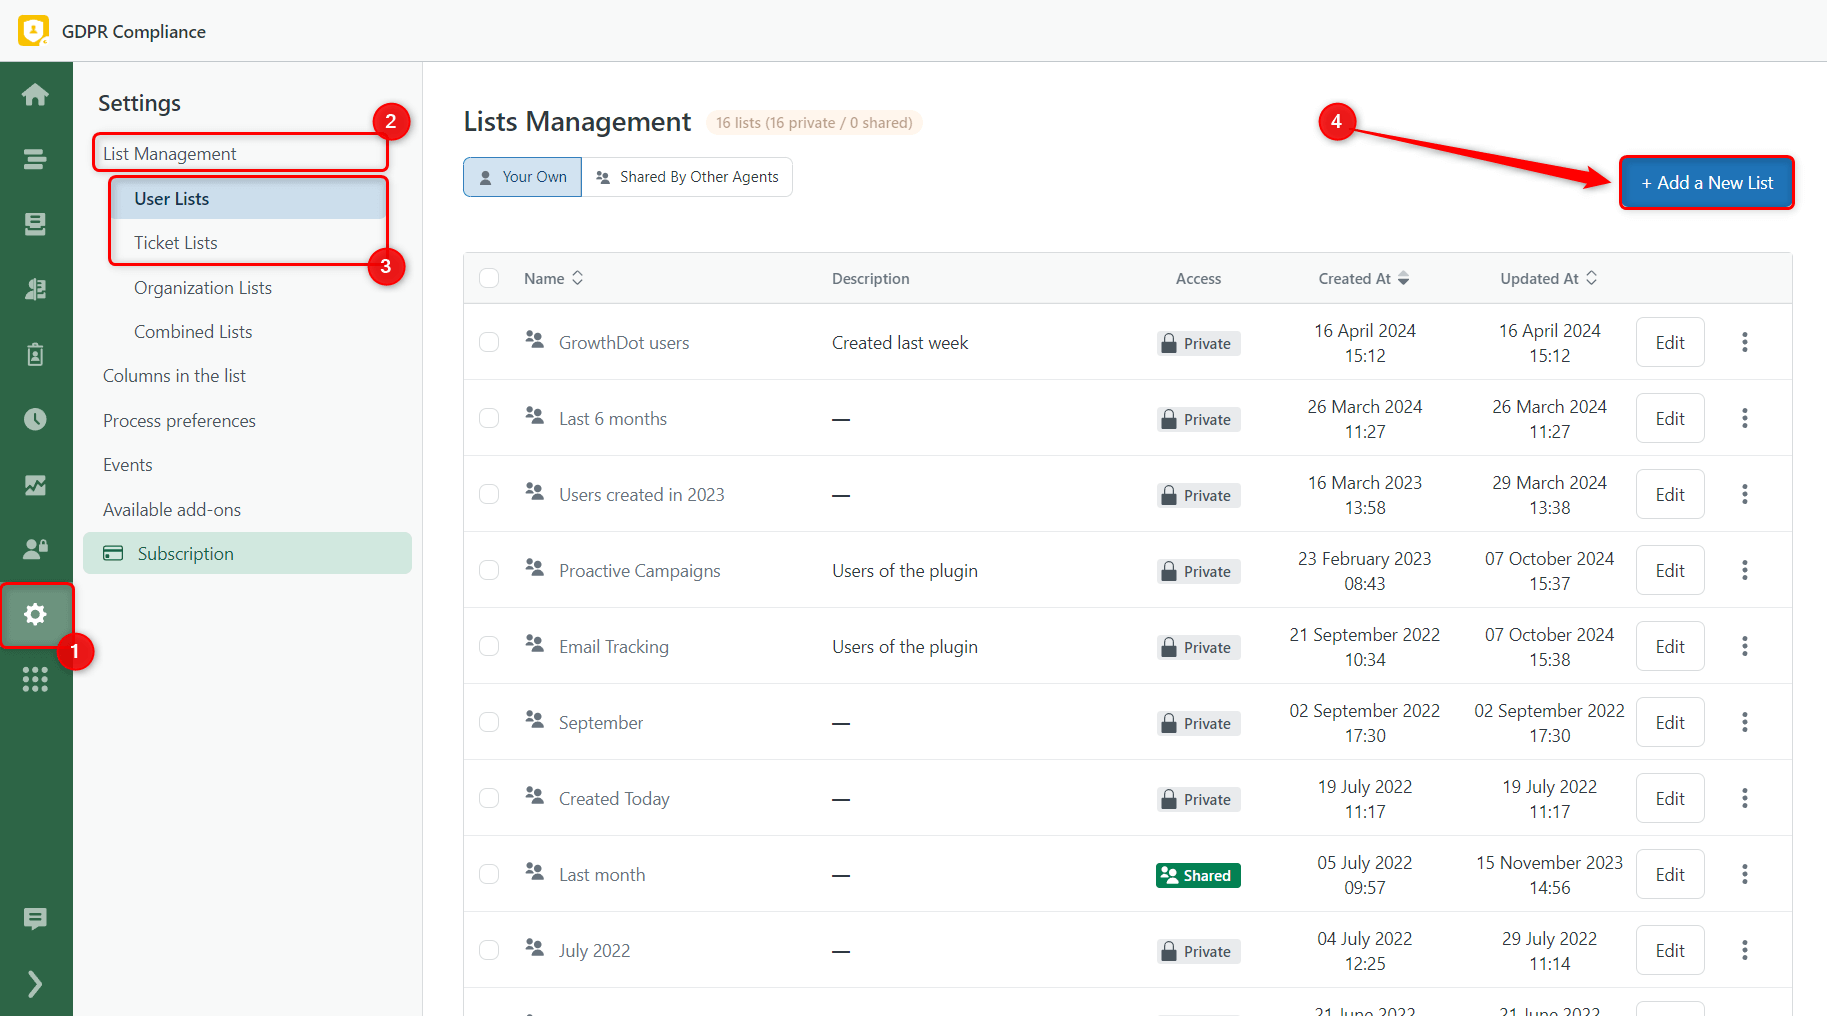
Go to Settings > List Management > User/Ticket Lists and click + Add a New List.
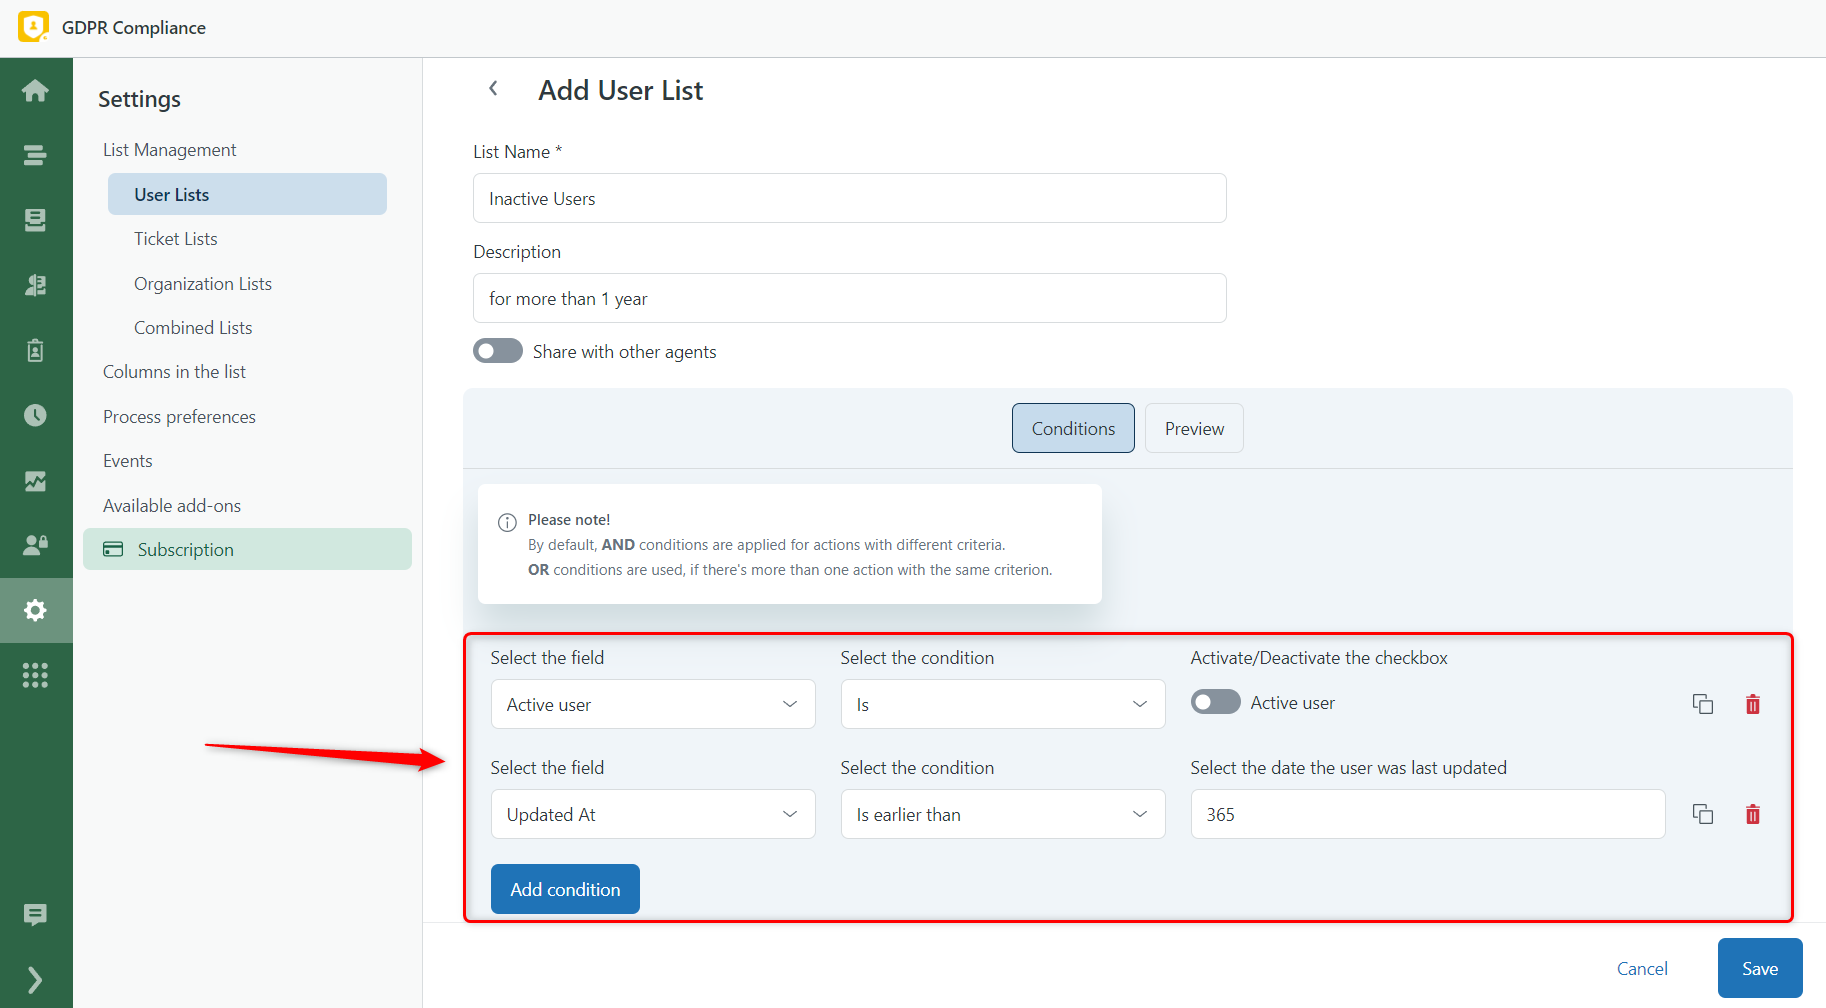
For example, you could create a list of users who have been inactive for more than one year.
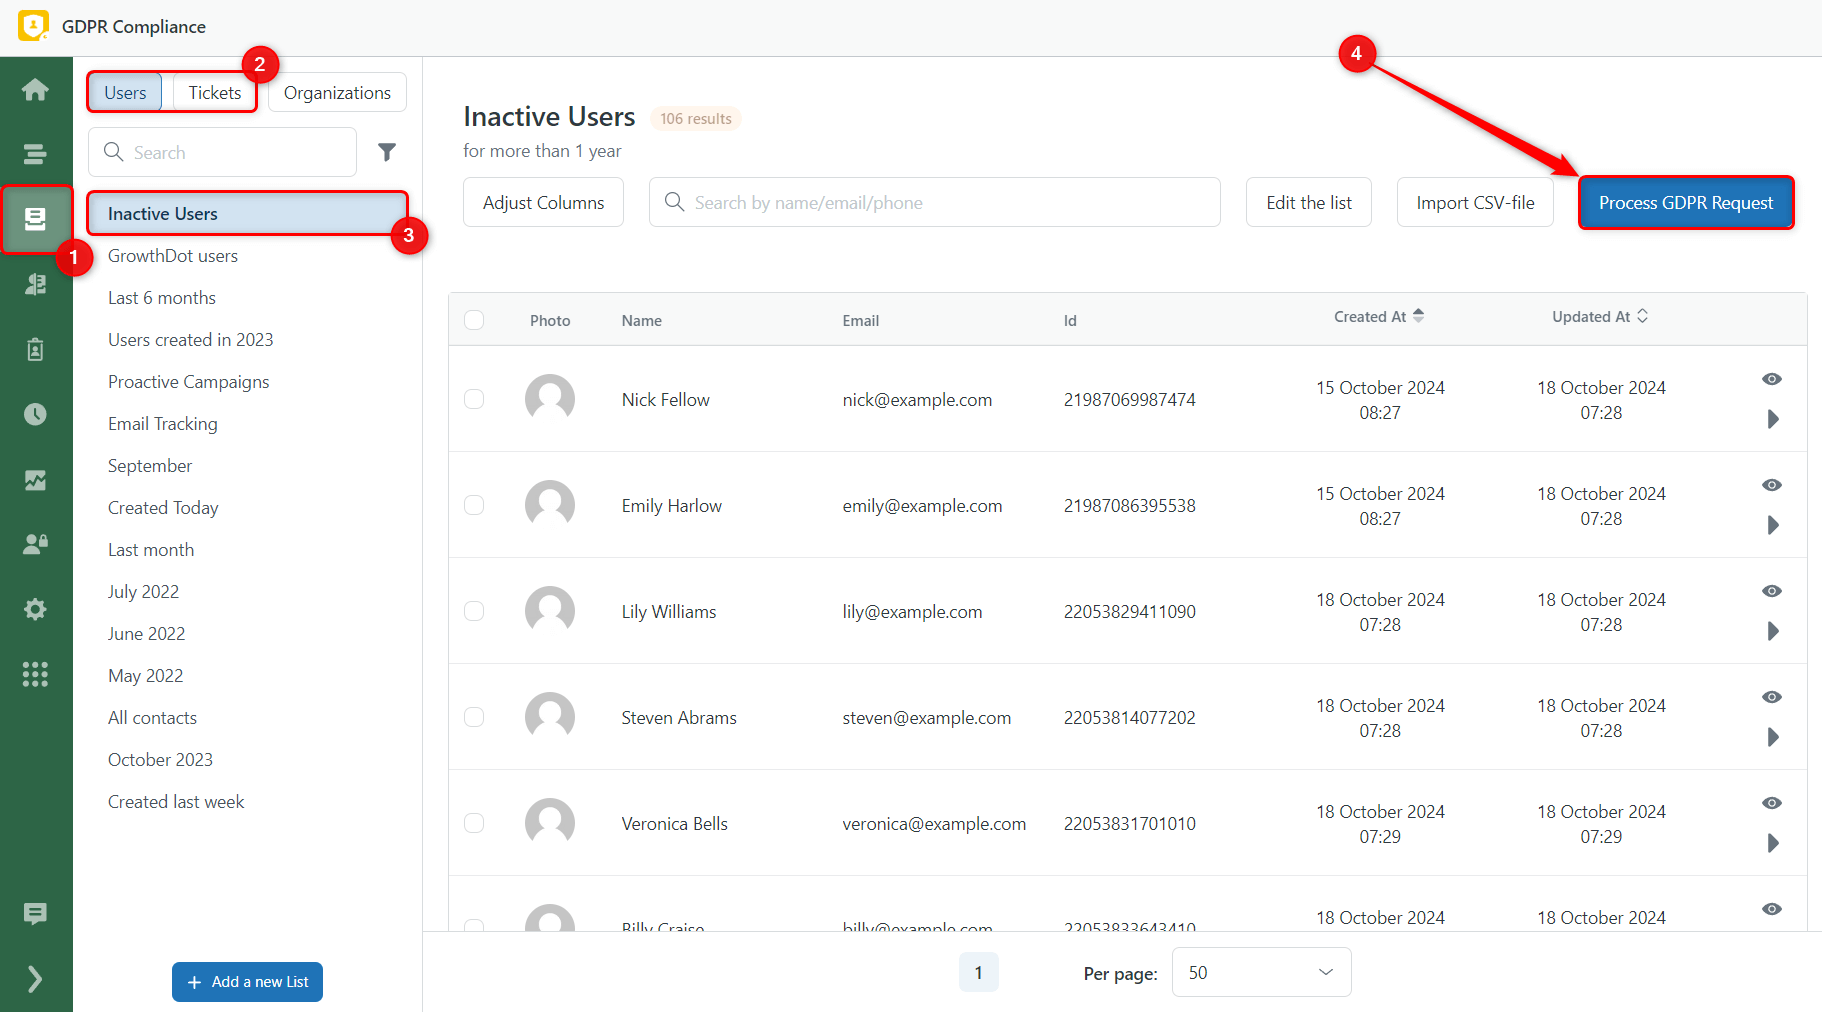
After creating the list:
- Go to the List Views tab.
- Choose either Users or Tickets from the top left.
- Find your created list.
- Click Process GDPR Request.
Again, provide a name and select Redact Ticket Attachments. Then, select the preset for the process, and start the redaction.
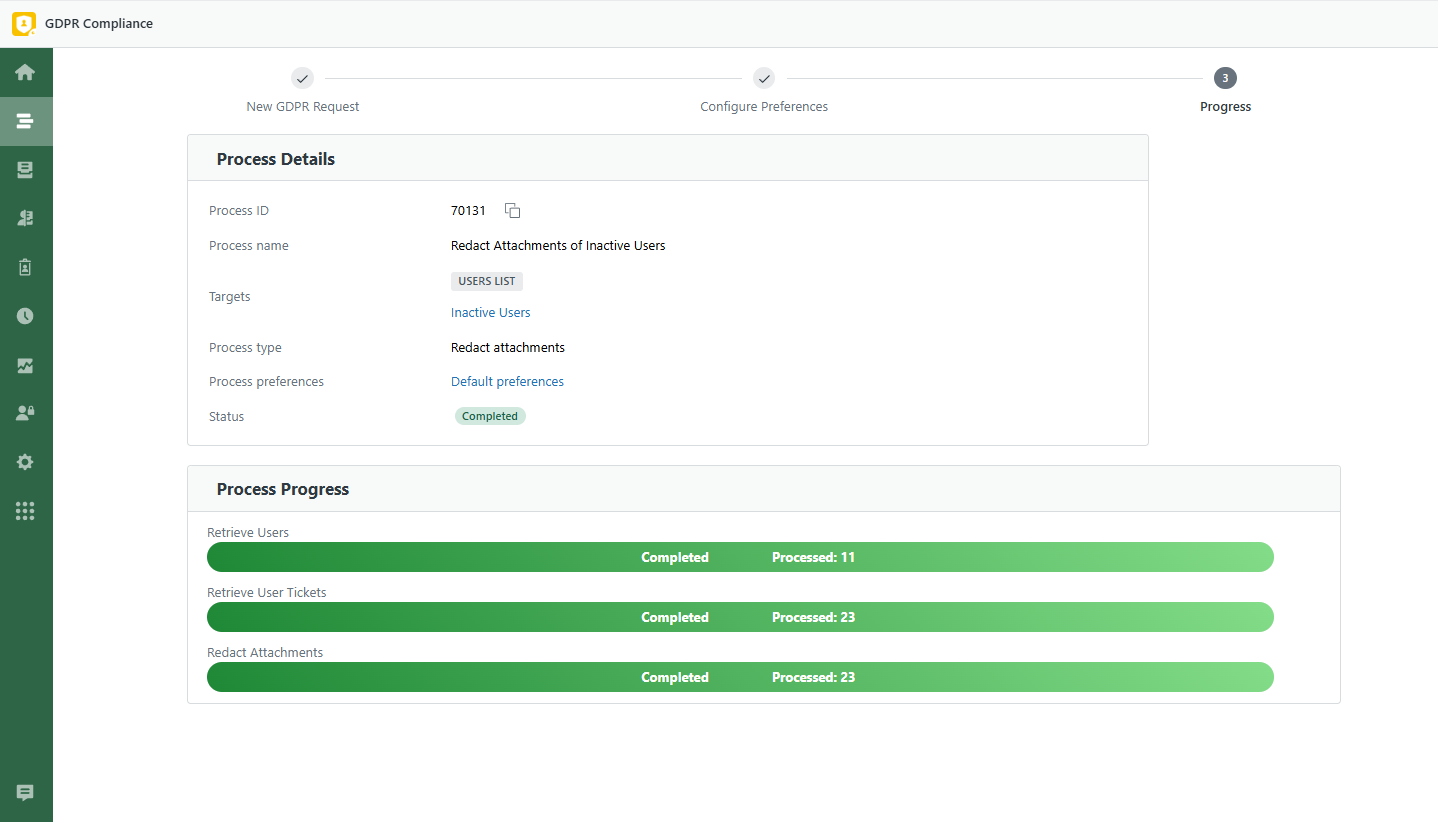
Afterward, you can view details on the number of users and tickets processed.
That's it! You have now successfully deleted attachments from tickets using the GDPR Compliance app. If you have any questions or need further assistance, feel free to contact our support team.


