How to group contacts for my email campaign
-
Proactive Campaigns
With Proactive Campaigns, you can easily send out particular messages to a specific group of contacts from your Zendesk. However, you will have to create contact lists to add to your email campaigns beforehand. If you can’t figure what is the best way to filter contacts in this case, we will show you three options of how to separate your contacts into lists to target the right audience.
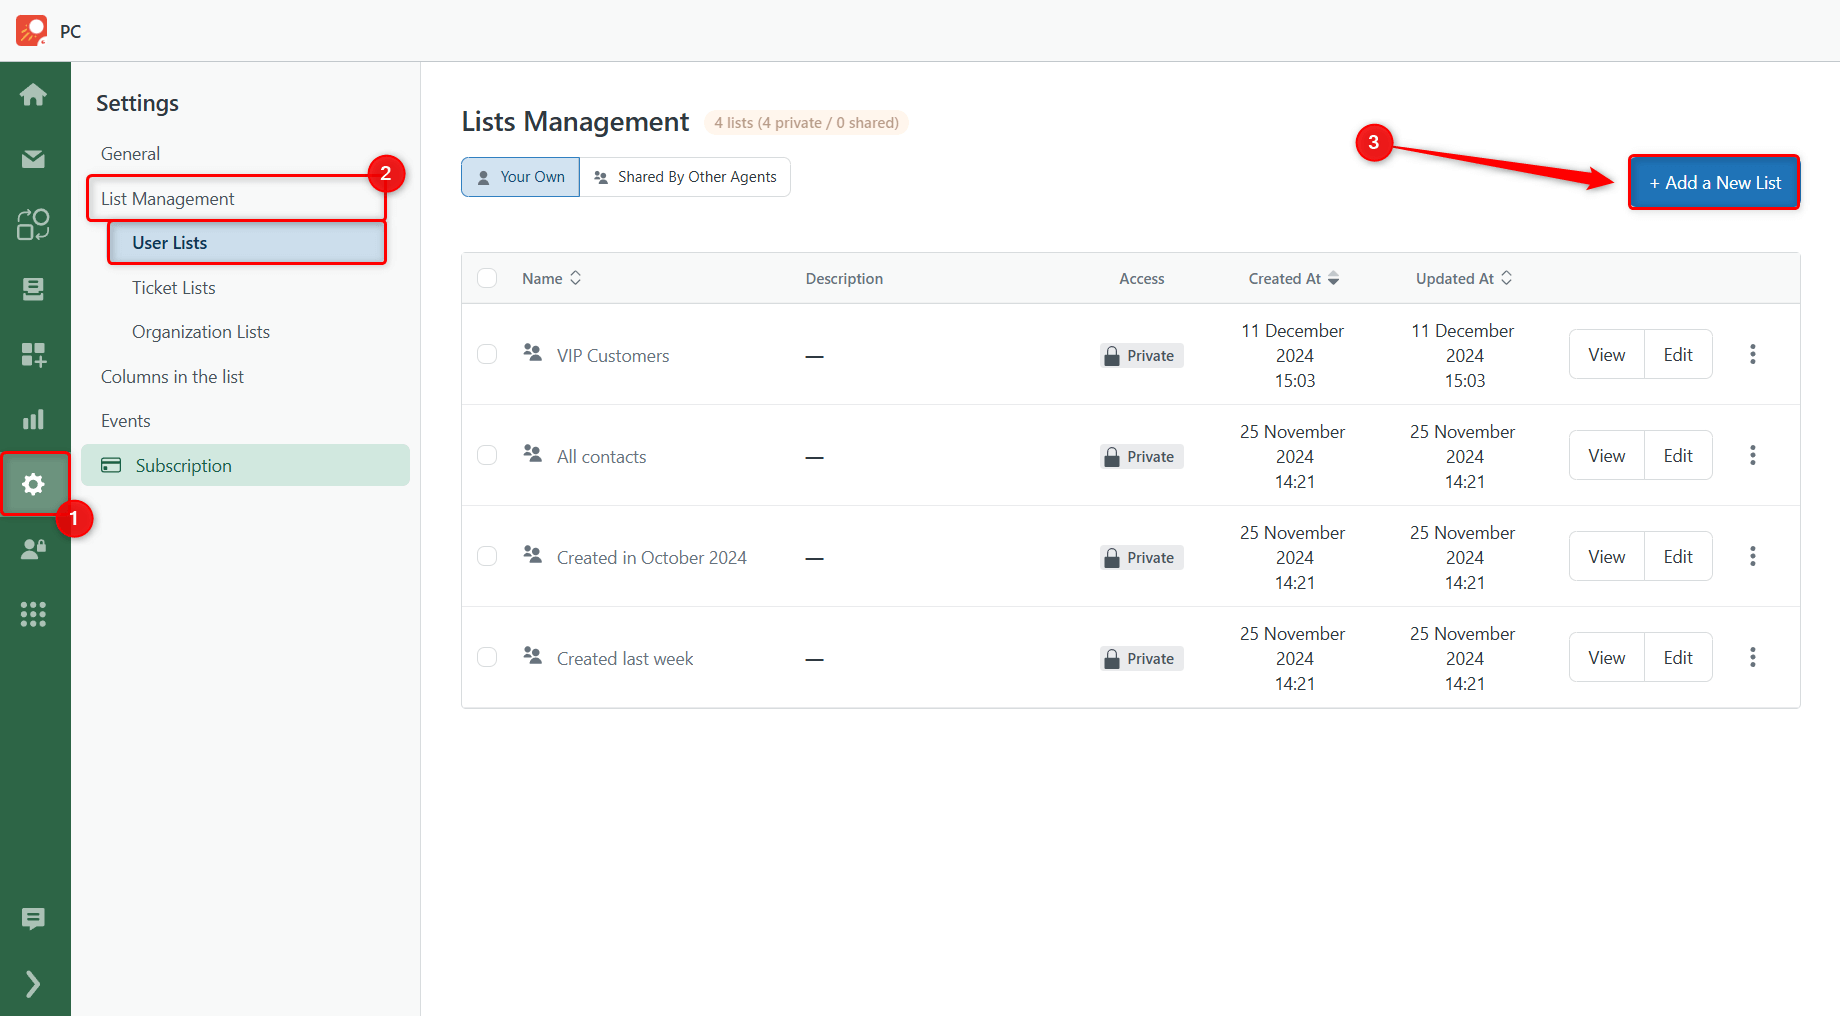
First of all, you have to go to the customer list management menu. To do so, go to Settings > List Management > User Lists > Add a New List. When creating a list, you need to add the Name, Description, and Conditions to match the exact group of people you want to target with your emailing campaign. Now, let’s see how we can filter your contacts using different conditions.
Filter contacts by Tags
The first way to segment your contact list by criteria is to add specific Tags to user profiles. For example, you want to send a special offer to customers using a certain version of your product. To do this, you can manually add a corresponding tag with the name of this product to the users that fall into the desired category. Then, in Proactive Campaigns, you will set the condition to include or exclude users with the needed tag.
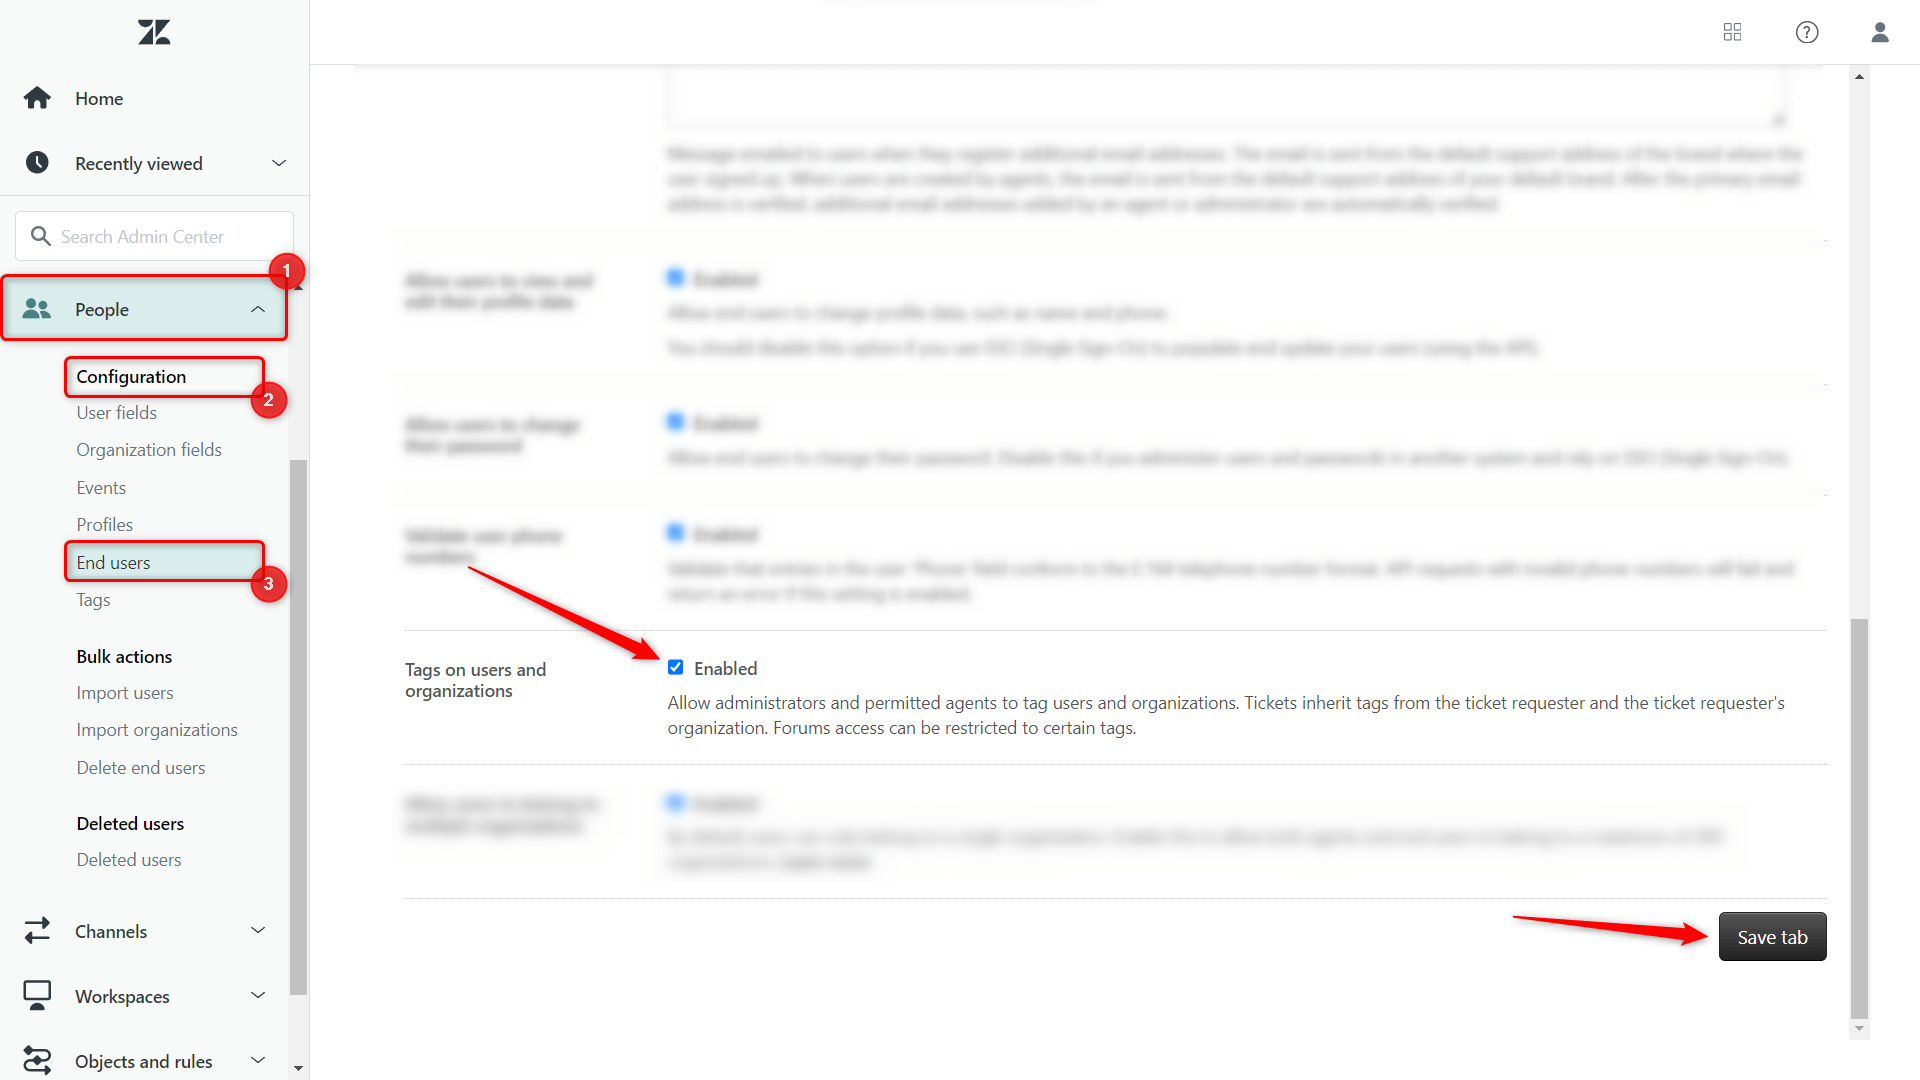
Remember! If you haven’t used the tagging feature in Zendesk before, you need to enable it before creating and adding Tags to Users and Organizations. To do so:
-
- Go to the Admin Center > People > Configuration > End users.
- In the section Tags on users and organizations, click Enabled.
- Click Save Tab.
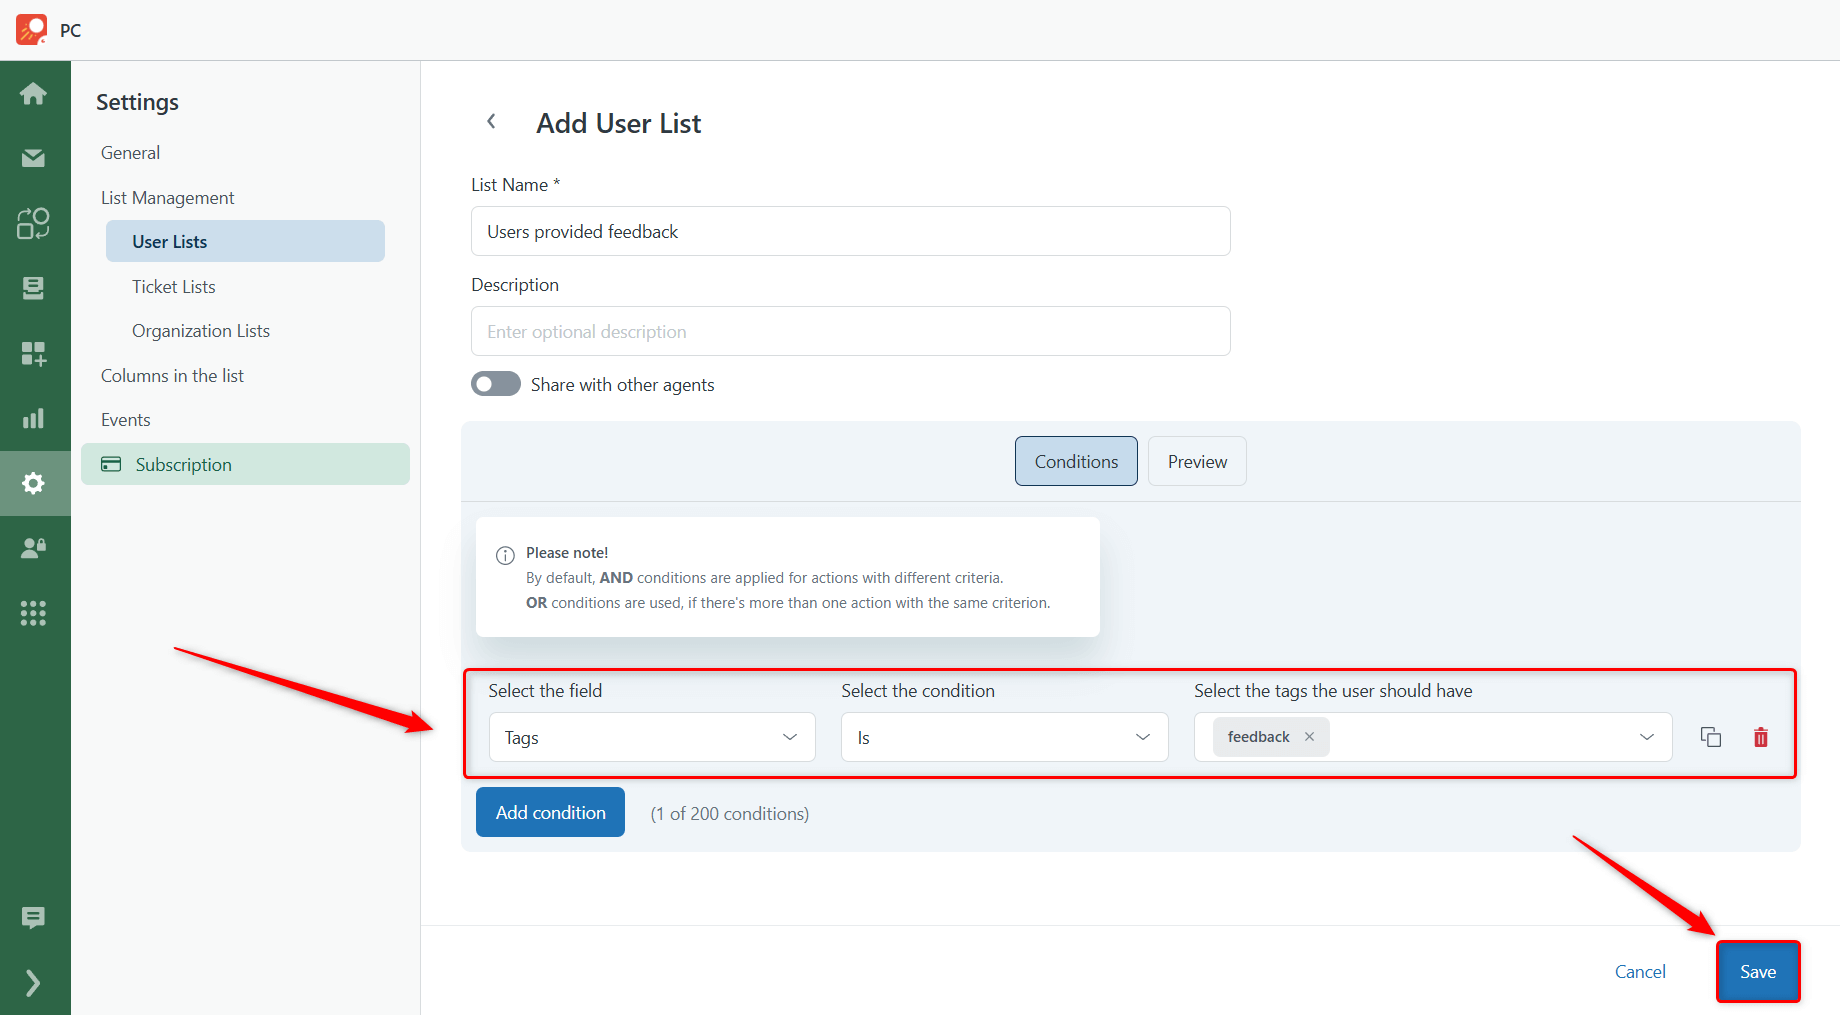
If you have already used the tagging option before, look up the conditions drop-down list for the Tags that fit the requirements of the future email campaign when creating a User List. Then, choose the corresponding value and save:
Filter by Standard Fields (like created_at, updated_at, etc.)
With this method, you don't have to do any manual preparations to make the conditions in the user lists work because the Standard Fields are updated automatically.
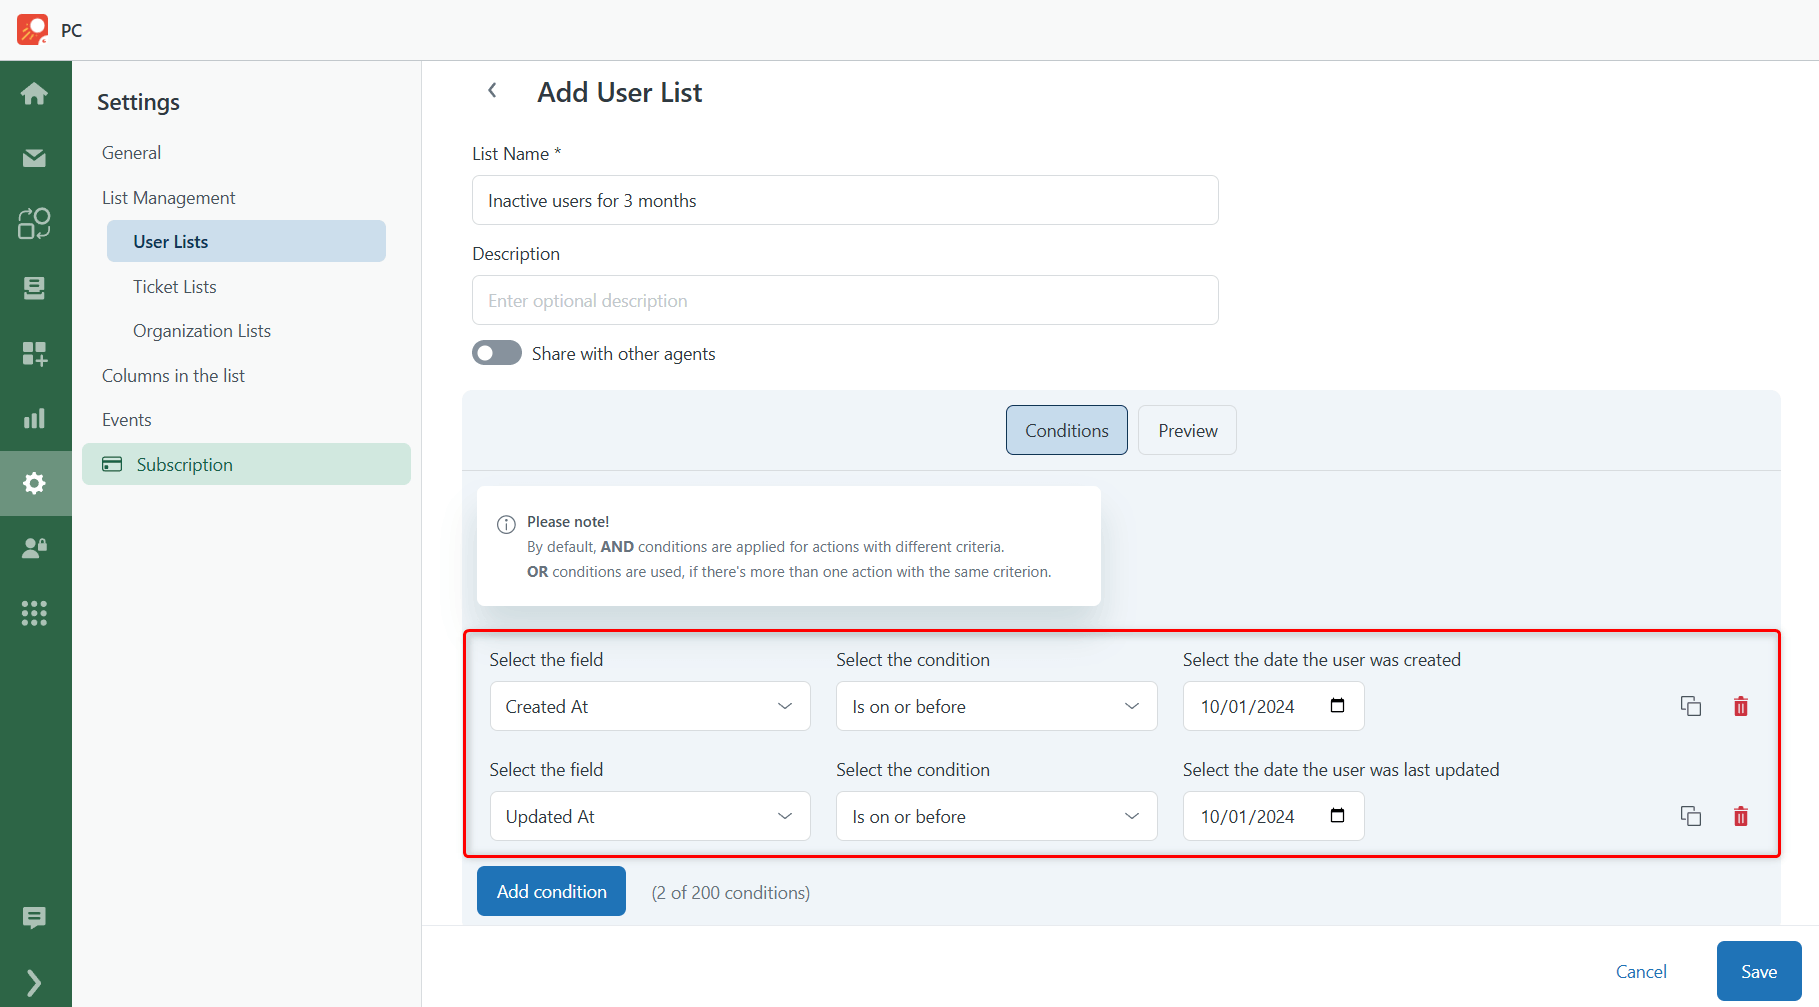
For instance, you want to send out a follow-up email to your old customers who haven’t been in contact with your company for a while to find out if they are still interested in buying some of your products and services. In this case, you can just select the corresponding dates in the Updated At field (with the last time you updated the customer info). See how you can do this:
Filter by Custom User Fields
It is also possible to filter users by setting specific Custom Field values as criteria for forming a contact list in Proactive Campaigns. Custom User Fields allow you to store additional details about your users, such as subscription type, account status, preferences, etc.
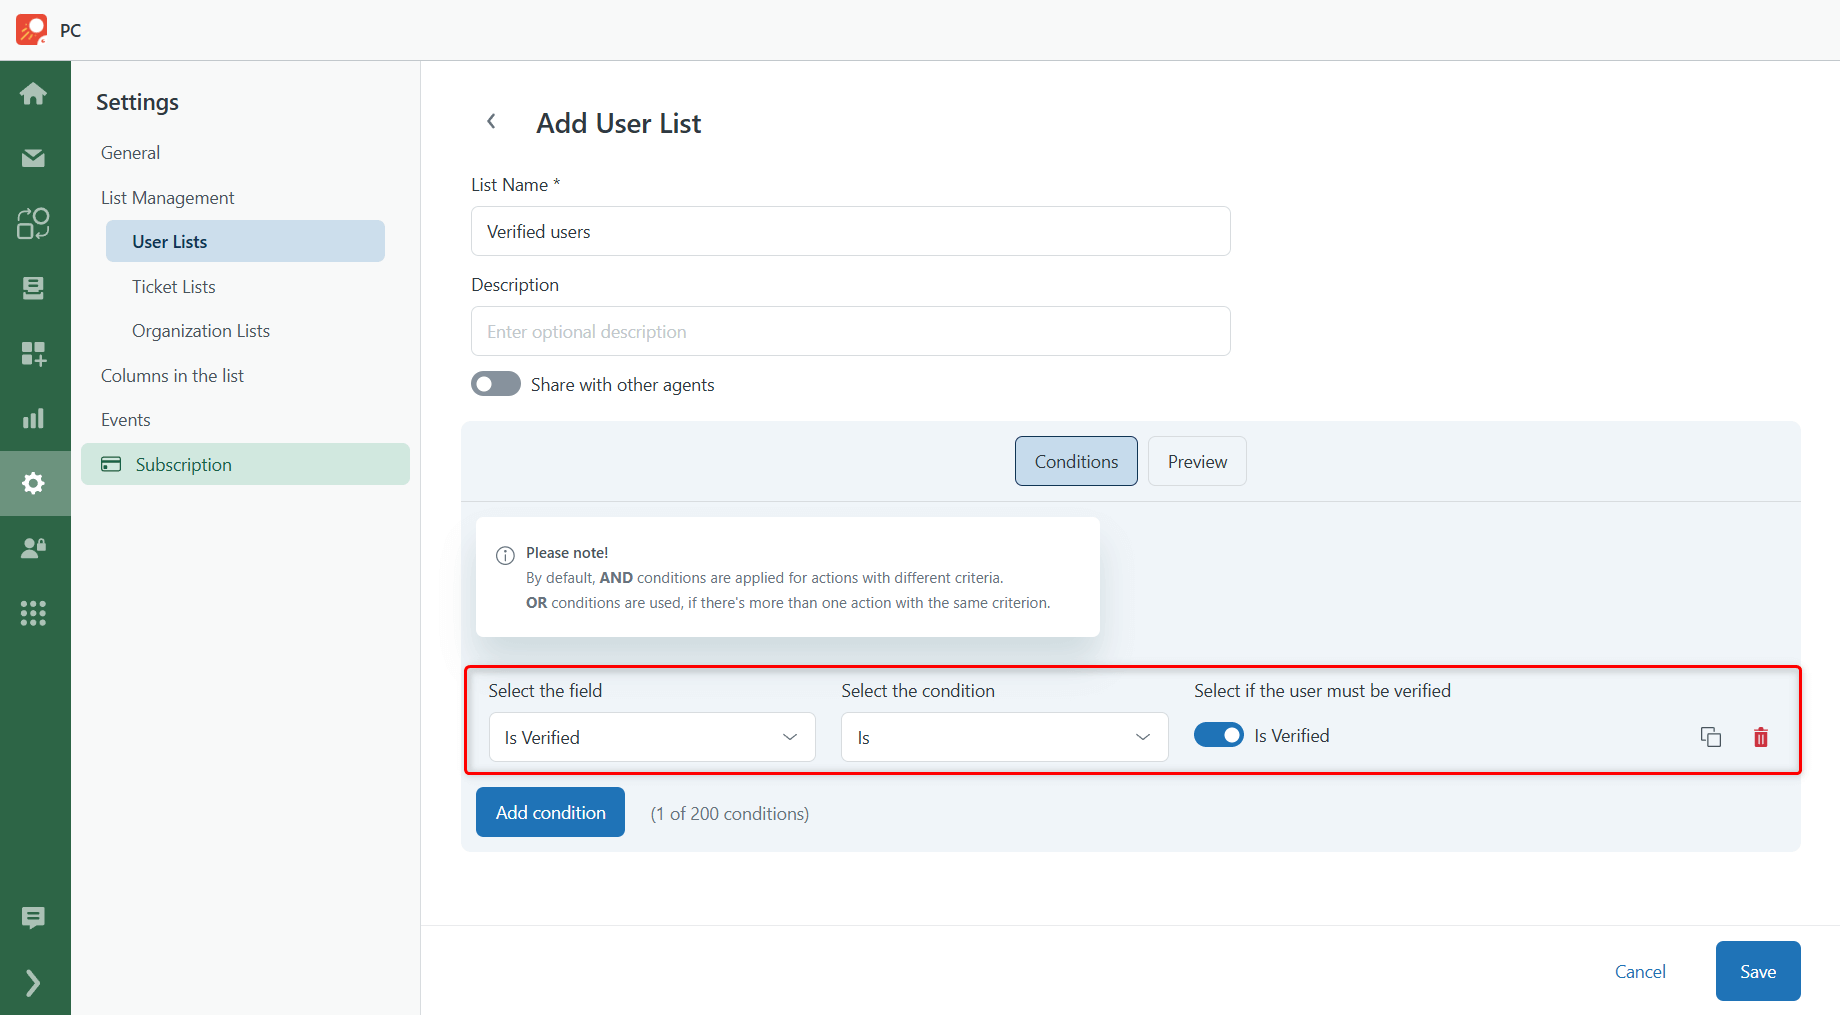
For example, if you want to send an email campaign only to verified users, you could use a custom field like Is Verified. While creating a list, just select it as a condition and toggle on the button to include users marked as verified:
And these are all the basics you need to know about filtering users for different User Lists. You can segment contacts with any option mentioned above or combine several types of conditions for more detailed segmenting. Everything is up to you.
If you have additional questions, feel free to contact our super-friendly support team!


