How to retrieve users in bulk in GDPR Compliance app
-
GDPR Compliance
Bulk Retrieval – our powerful new add-on for the GDPR Compliance app is designed to streamline data exports from Zendesk, making them faster and easier. With just a few clicks, you can now export large volumes of data, saving you time and streamlining your workflows. This article will guide you through everything you need to know to get started. So let's get down to the process.
Please note that this feature is only available to Premium GDPR Users.
Before you start, you should purchase the Bulk Retrieve add-on. Open the app and navigate to Settings -> Available add-ons. You can view your available export storage by selecting the Bulk Retrieve Add-On or purchasing more if needed. Also, you can buy some extra GB by just contacting our team.
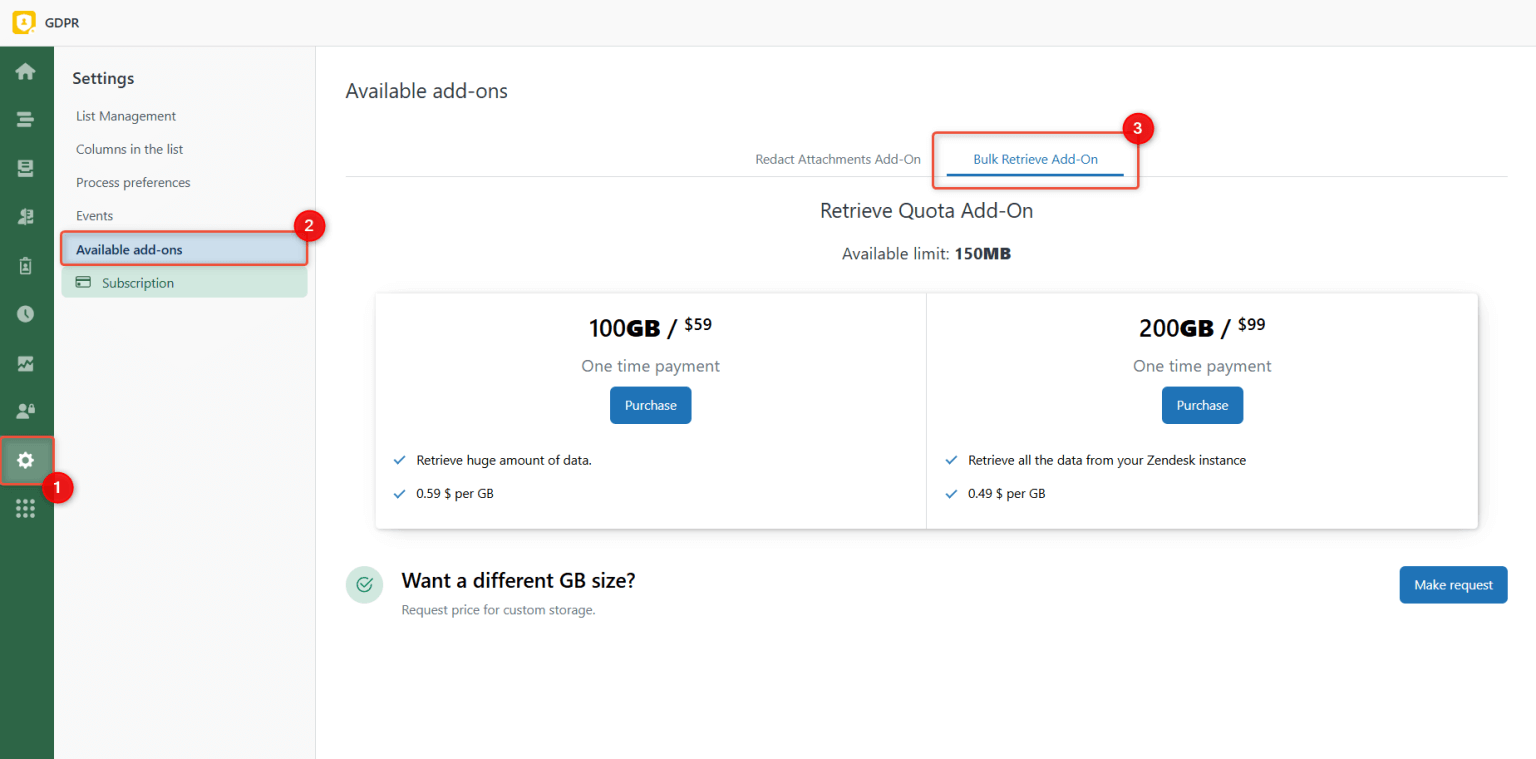
Next, define what data you want to retrieve in bulk. To do this, configure preference presets.
How to configure preferences
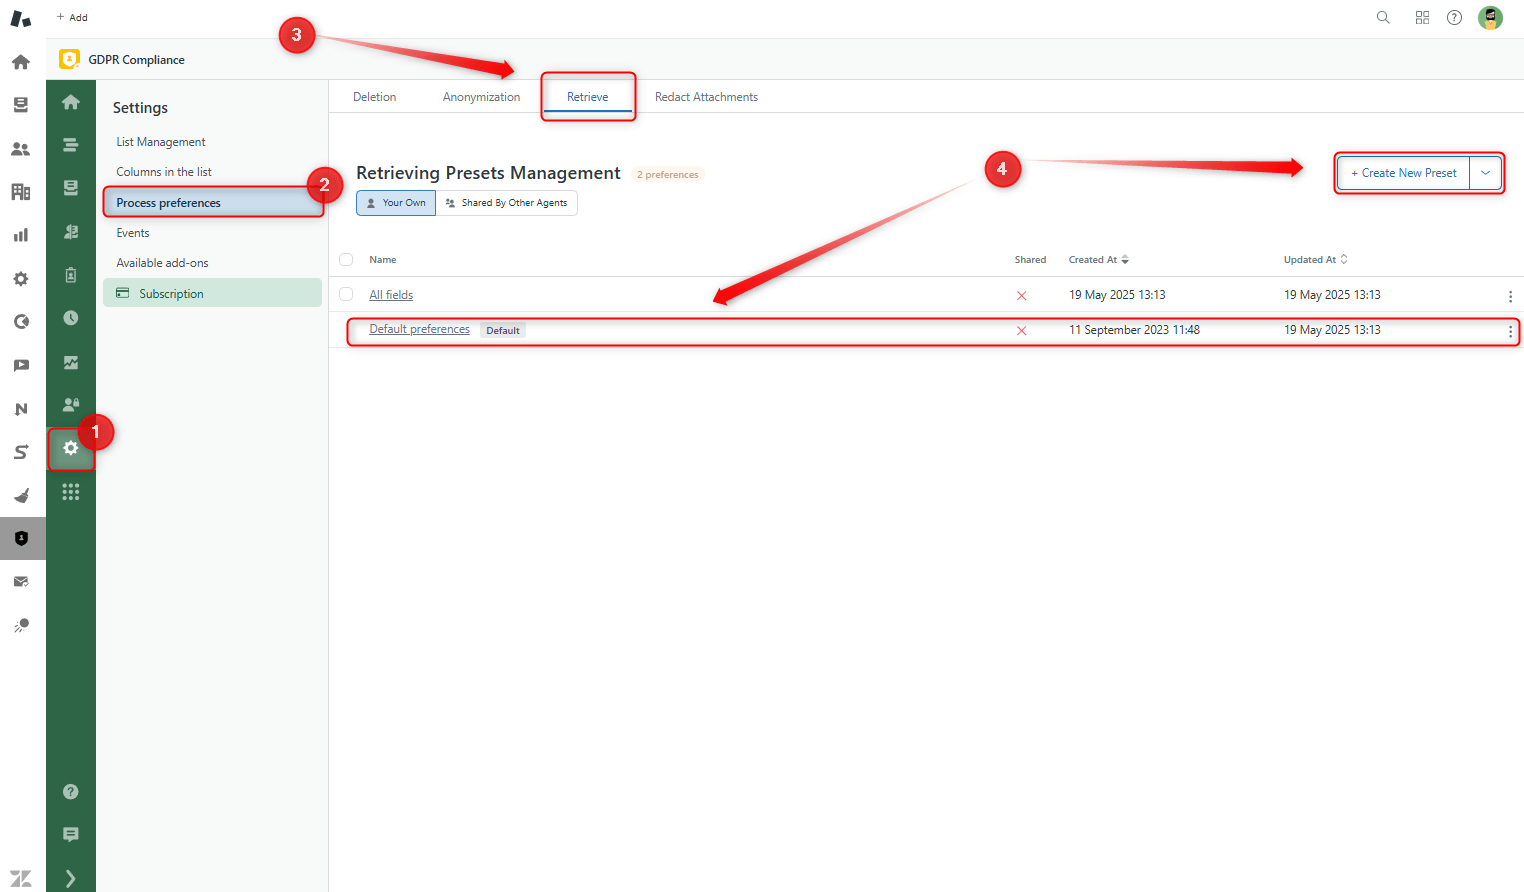
Go to the Settings tab -> Process preferences -> Retrieve tab. On the Retrieving Presets Management page, choose to adjust the default preset or create a new one.
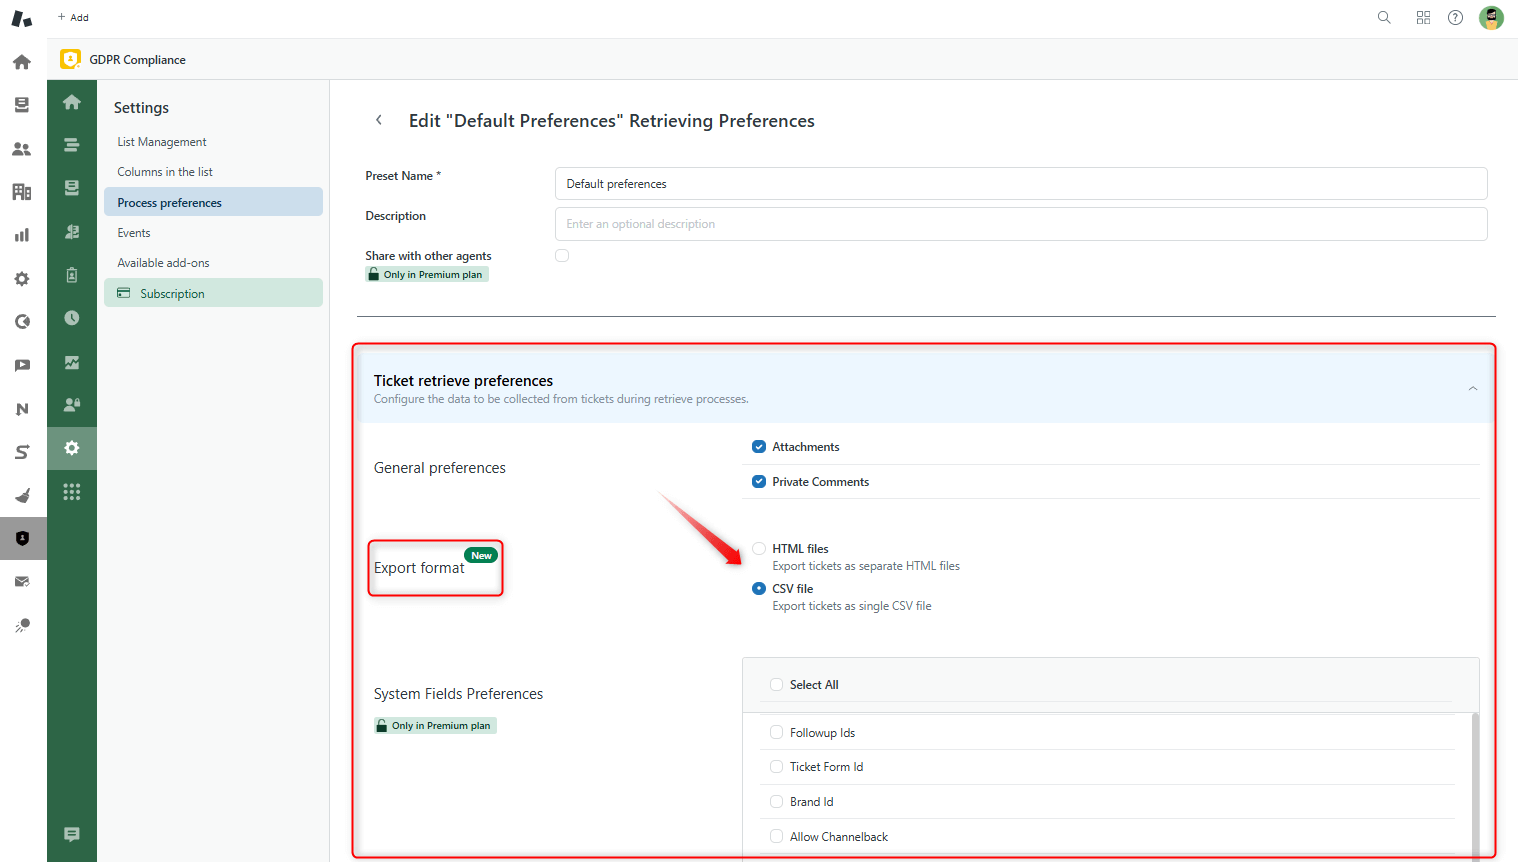
Presets have two sections: Ticket and User retrieve preferences. Select Attachments and/or Private comments in the General preferences of the first one for ticket retrieval. Additionally, there is a new option that allows you to select the Export format of your file.
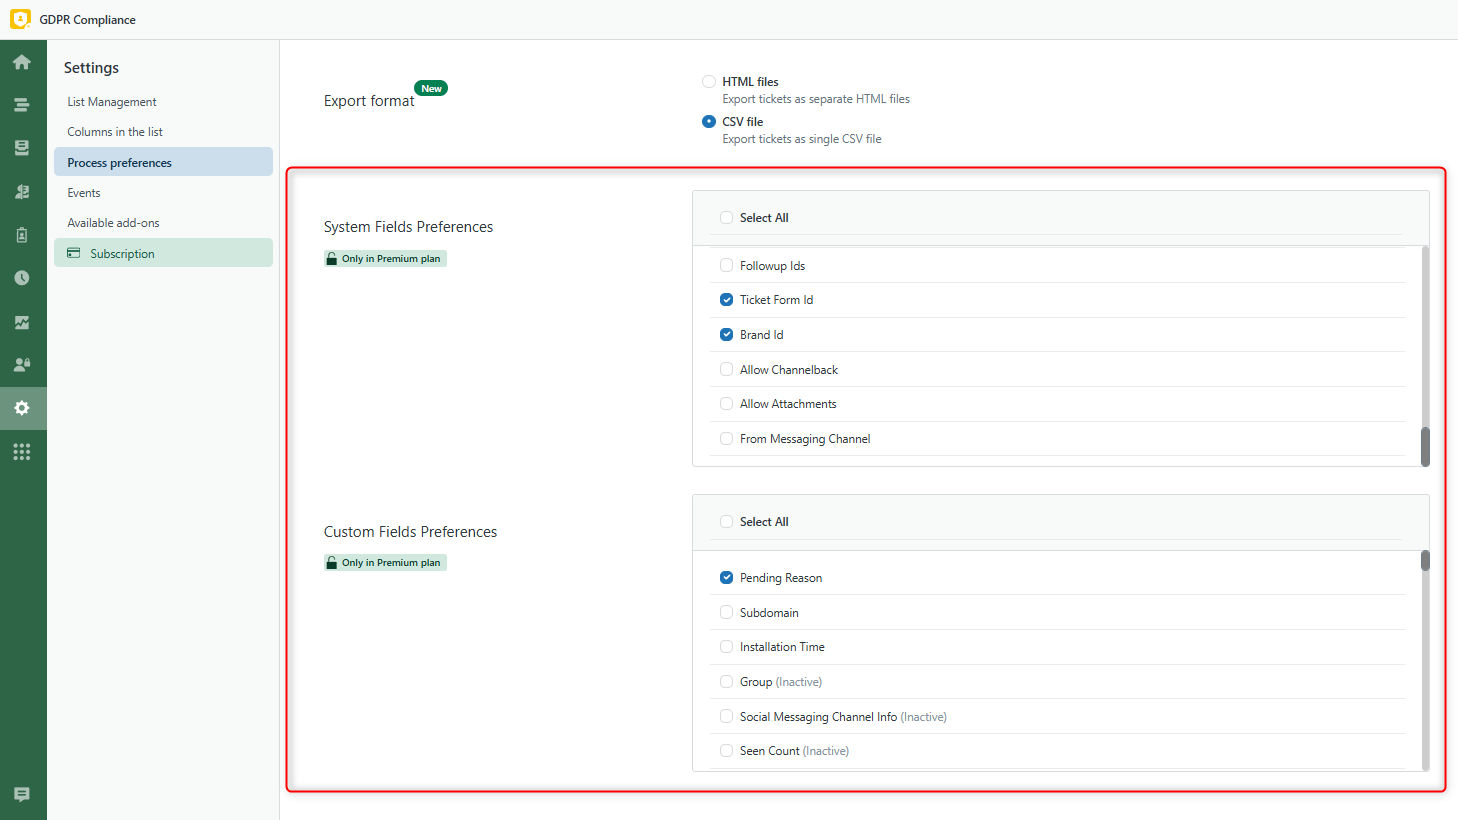
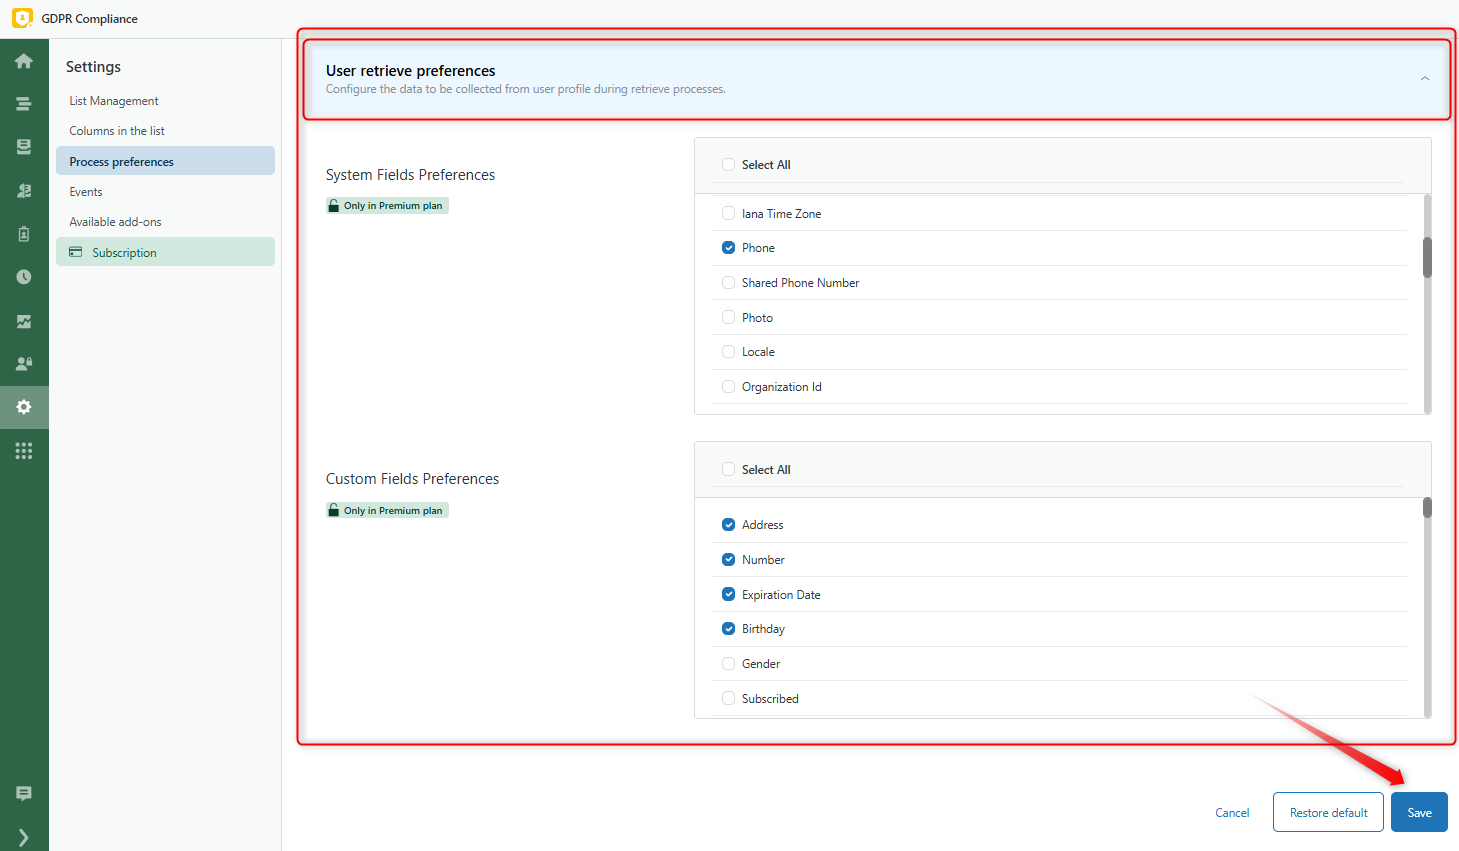
Additionally, you can choose System Field Preferences and Custom Field Preferences to retrieve only the required data.
Do the same with the User retrieve preferences and save the changes.
Finally, you can go through the retrieval process.
How to start bulk retrieval
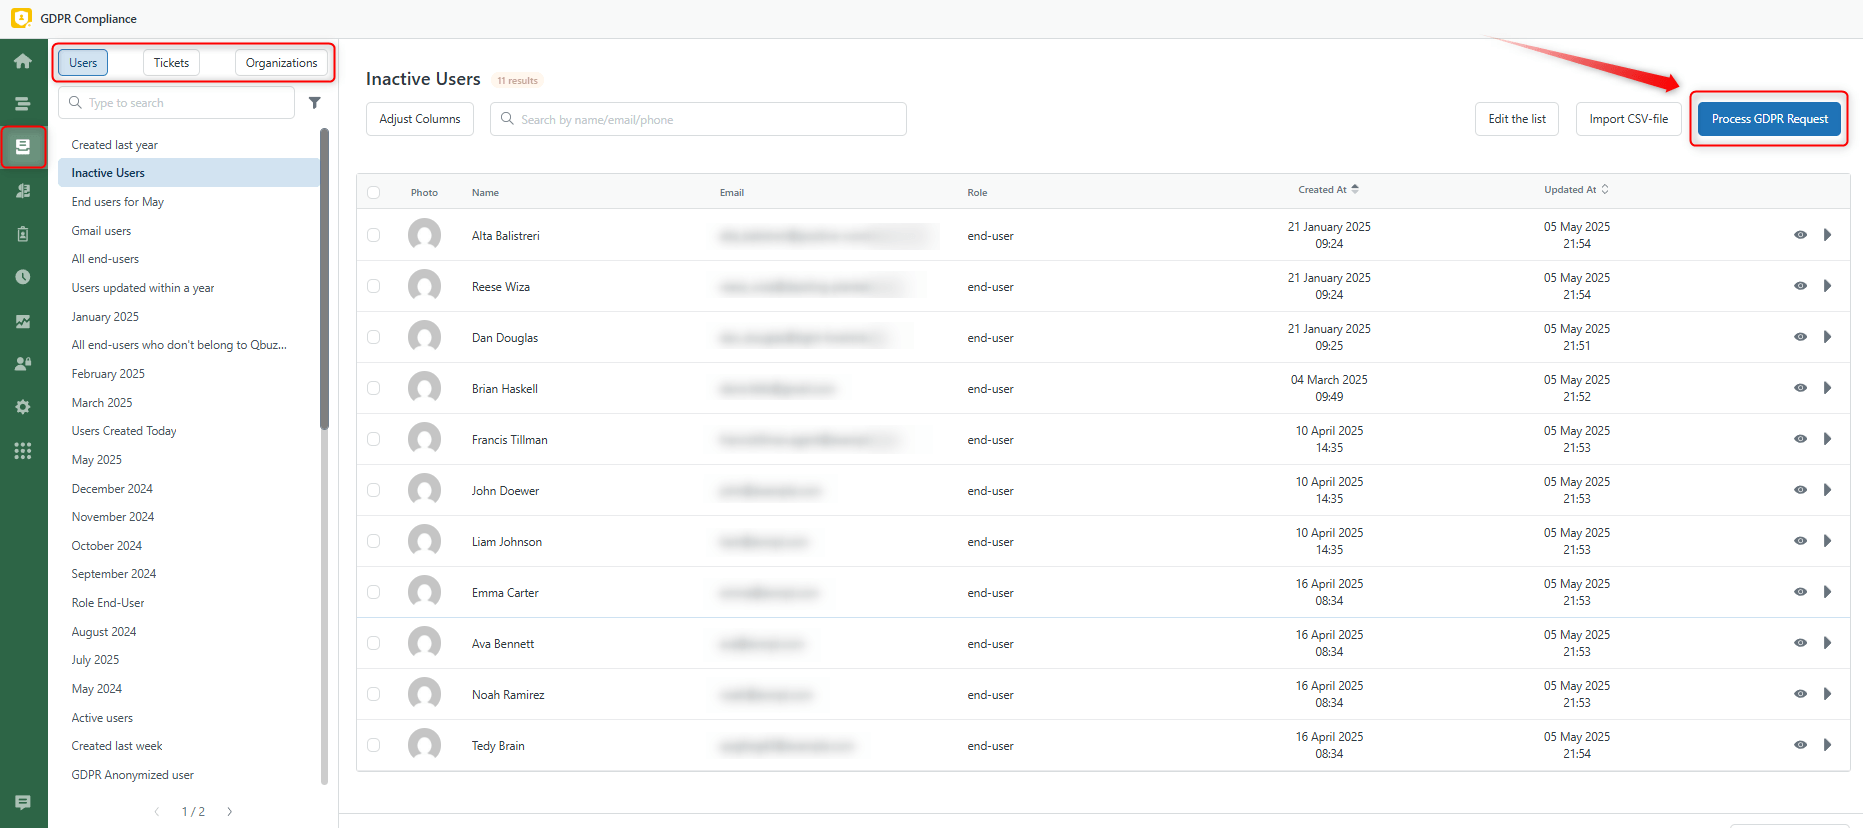
You can start retrieving users' data only from one place - lists in the GDPR app. So, go to the User, Ticket, or Organizations list in the GDPR app -> select the needed list -> click on Process GDPR Request.
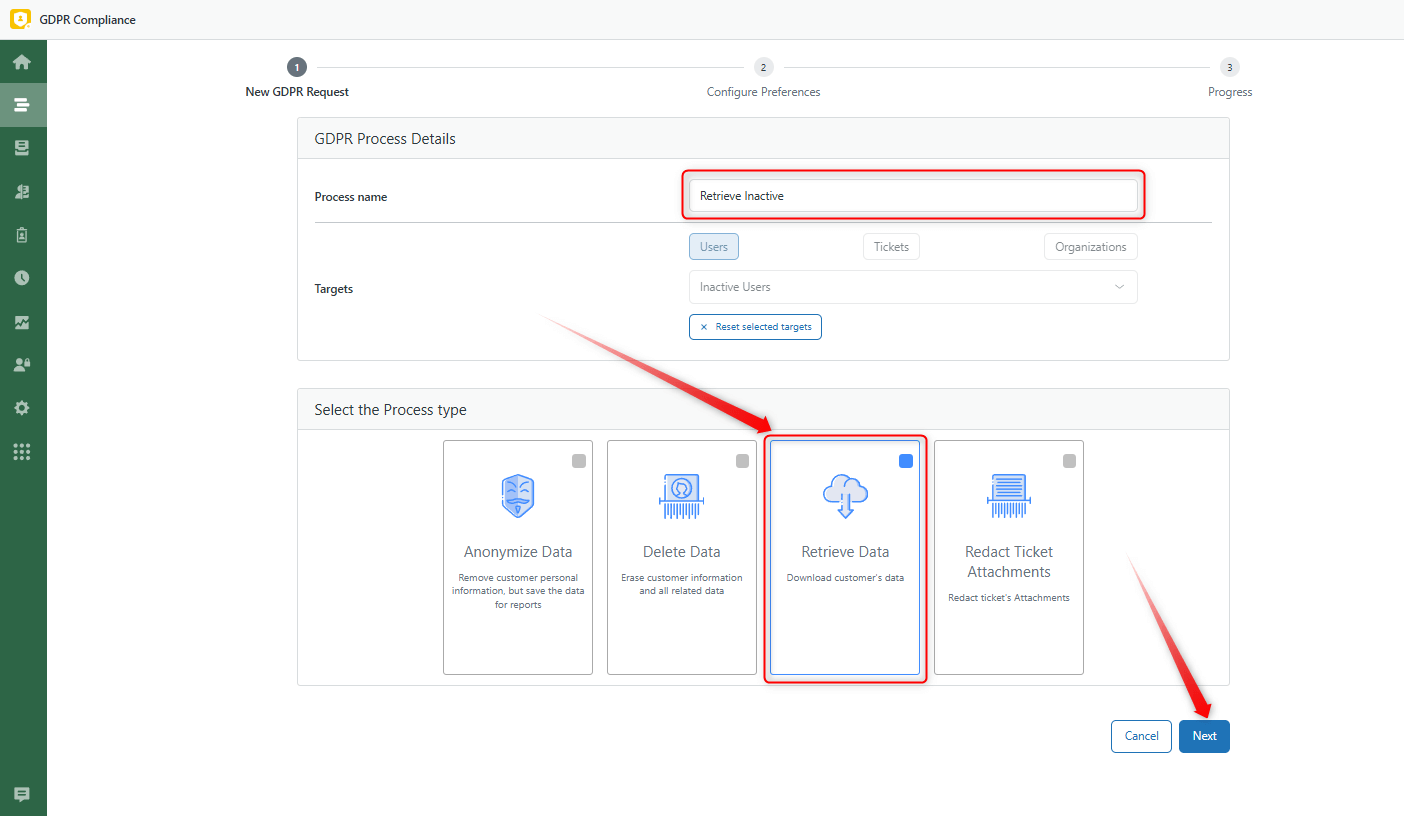
Then, name the process, and you’ll see the active process type, Retrieve Data. Select it and click Next.
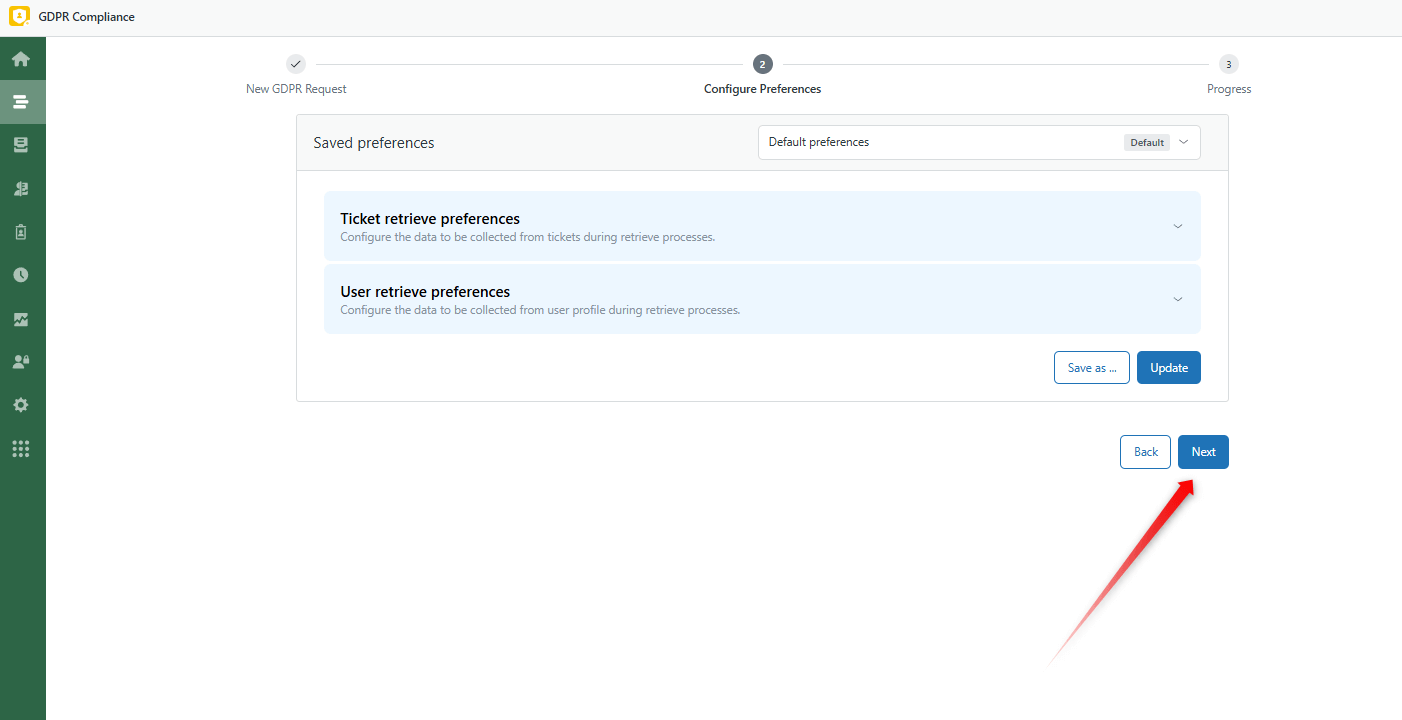
You can also update your Preferences or choose a different preset during the second step. Click Next here.
Finally, you’ll see all the process details. Click Start Process and Confirm. Then, wait until the process is complete and click on 'Download archive'.

That’s all. The archive has been successfully saved to your computer.


