How to Create and Use Process Preference Presets
GDPR Compliance allows you to anonymize, delete, or retrieve data in Zendesk. To simplify these processes and speed up the preparation stage, we’ve added a new feature to it. Now, you can create presets for process preferences.
Sometimes, a department within a company only requires ticket anonymization, while others may need to remove user data without impacting ticket information. In such cases, you no longer need to change the settings every time. Just create a number of presets based on your goals and select any before processing. Here’s how you can do it.
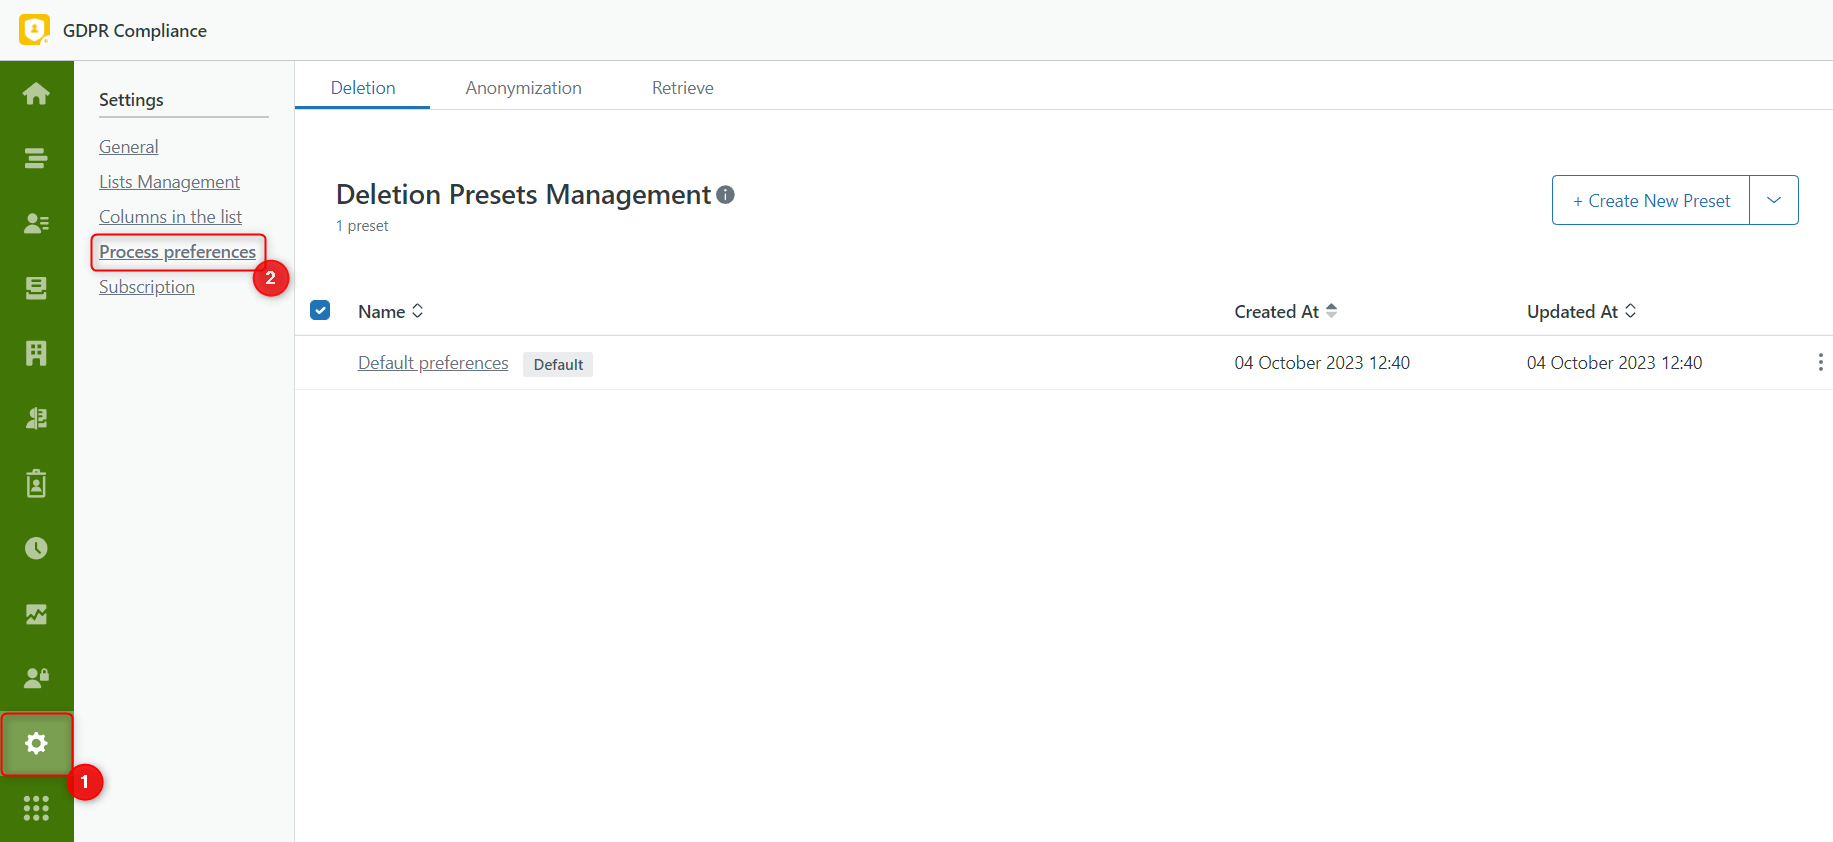
After you’ve opened the GDPR Compliance app, click the Gear icon > Process preferences to reach the Settings page.
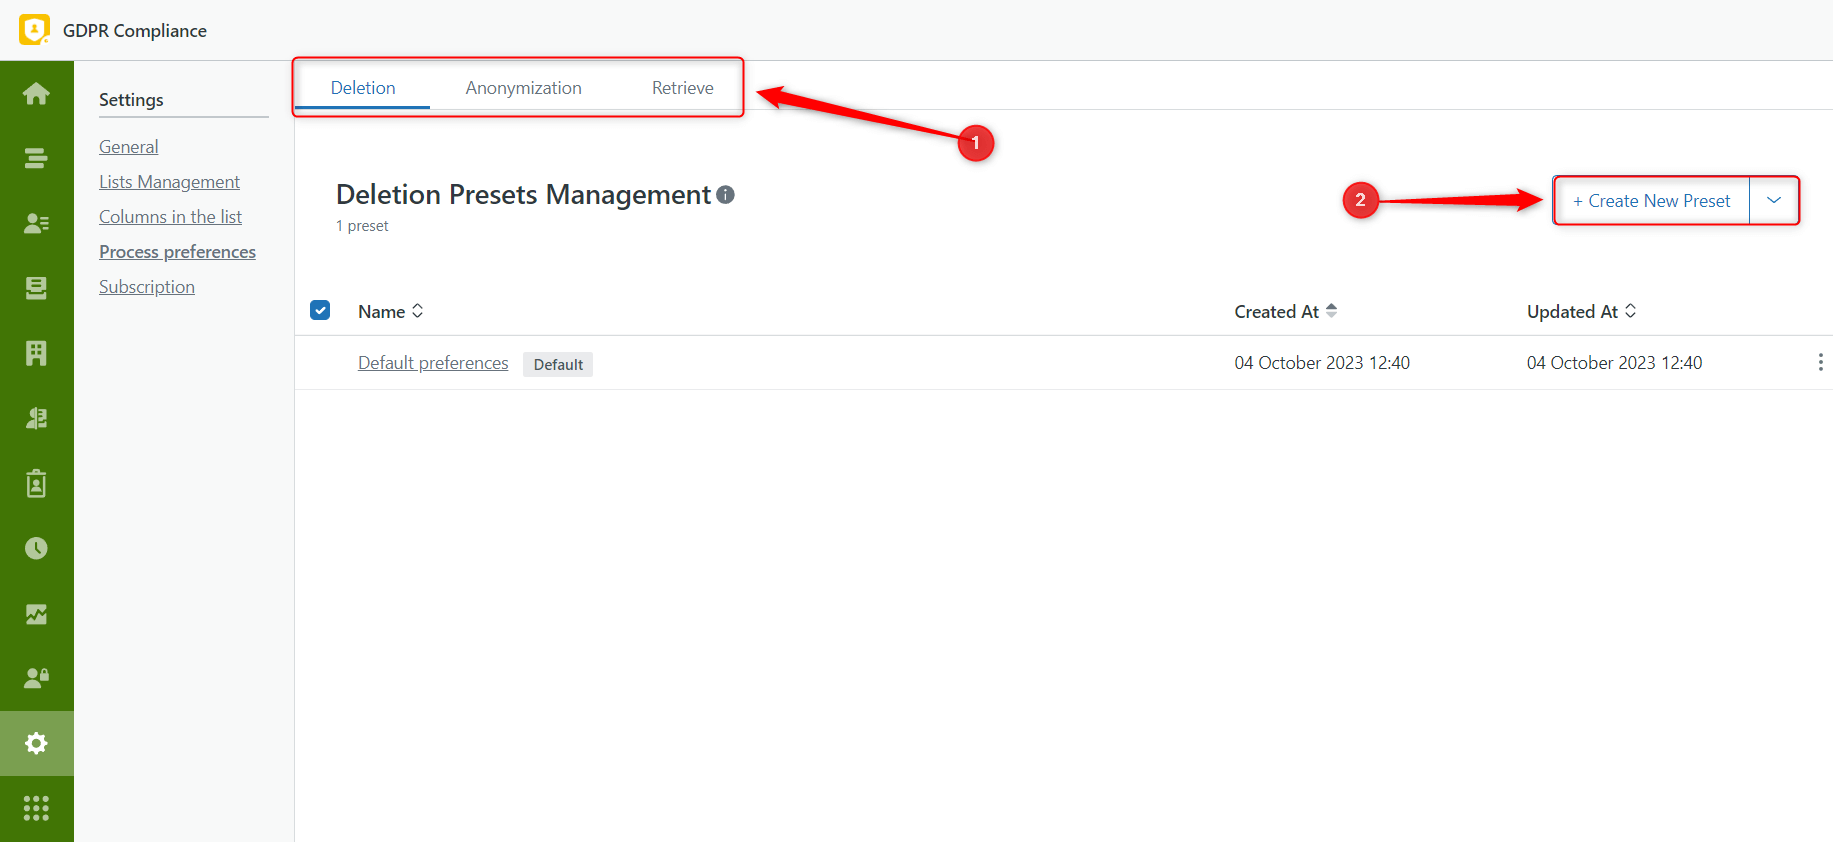
On the top of the page, you can find tabs with three types of processes:
- Deletion
- Anonymization
- Retrieve
Select the one for which you want to create a preset and click Create New Preset.
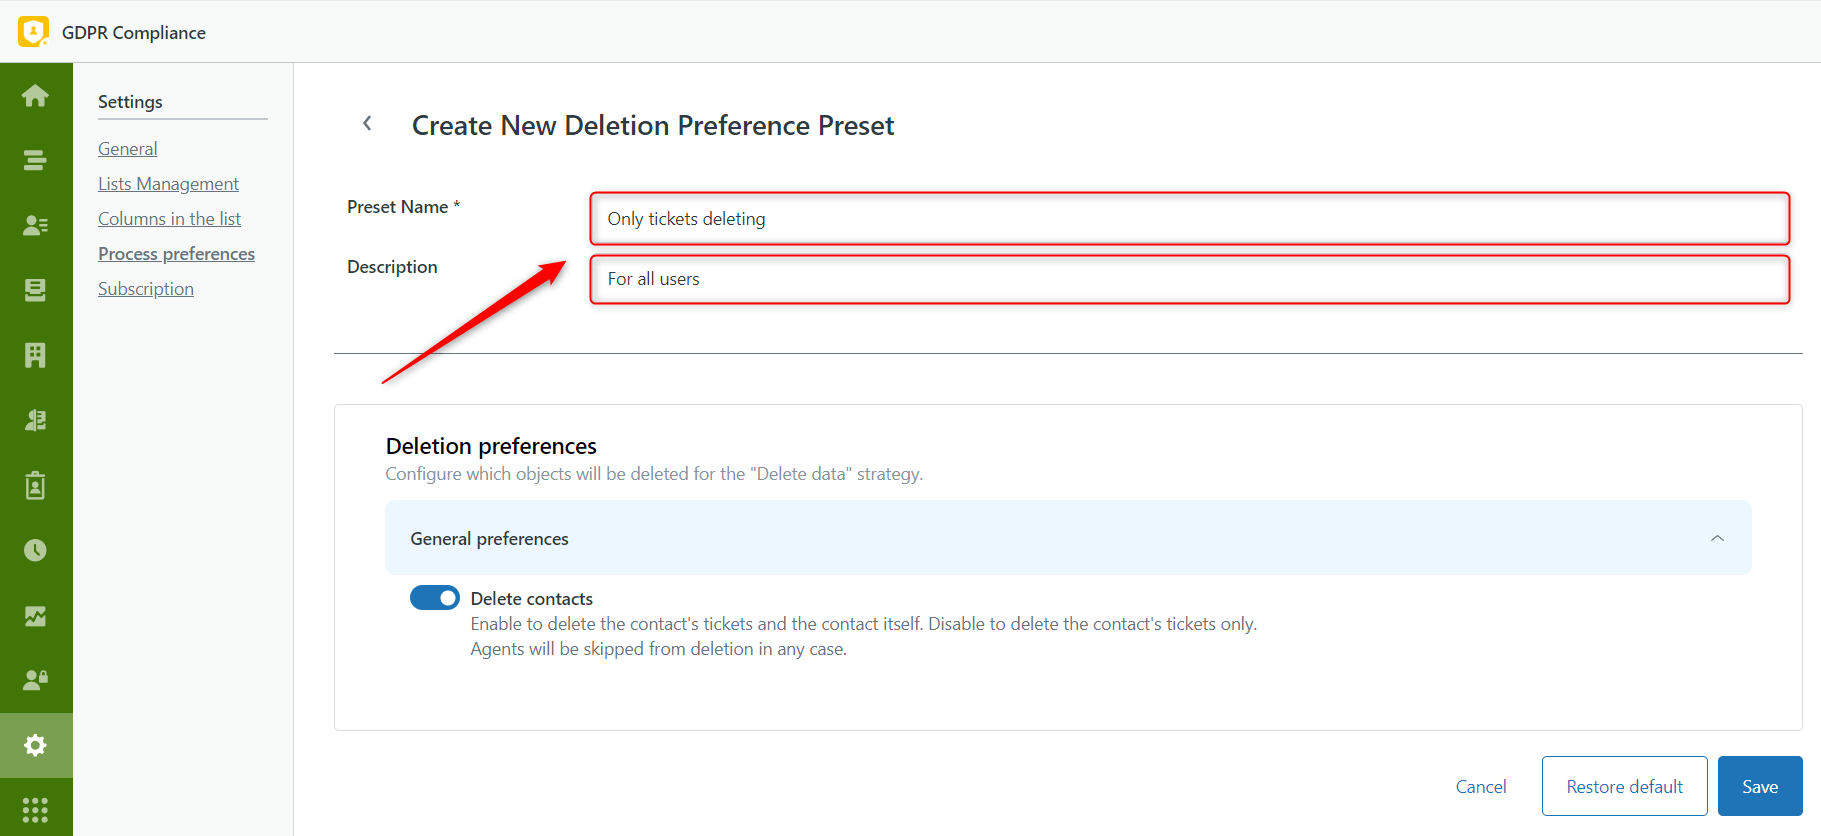
To start, type in Preset Name. Then, you can add extra information in the description field, but this is not required.
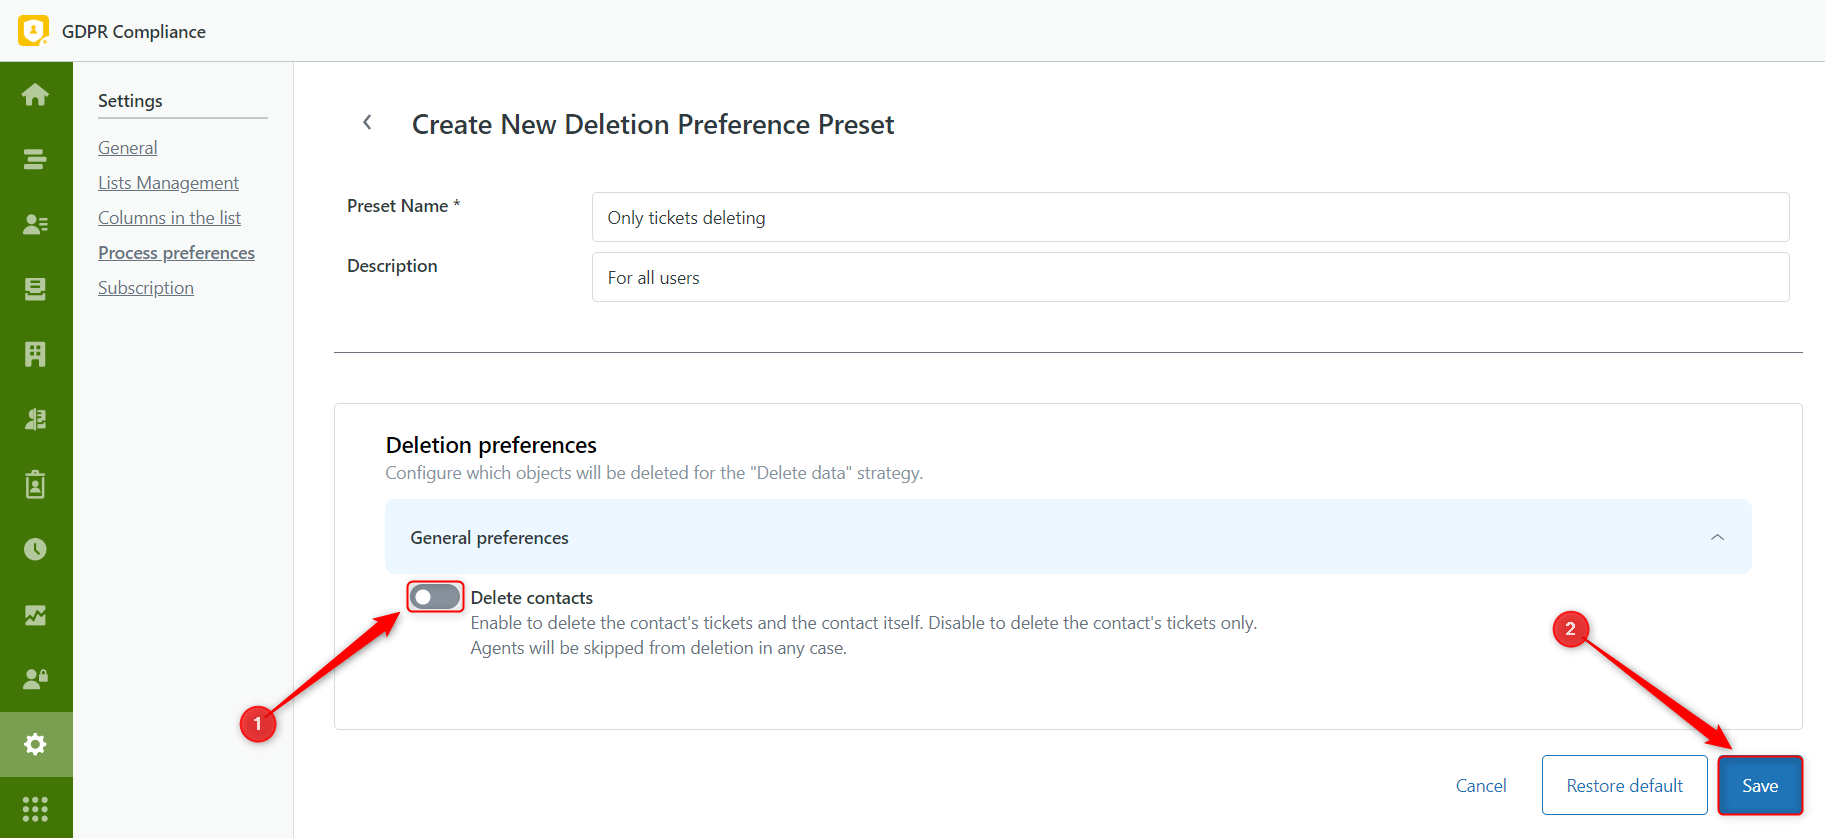
Let's begin with Deletion preferences. So, if you want to delete a contact's tickets and the contact itself, leave this option enabled. But to delete only the contact’s tickets, disable it by clicking the button. To finish, click Save.
Next, we’re going to discuss the Anonymization preset settings.
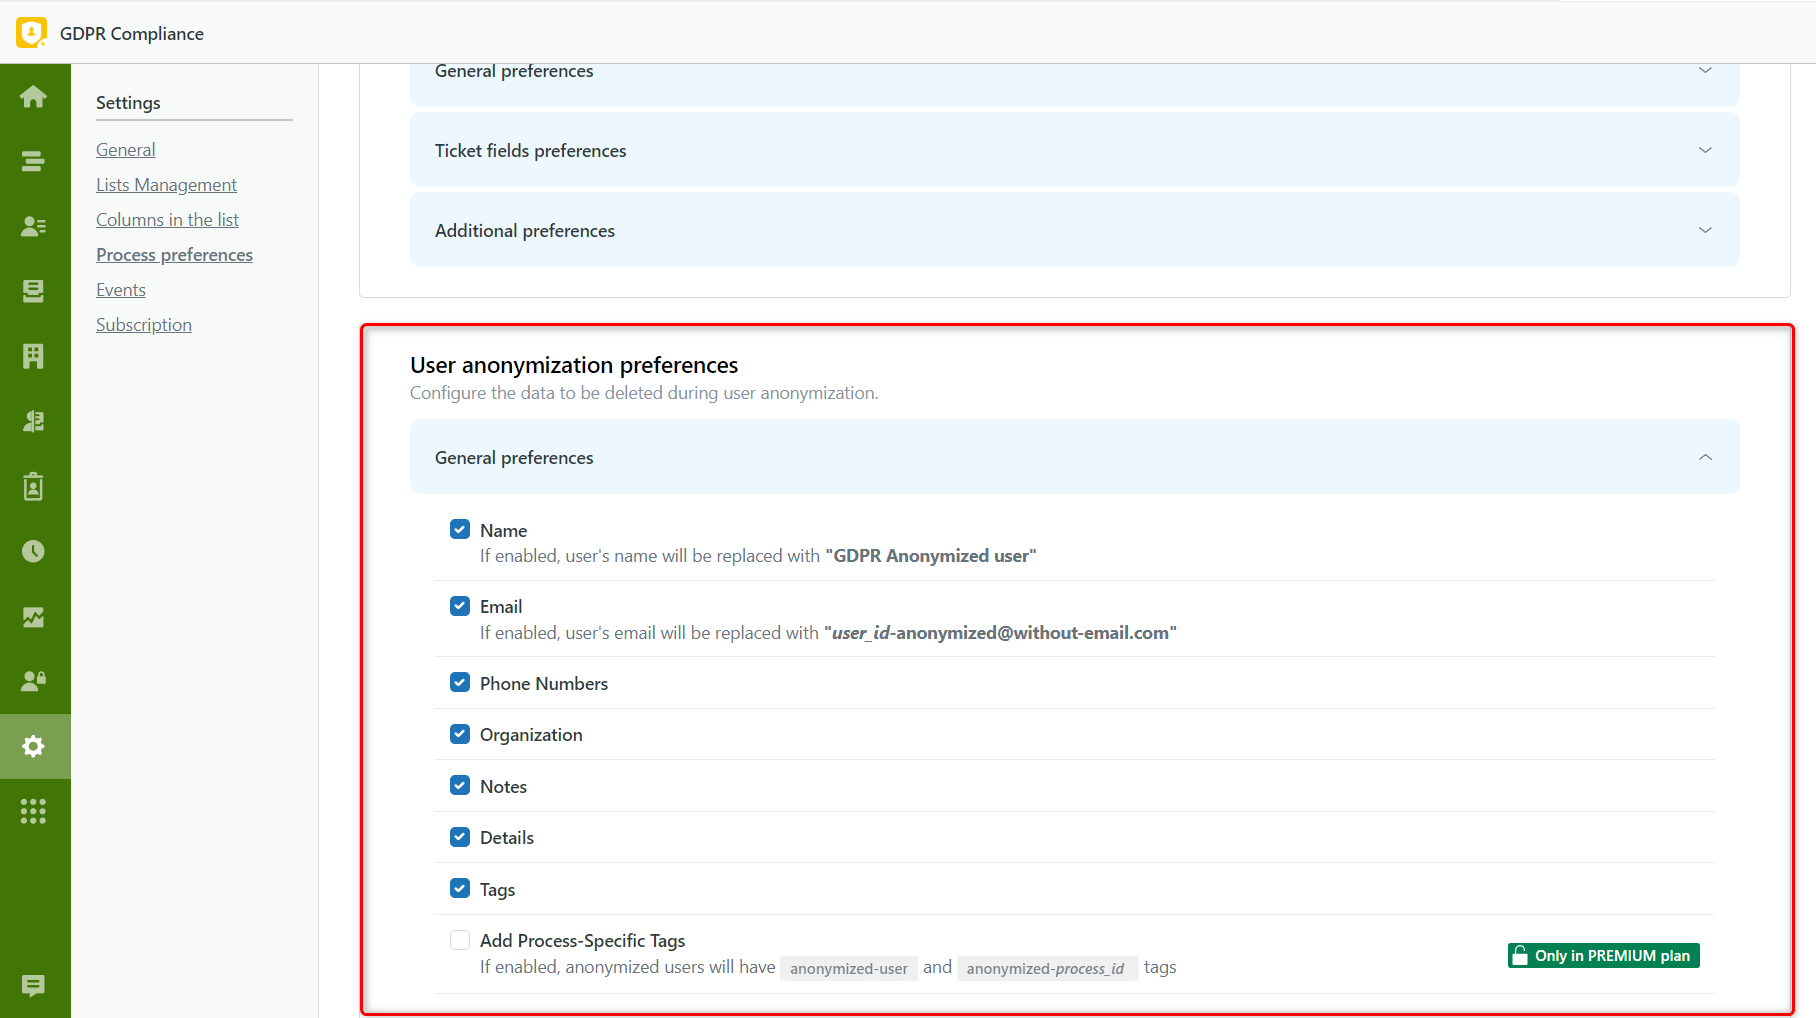
In the Ticket anonymization preferences, there are categories of General preferences, Ticket fields preferences, and Additional preferences in which you need to configure the data you want to remove during ticket anonymization.
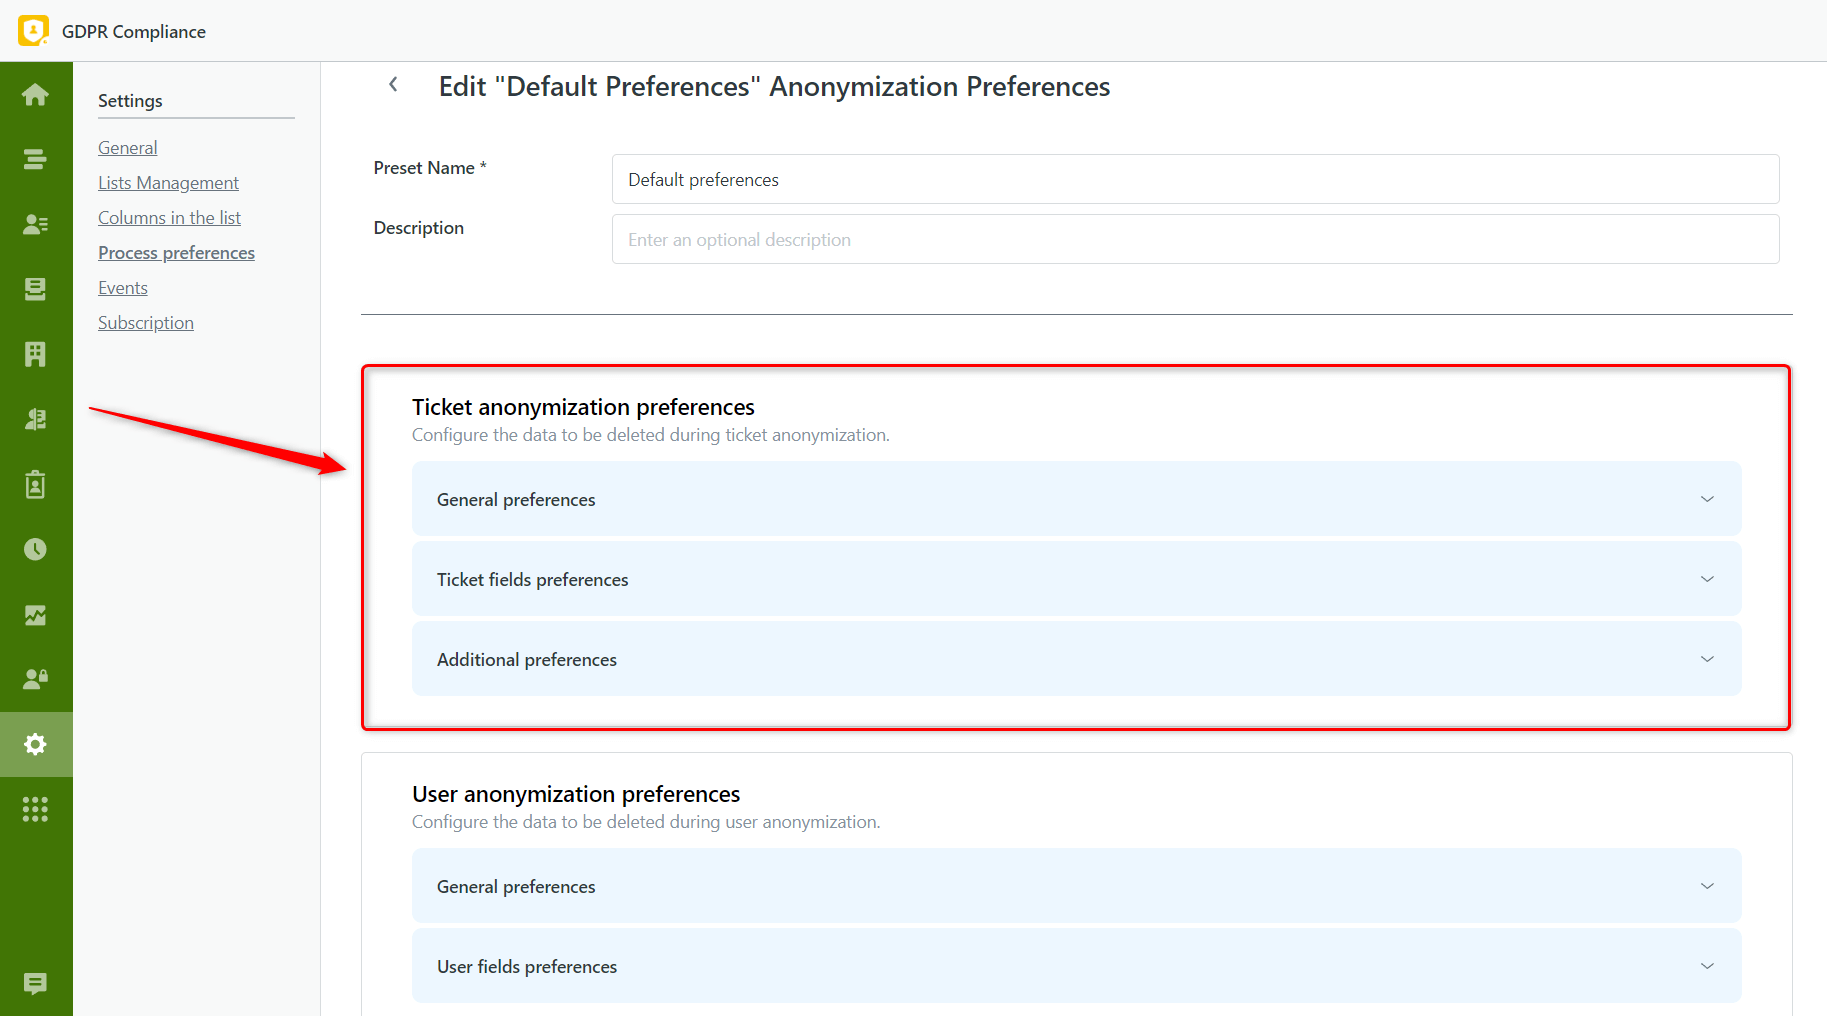
So, click on these categories and mark the options in the dropdown menus that should be deleted when anonymizing tickets.
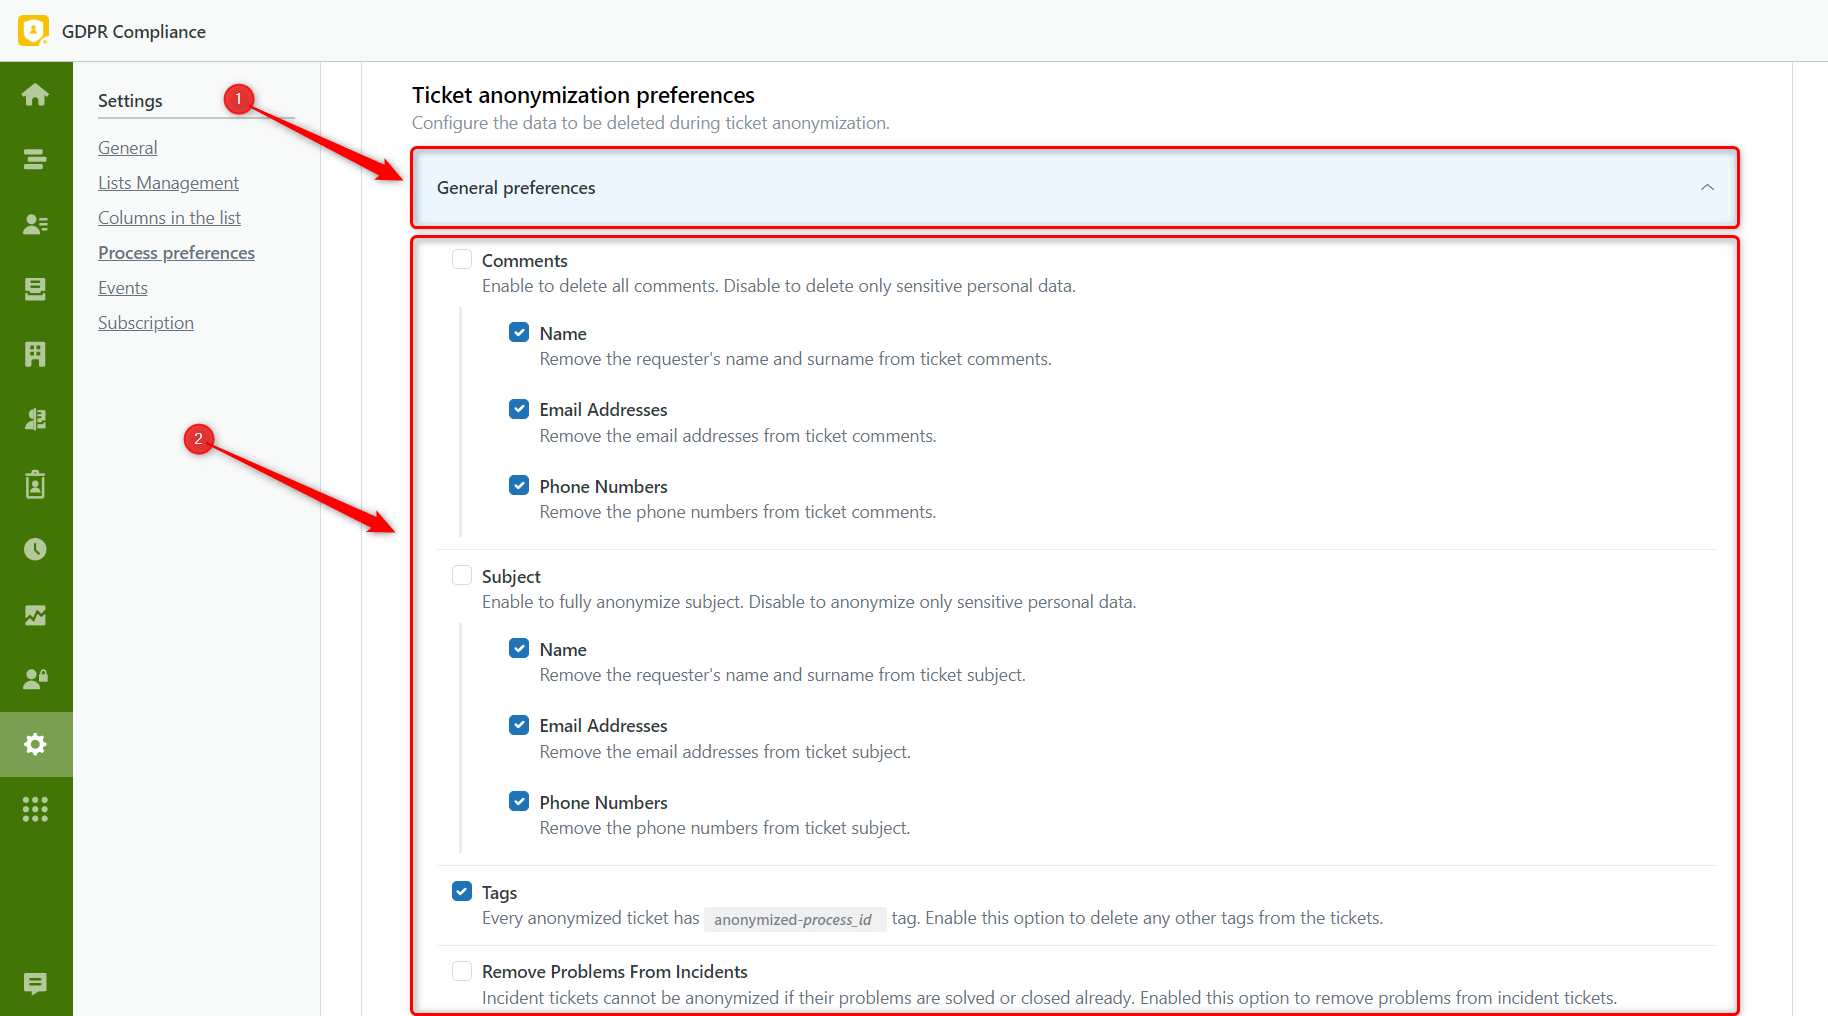
Do the same with User anonymization preferences to specify the data you want to delete during contact anonymization and save the settings.
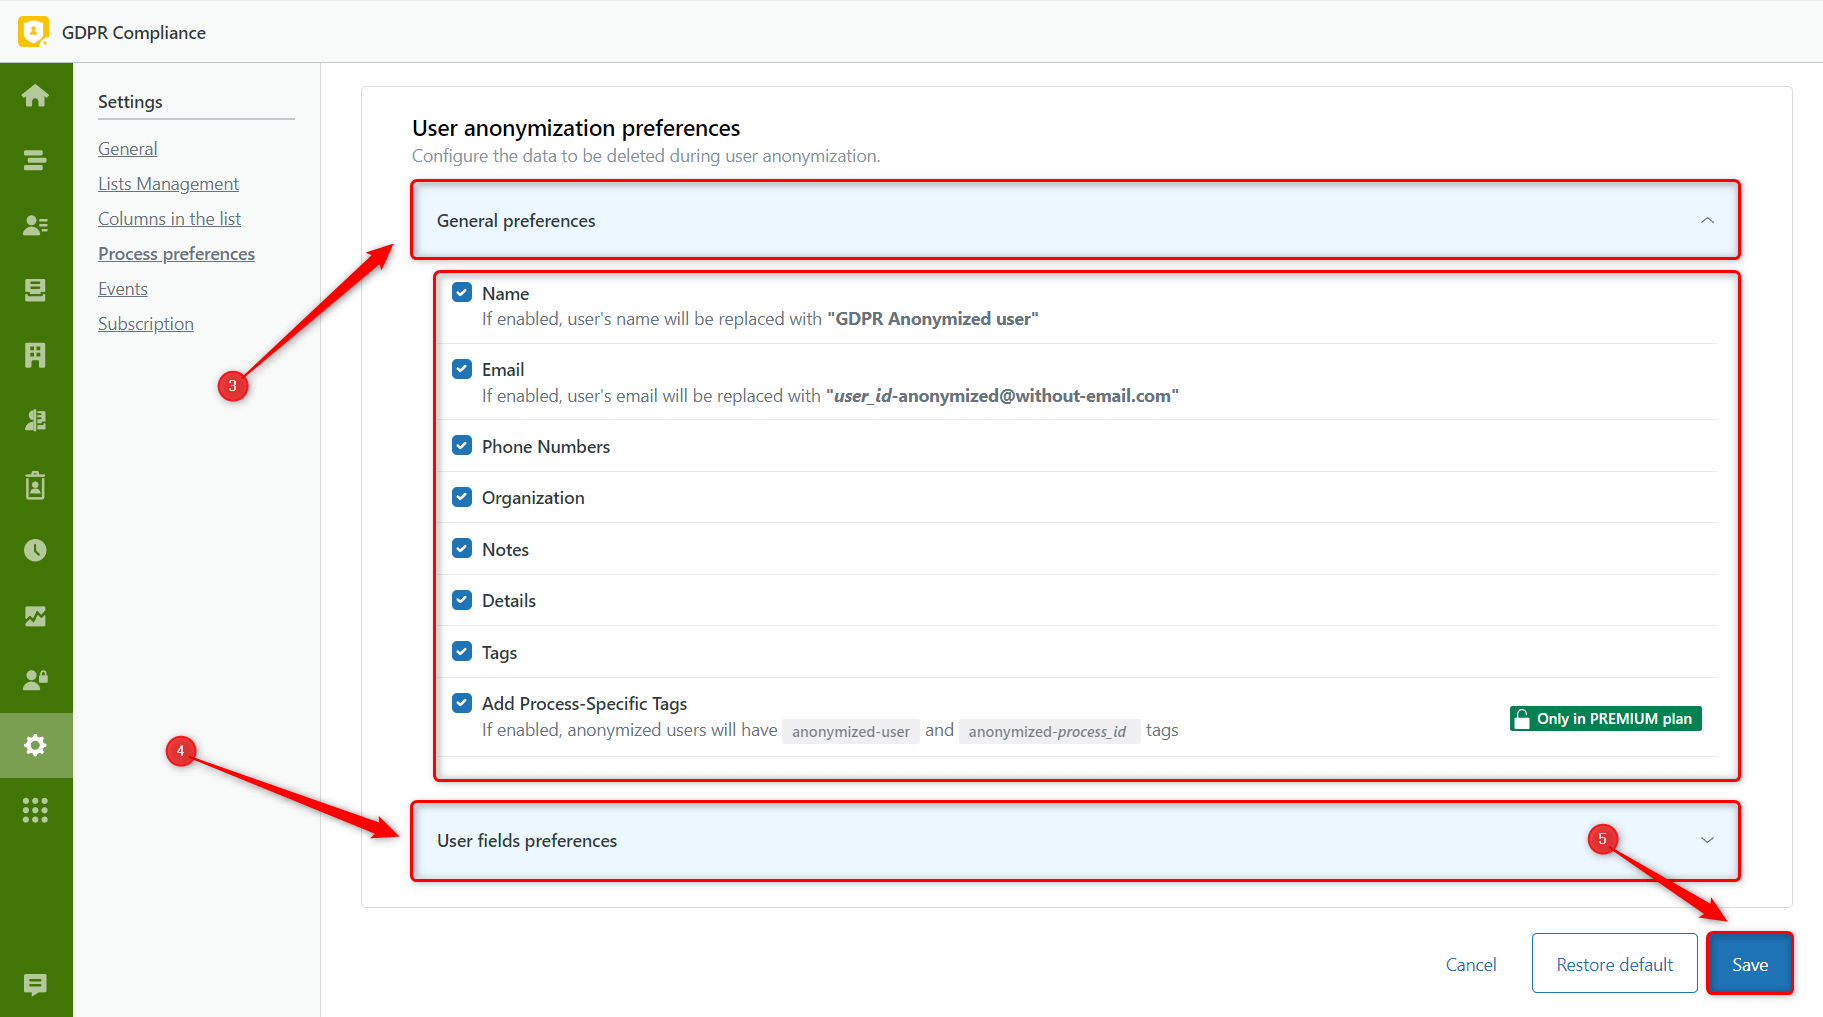
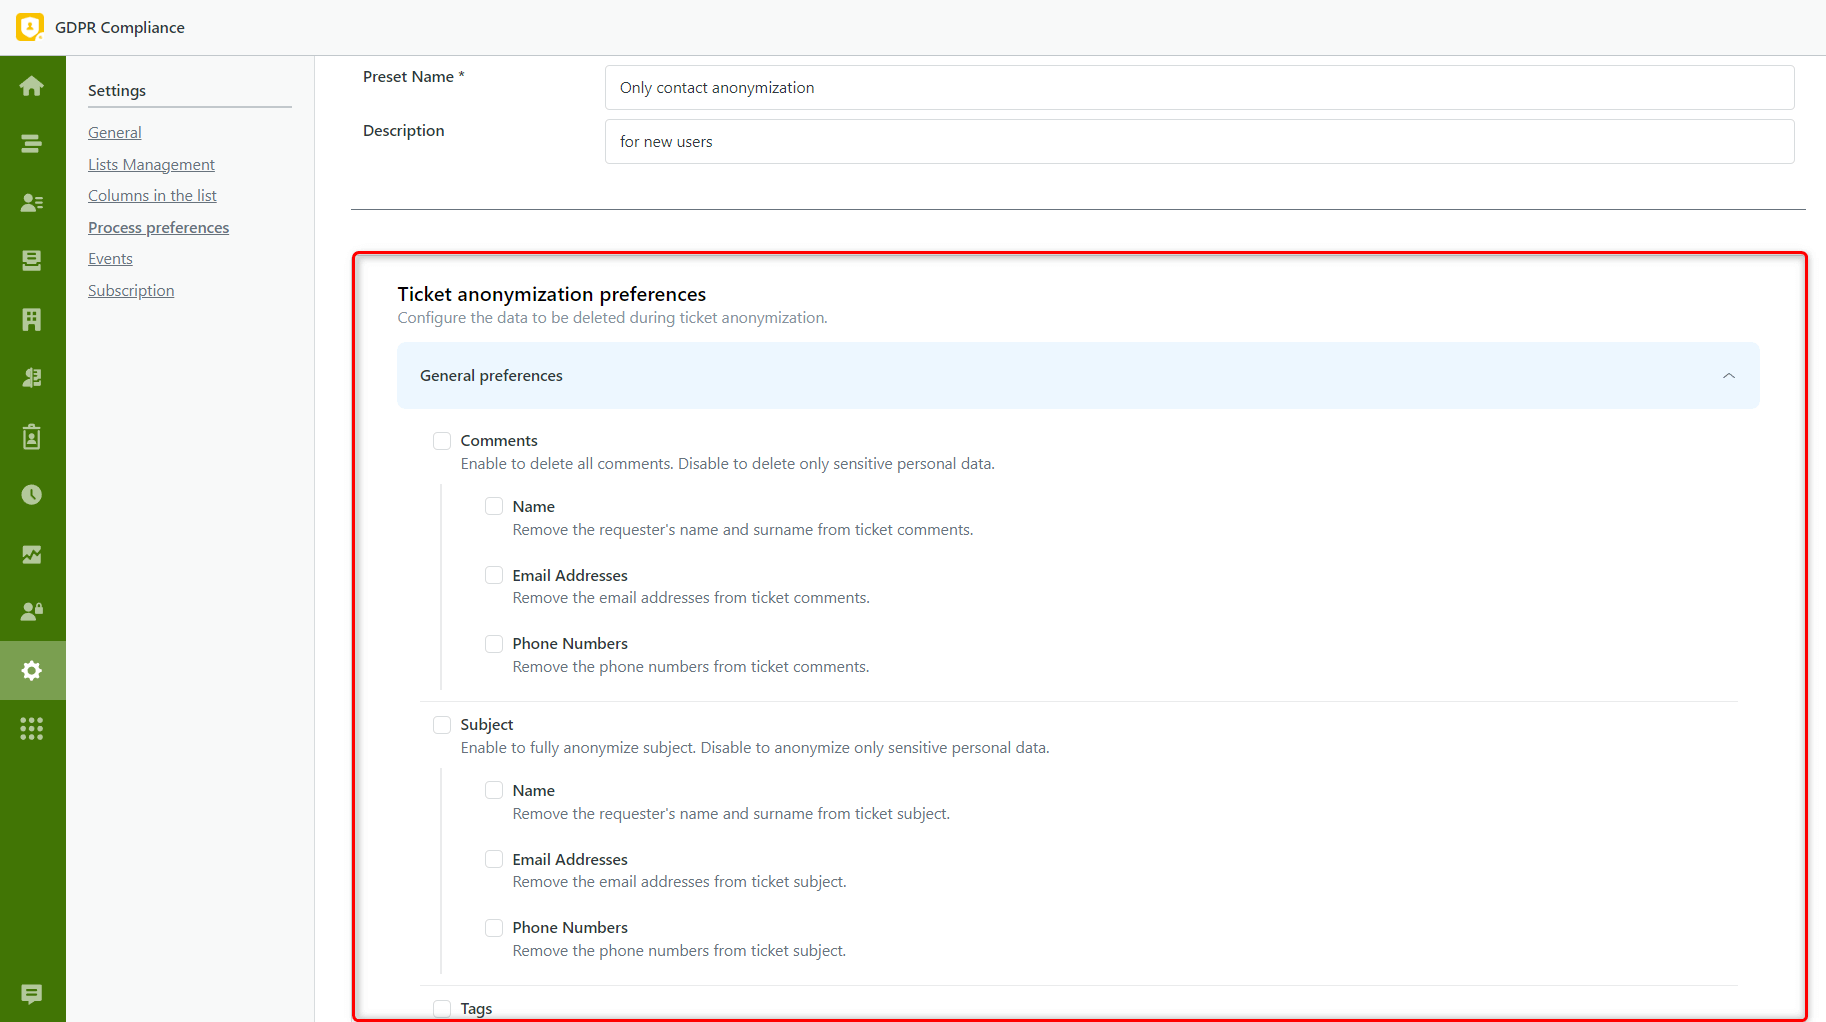
For example, you can see a preset that anonymizes only user data and does not affect tickets.
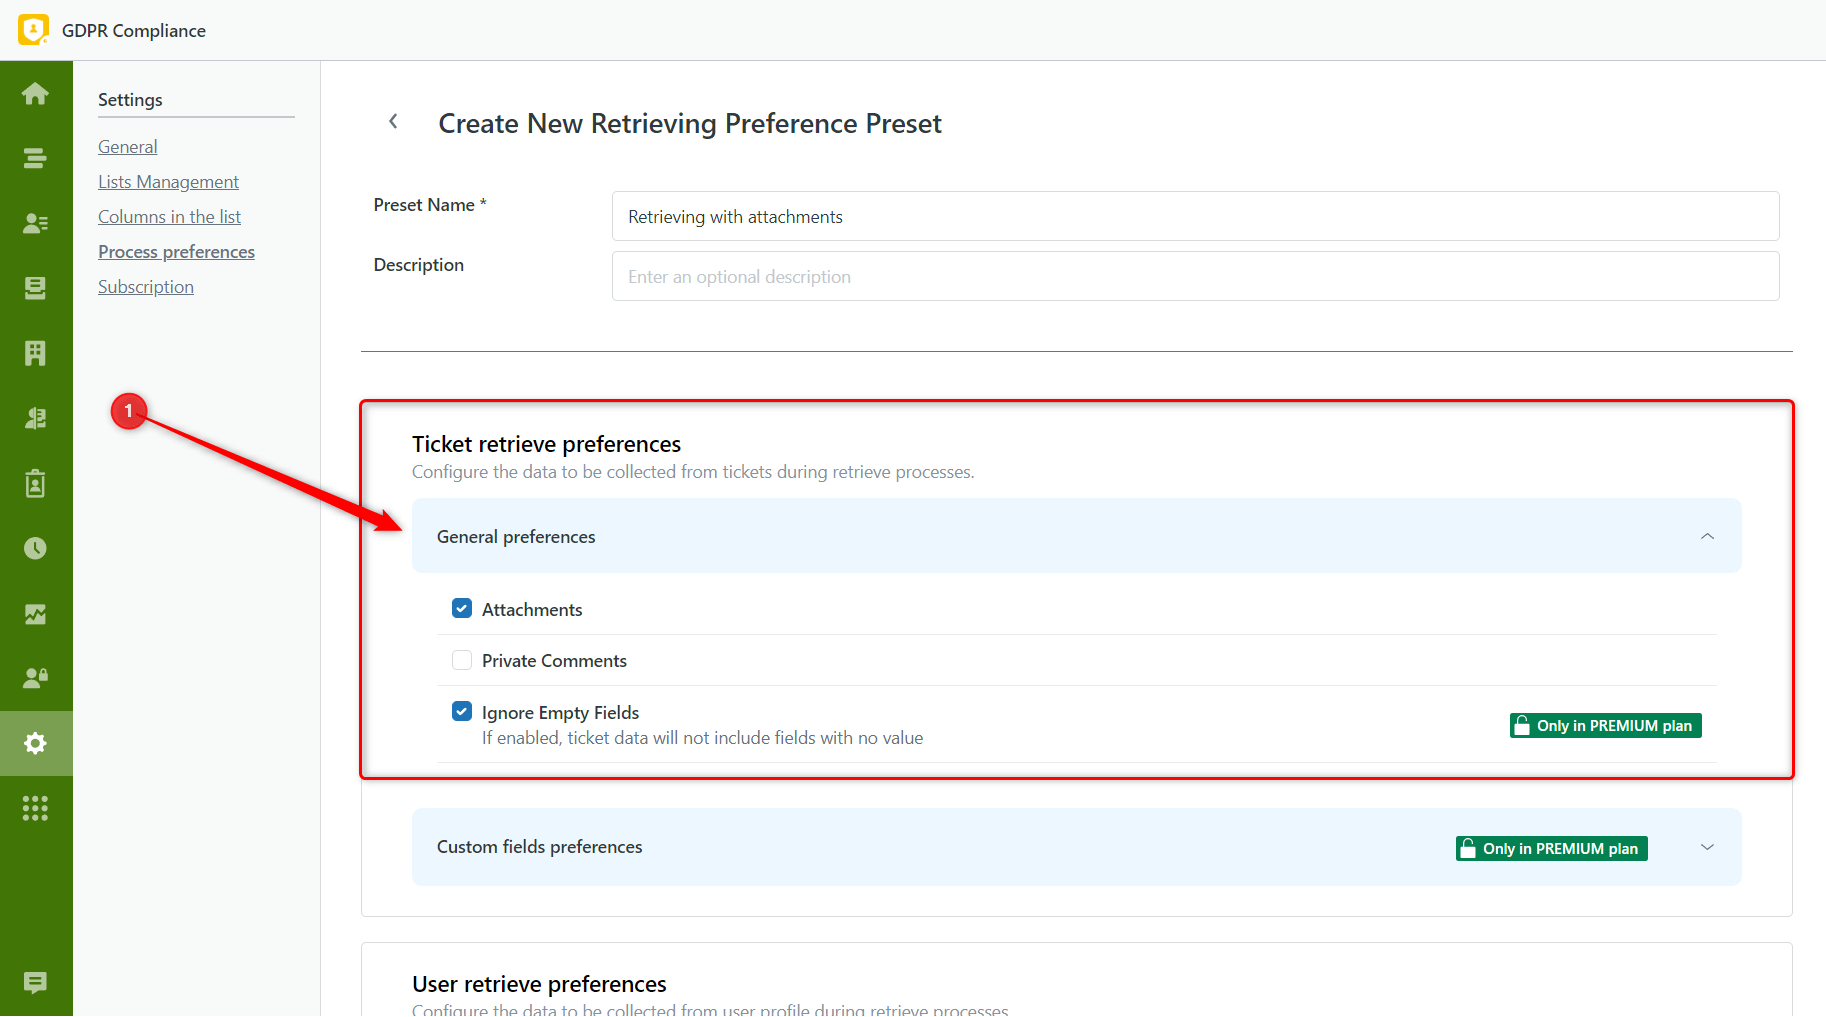
After creating a new Retrieving preference preset, name it and type an optional description. In the Ticket retrieve preferences, select additional data, such as attachments or private comments, to include in the retrieving process.
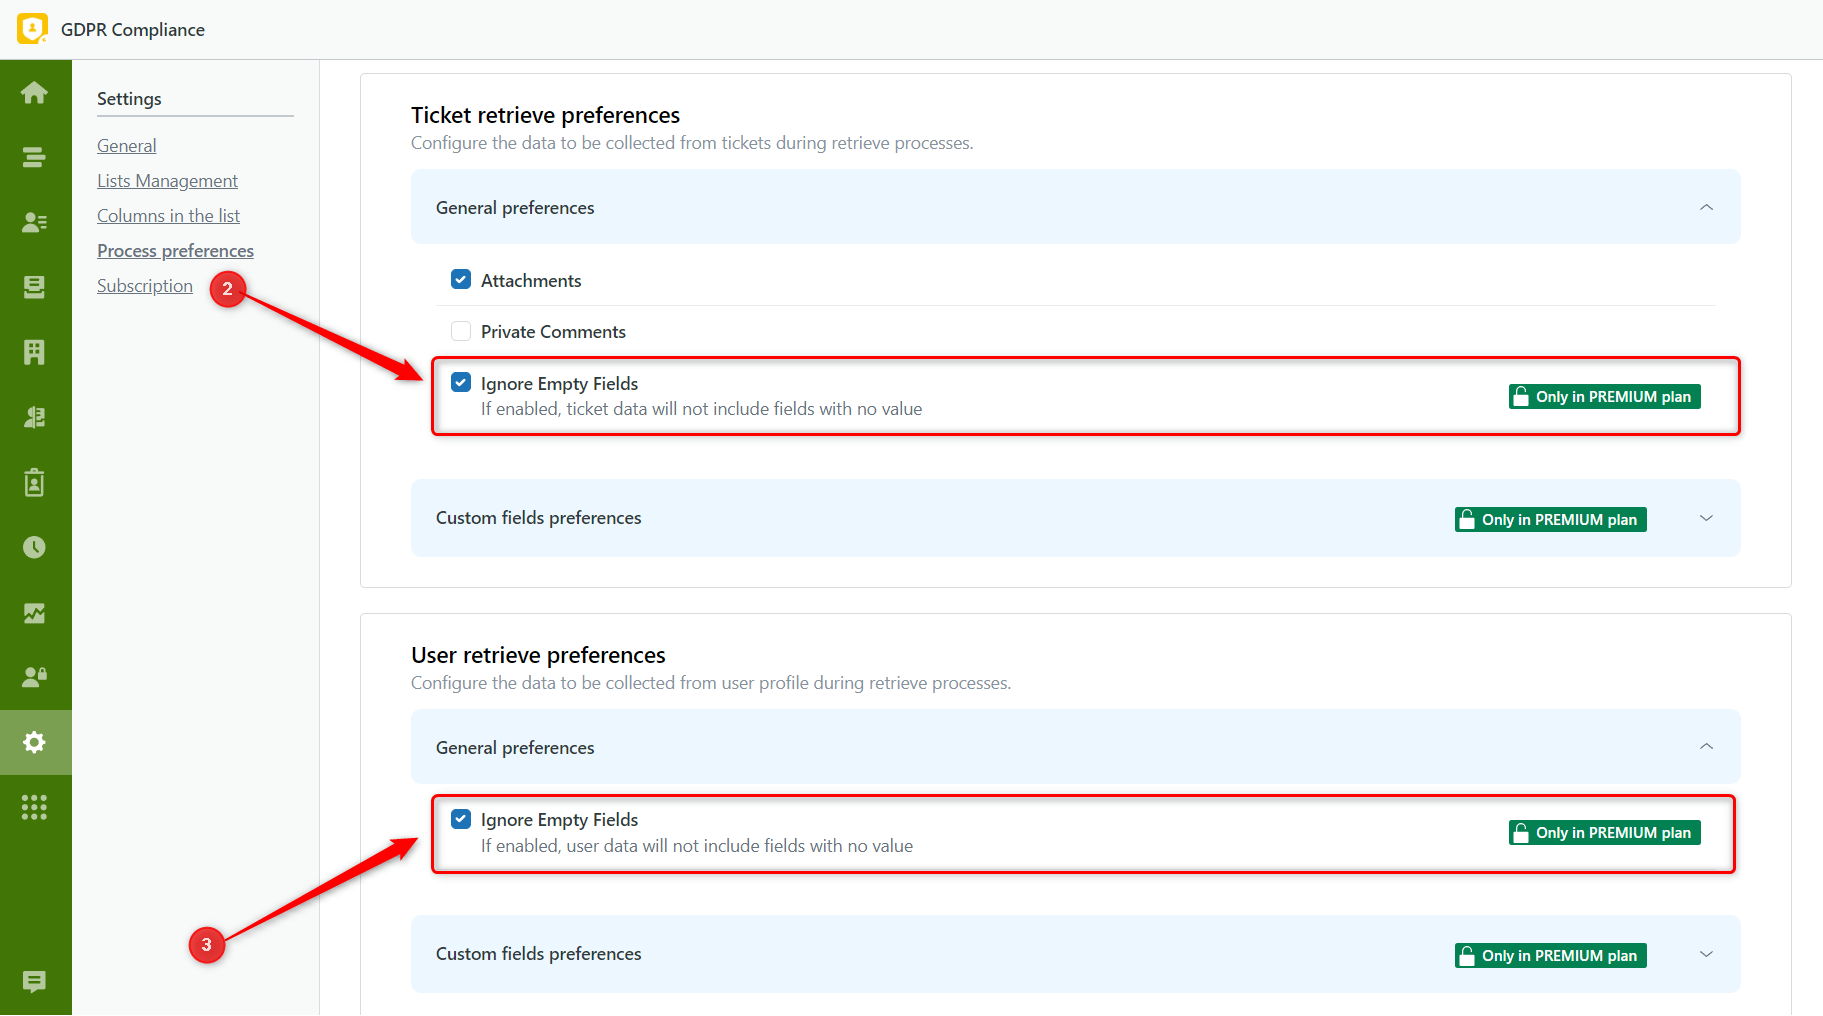
In General preferences, for both the ticket and user retrieve sections, you can enable the option Ignore Empty Fields to skip fields with no value.
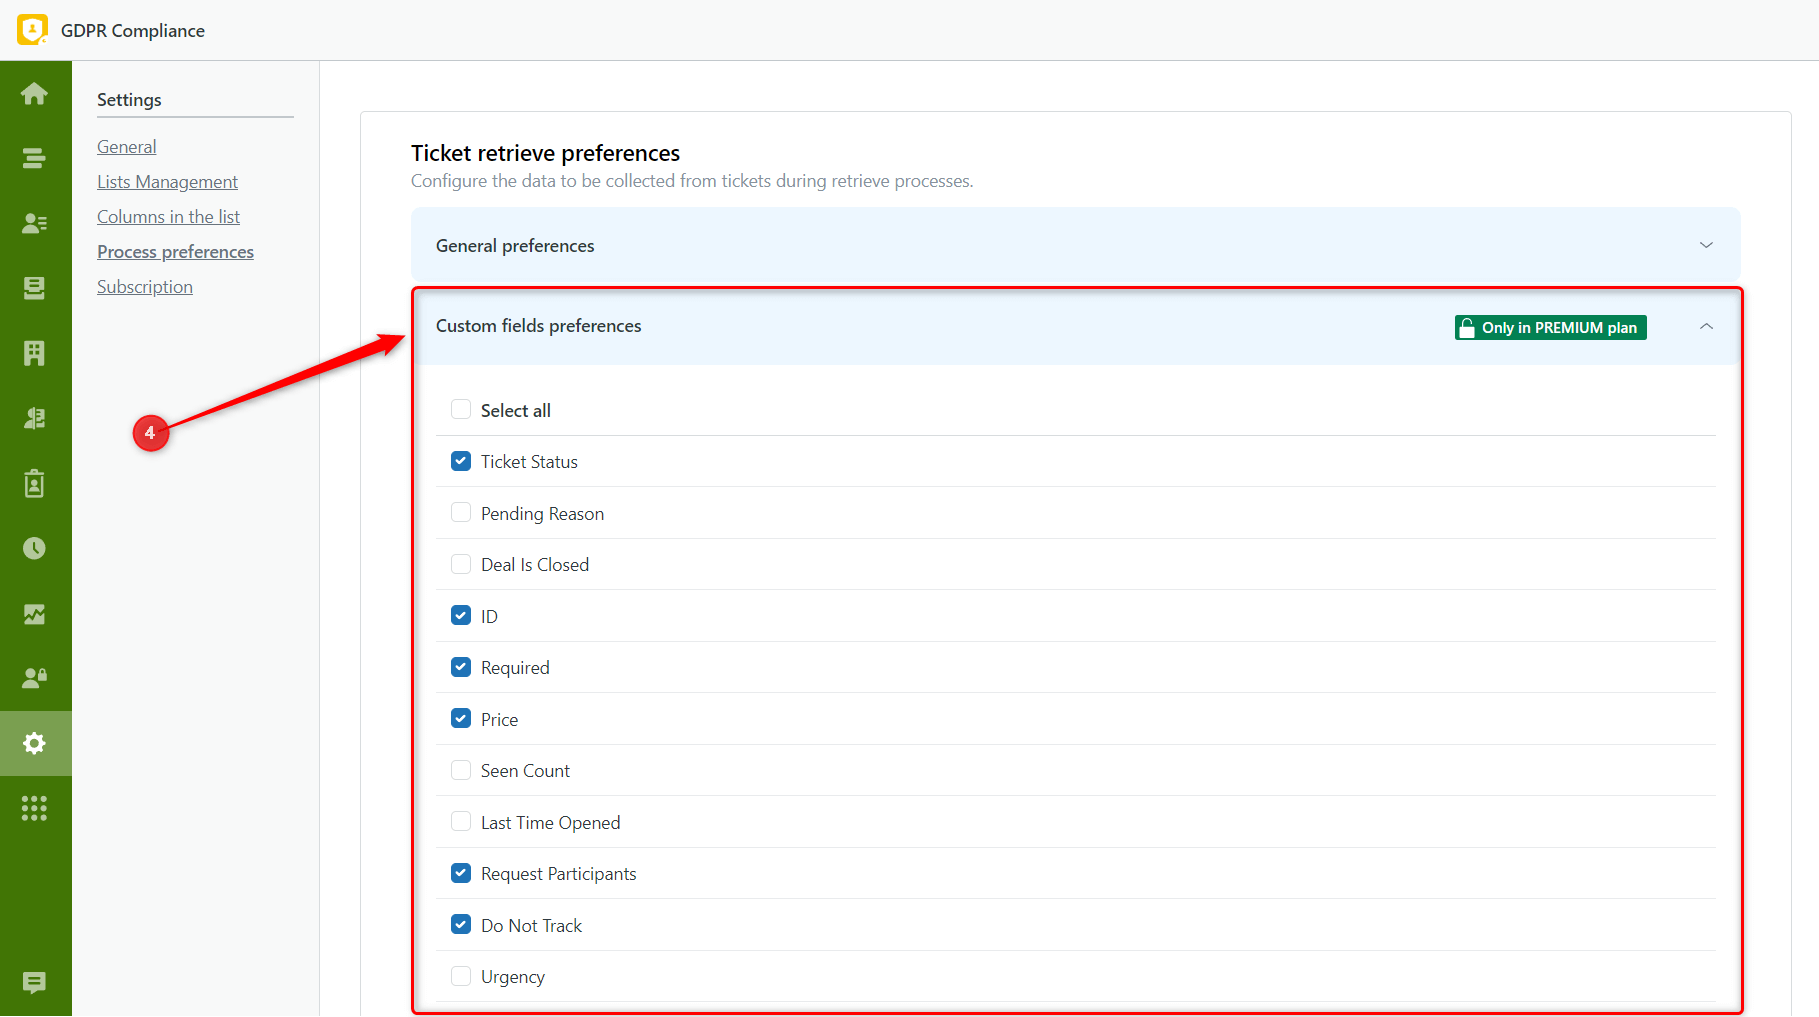
Also, in Custom fields preferences, you can specify which custom fields you want to export from the ticket and user profile.
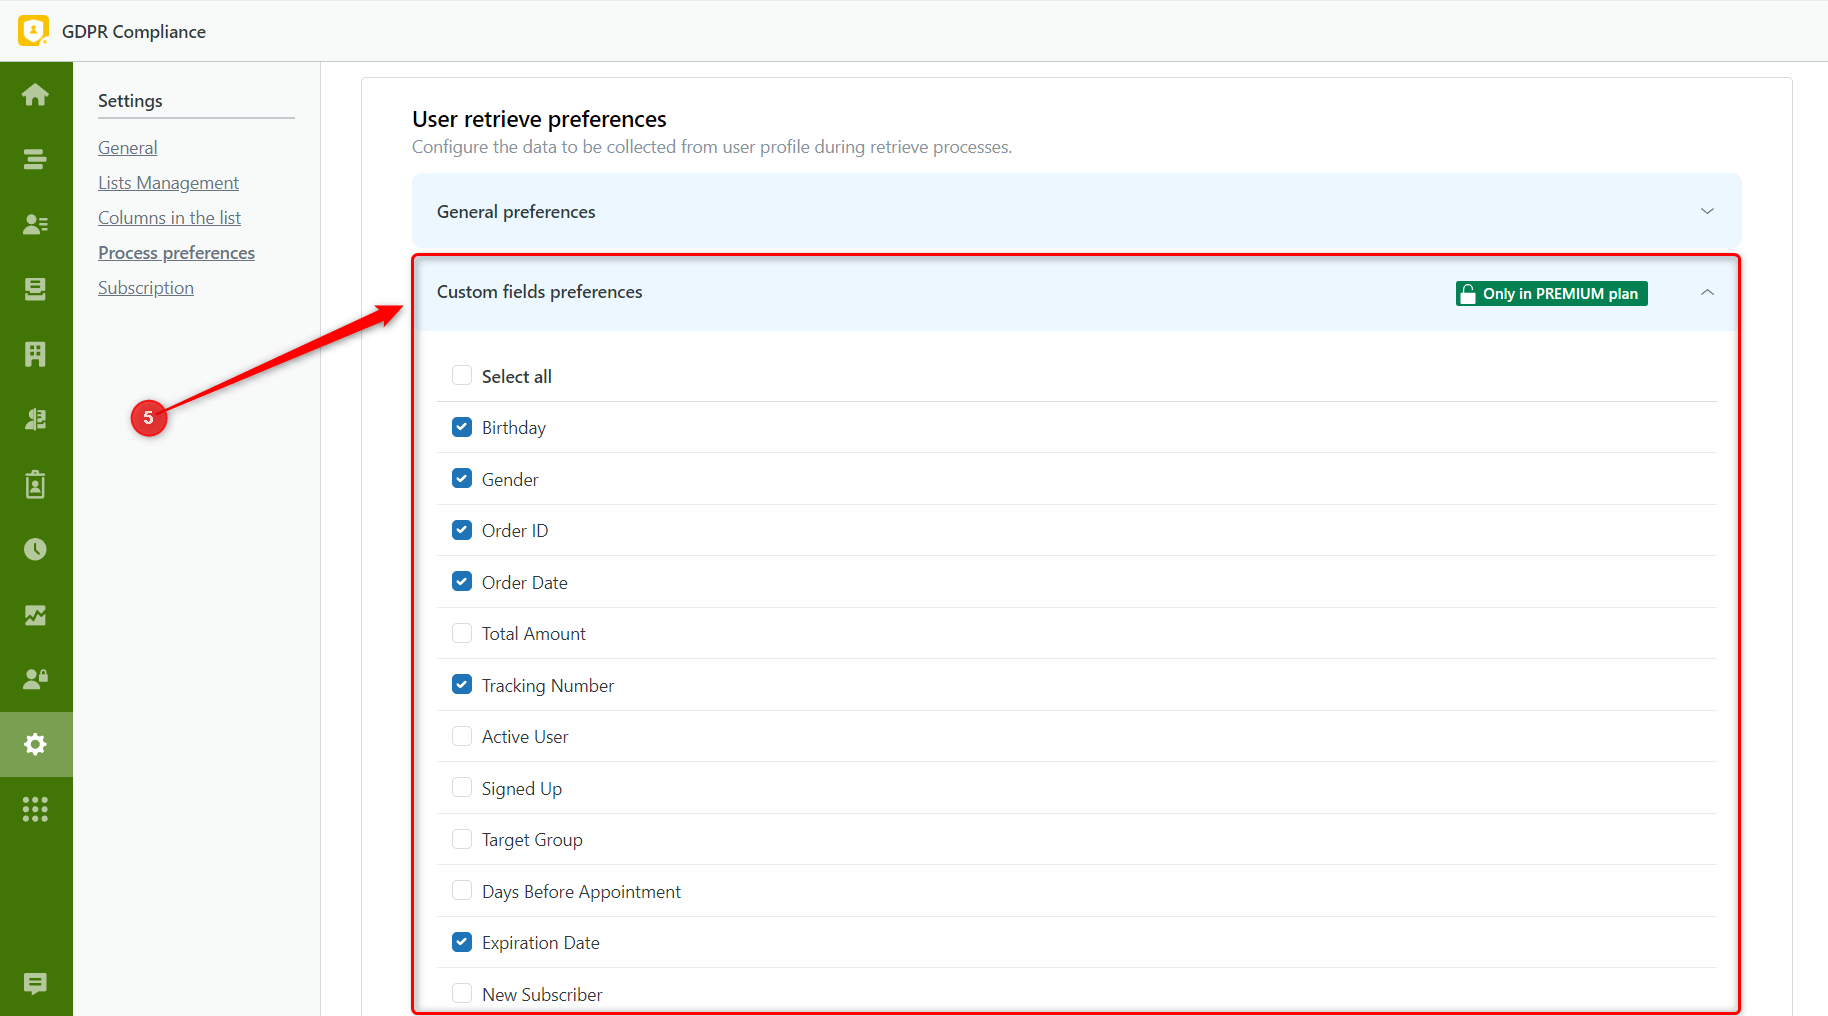
When you're done with these settings, click Save.
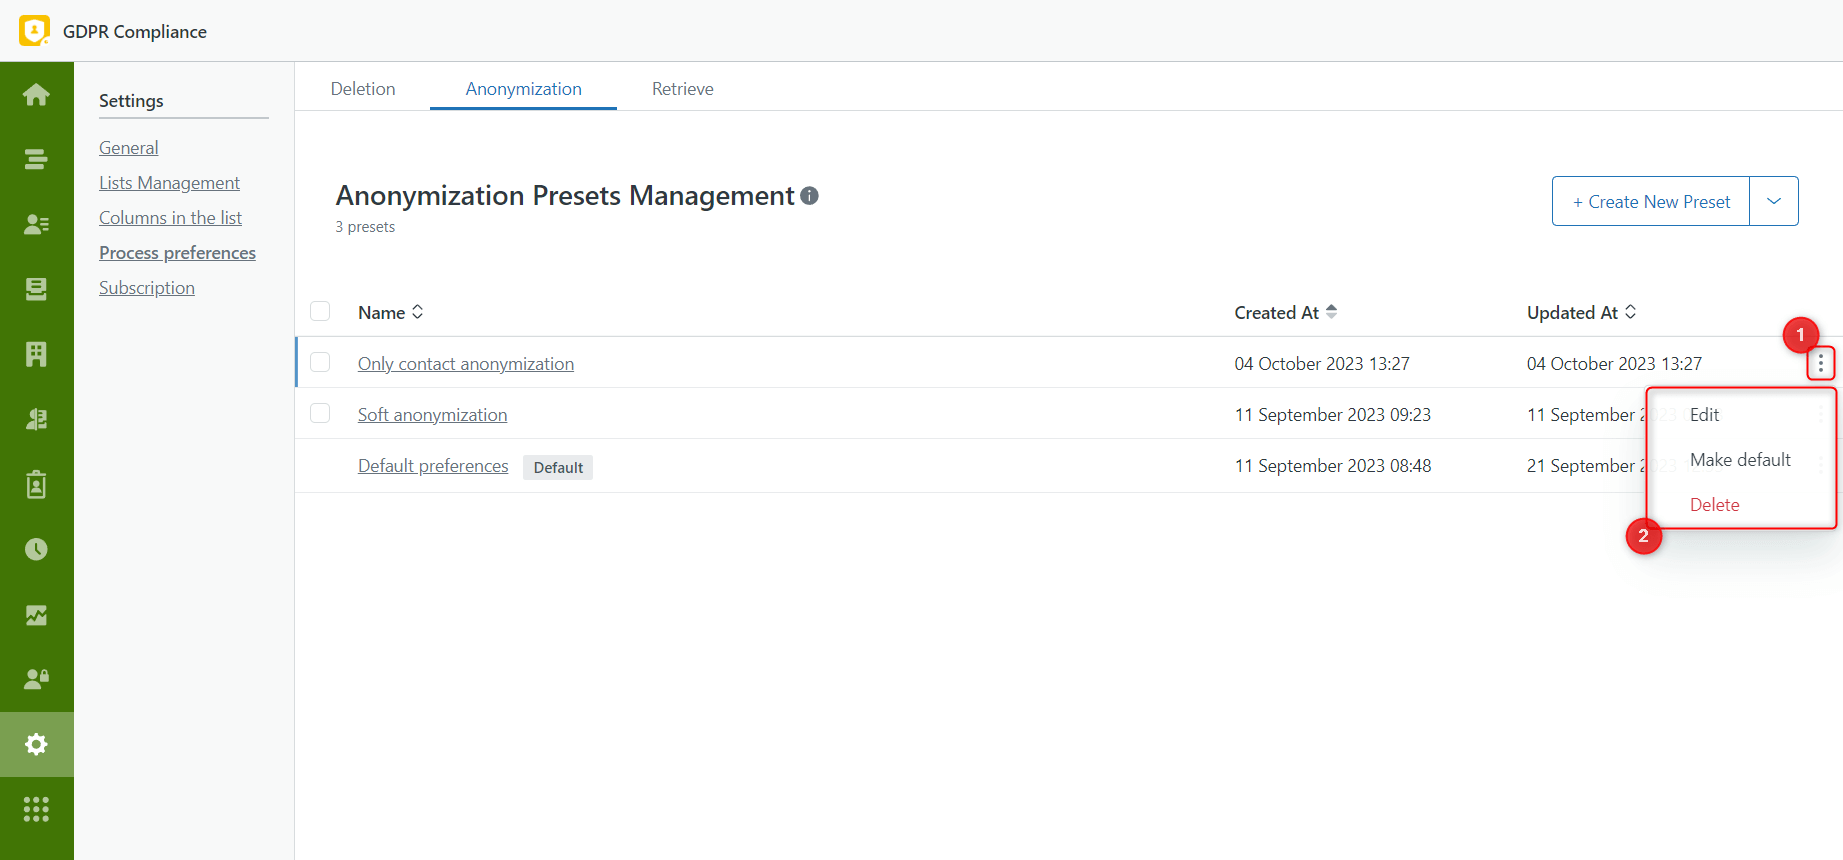
On the Presets Management page of any process, you can edit, delete, or set presets as defaults.
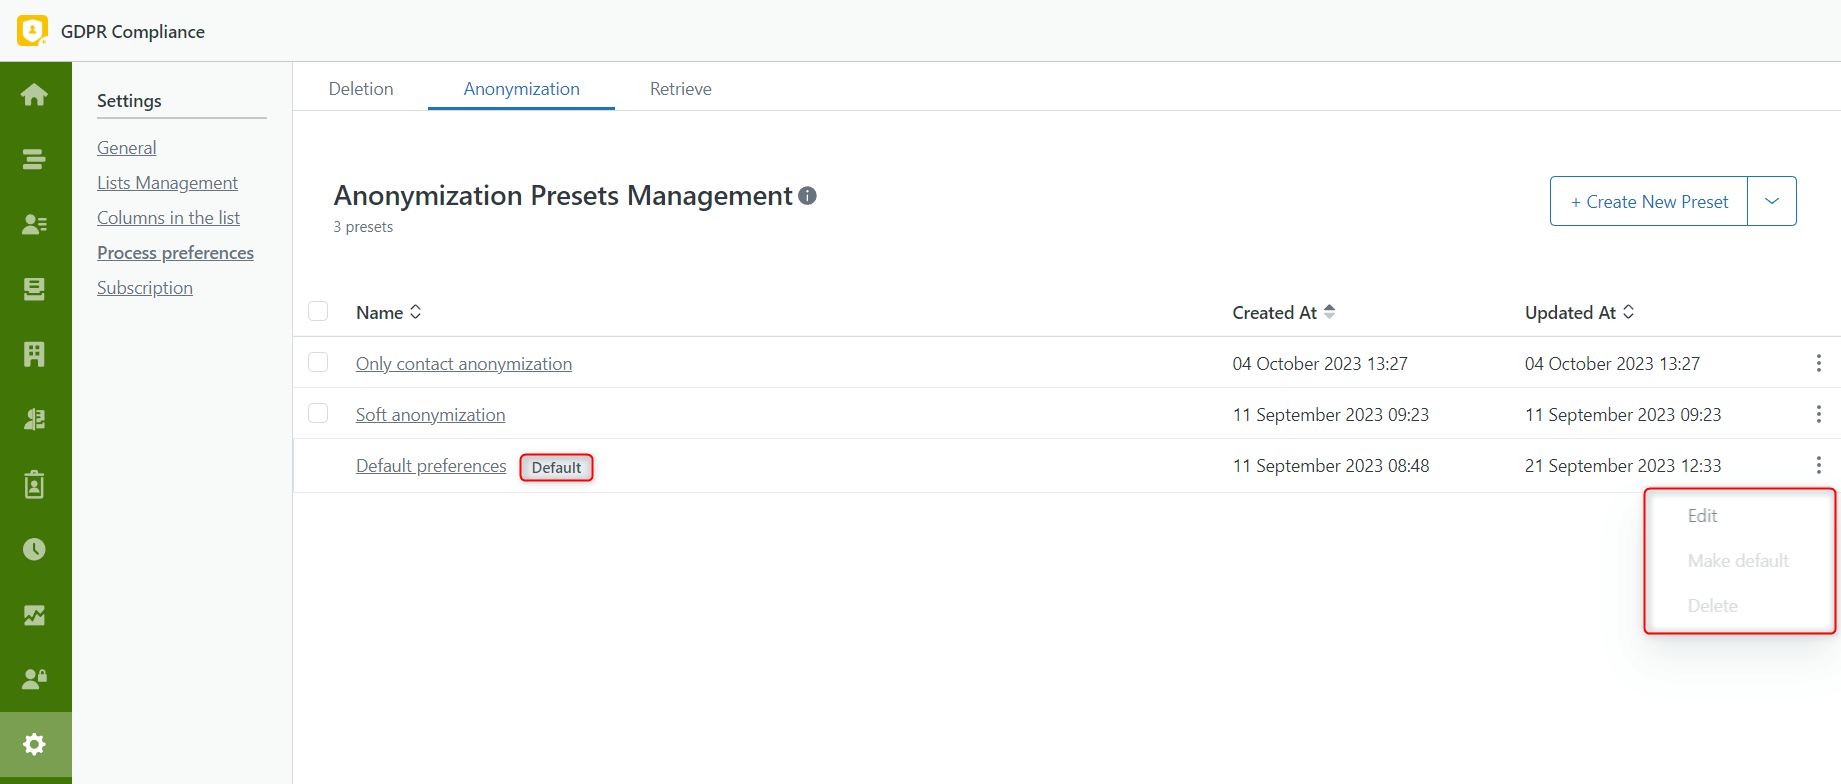
Please note: you cannot delete the default preset.
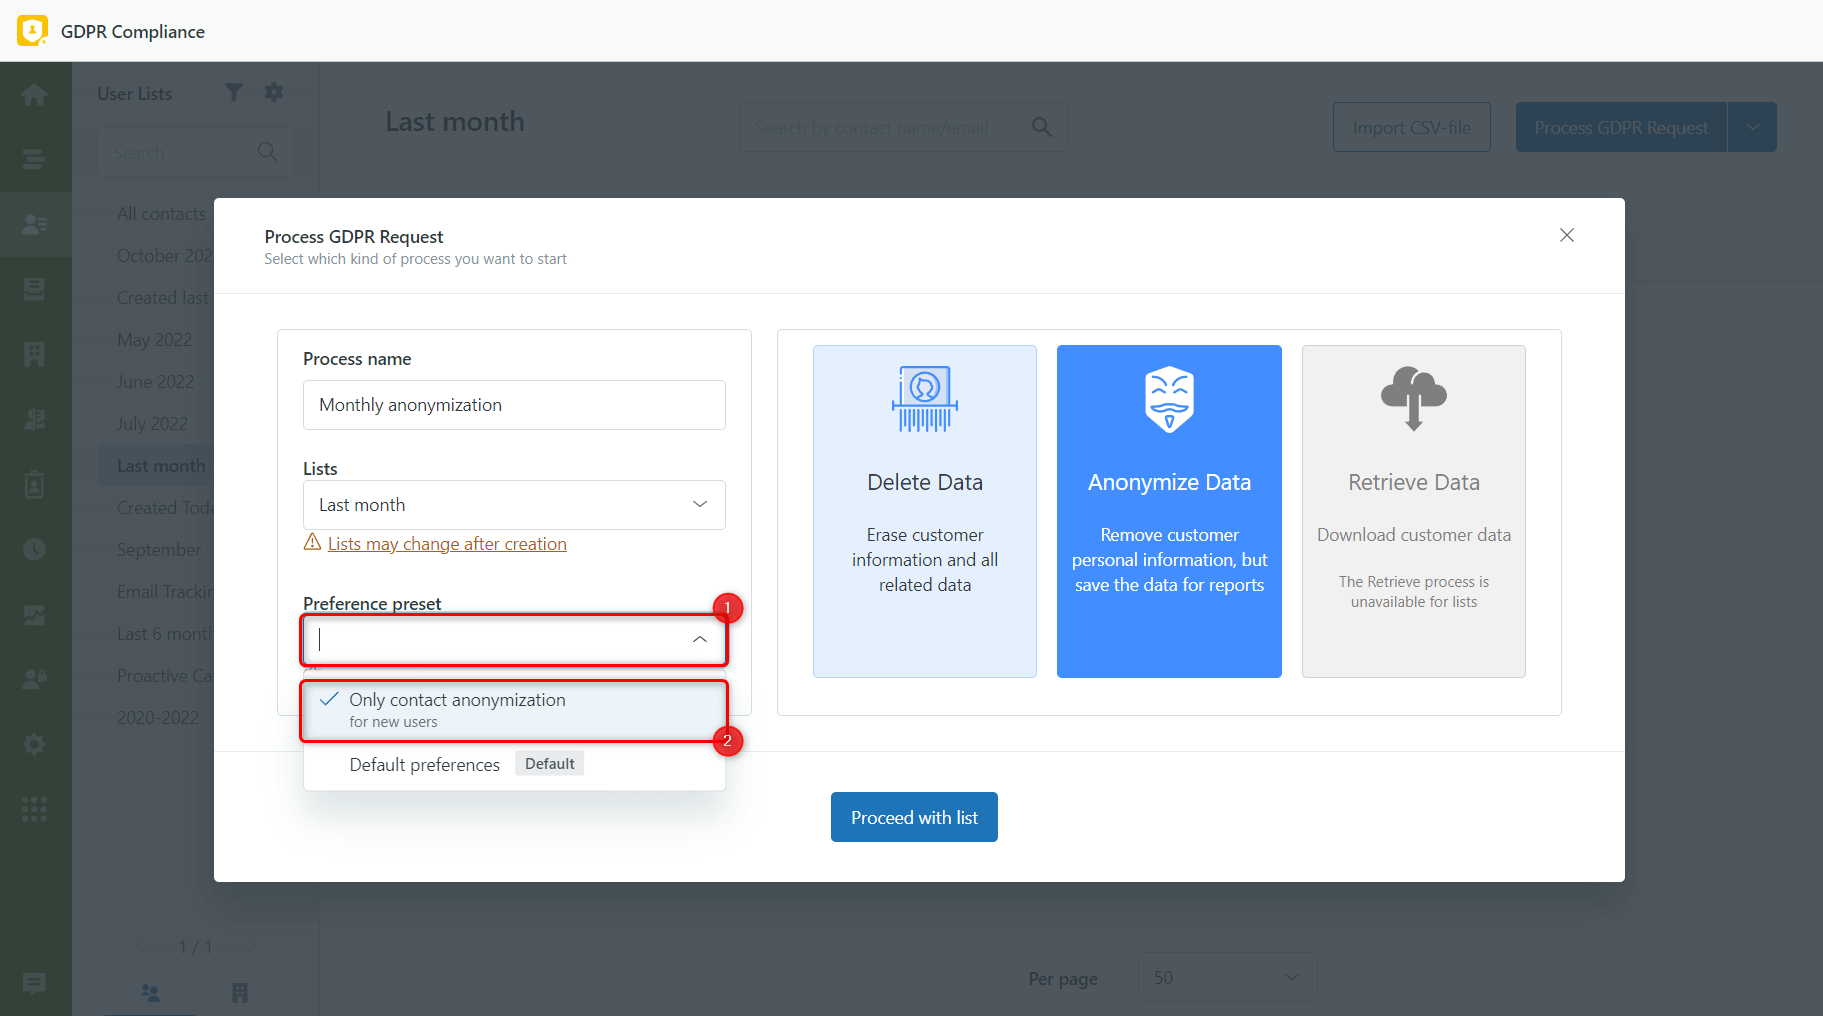
To start using your personalized presets, launch a GDPR process, type in the Process name, and select the necessary preset. And you’re ready to proceed with the process.
Take into account: with the Premium plan, you can create 20 presets per process; with the Standard plan, you can create only 1 preset per process.
Still have questions about creating or using Process preference presets? Please contact our support team.

