How to run SMS campaigns in bulk via Proactive Campaigns
-
Proactive Campaigns
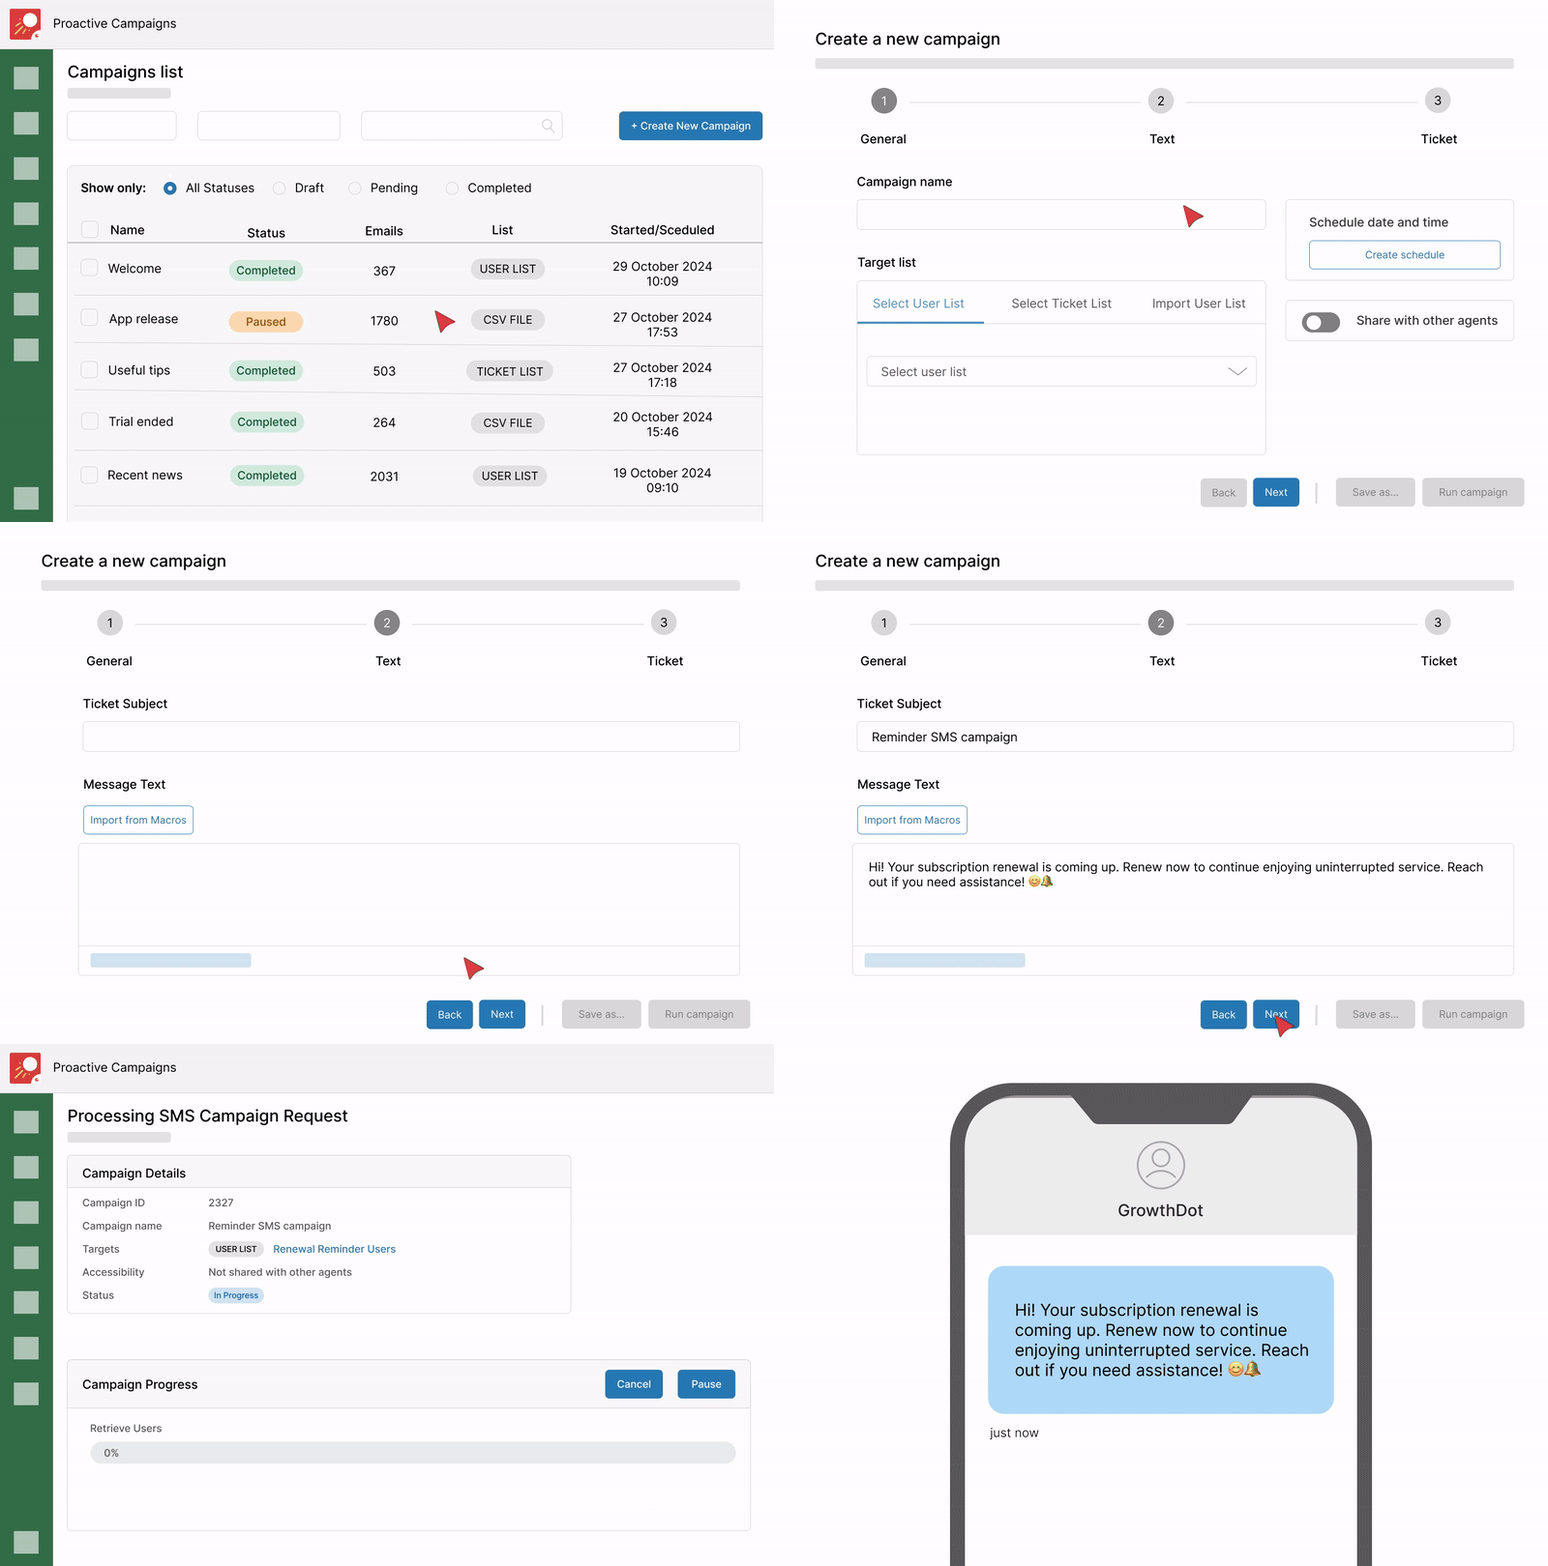
Proactive Campaigns allows you to run not only bulk email campaigns but also SMS campaigns directly from Zendesk. The process is straightforward, requiring only a few quick steps to start sending SMS messages to your customers. Follow this guide to set up and launch your first SMS campaign.
Step 1: Set Up a Phone Number in Zendesk
1. Access the Zendesk Admin Center
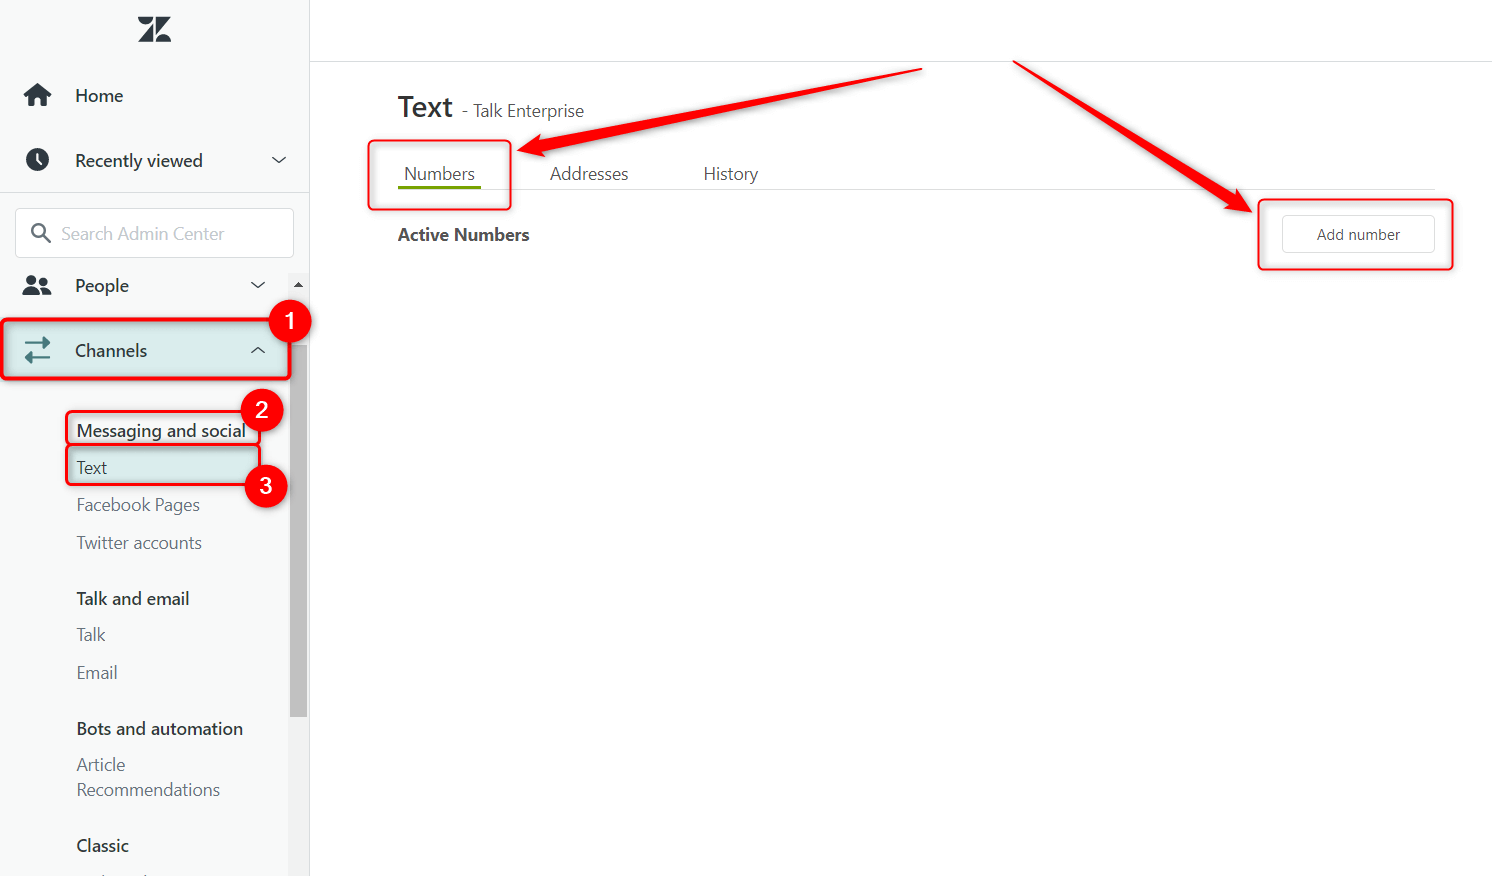
Go to Admin Center > Channels > Messaging and social > Text.
2. Add a Phone Number
Under the Numbers tab, click Add number if you haven’t added any numbers yet. Ensure you have at least one active number to use for SMS campaigns.
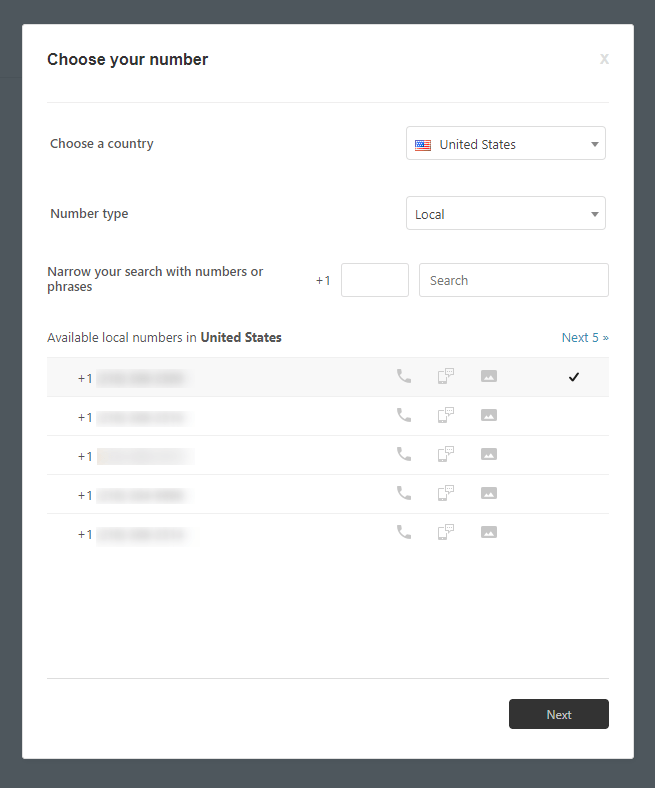
3. Choose the Number
In the new modal window, choose the number and click Next to confirm your choice. Your chosen number will now appear under Active Numbers.
If you’re using a Talk number, you can enable it for SMS by checking the Enable for Text option in Admin Center > Channels > Talk and email > Talk > Lines.
Step 2: Enable SMS Campaigns in Proactive Campaigns
1. Open Proactive Campaigns Settings
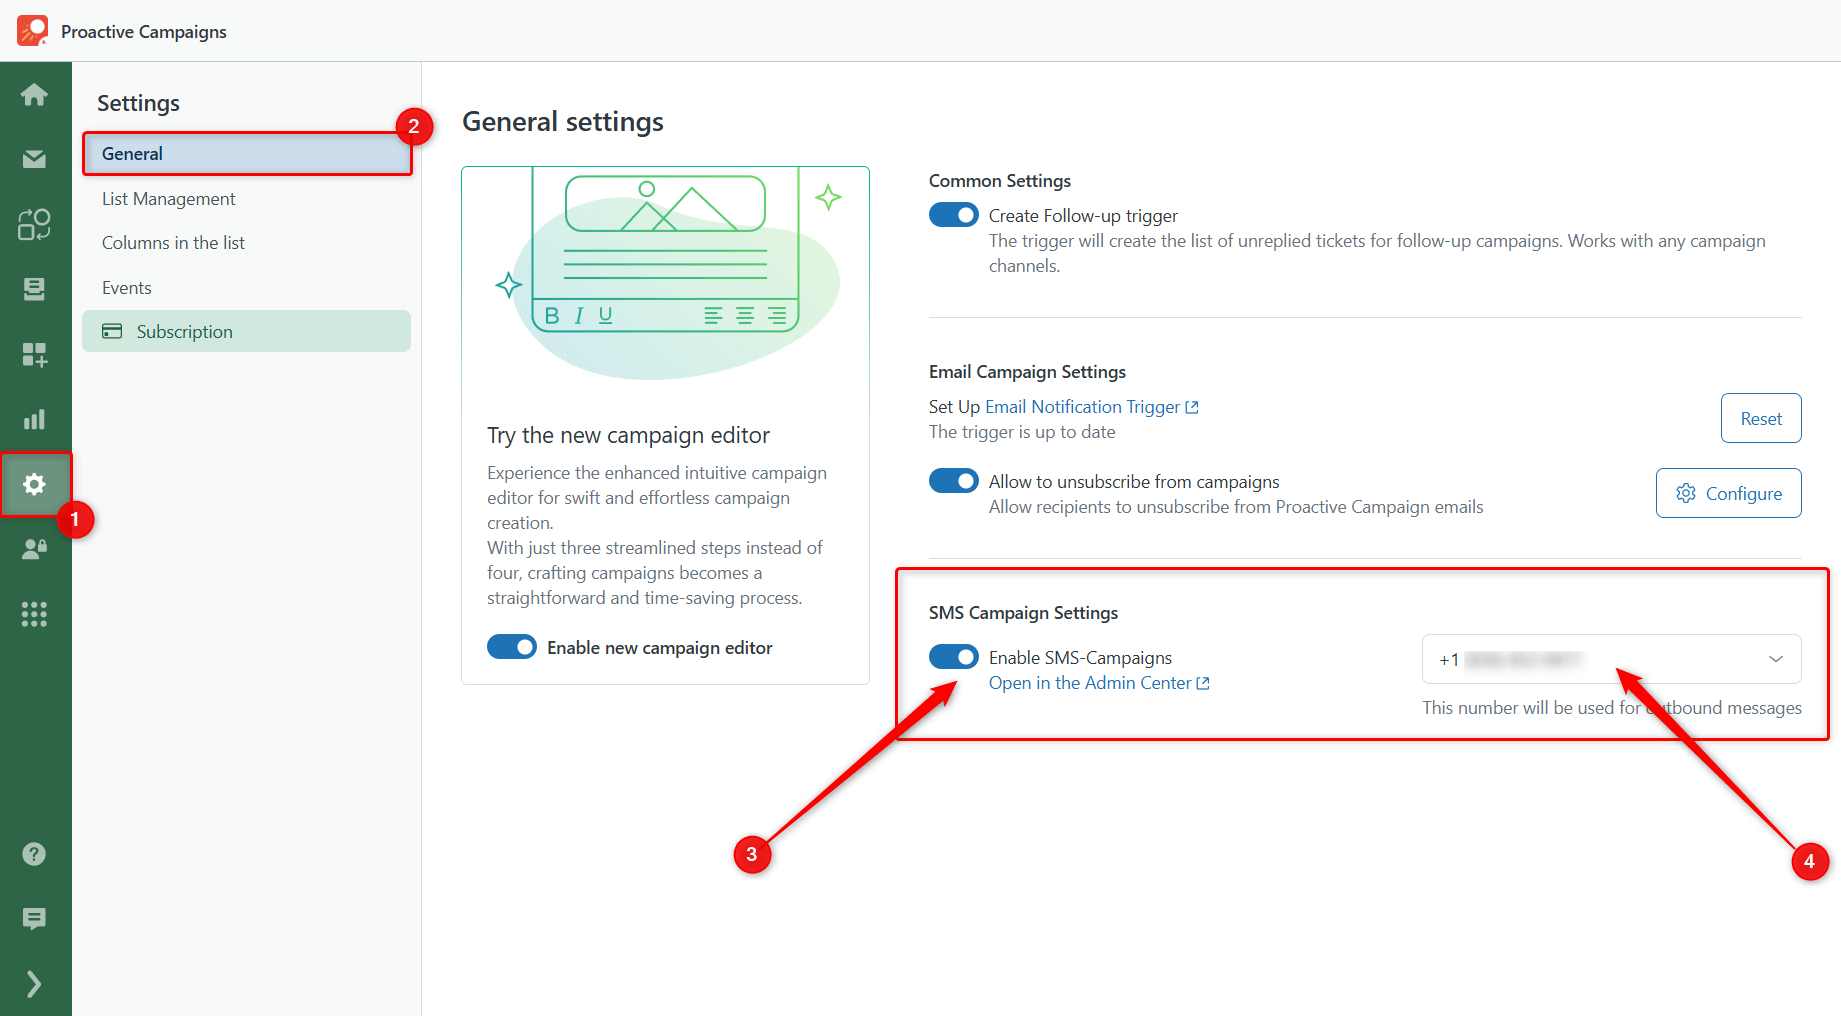
Go to the Proactive Campaigns app and navigate to Settings > General.
2. Activate SMS Campaigns
Toggle on Enable SMS-Campaigns. The number configured for outbound messages will now be displayed. If you have multiple numbers, select the one you wish to use for this campaign.
Step 3: Create Your SMS Campaign
1. Start a New Campaign
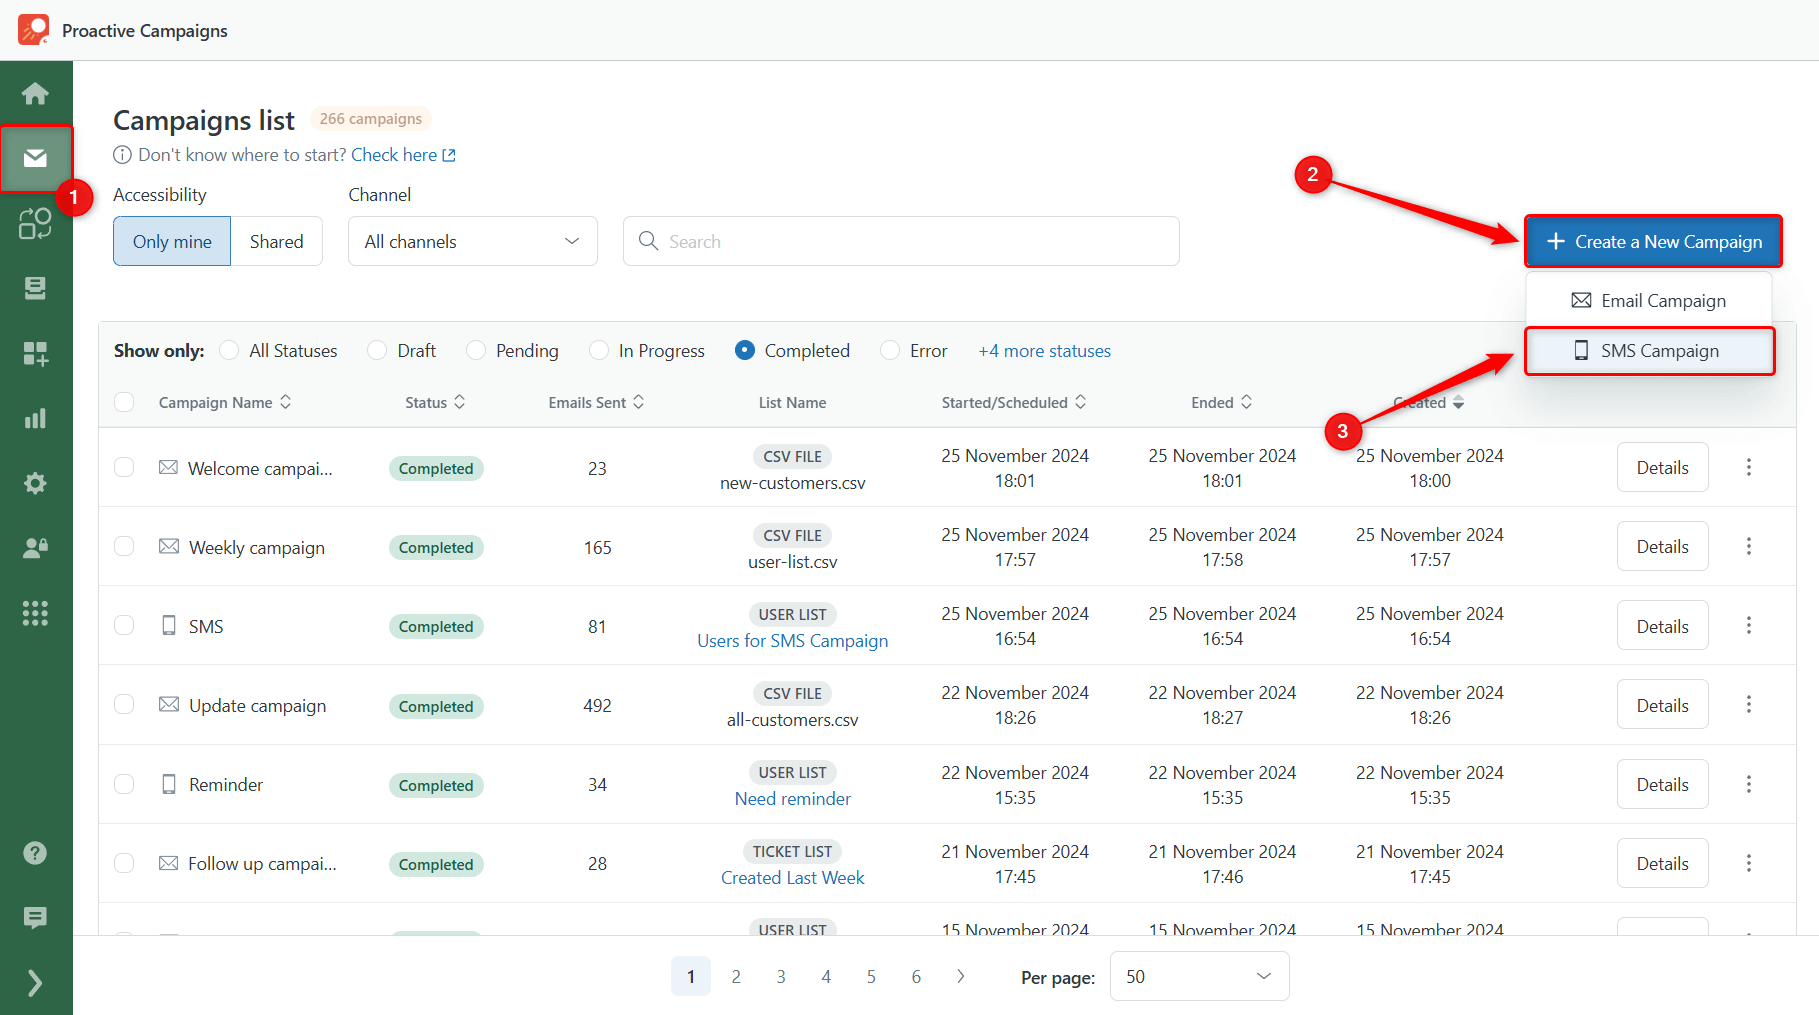
On the Campaigns page, click + Create a New Campaign. From the dropdown, select SMS Campaign.
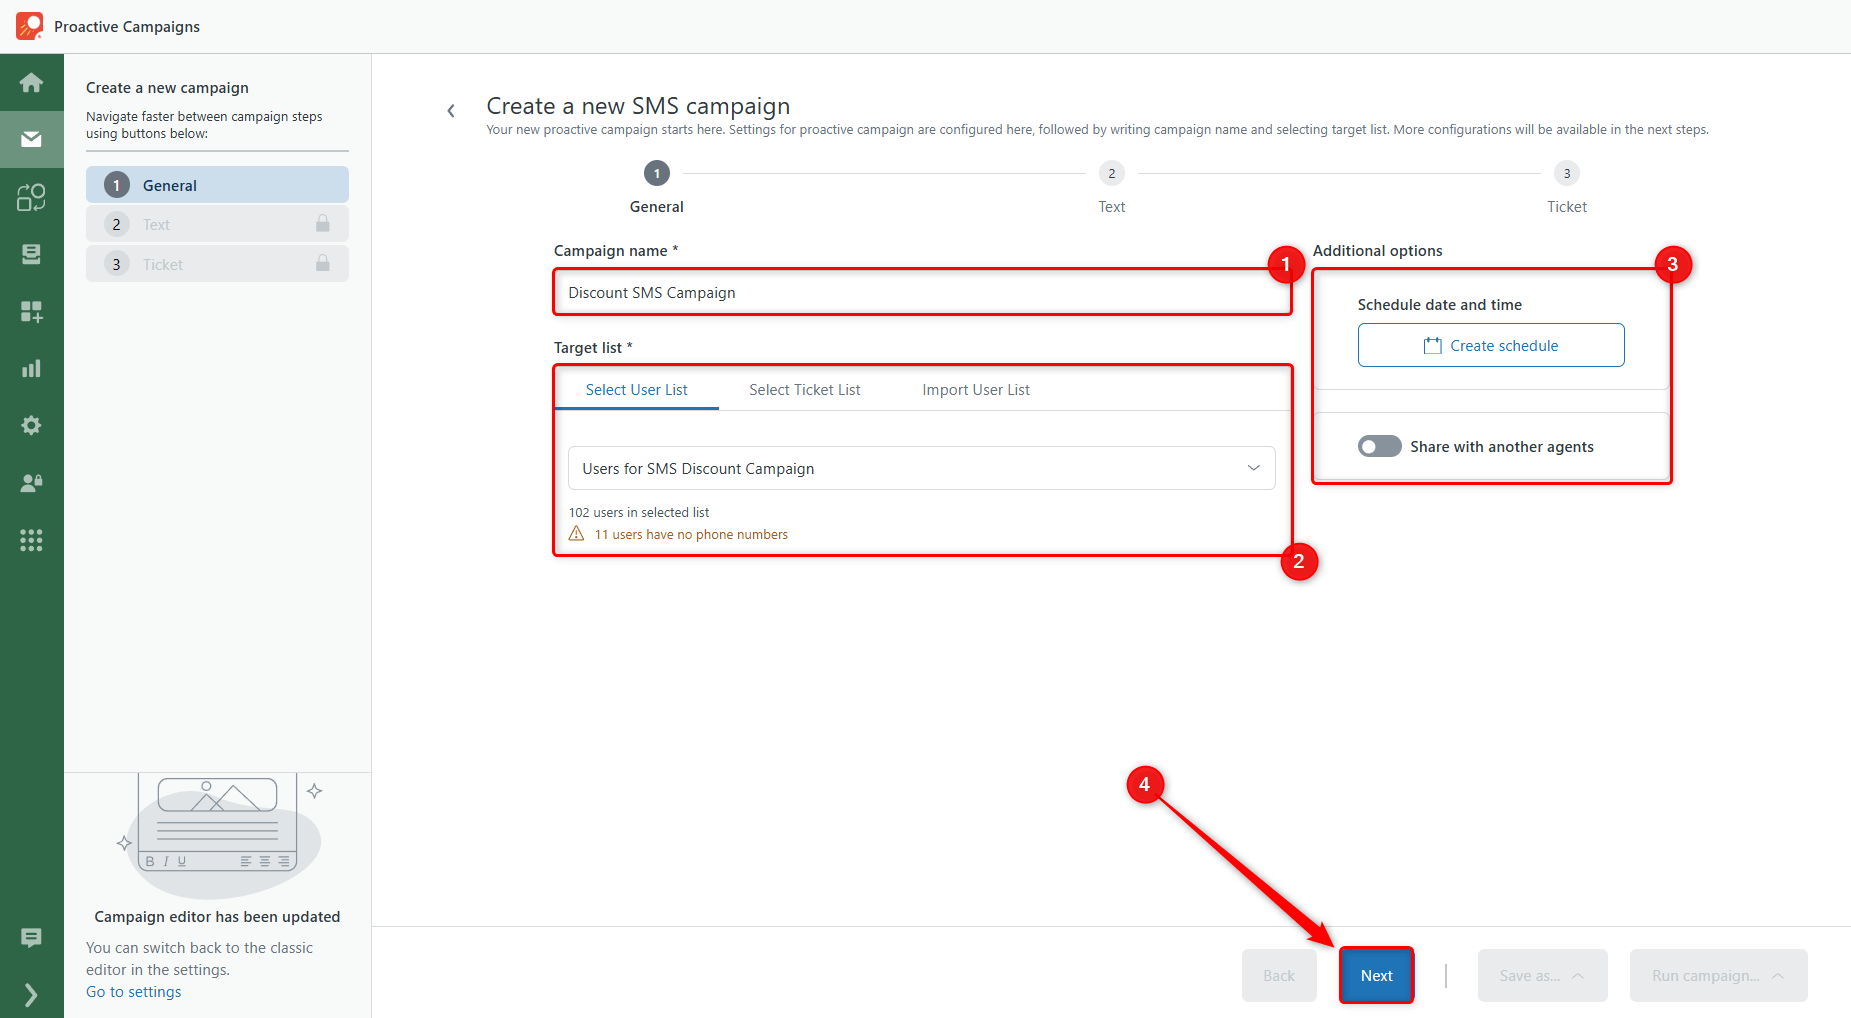
2. Configure General Campaign Details
- Campaign Name: Enter a name for your campaign.
- Target List: Choose a pre-built User or Ticket List or import a CSV file with contacts.
- Additional Options: Schedule your campaign for a future date or share it with other agents if desired.
Once done, click Next.
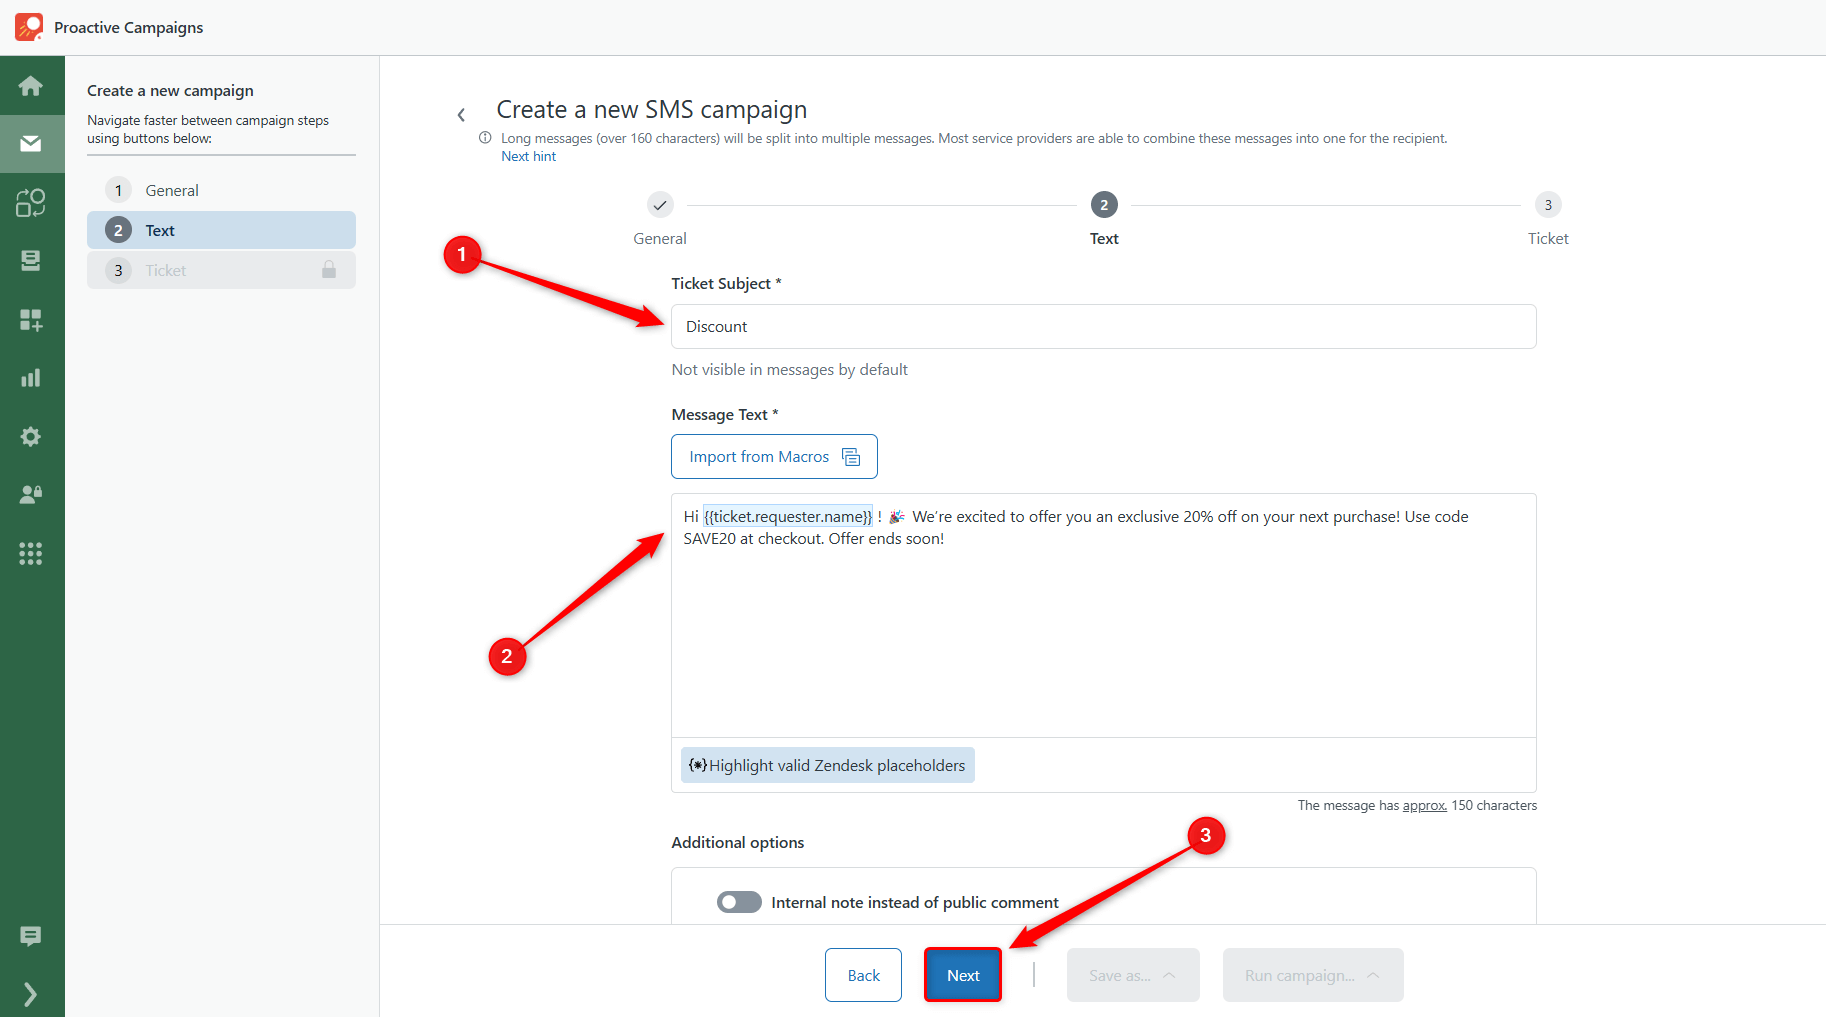
3. Compose the Message
- Text Subject: Enter a subject, though it won’t appear in the actual SMS.
- Message Text: Write your message, keeping it within 160 characters to avoid splitting. If it exceeds 160 characters, the app will send the message in multiple parts per recipient.
4. Ticket Configuration
Adjust Ticket Configurations and Ticket Fields to set parameters for any tickets that will be created from this campaign.
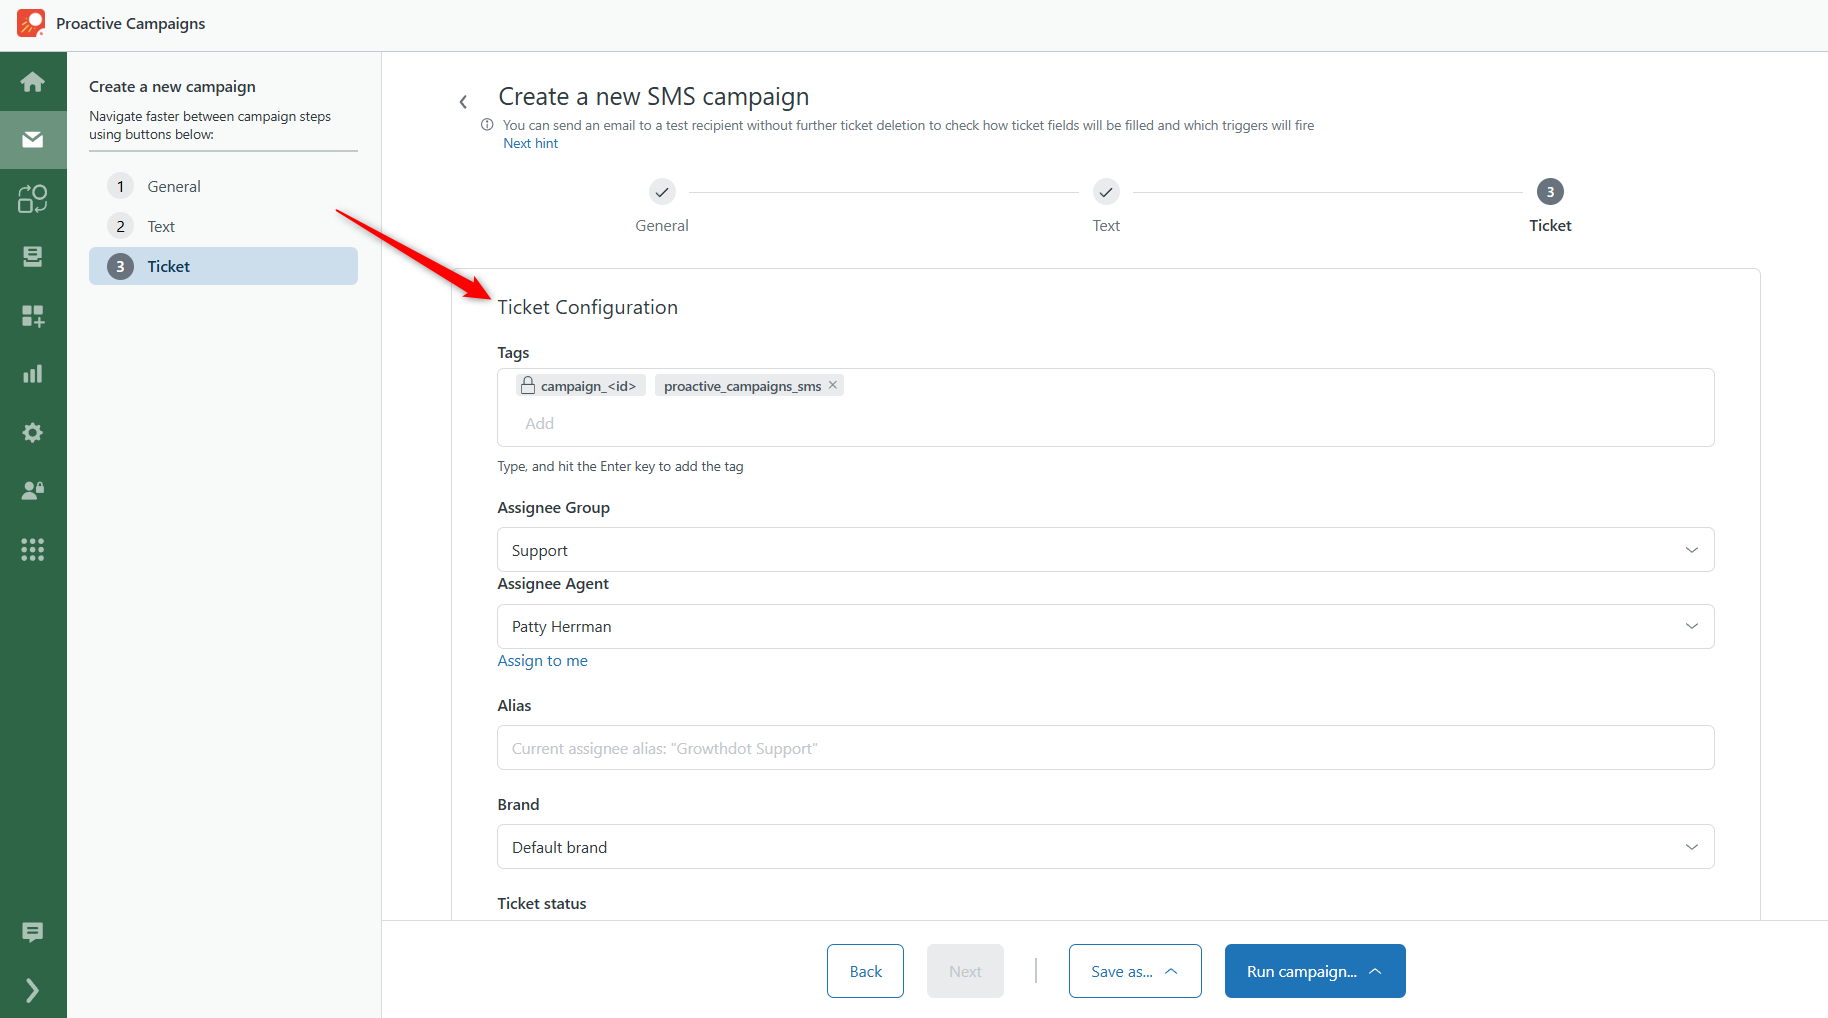
proactive_campaigns_sms, which you can remove if necessary.Step 4: Test Your SMS Campaign
1. Run a Test
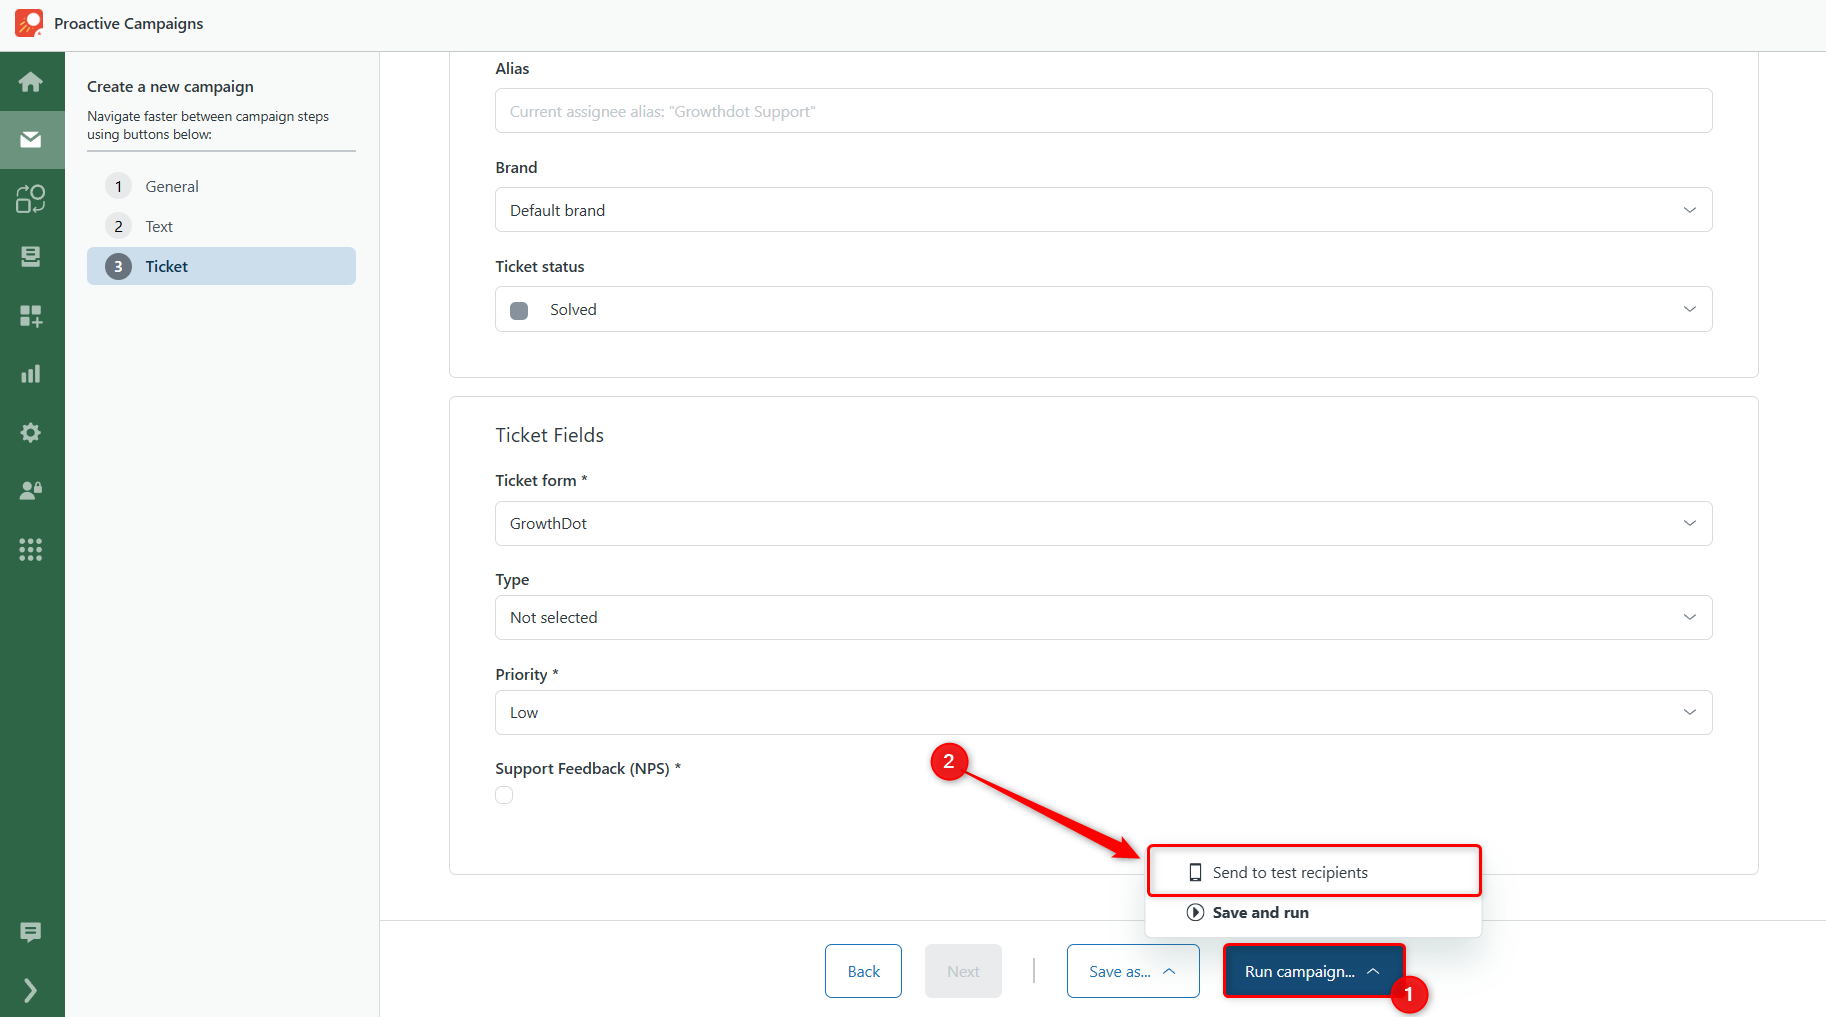
Before sending your SMS campaign, you can test the message. Click Run campaign > Send to test recipients.
2. Enter Test Numbers
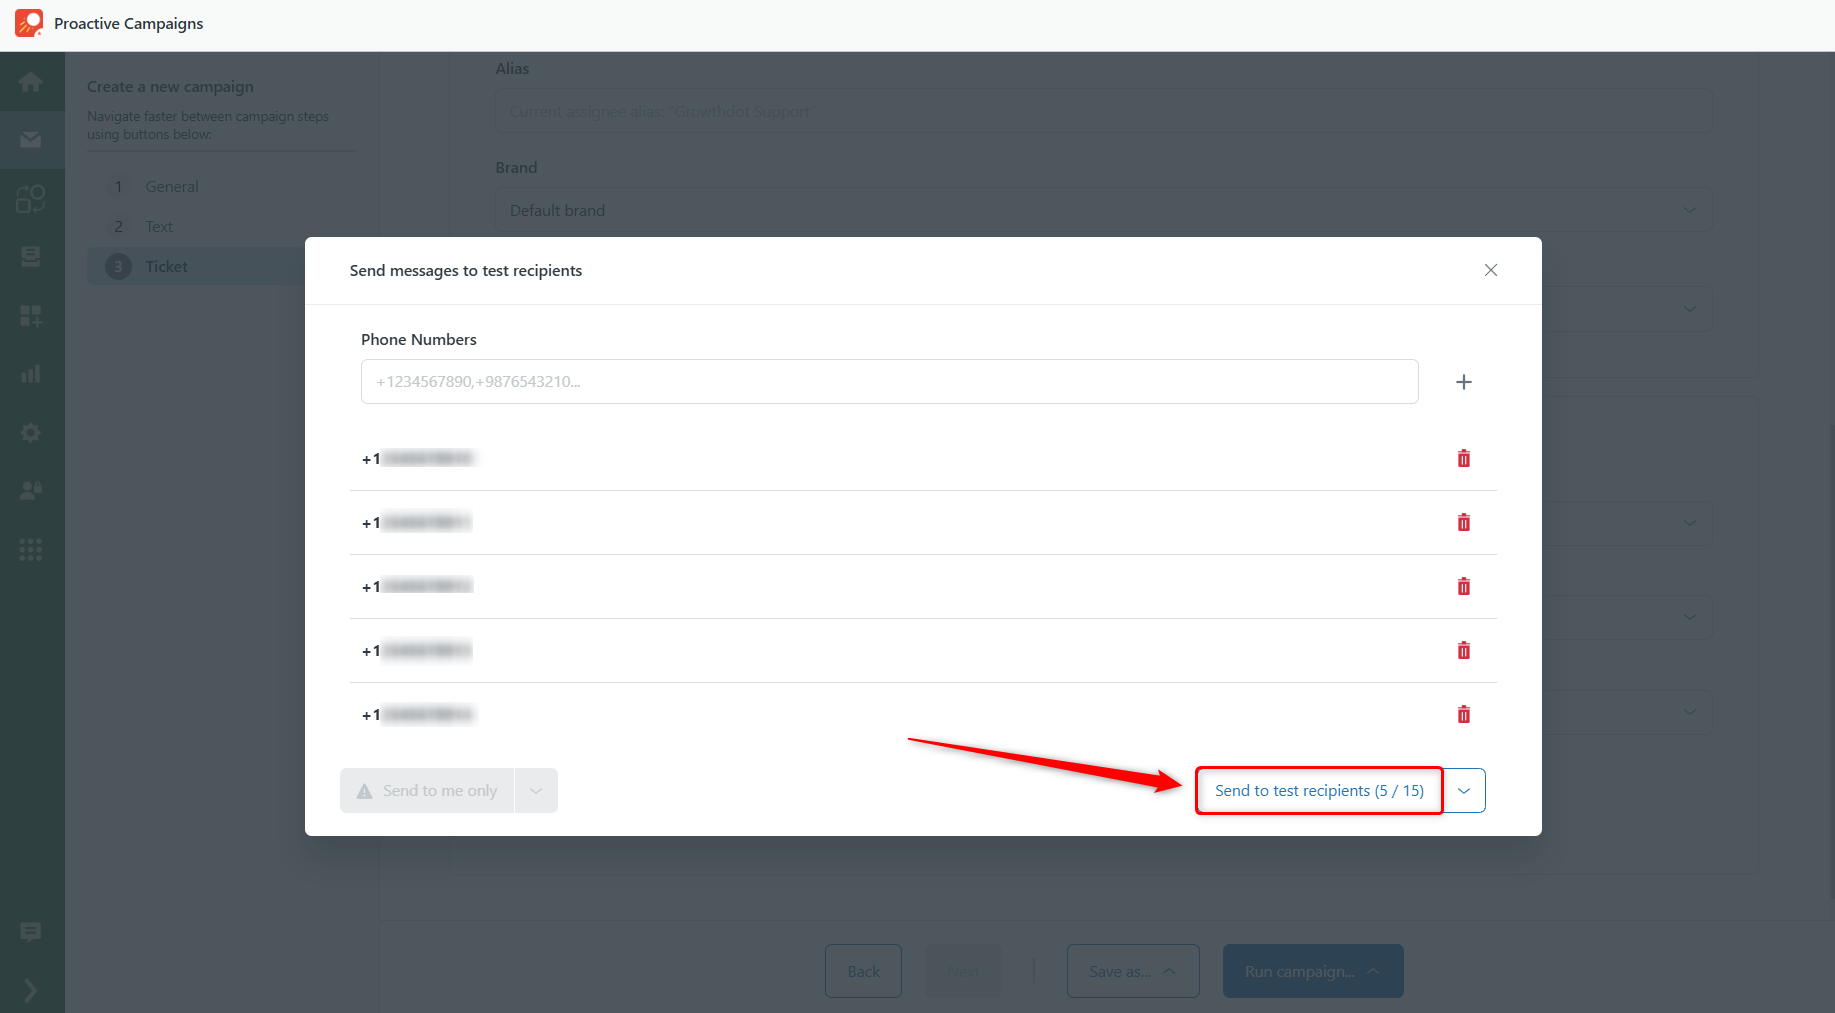
Input up to 15 test phone numbers and send the message to verify how it appears to recipients.
Step 5: Launch Your SMS Campaign
When everything is set, and you're happy with the test results, it’s time to go live!
1. Run the Campaign
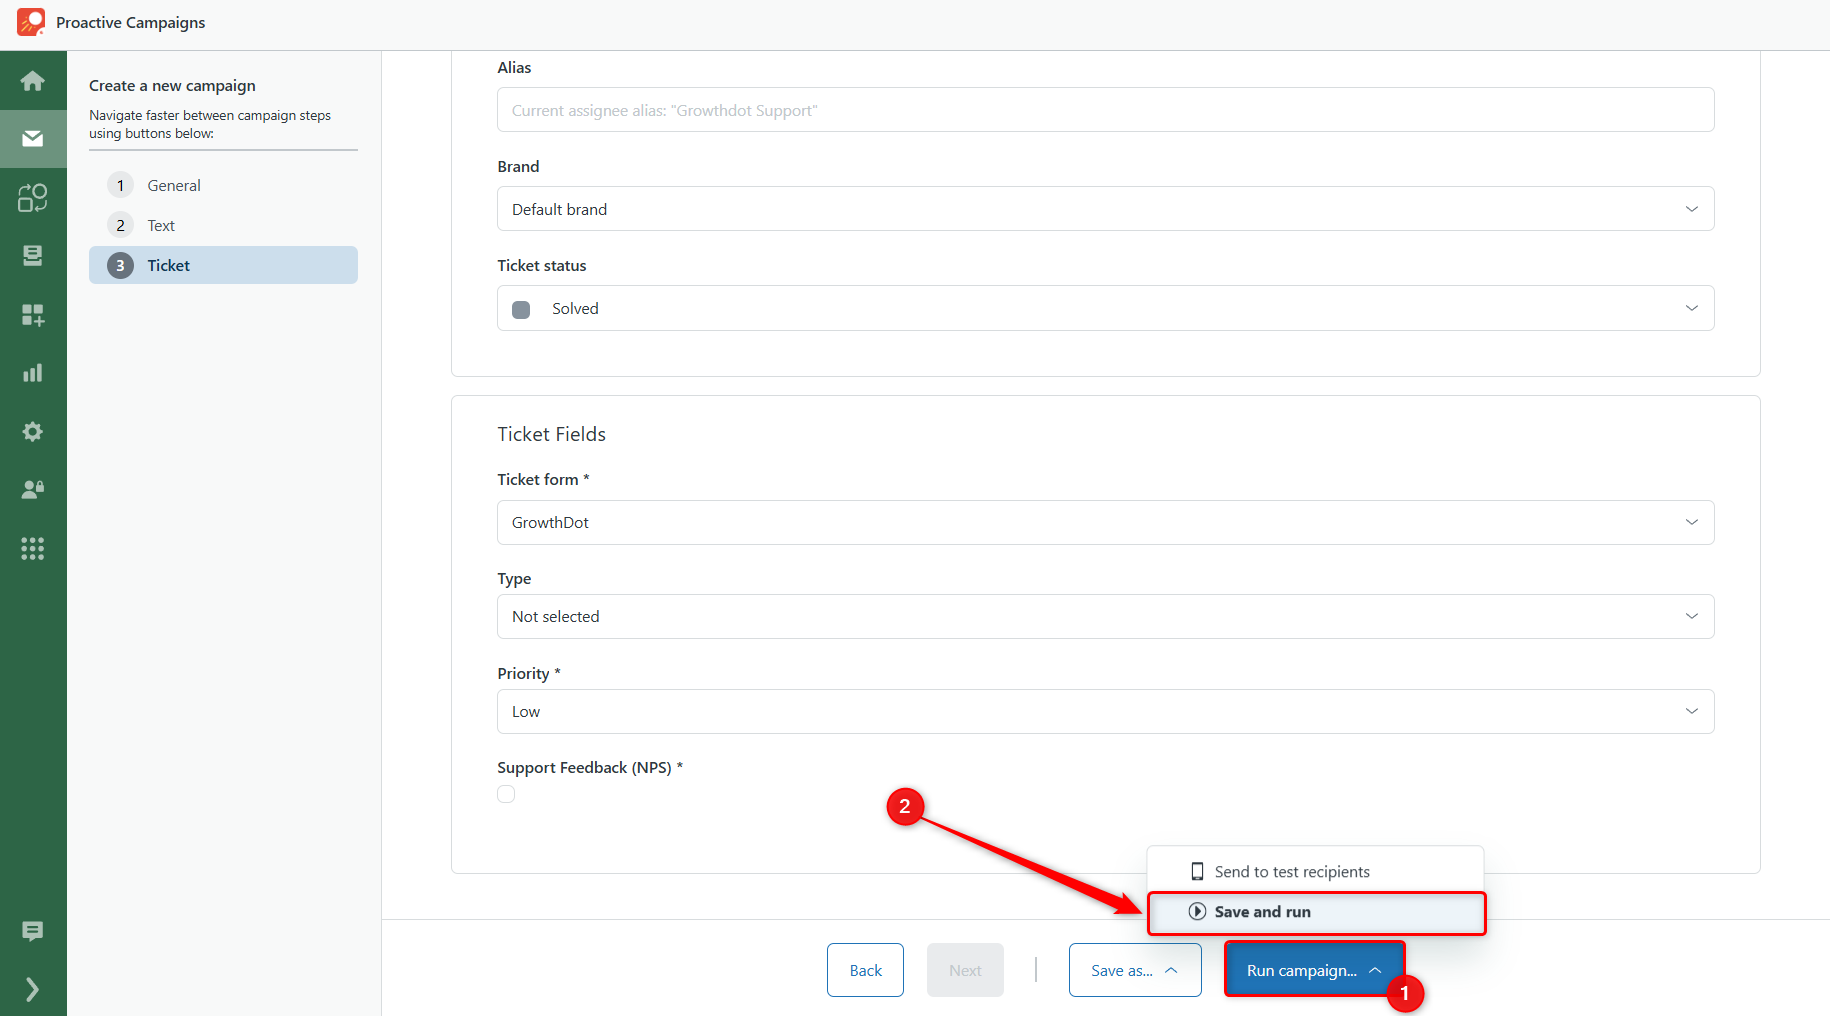
Click Run campaign > Save and run. This will send the SMS messages to your selected contacts.
Step 6: Review Campaign Results
1. View Campaign Details
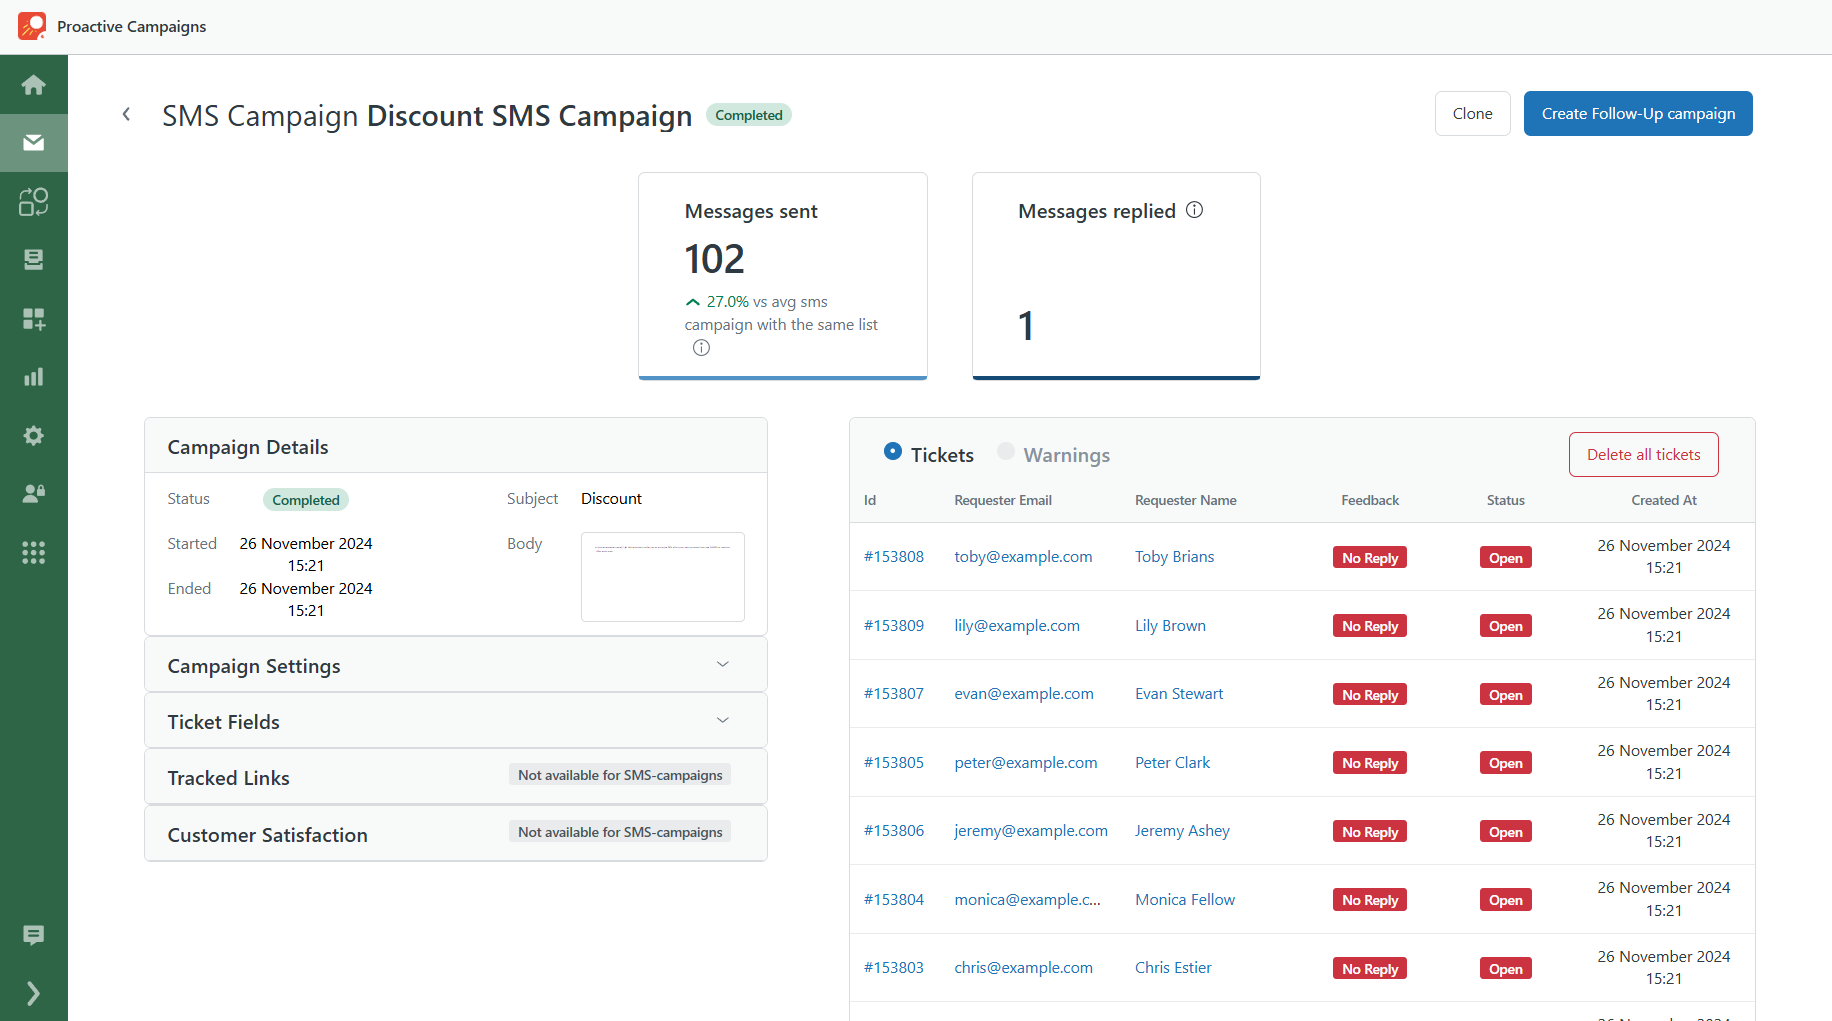
Once your campaign is complete, you can monitor its performance by clicking Details.
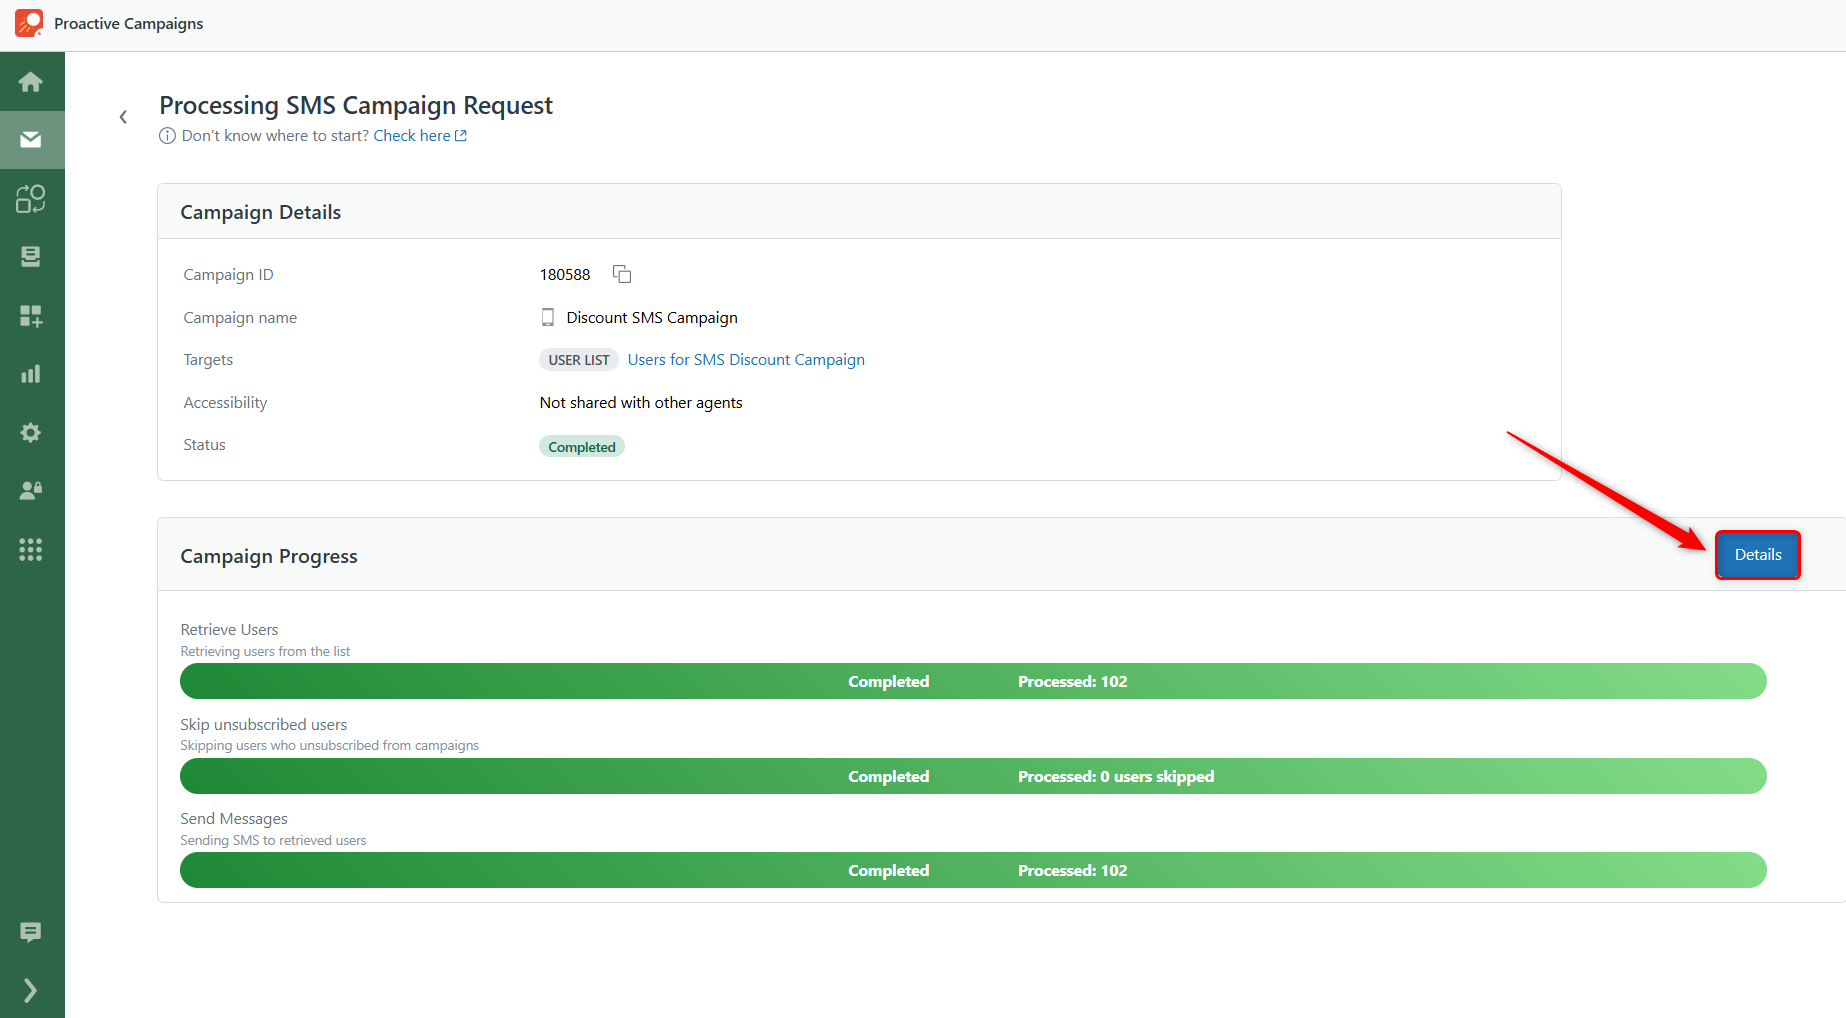
Here, you’ll find stats on the number of messages sent, replies received, campaign details, and all tickets to assess campaign effectiveness.
By following these steps, you can easily engage customers via SMS and monitor the results directly within Zendesk. If something is unclear and you have a question, please contact our support team.


