How to Send Test Emails in Proactive Campaigns
- Proactive Campaigns
The Time Code: «1:29 - Send Test Emails»
The Proactive Campaigns app allows you to create bulk emails easily. When the number of such emails gets higher, grows the possibility of emails being sent beyond the Inbox.
In that case, sending emails becomes one of the companies' pain points. However, Proactive Campaigns provides a chance to check whether your emails are sent to the Inbox or not.
So, let's learn how to do this together.
How to send emails to test recipients
First, Create a New Campaign on the Campaigns tab. Then, when you have done the three steps, we need to focus on the last one.
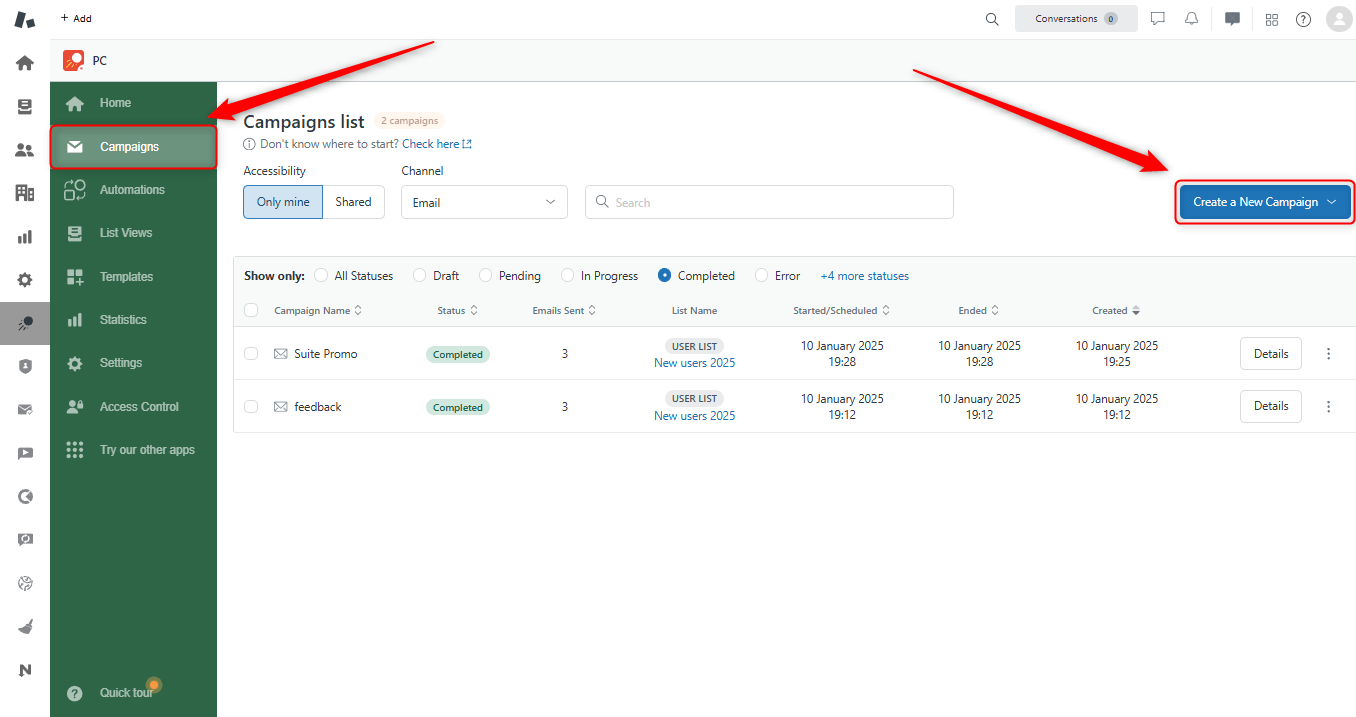
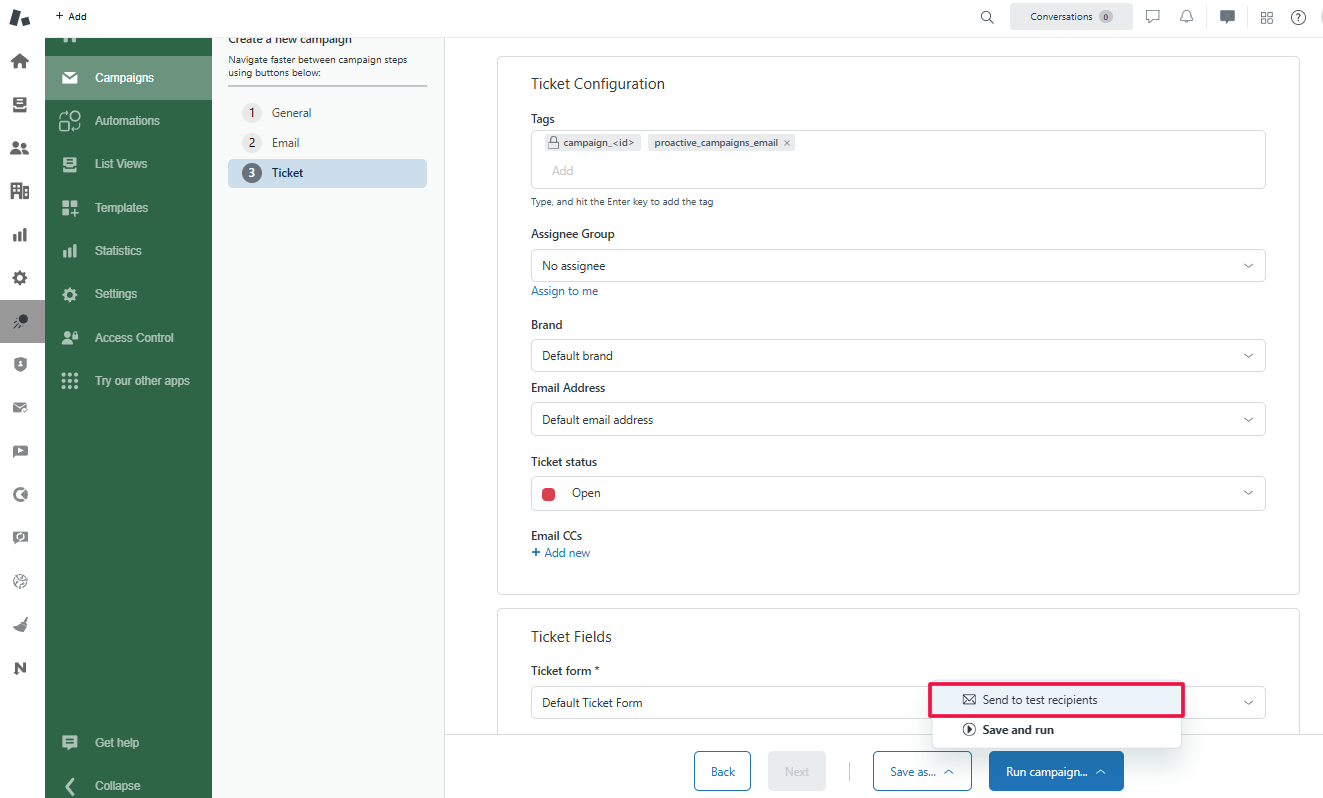
After filling in all requirable fields, click on the Arrow icon near the Run Campaign button. Next, select Send emails to test recipients.
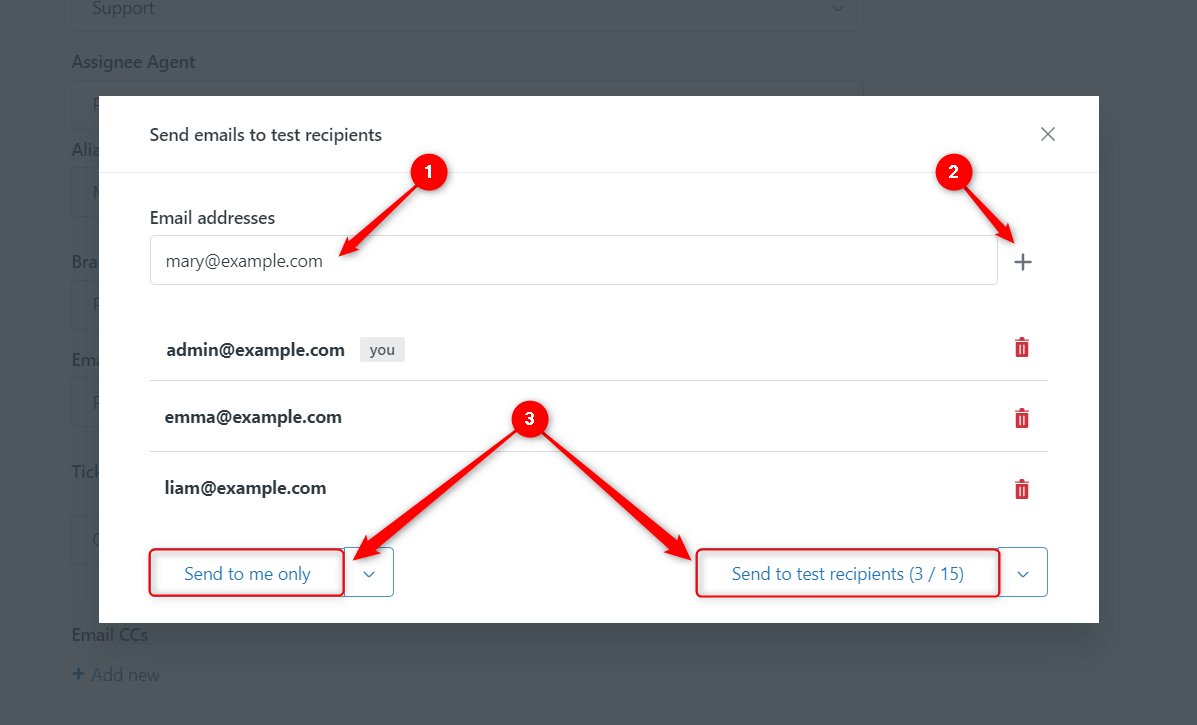
In the modal window opened:
- Enter the email address.
- Click + or press the Enter button on your keyboard. If you need to add several email addresses at a time, separate them with commas.
- Next, you can send emails to yourself (Send to me only) or all pointed email addresses (Send to test recipients). So, select what is fit your purpose the most.
Where can I get test emails?
Well, there are a lot of websites that conduct email deliverability tests. You can copy test emails and paste them into the Email addresses field.
Finally, click on the Send to test recipients button and check your test emails.
Test the email campaign with attachments
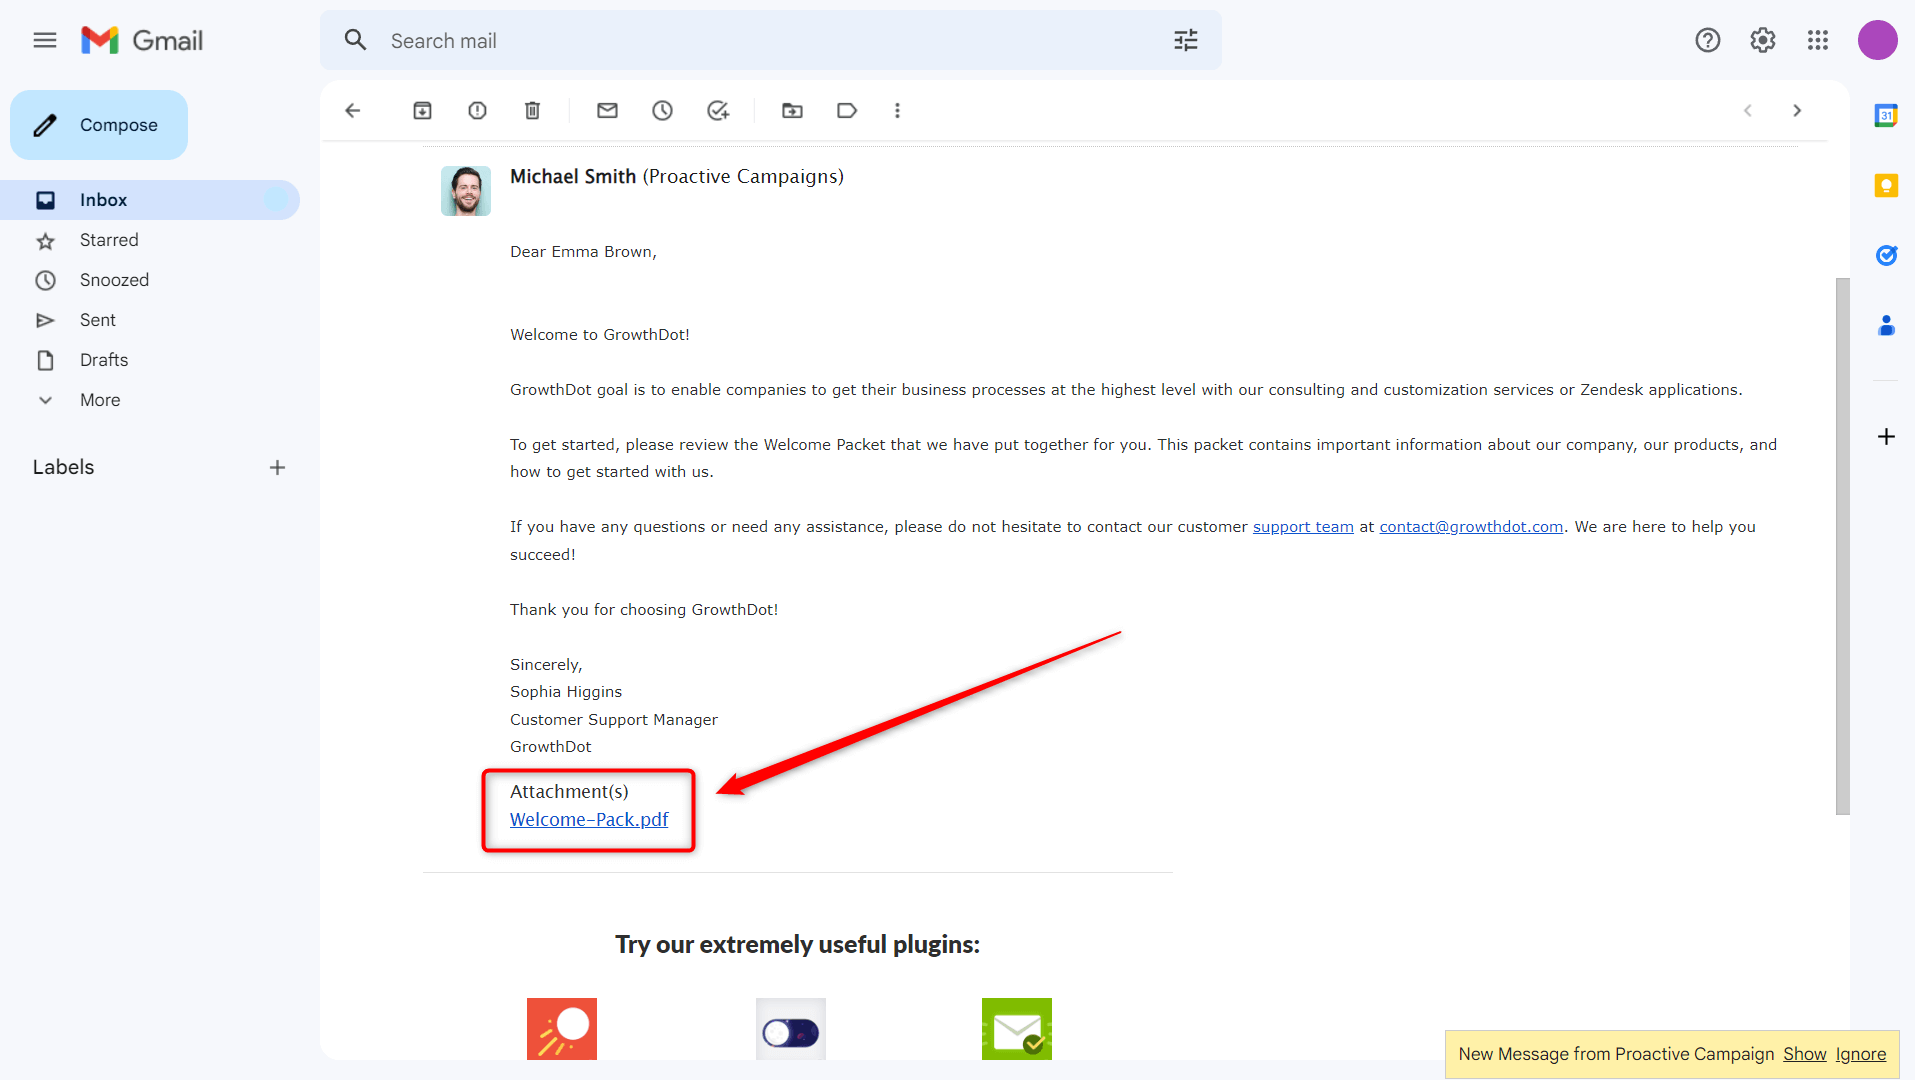
If you want to check the campaign with attachments, then if you click the Send to me only or Send to test recipients button, the app sends emails with empty links. However, there is an option that helps see the actual view of the attached files.
When you have done all the steps described above in this article, and you have a modal window opened, enter emails as usual. Then, instead of clicking Send to me only or Send to test recipients buttons, you need to select an Arrow icon next to one of them. So, you have two options:
- Send without ticket deletion if you want to send a test email only to yourself.
- Send without tickets and imported users deletion if you added several email addresses.
So, click the most appropriate option.
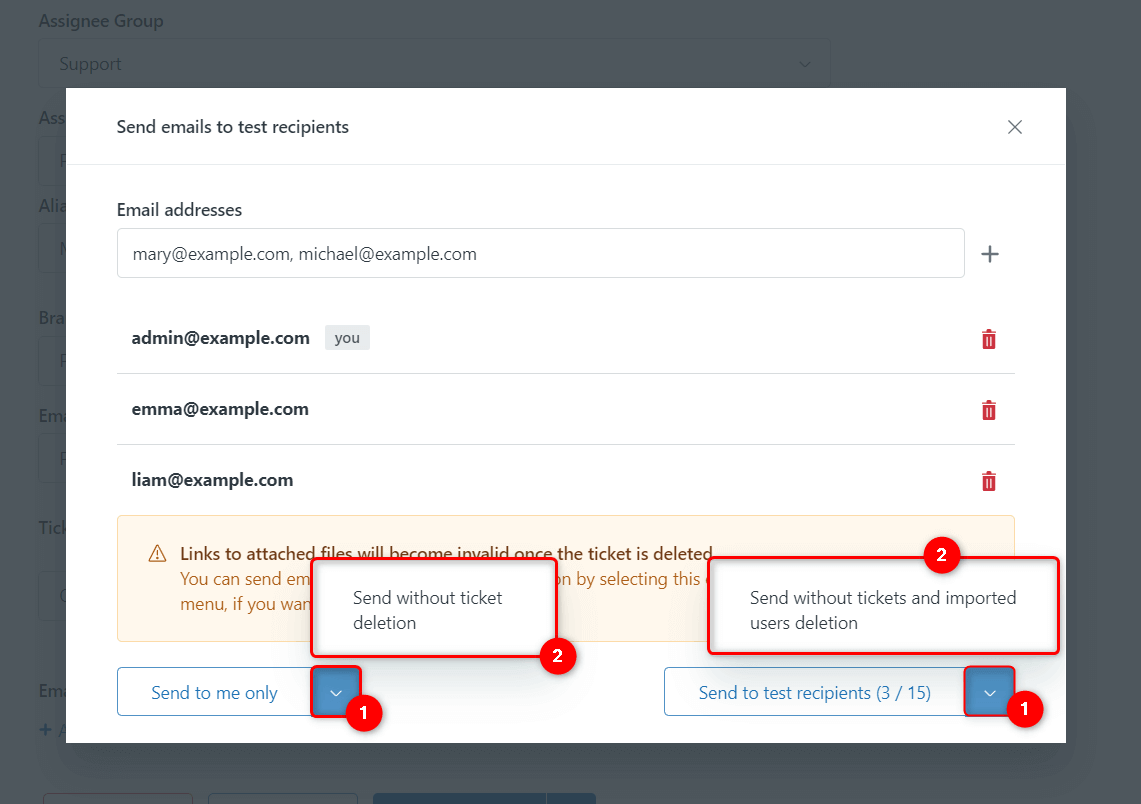
Then, the app leave generated tickets, so you will be able to check out attachments from the email service you use.
Good job! Hope it will facilitate your email campaign creation.
If you still have any questions about the test emails or suggestions, please contact us.


