How to unmerge tickets in Zendesk with the GDPR Compliance app
-
GDPR Compliance
Sometimes, tickets in Zendesk are merged by mistake or for convenience, but later you may need to separate them to manage requests accurately or comply with data handling regulations.
With the GDPR Compliance app, unmerging tickets is simple and gives you full control over your ticket records. This guide will show you two ways to split merged tickets: unmerging a specific ticket or performing a bulk unmerge of multiple tickets.
Single Ticket Unmerge
Unmerging a single ticket is useful when you notice a ticket was merged incorrectly, or when you need to restore it for individual follow-up. Here’s how:
Step 1 - Open the merged ticket
Navigate to the ticket in Zendesk Support that was previously merged. This is the ticket you want to restore as an independent record.
In the sidebar, click Apps and select GDPR Compliance. Then click Process the Ticket.
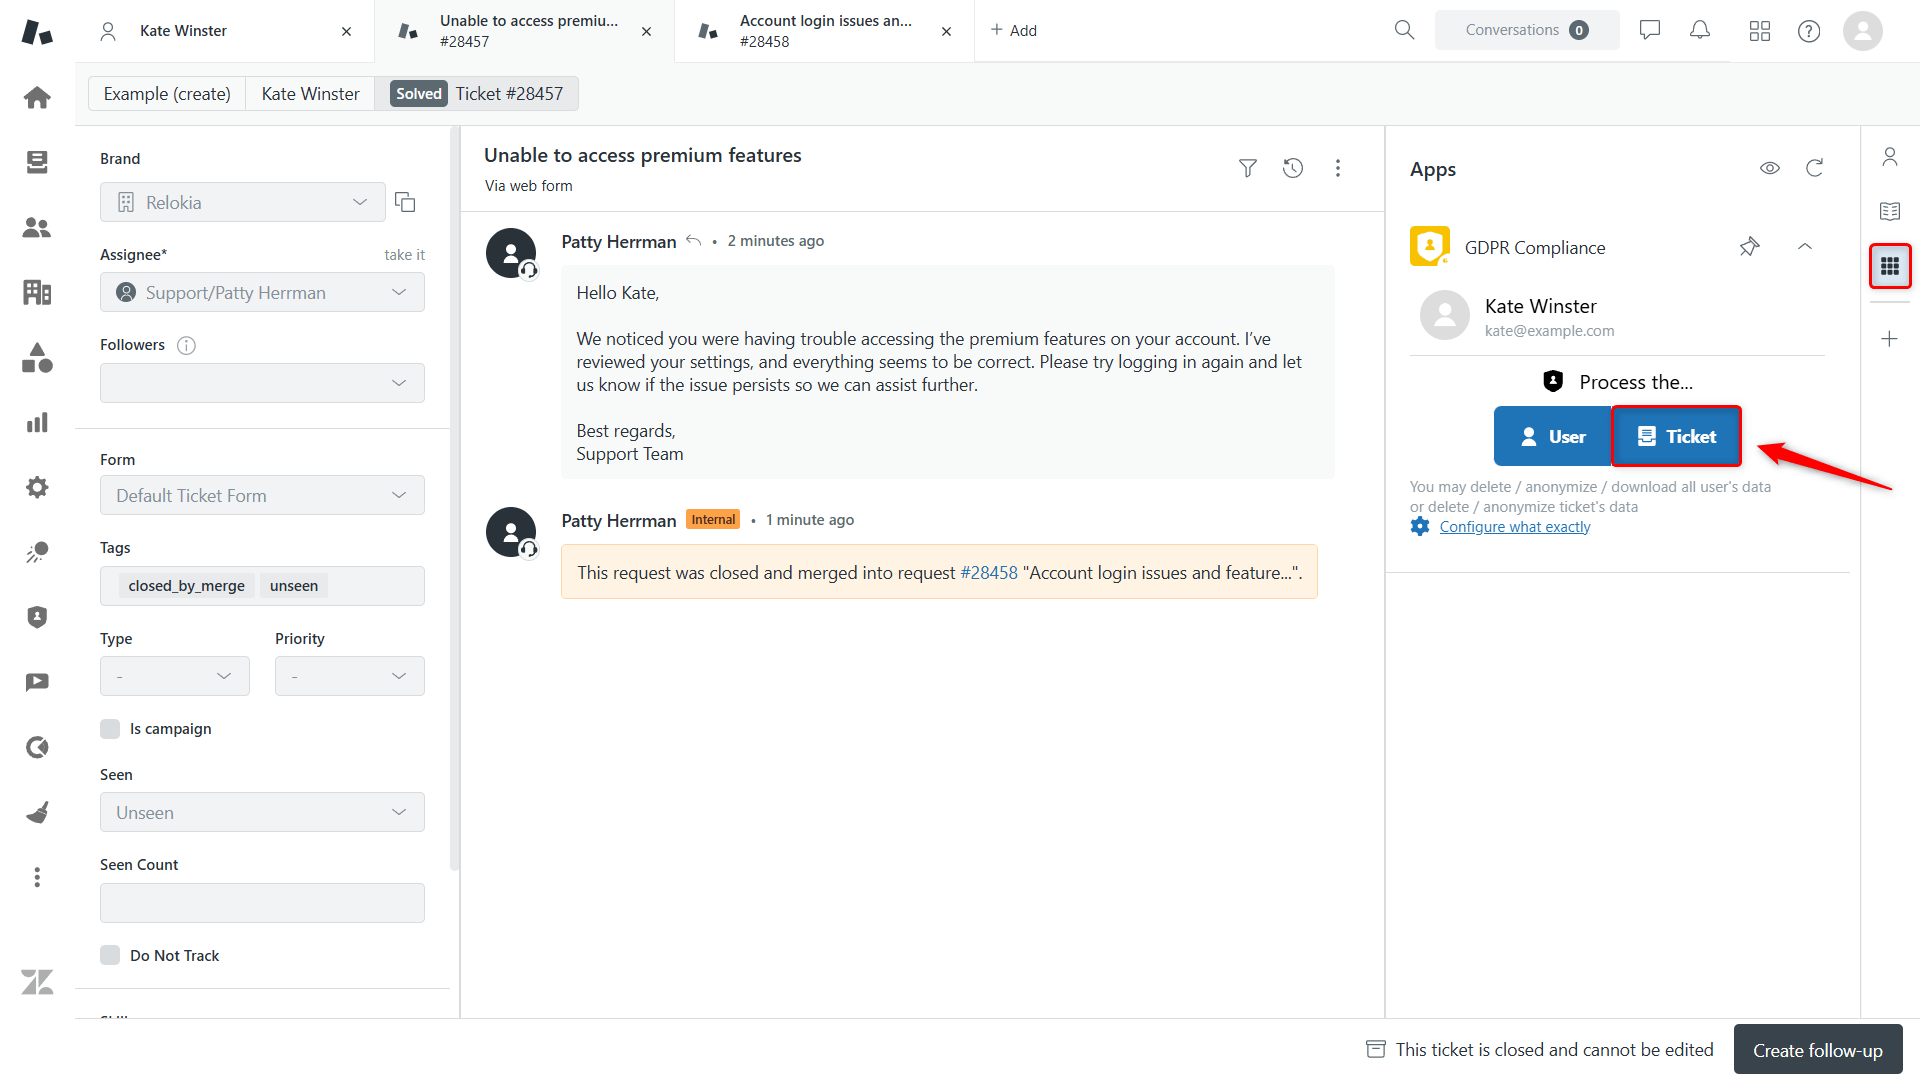
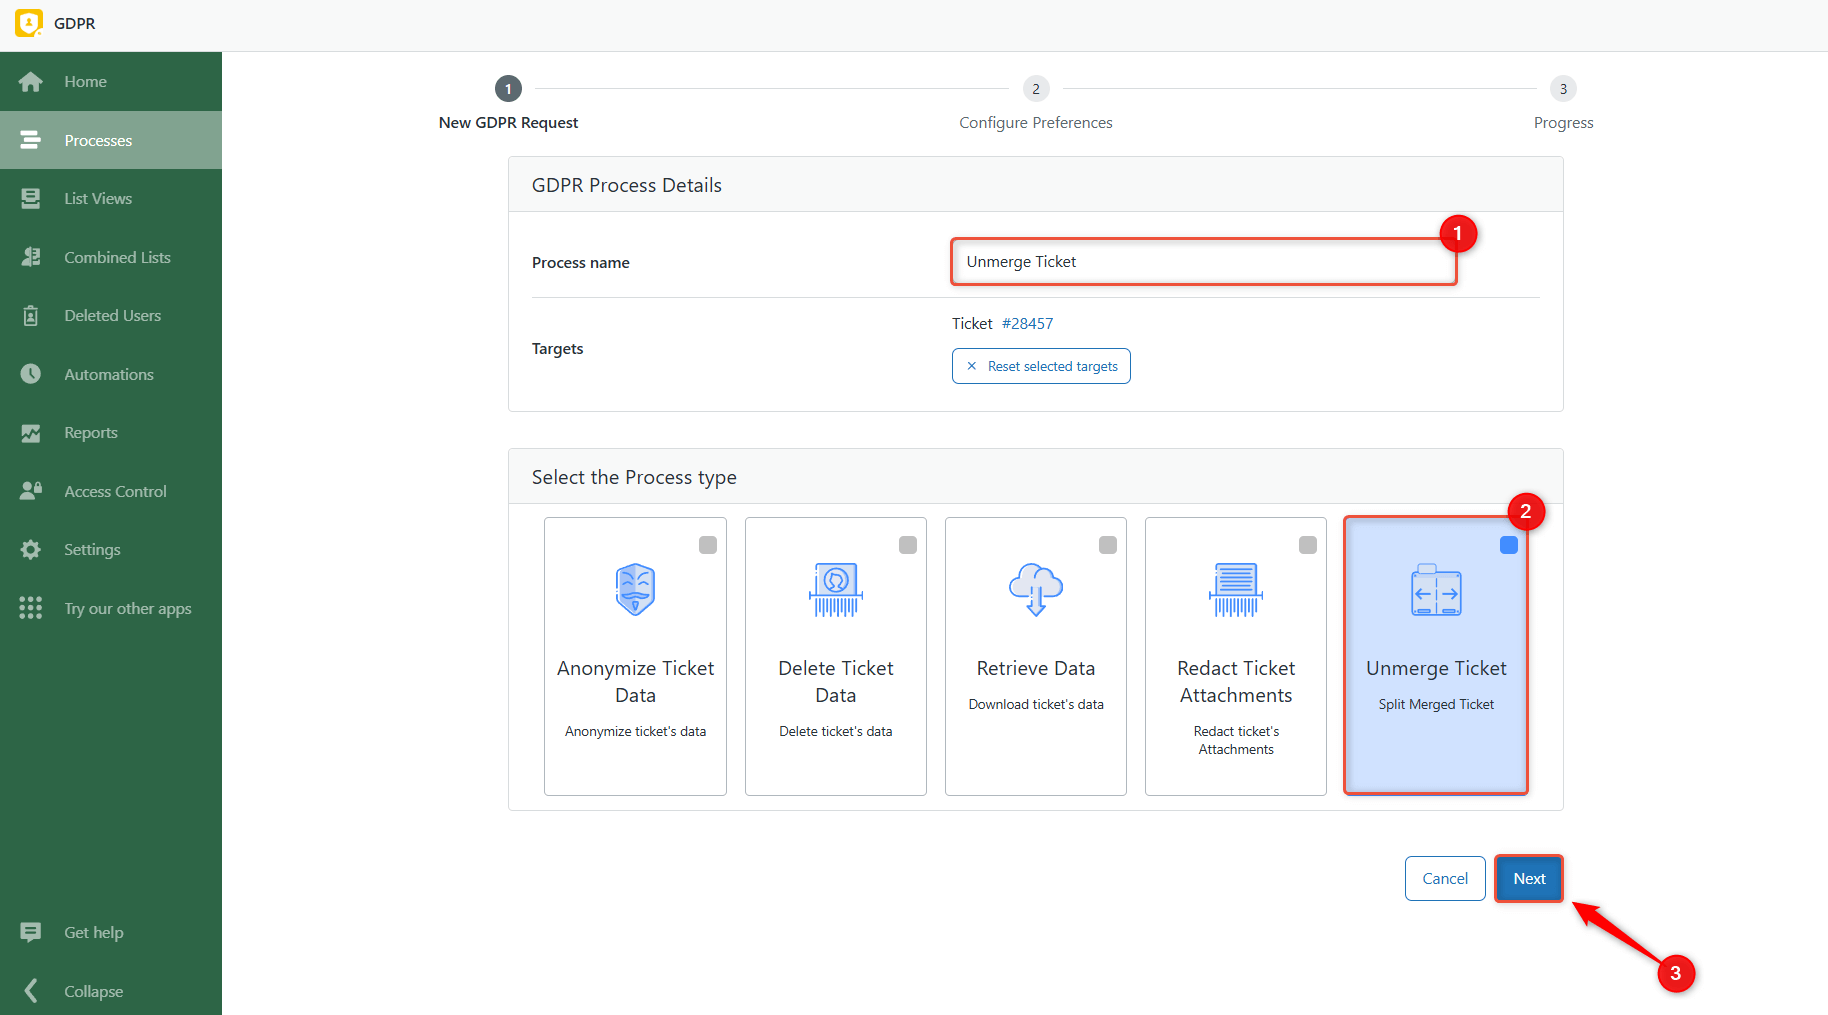
Step 2 - Name your process and select unmerge
Enter a name for the process to help you identify it later. Select Unmerge Ticket and click Next.
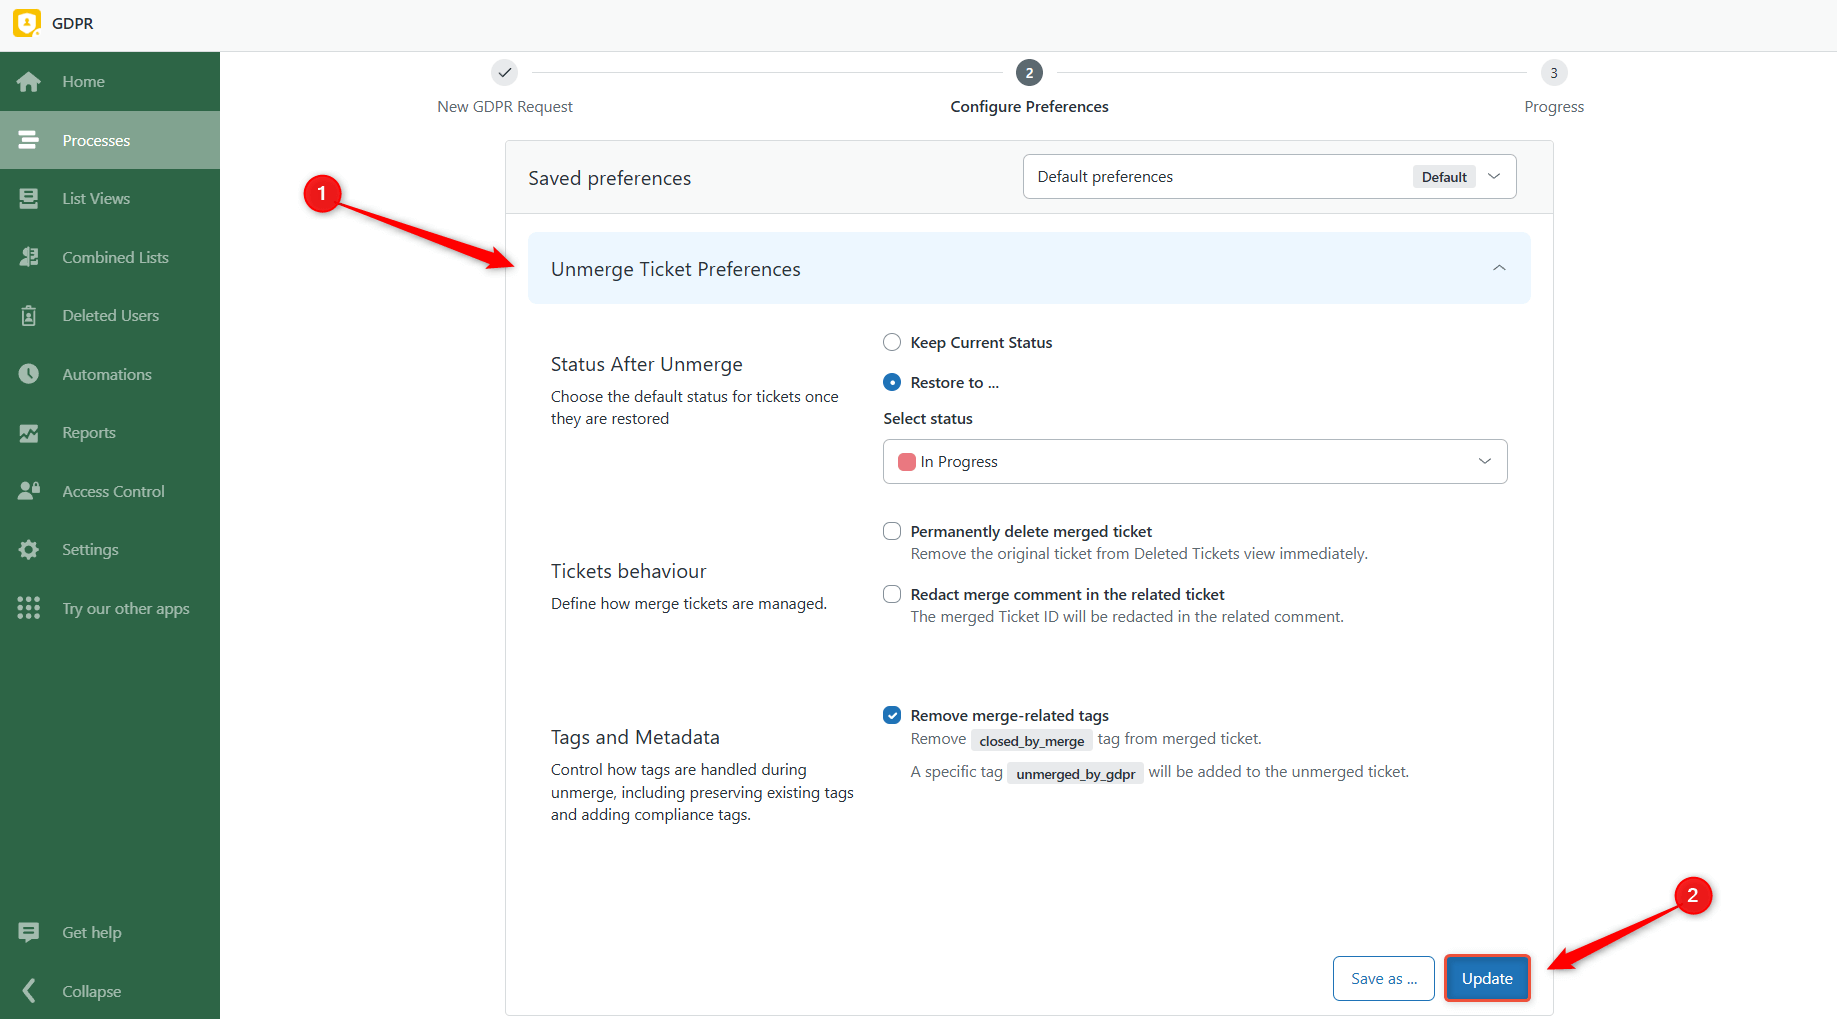
Step 3 - Set process preferences
Here, you can make choices about the restored ticket’s status. You can keep the current status or change it to any status you need.
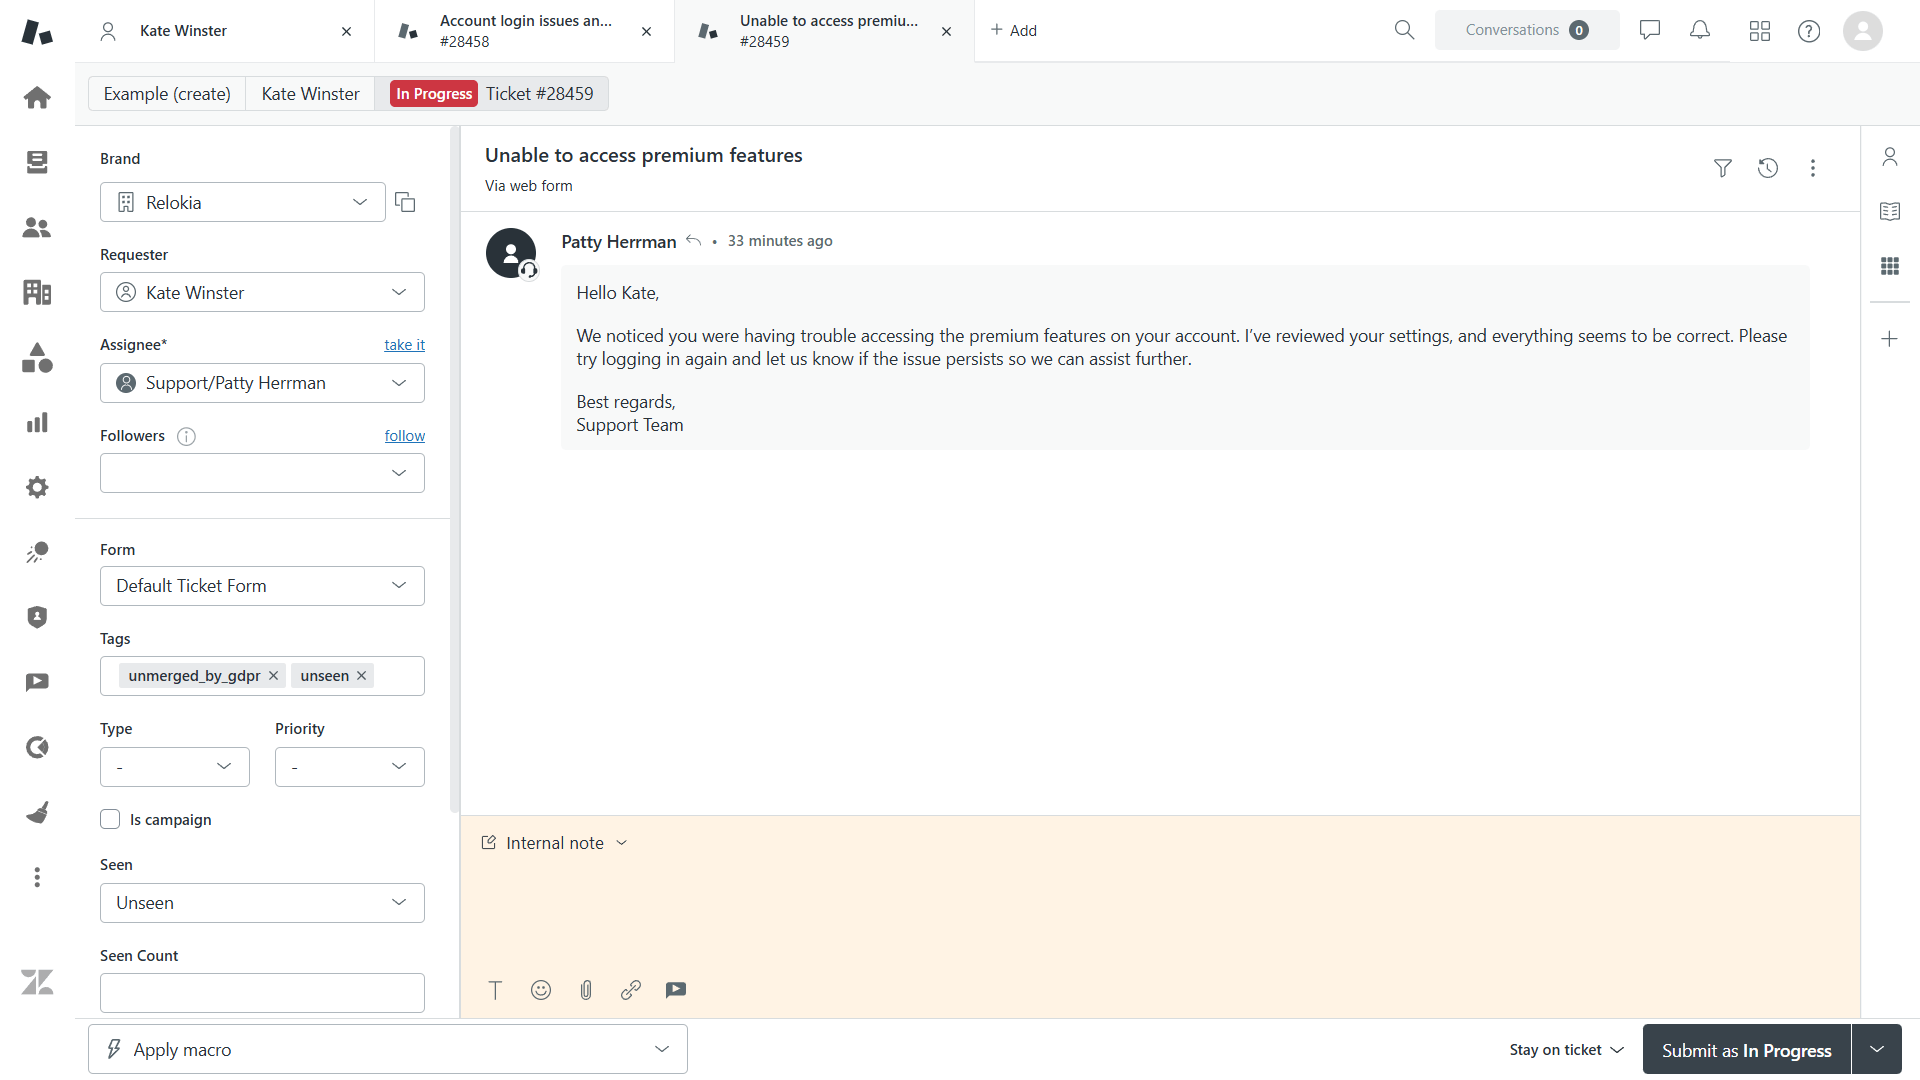
You can also define how the original merged ticket is handled (whether to keep it, delete it, or redact merge comments). Additionally, you can manage tags and metadata. For example, merge-related tags can be removed, and a special tag like unmerged_by_gdpr will be added to the restored ticket for tracking purposes.
After reviewing your selections, click Update (if you made any changes) and Next.
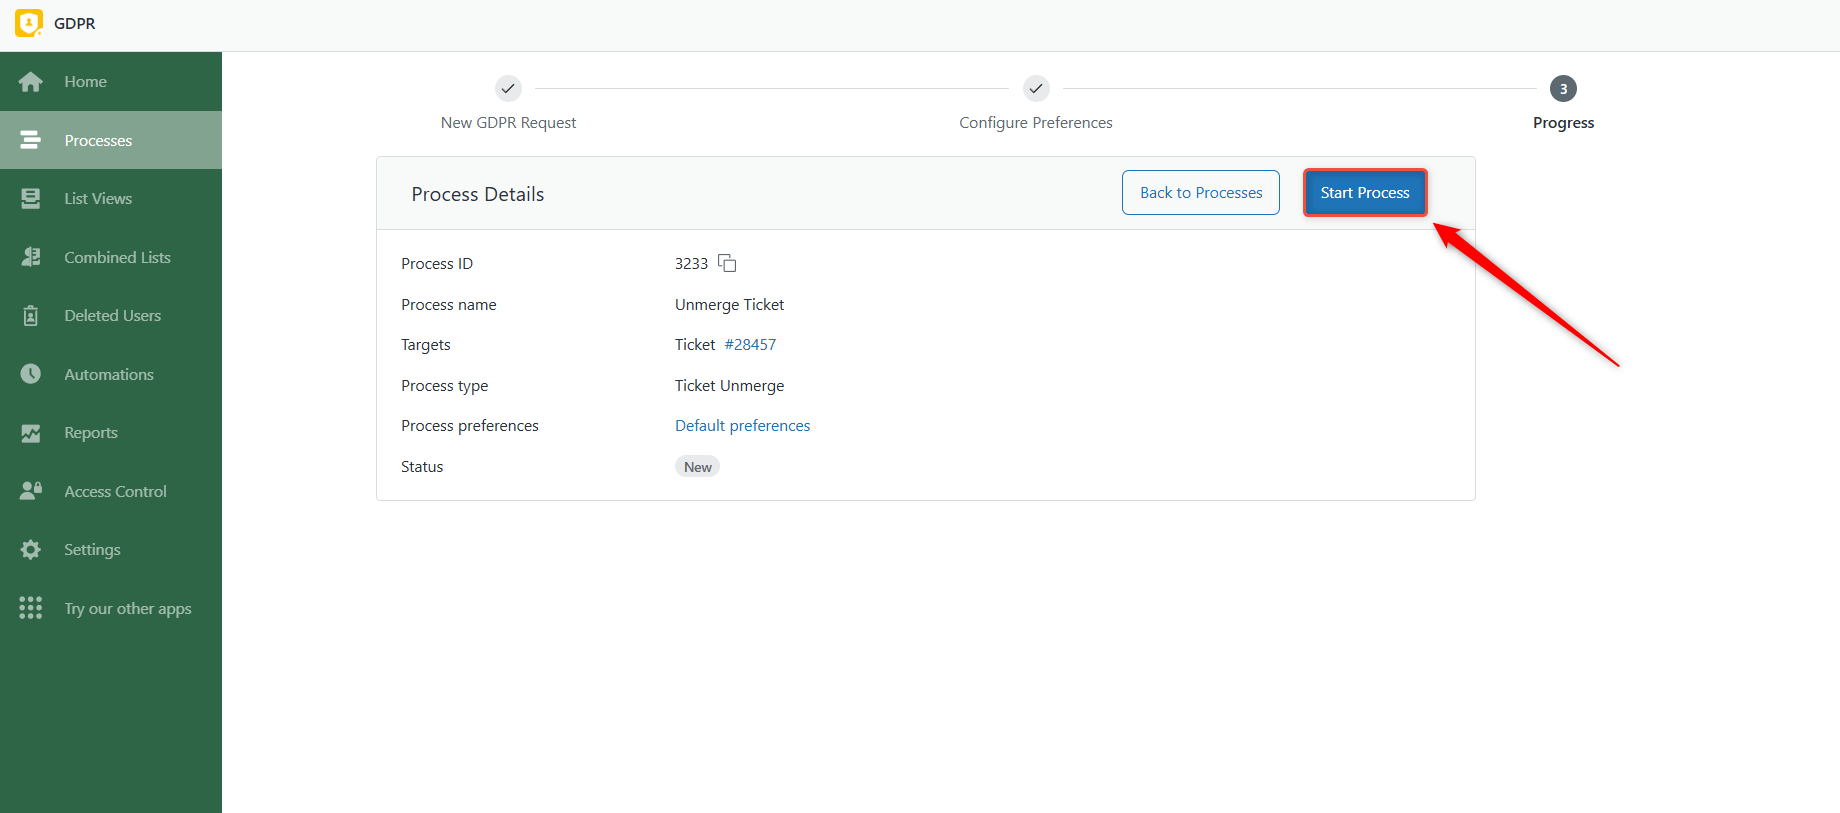
Step 4 - Start the process and verify results
Finally, review the details and click Start Process.
Once the process is complete, you’ll see the newly unmerged ticket in your Zendesk system.
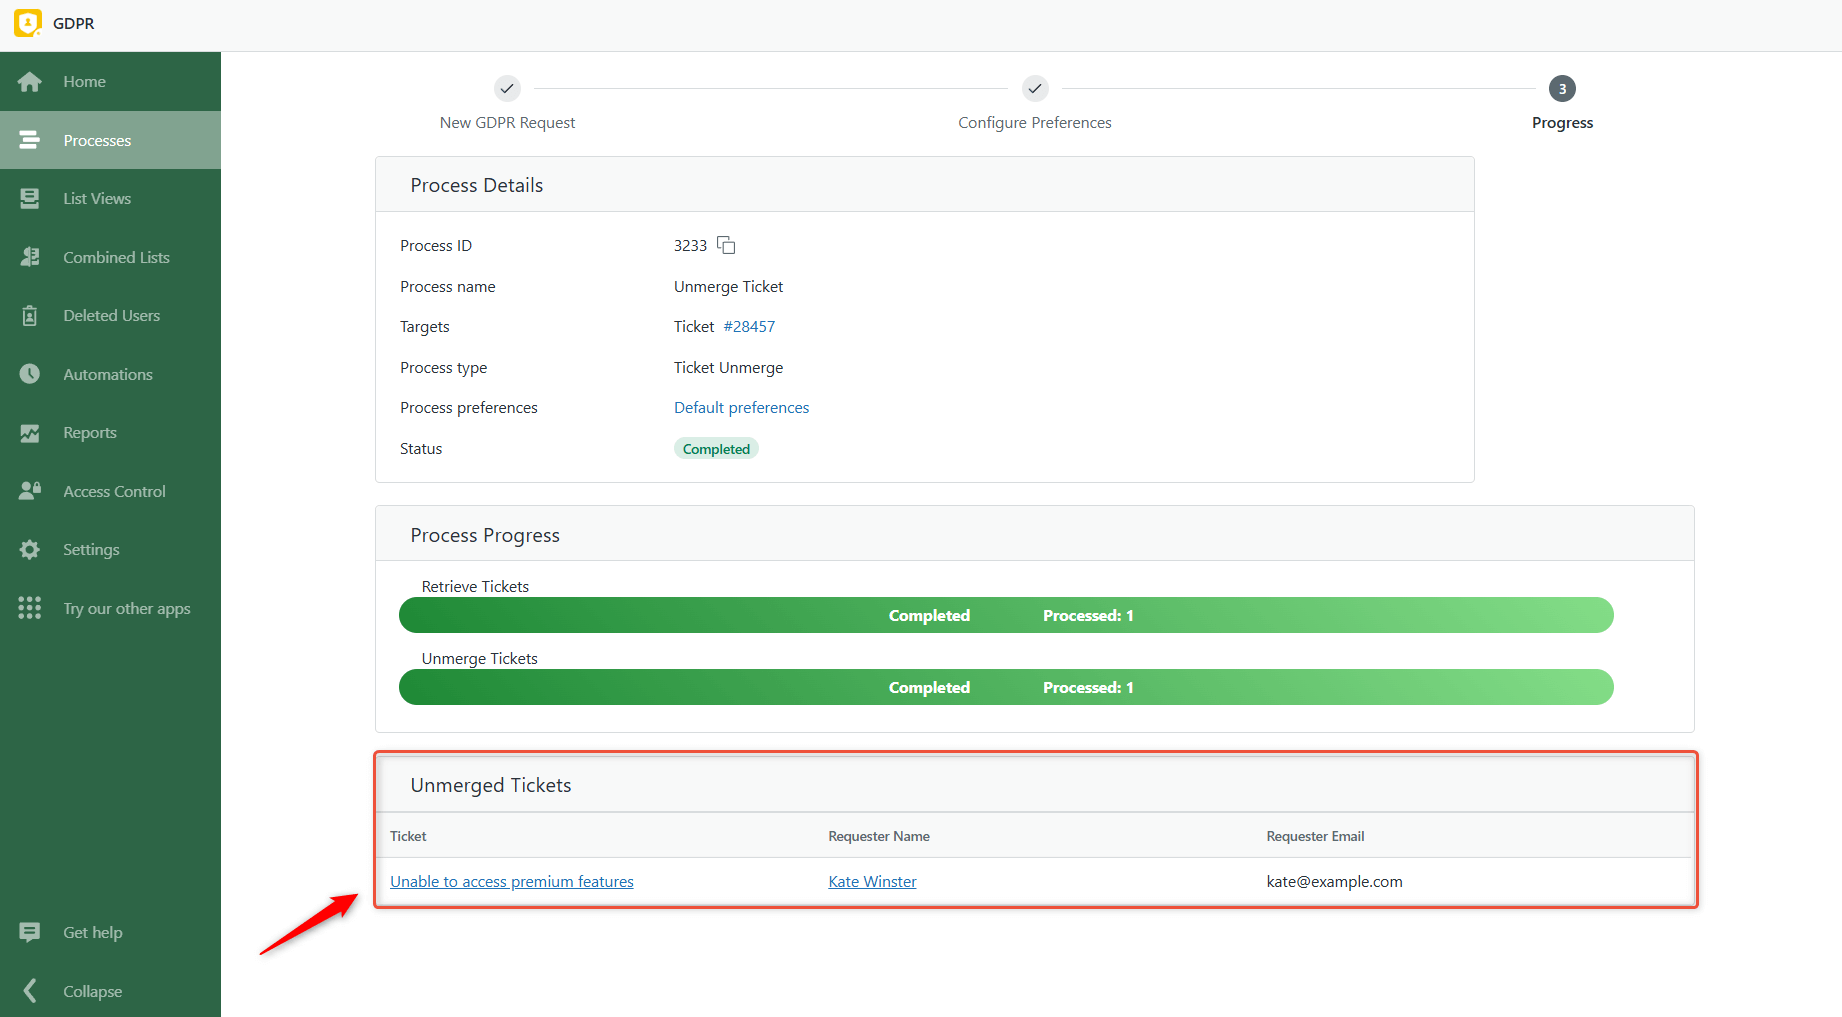
You can now open the ticket to check it. The ticket is fully restored, including all comments (and attachments, if any), with the correct status, tags, and other fields.
Bulk Ticket Unmerge
Bulk unmerging is useful when you need to restore multiple tickets that were merged, for example, after a system cleanup or to correct multiple merge mistakes at once.
Step 1 - Create a ticket list in the app
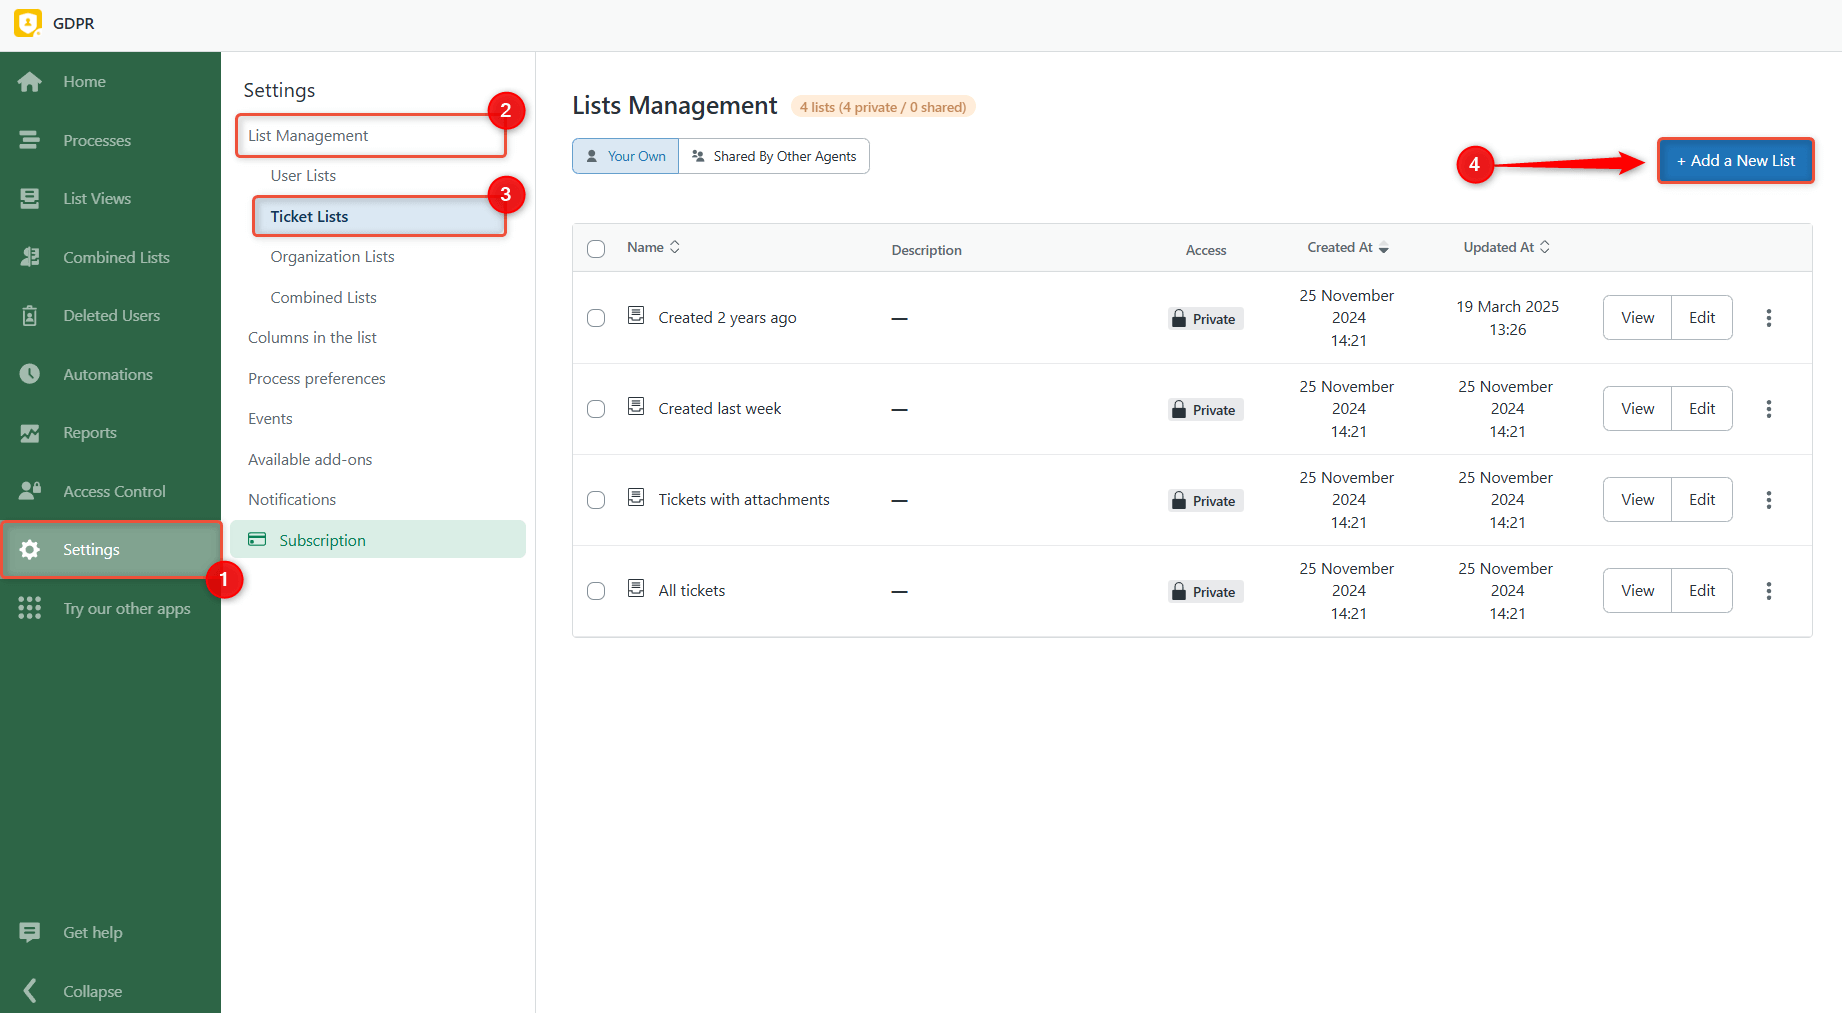
Open the GDPR Compliance app in Zendesk and go to Settings > List Management > Ticket Lists. Click + Add a New List to create a new list.
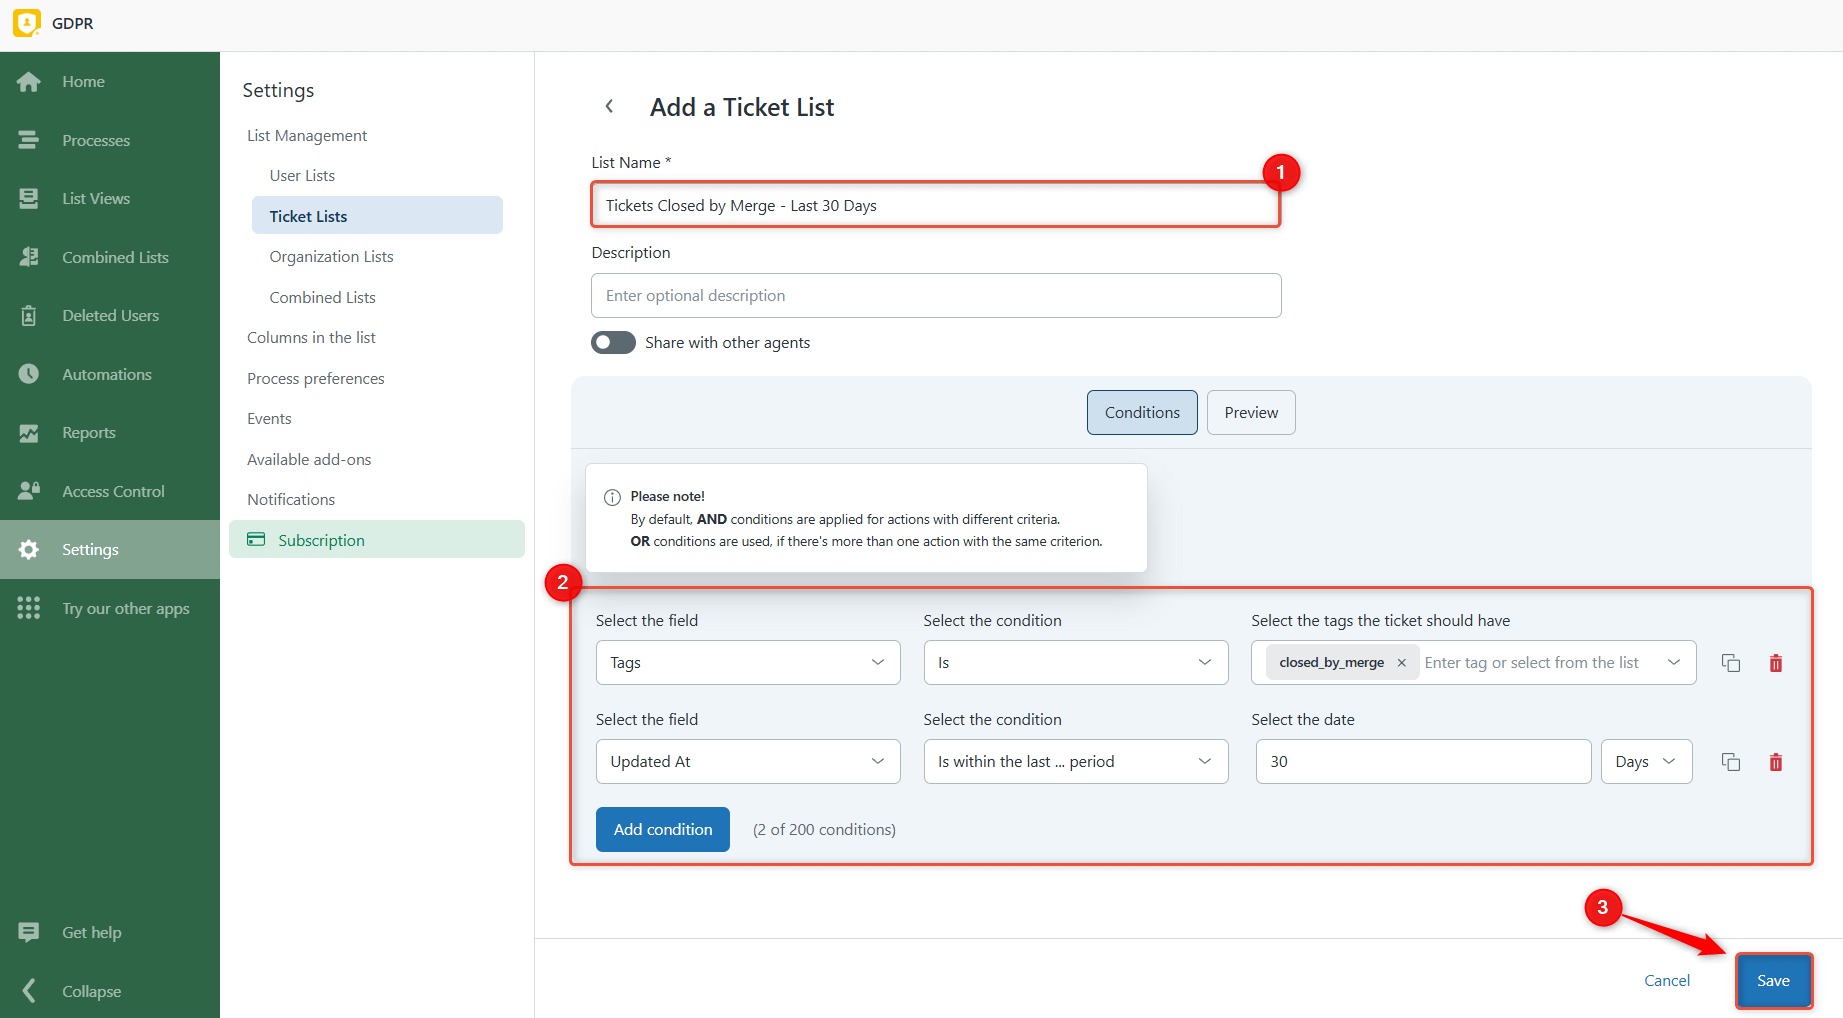
Give your list a name and click Add condition to define which tickets should be included.
To find all merged tickets, set the condition to Tags - Is - closed_by_merge.
You can also add other conditions to filter tickets further, for example, by time period, brand, assignee, or other ticket fields. Once your conditions are set, click Save to create the list.
Step 2 - Start the bulk unmerge process
Go to List Views > Tickets, select the ticket list you just created, and click Process GDPR Request.
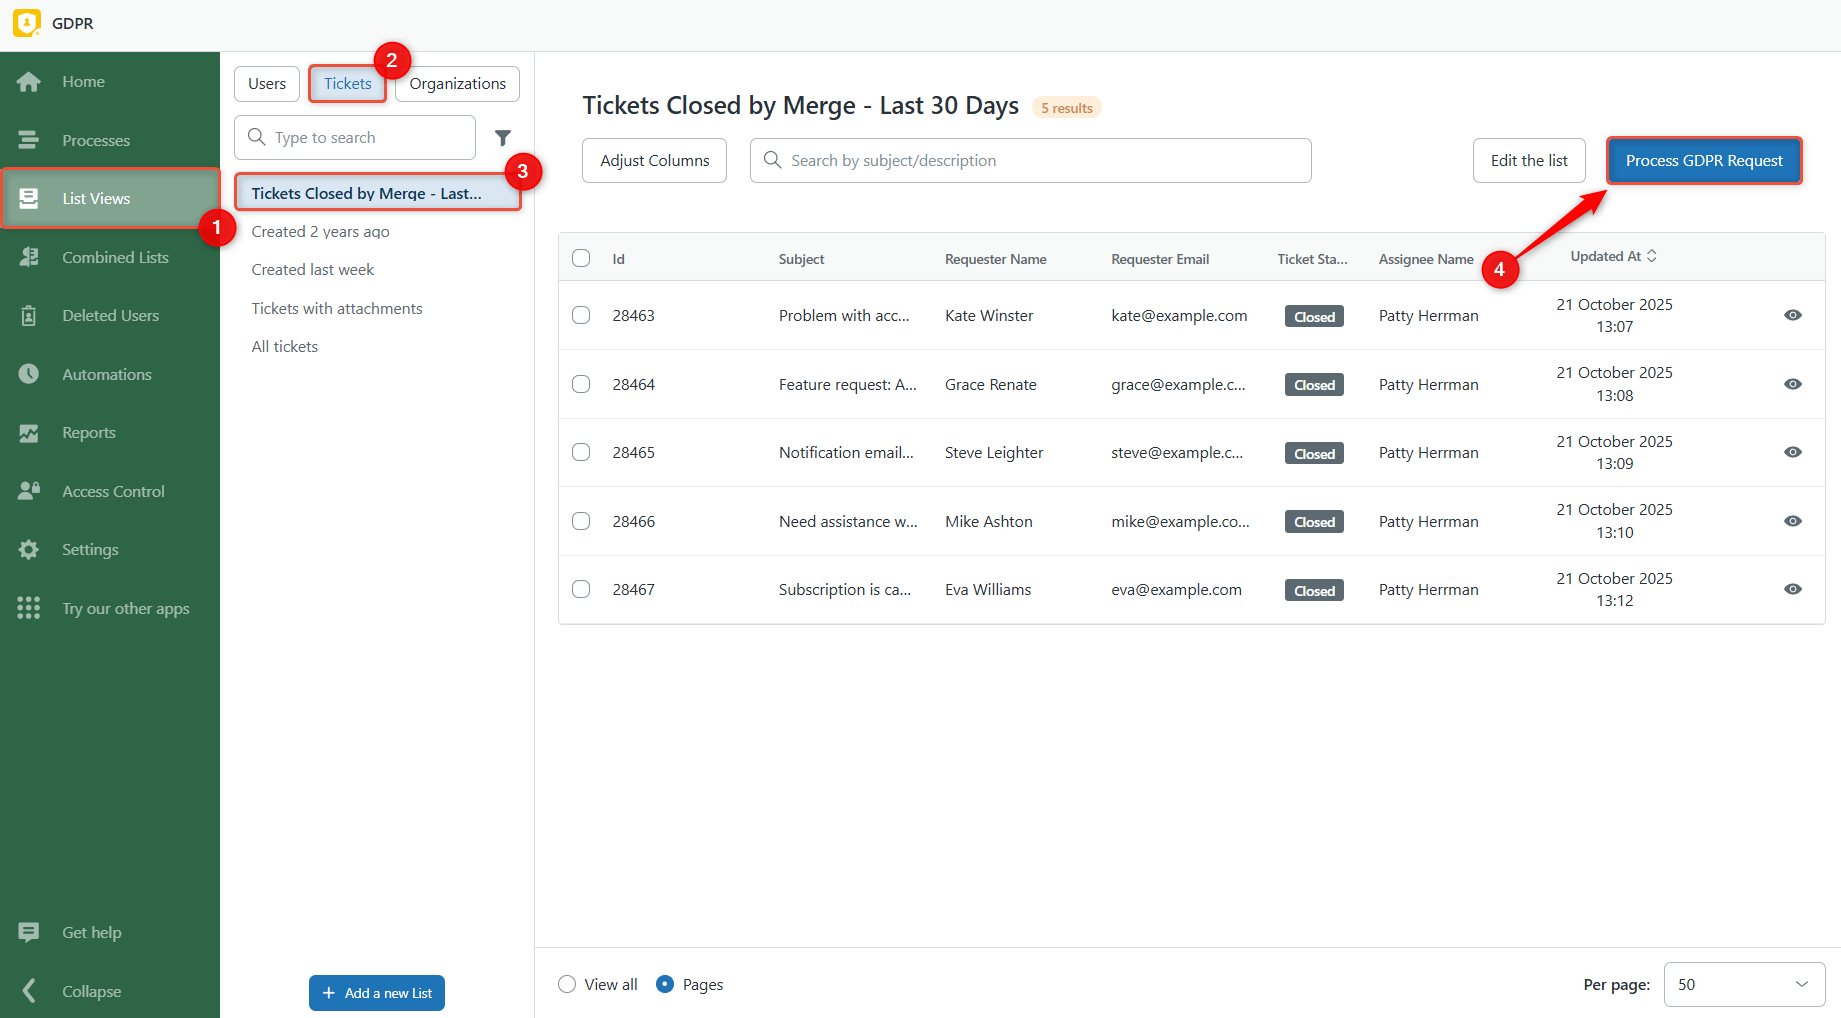
From here, the steps are the same as for unmerging a single ticket. Name your process, select Unmerge Tickets, set your preferences, and start the process.
Step 3 - Check unmerge results
After, you can see the overview of all your successfully unmerged tickets.
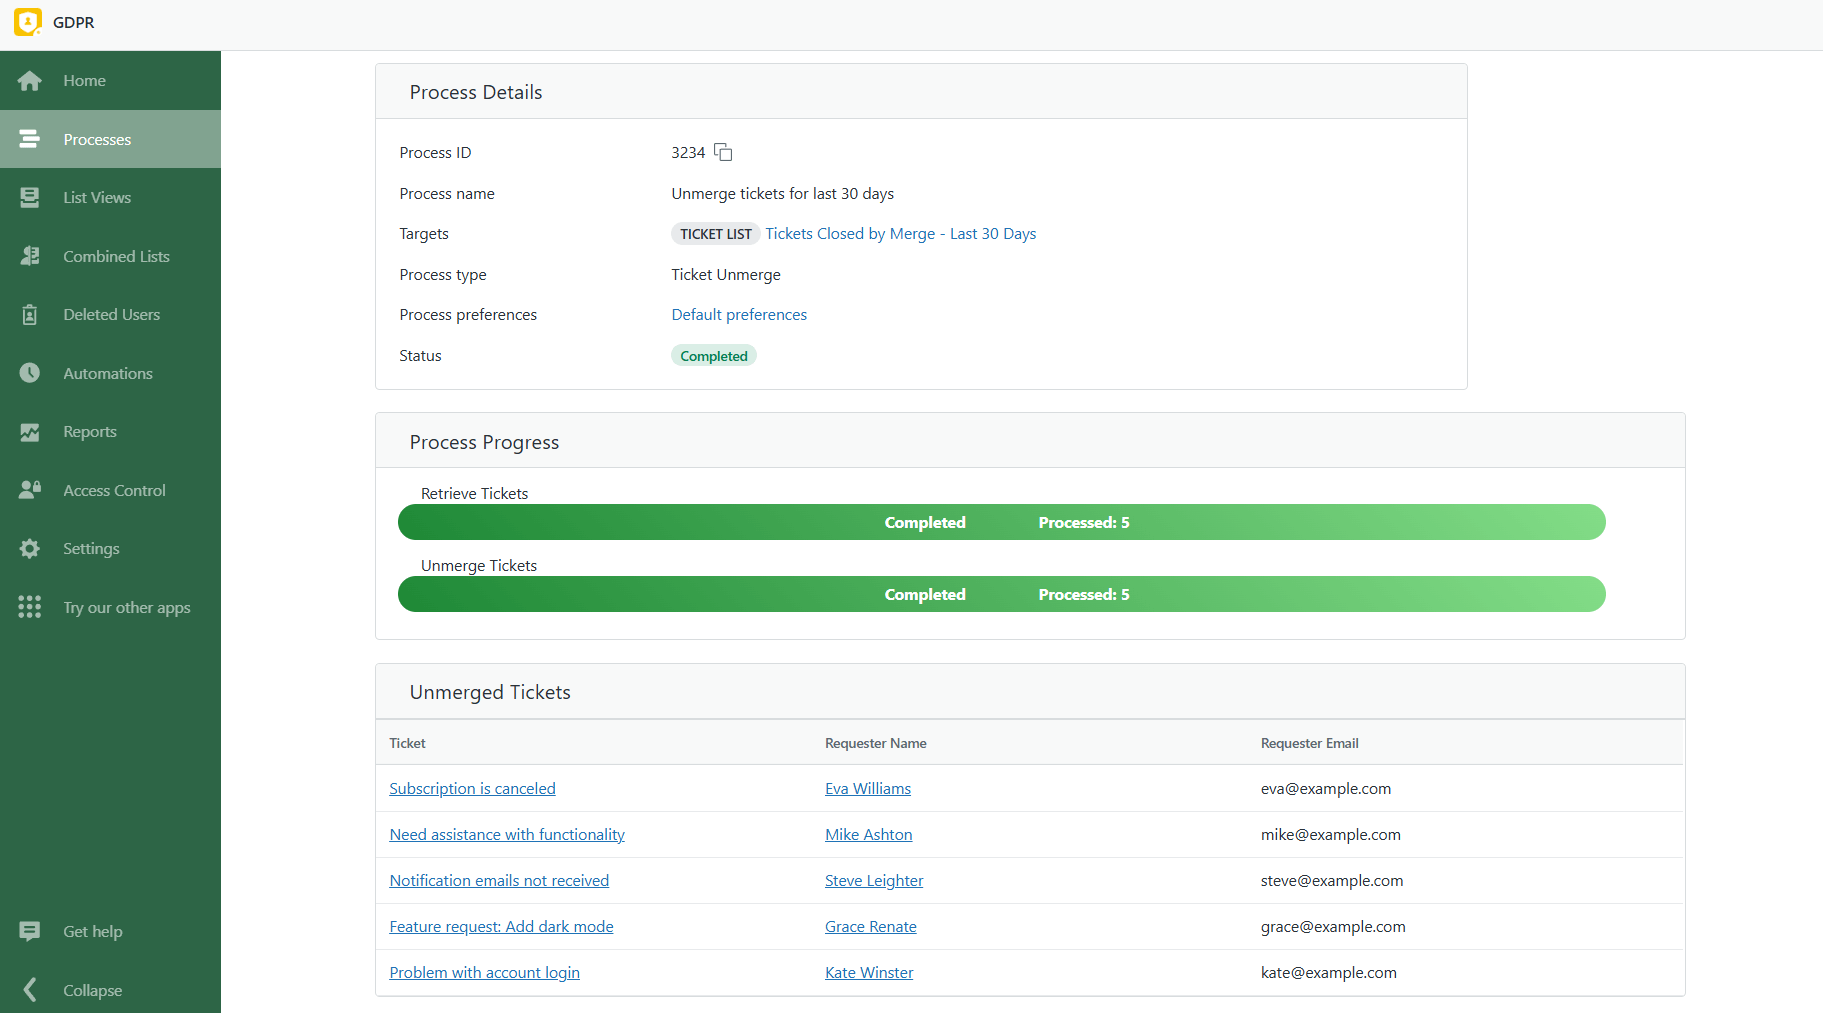
Use this process to ensure all previously merged tickets are fully restored, organized correctly, and aligned with data regulations.


