How to Update Ticket Fields via CSV During a Campaign in Proactive Campaigns
-
Proactive Campaigns
With Proactive Campaigns, you can automatically update custom ticket fields by uploading a CSV file for your mass email campaigns. This saves you time and effort by eliminating manual updates, ensuring your tickets stay current without any extra work.
Follow this guide to streamline your bulk ticket management.
Step 1: Prepare Your CSV File
First, ensure your CSV file includes a column with the data for the custom ticket field you want to update. In our example, we use the field ‘Subscription Plan.’ The app will map this data to the corresponding ticket fields in Zendesk.
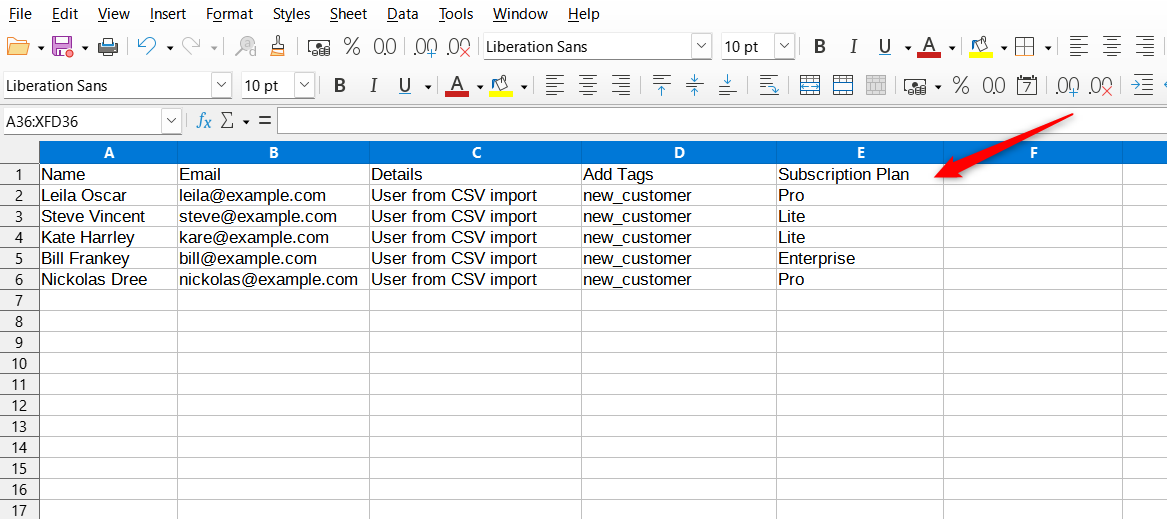
Step 2: Upload Your CSV File
1. Open the Proactive Campaigns app in your Zendesk dashboard and create a new campaign: Campaigns tab > Create a New Campaign > Email Campaign.
2. On the first step of the campaign setup, select Import User List and upload your prepared CSV file.
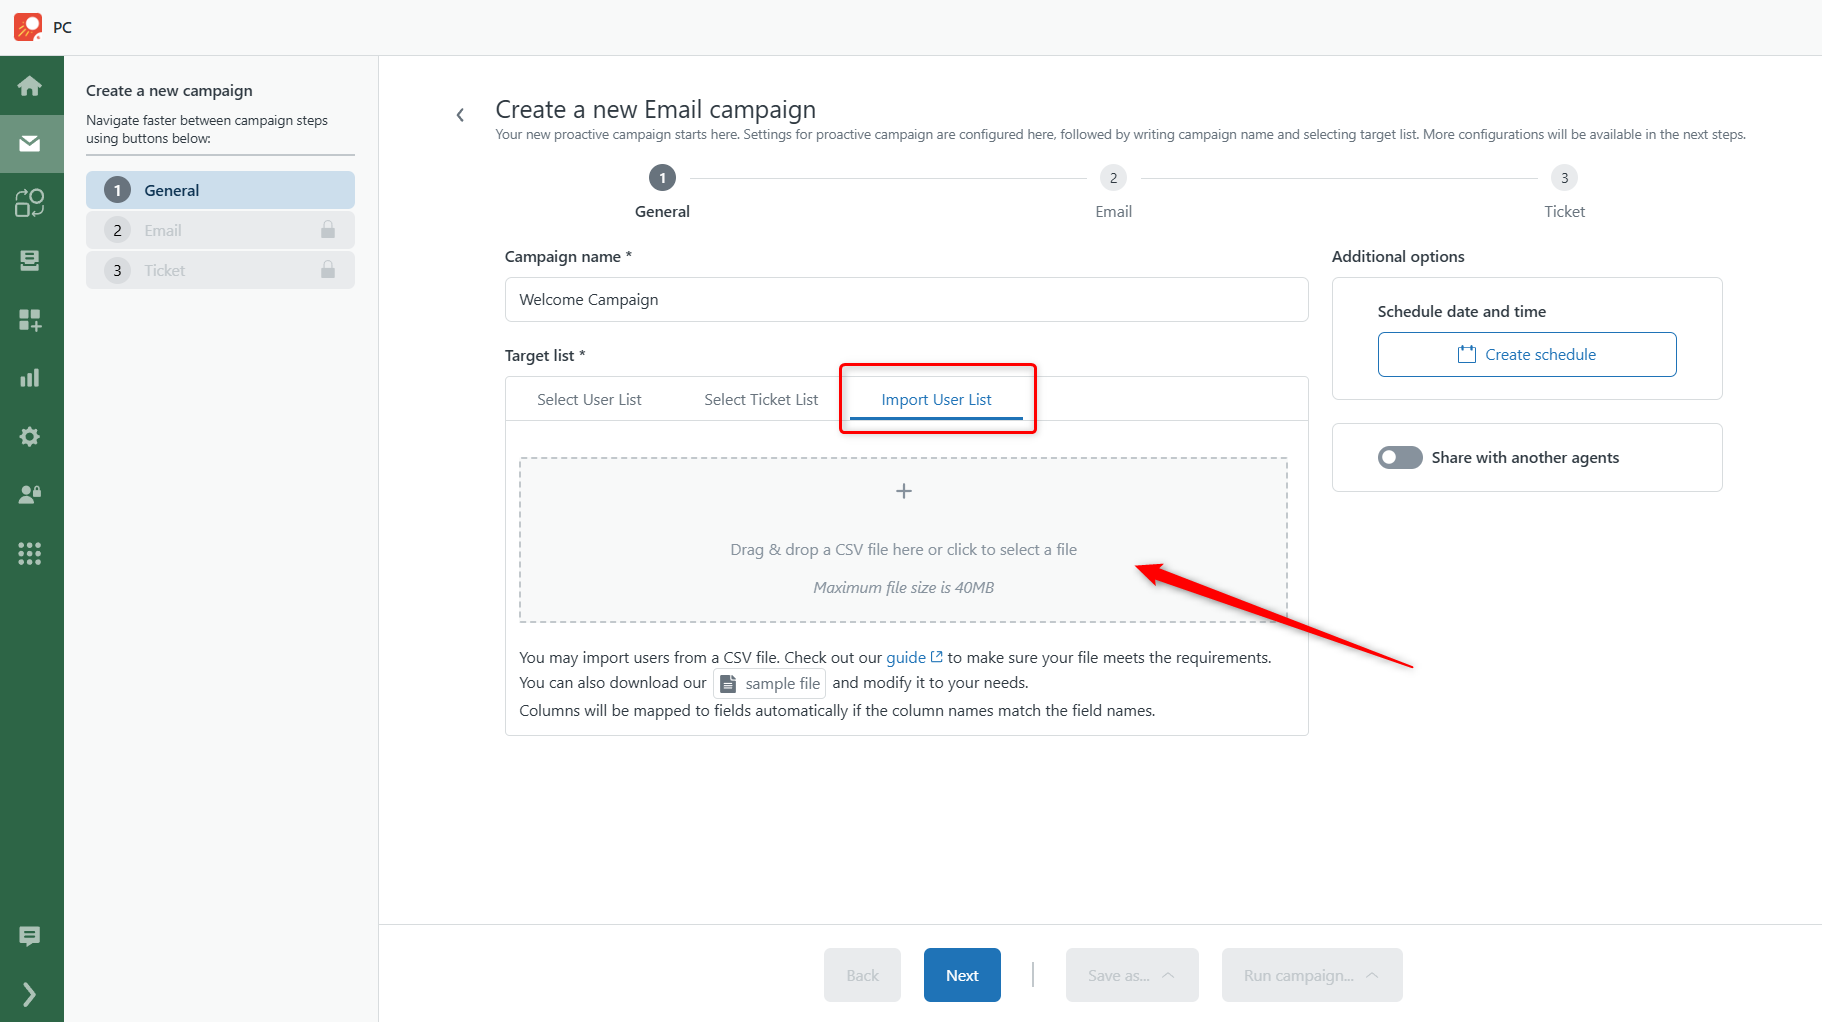
Step 3: Map Your Fields
Once your CSV is uploaded, you’ll need to map the data to the correct custom ticket fields. If your column names match the ticket fields, the app will map them automatically.
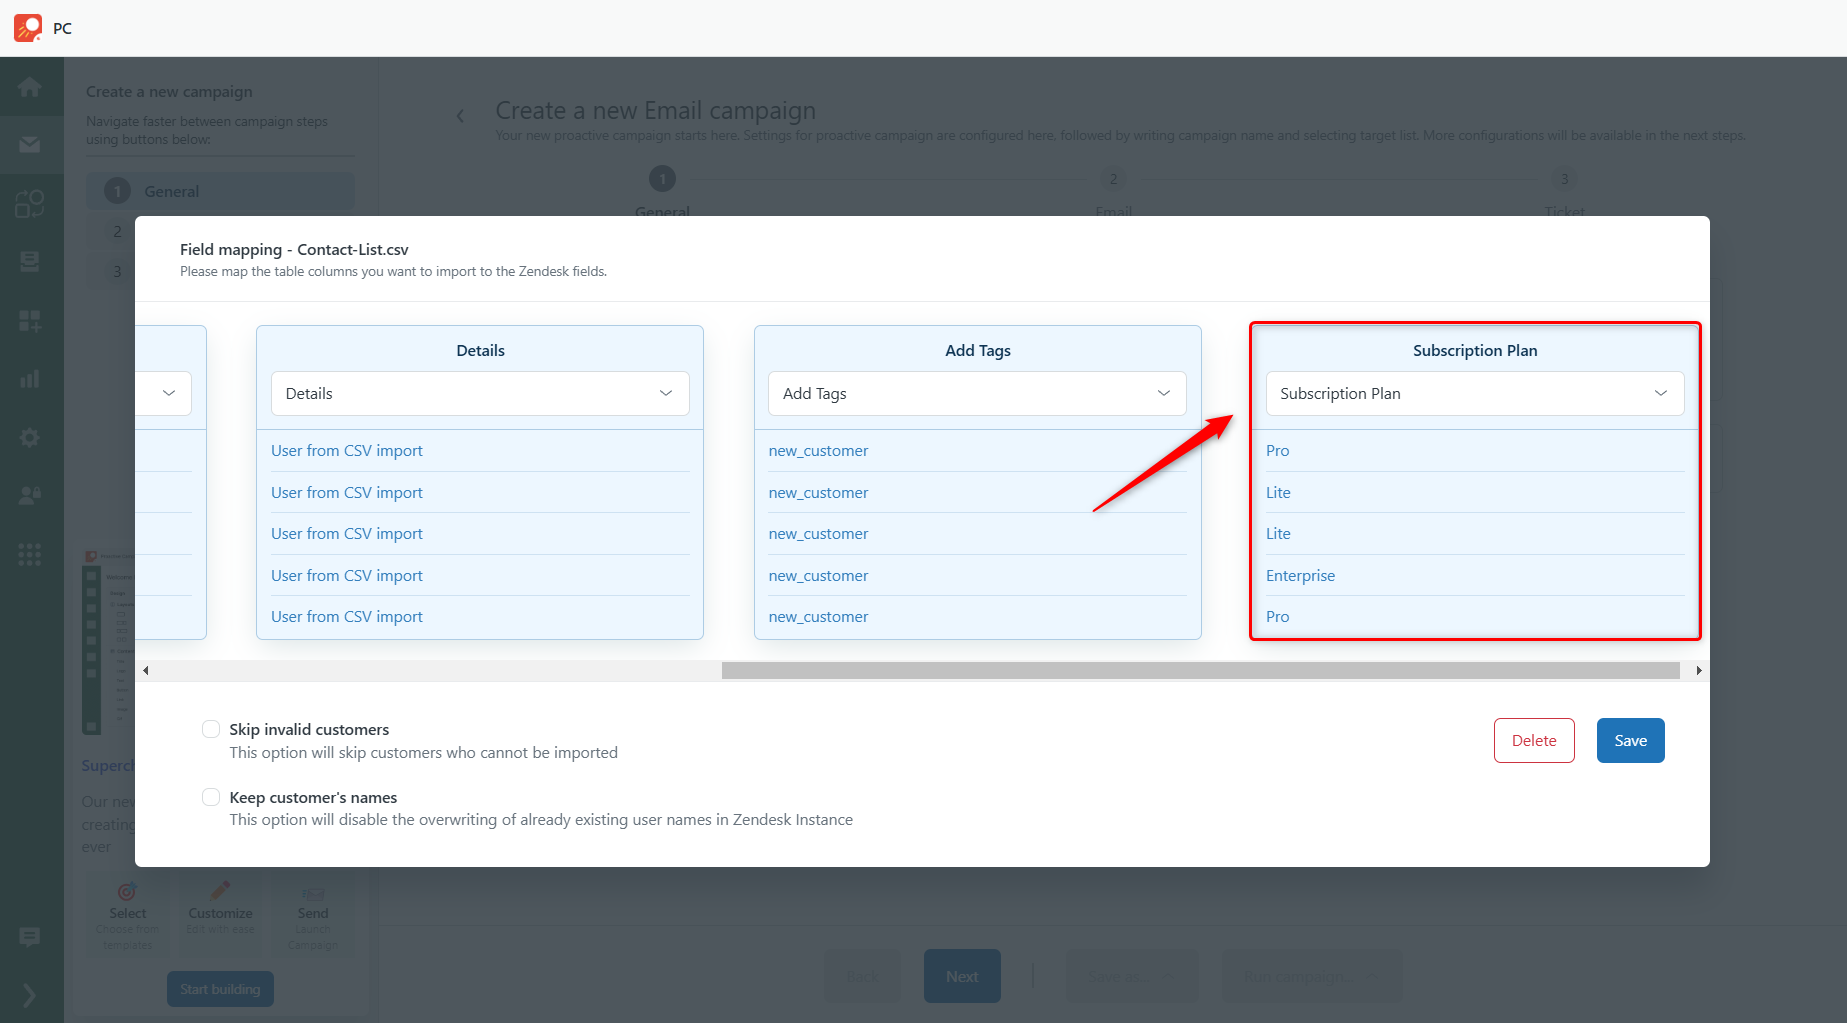
If not, manually select the correct field from the Ticket custom fields section.
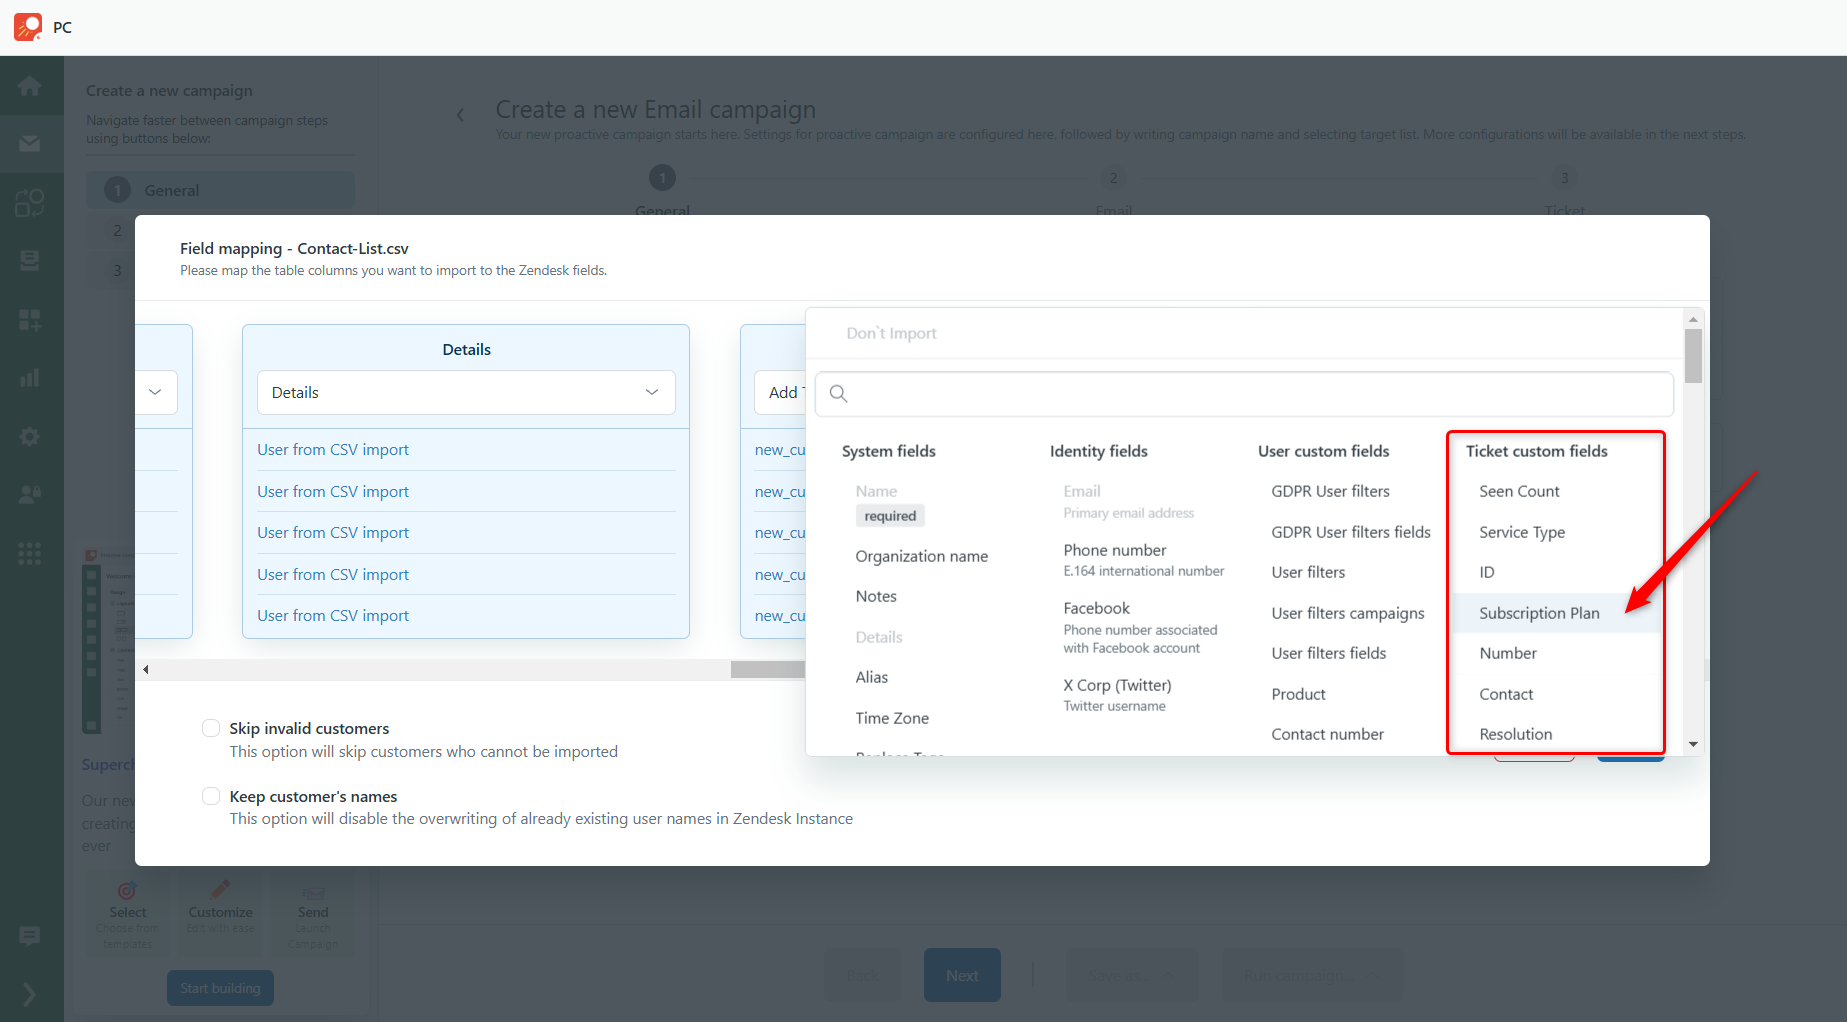
Then, proceed with your campaign setup as usual.
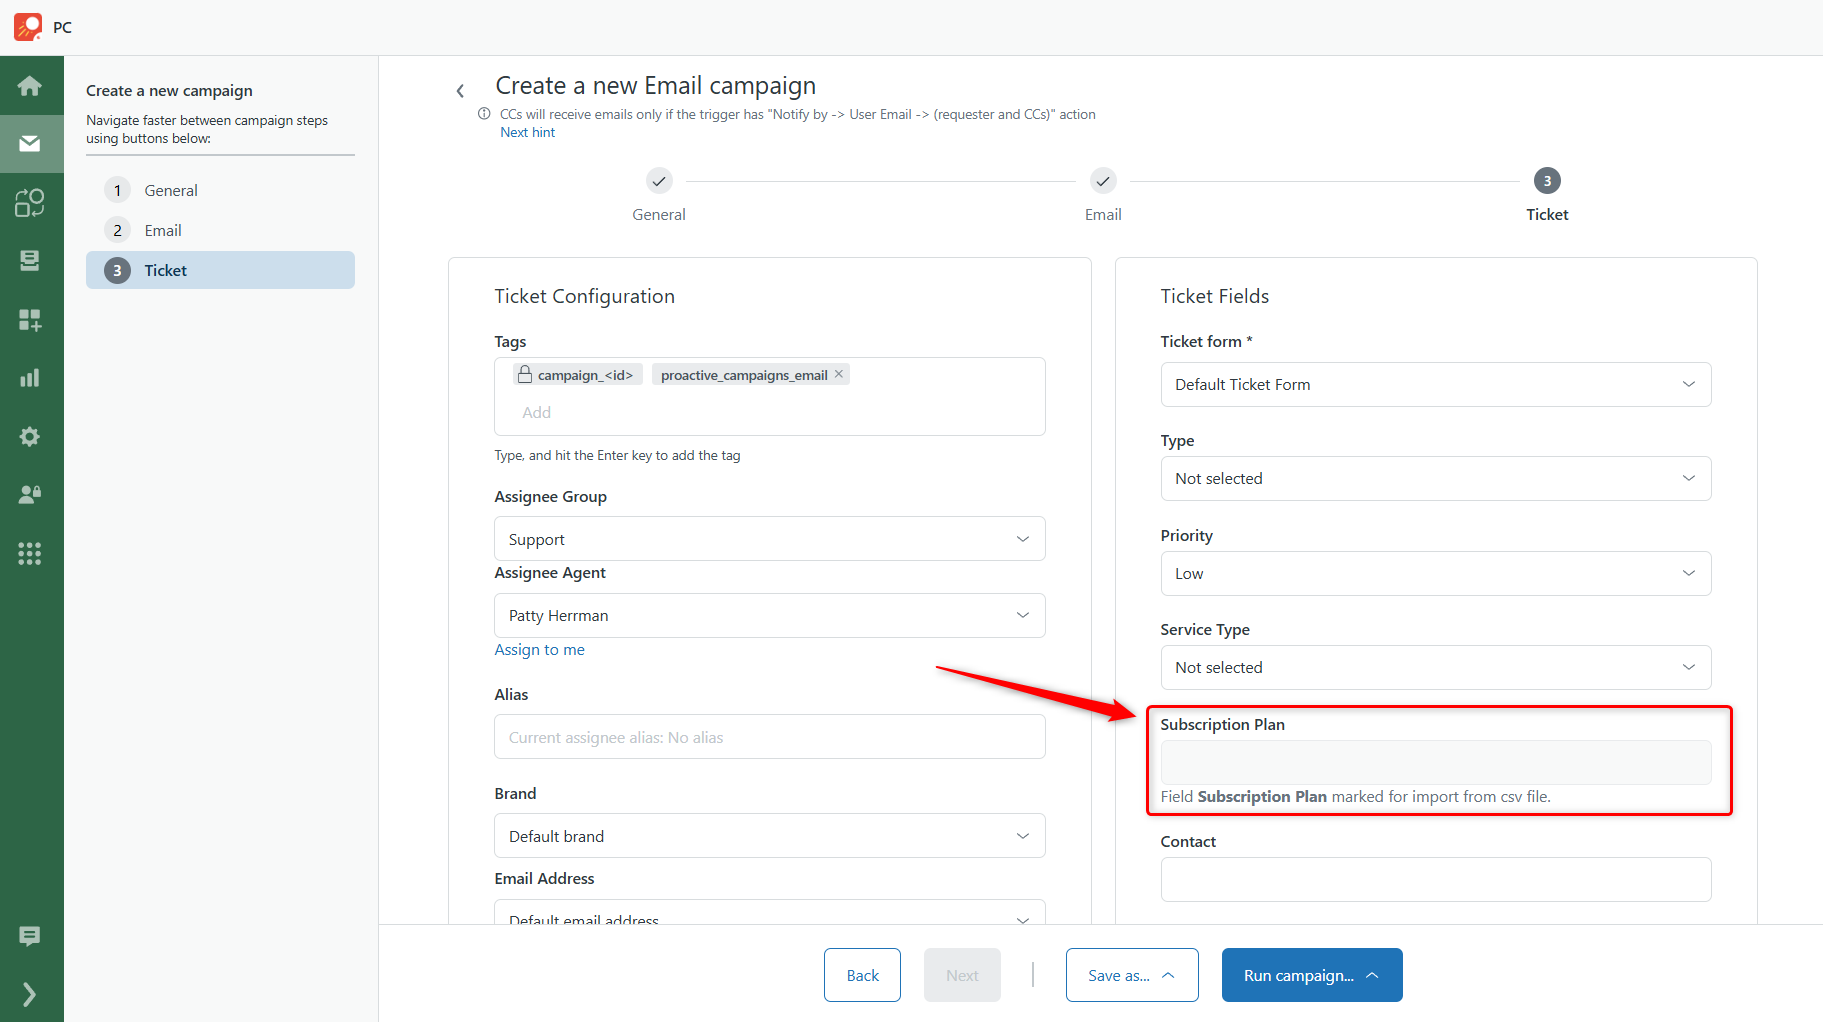
On the final step, you’ll see that the imported ticket field is locked for changes, with a note saying, "Field [name] marked for import from CSV file."
Step 4: Launch Your Campaign
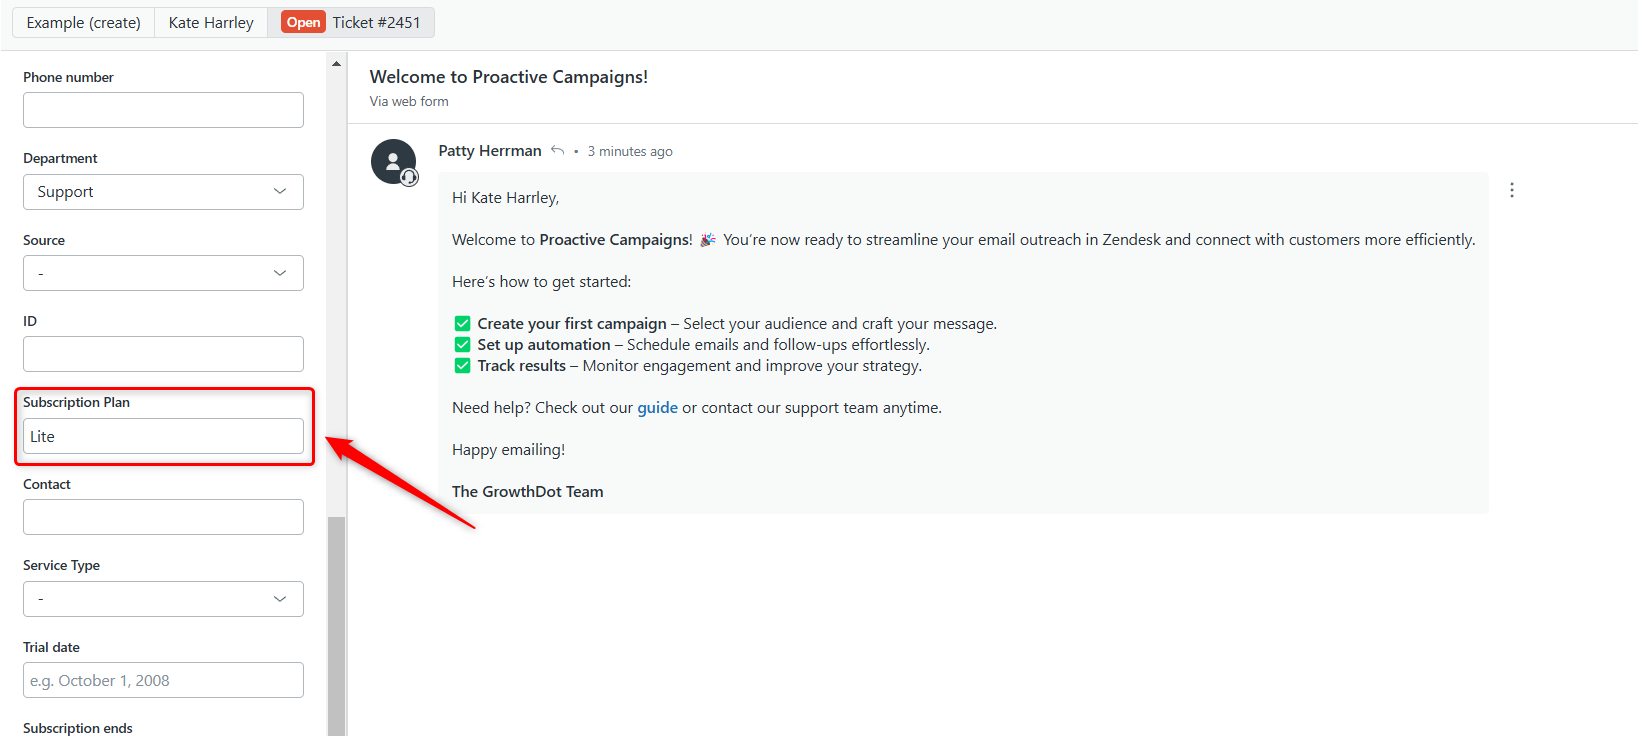
After, launch your campaign. The Proactive Campaigns app will automatically update the mapped ticket fields in Zendesk, so no manual work is required.
You’re all done! If you have any questions or need assistance, feel free to contact our friendly support team.


