How to use Dynamic Content for your campaign in Proactive Campaigns
-
Proactive Campaigns
Maybe, you used Dynamic Content for multi-language responses before but thought it is unavailable for Proactive Campaigns. However, we are going to show you how to integrate Zendesk's functionality into our app. So, follow the stages:
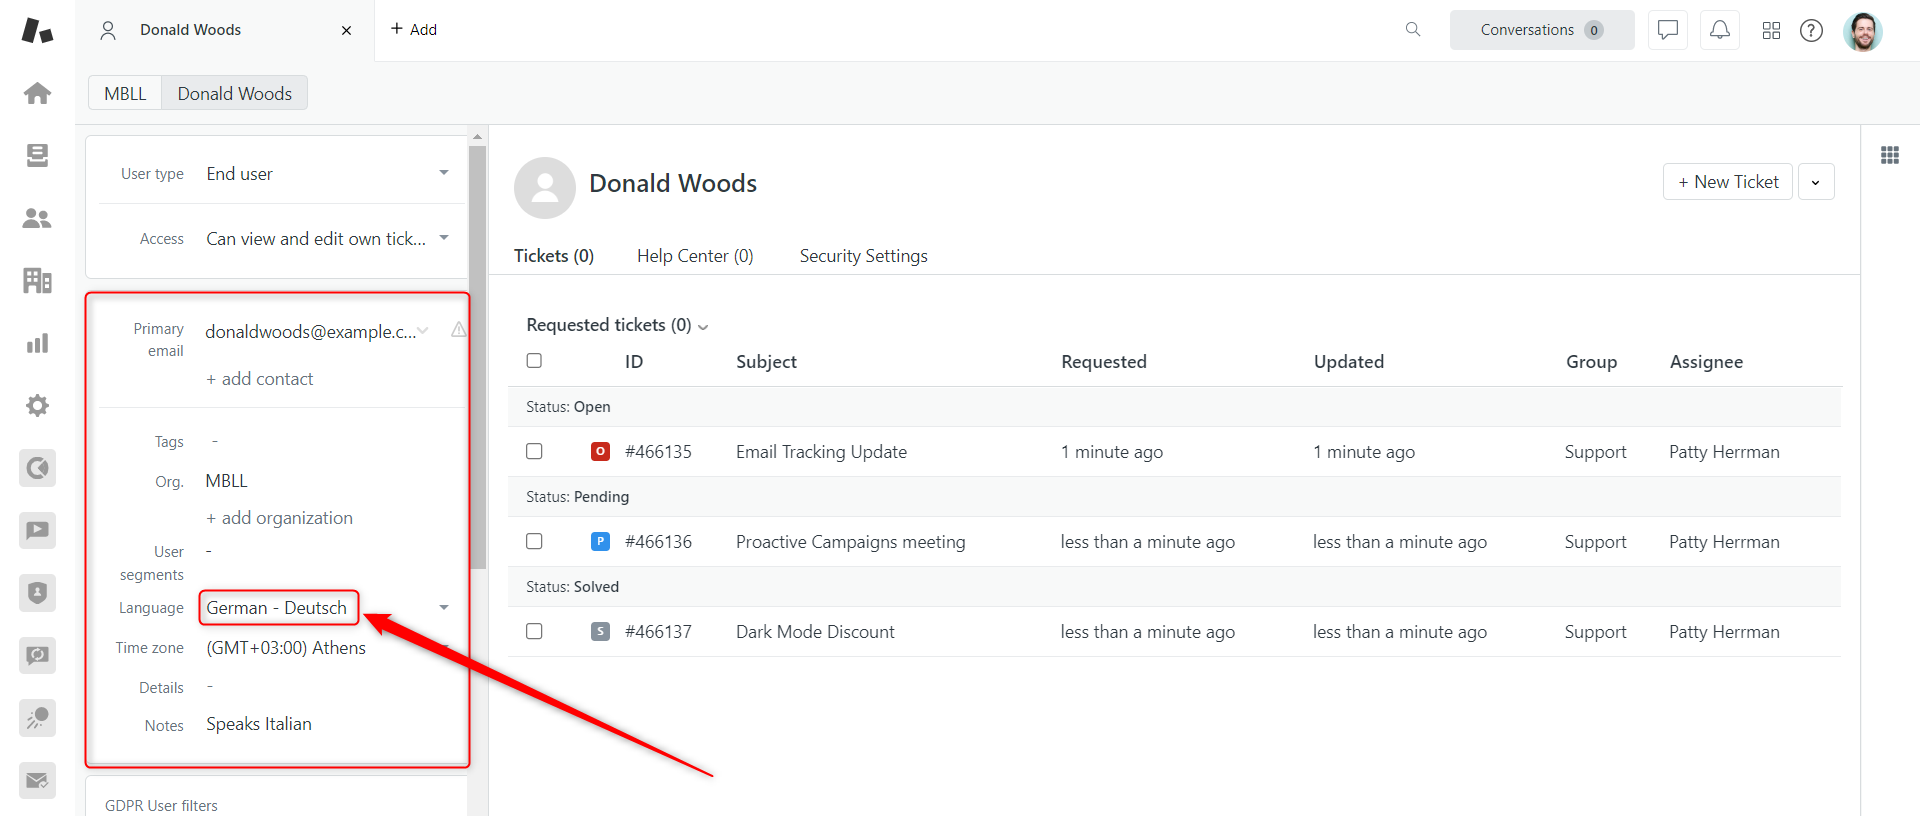
1. First, make sure that the appropriate language is set for every user. To do so, go to the user’s page in your Zendesk and check their language. If needed, change the language to the necessary one.
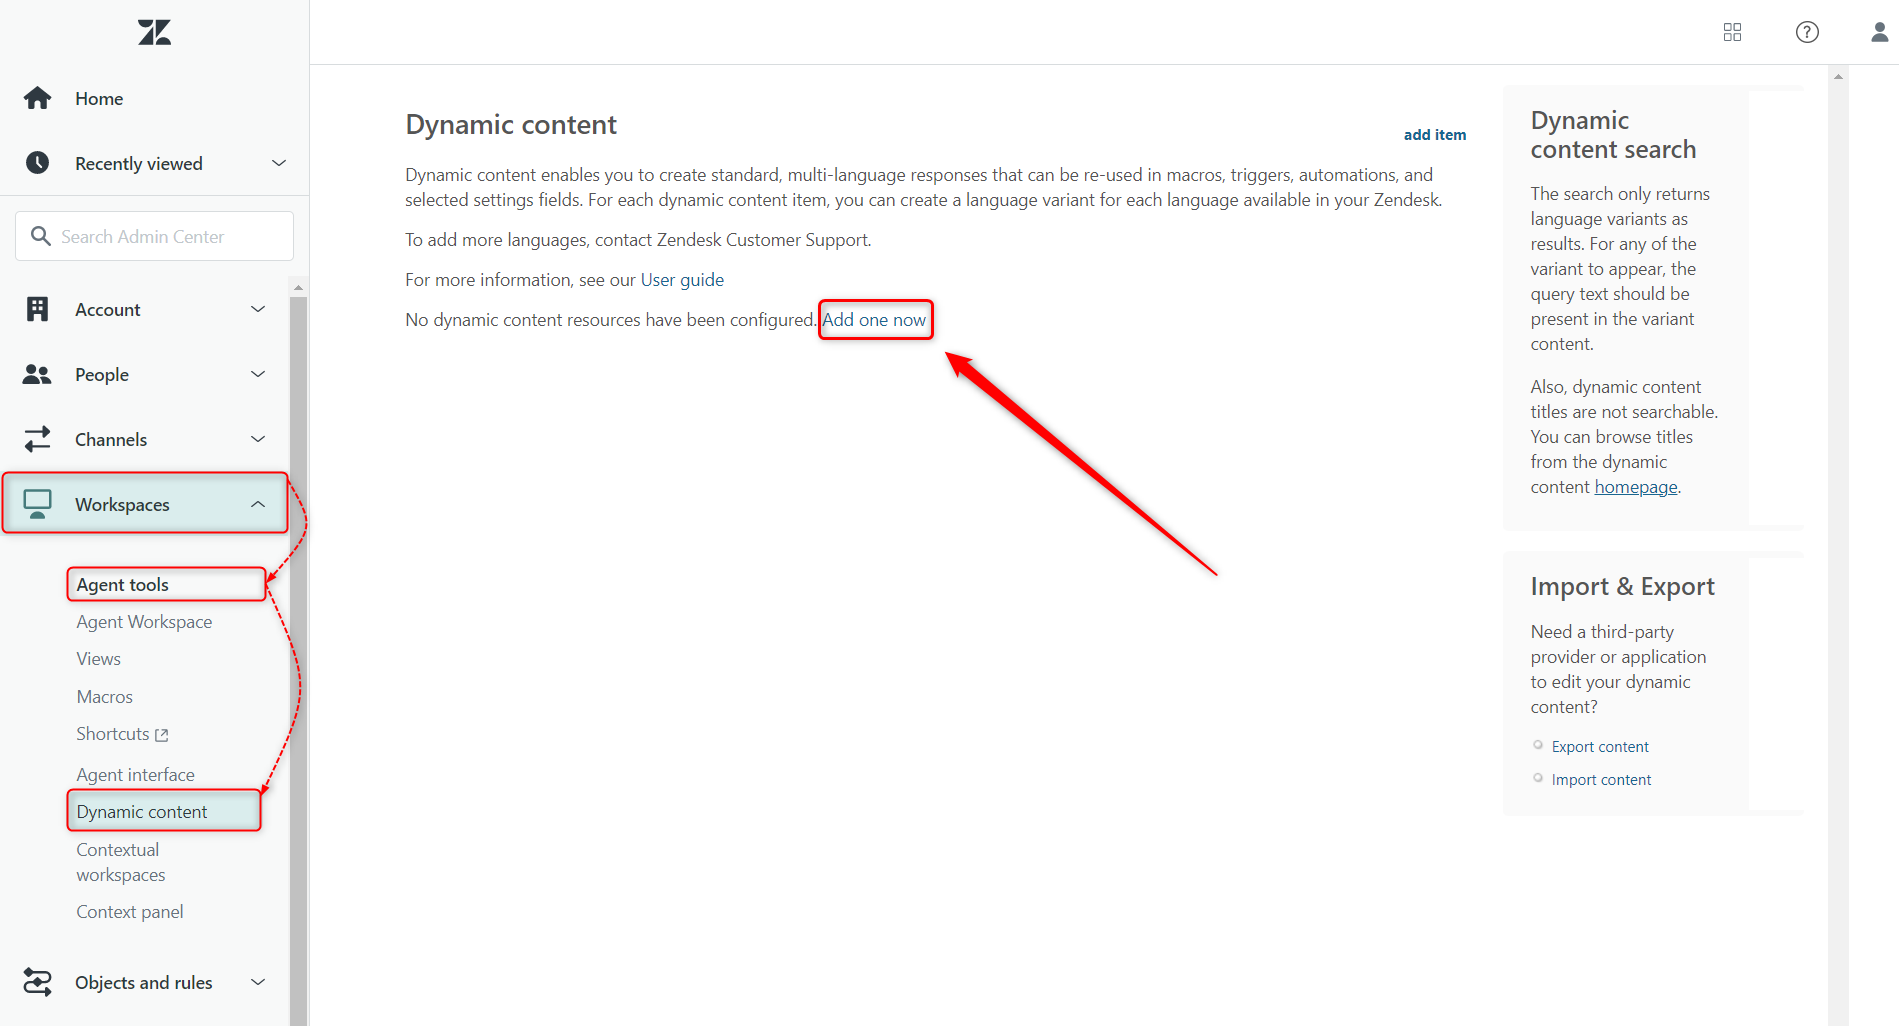
2. Then, go to the Admin Center > Workspaces > Agent tools > Dynamic content and click the Add one now.
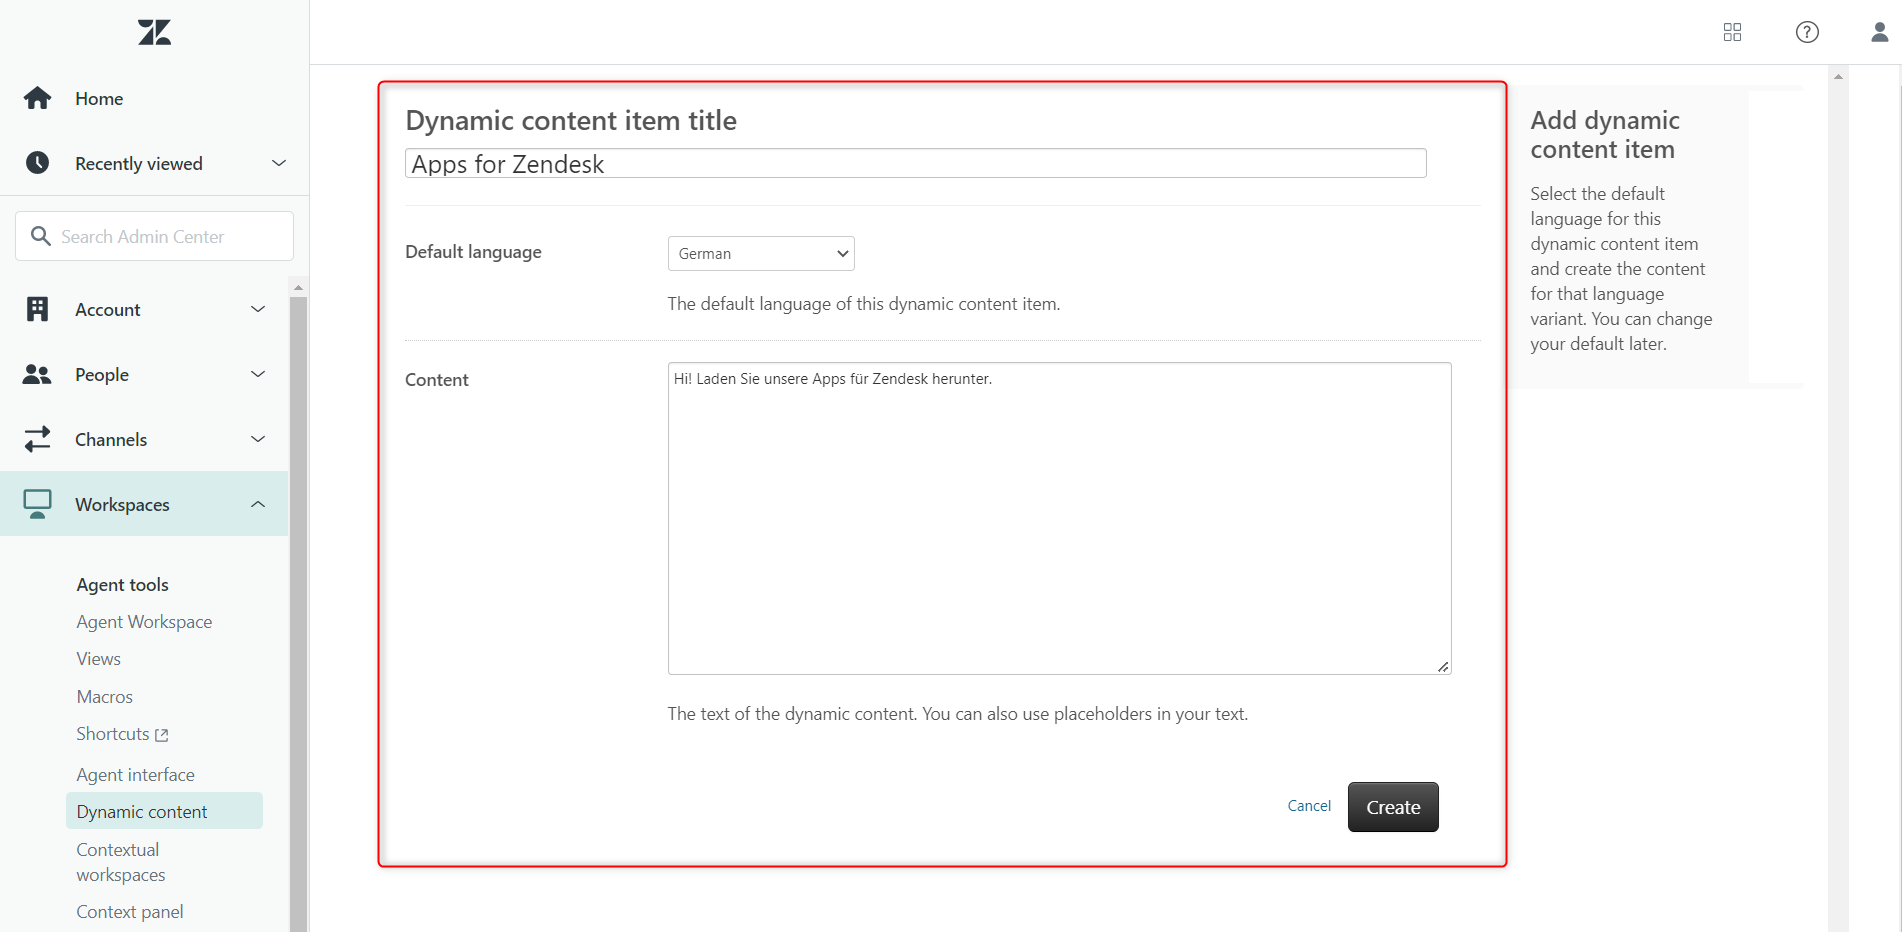
3. Next, name the item, select the default language (we selected German), and insert the text content in chosen language as shown on the screenshot.
4. After you pushed the Create button, you will be directed to the item’s page and see the German item. If you want to create multi-lingual messages with the same meaning, for example in German and in English, you should create both variants.
Since we created the German variant, we need the same in English. To create it click on “add variant” and follow the instructions described in stage #3. Take into account that you can change the default variant at any time.
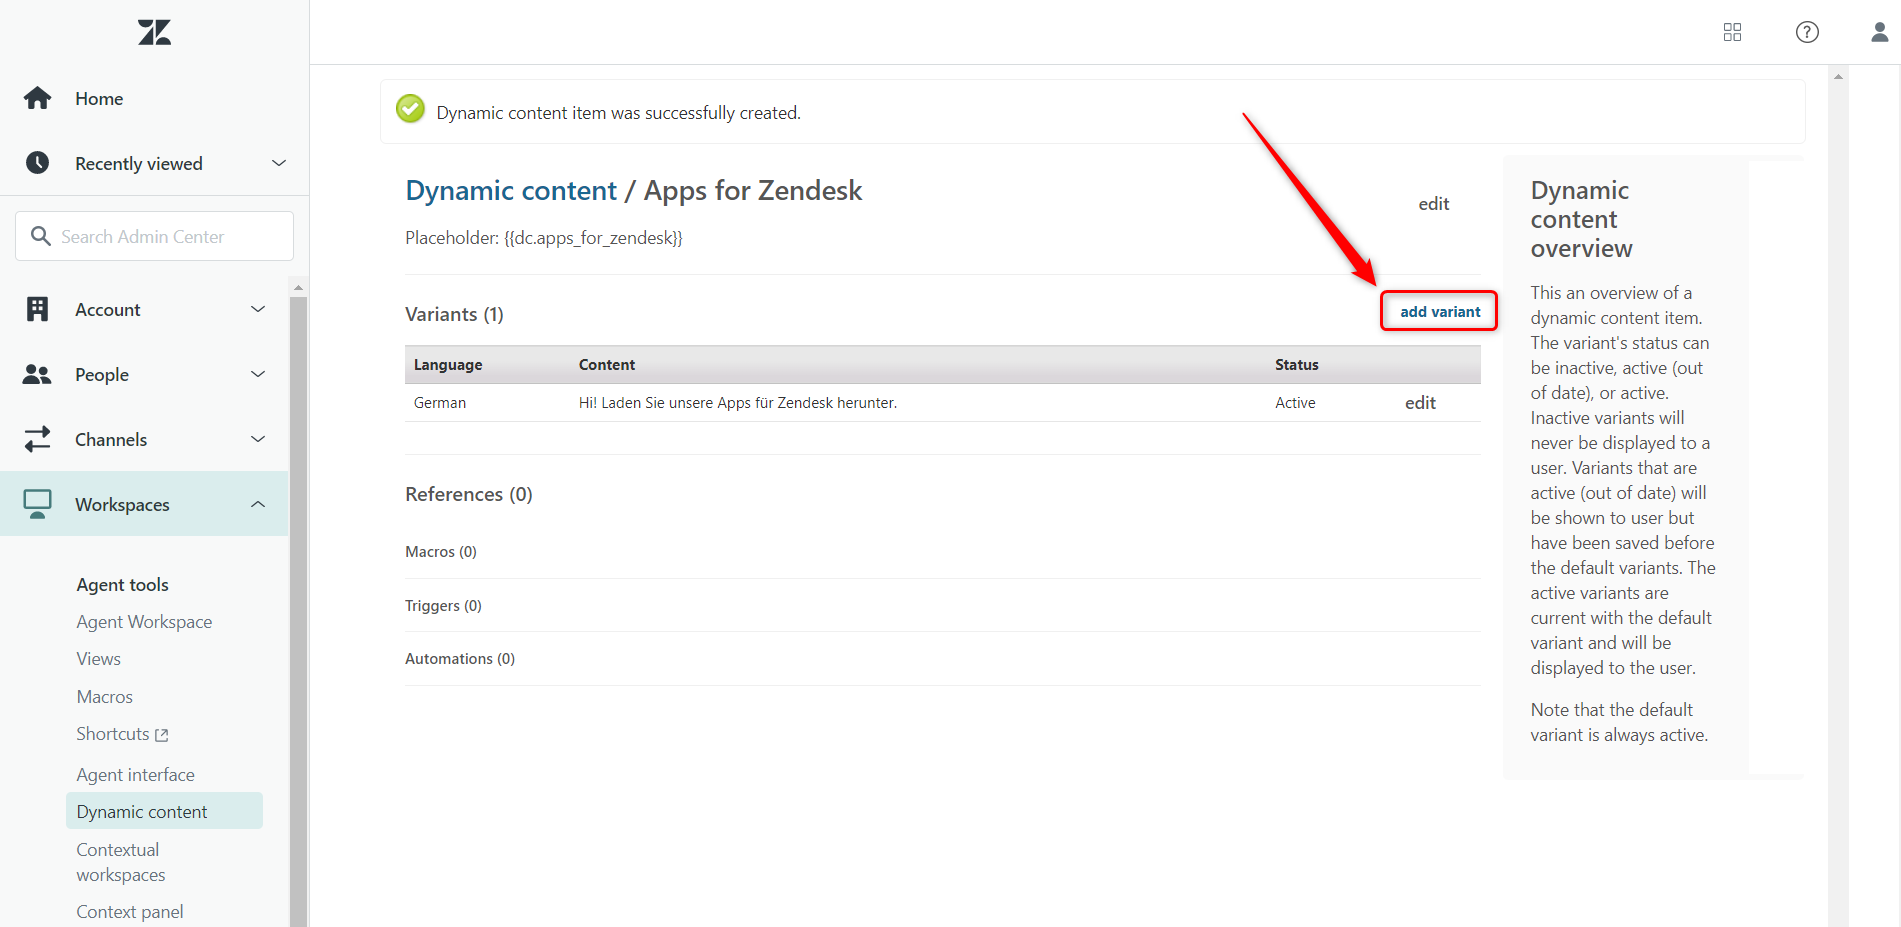
5. Afterward, copy the placeholder framed on the screenshot below.
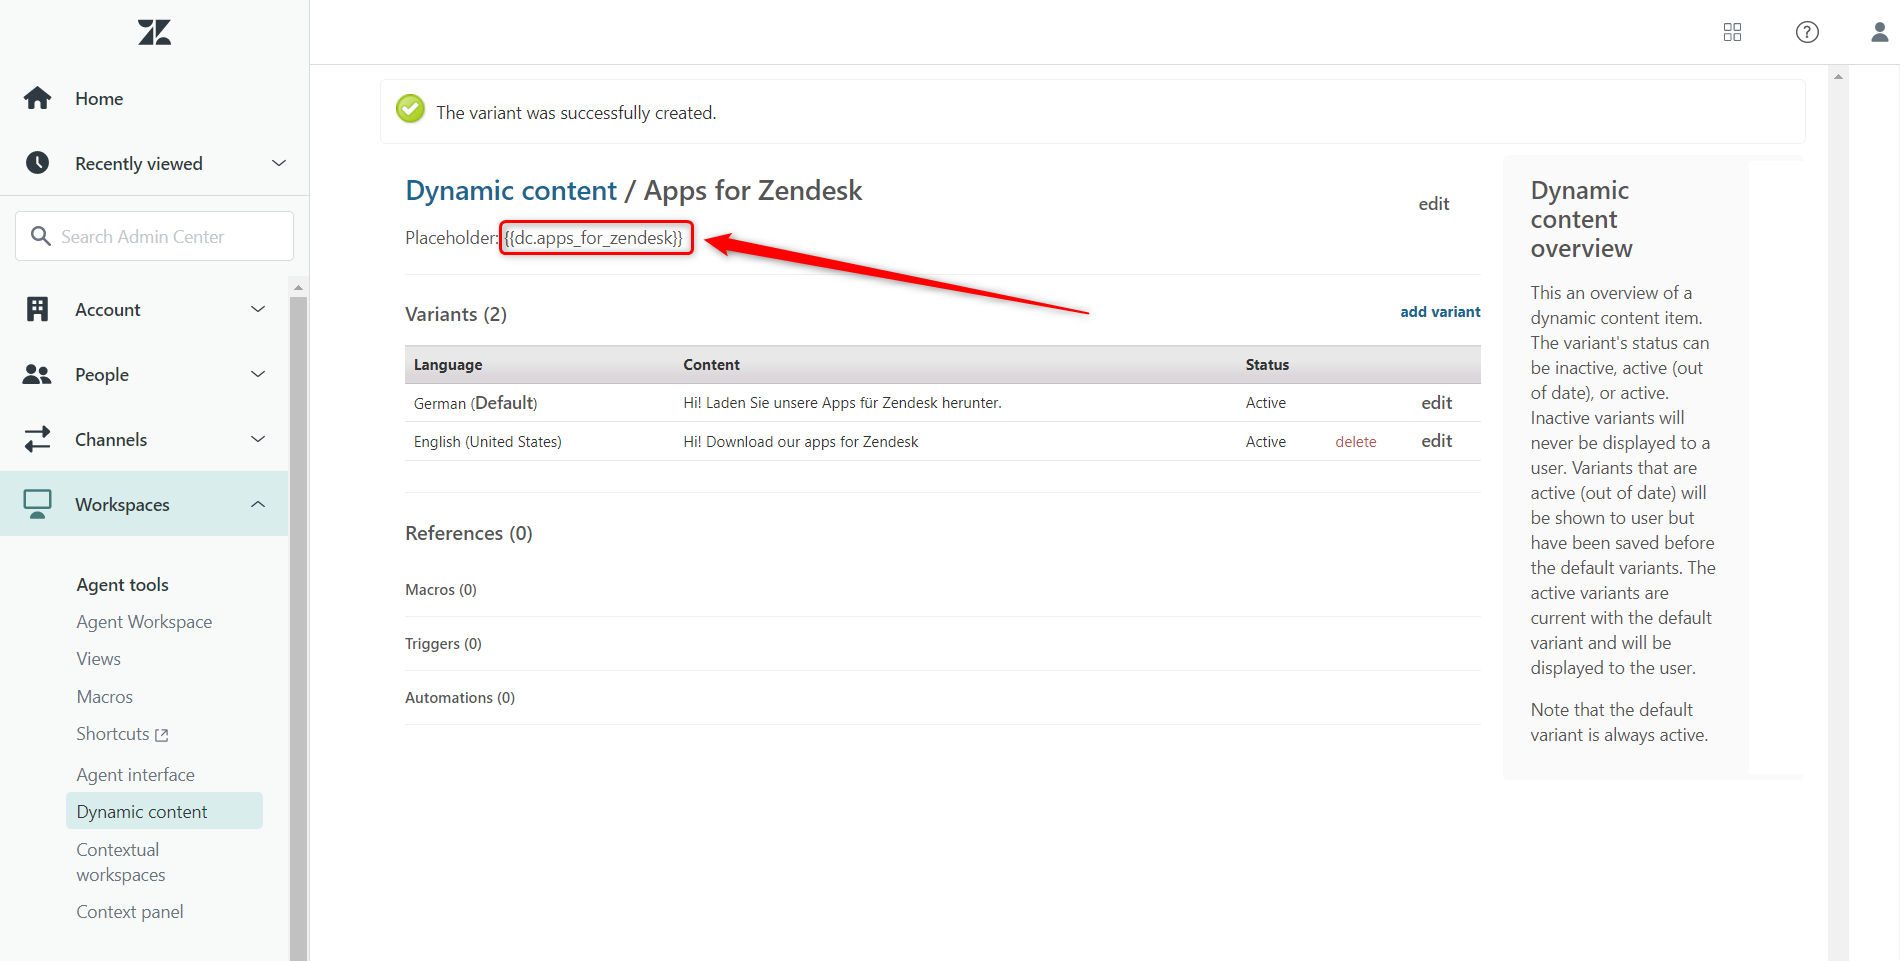
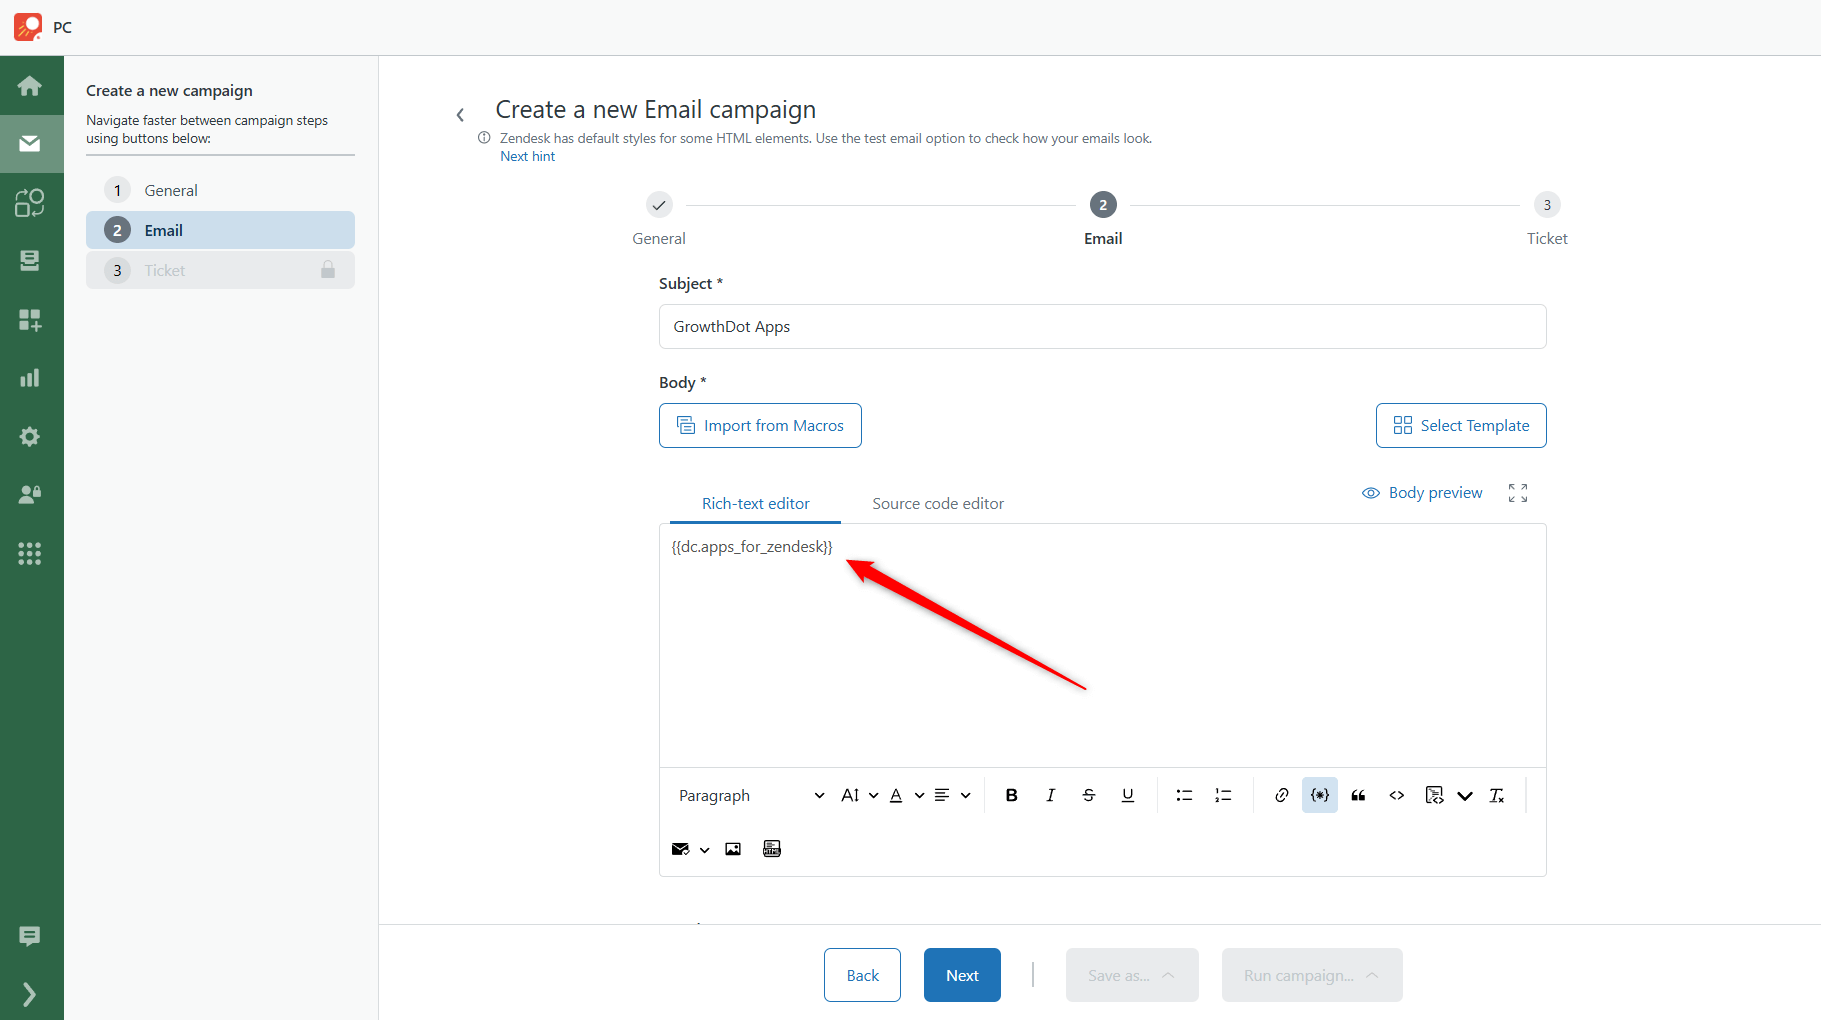
6. Next, go to Proactive Campaigns and create a campaign as you usually do. When it comes to the Email section, insert the placeholder in the email body as we did. Finally, run the campaign.
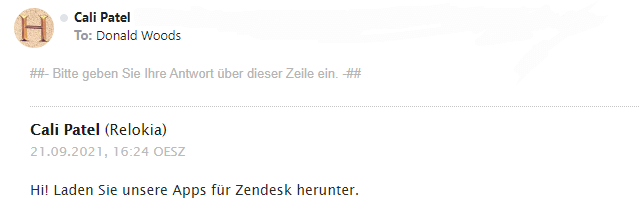
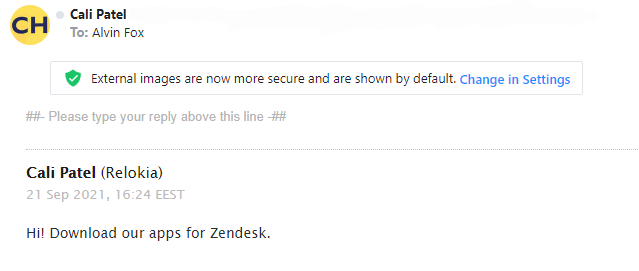
Every contact will receive a letter in the language that matches the chosen language in contact. (e.g., Donald Woods received a message in German as selected in contact)
In case of any questions or issues, contact us to get a quick and qualified response.


