How to use placeholders to create automated messages with custom fields in Proactive Campaigns
-
Proactive Campaigns
Placeholder is the shortcode element for creating automated messages. It is also a reference for user data. Using a placeholder, you can extract the needed information from your ticket for a particular user without any manual actions.
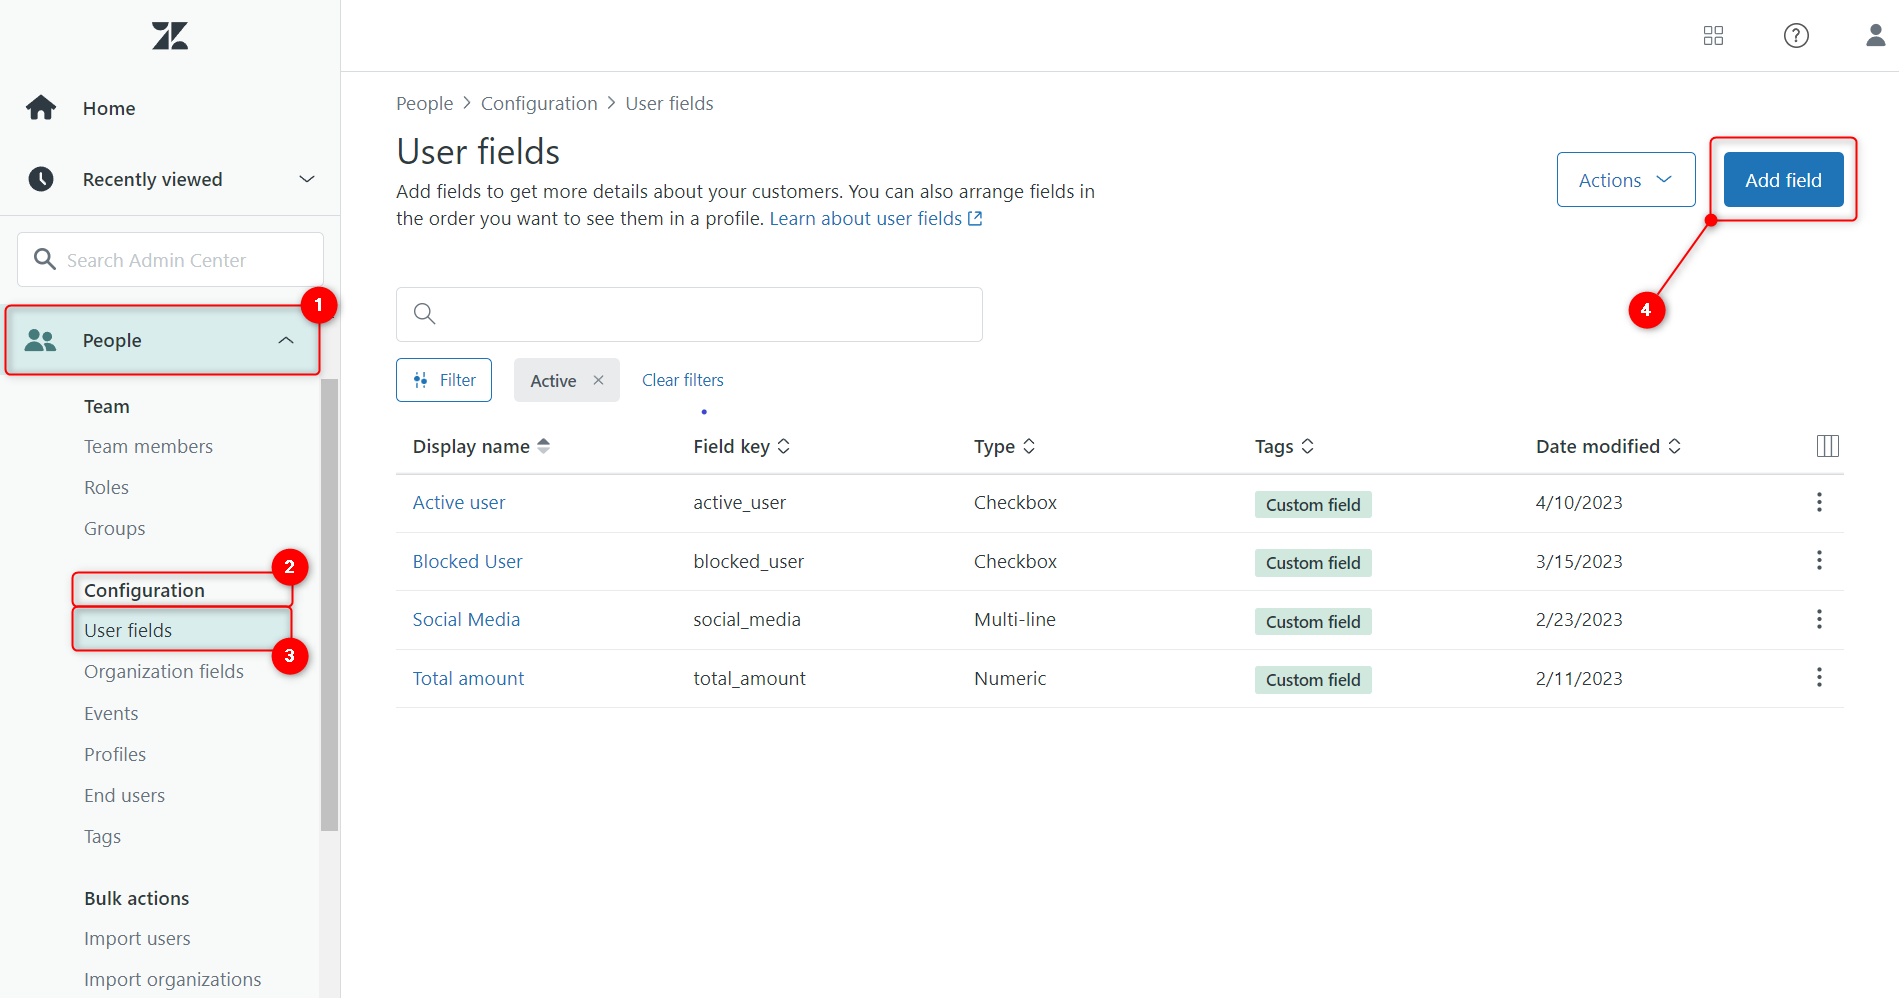
Check out Zendesk’s article to learn about all the uses of placeholders. In our turn, we will explain the correct use of placeholders with custom fields when creating the campaign using an imported CSV file. However, you can also use this option with the list created inside the app. Before launching the campaign, you need to create a user custom field in your Zendesk instance. To do it, go to the Admin Center and select People > Configuration > User fields. Then, create a custom field by clicking the Add field button at the right corner of the page.

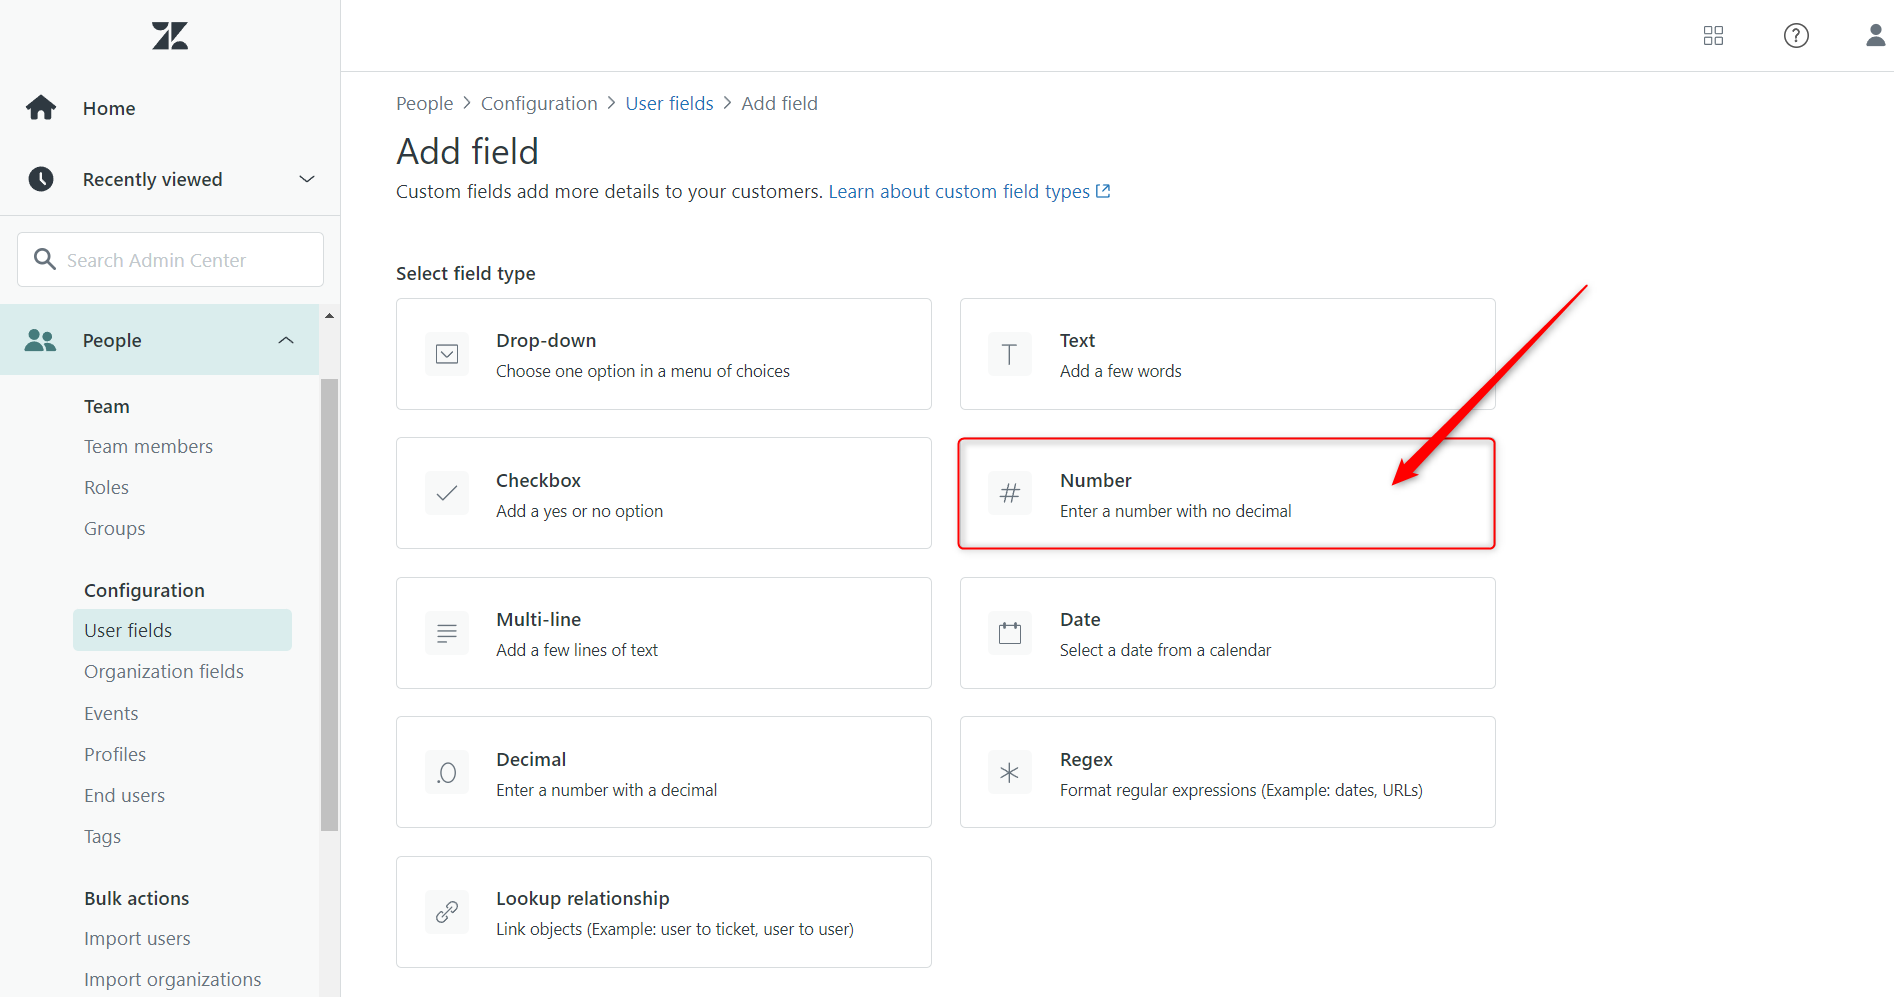
Next, choose the field type and give it a name. For instance, we select the Number field type and create the 'Tracking Number' custom field.

Pay attention that every field has its specific field key, so copy a created one to use it later.
![]()
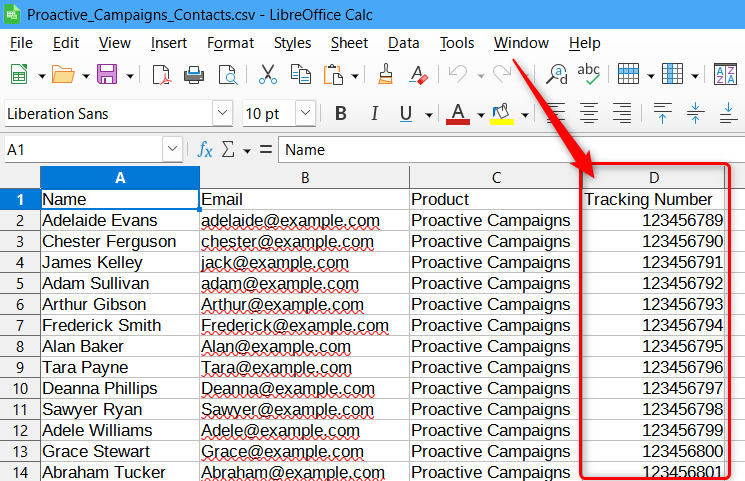
Next, for example, we create a CSV file with the 'Tracking Number' column name and related data.

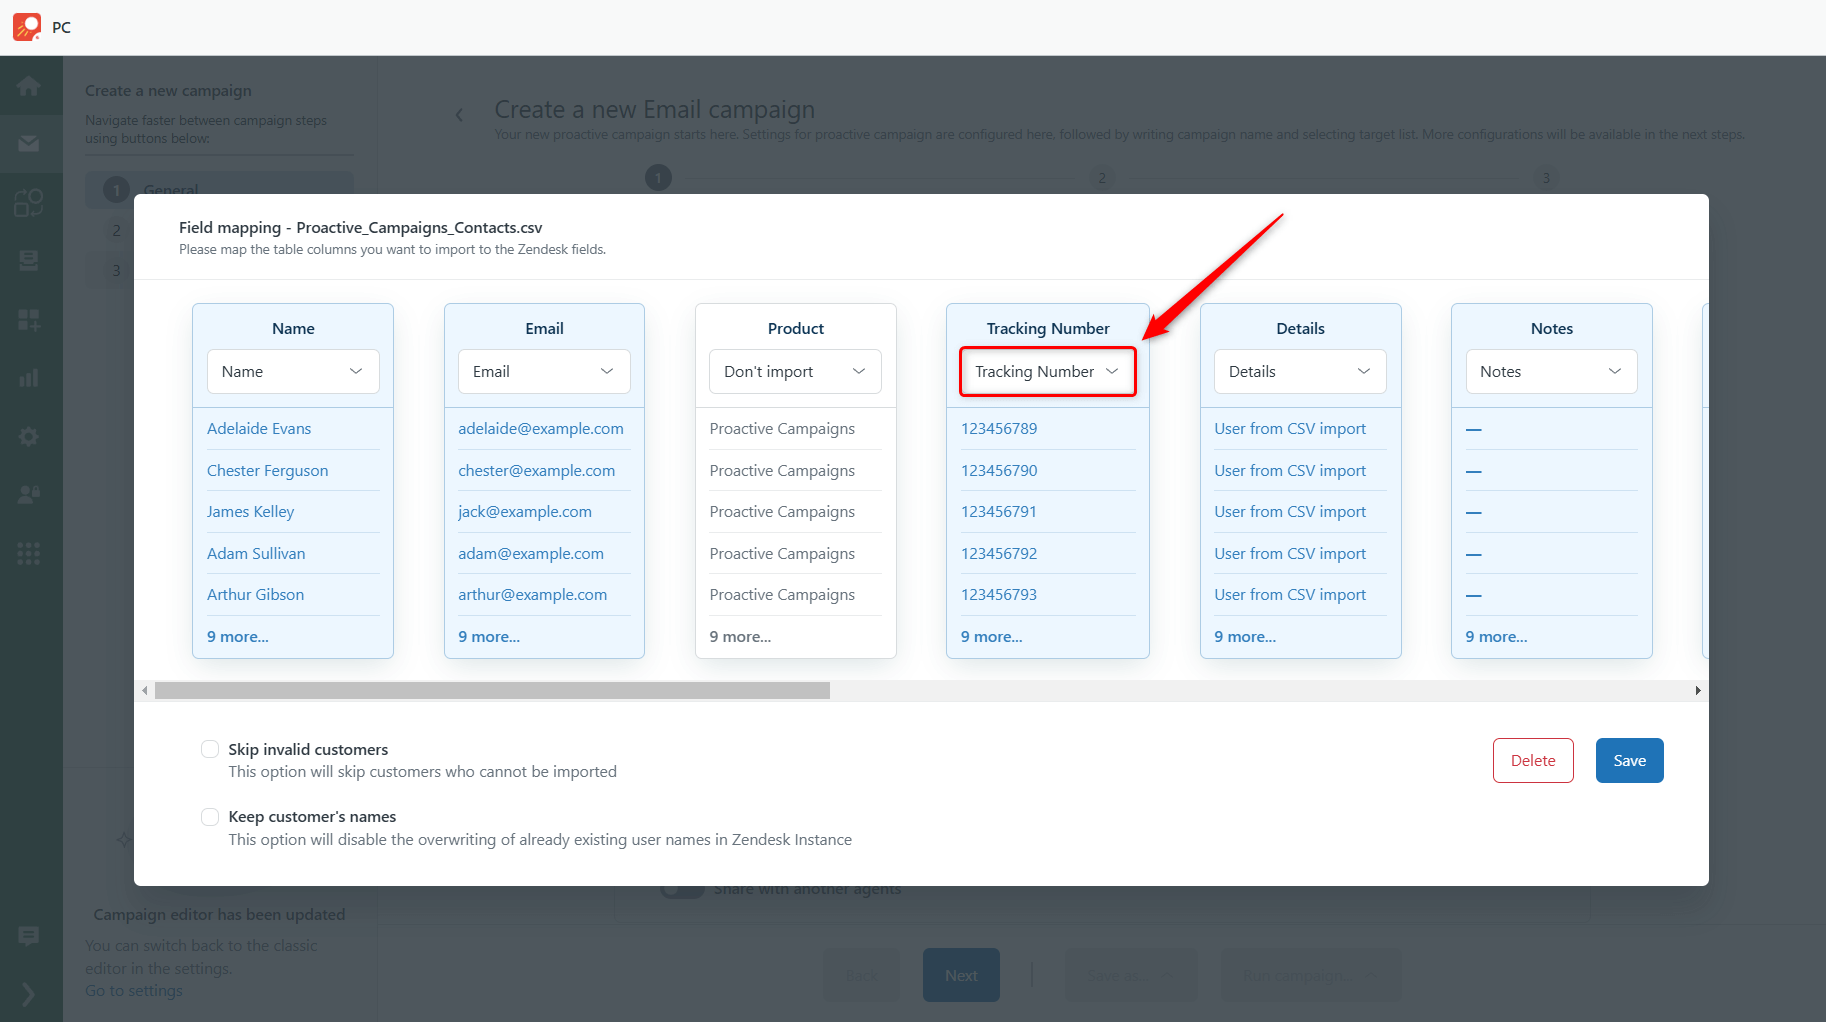
Then, create a new campaign. In the Import Users List tab, upload your CSV file, map the Tracking Number field, and click Save.

Afterward, insert the placeholder {{ticket.requester.custom_fields.key_name}} in the email body field, but insert the tracking_number as we did, or your field name instead of the key_name block. We added {{ticket.requester.custom_fields.tracking_number}}.
![]()
Finally, continue creating your campaign. Every receiver will see their own corresponding tracking number in the email message if you did everything correctly. If you have any questions, problems, or proposals, feel free to contact us.


