Sending order confirmations in Zendesk isn’t a built-in feature (since Zendesk is primarily a support tool, not an eCommerce platform), but you can absolutely automate or trigger order confirmation emails using Zendesk tools and integrations.
What is the Best Way to Send Order Confirmations in Zendesk?
The Proactive Campaigns app for Zendesk is actually one of the best ways to send order confirmations (especially if you need to send them in bulk or with personalization). It offers automated drip campaigns, triggering, and CSV user import for retail and other industries. Let’s go step by step so you can see exactly what to do.
What You’ll Need to Send Bulk Order Confirmations
Before you start:
- Make sure that the Proactive Campaigns app is installed in your Zendesk.
- A list of customers who’ve placed orders (can be imported from a CSV file or based on a ticket view).
- Order details available as ticket fields or columns in your CSV (like Order ID, Items, Delivery date).
Step-by-Step: Sending Order Confirmations
1. Open the Proactive Campaigns App
-
- In your Zendesk Support, go to the left sidebar → open Proactive Campaigns app
- Go to the Campaigns tab and click Create campaign.
2. Choose Your Audience
You can create a campaign in one of two ways:
- From a ticket or user list: Create a ticket or user list based on the custom fields information
- From a CSV file: Upload a CSV with customer data (valid if your orders are in another system like Shopify, WooCommerce, or ERP).
Let’s go through both variants:
Creating an Order Confirmation Campaign from a CSV file
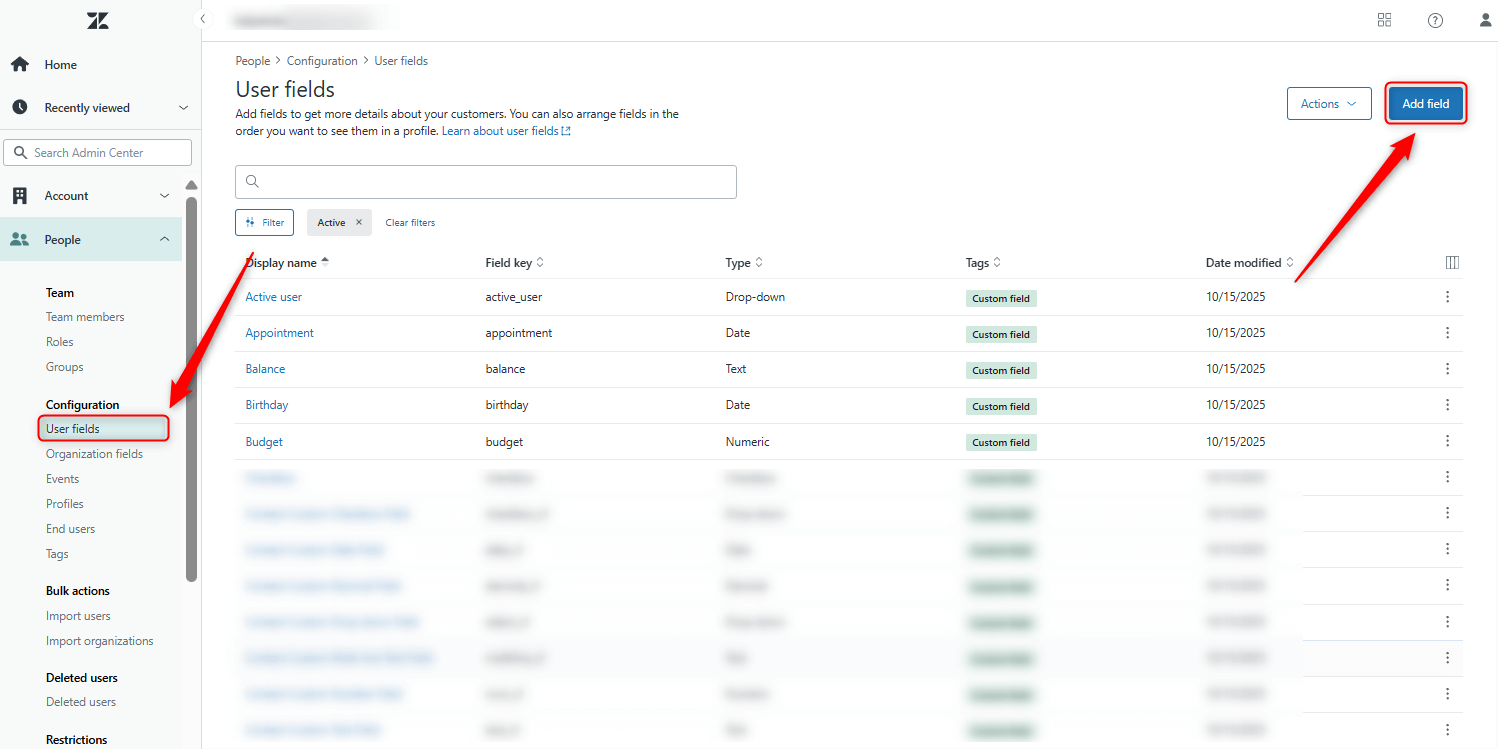
Before launching the campaign, you need to create custom fields in your Zendesk instance. To do it, go to the Admin Center and select People -> Configuration -> User fields. Then, create a custom field by clicking the Add field button in the right corner of the page.
Next, choose the field type and give it a name.

For instance, we select the number field type and create the Order ID and Total Amount custom fields.
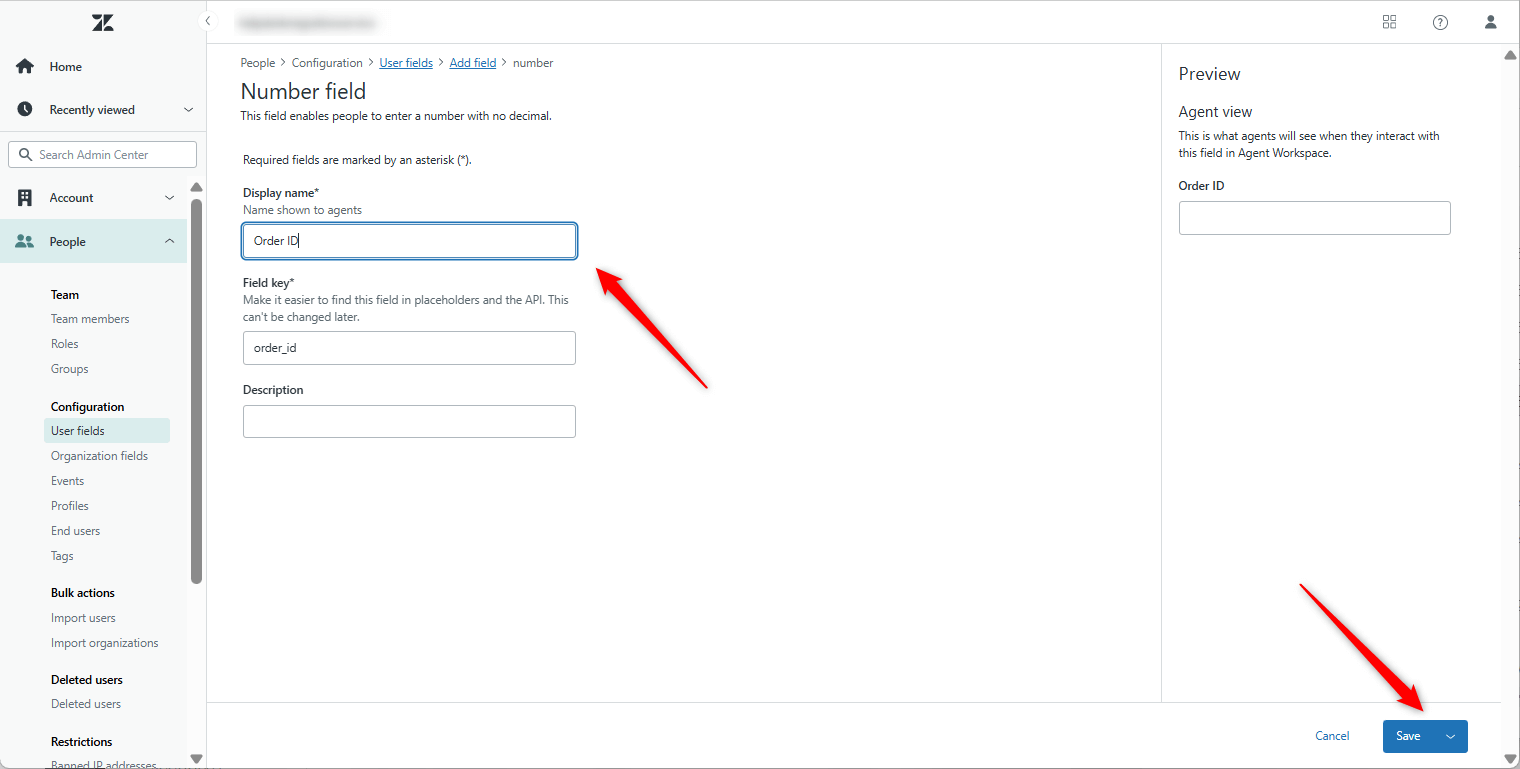
Also, we added a Delivery Date with a date field type. Pay attention that every field has its specific field key, so copy the one you create to use it later.
Next, for example, we create a CSV file with the Order ID, Total Amount, and Delivery date column names and related data.

Start your campaign
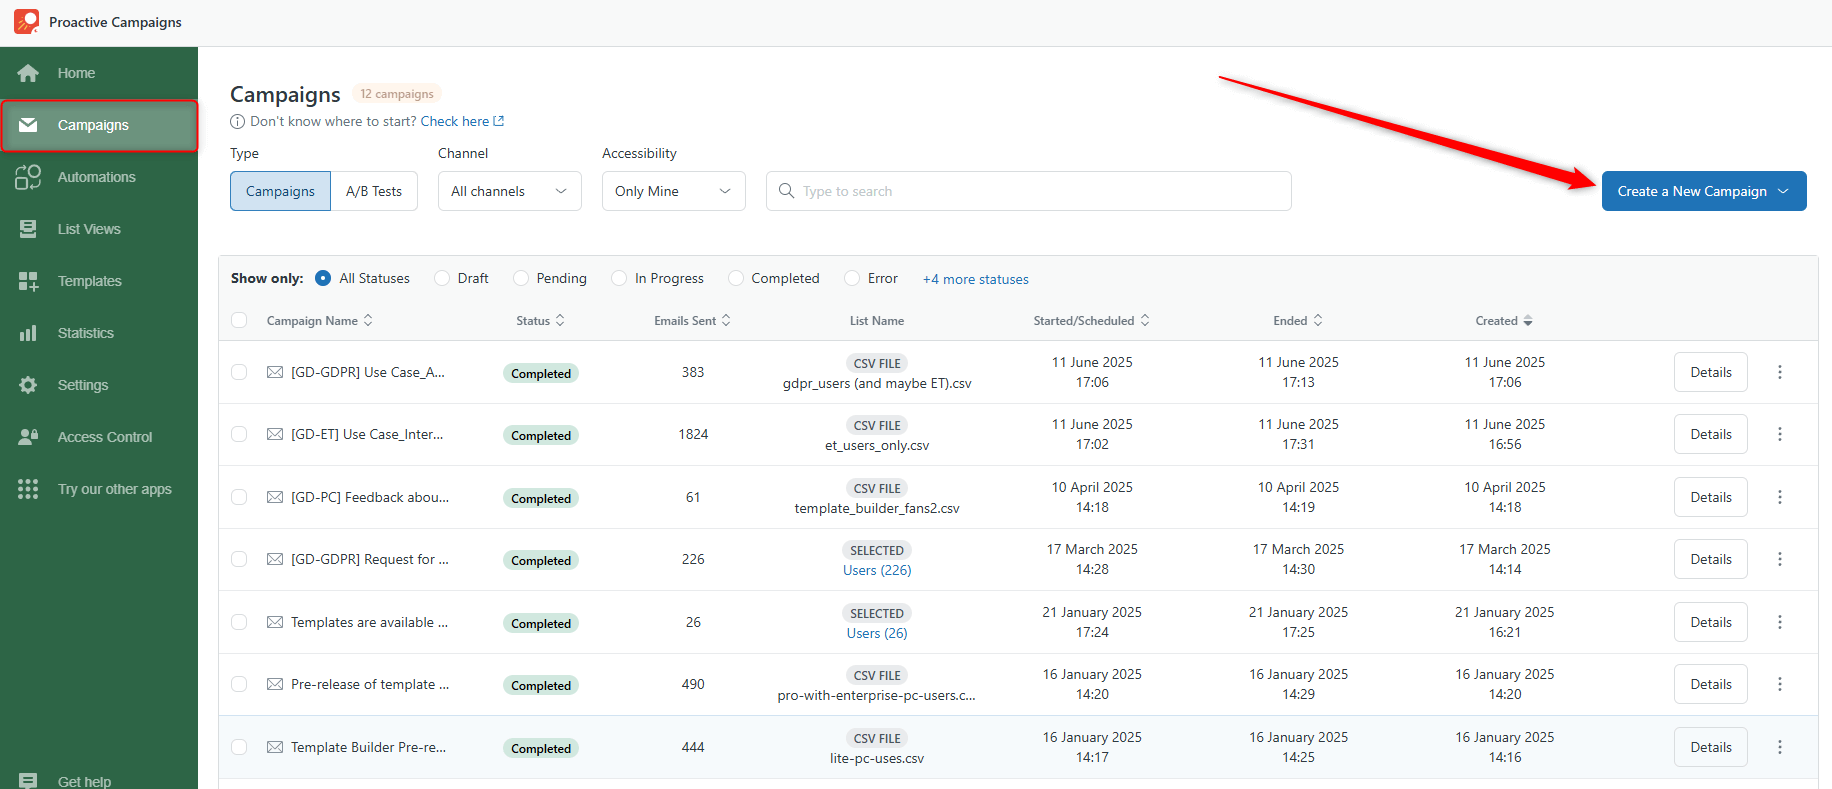
The next step is actually creating a campaign. To start it, go to the Campaigns tab and click on the Create a New Campaign button.
Then, name the campaign and add your previously created CSV file.
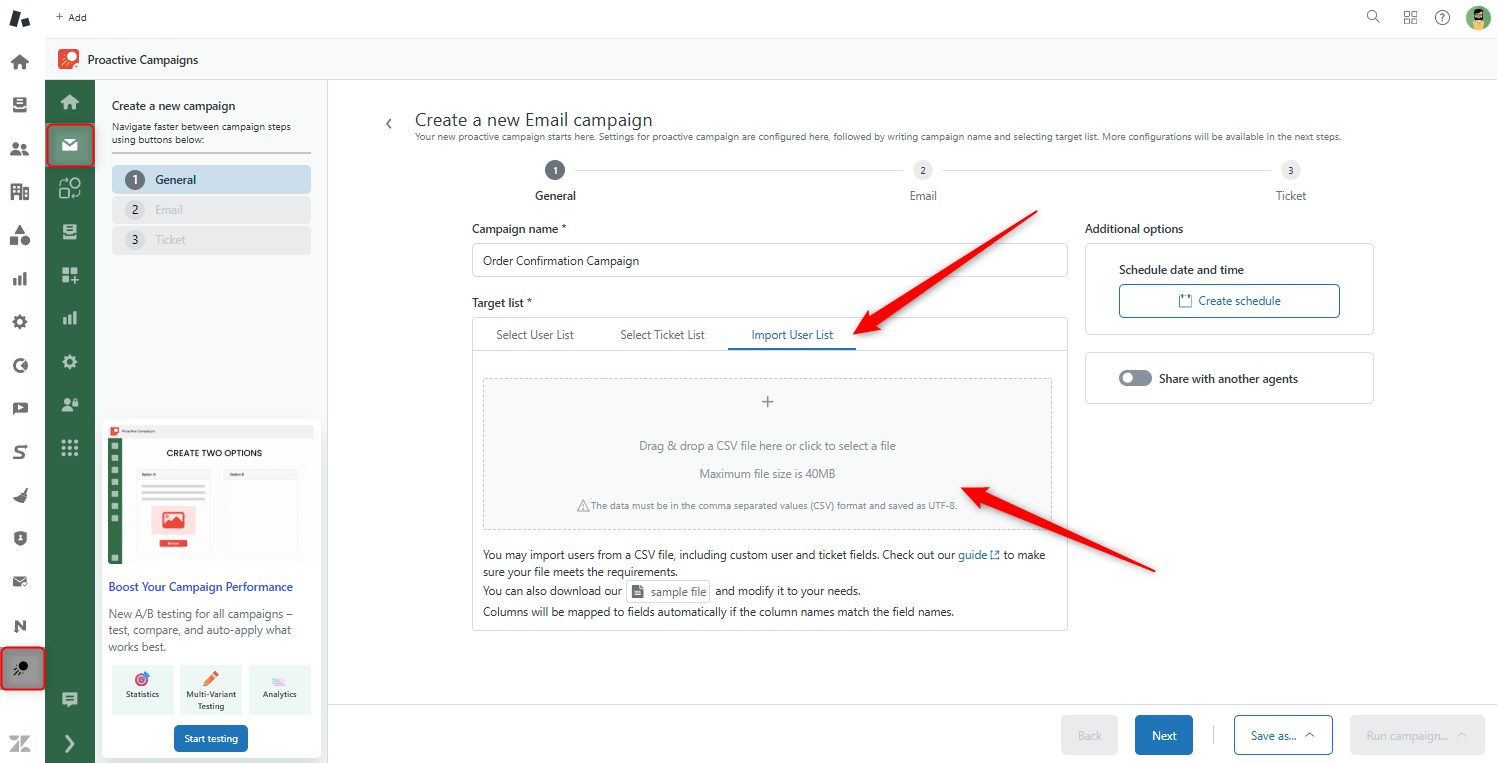
Then, map the fields with the table columns you want to import to Zendesk. Names of columns must match the names of custom fields.

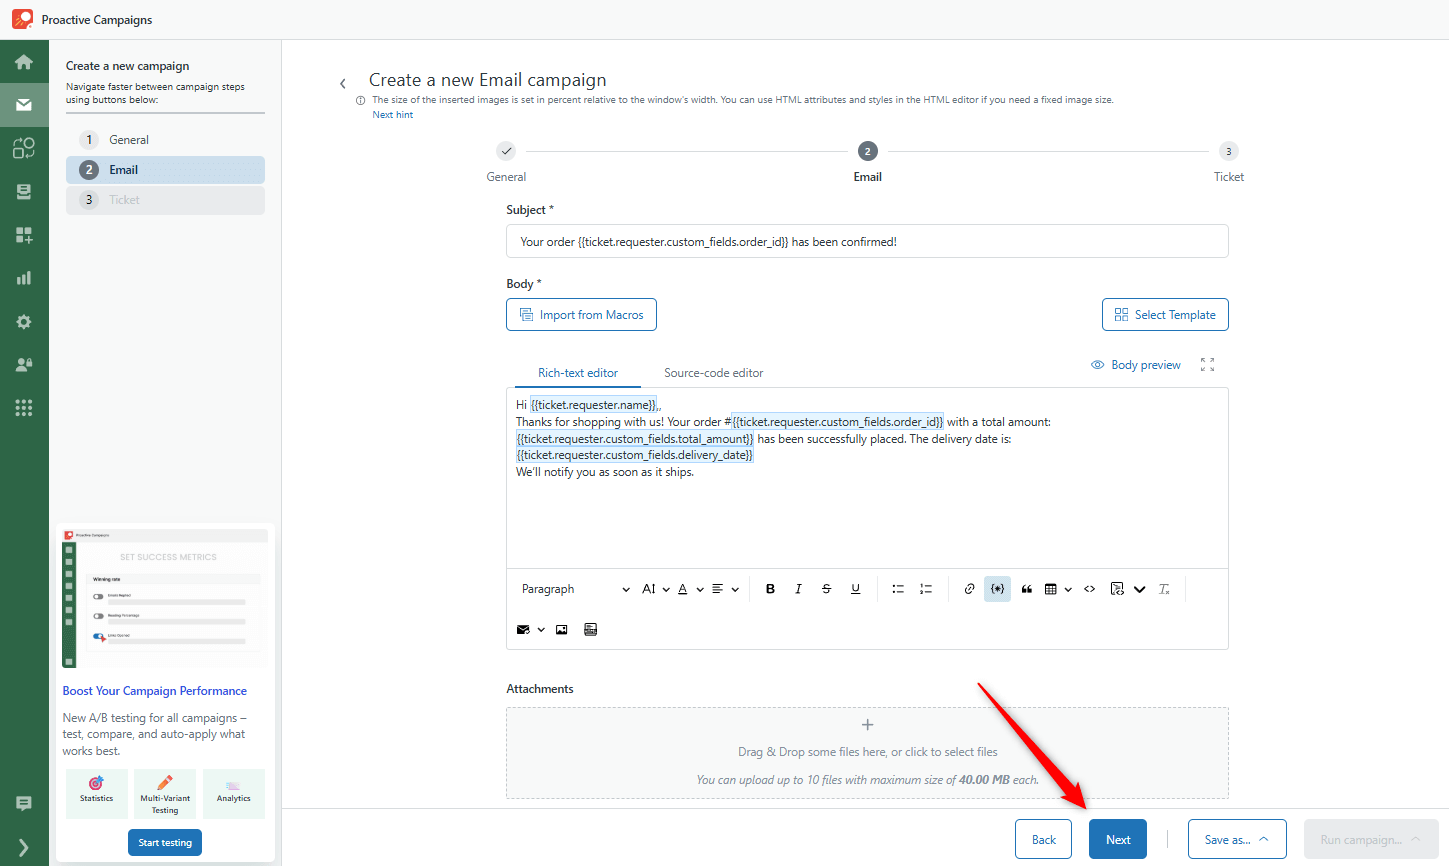
Then, as an example, we typed the following email copy. We included all custom fields in one letter, as the Proactive Campaigns app allows us to do so.
Consider that you can add as many placeholders as needed at once to provide more information to your customer.
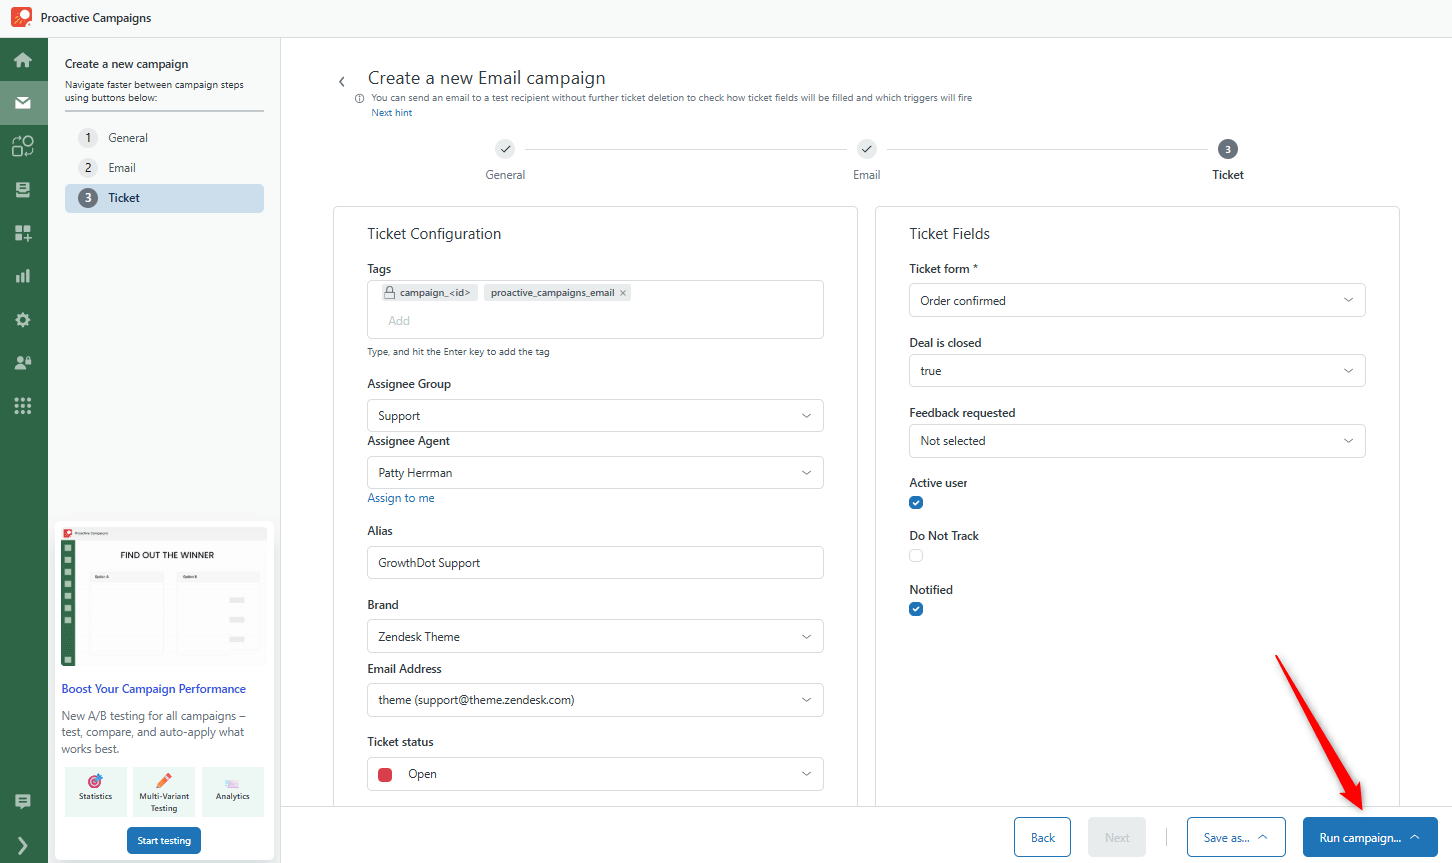
Finally, set the ticket configurations and ticket form, then test your campaign or click Save and Run.
Creating an Order Confirmation Campaign from the Ticket or User List
The Proactive Campaigns app allows you to create any campaign from the Zendesk contact base by grouping contacts by any parameter you need. So, it is also possible to make an order confirmation campaign using this option. Let's see our detailed explanation on how to do it.
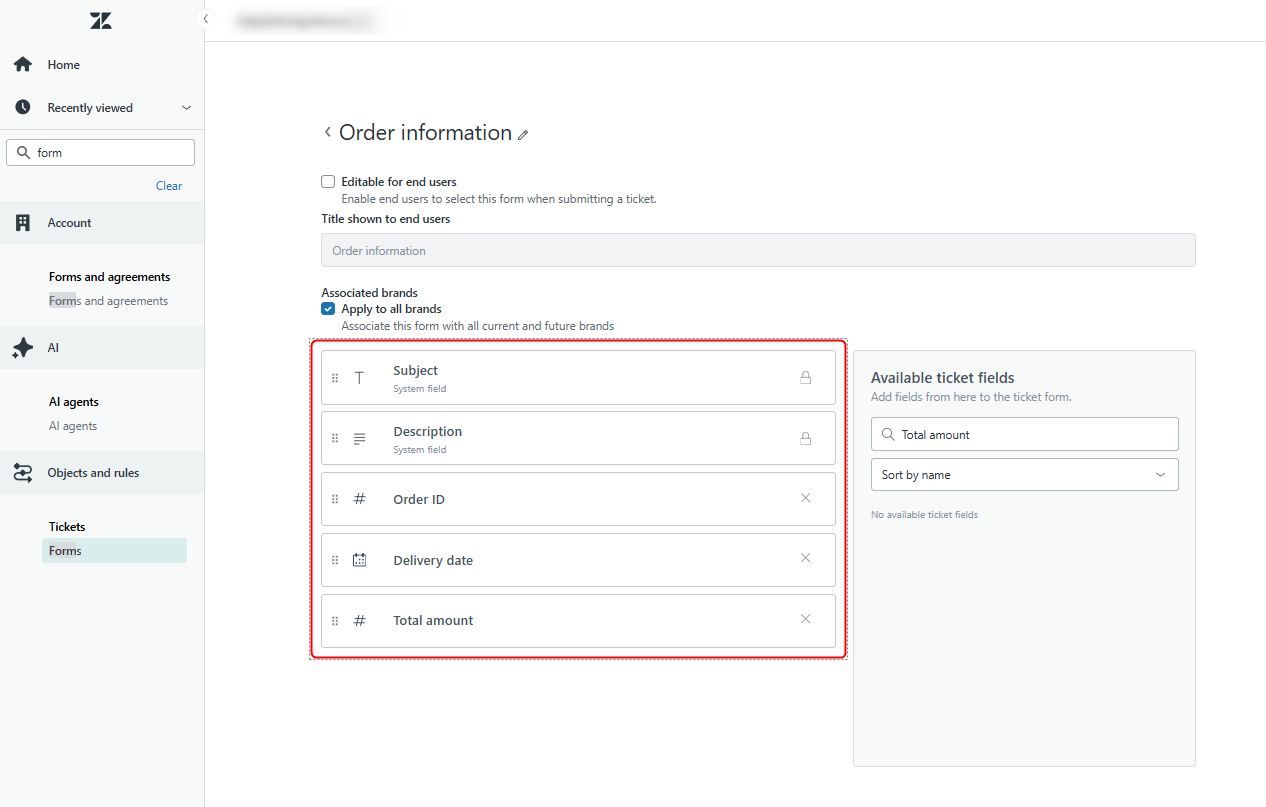
Initially, we suggest creating a ticket form with order information or simply adding custom fields to your existing ticket form.
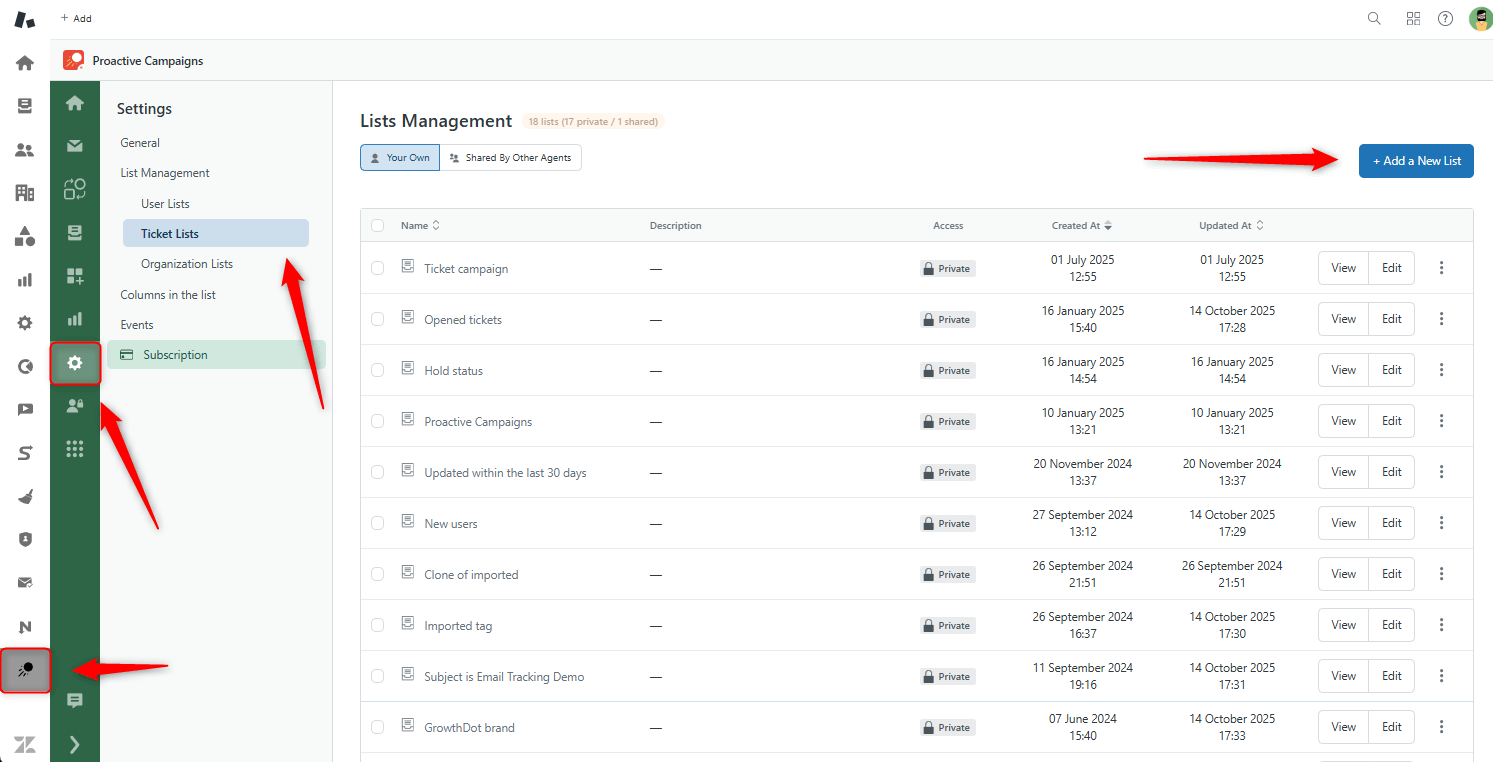
Next, go to the Proactive Campaigns app -> Settings-> Ticket list-> +Add New list.
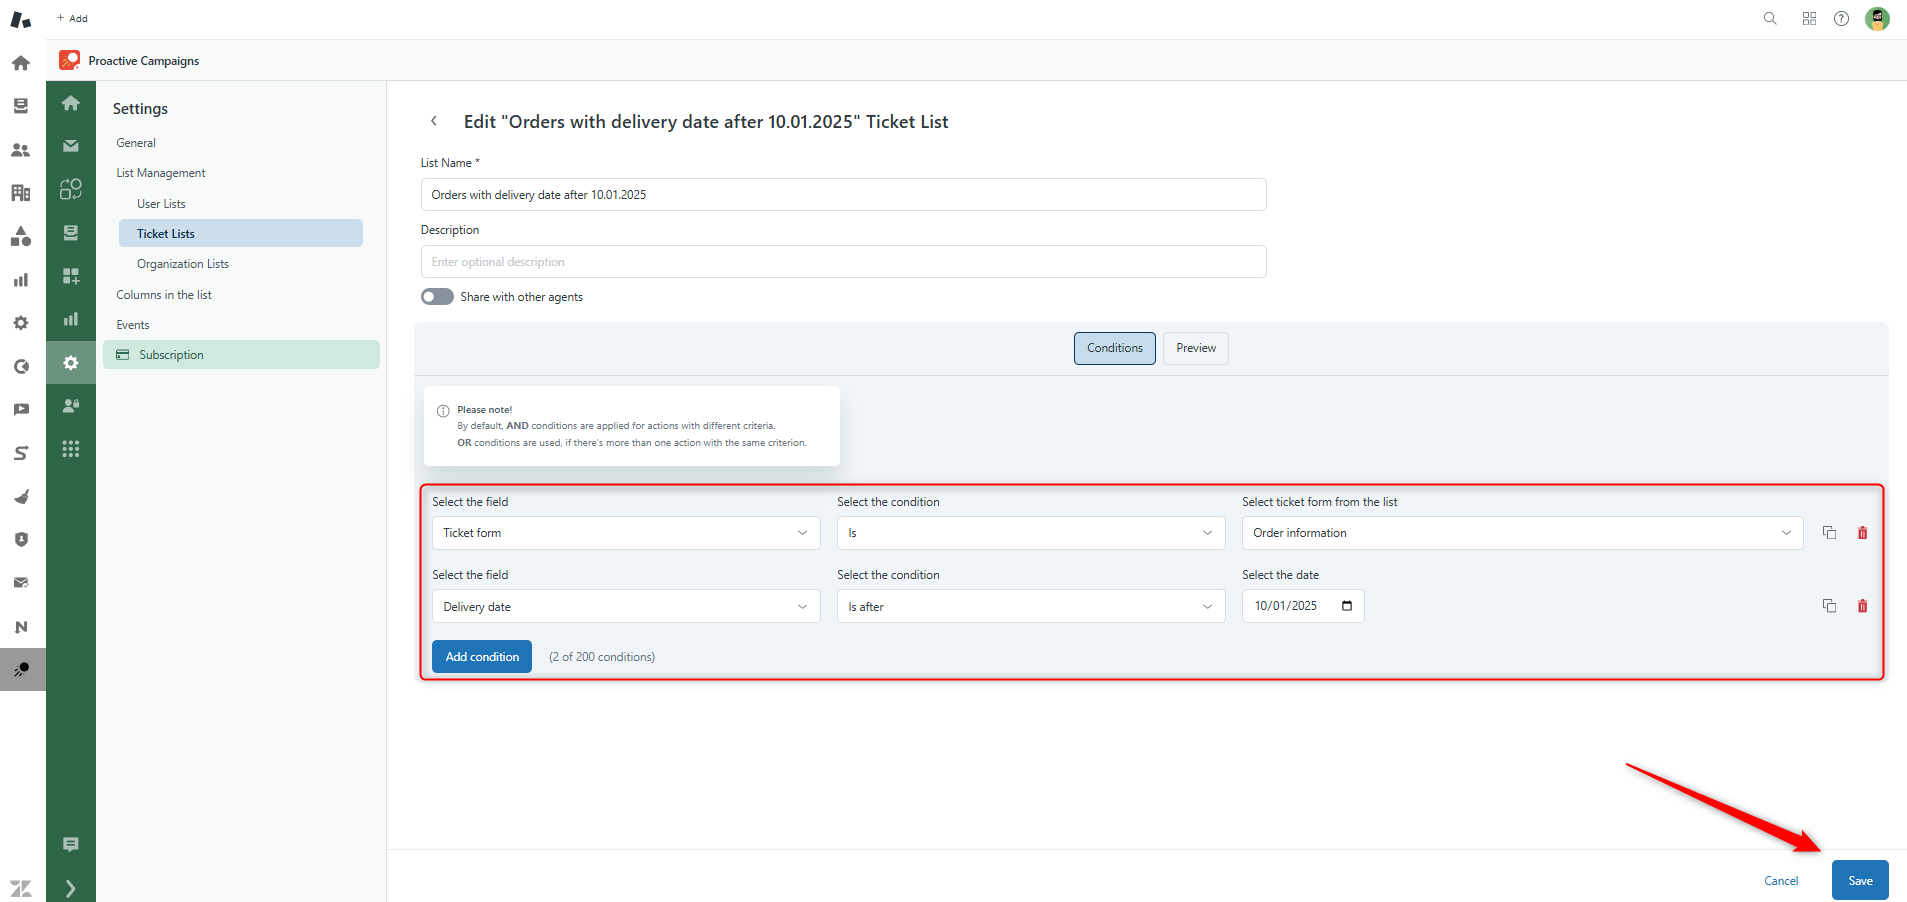
Then, create a list based on any condition that you need. As an example, we created a list based on our previously created ticket form and a specific delivery date. In your turn, you can use any other condition with system or custom fields or ticket form filter together with any other. For instance, if you need to follow up on the latest customers, you can also add Created at or Updated at fields or even use the specific date filter.
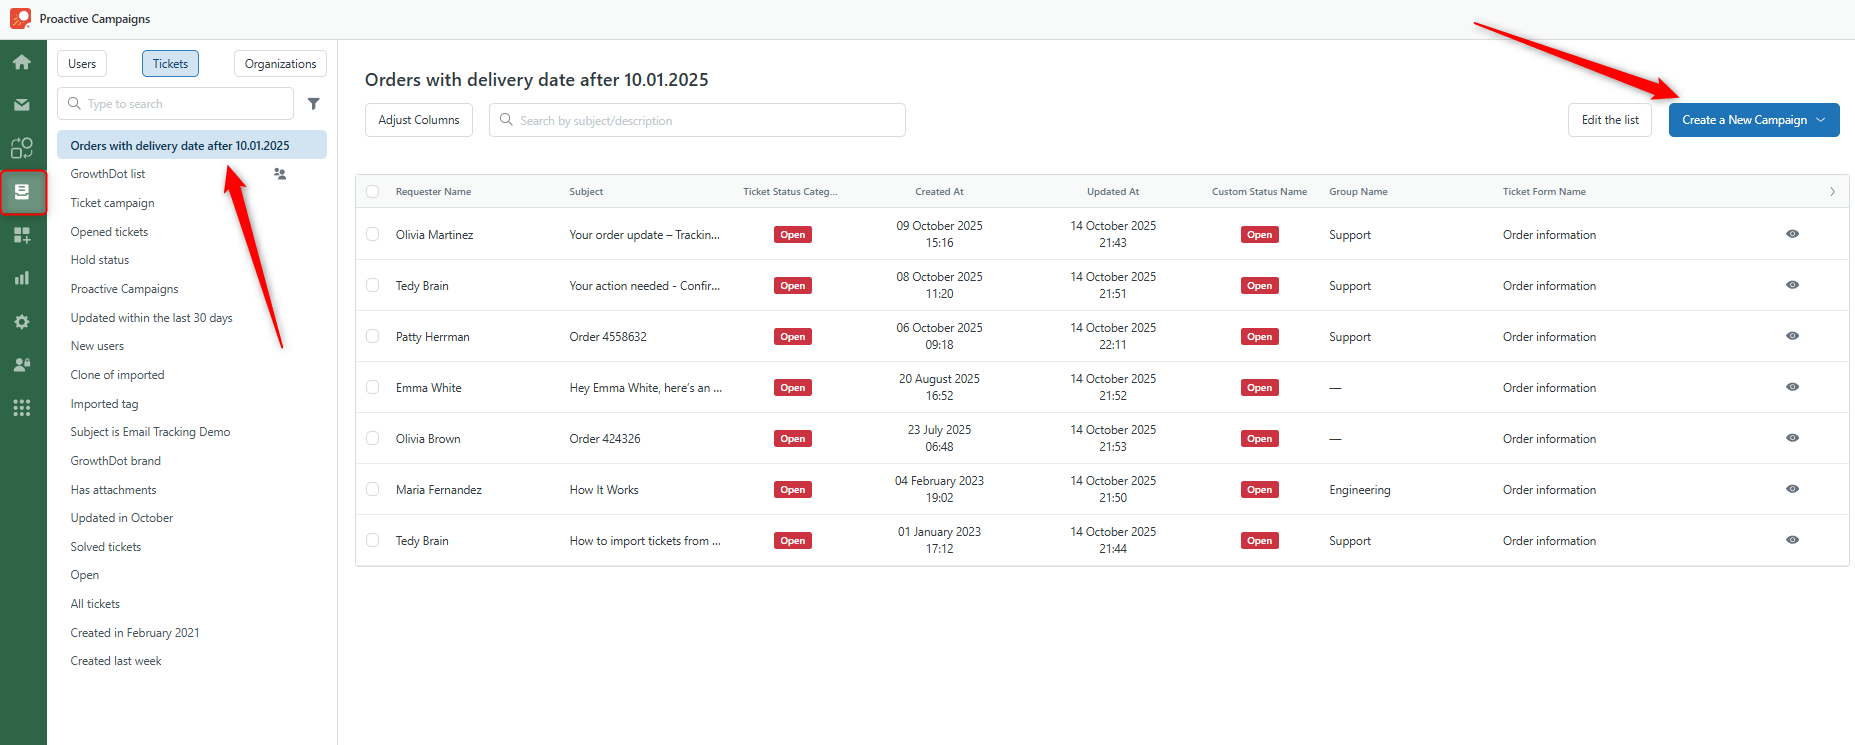
After we’ve created conditions, we need to go to the List Views tab and select your list. Then click on the Create a New Campaign button.
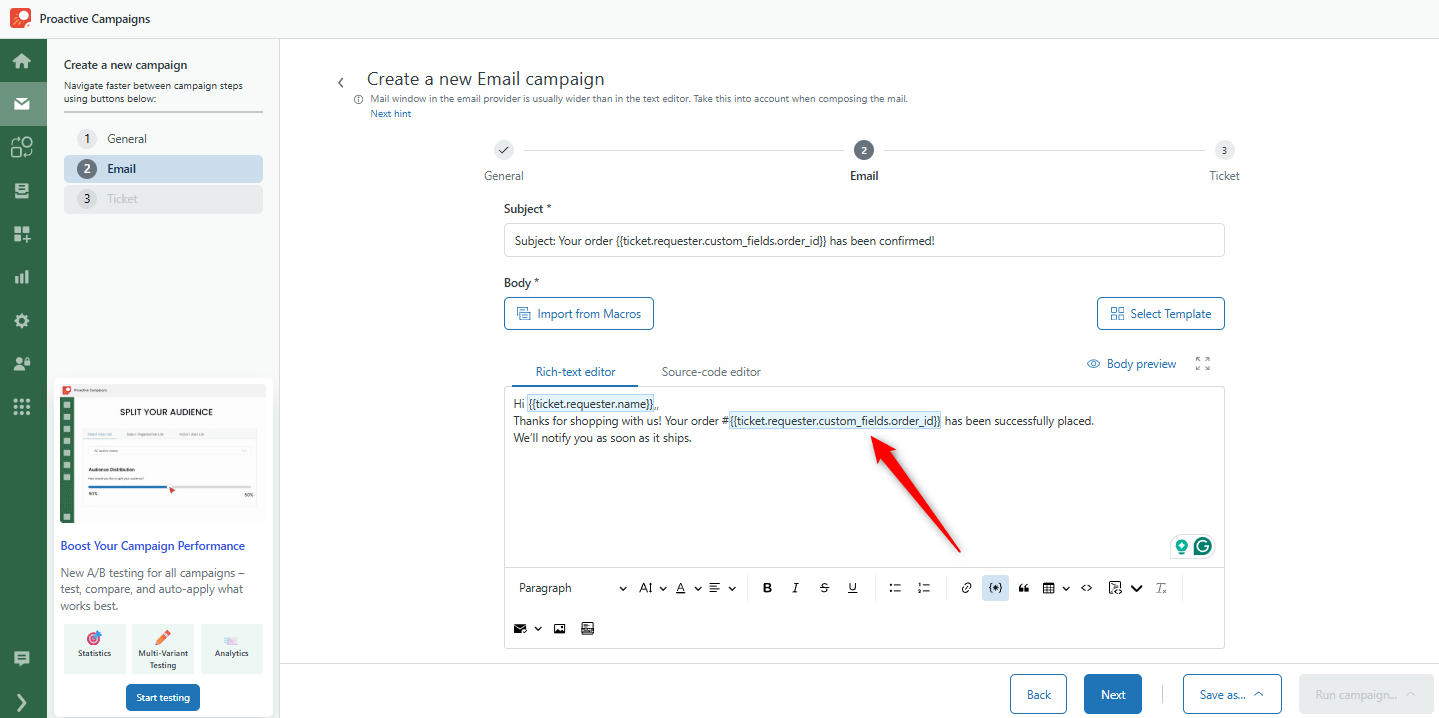
Next, add your campaign name and check if your list is selected. Then, go to the Email section and type your email with the order ID placeholder. Here is how it looks.
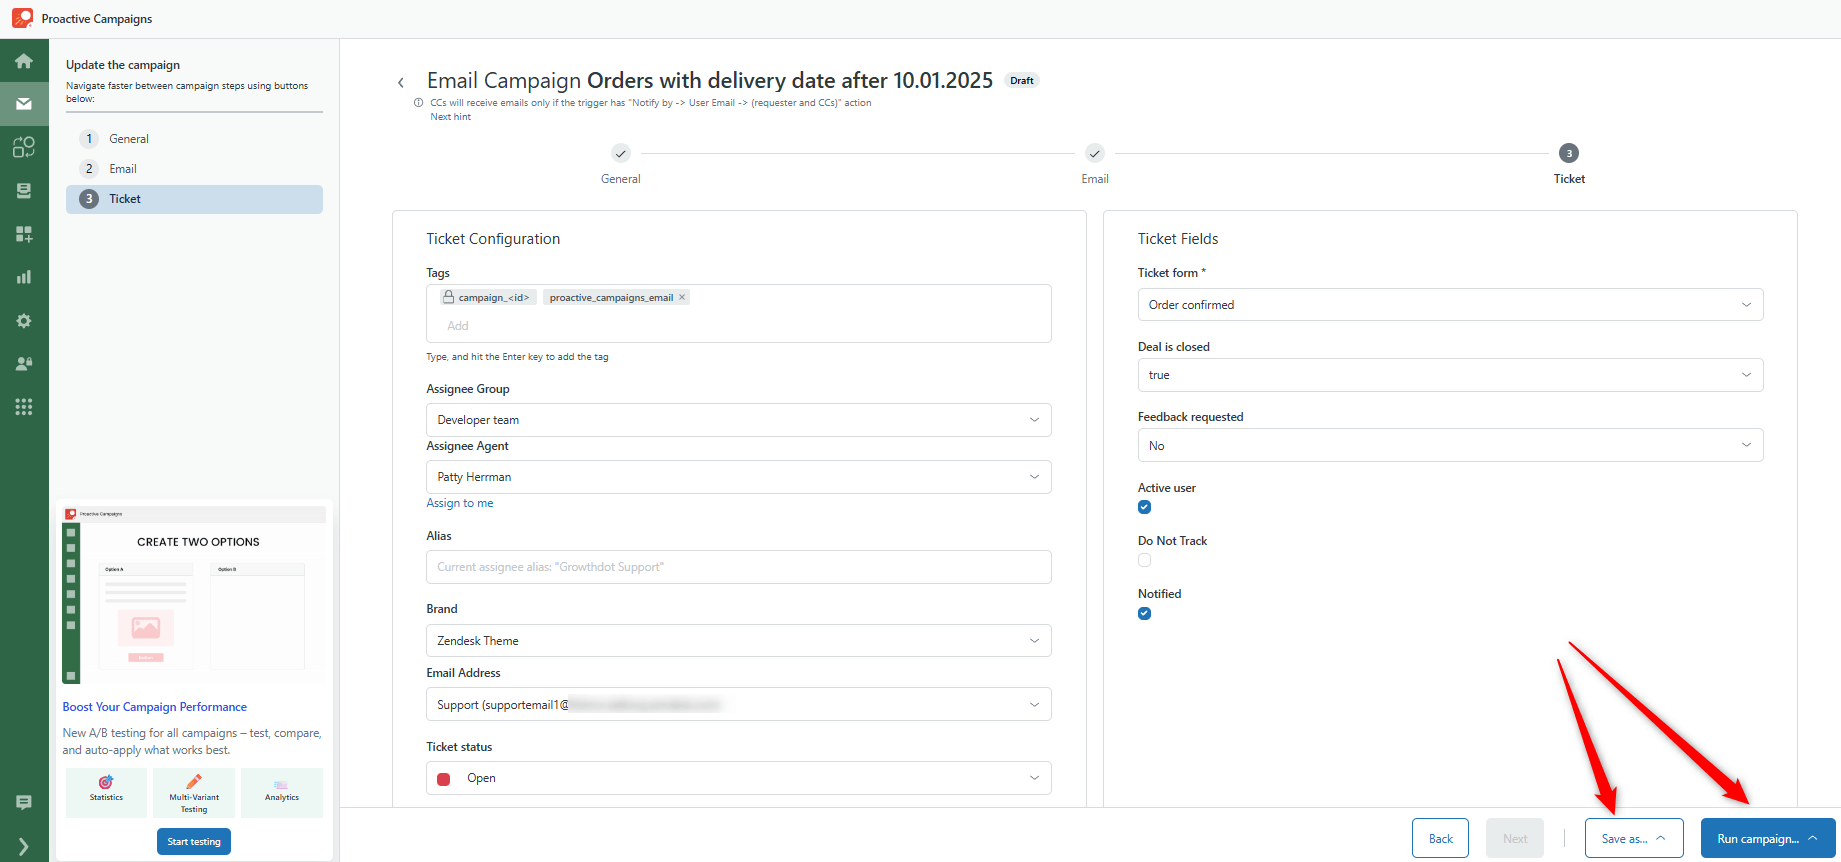
Finally, select the needed ticket configuration and select the ticket form for tickets created by Proactive Campaigns. You can run the campaign immediately or save it as a draft. Also, there’s an ability to test an email campaign and see if there are any errors.
Conclusion
While Zendesk doesn’t have built-in order confirmation functionality, the Proactive Campaigns app bridges that gap seamlessly. With its ability to automate campaigns, use custom fields, and personalize each message, it transforms Zendesk into a practical solution for managing post-purchase communication and customer support. Whether you’re importing orders from external systems or triggering confirmations directly from tickets, this setup ensures every customer receives timely and accurate order details, with no manual effort required.


