The Kanban ticket board in the Kanban Pro app for Zendesk offers a powerful, visual way to track ticket progress, prioritize tasks, and close tickets faster.
But Zendesk Kanban view is more than just a visual tool—it's a game-changer for organizing work, streamlining processes, and improving team collaboration. So, let's walk you through a real-world scenario that shows how the Kanban board can transform your Zendesk ticket handling process.
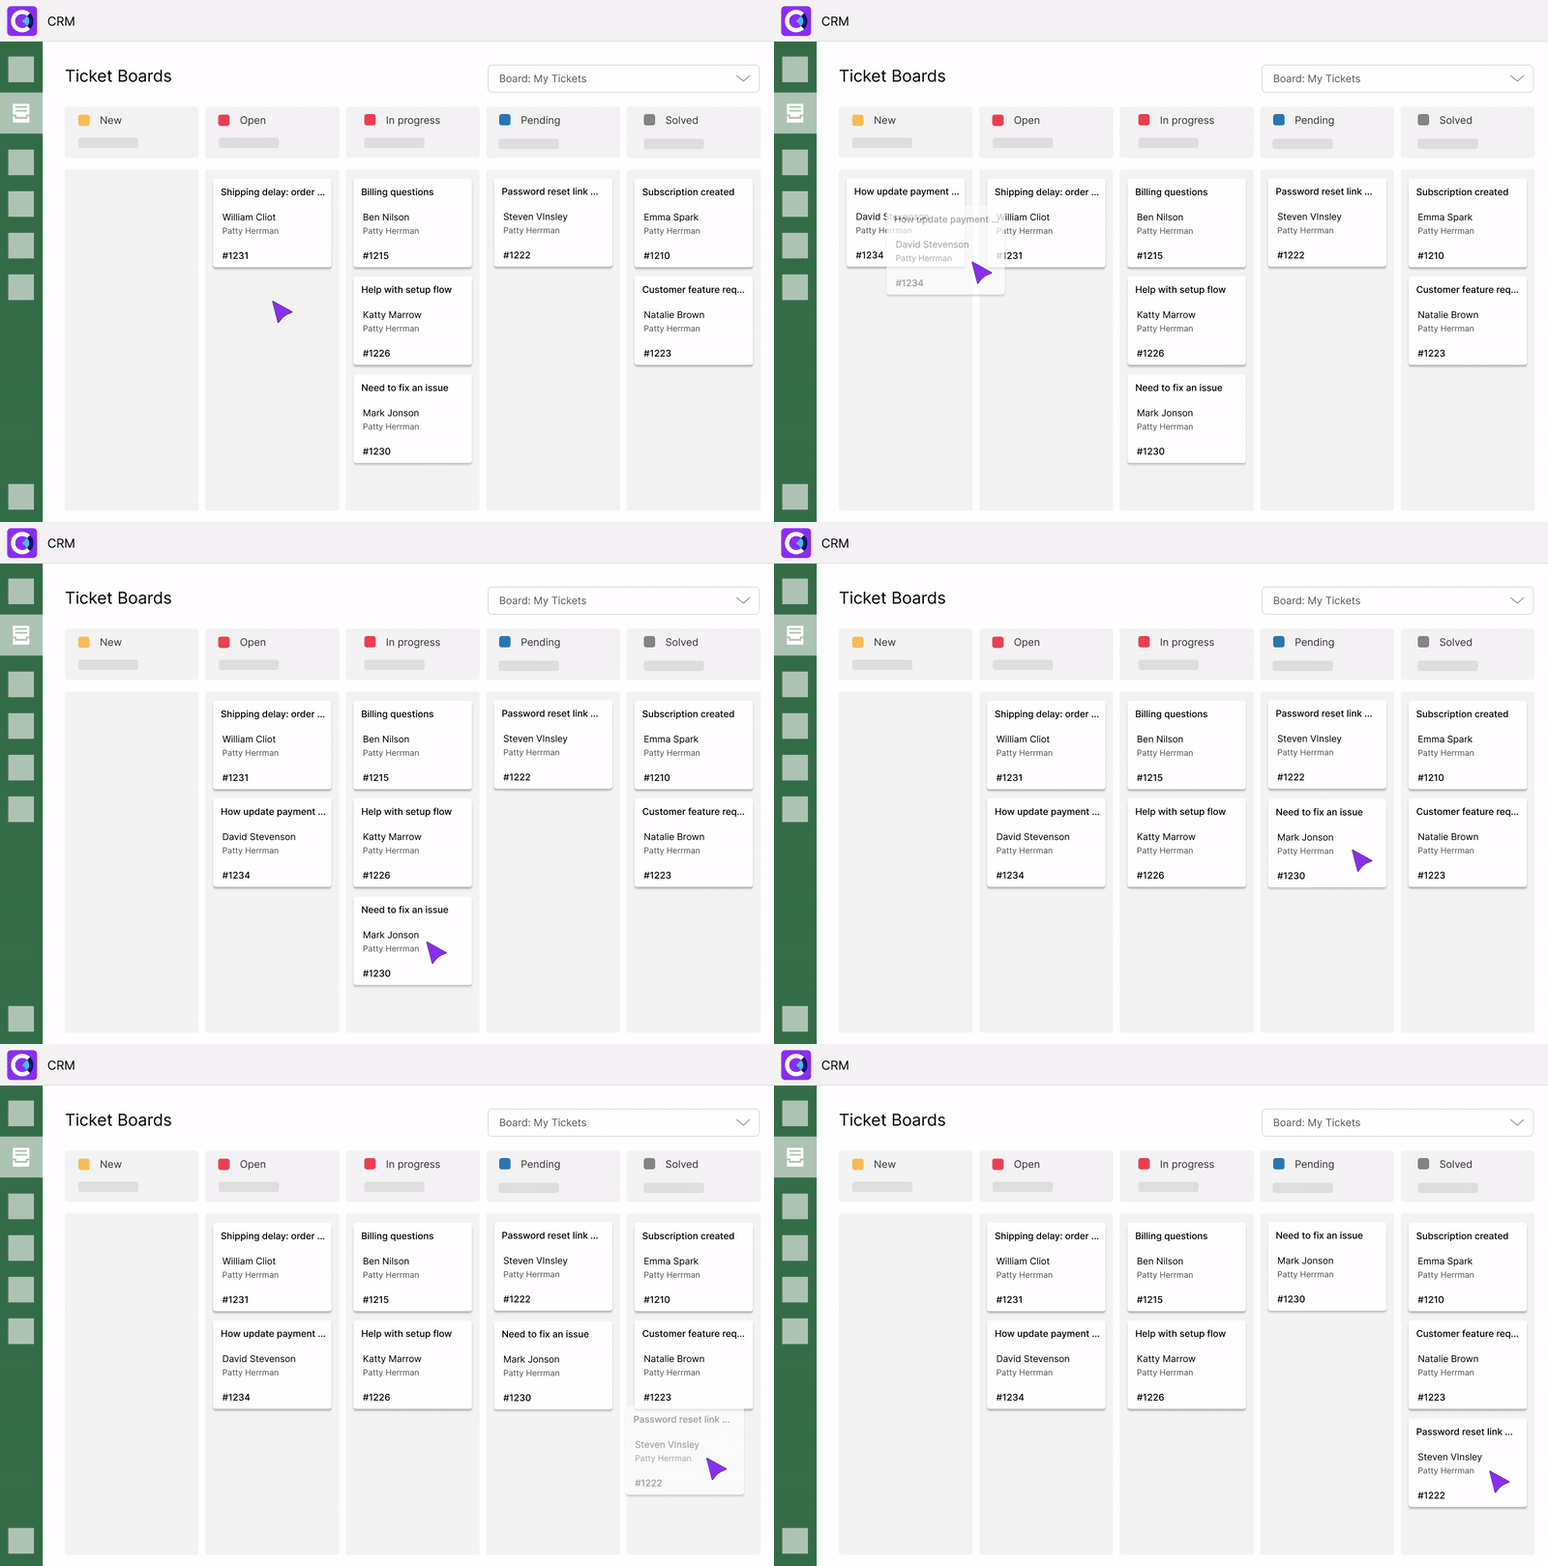
How Kanban View Simplifies Ticket Management
Have you ever questioned how to use Kanban for helpdesk or support ticket queues?
Imagine this: A growing e-commerce company’s support team struggles with ticket visibility. High-priority issues often go unnoticed, and agents waste time manually sorting tickets. They need a better way to:
- Organize tickets by status (e.g., Open, Pending, On Hold, Solved).
- Ensure proper ticket assignment to the right agents.
- Track critical requests without digging through endless lists.
- Customize views for different teams and workflows.
With the Kanban ticket board, the team can address all these challenges, improving both efficiency and customer satisfaction.
How to Use the Kanban Board in Zendesk
Step 1: Setting Up Your Zendesk Kanban board
To get started, go to the Ticket Boards tab in the Kanban Pro app.
From here, you can select a relevant ticket view from the dropdown menu at the top. These views sync directly with Zendesk, allowing you to see all your custom ticket lists in the form of a Kanban ticket board.
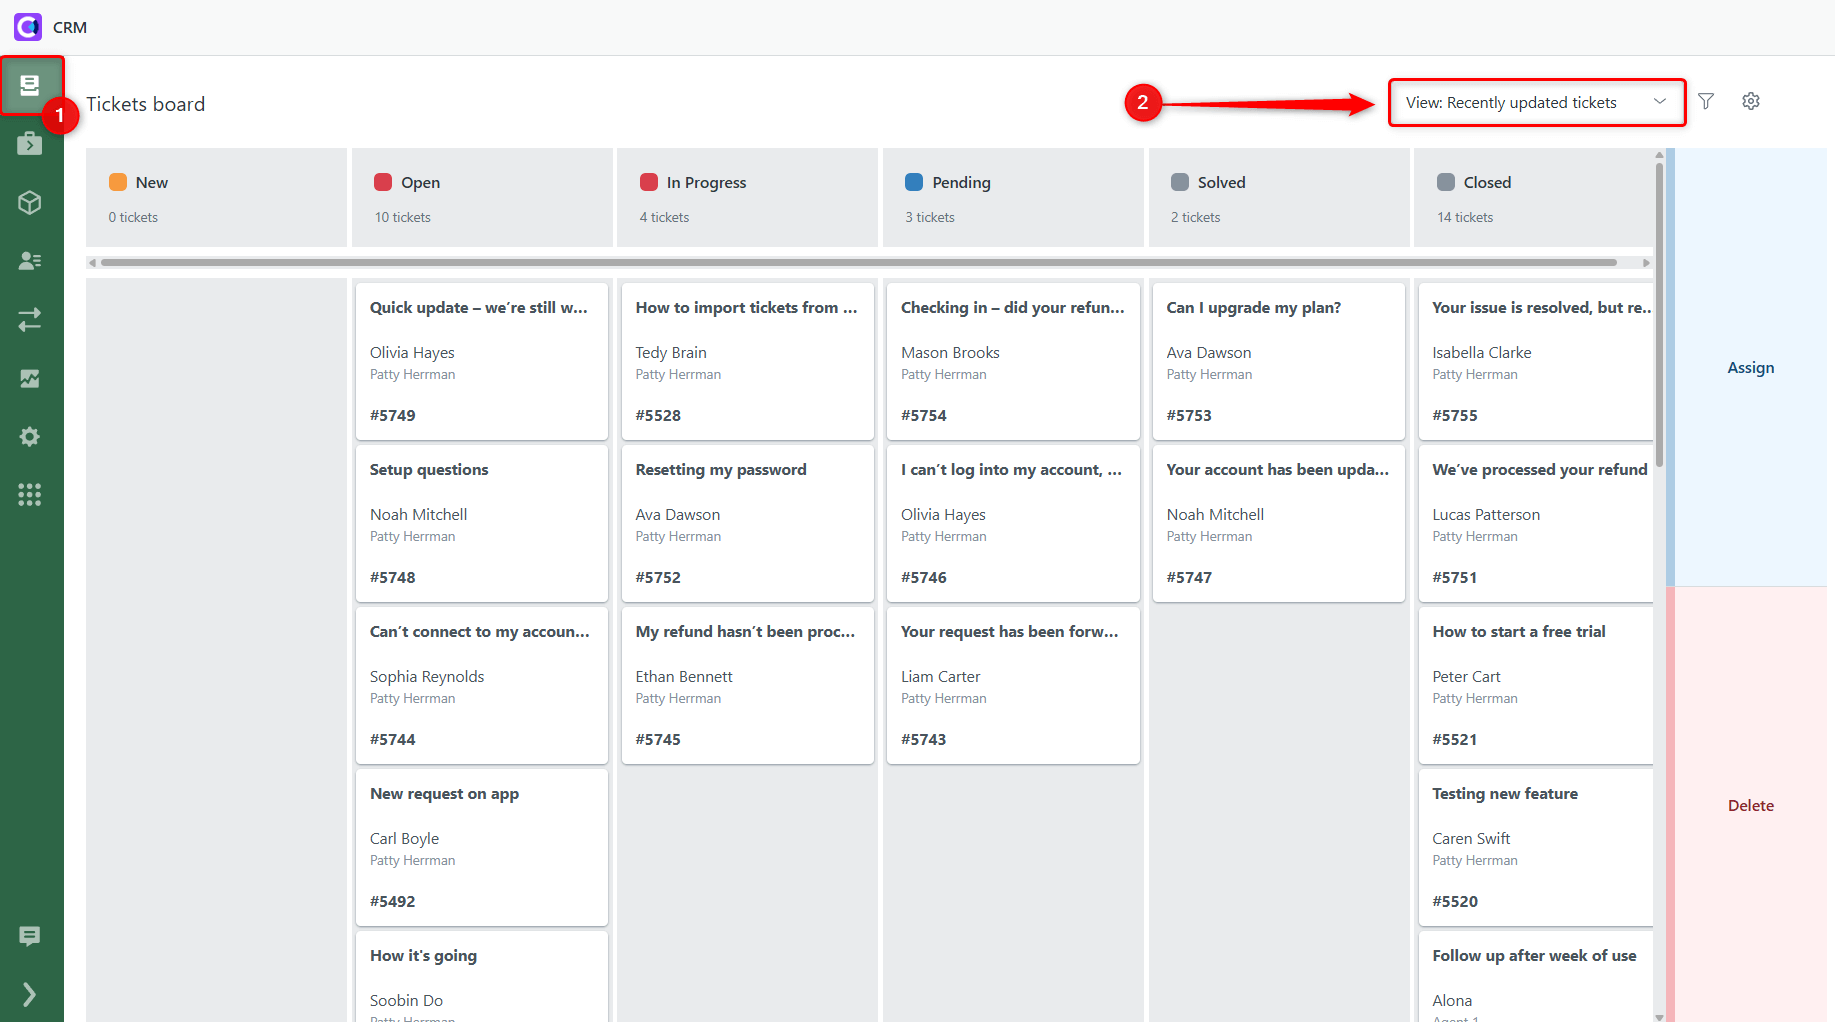
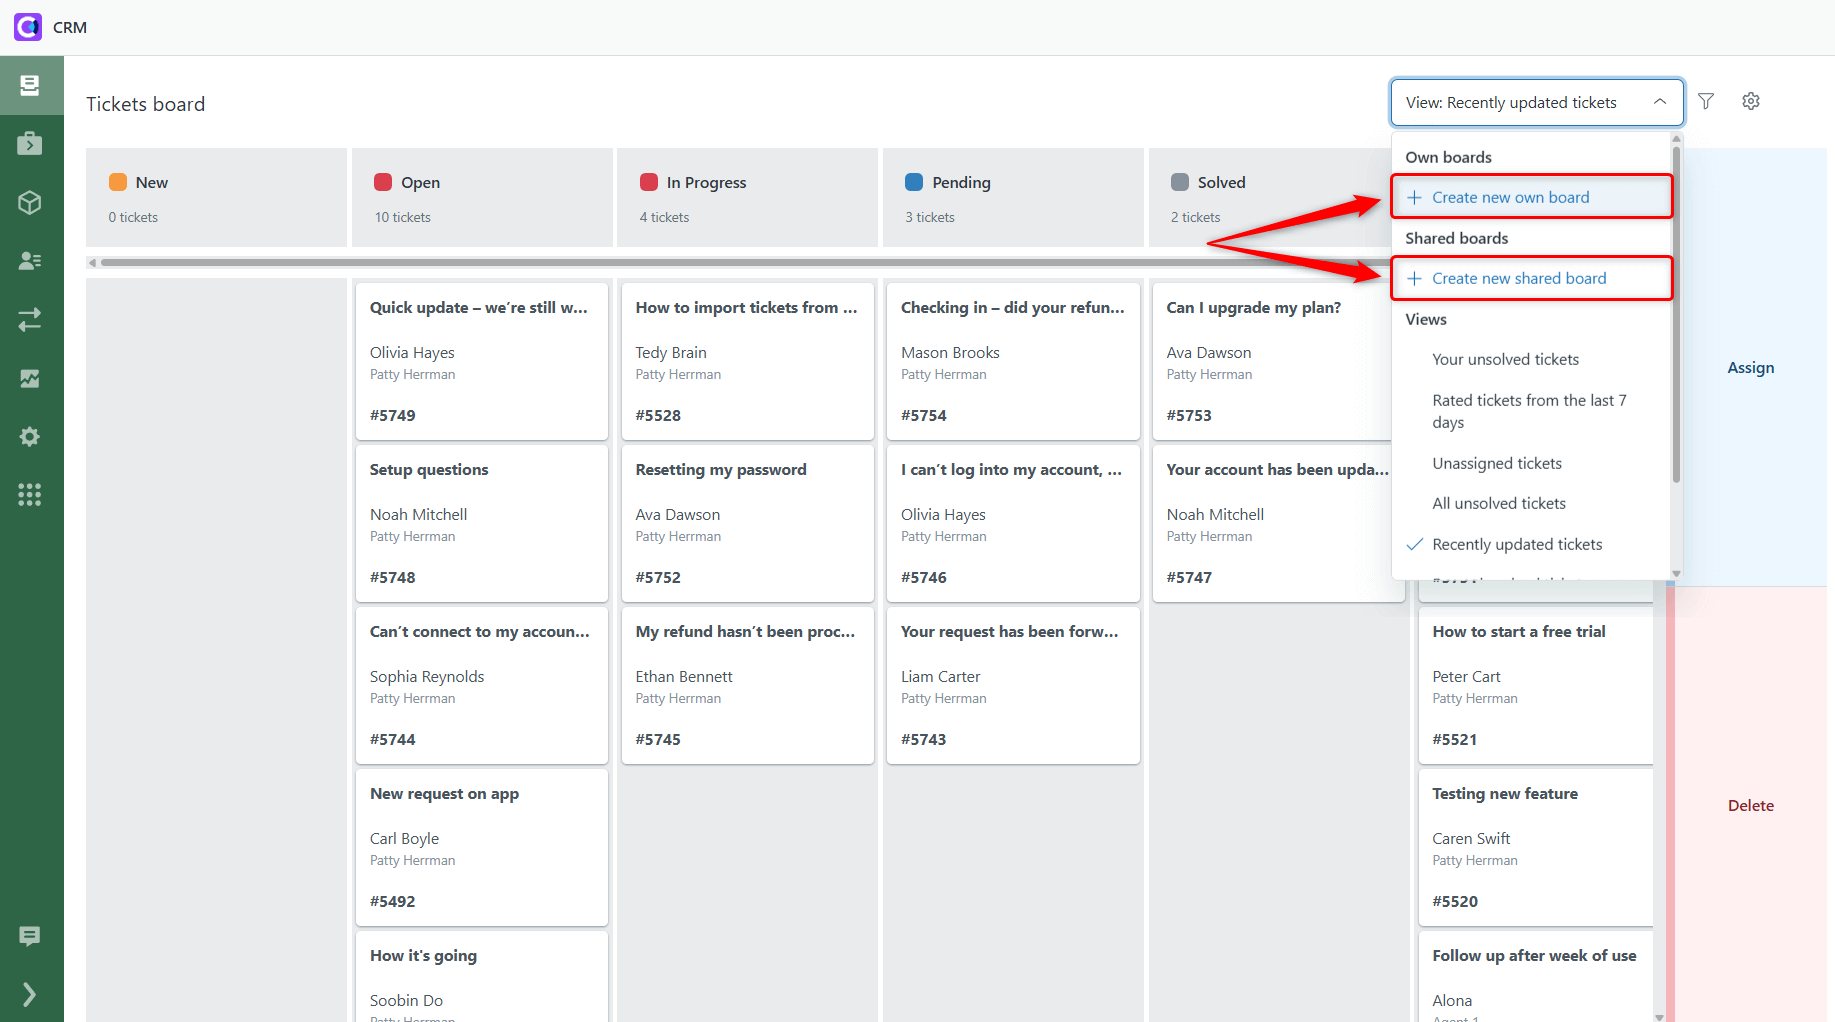
Or, create a custom Kanban board by clicking Create new own/shared board in the same dropdown. Make it either personal or shared, depending on your team’s needs.
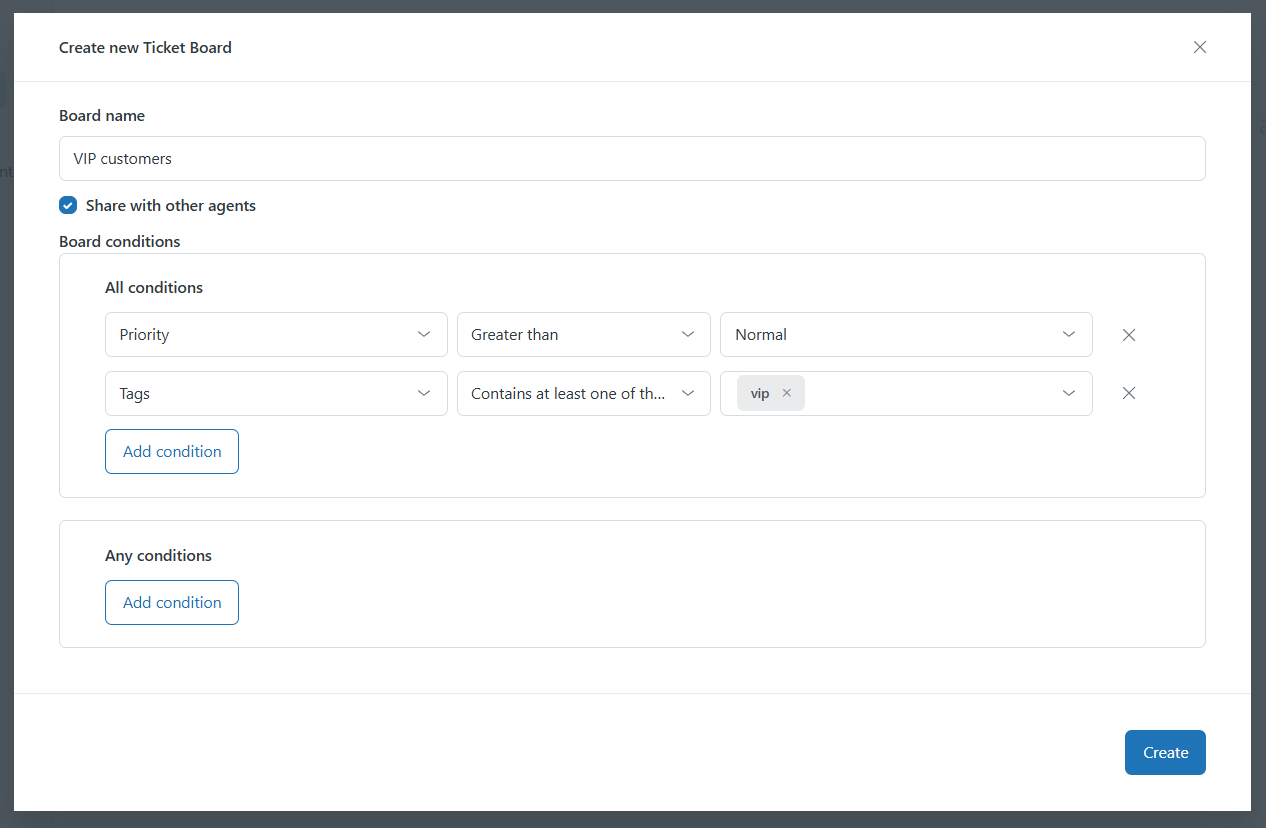
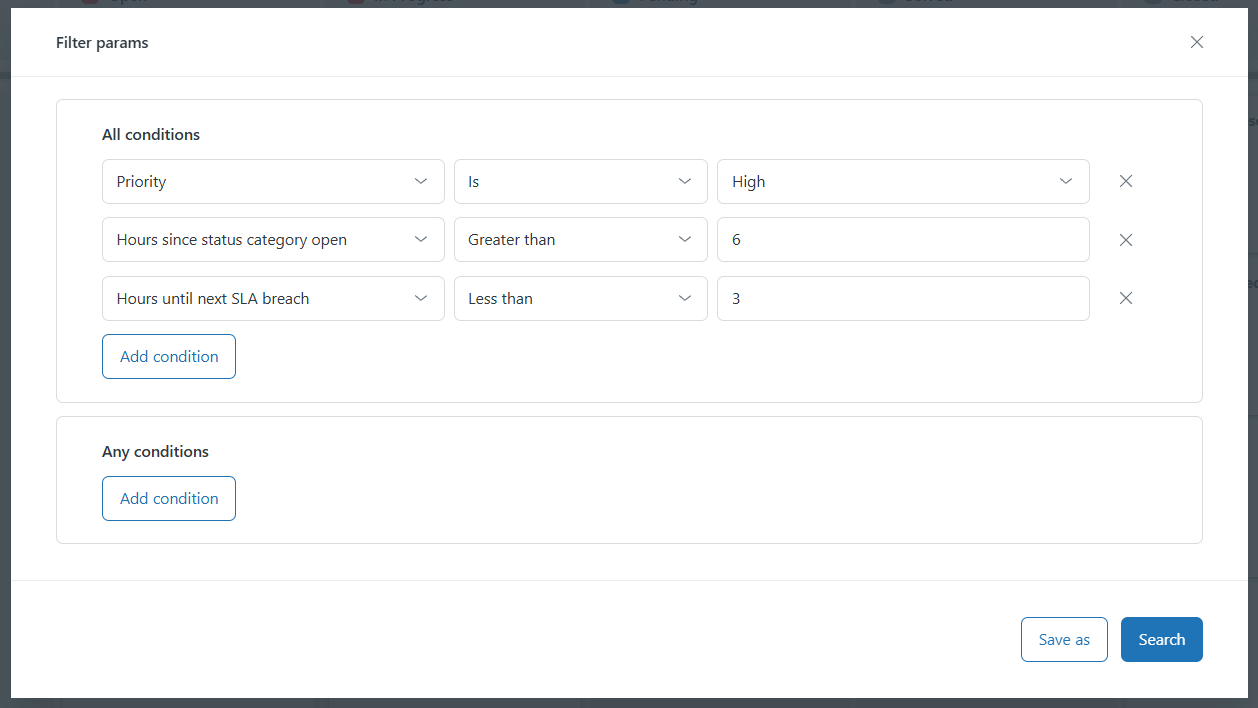
Next, set up the conditions to filter which tickets will appear on your board. Click Add condition, select ticket fields (like priority, status, or custom tags), and define the value. You can add as many conditions as needed to fine-tune your board’s view.
Step 2: Organizing Tickets Visually
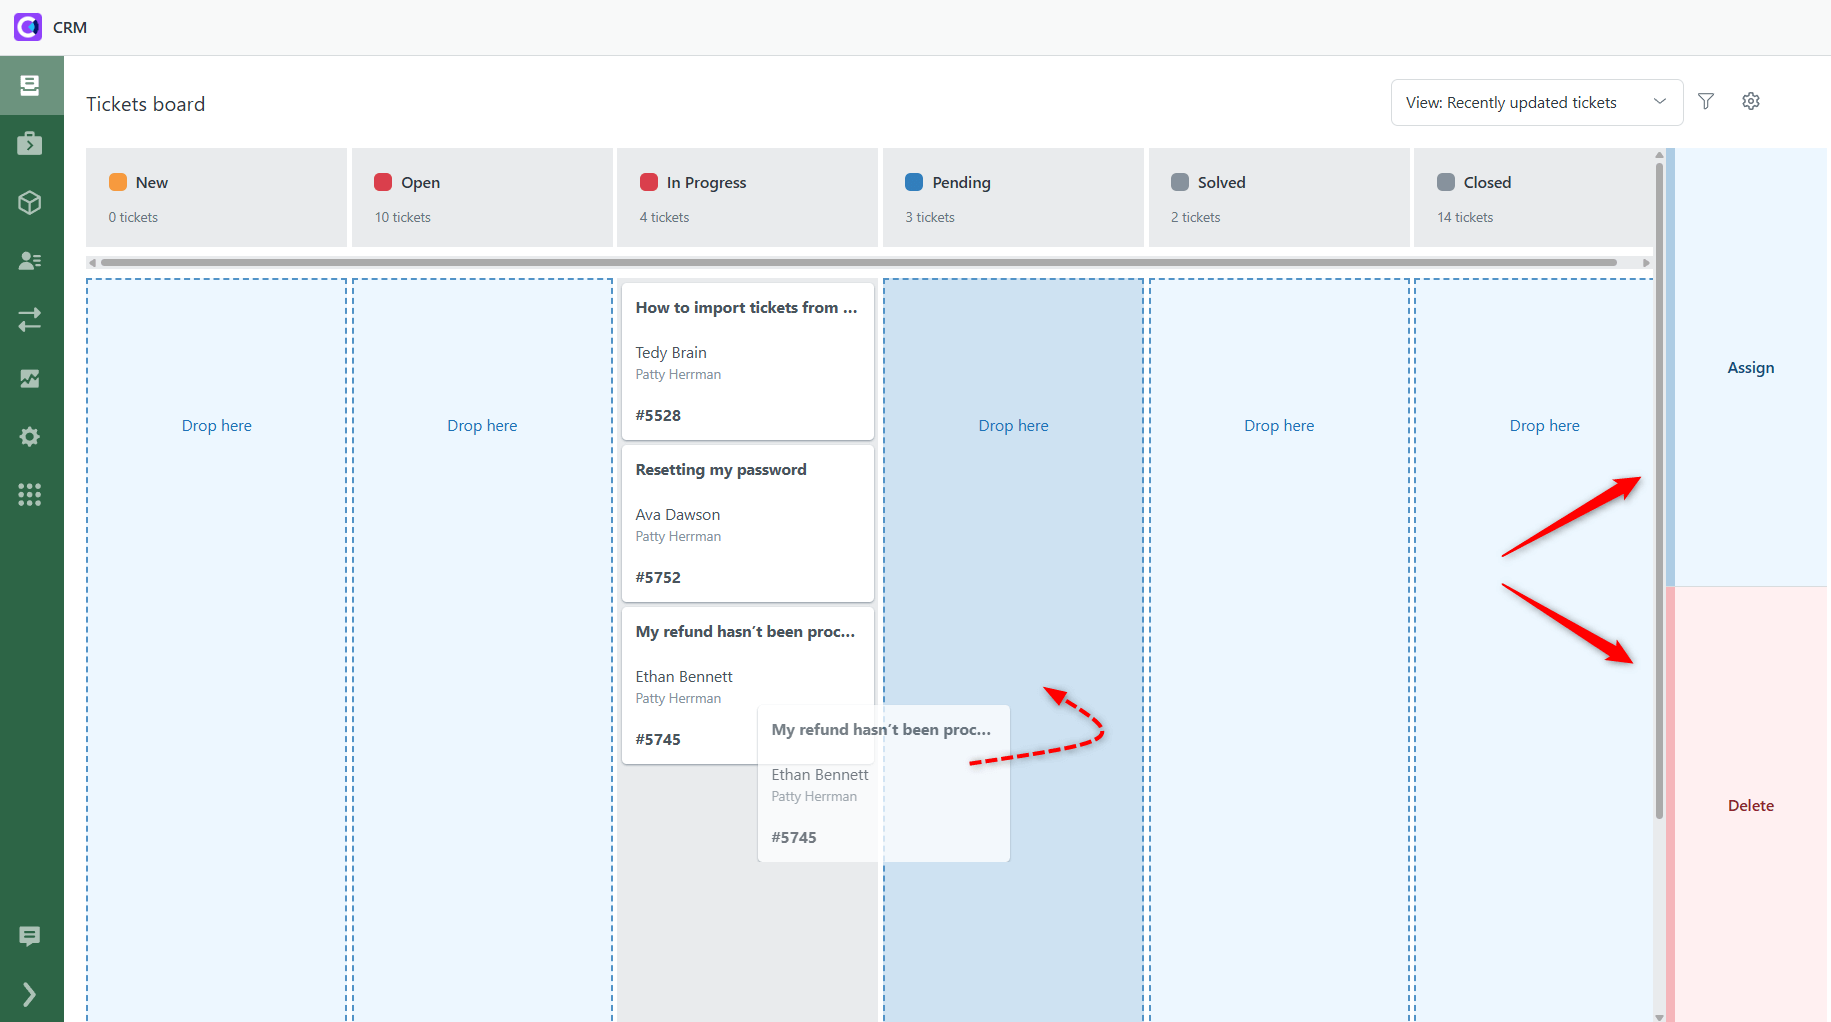
Managing tickets is easy with Kanban’s drag-and-drop functionality:
- Move tickets between columns to update their status in real time.
- Assign tickets to the right agents by dragging them into the ‘Assign’ block.
- Delete tickets instantly by dragging them to the ‘Delete’ block.
Step 3: Prioritizing Work
To focus on critical tickets, use the quick filters.
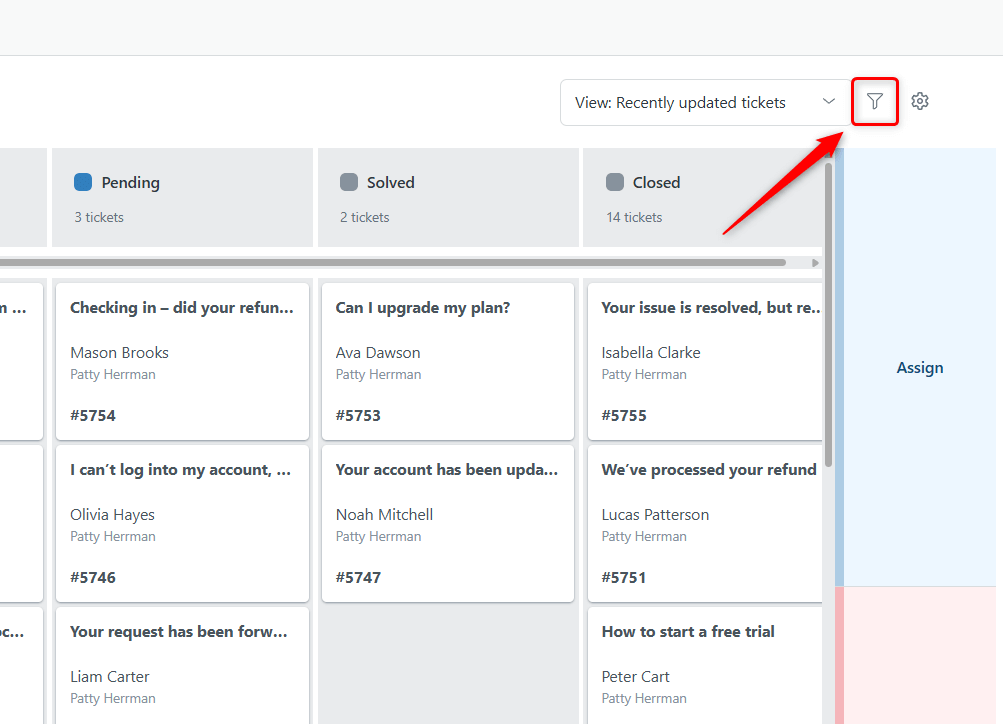
You can sort by:
- Priority (e.g., High, Urgent)
- SLA time (to prevent breaches)
- Ticket age (to ensure no ticket is left unresolved for too long)
Step 4: Tracking Progress & Collaboration
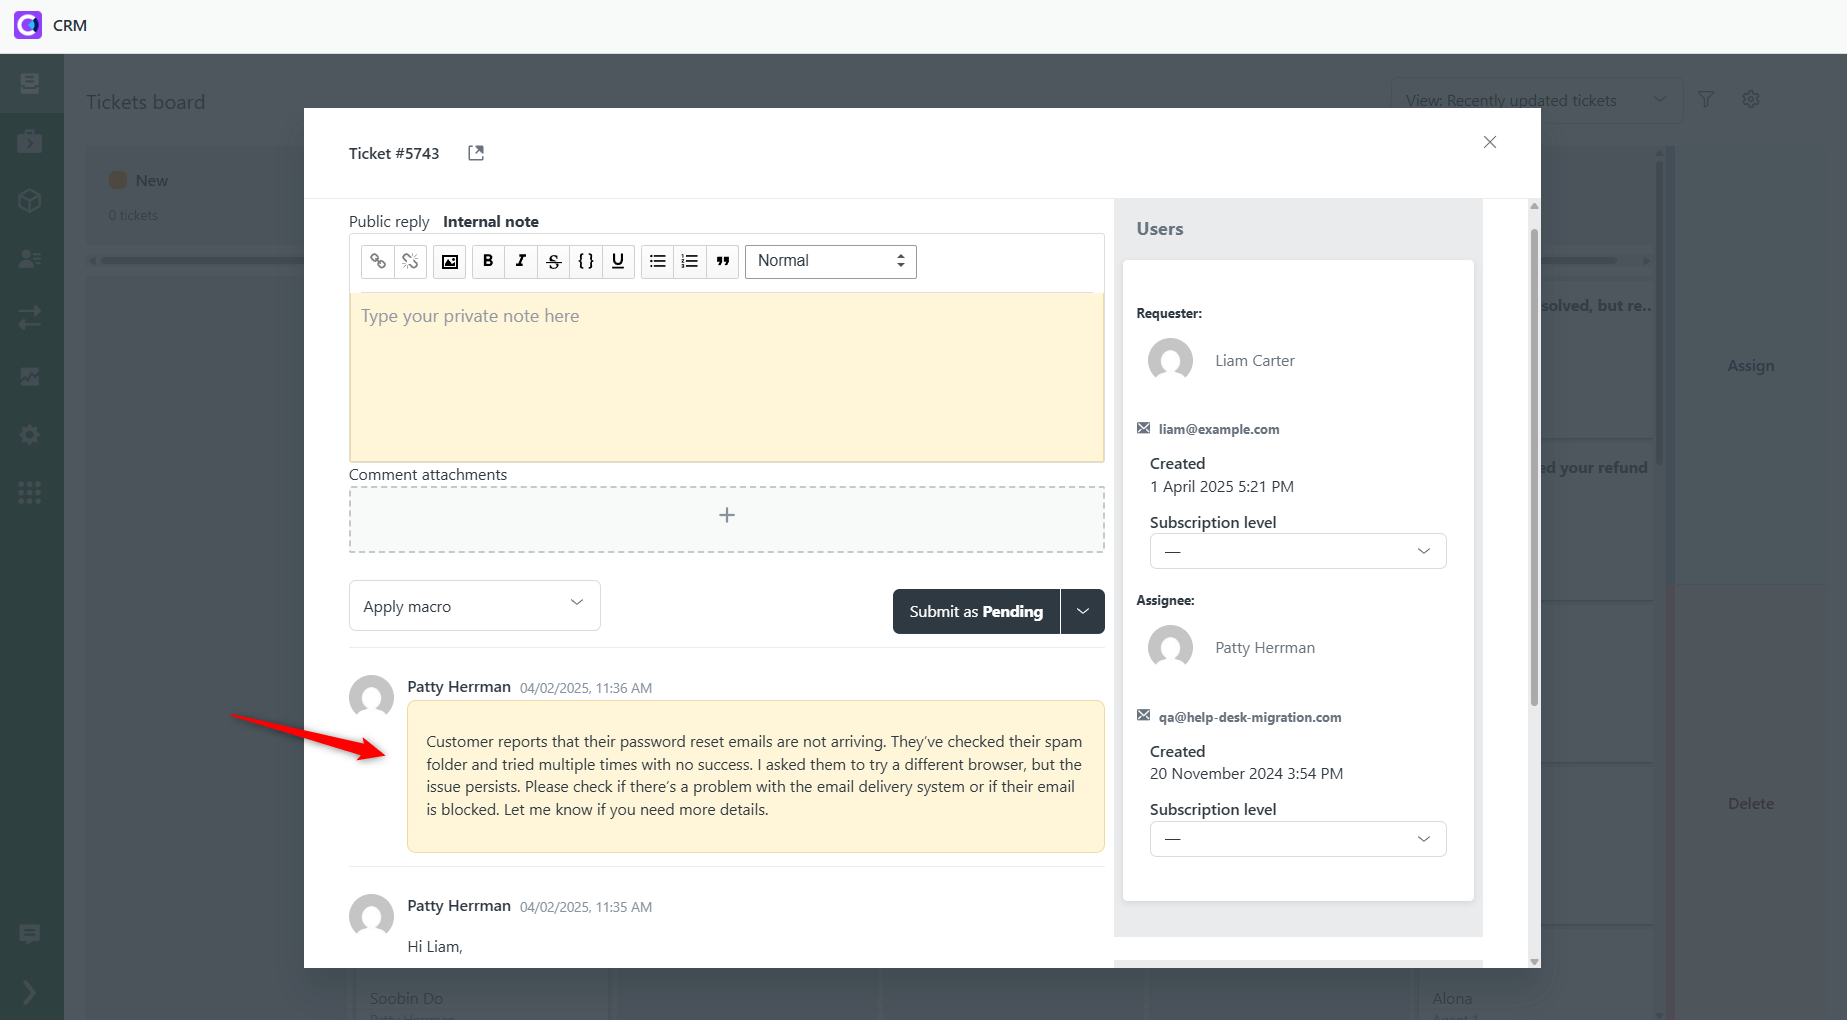
Shared Kanban boards improve team collaboration by allowing agents to:
- Leave internal notes on tickets for seamless handoffs.
- Assign tickets efficiently to distribute workload.
- Monitor ticket movement trends to refine workflows over time.
Step 5: Closing & Analyzing Completed Tickets
Once a ticket is resolved, move it to the ‘Closed’ column to keep your board organized. Reviewing completed tickets helps identify:
- Common customer pain points
- Areas for workflow improvement
- Opportunities for automation and efficiency
Best Practices for Using Zendesk Kanban Board
To get the most out of the Kanban board, try to:
- Keep columns simple and aligned with meaningful statuses (the column names match the ticket statuses in your Zendesk instance, so learn how to manage them here).
- Regularly review and adjust workflows based on ticket trends.
- Use automation to handle repetitive tasks and reduce manual effort. For example, set up automation to move tickets between columns based on certain conditions, such as priority or SLA status.
- Encourage team collaboration through internal notes and assignments.
Conclusion
By applying these tips, the Kanban Pro app can help you streamline Zendesk ticket management, boost tracking and prioritization, and increase overall team productivity.
So, why wait? Set up your Kanban board today and start optimizing your support process!


