How to Customize and Reorder Columns in Kanban Ticket Board
-
CRM and Deals for Zendesk
Kanban Pro for Zendesk now allows you to customize your ticket board columns to better match your workflow.
Instead of being limited to the default ticket statuses, you can choose custom ticket fields and arrange the columns in the order that makes the most sense for your team. This makes it easier to track tickets, follow your process, and improve agent usability.
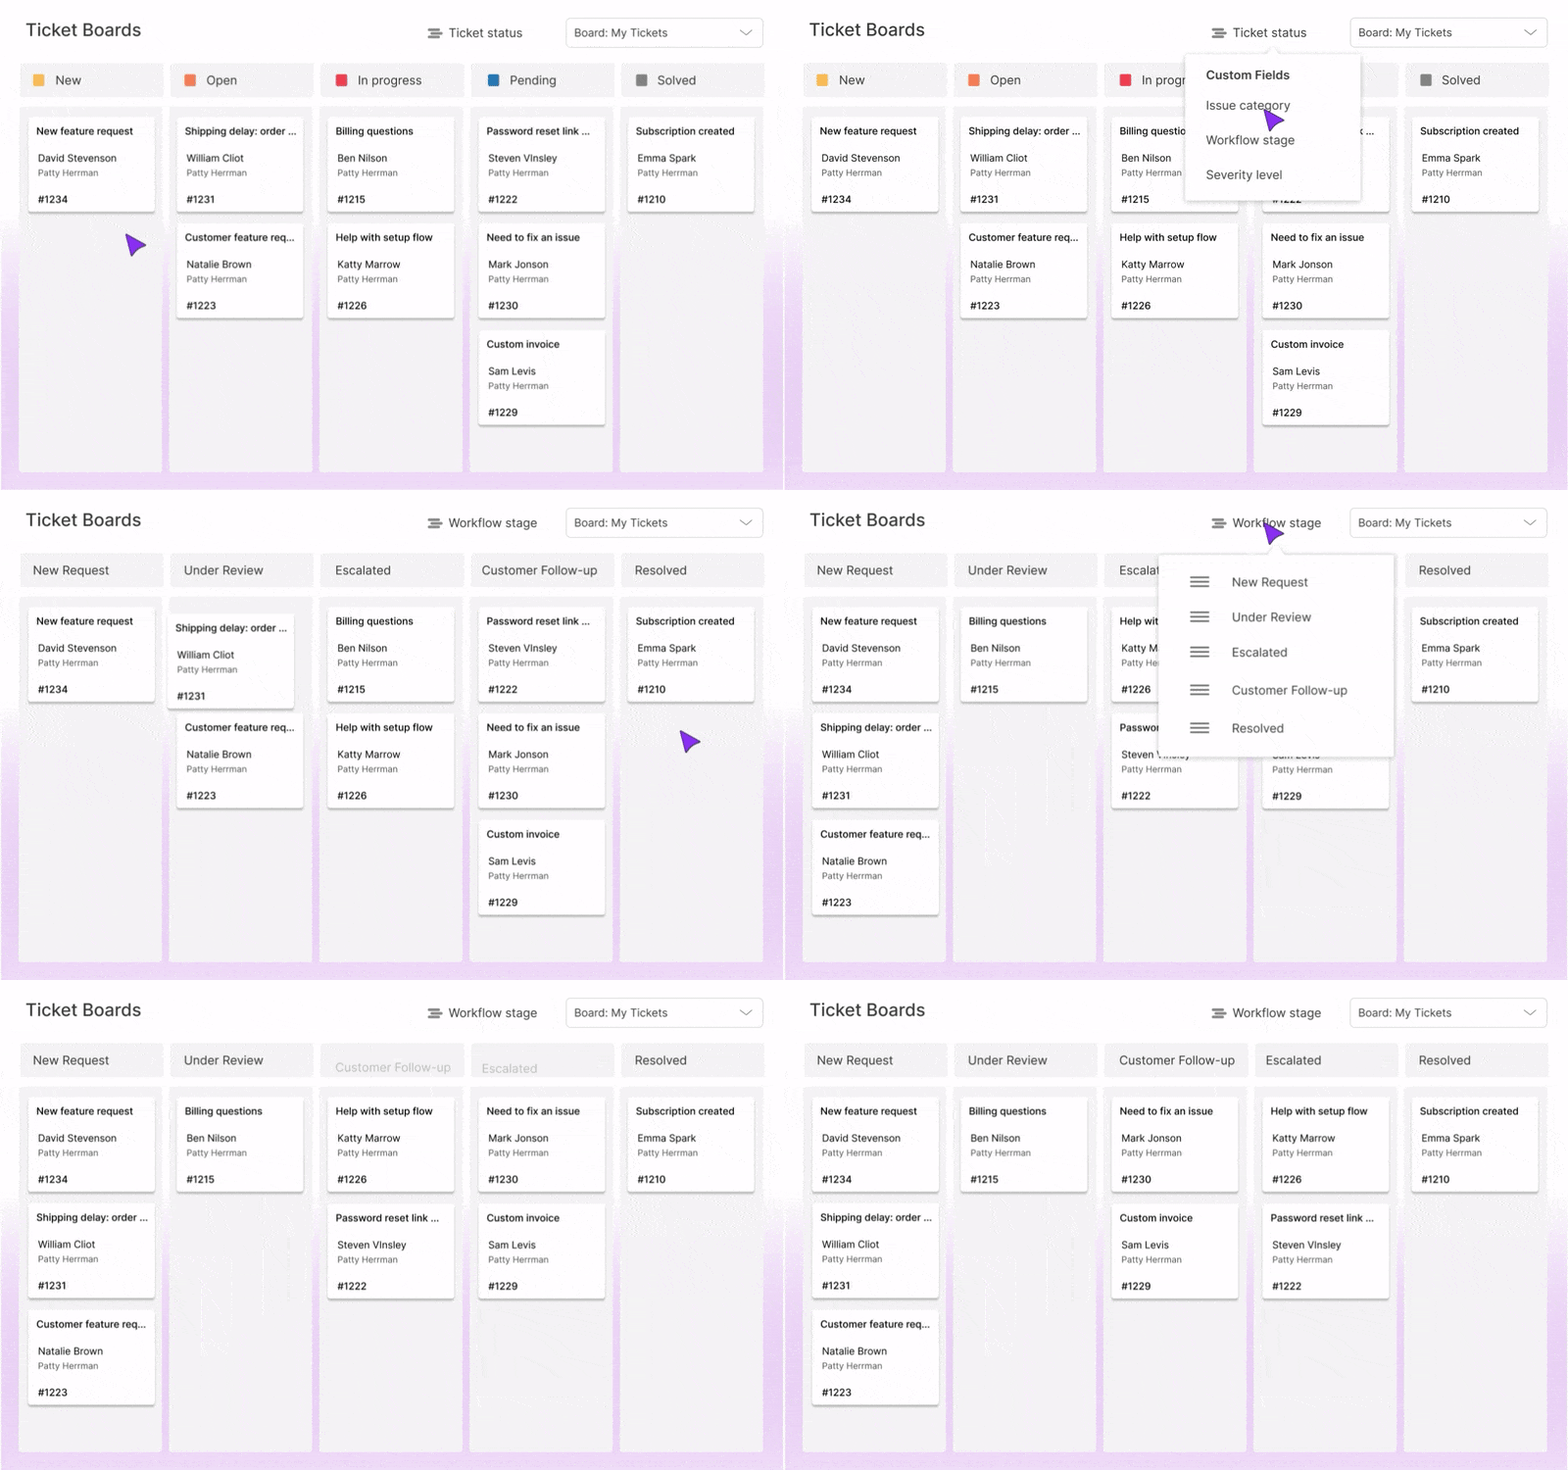
Step 1: Open Ticket Board
To start, open the Kanban Pro app in your Zendesk Support. In the Ticket boards, choose the board or view you want to customize.
Step 2: Choose a Field to Organize Columns
By default, your Kanban board shows columns based on the Ticket status. Now, you can change this to any field that fits your workflow, including custom ticket fields with drop-down options.
To do this, click on the Ticket status dropdown at the top.

You’ll see a list of available custom fields. Select the one by which you want to group requests based on the values in that field.
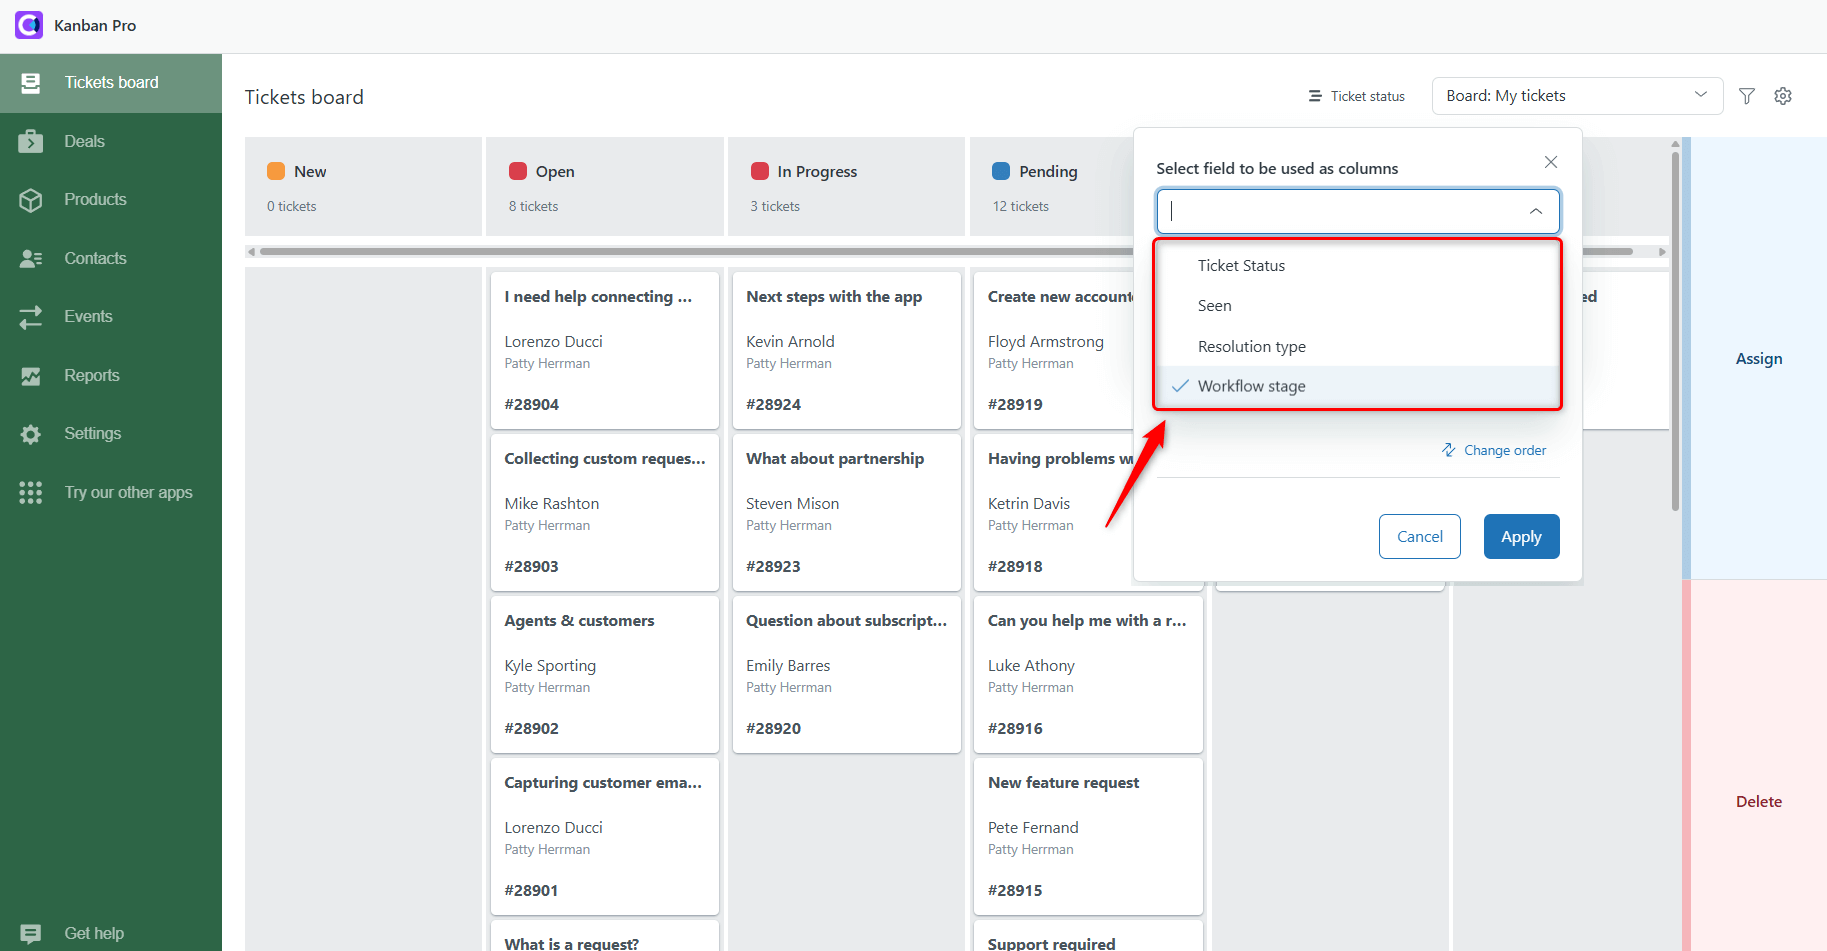
Step 3: Customize and Reorder Columns
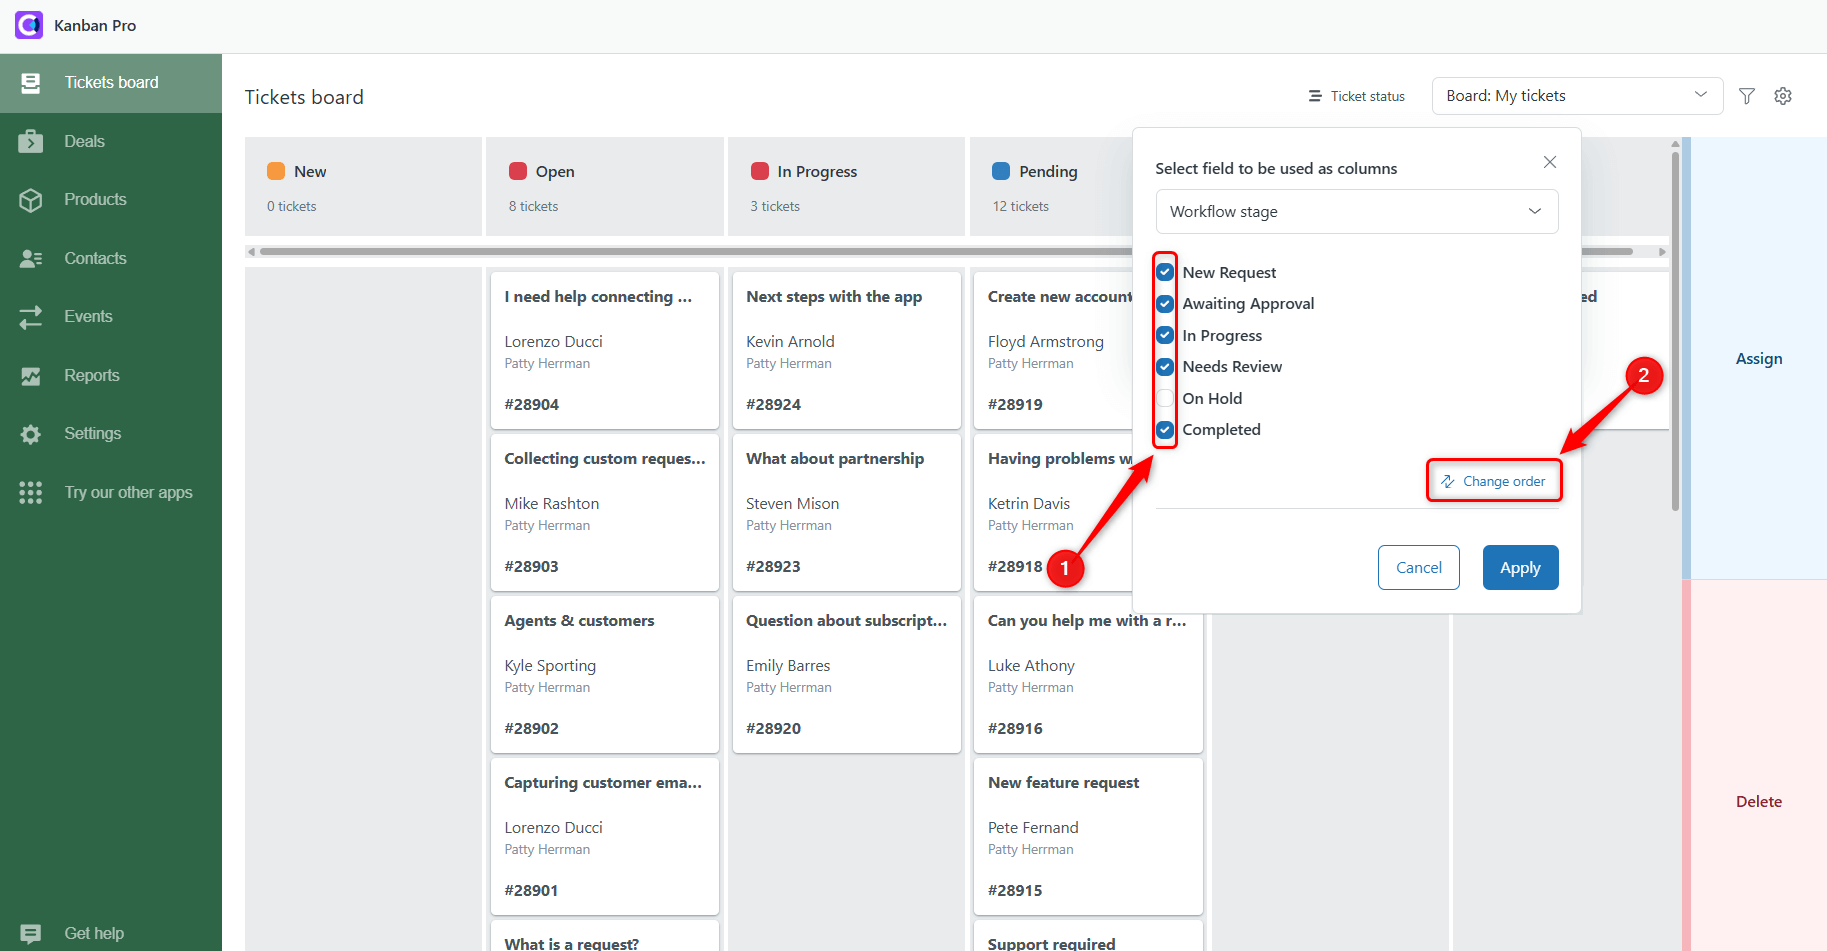
After selecting a field, you can select which values to include as columns by putting a tick. Also, you can adjust the column order to match your team’s workflow. To do so, click on Change order.
Then, drag and drop the columns until they reflect the sequence your tickets usually follow. When you’re satisfied with the arrangement, click Save order. Then click Apply to update your board. Your tickets will now appear in the custom columns you defined, in the order that best fits your process.
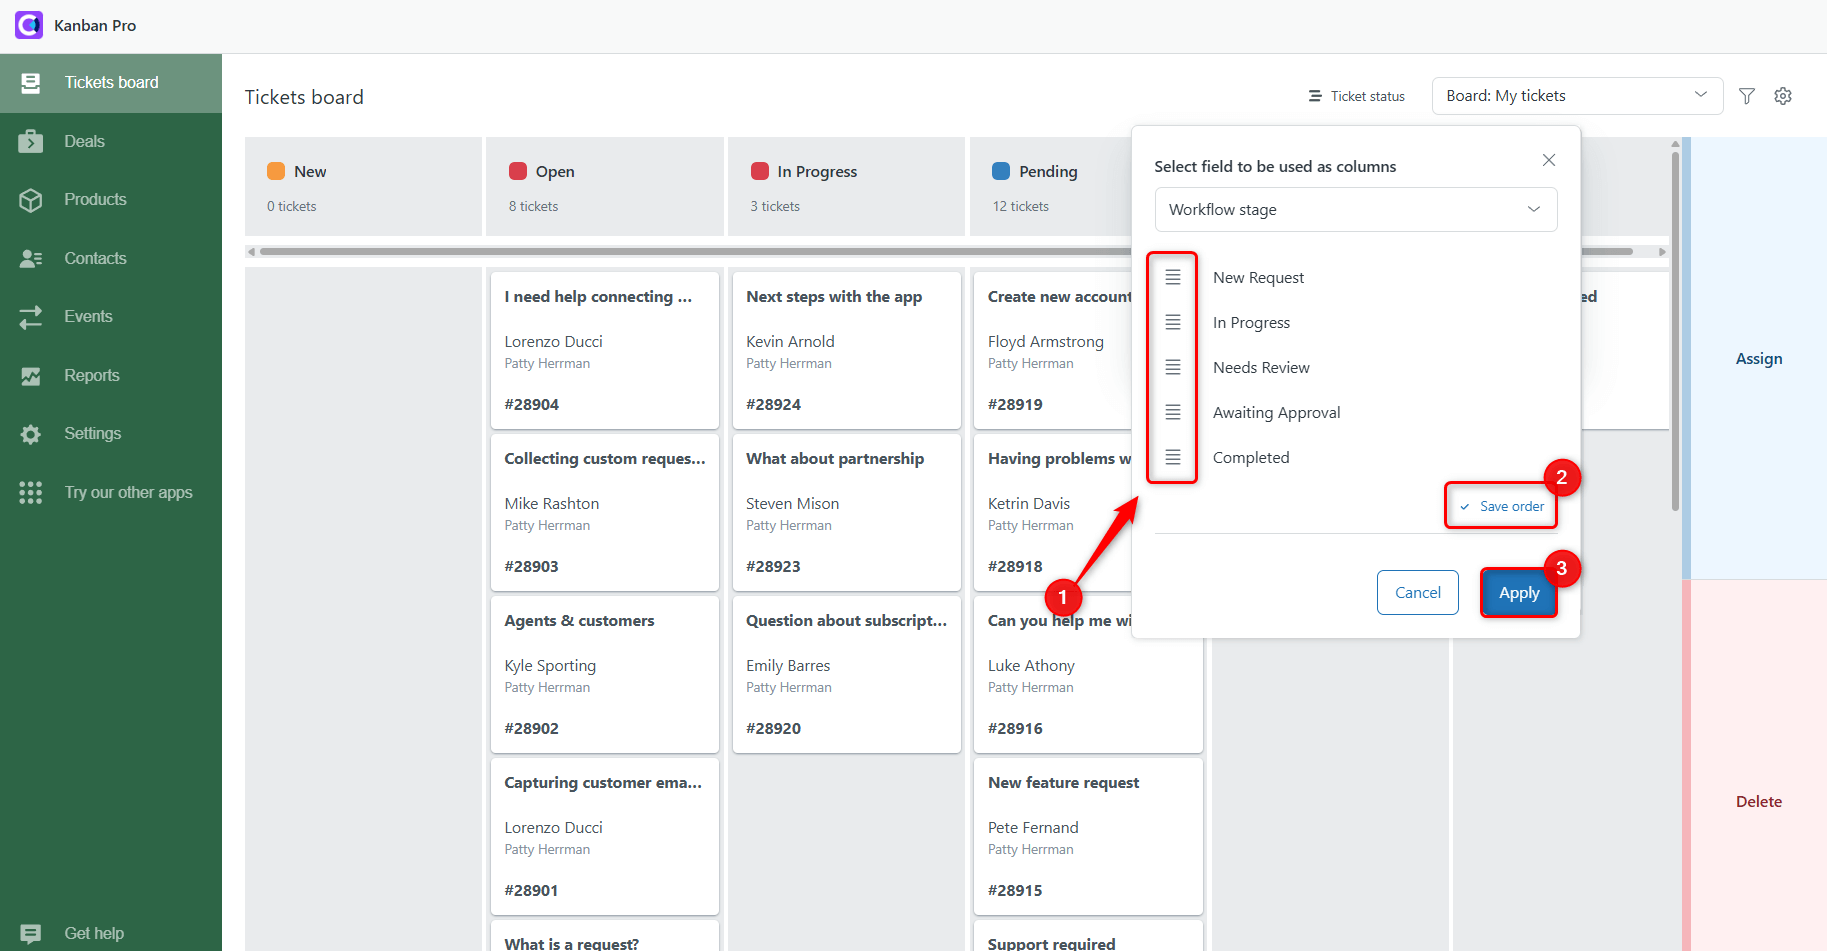
And that’s it. Your Kanban board is now fully customized to match your team’s workflow.
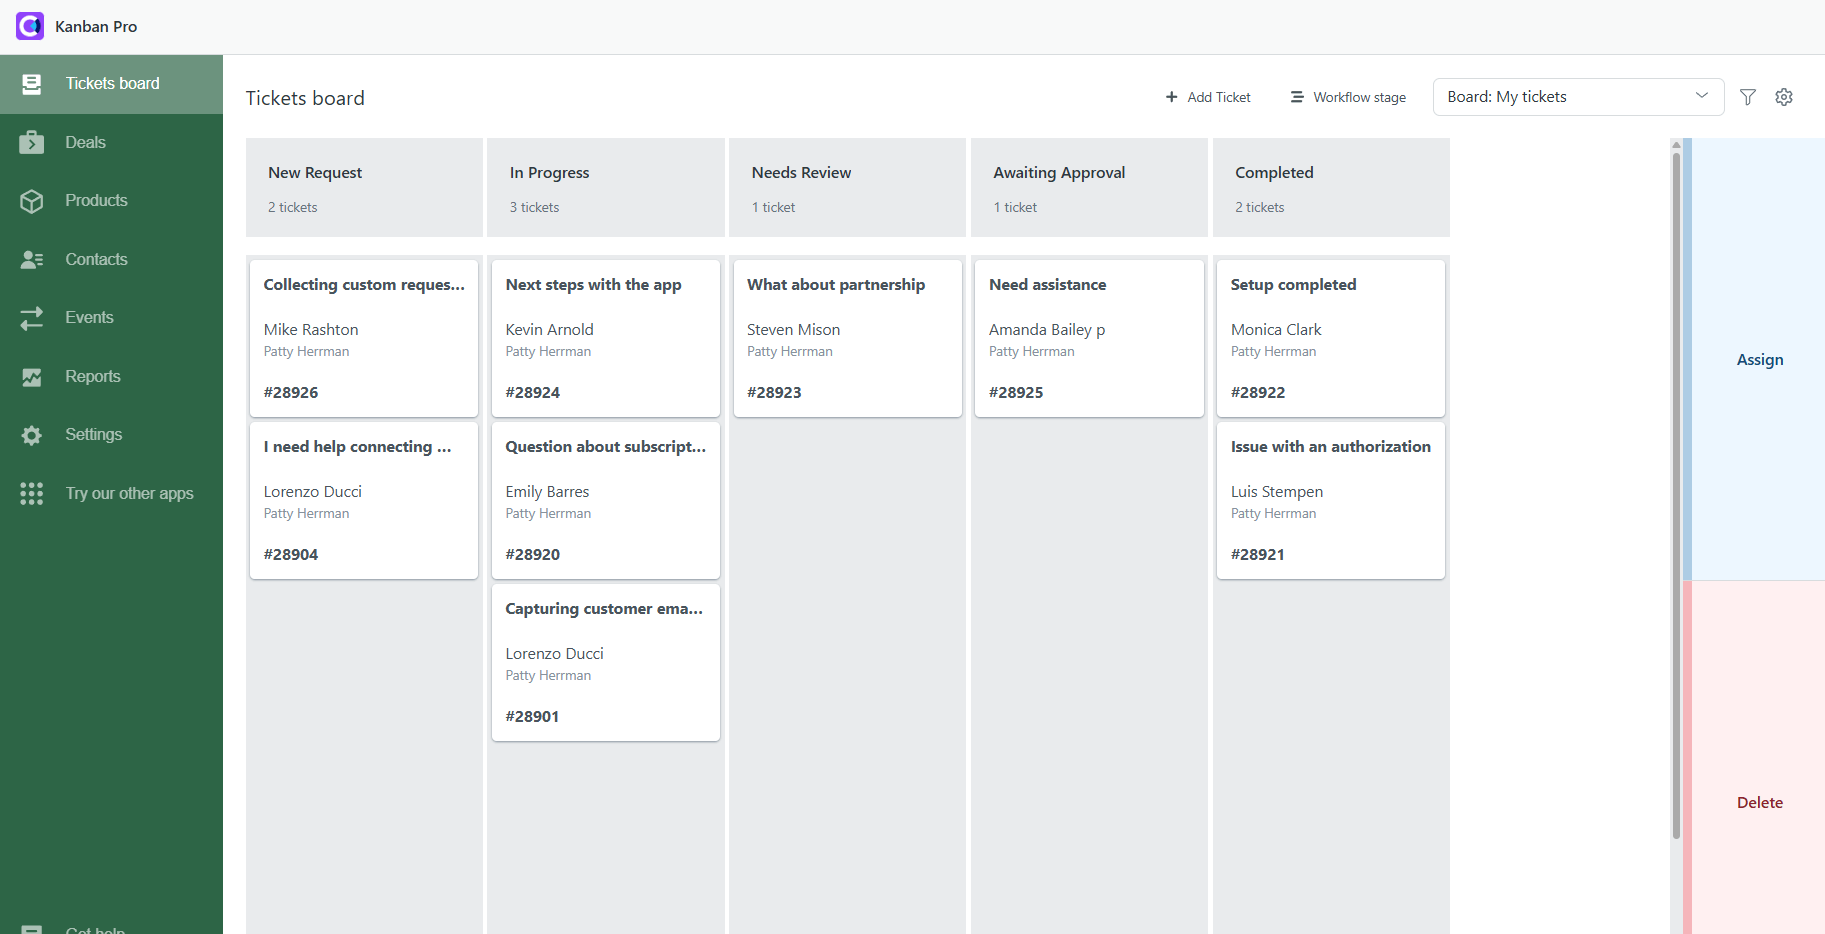
With this easy setup, your team can manage tickets faster, more effectively, and more intuitively.


