Are you looking for an in-depth guide to the Zendesk Guide platform? Then you’ve come to the right place as today, that is exactly what we will be looking at. We will cover many things, starting from the very definition of what the tool is all about and ending in how you can use it to your advantage. Thus, sit tight, grab a cup of something cause we are about to get started!
What is Zendesk Guide?
Unless you’ve been living under a rock for the past ten years, you’ve probably heard about a little platform called Zendesk. The company has been on the market for years now and has established itself as a juggernaut of excellent customer and business tools. One such tool of theirs is Zendesk Guide, a dedicated knowledge base platform that you can use to enhance your service.
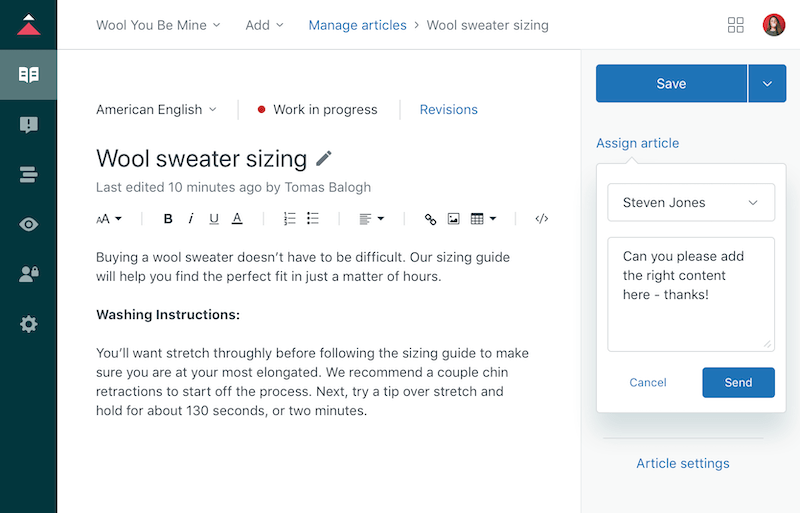
The menu for knowledge base article management in Zendesk Guide. Source: Zendesk
One of the key benefits of the Zendesk Guide system is that it helps you use your accumulated knowledge to gain maximum output. From teaching your personnel to customizing your help center or online community to improving your resolution rates, it is a perfect system for that as it is equipped with all the right tools to achieve the absolute maximum.
How to Implement the Zendesk Guide Platform
Now if you are a Zendesk user, you probably already have access to Zendesk Guide, you just need to activate it to start using, which is what we will be discussing in this section. But first, let’s take a look at the available tariff plans the tools are being sold as not everyone is using the Zendesk family of products and not everyone has access to it right away.
Figure 1: Zendesk Guide Pricing Options
| Lite $0 (Included with Zendesk Support) | Professional $15 per agent per month | Enterprise $29 per agent per month | Answer Bot $50 per month |
|
|
|
|
As you can see, the tool comes in at all flavors, and for all budgets (even if you don’t have one, you can still use the system with Lite). For our money, we suggest going with at the very least with the Professional plan as Lite is pretty limited and doesn’t really have room for expansion.
Yet, if you are already using a system, you probably already have it in your tariff plan and all your need is to activate it. To do so, you first need to sign in to Zendesk Support using your admin credentials. Once you are there, you need to click on the Zendesk Products icon that is located on the top bar and select Guide.
This will take you to a window that has a bunch of options. We are interested in clicking the “build your knowledge base” option. And that’s pretty much it, the tool will gather data from across your system.
Zendesk Help Center Customization
Now that you have access to Zendesk Guide, it is time you customize your space. By default, the company offers a free theme called “Copenhagen” which is used by virtually every other company so we suggest that you install something more unique, like one of our themes.
To start using it, all you have to do is head over to the Guide admin panel, pick the customization menu (it’s on the sidebar), and pick the “Add new theme” button. This will take you to an “Import” menu where you can select the desired compatible theme. If you want to use our theme, Aarhus, then all you have to do is import the zip file (if you have any troubles with setting a custom theme, contact our GrowthDot team for a free Zendesk themes installation). Once uploaded, the theme should appear in the general list of themes. Pick the theme from the menu and apply it.
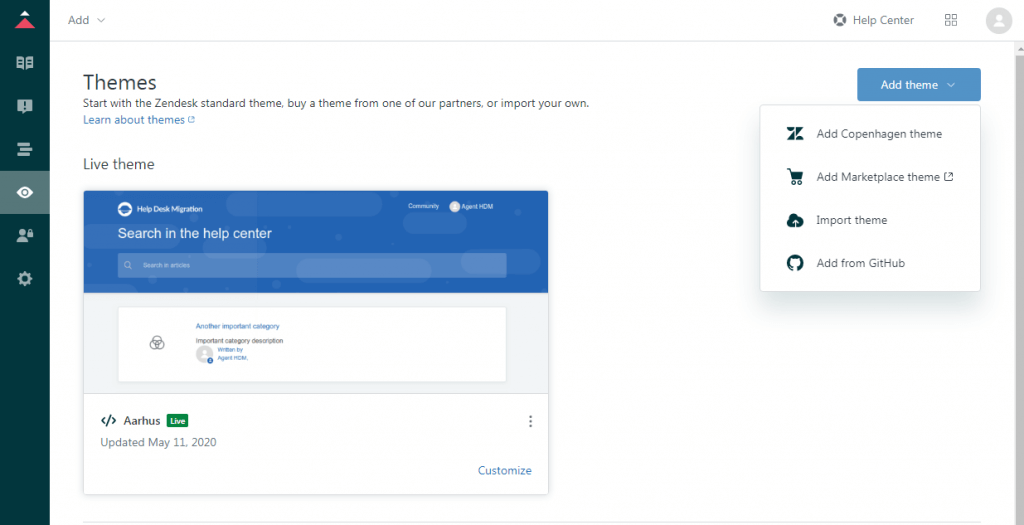
Customization of themes in Zendesk Guide. Source: Zendesk
Alternatively, you can also click on the “Help Center” link to see how the theme would look like with your content. Furthermore, by clicking the “Templates” drop-down menu you can see how it would look on different pages. And last but certainly not least, you can view the theme as both an agent and as an end-user using the “Preview Role” menu.
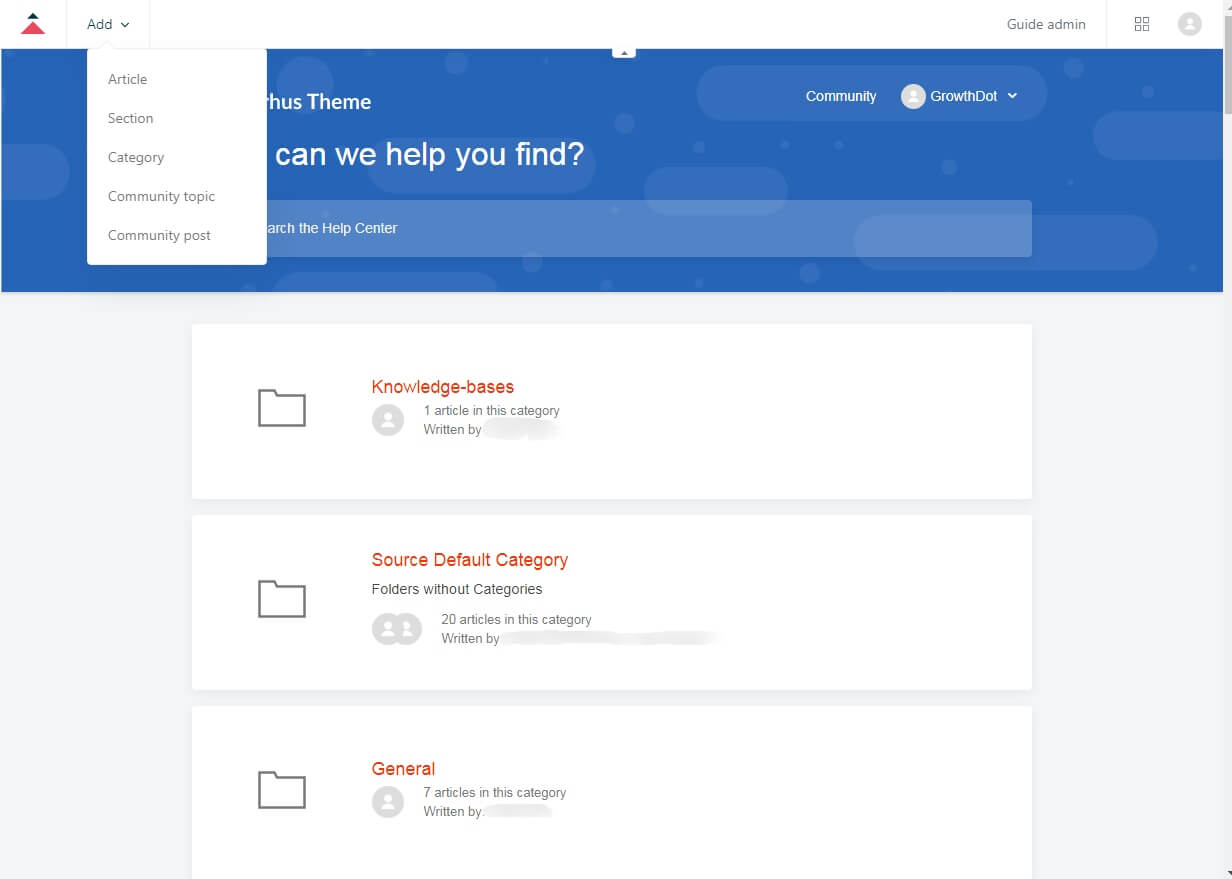
Preview of themes in Zendesk Guide. Source: Zendesk
After you’ve settled your mind on a theme, just close the preview mode and go back to the Guide Admin panel. Once there you will see a three dots menu where the “Set as live theme” option will be hidden. Just press on it and you are good to go.
How to Publish an Article in Zendesk Guide
And now for the article publishing functionality. Zendesk Guide is packed with a myriad of different functions when it comes to articles but perhaps the most important one is the publishing system. Yes, you’ve heard us right, you don’t just publish your work, you push it through a system that allows you to adjust a bunch of different things such as article statuses. Let’s take a look at some of the most commonly used statuses.
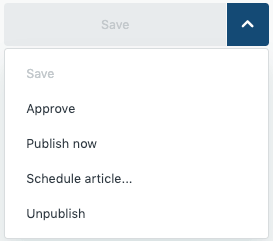
Ready for Publishing — As the name suggests, this status indicates that the article has been reviewed and is ready for publishing. This status is internal and cannot be seen by users.
Scheduled for Delisting — This status allows your content editors to see what article is ready to be delisted from the audience. Again, this status is only visible for your agents that are responsible for pushing content in and out.
Ready For Review — This status indicates that the article is ready for review and can only be seen by the original author and the editor responsible for the review itself.
Needs Corrections — Indicates that the article needs corrections and revisions. Visible to the editor and original author.
Approved & Rejected — These statuses indicate that the editor either approved or rejected the article. Only visible to the editor and original author.
Outdated — This is a community tag and it indicates that the article is no longer relevant and/or valid. Visible to both the users and editors.
There are a few other article statuses such as Draft, Published, and Re-assigned but these are pretty self-explanatory so we won’t be covering them. Instead, we’d like to point a few things whether it is good or not to limit publication rights.
To Limit or Not Limit — Publishing Rights
And last but not least, we’d like to cover the pros and cons of limiting publishing rights. However, spoiler alert, there is no right answer, and readers’ discretion is advised since each company case is unique.
Pros
Let’s start with the pros. So, if you limit your publishing rights, you will know exactly what is going on with your knowledge base center. You will also have the ability to correct false information in-advance before they are published. Moreover, you also will have the ability to proofread the article before it is published which will further increase its value.
Cons
You have to do all of the publishing on your own which can be time-consuming. You will also need to check each and every piece for facts, grammar errors, and other things. It is generally agreed that a single opinion might not be entirely good to follow. You will have to delegate your work and permissions when you won’t be able to publish things on your own.
Bottom Line
And there you have it. Our guide to well, Zendesk Guide! The tool is phenomenal and we are glad that Zendesk includes it in almost all of their products. We hope we managed to get you started with it. If you need more help or maybe you want a unique theme to spice your help center, give us a call and we’ll get back to you ASAP but for now, thanks for joining!

Customize your Zendesk Guide with an exclusive theme
Get a Zendesk app or customization services
Try it now


