How to Create Automations
-
Proactive Campaigns
Creating automation can seem complicated. However, it’s only complicated at first sight. So, let's show you how to use Proactive Campaigns' automation feature.
First, create a user list on the Settings page > List Management > User Lists > + Add New List. It'd be better to create a list based on custom fields for the correct work of the application.
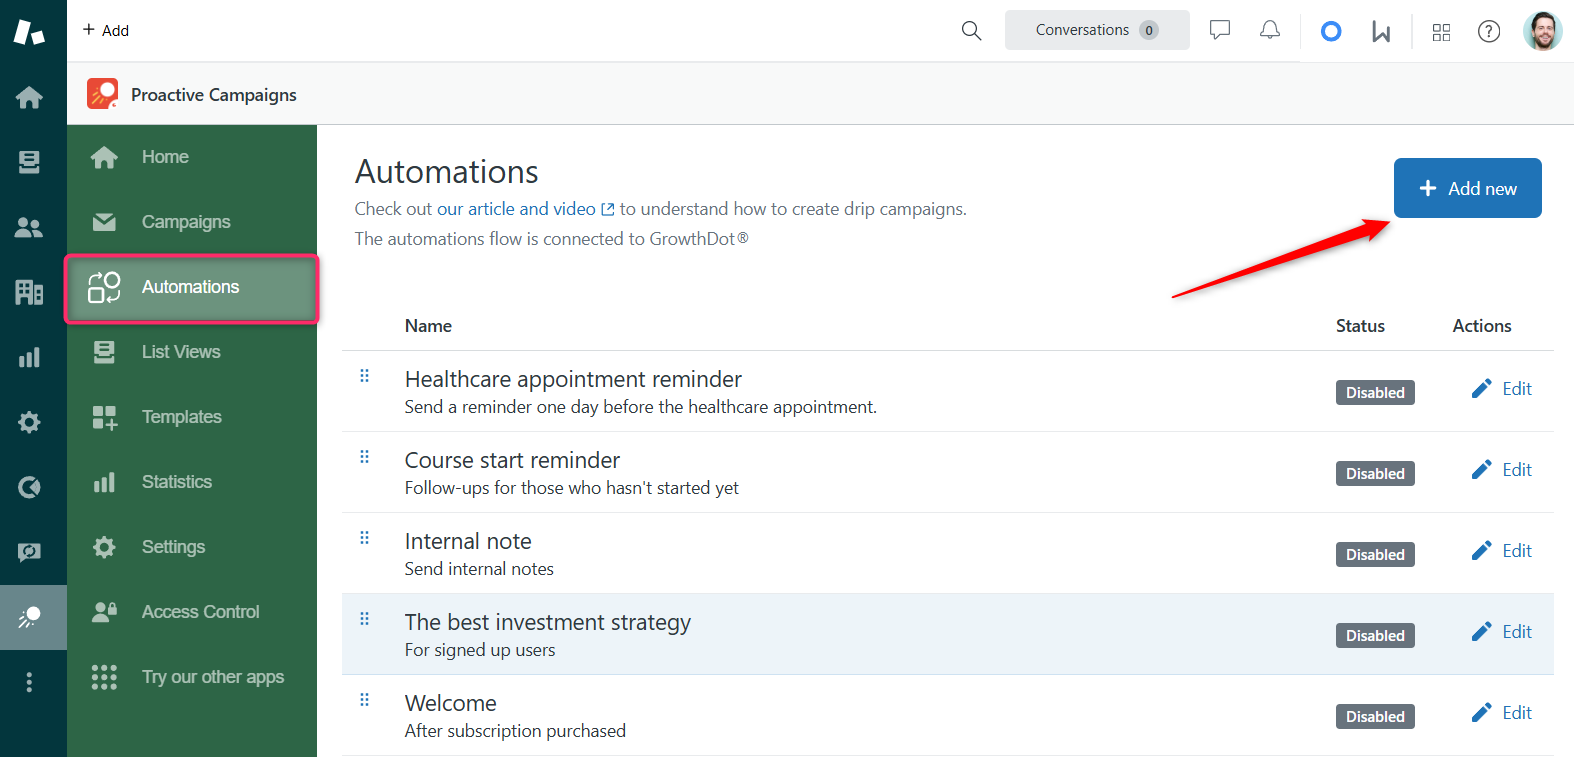
After, go to the Automations page and click + Add new.
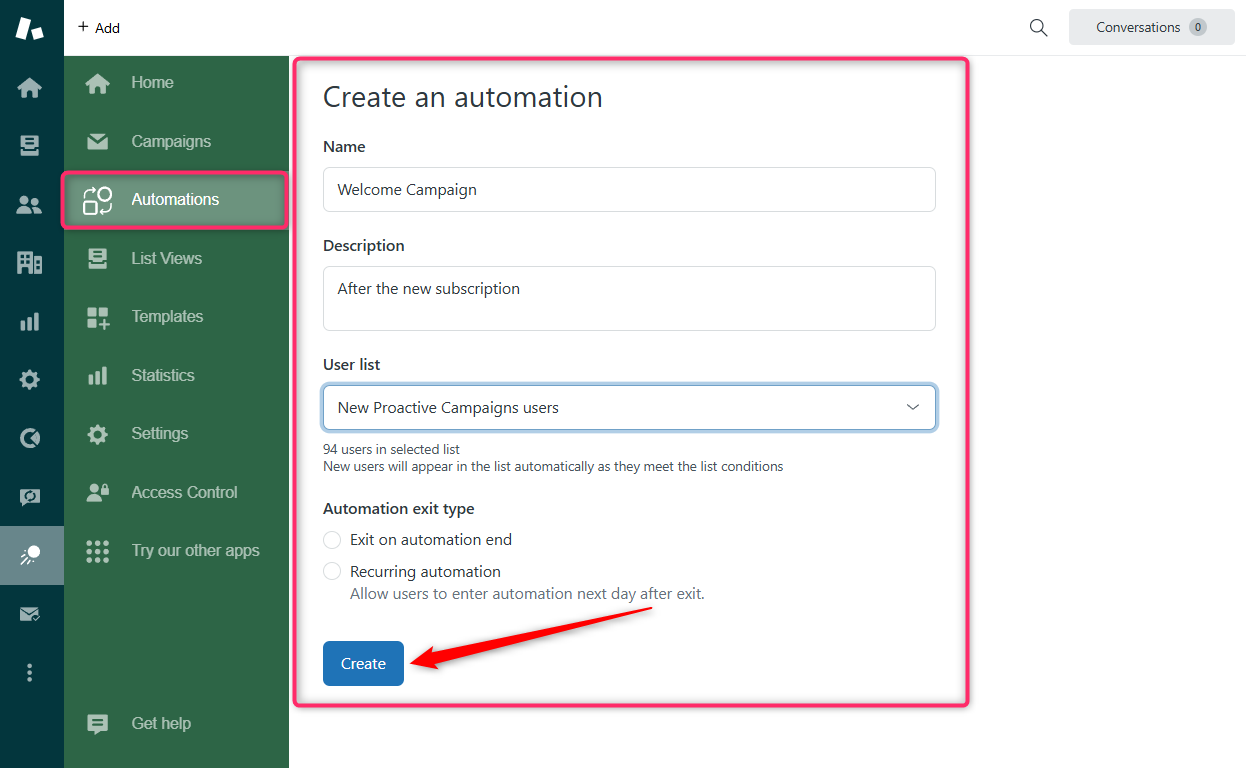
Then, fill in the fields like Name and Description and select a user list from a drop-down menu. Also, point out the Automation exit type. For now, there are two of them available:
- Exit on automation end. After the automation is launched and all steps are finished, the recipients move out of the automation, and emails won’t be sent to the same ticket requester twice.
- Recurring automation. This option allows the application to add the same user to the automation again and again so an email can be sent to the same user whenever they (users) match the conditions you define.
Click the Create button to save the changes.
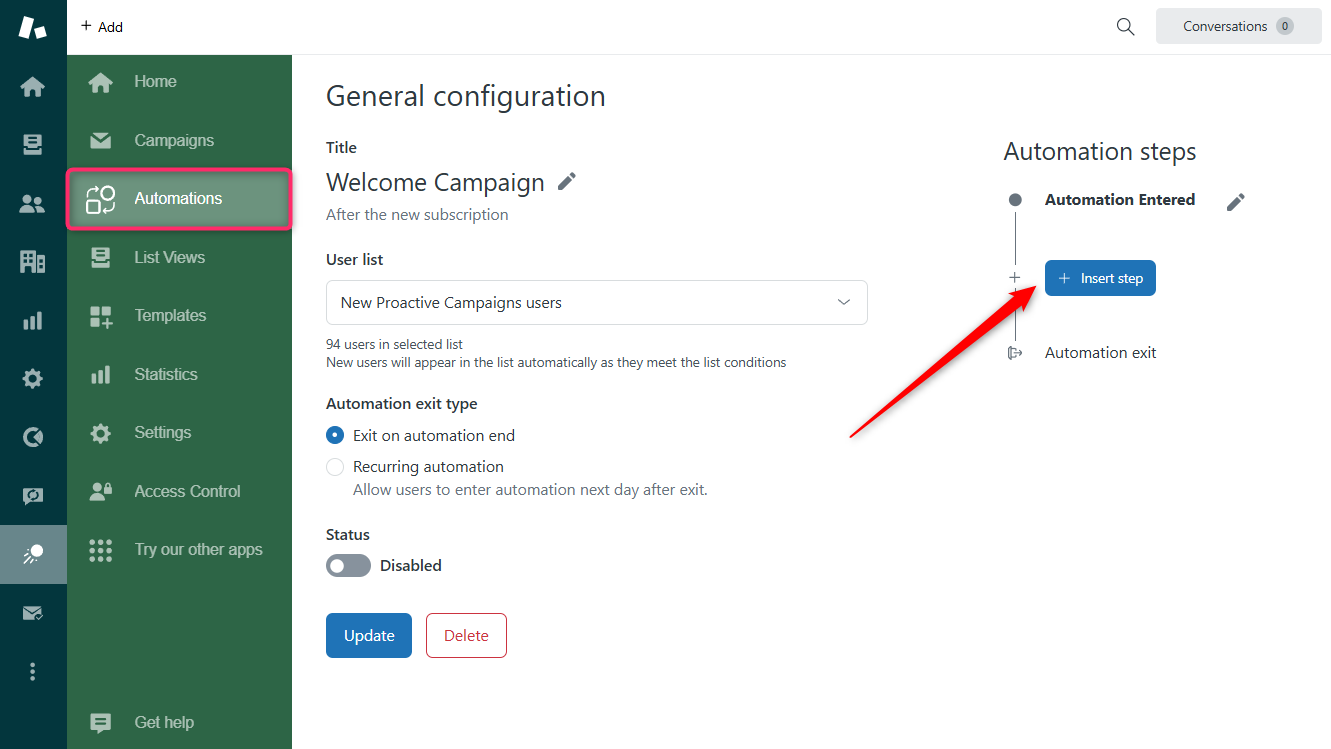
Then, you'll proceed to its configurations. On the right, you need to create automation steps. Start by clicking Insert step.
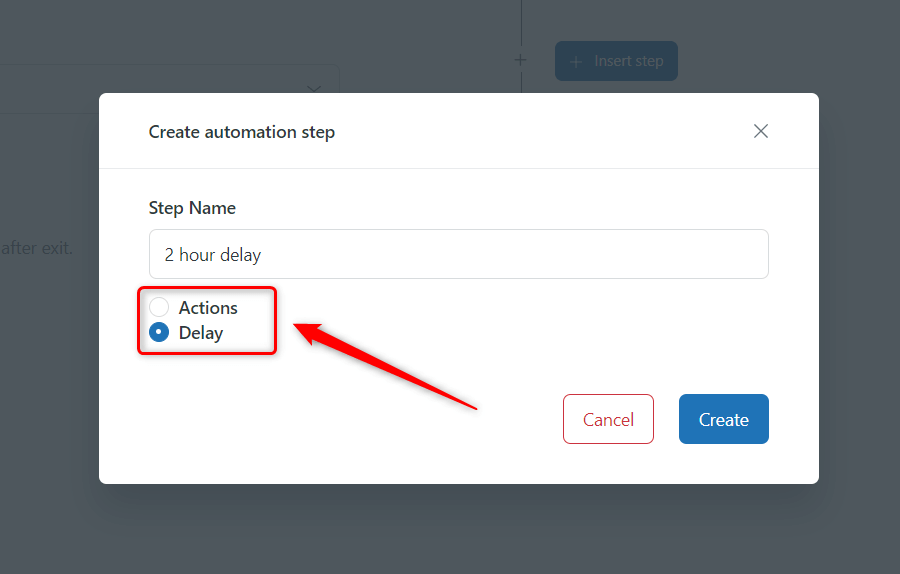
There are two possible options for the step:
- Actions - Use to create an email, update user custom field, update ticket custom field, or append tags to the ticket.
- Delay - Use to include a time pause for the action.
Let's start with the second one. If you want your email sent with a delay, choose it, name the step, and click Create.
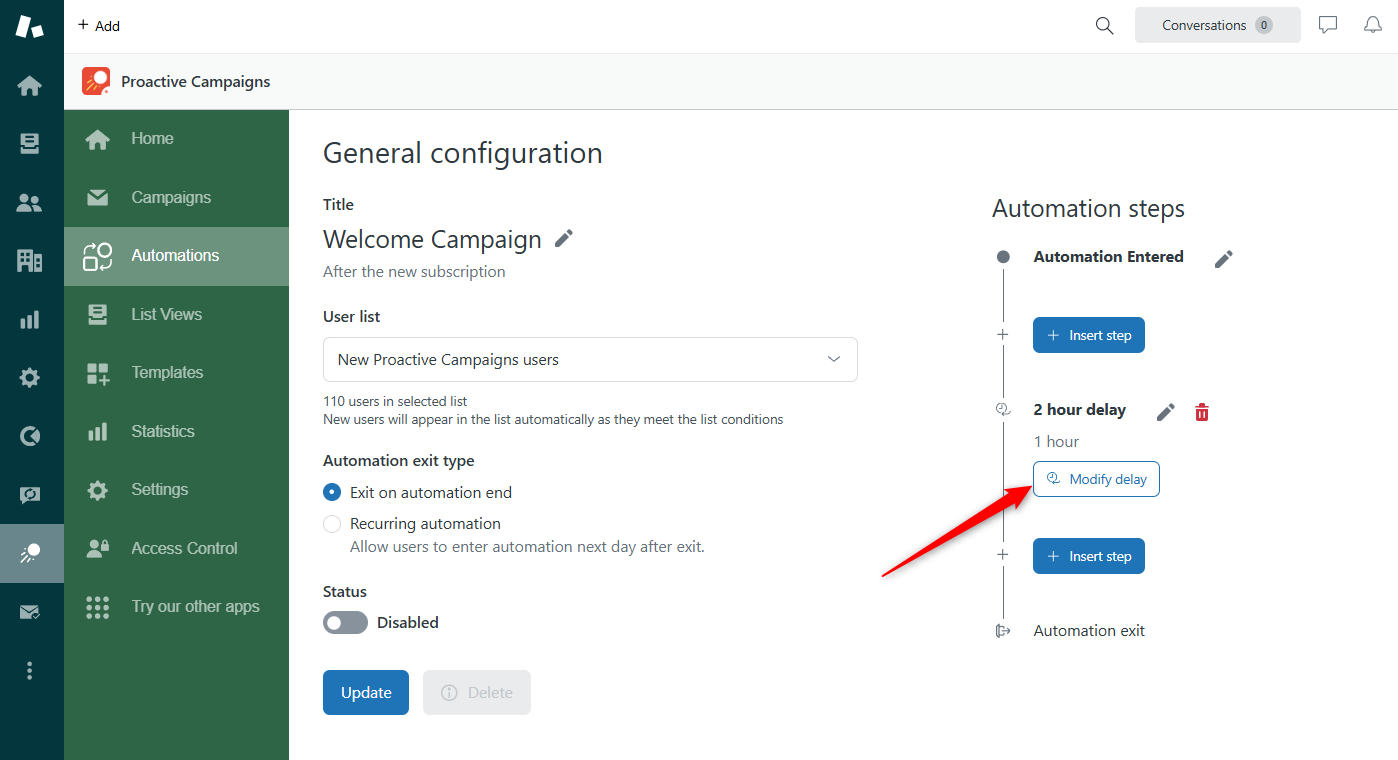
Be careful, as you only created a step that has not been configured yet. To specify the time, click Modify delay.
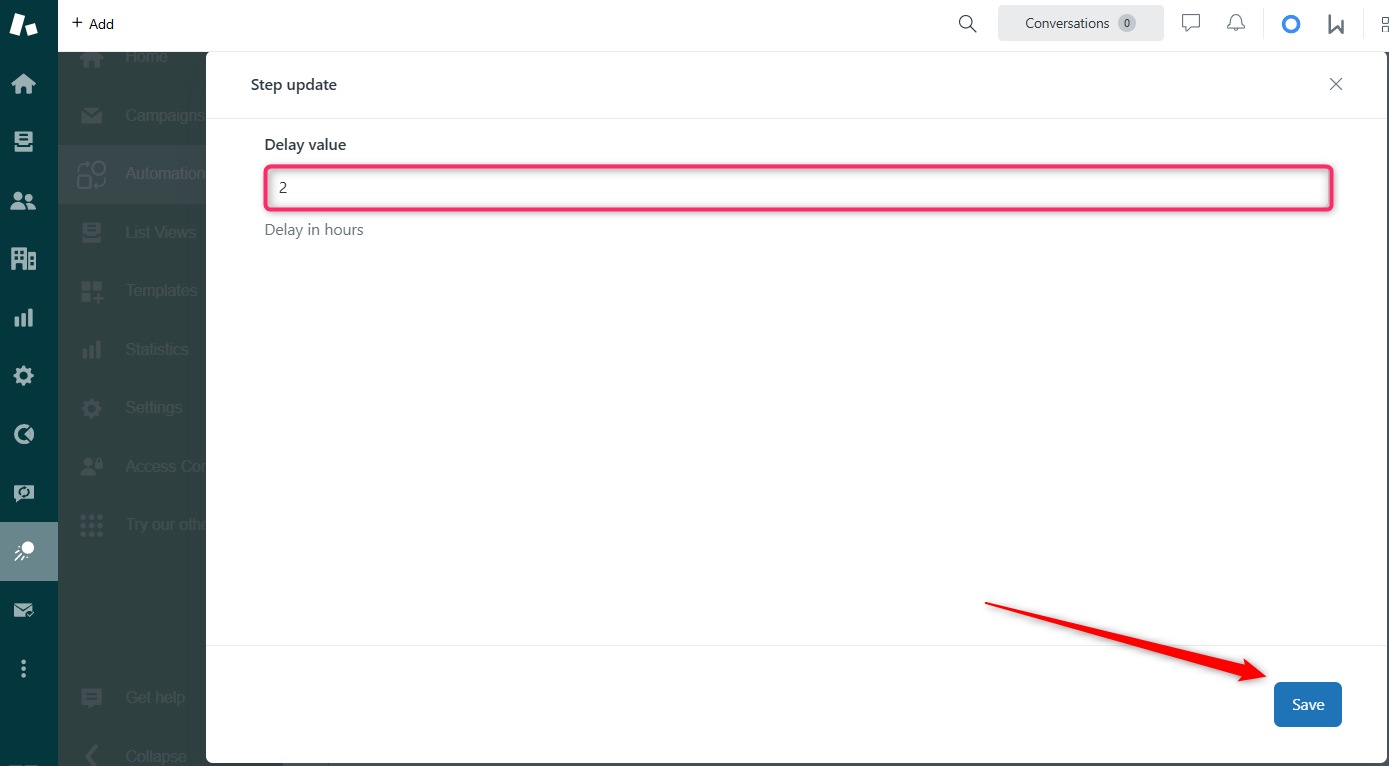
In the new modal window, type the necessary value in hours (one day = 24 hours) and save.
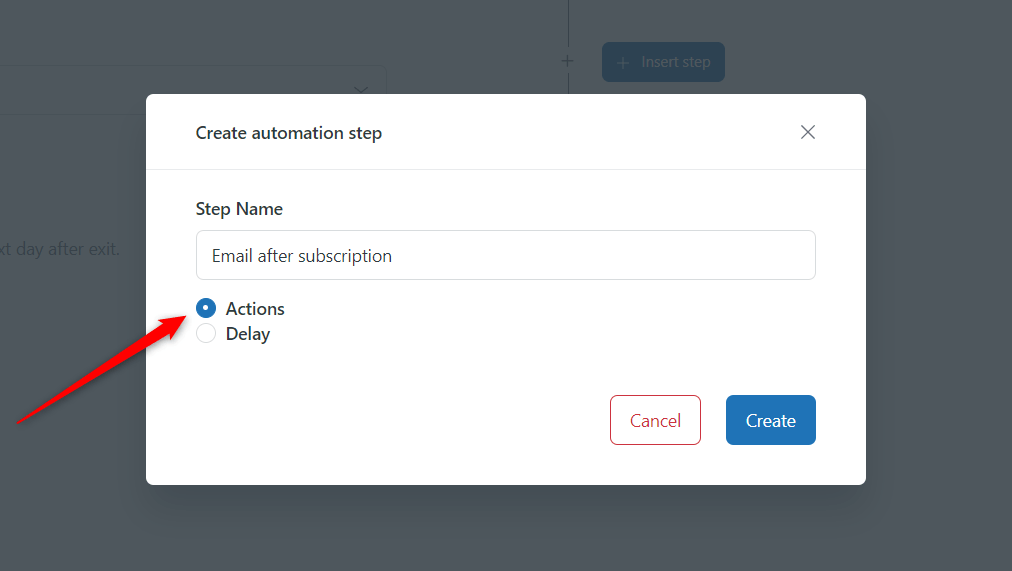
Follow the same logic while creating Actions. Therefore, click Insert new step, select Actions in the modal window opened, name the step, and create it.
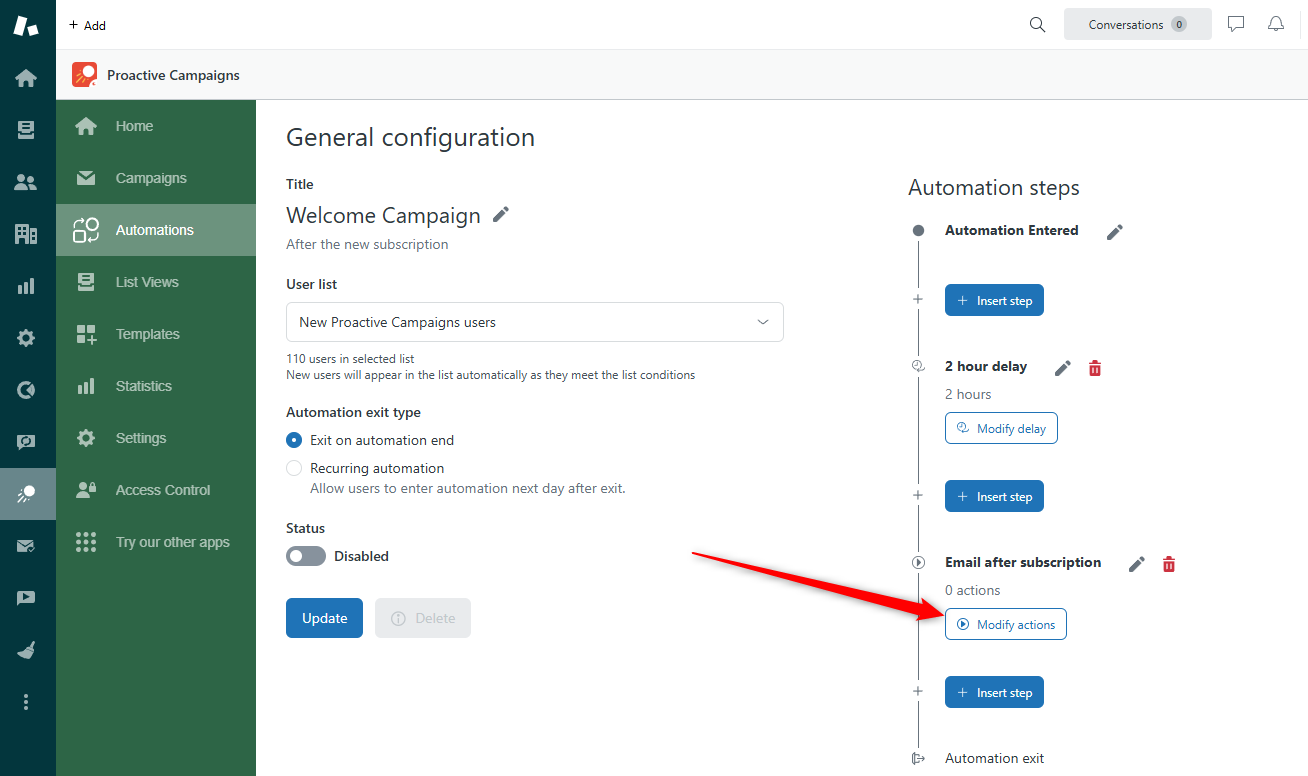
Then, click Modify actions.
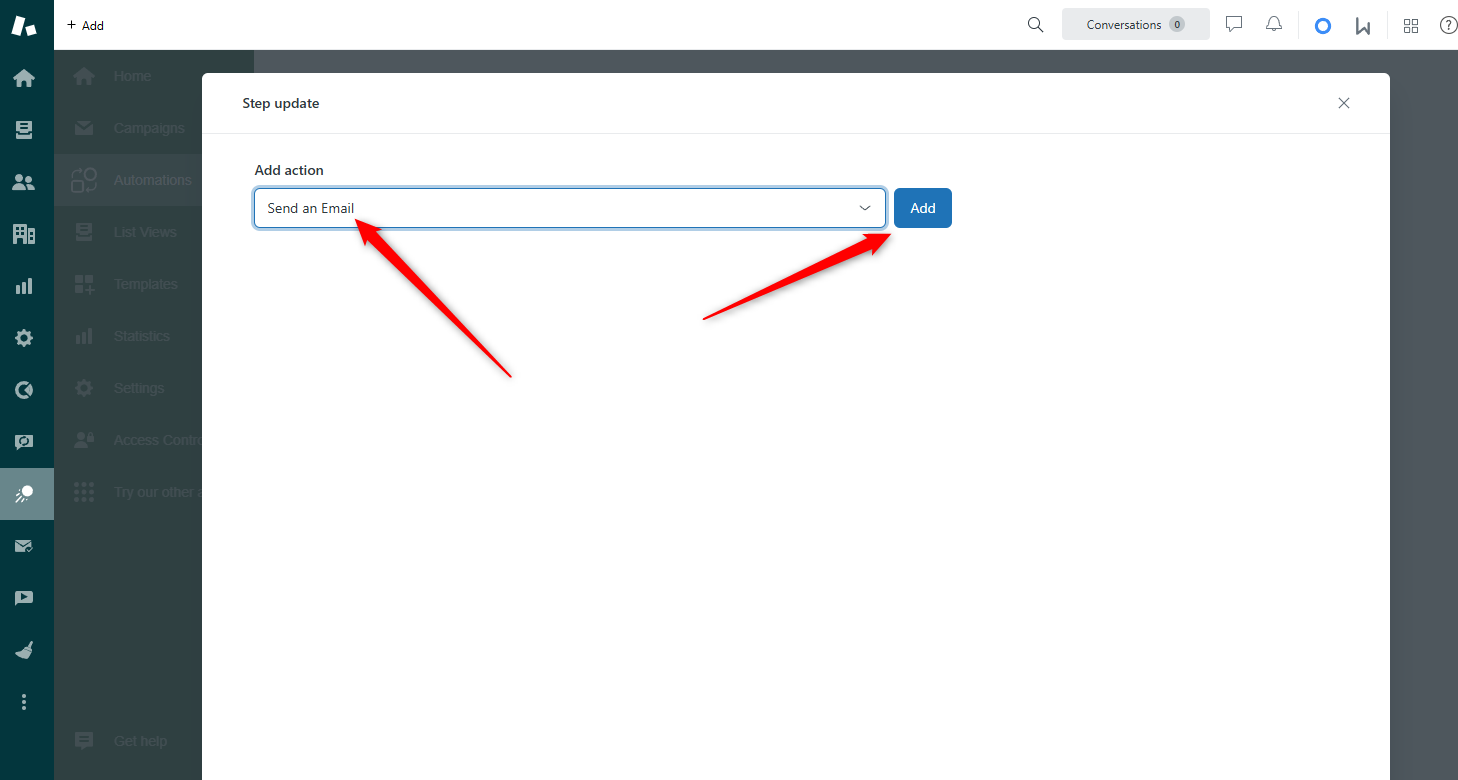
Now, you need to select the action type, for example, email, and confirm your choice by hitting the button.
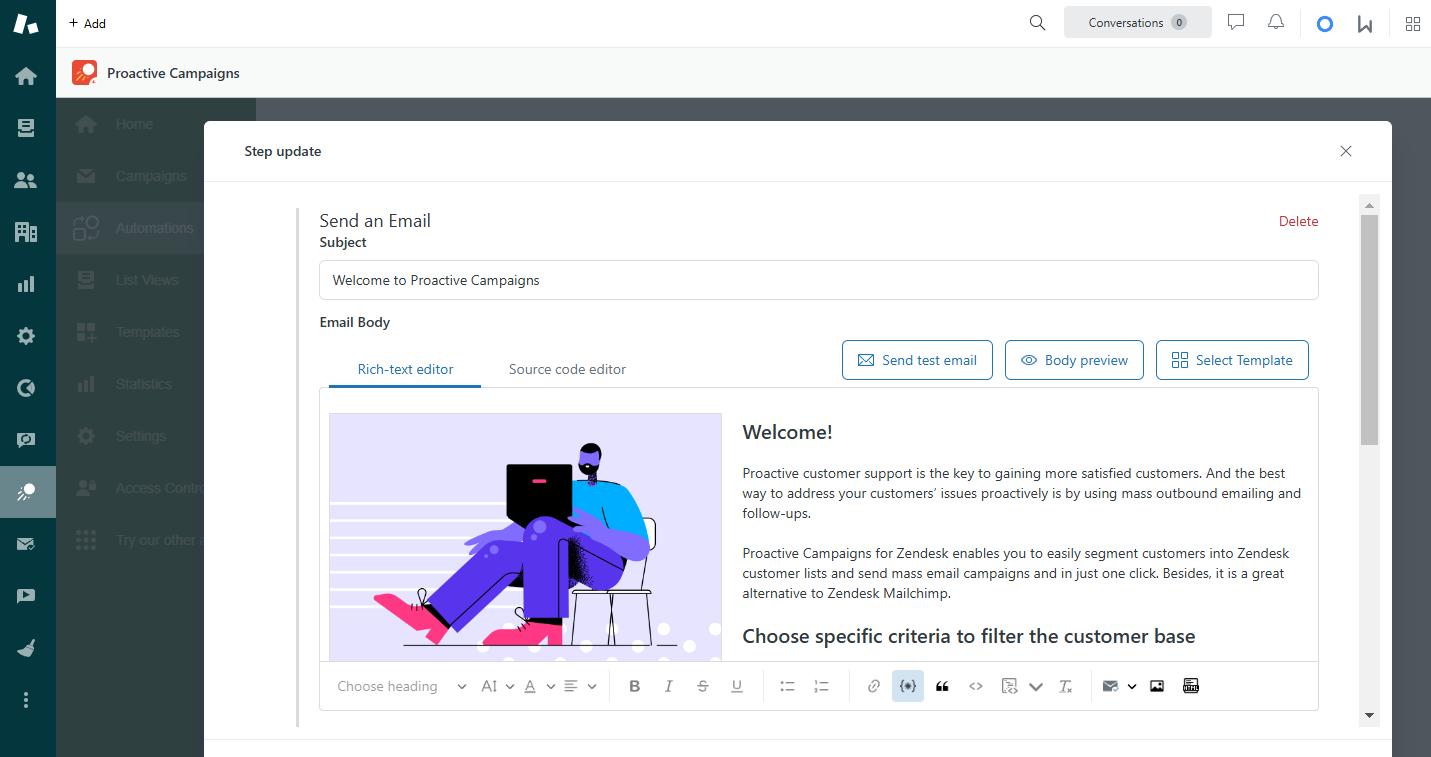
Then, you can start creating an email as usual because the editing section is pretty similar to what you use during a regular campaign.
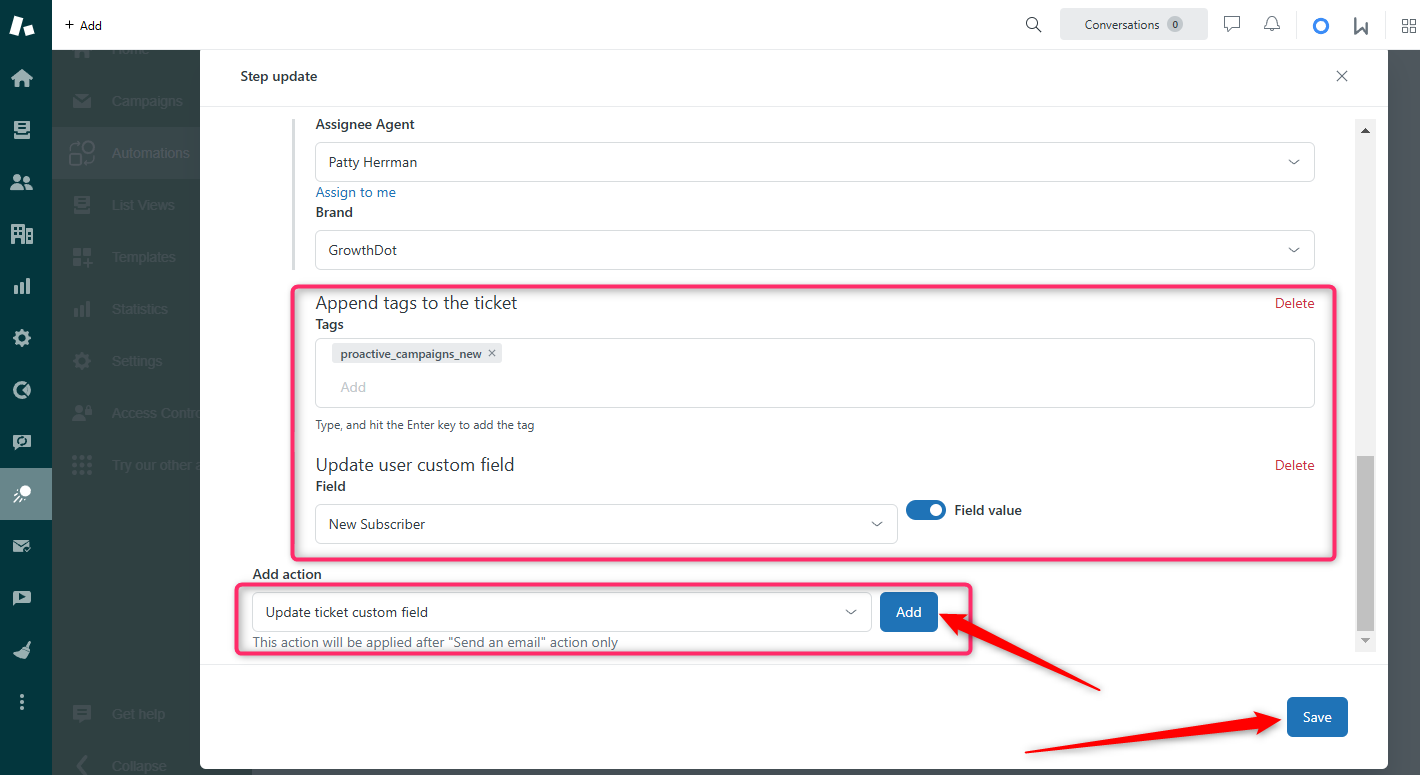
The same situation applies to field updates. You can either set up custom fields updates and add tags during the email creation or configure it as a separate step. In the first case, select a necessary action from the Add action field, such as Update user custom fields/Update custom ticket fields/Append tags to the ticket, and point out the required field(s) value(s).
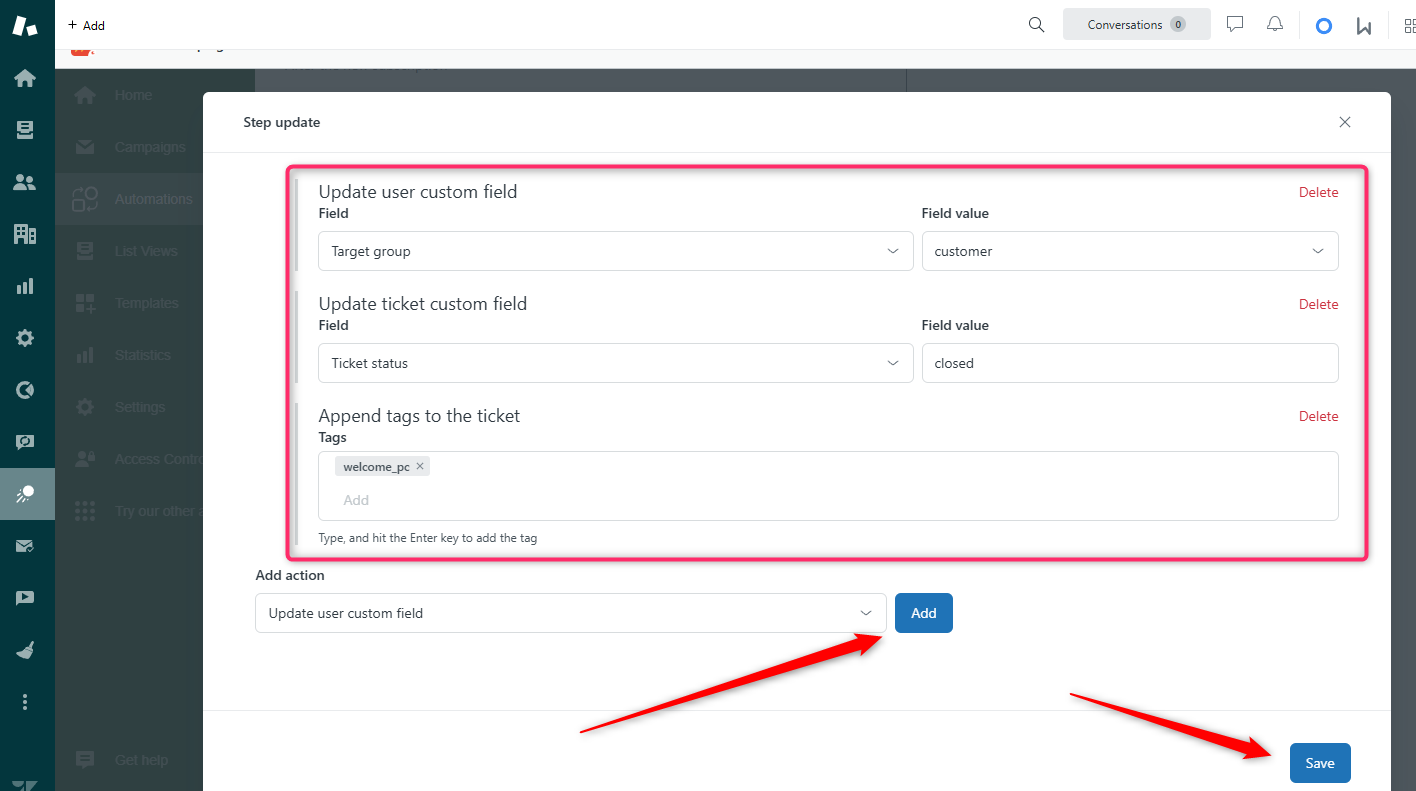
The second way is to add a new Action within another step. So, click Insert new step and select Actions. Then, Modify actions, choose a necessary field, and insert the required values. If needed, create several actions at a time.
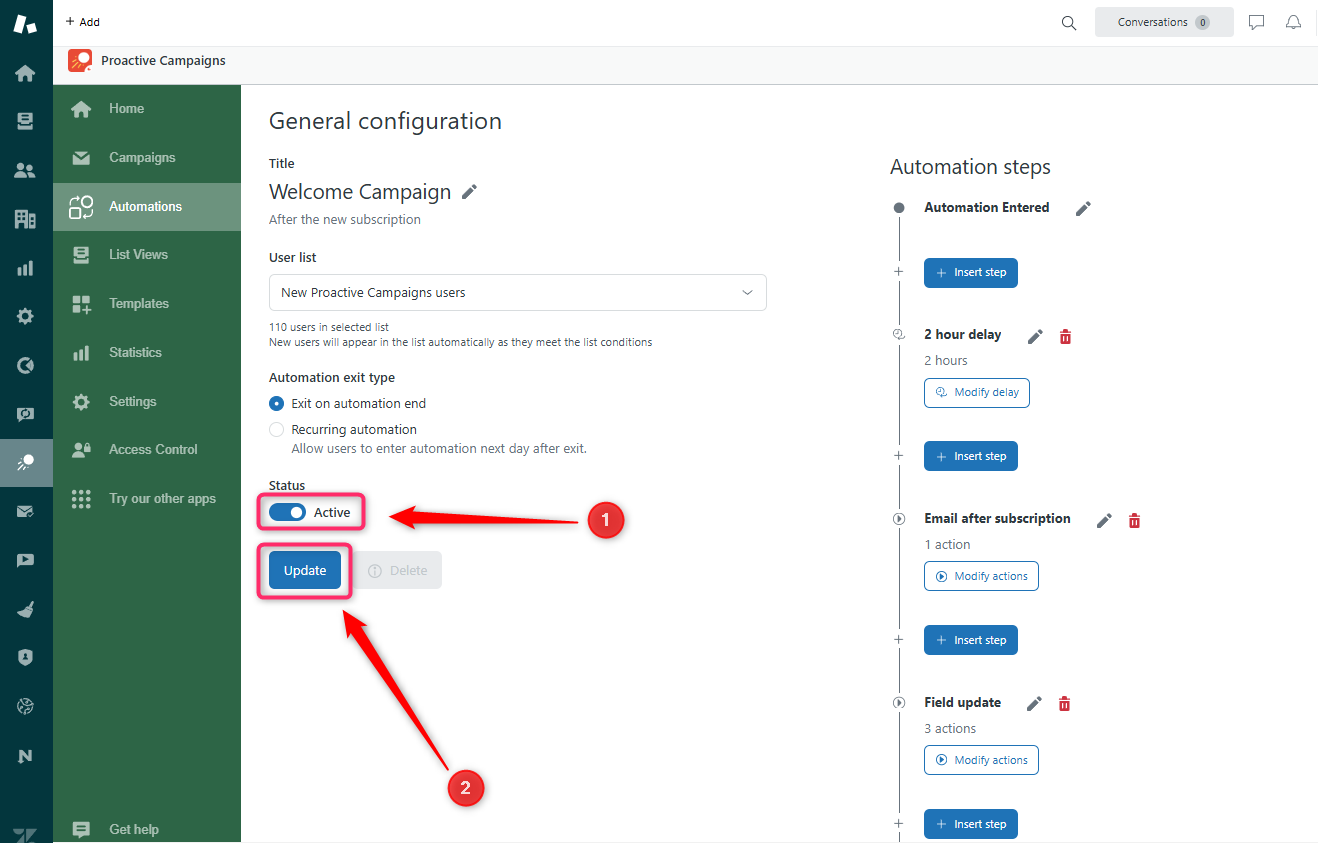
Finally, toggle on to activate the automation and click Update.
If you have any questions, contact our friendly support team! We are always happy to assist you.


