How to Create User, Ticket and Organization Lists in Proactive Campaigns
-
Proactive Campaigns
Before starting an email campaign, you should define the receivers. We have three ways of filtering your audience so that you can create a User, Ticket, or Organization list. Therefore, we are going to explain how to create these types of lists in detail.
Users list
Your Zendesk Support account contains your customer profiles and related data. For example, contact profiles have system and custom fields that you can use to sort out the target audience.
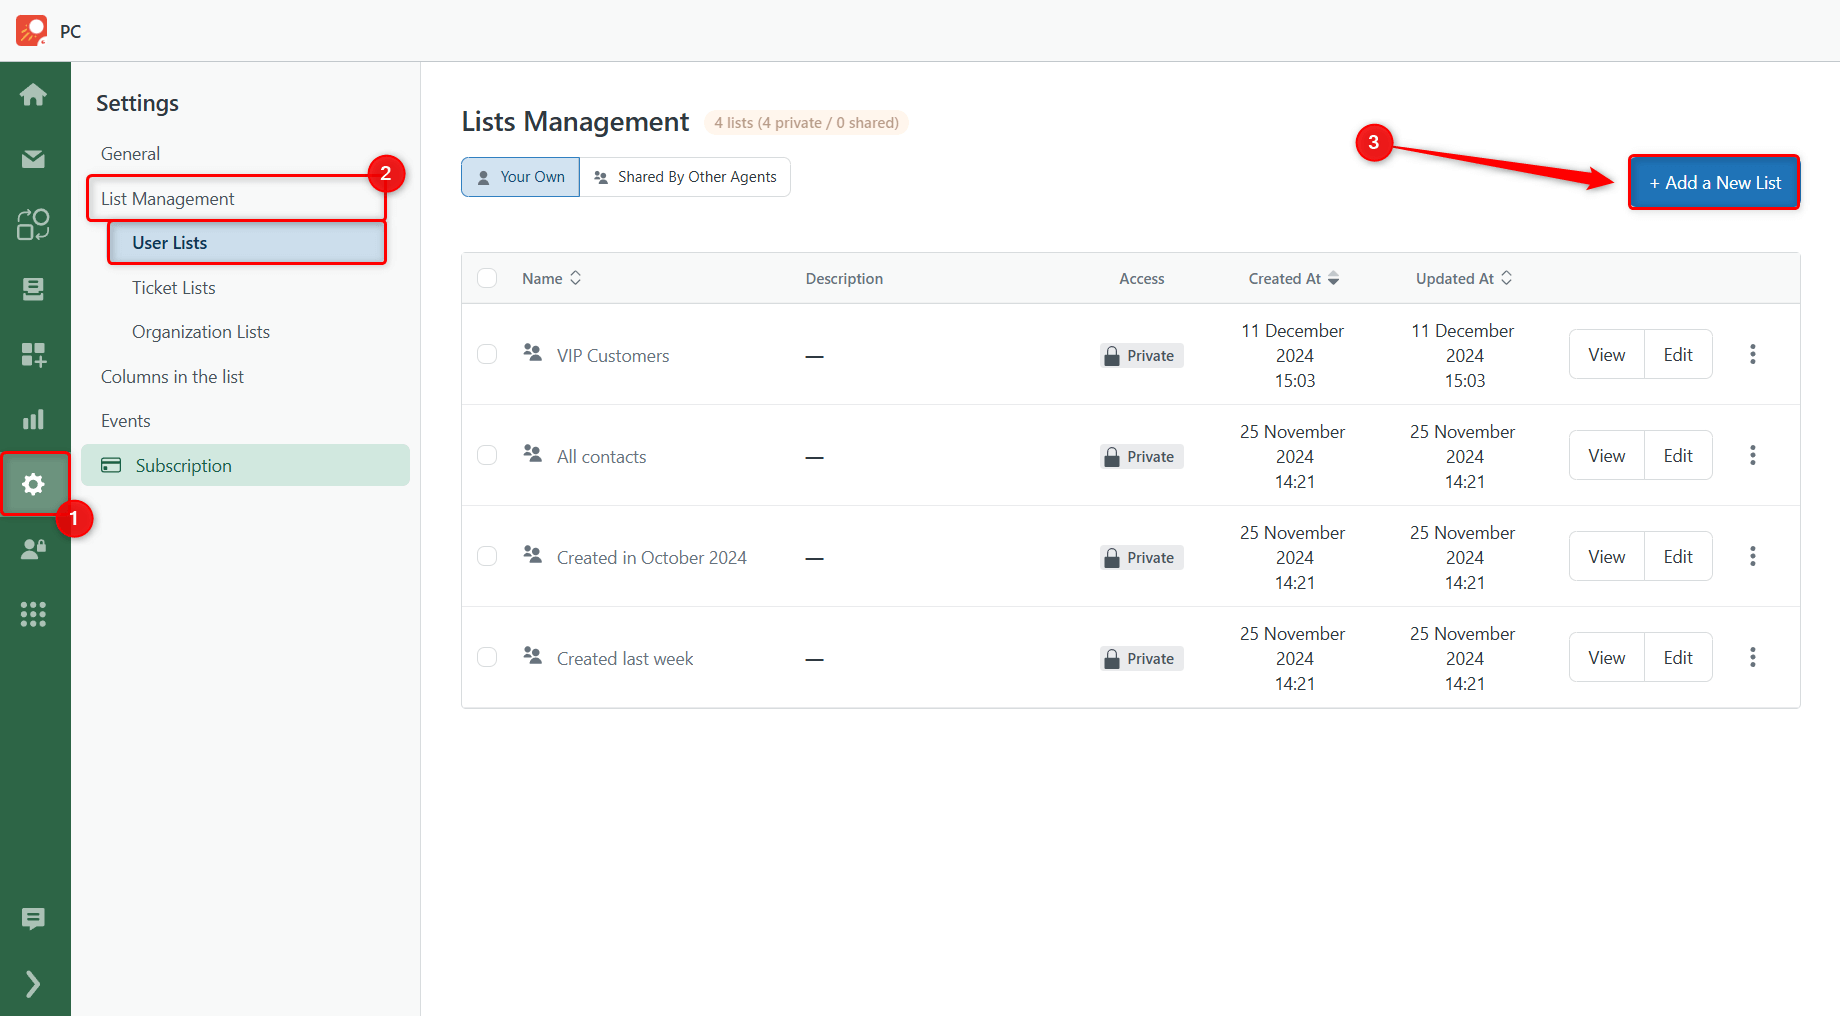
To do so, open the Proactive Campaigns application and go to Settings > List Management > User Lists. In the upper right corner, click the +Add a New List button.
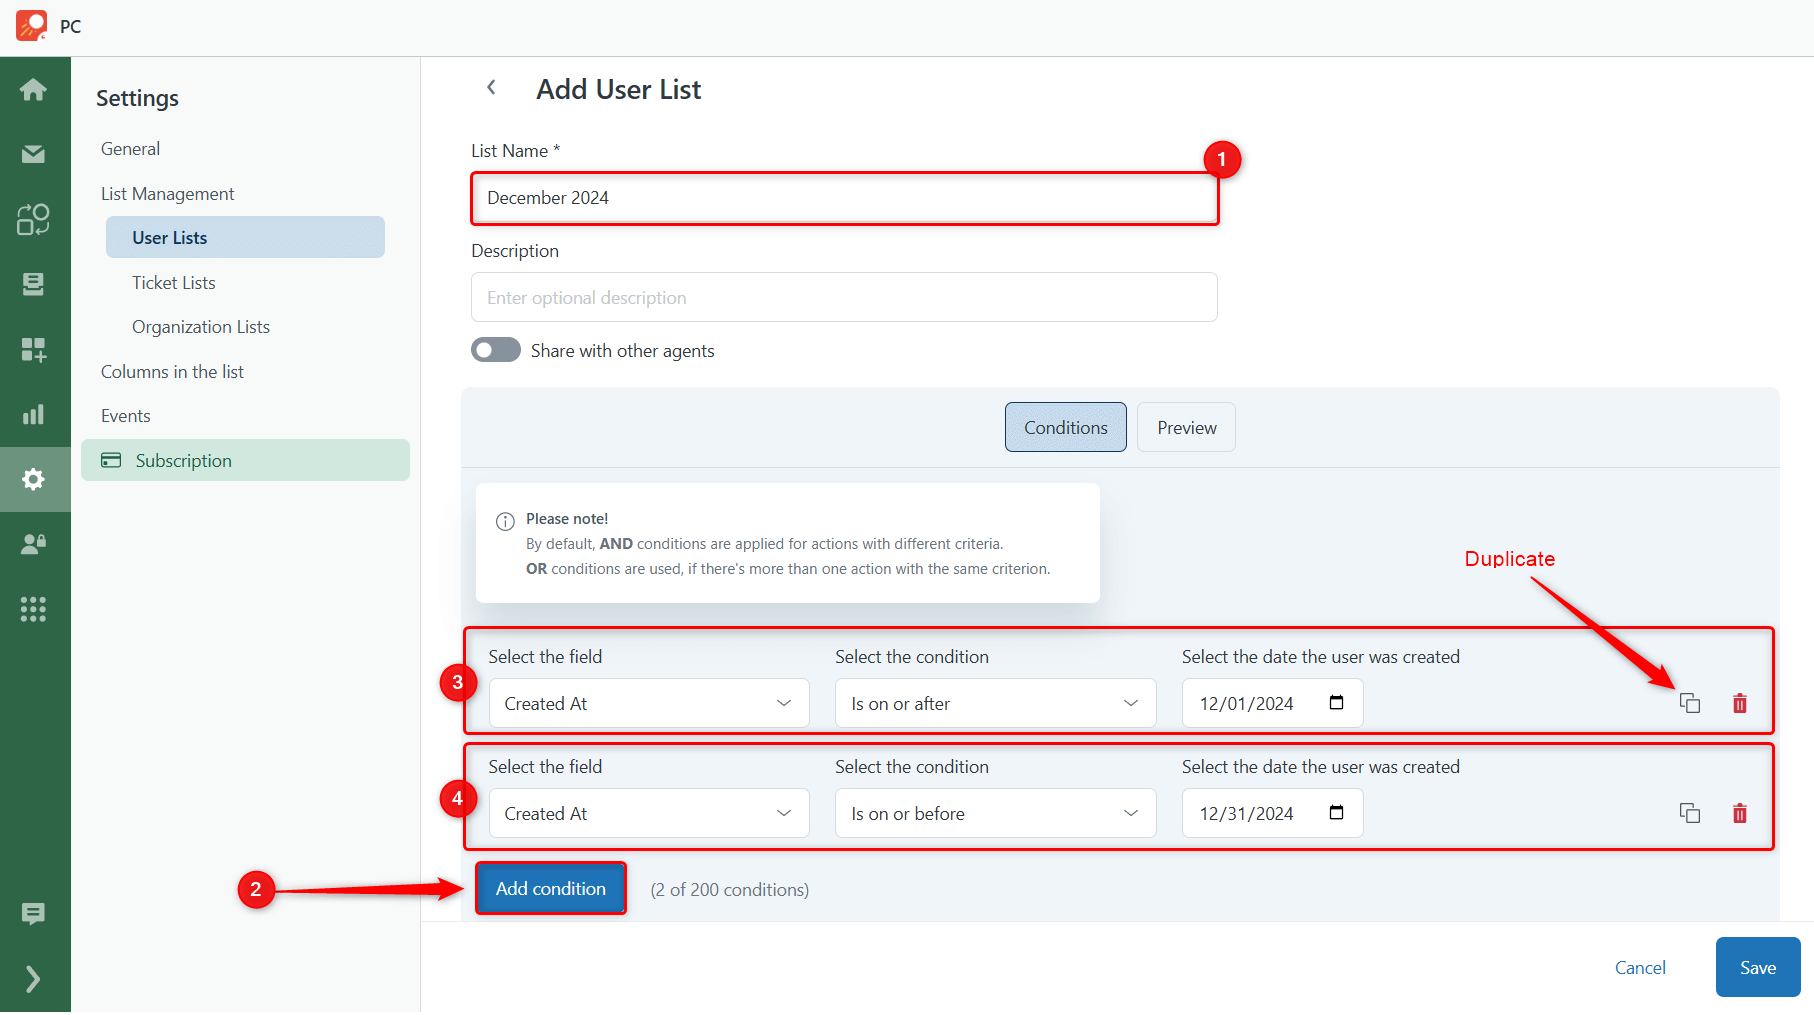
Next, you will be directed to the new page, where you have to provide a few details about the list, like Name (Obligatory) and Description (Optional), so that you can easily search lists later. After, create the conditions. They allow you to filter your users by the data from standard and custom fields. If you need to make a list with users created during, for example, December, click the Add Condition button and set two conditions:
‘Created at > Is on or after > 12/01/2024’ and ‘Created at > Is on or before > 12/31/2024’
To create several conditions, you can duplicate the created one (grey icon on the right, next to the red delete icon) or click the Add condition button again and select the necessary item.
To finish the creation, click Save.
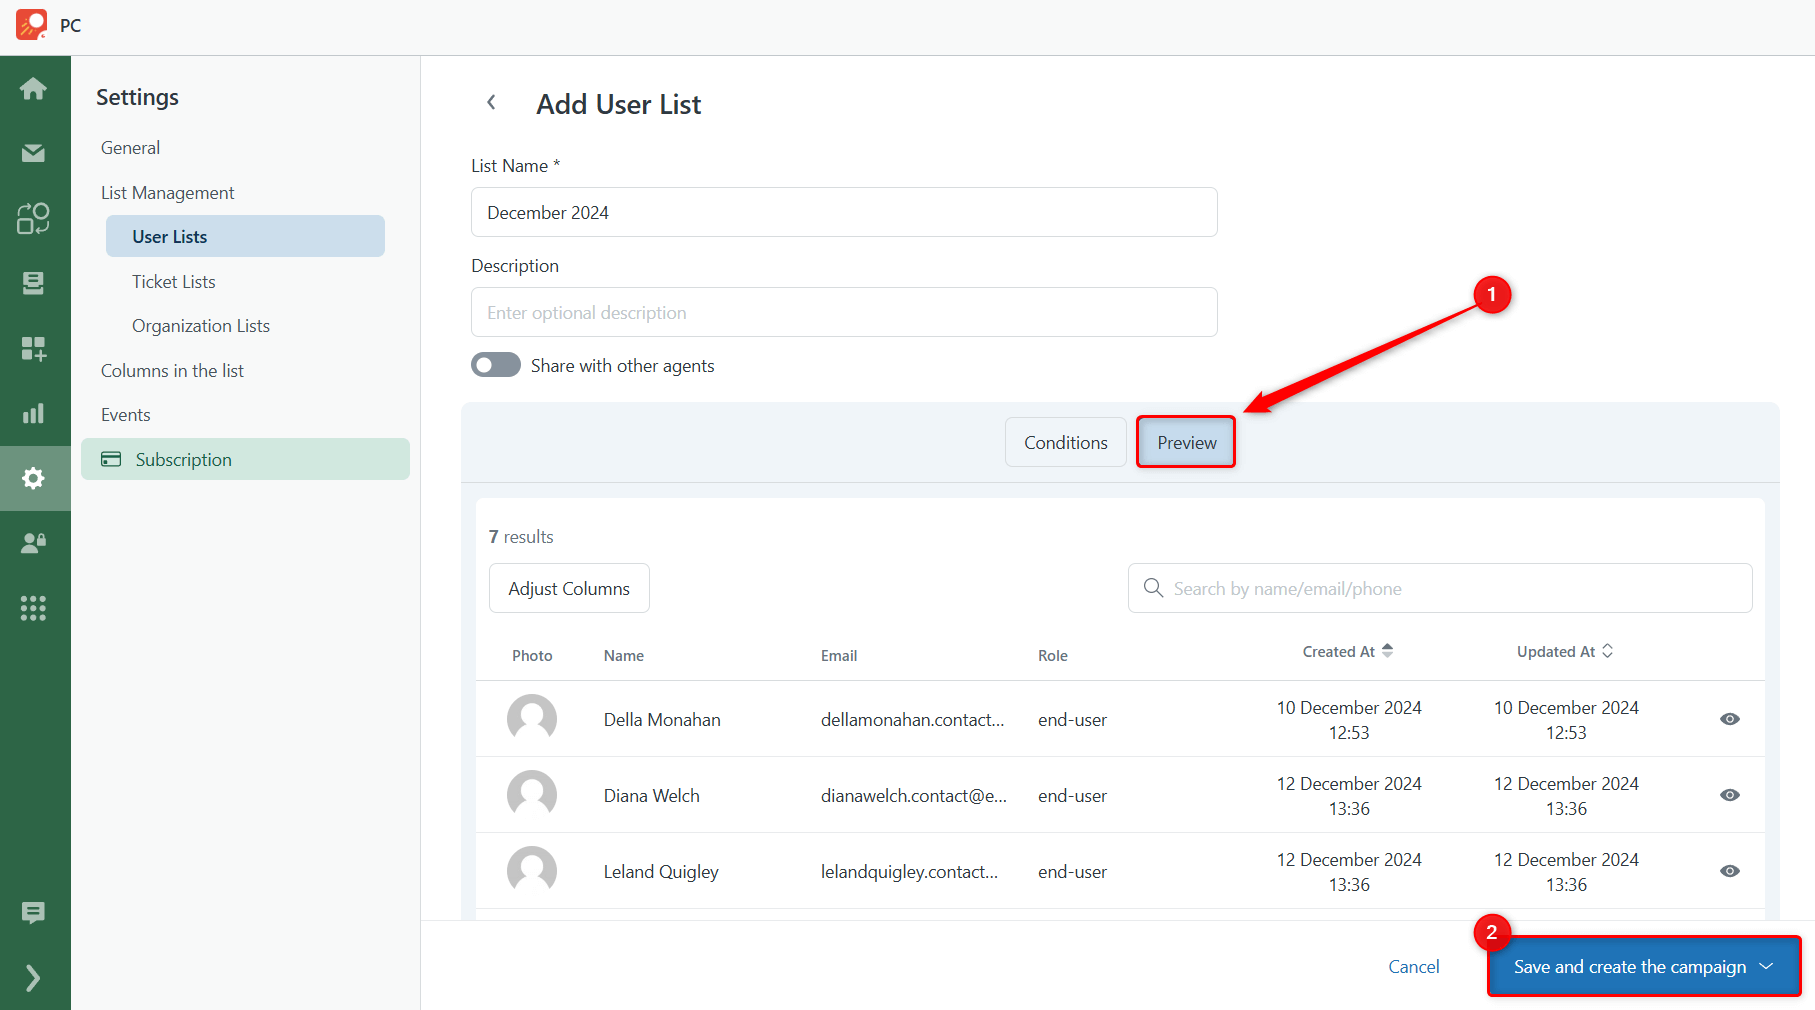
You can also check how the conditions work by clicking Preview. Here, you have the created list, and if you are satisfied with it, you can start a campaign immediately.
Ticket List
The next list type is Ticket. While sending the campaign to this type of list, the application updates the existing tickets or creates new ones. To be more precise, we create the Ticket List to send emails to the ticket requesters from this list. For this type of list, the application uses ticket fields, statuses, and other specific conditions.
To create a list, go to Settings > List Management > Ticket Lists. In the upper right corner, click the +Add a New List button. Then, name the list and add the description if needed.
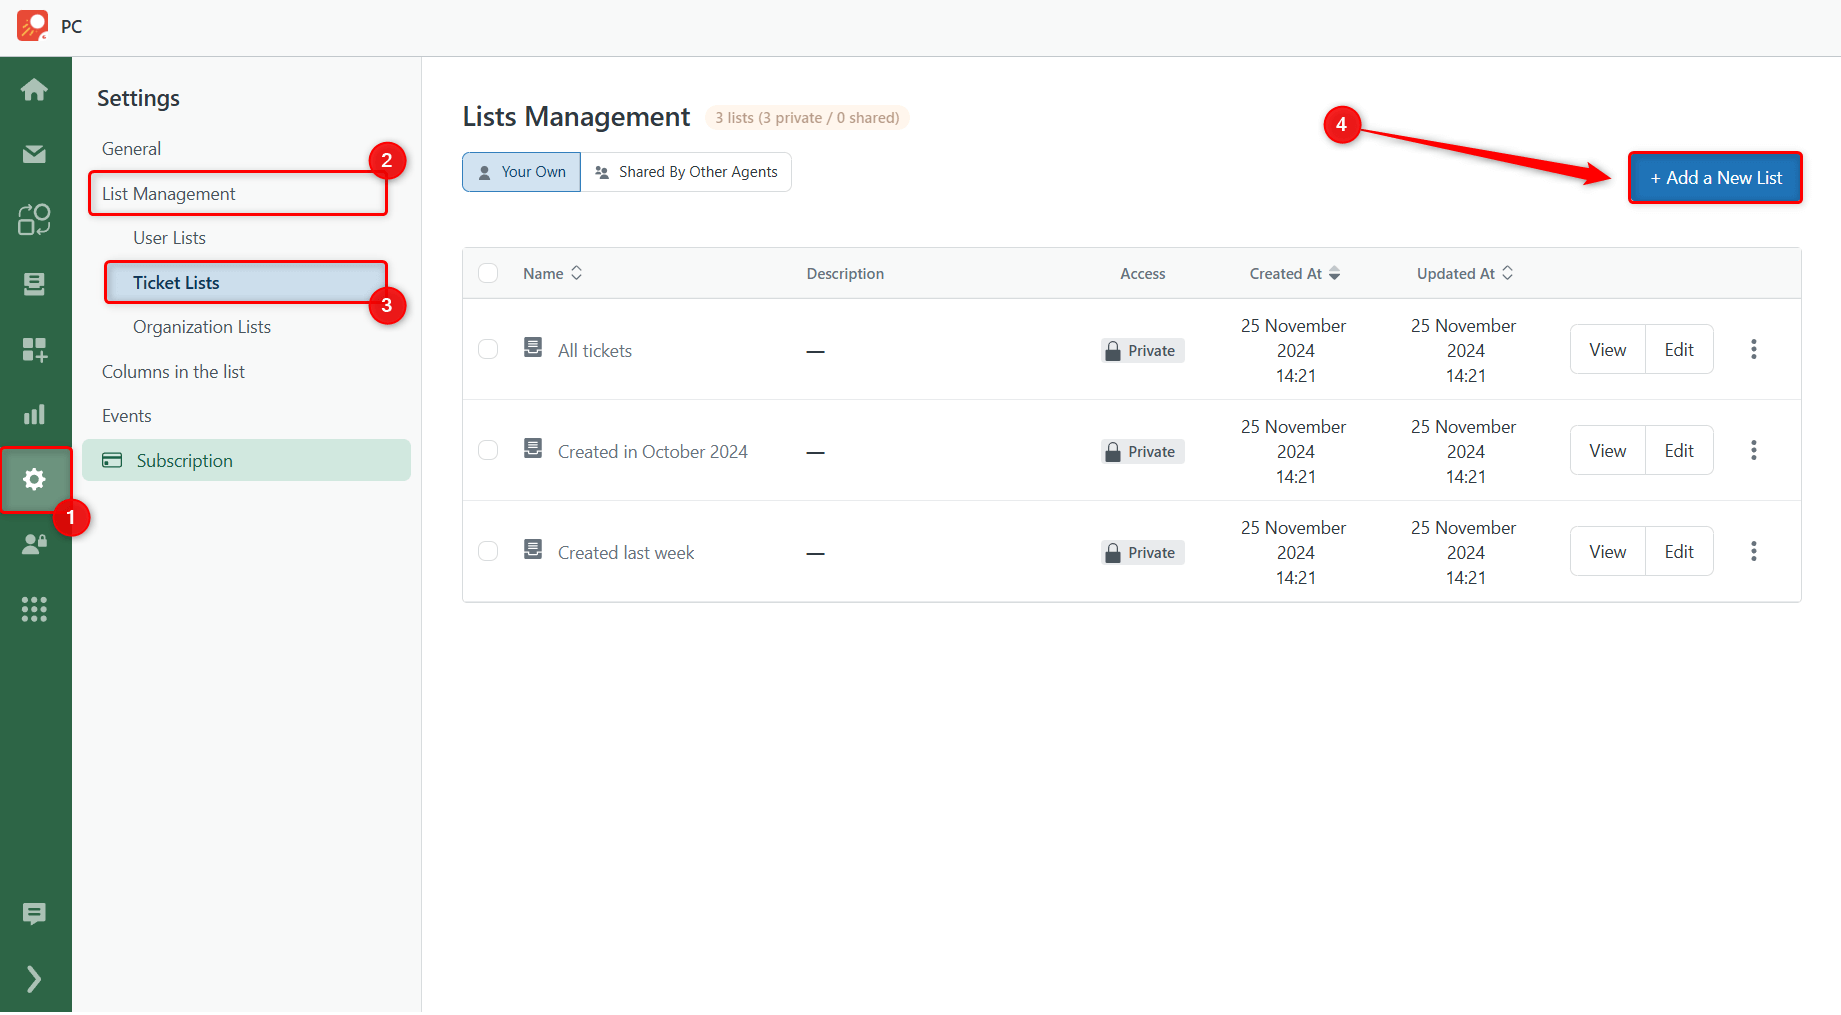
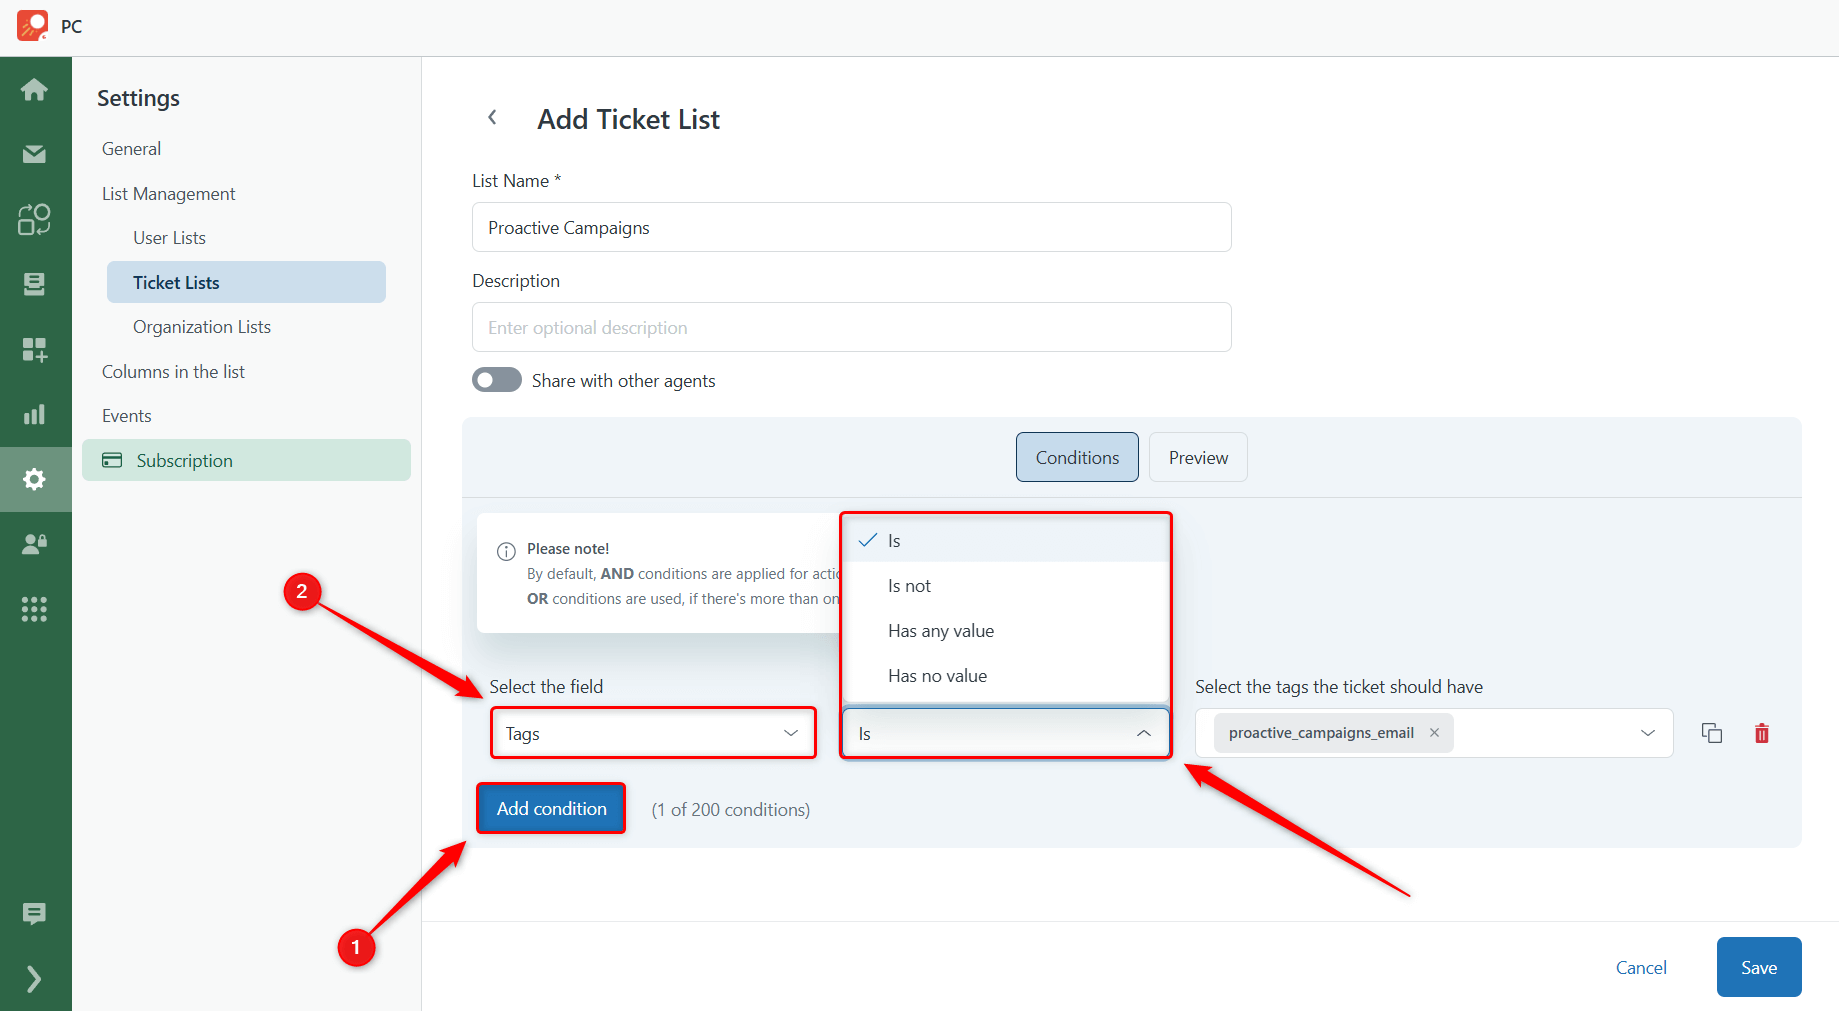
After, click the Add Condition button and select the necessary item from a drop-down menu.
For example, you can choose the ‘Tag > Is’ condition and type any tag you want to filter tickets by. We used the ‘proactive_campaigns_email’ tag. You also have other conditions, like ‘is not,’ ‘Has any value,’ and ‘Has no value.’ If you set the ‘Is not’ condition, the app selects tickets without the pointed tag. While choosing the two last conditions, the application will add tickets with or without any tags to the list.
Organization List
The third type of list is Organization. You can use them to send mass emails to users from a particular organization or several organizations. The list creation process is similar to User and Ticket lists. The difference is in the available conditions, as they are slightly different in each list.
So, to start creating the Organization list, open Settings > List Management > Organization Lists.
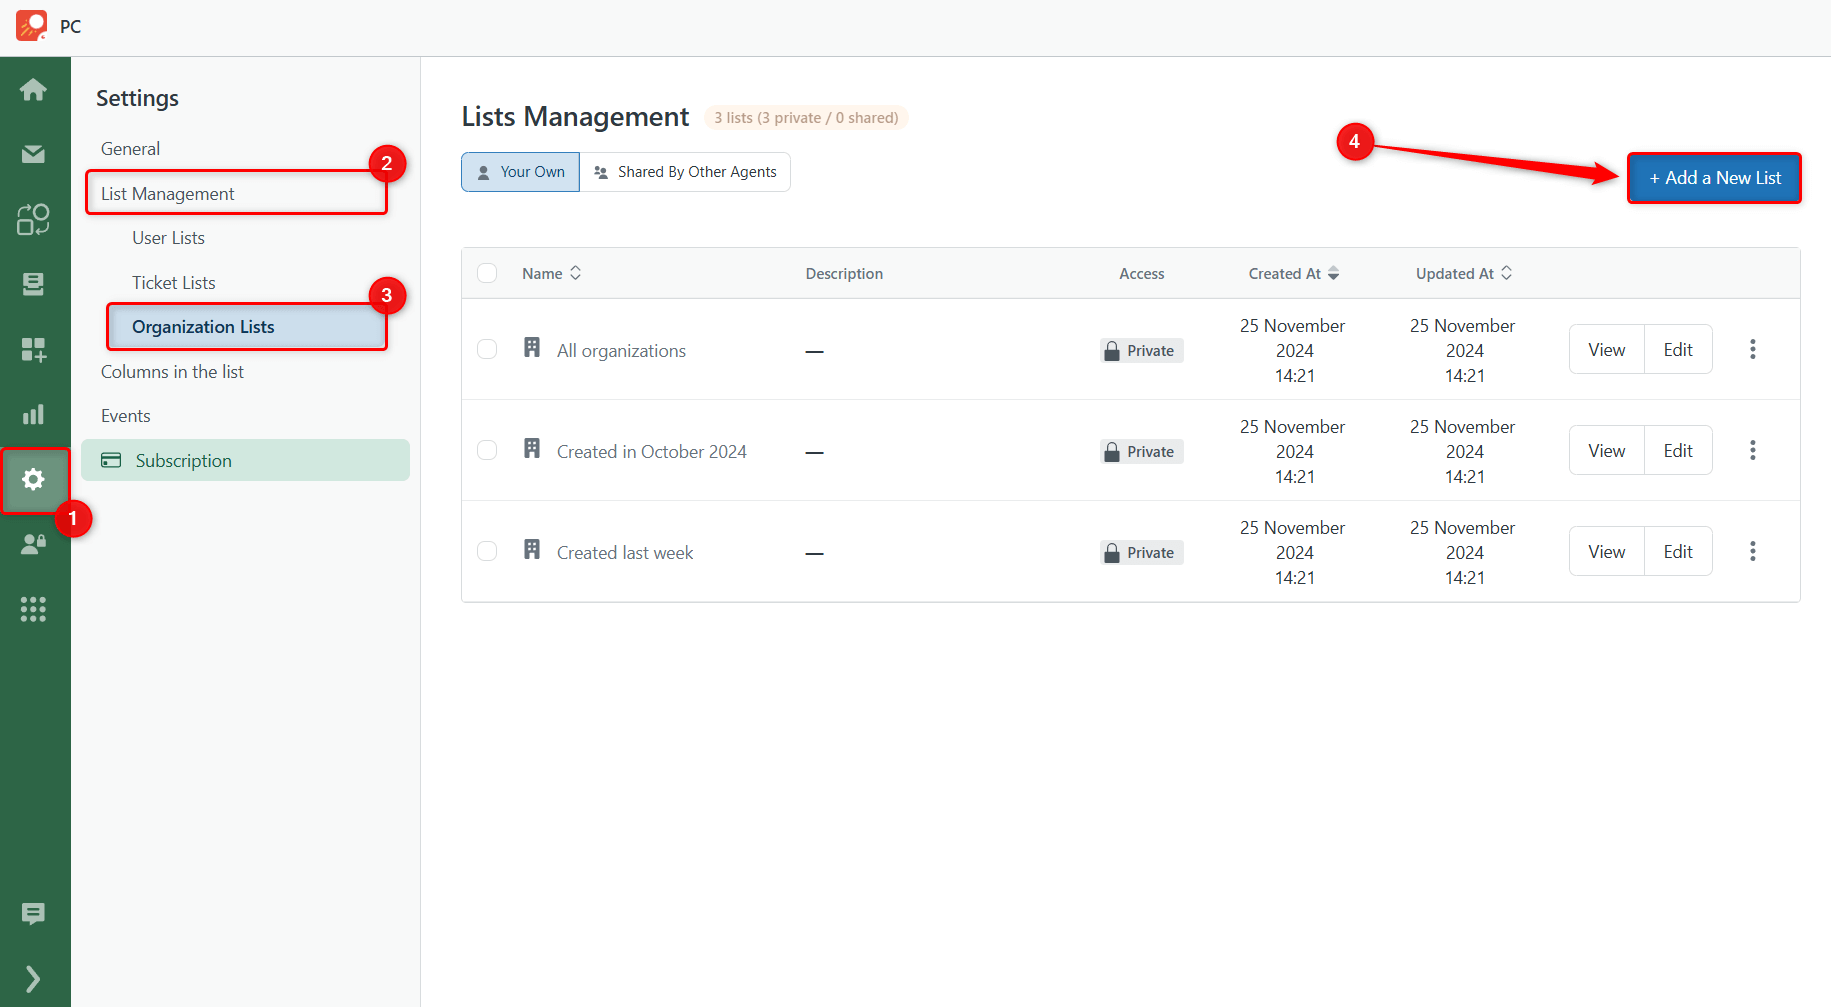
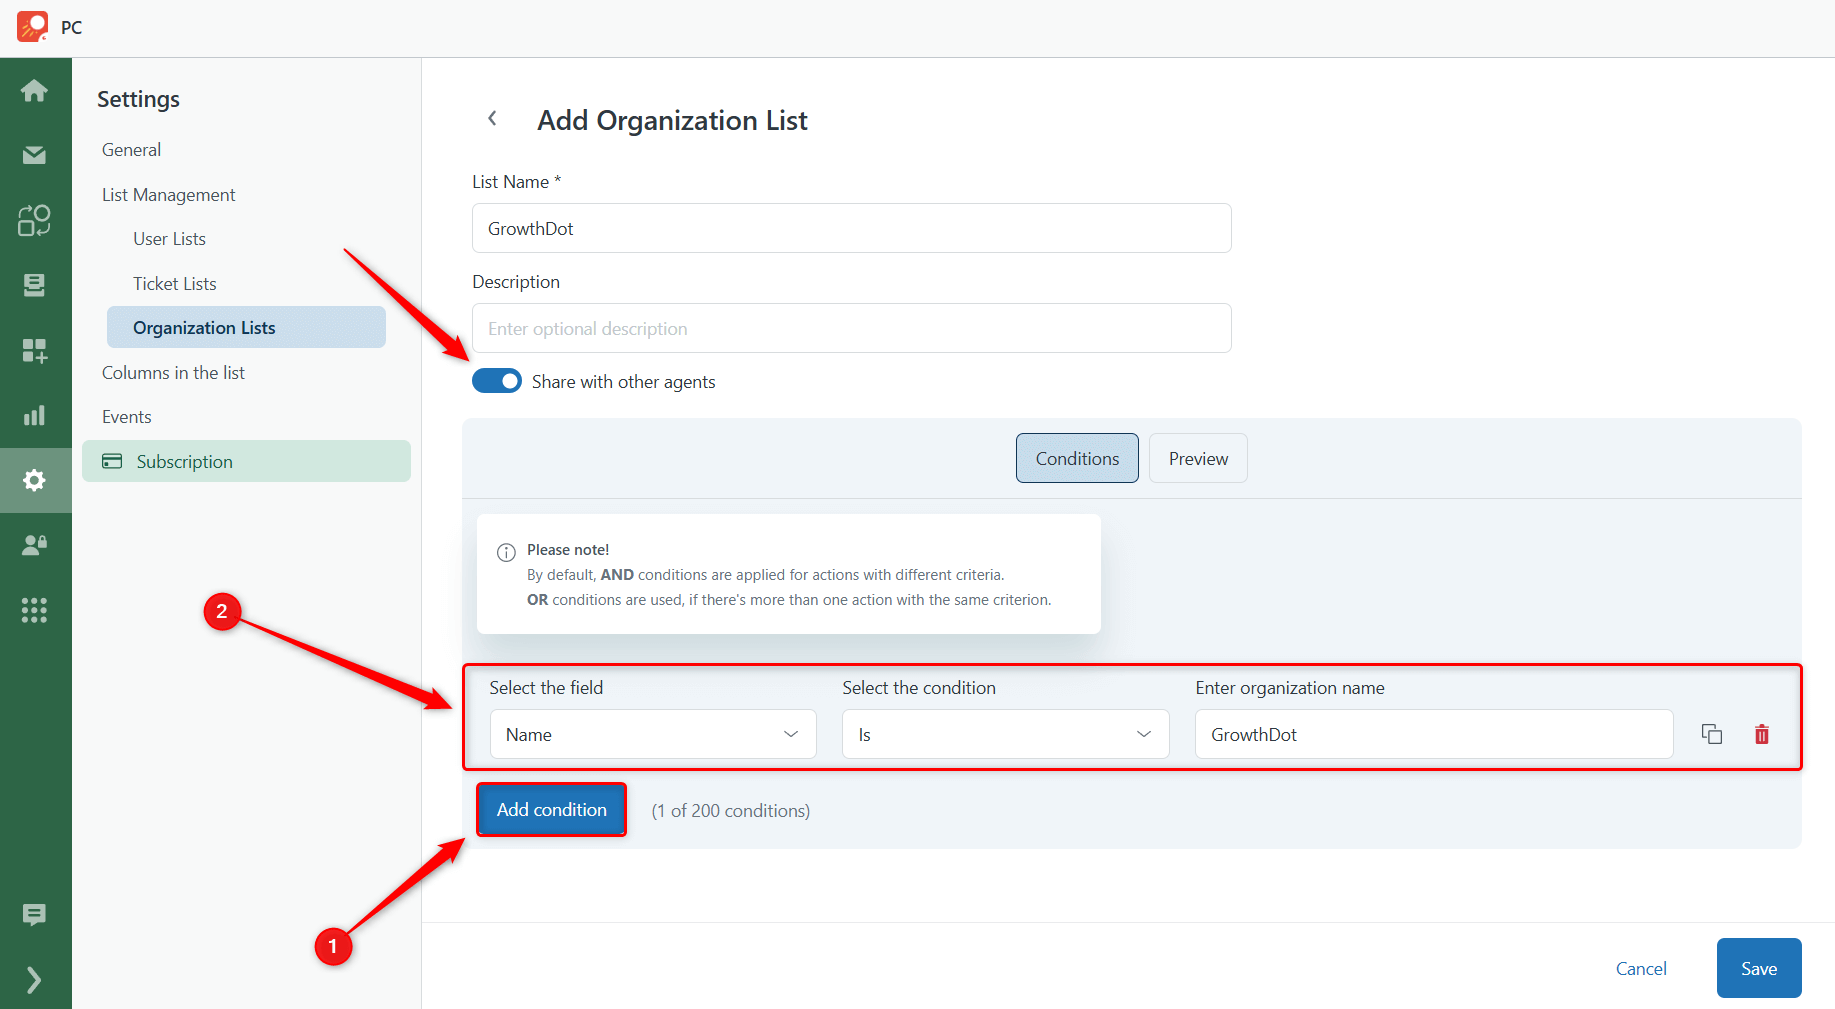
In the upper right corner, click the +Add a New List button and type the Name and Description. Besides, if you want other agents to see and use this list, you can select ‘Share’ under the Description field (User and Ticket lists have such an option as well).
Next, add the condition. For example, we want to send the email campaign to users from the GrowthDot organization, so we set this condition: ‘Name - Is - GrowthDot.’
Finally, now you know how to create User, Tcket, and Organization lists!
If you have any questions, feel free to contact our super-friendly support team!


