How to Add a User, Ticket, and Organization list in GDPR Compliance for Zendesk
-
GDPR Compliance
We recommend creating a User, Ticket, or Organization list to process data in bulk instead of treating every person’s data separately. So here, we are going to show you how to separate your contacts, tickets, and organizations into lists to delete or anonymize data.
Creating a User list
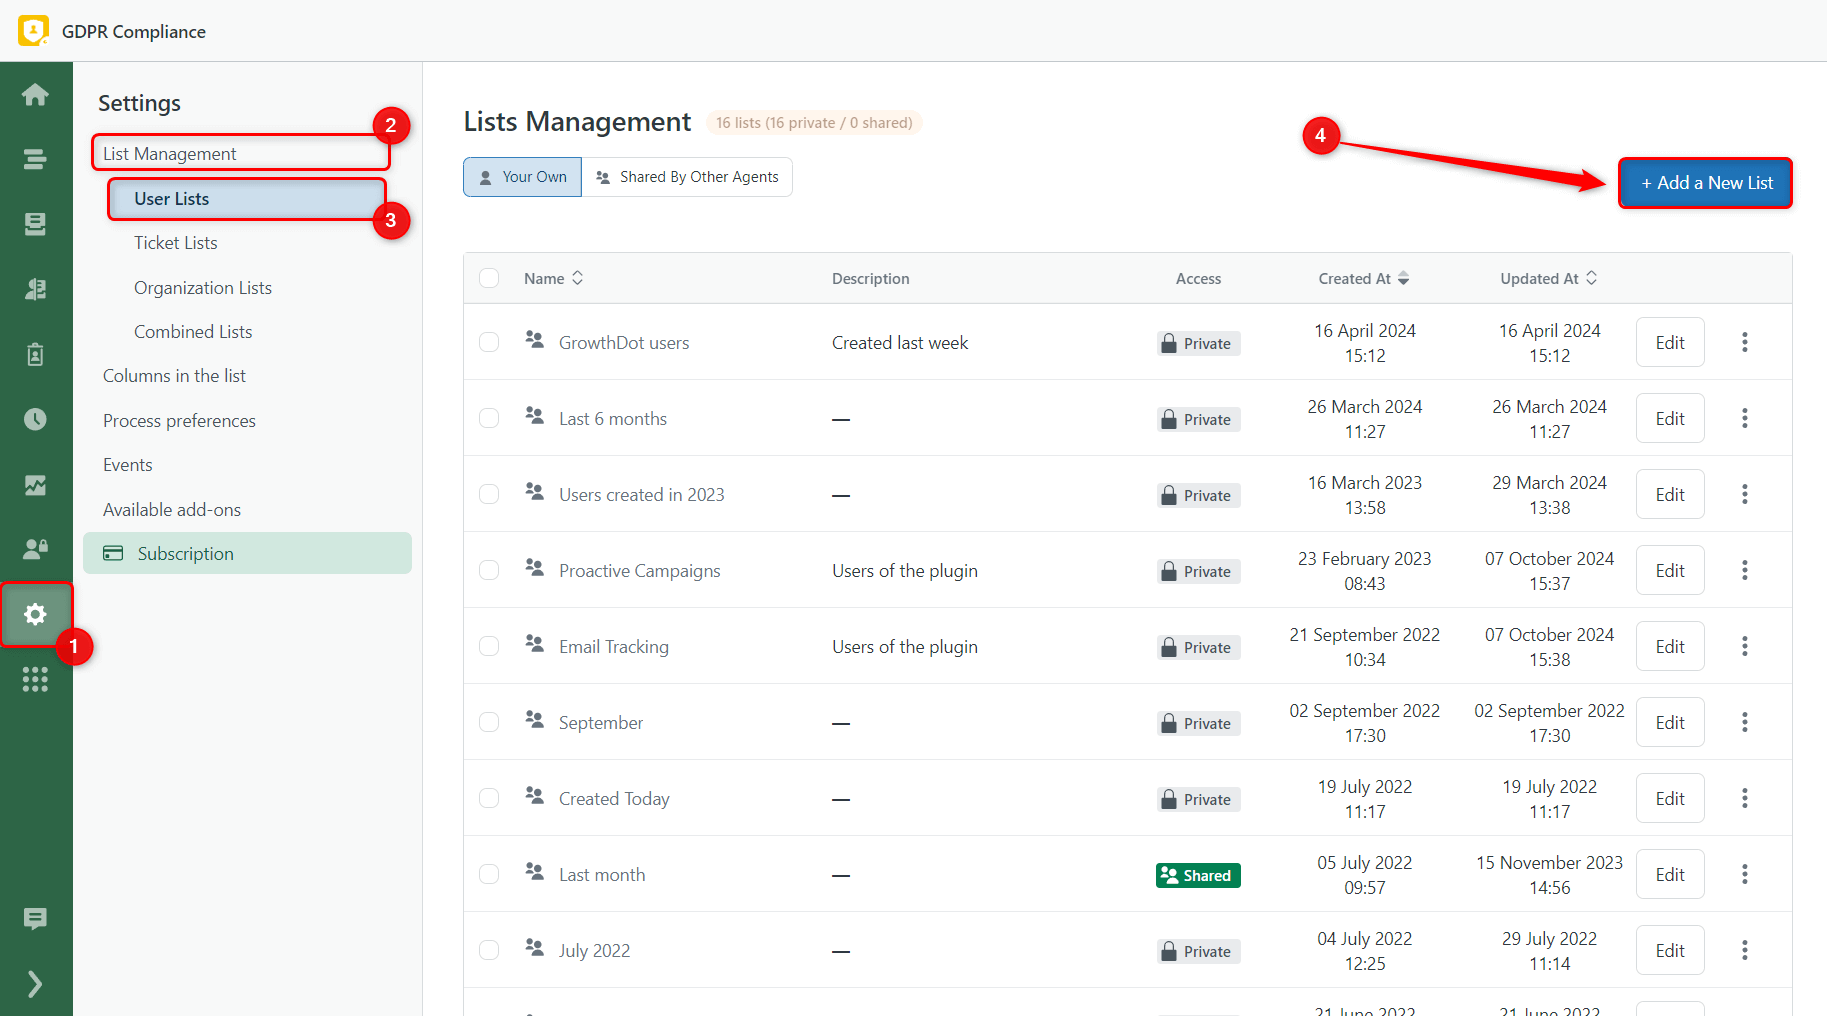
1. First of all, go to the Settings tab > Lists Management > User Lists > click + Add a New List.
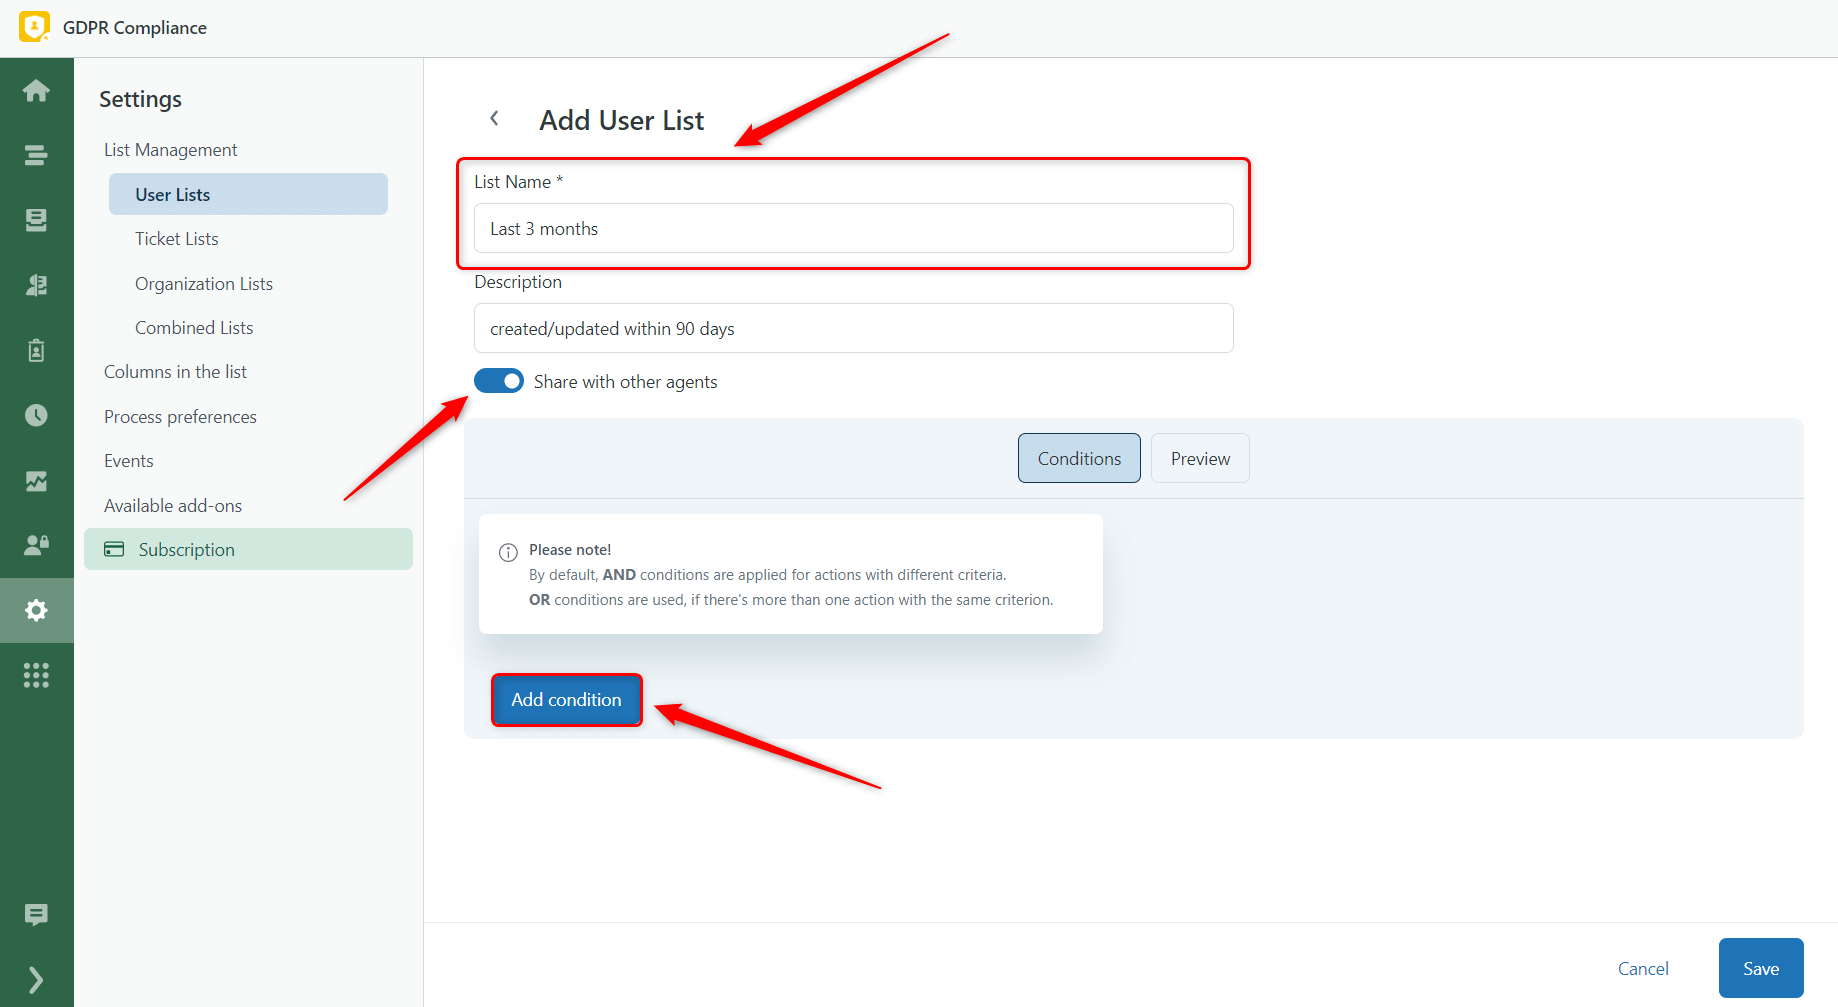
2. While creating a list, you need to add the List Name and additional description. If you want to make this list available to other agents, put the checkmark next to the Share box. To start filtering users, click Add Condition.
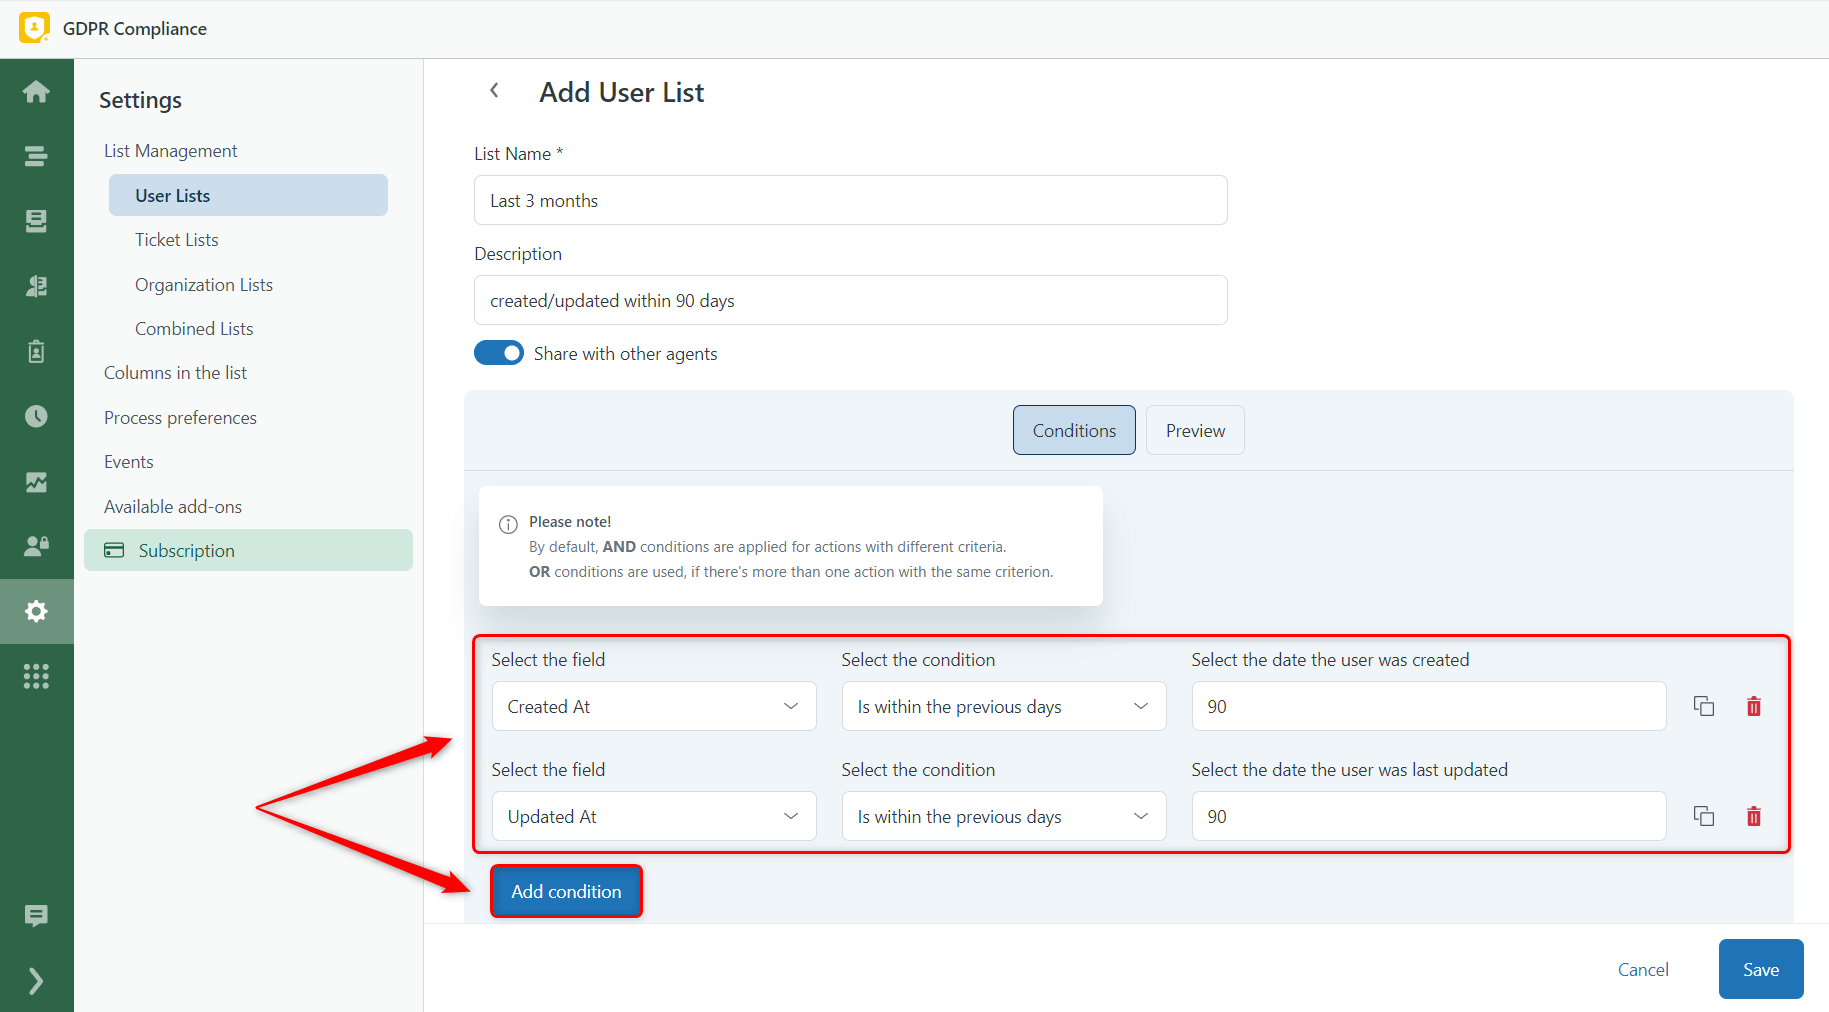
3. Then, set conditions that will collect contacts into the list.
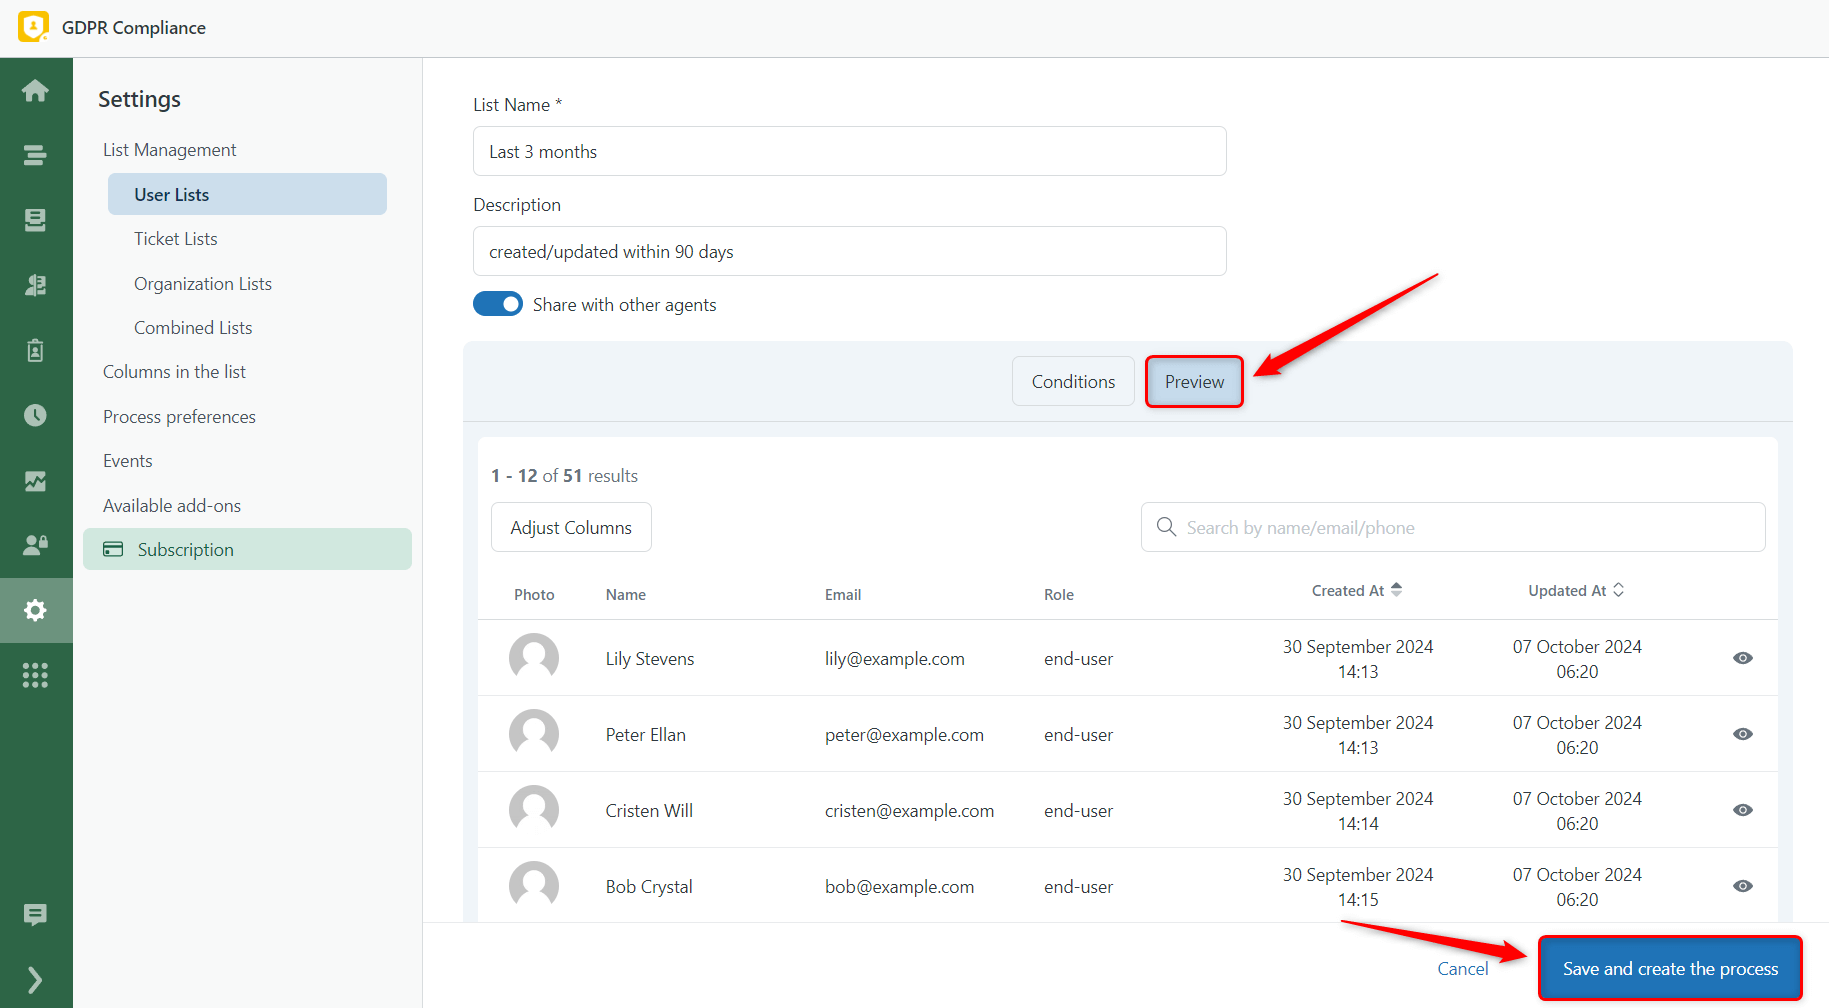
4. You can also check how your conditions work by going to the Preview tab. If you're satisfied with the list of users, you can click Save and create the process to run it immediately. Or, go back to the Conditions and save it for future use.
That's it. Your list is ready. However, let’s check the different approaches to setting conditions to receive a general understanding of the whole process.
Filter by Standard Fields (like created_at, updated_at, etc.)
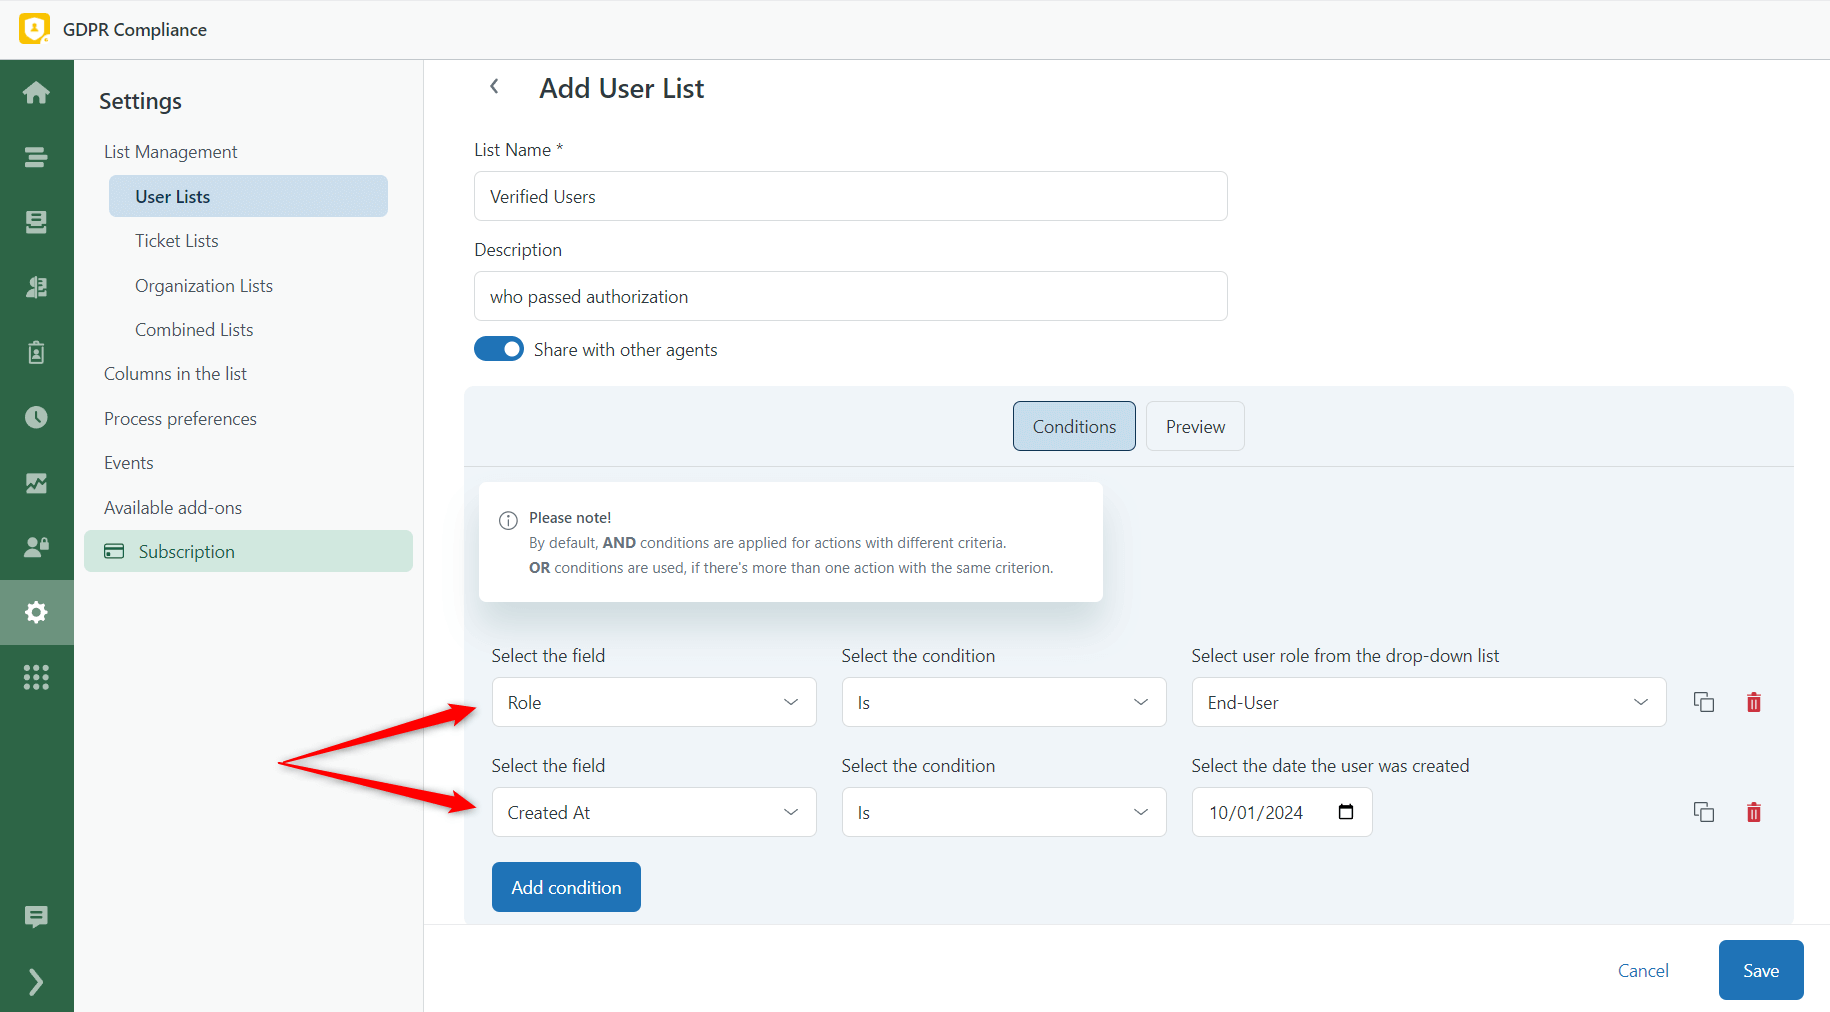
This is the first way of creating the list. Here you can set Conditions using predefined fields like Name, Email, Role, Group, Organization, Created at, Updated at, etc. Besides, combining them allows you to be more precise in list filtering. For instance, you want to anonymize the data of all end-users over a specific period according to GDPR protocols. If so, you can select the particular date and user role.
Filter Users by Tags
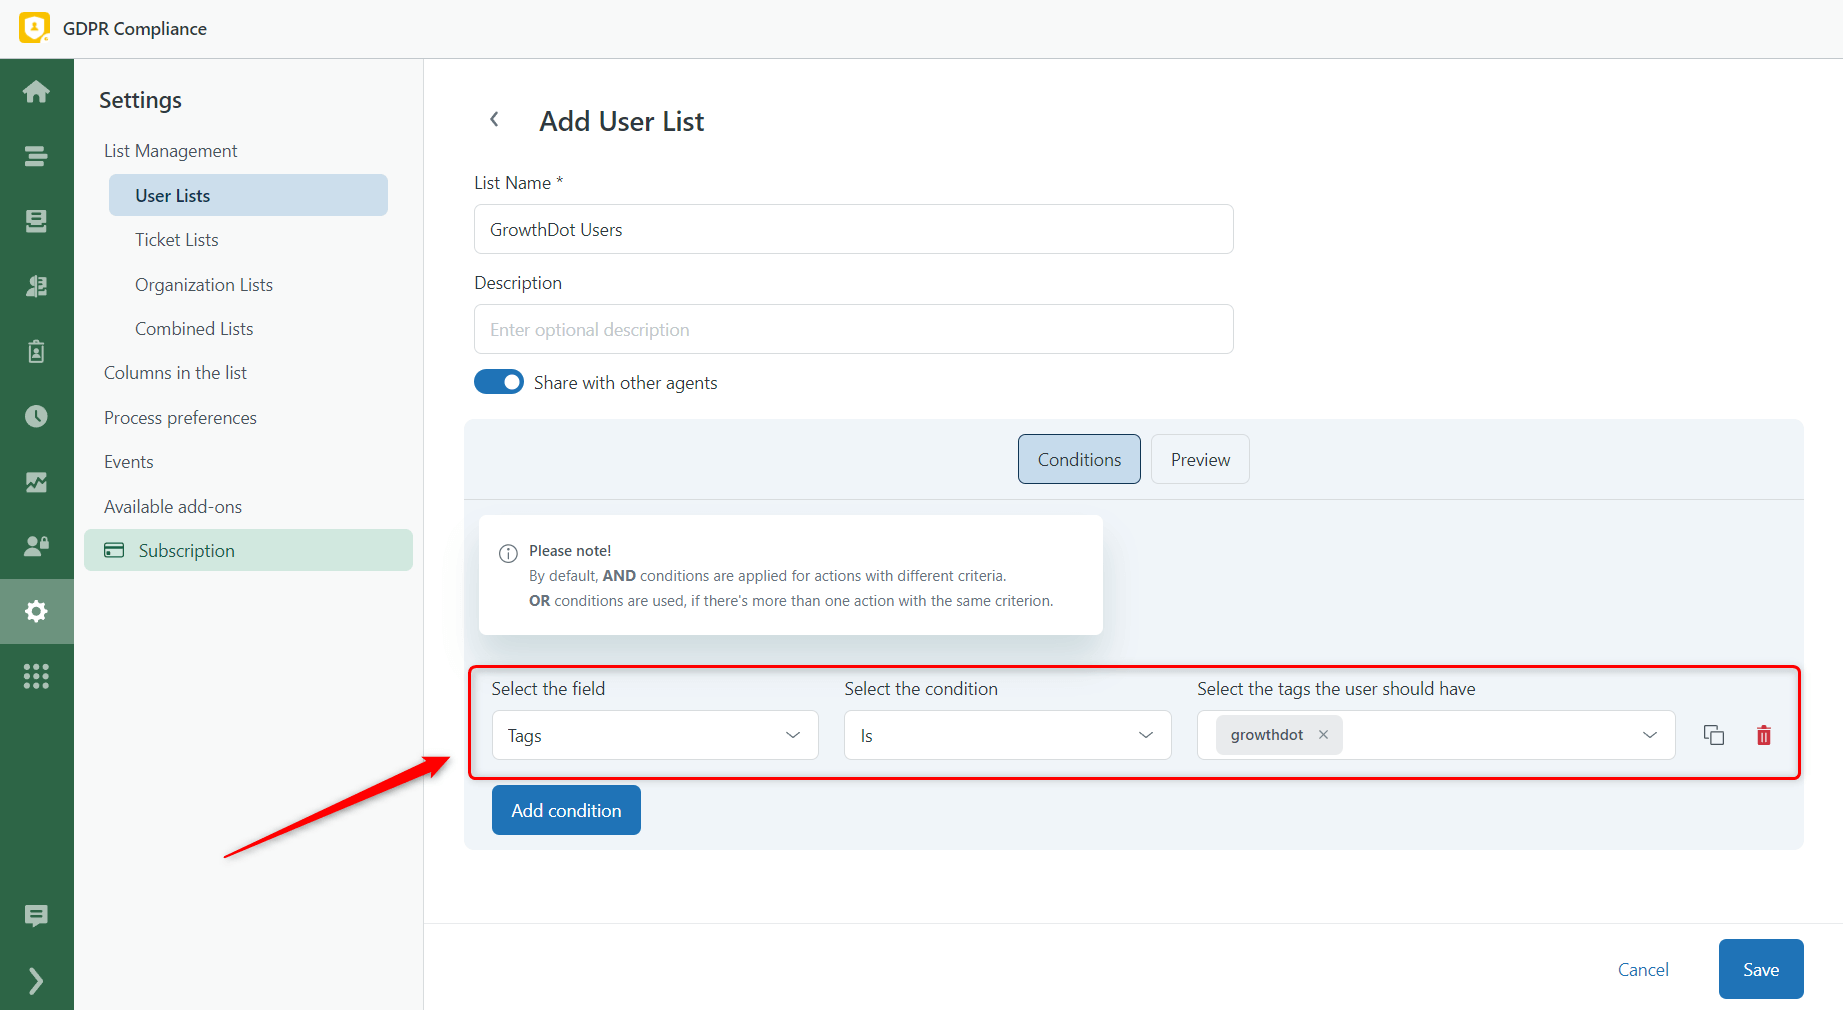
The next approach to separate a contact list by criteria is to add specific Tags to users. For example, you want to anonymize GrowthDot customers’ emails. To do so, view the Conditions drop-down list for the Tags that fit the requirements and enter the needed tag.
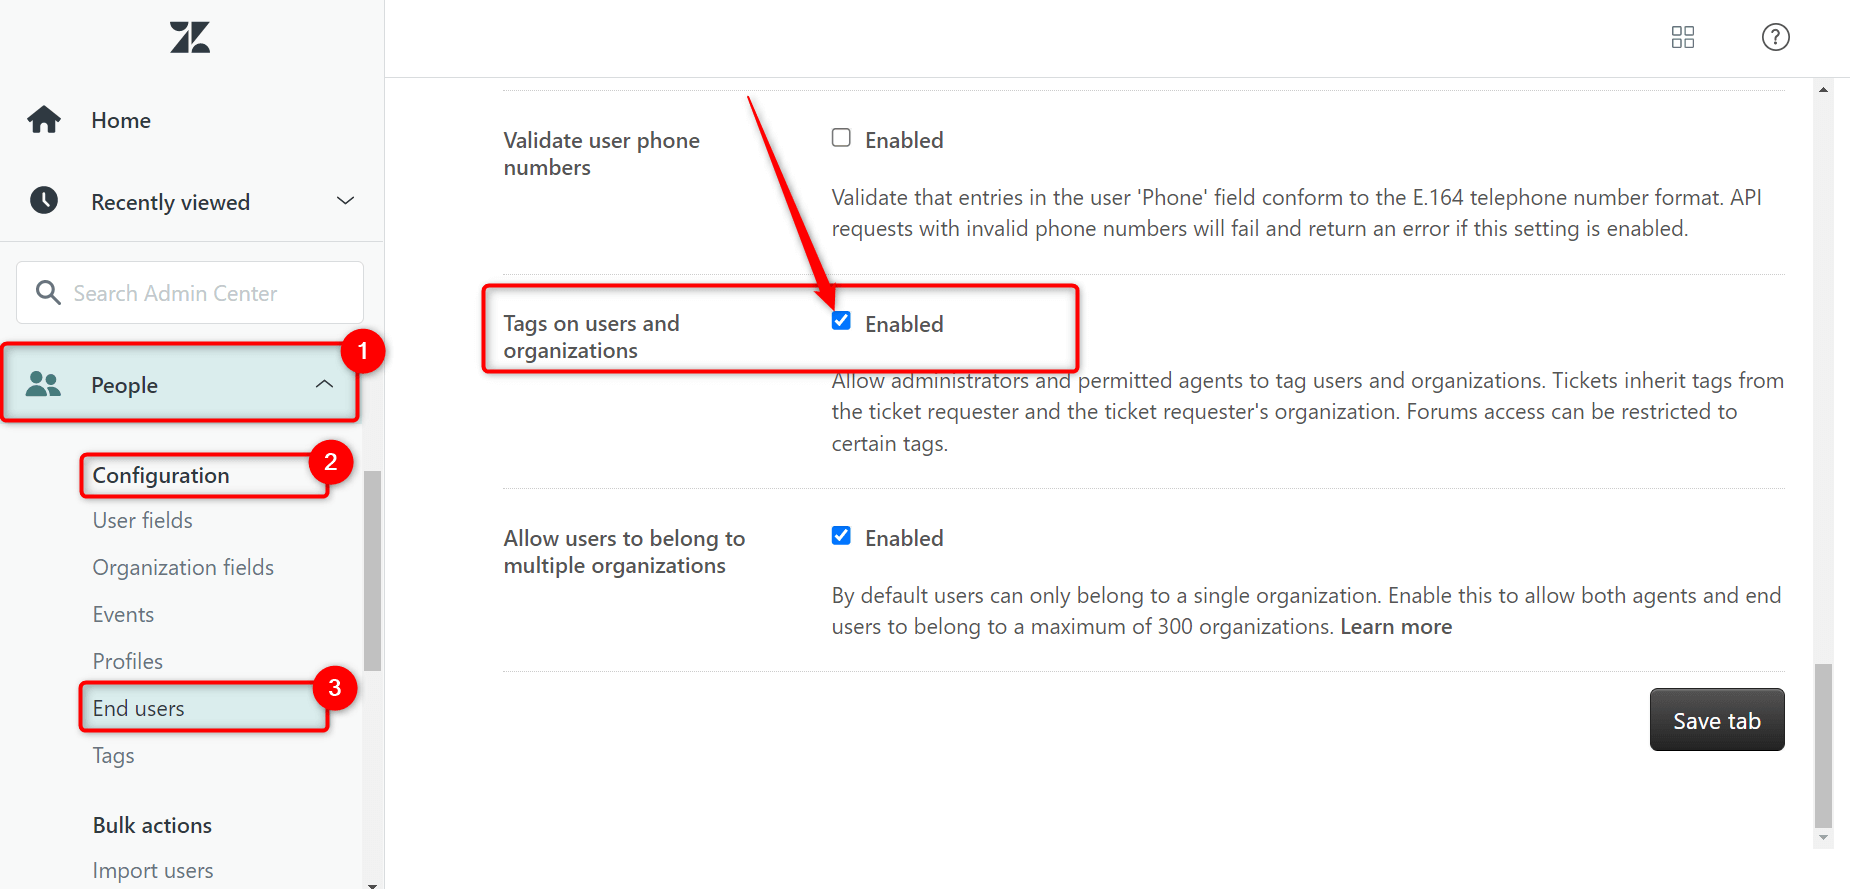
If you have never used the tagging feature in Zendesk, you need to enable it before adding Tags to users and organizations. Go to the Admin Center > People > Configuration > End users. Then, scroll down to the Tags on users and organizations and mark the checkbox ‘Enabled.’ And remember to click the Save tab button.
Filter by Custom User Fields
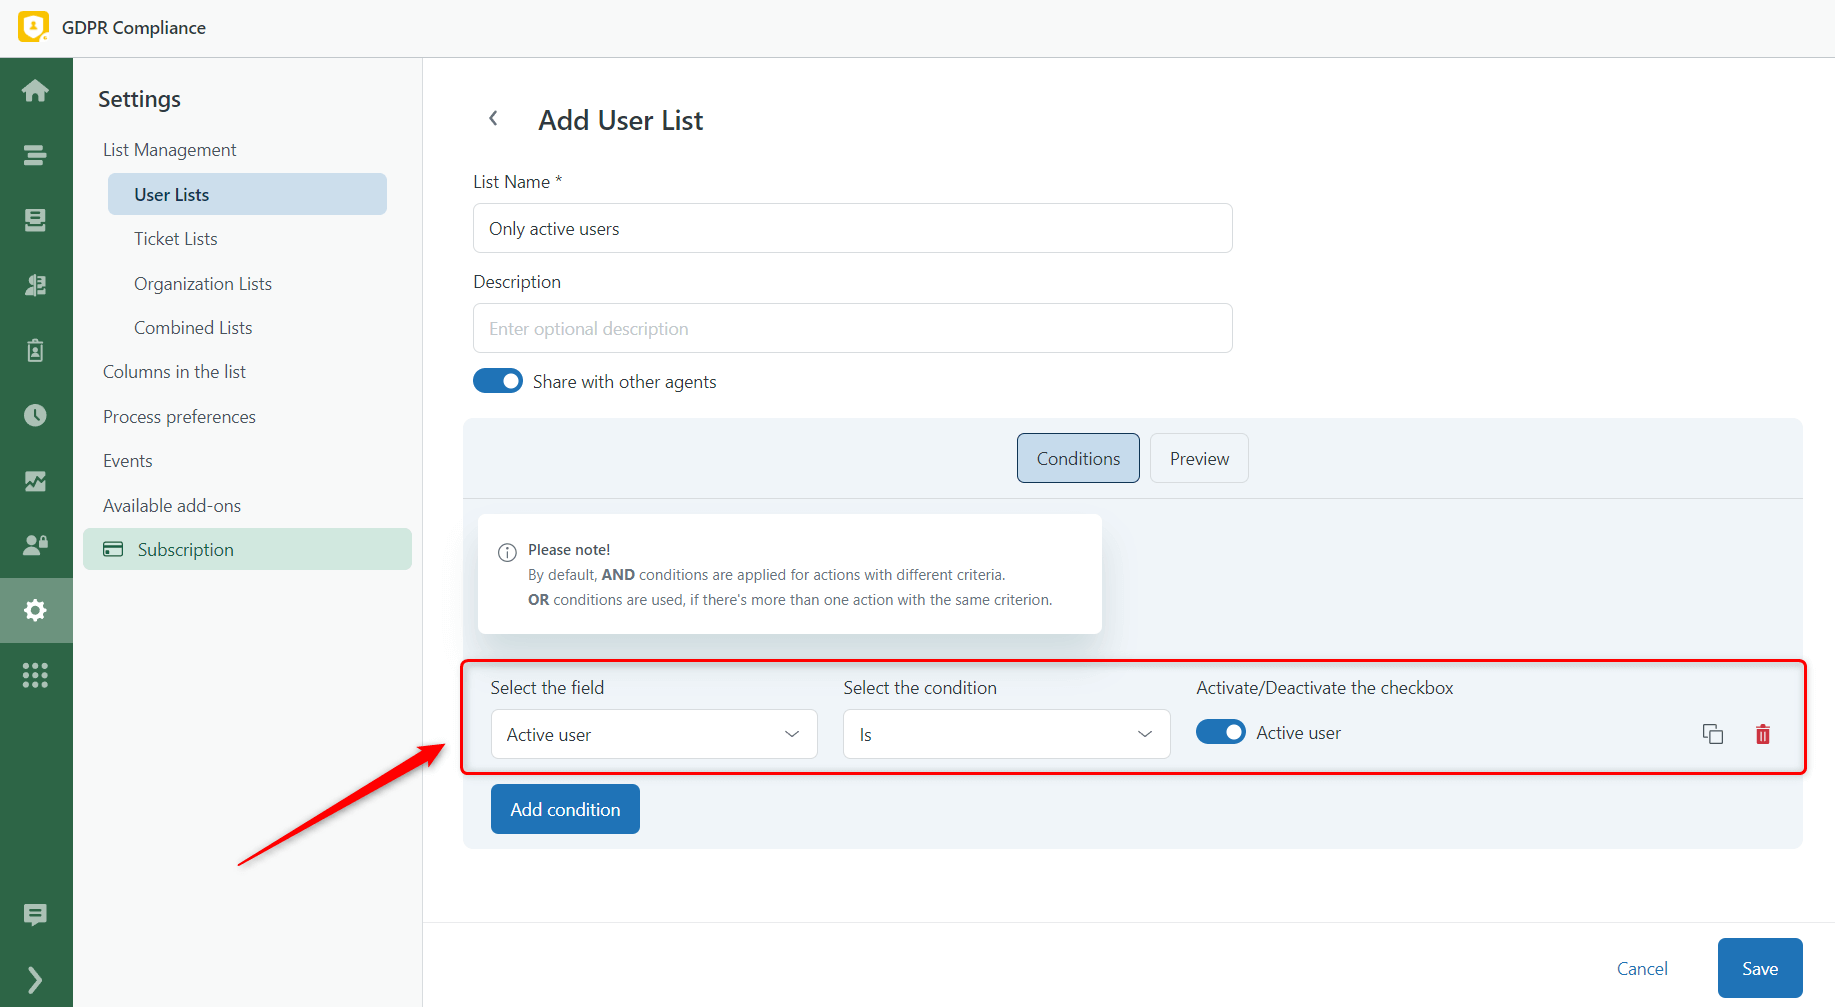
Custom user fields can also be used as the criteria for creating a User list. The whole procedure is similar to creating a list by tags, but you select your custom field. For instance, we selected the 'Active user' custom field and toggled on the 'Active user' value.
Creating a Ticket list
In general, the process of creating a Ticket list is almost similar to creating a User list. The difference is that conditions consist of different kinds of fields. For example, 'Priority' or 'Requester name,' but obviously, this is a different type of data.
To create a Ticket List, you need to:
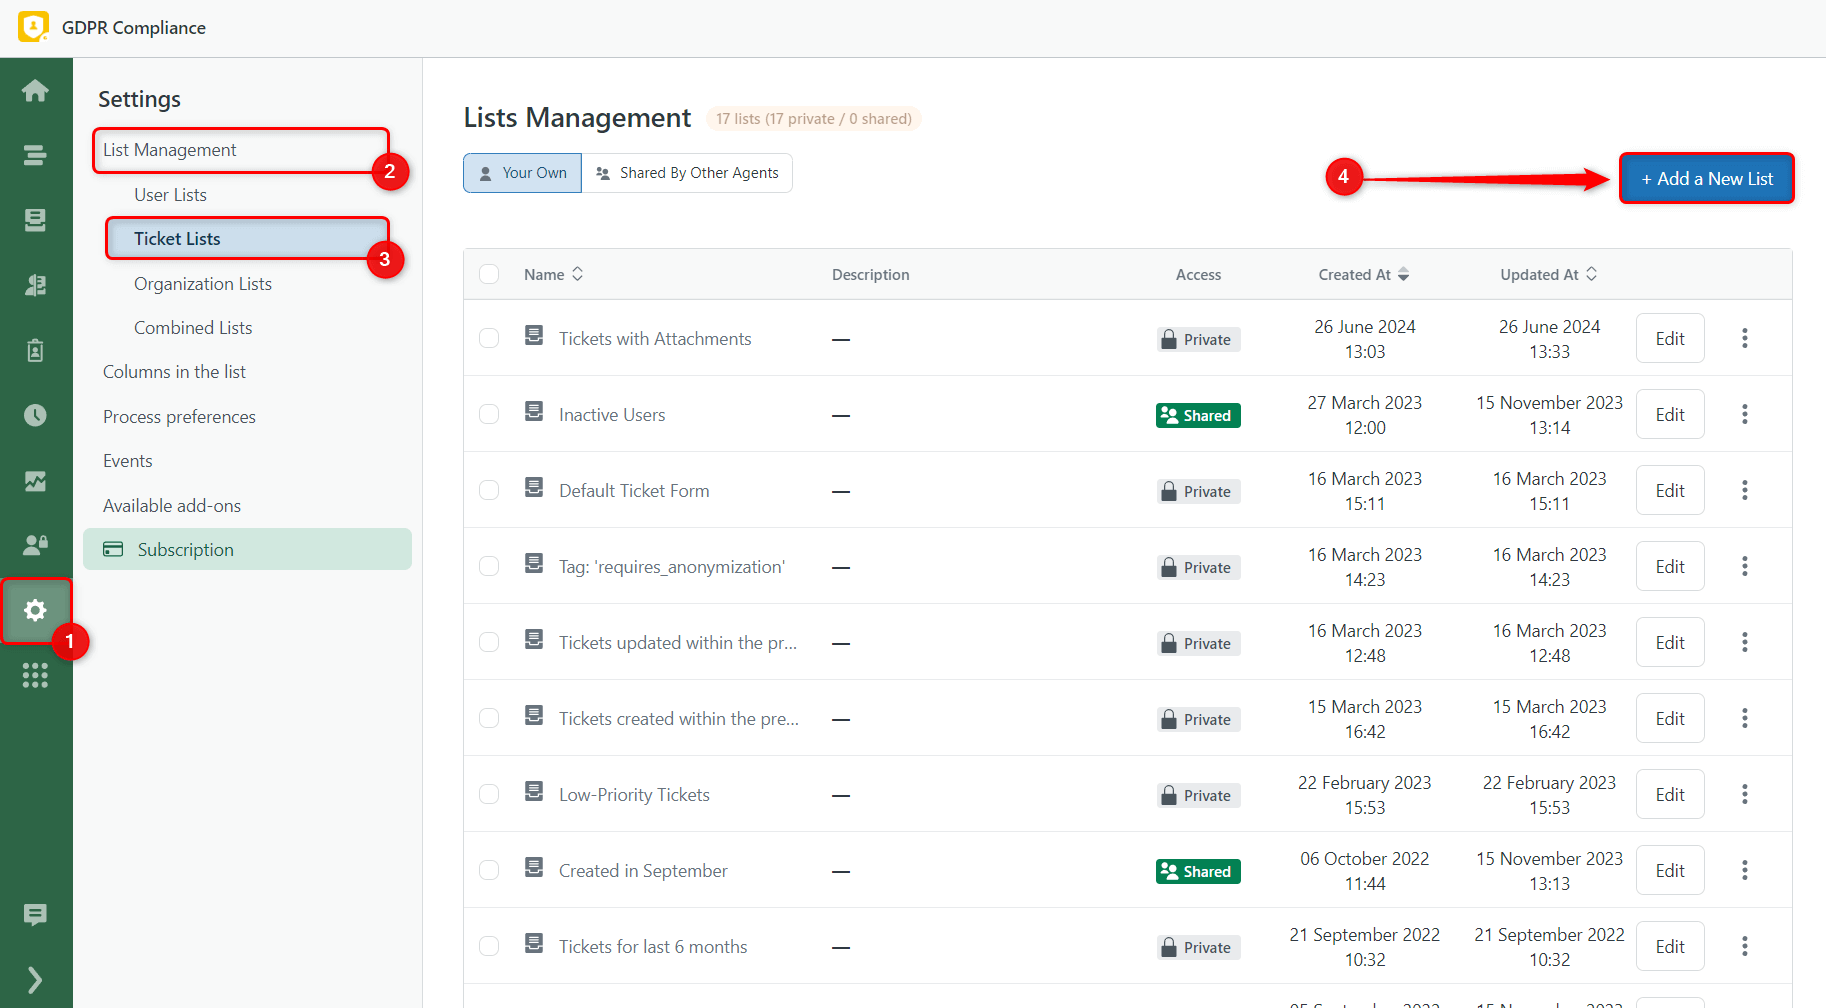
1. At first, open the Settings page, and then go to the Lists Management tab and click the Ticket Lists. Then, click the +Add New List button in the upper right corner.
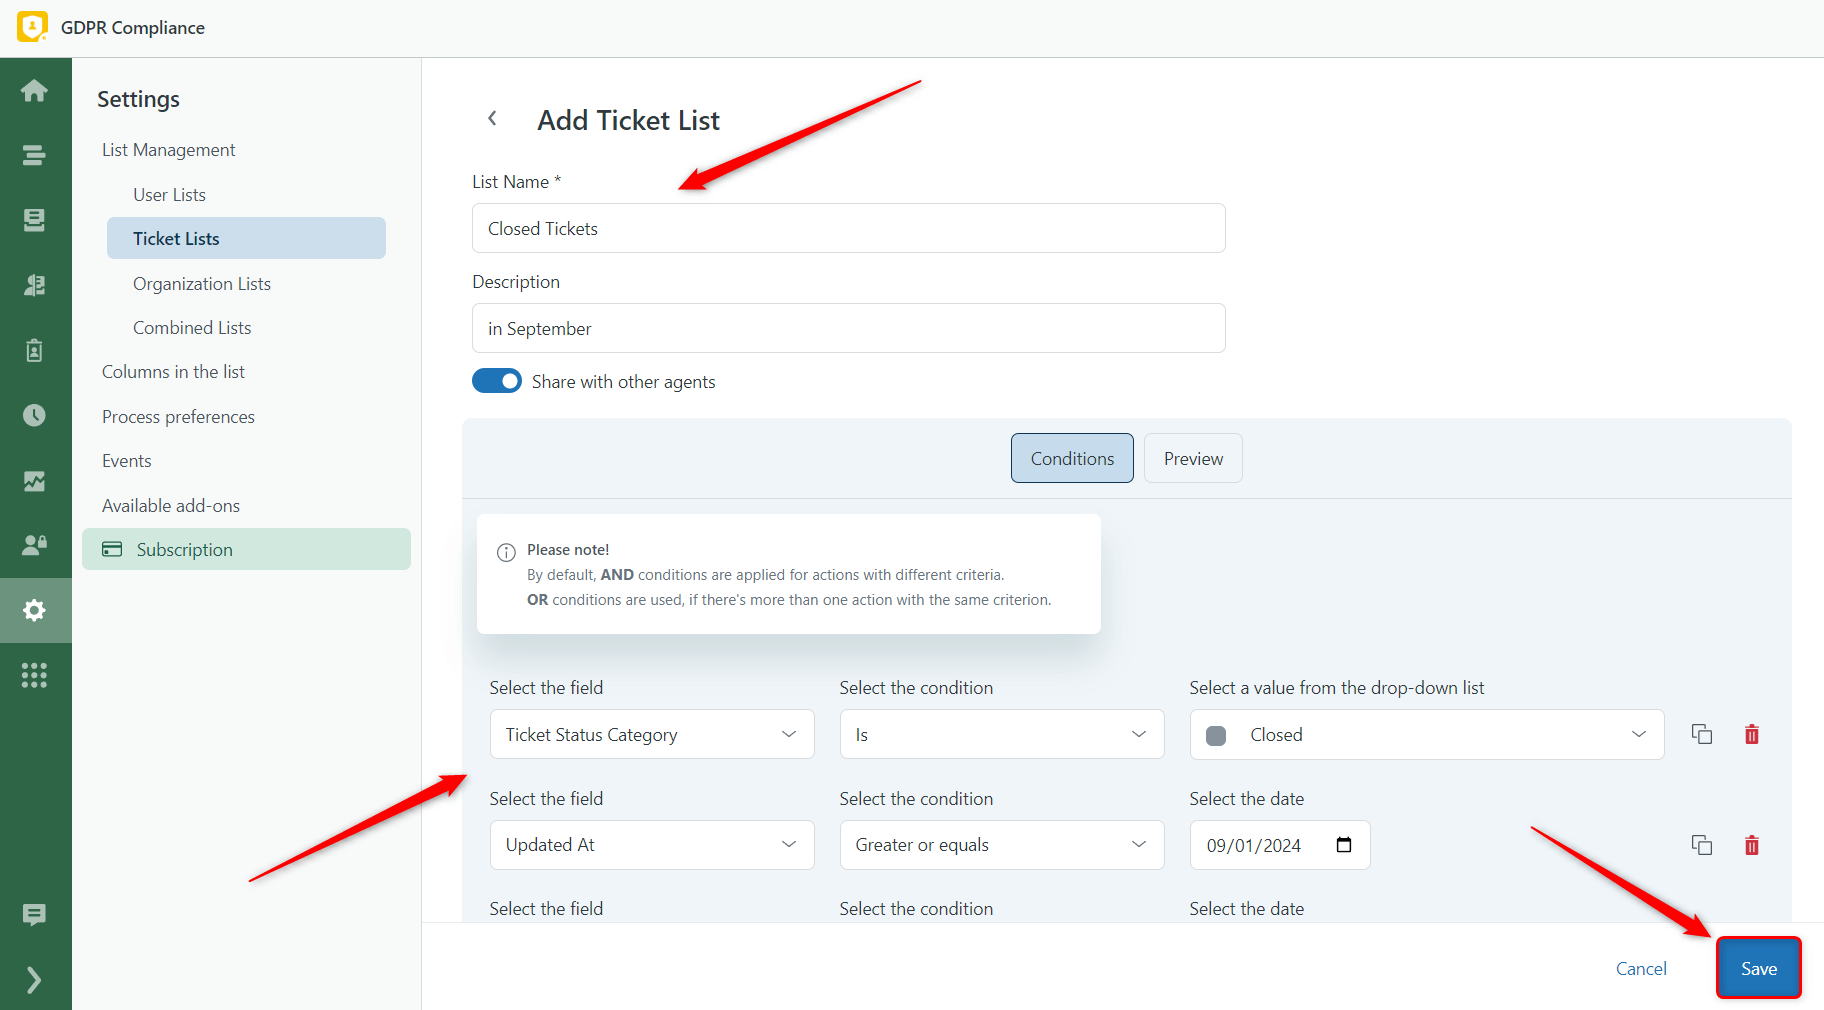
2. Then, follow the same steps as for the User list and click Save.
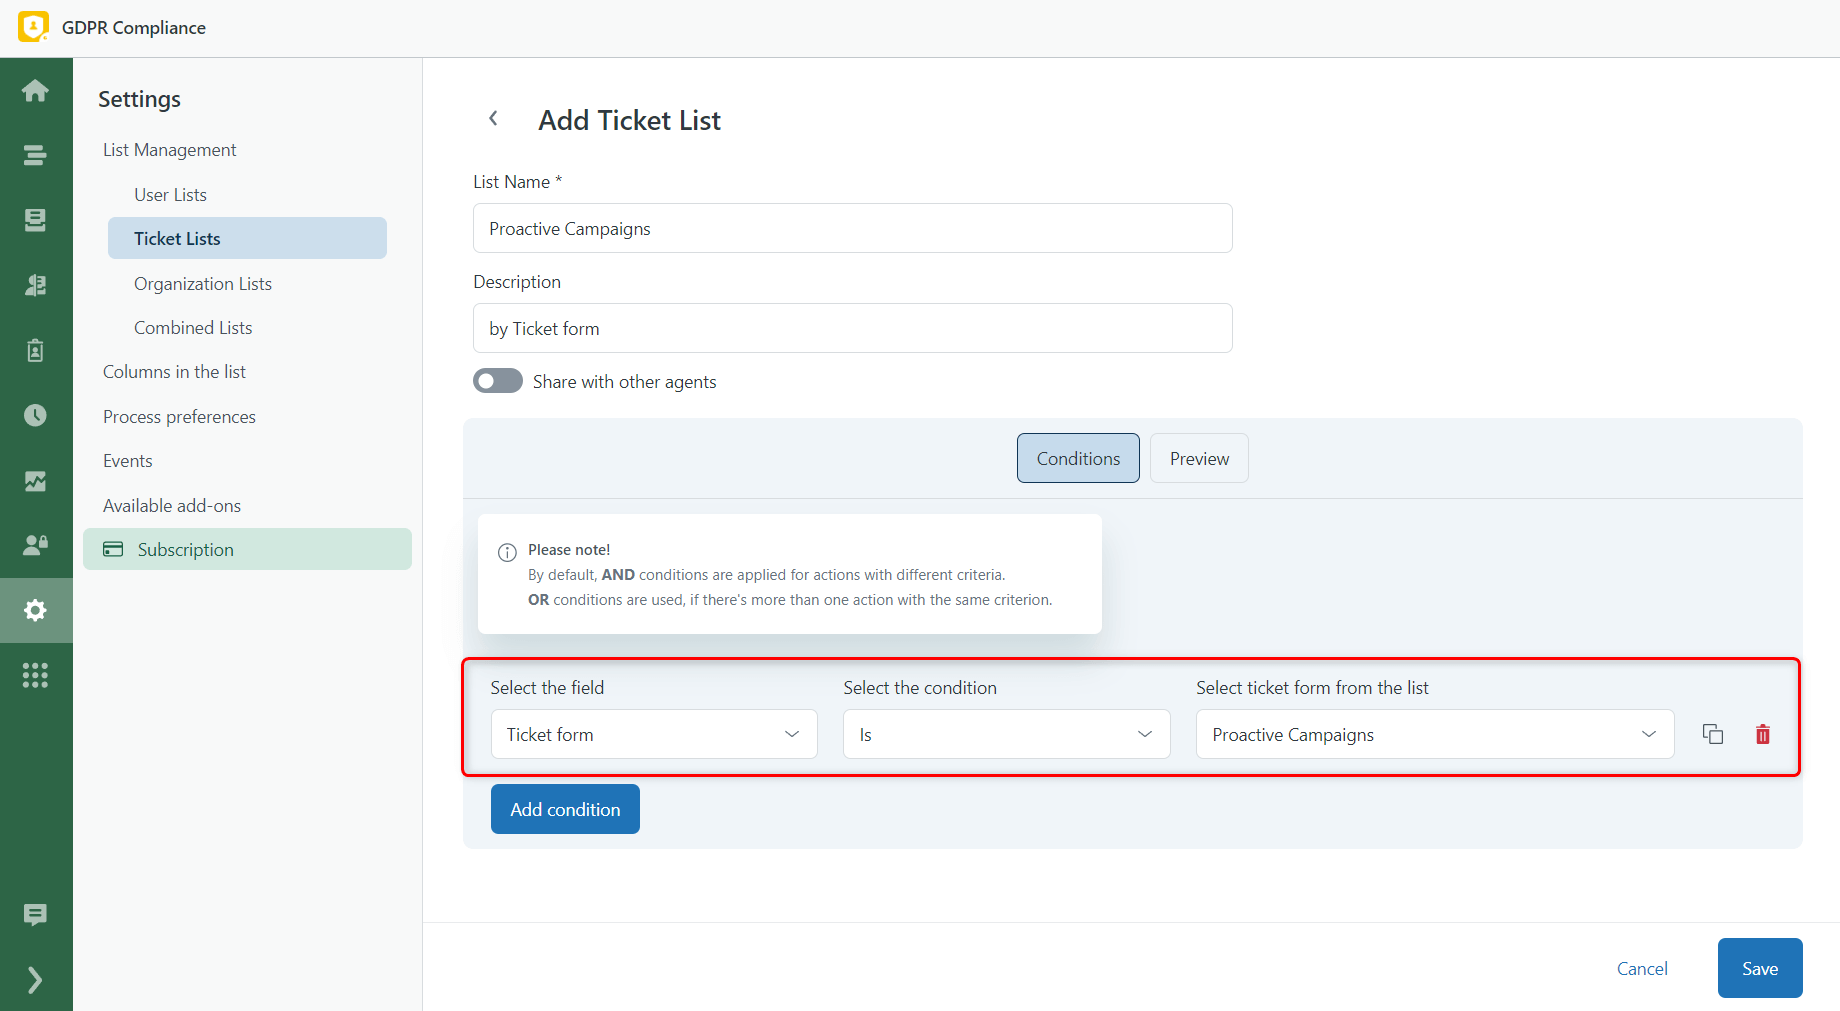
Filtered by Ticket Form
Zendesk users can create different ticket forms depending on the purpose of the tickets and the data they want to point to. So, it’s possible to filter your tickets using this criterion. All you need is to select a Ticket Form field and choose an item from the drop-down menu.
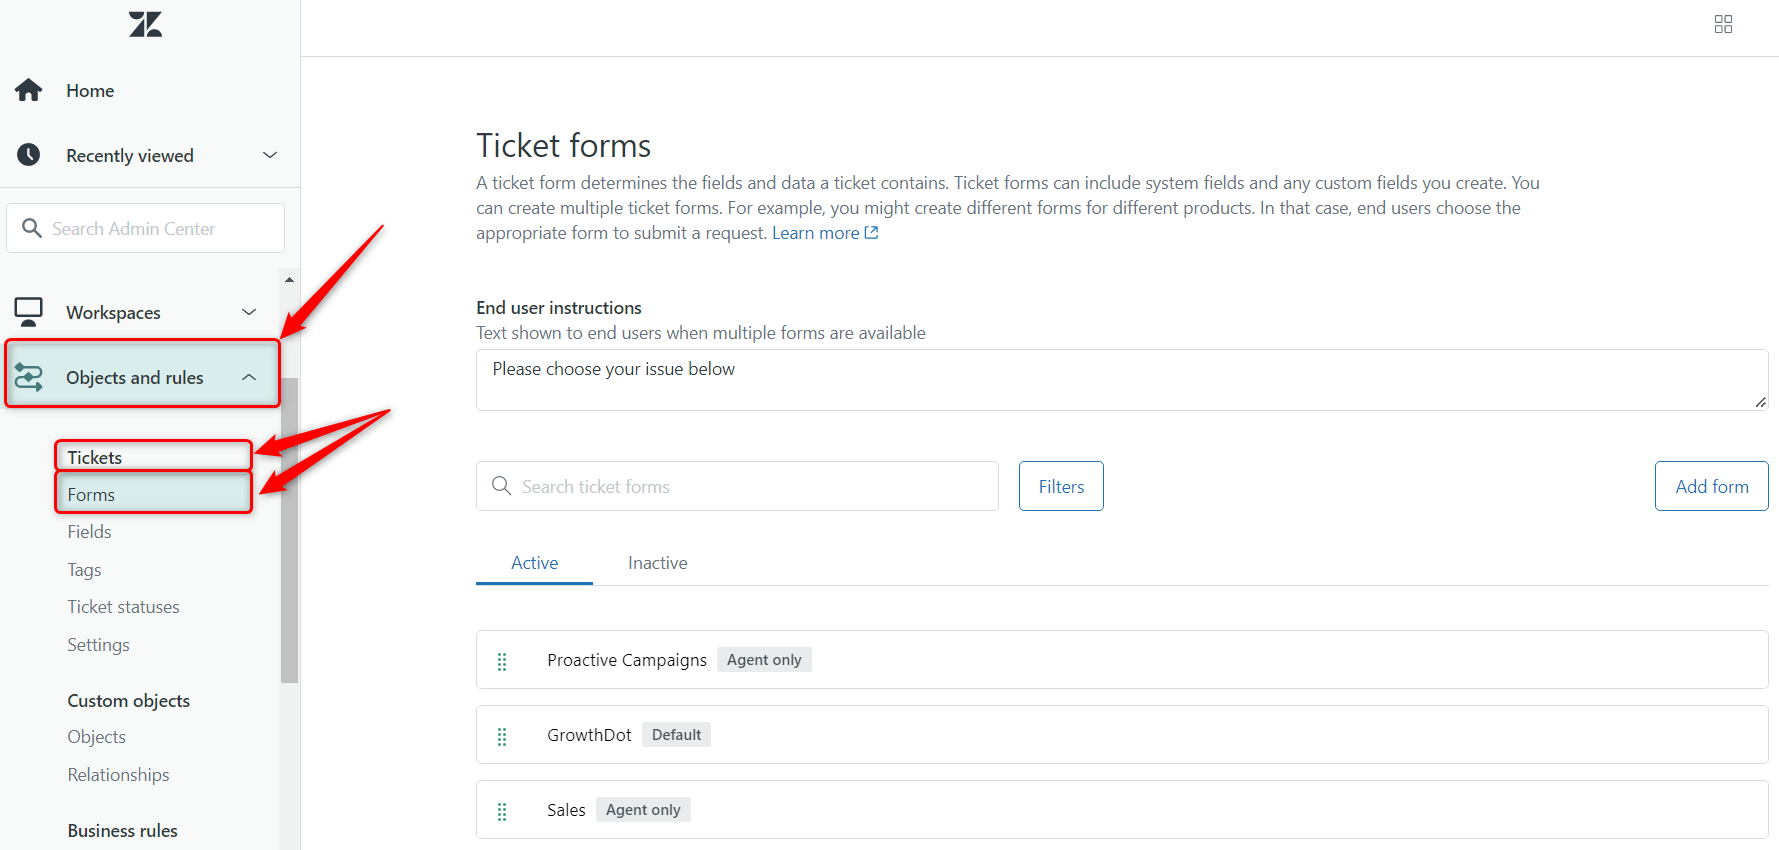
To create a new ticket form, go to the Admin Center > Objects and rules > Tickets > Forms. Then, click Add form button in the top right corner.
Filtered by Brand
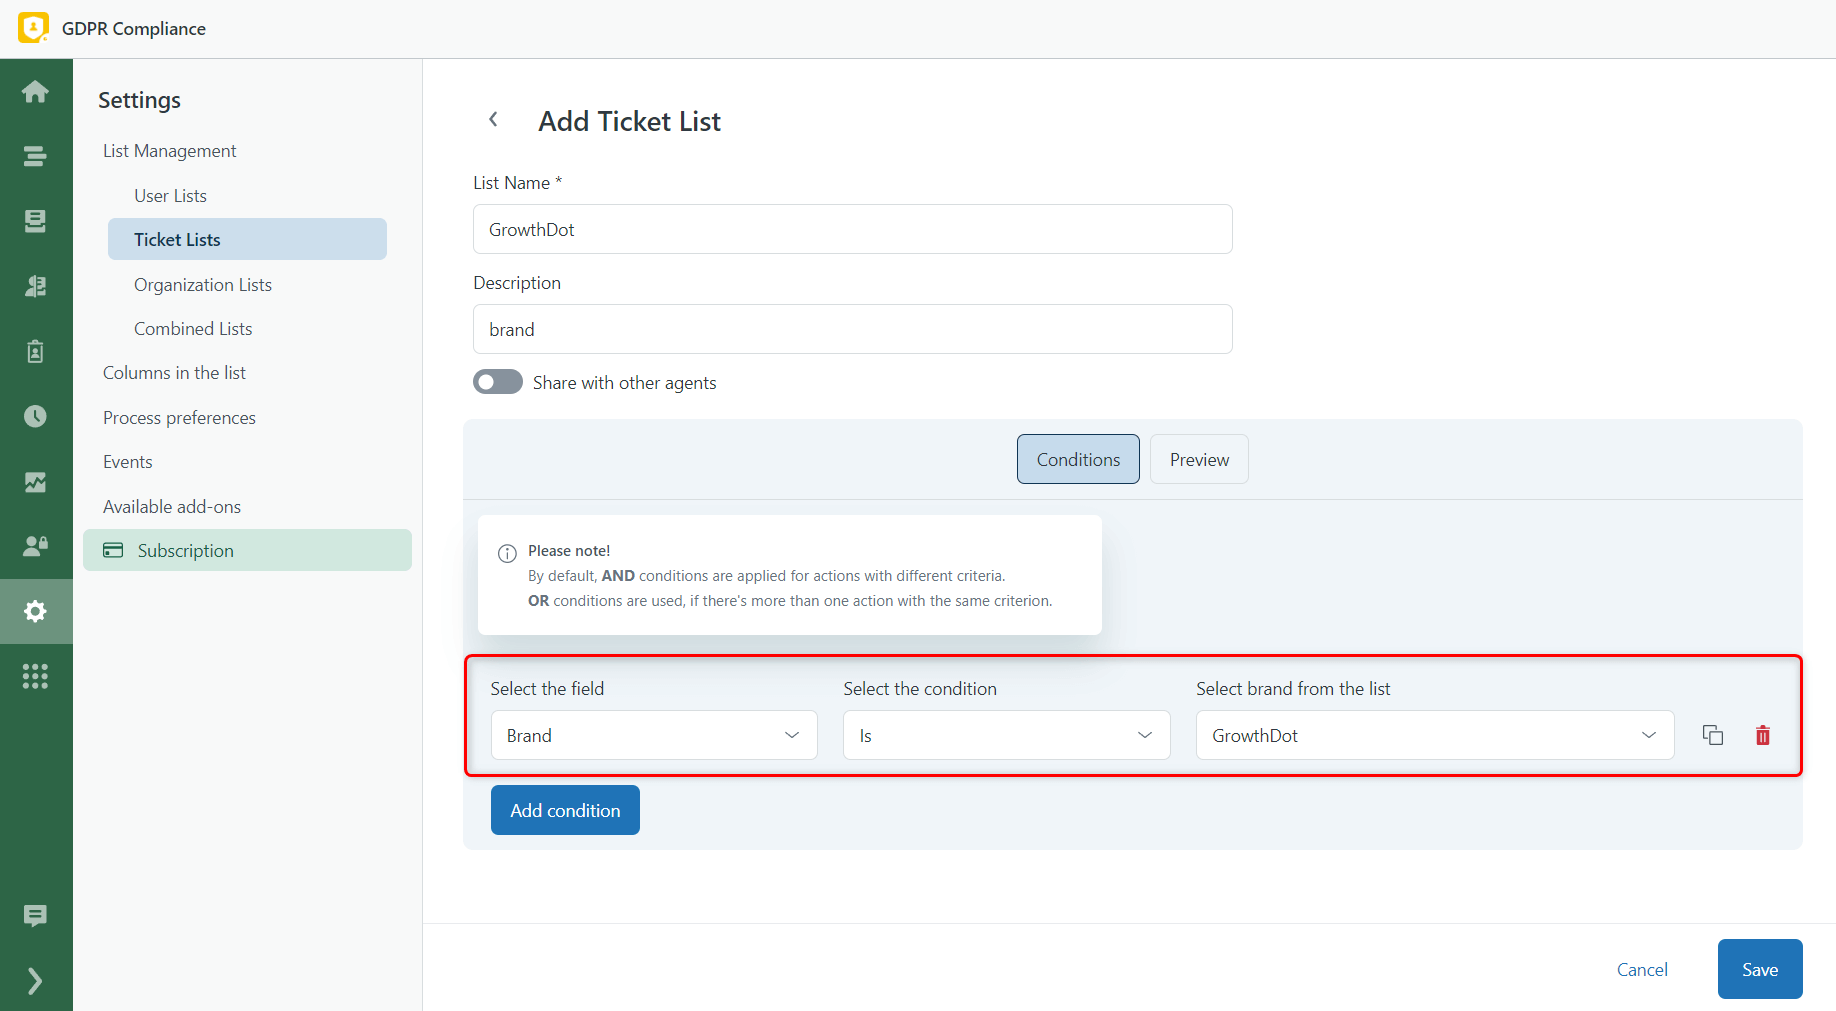
You also can process tickets with a specific brand. Just create a list, where you need to set Brand as a field and type the brand name.
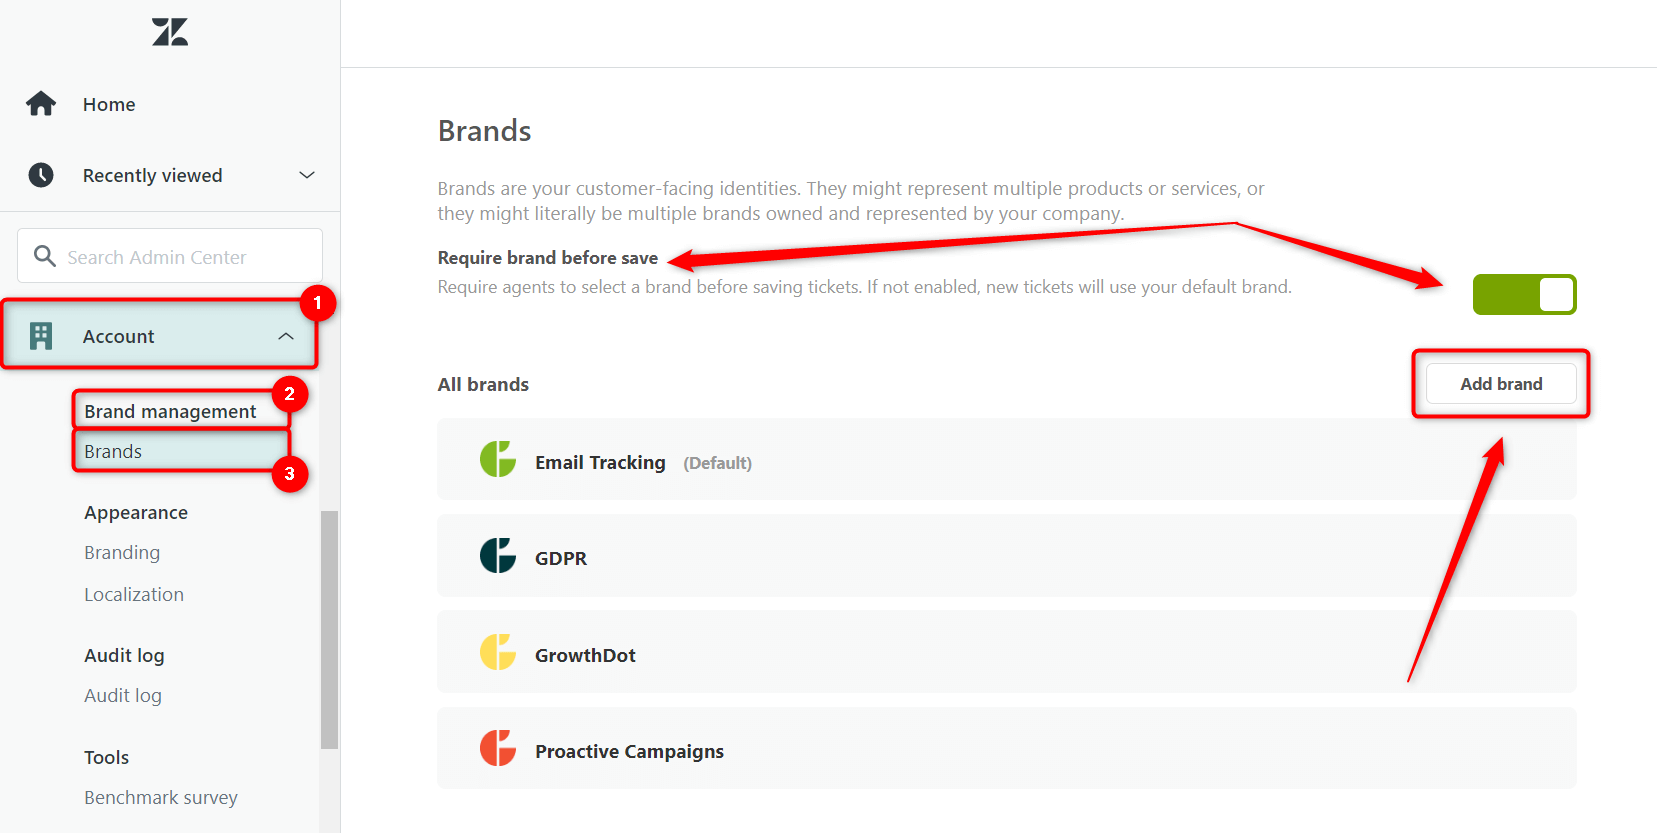
By the way, to add a new Brand, go to the Admin Center > Account > Brand Management > Brands. Next, click the Add brand button. Besides, decide whether a brand is a requirable element that agents must select in tickets. For this, toggle on/off Require brand before save.
Creating an Organization list
As you can assume, the organization lists making process is the same as for User and Ticket lists. The difference is in data type and fields available.
To create an Organization List:
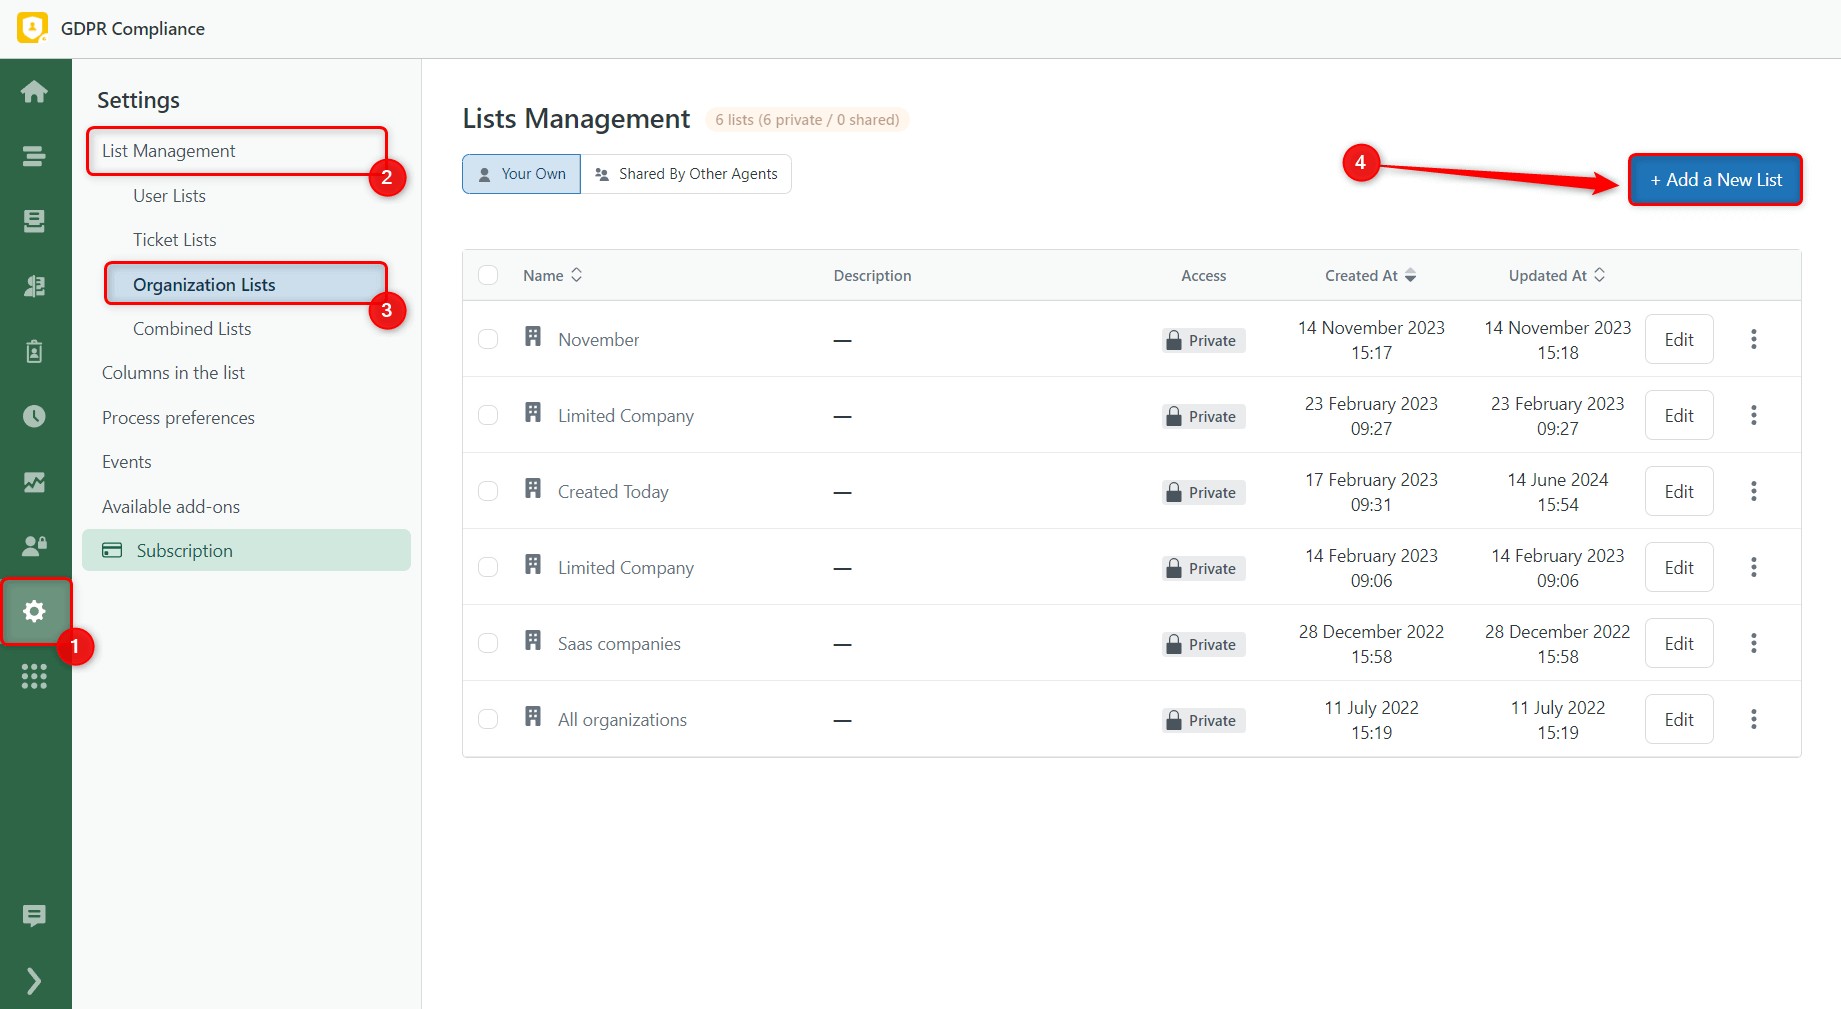
1. First, open the Settings page, and then go to the Lists Management tab and click the Organization list. In the upper right corner, click the +Add New List button.
2. Then, name the list and set the necessary Conditions. For example, we want to see organizations that belong to the IT sphere in the list. Previously, we added some Details to such organizations, so now we can use this criterion for filtering.
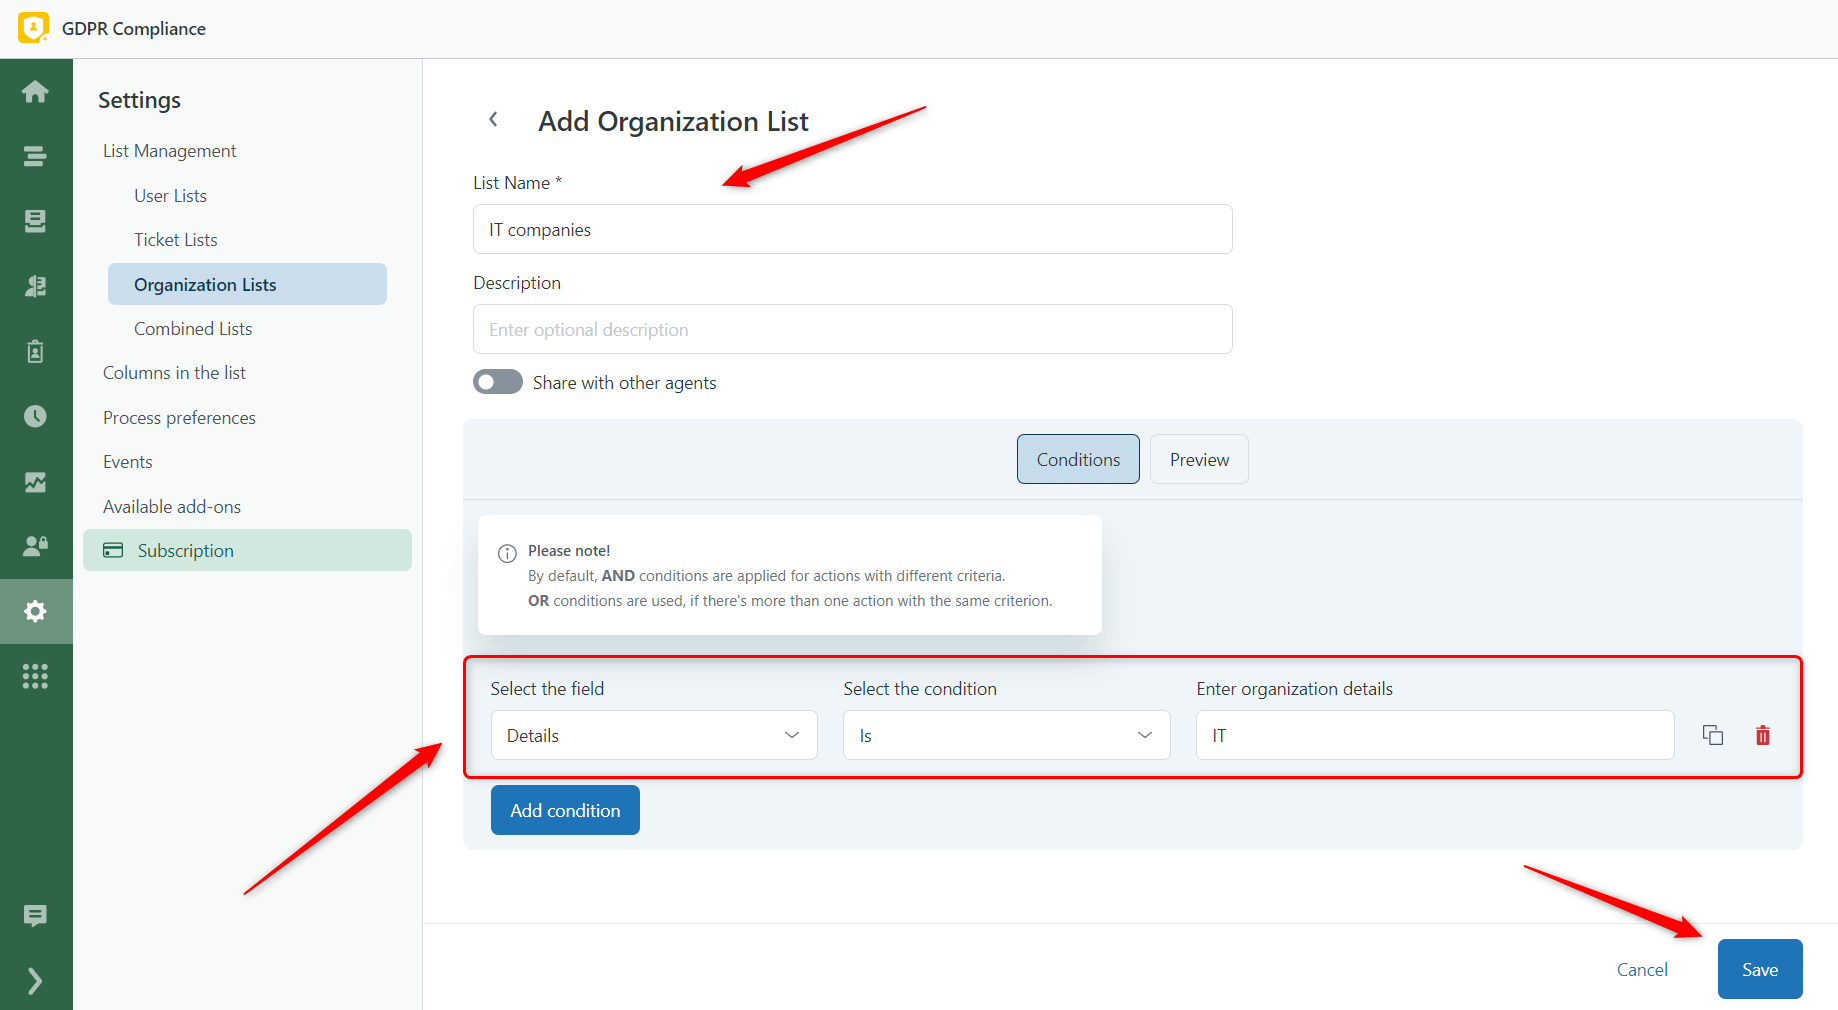
To finish the process, click Save.
When you are done, you can run the needed data process. You can contact us around the clock in case of any additional questions.


