How to delete data in GDPR Compliance for Zendesk
-
GDPR Compliance
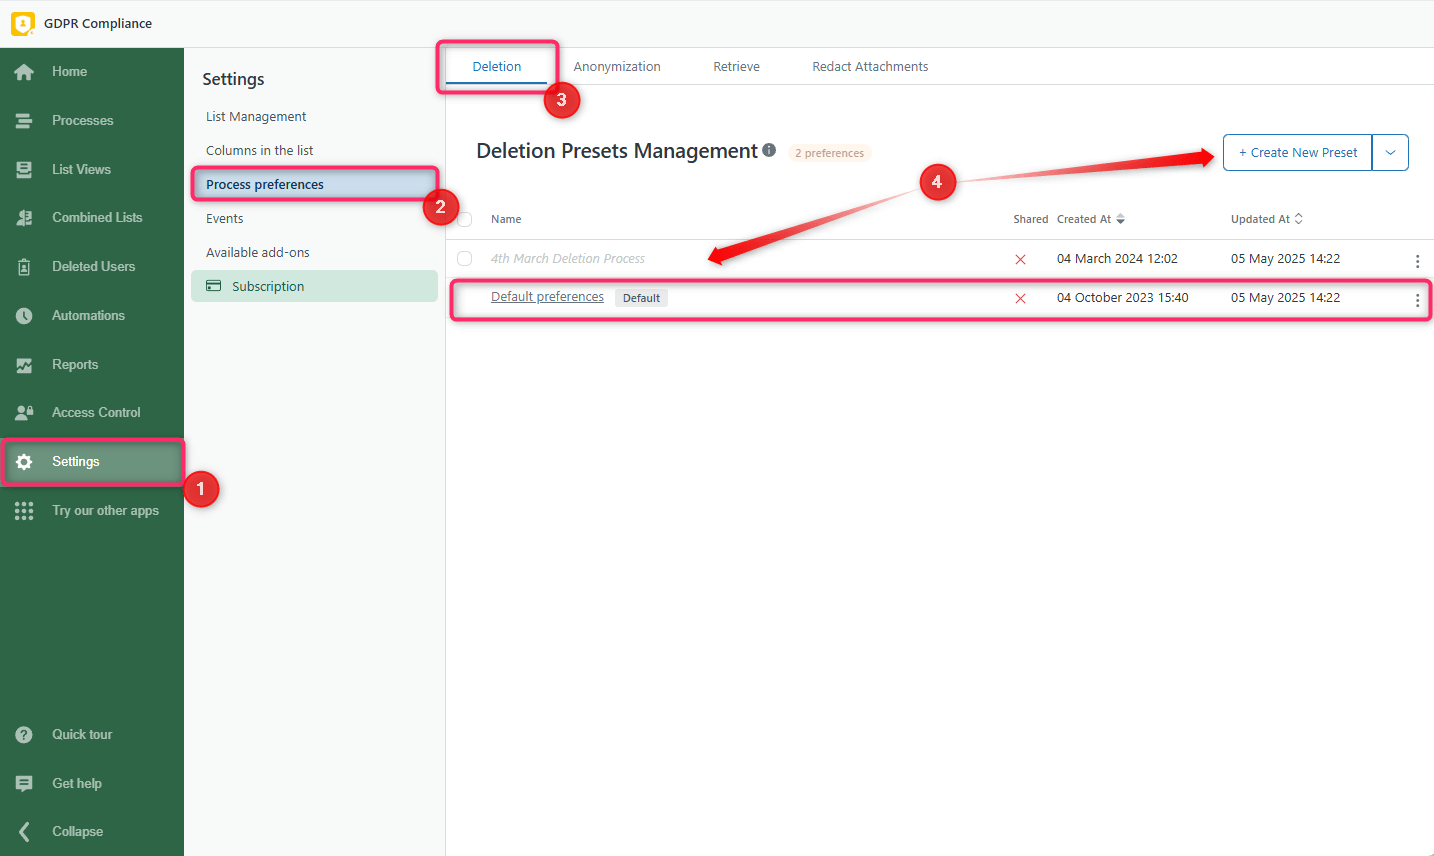
As you may know, you are required to delete personal data after the end of customer services according to European and Californian privacy protocols. Let’s dive into the detailed overview of the process. First, we suggest defining the info you want to delete. To do it, go to the Settings tab > Process Preferences > Deletion. Here, you can manage your default preset or create a new one.
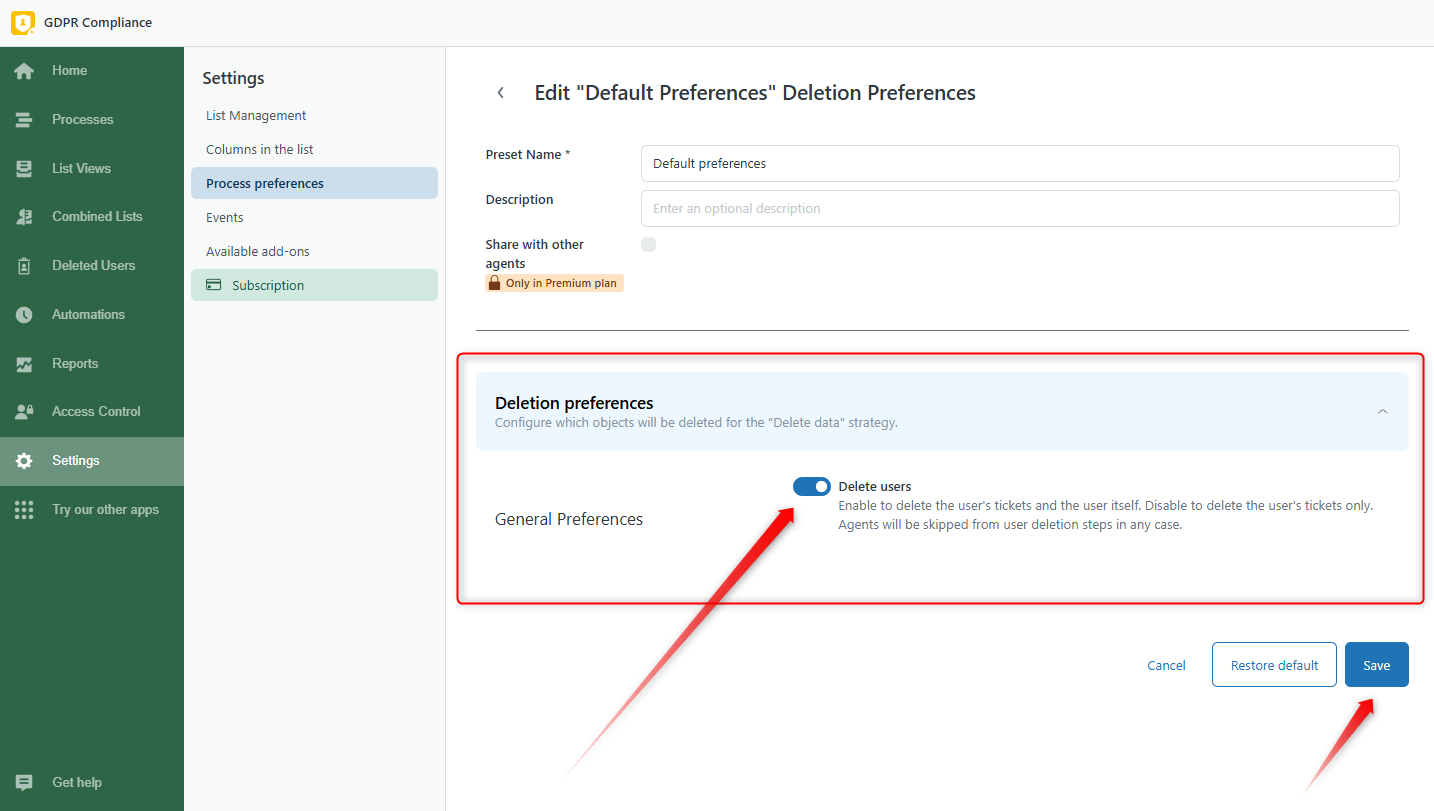
When creating or editing a preset, toggle the Delete contacts option to remove contacts with tickets permanently. If you need to delete only tickets, disable this option. Also, remember to save the changes.
You can launch the deletion process from several places in Zendesk. So, let’s explain every method.
Deleting data for every single user from the list of all end-users in Zendesk
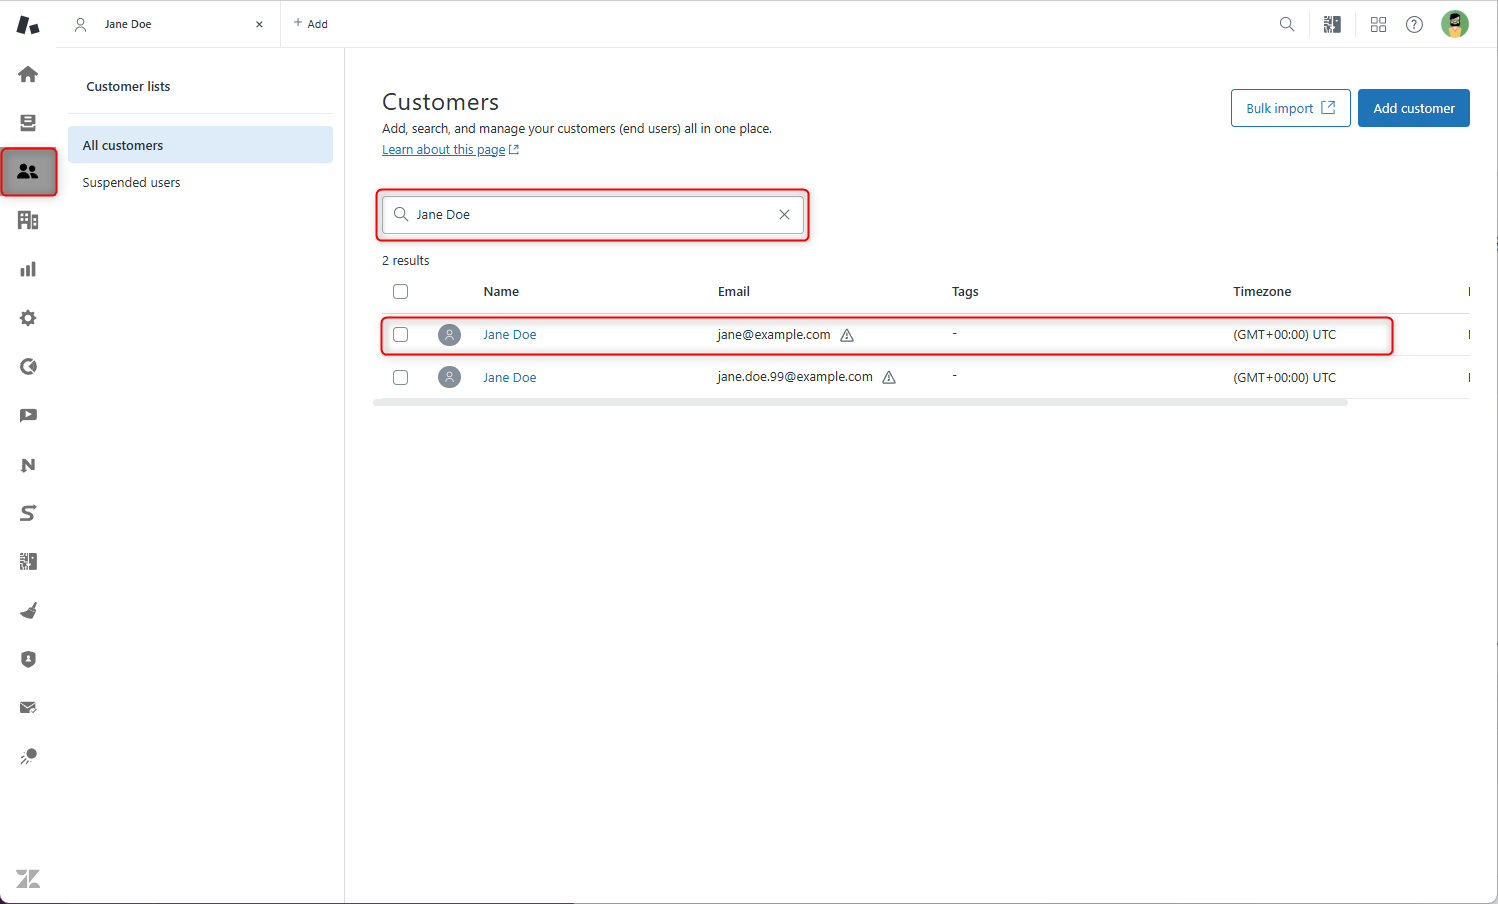
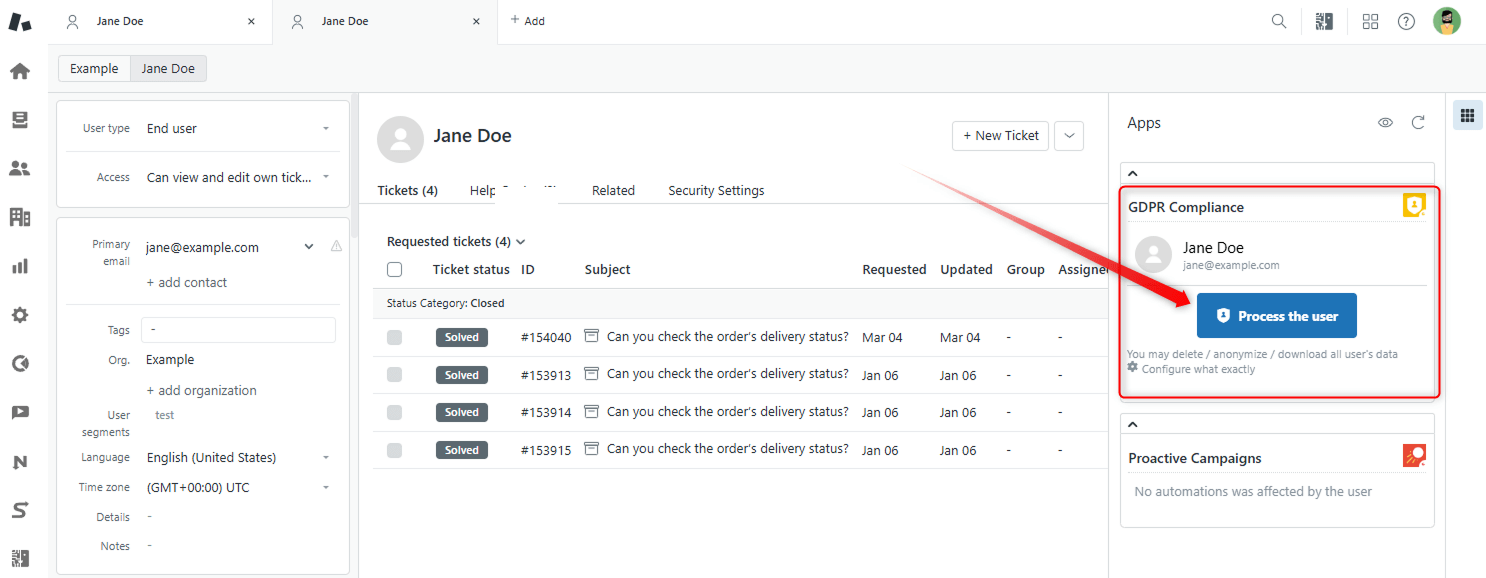
The first method is deleting data for every user from the list of all end-users in Zendesk Support. That means you need to: 1. Go to the Customers tab in Zendesk Support and use the search bar to find the required user. Then, click on their name to open their profile.
2. Find the GDPR app and click Process the user on the sidebar.
3. Then, you will be taken to the Processes tab where you must set up three main steps before data deletion. At first, name the process, select Delete Data, and click the Next button.

4. Next, choose a Preference preset, or leave the default one. Also, you can configure which objects to delete.
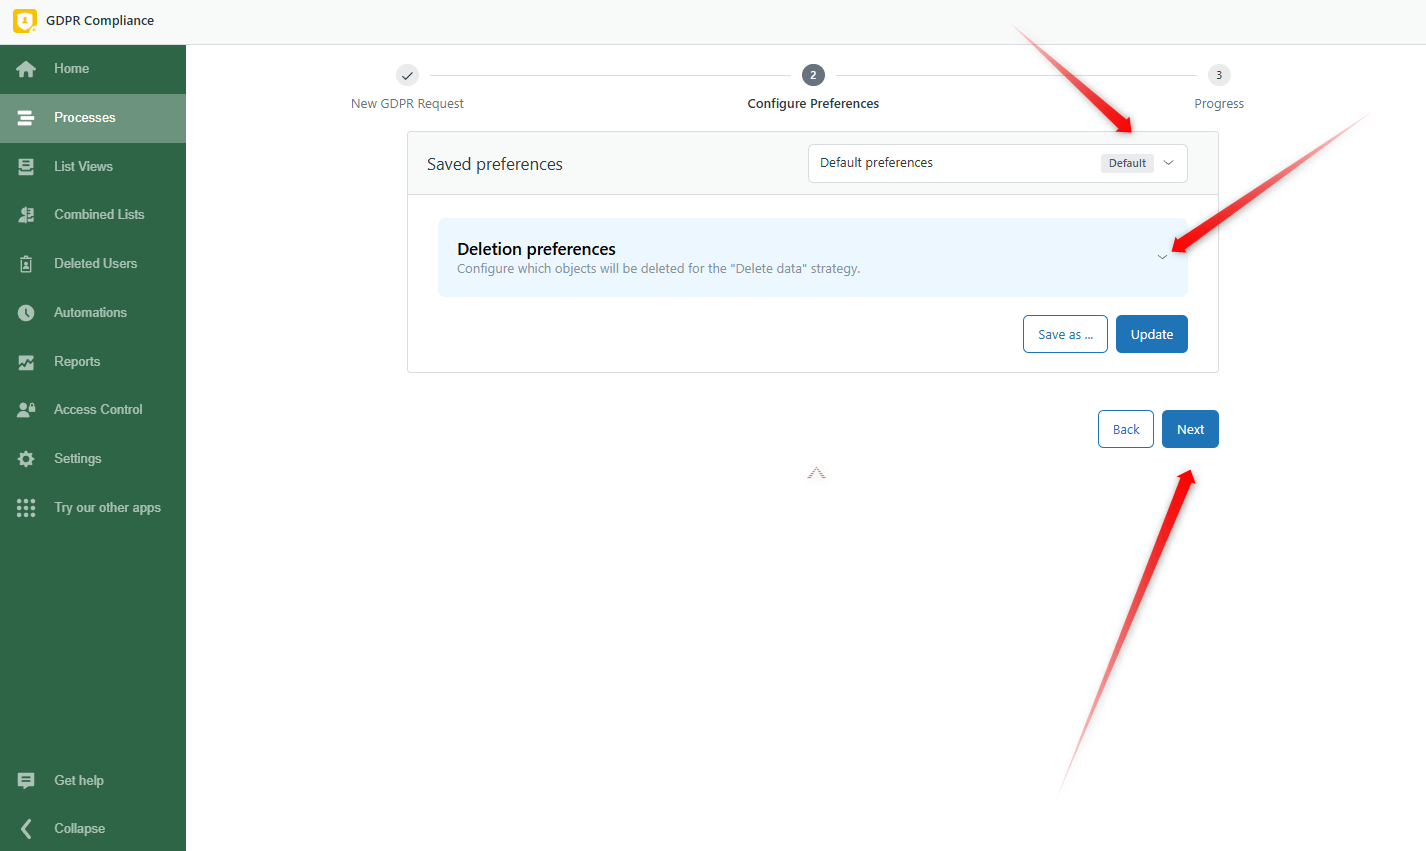
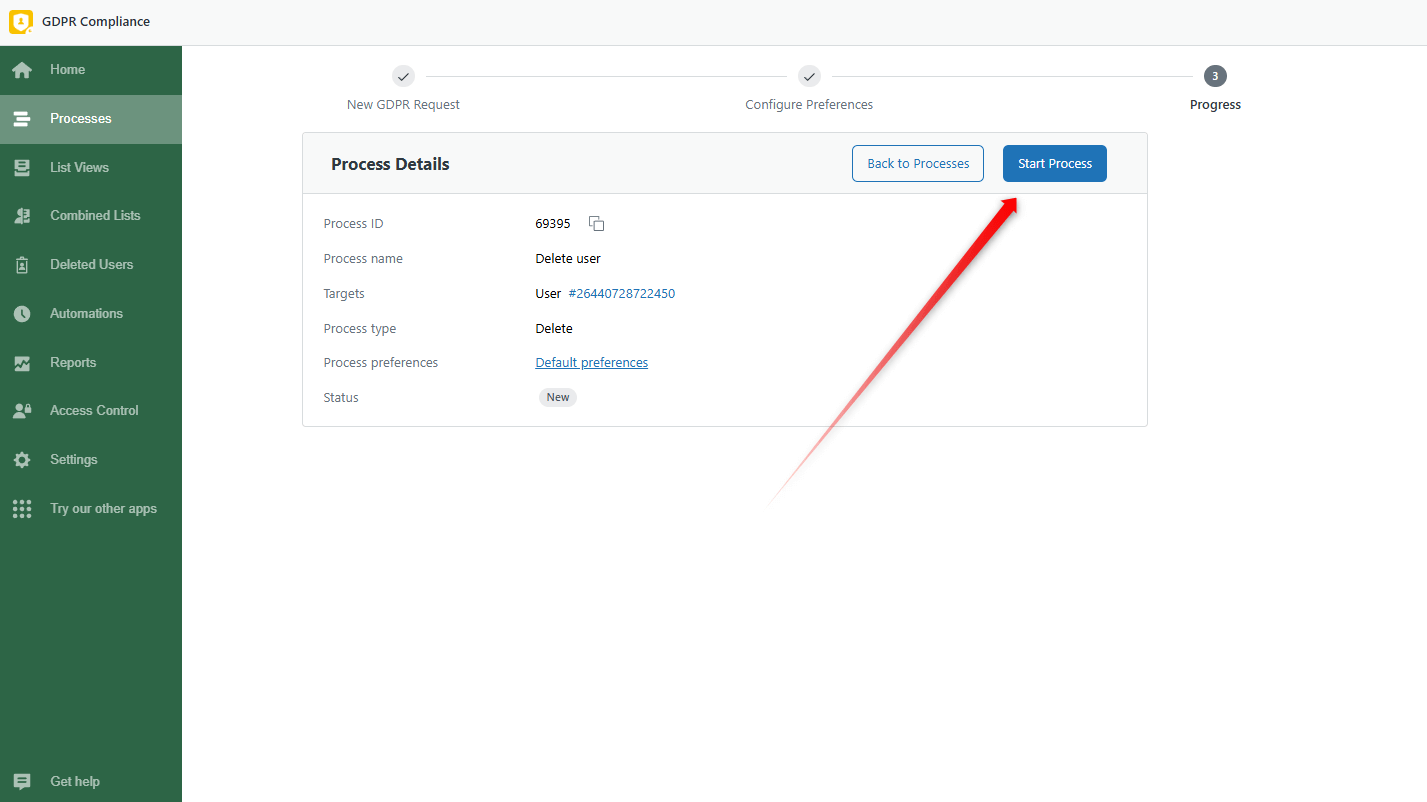
5. Finally, click on the Next and Start Process buttons.
Deleting from the specific ticket
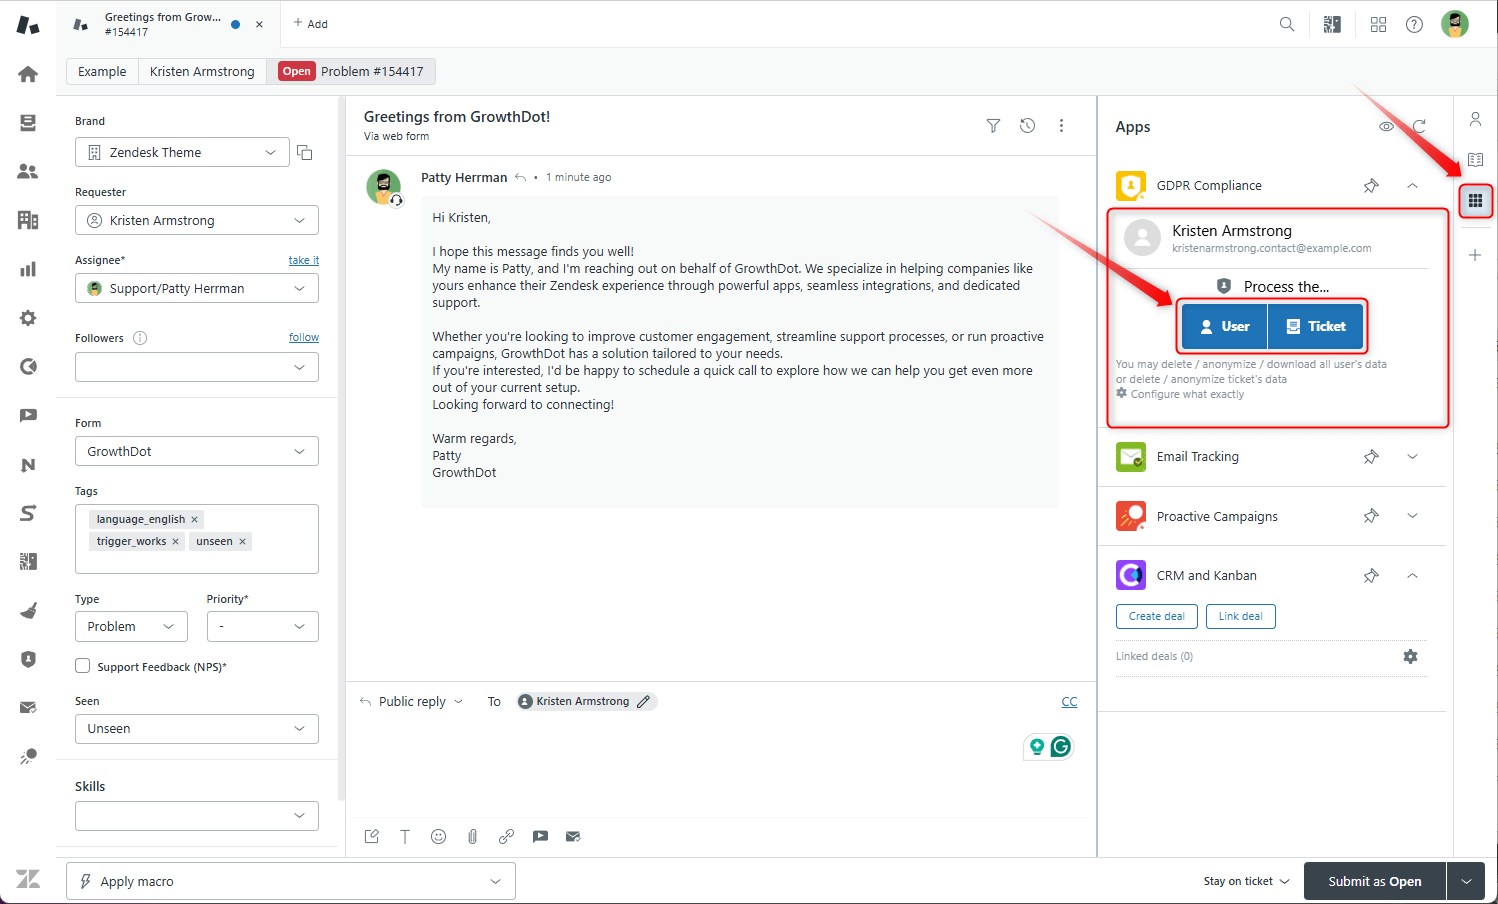
The second approach is Deleting directly from the specific ticket. 1. Open the Views tab in Zendesk and select the ticket. 2. Click Apps on the right-hand sidebar. Here, you have two options for processing User or Ticket info. So, choose the type of data you want to erase. In the modal window, select Delete data > Preference preset > Proceed with selected users/tickets.
Delete data from the ticket, contact, or organizational lists
Also, you can delete data from Ticket User or Organizational lists inside the app. 1. Go to your GDPR and click on List Views. At the top of the sidebar, select Users, Tickets, or Organizations (we selected user lists).
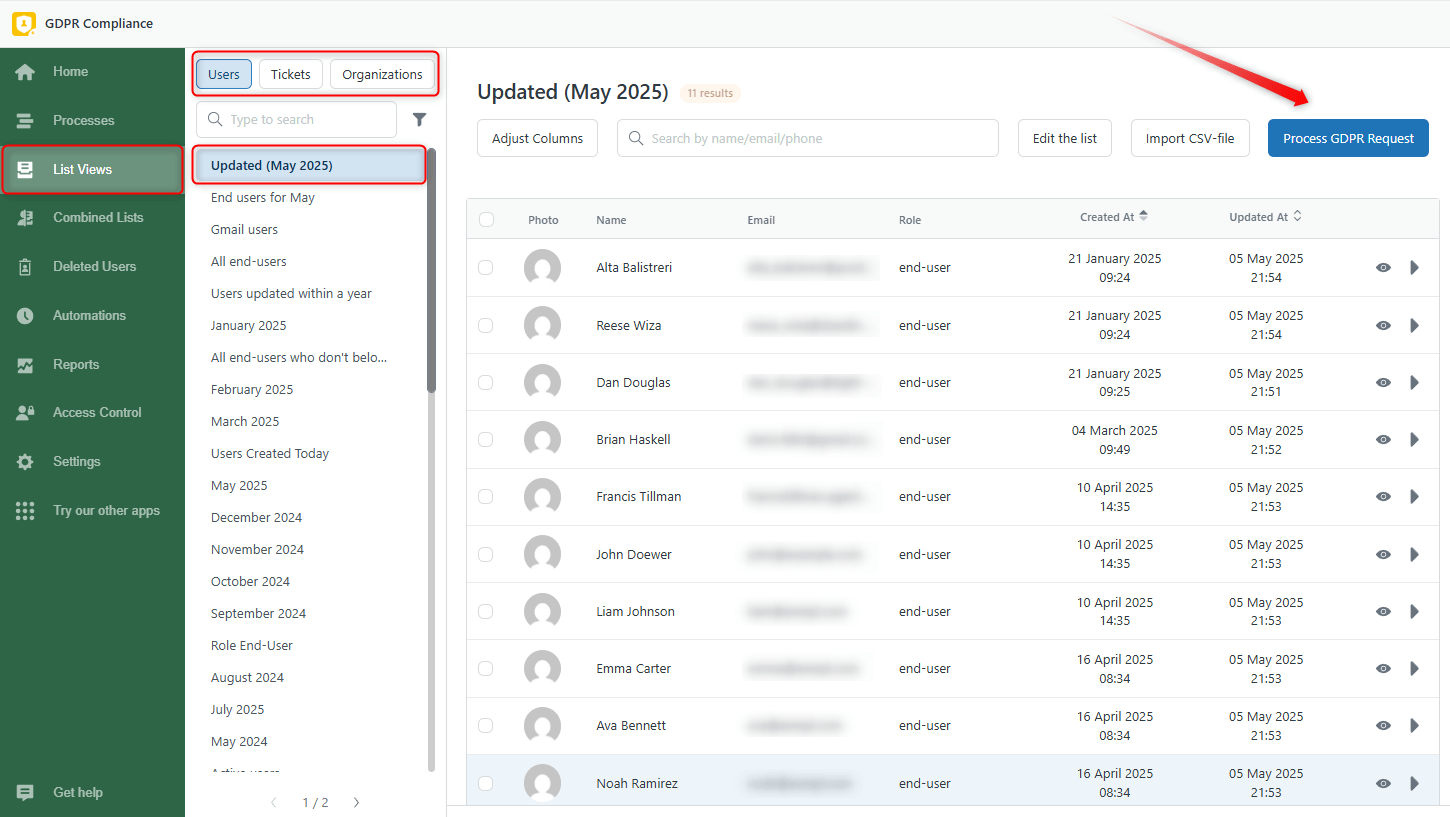
2. Then click on the Process GDPR Request button on the top right corner, choose data deletion and process preference preset, and Start Process.
Also, you may pick out a few contacts to process, click on Process GDPR Request, and perform the next steps for the whole list. 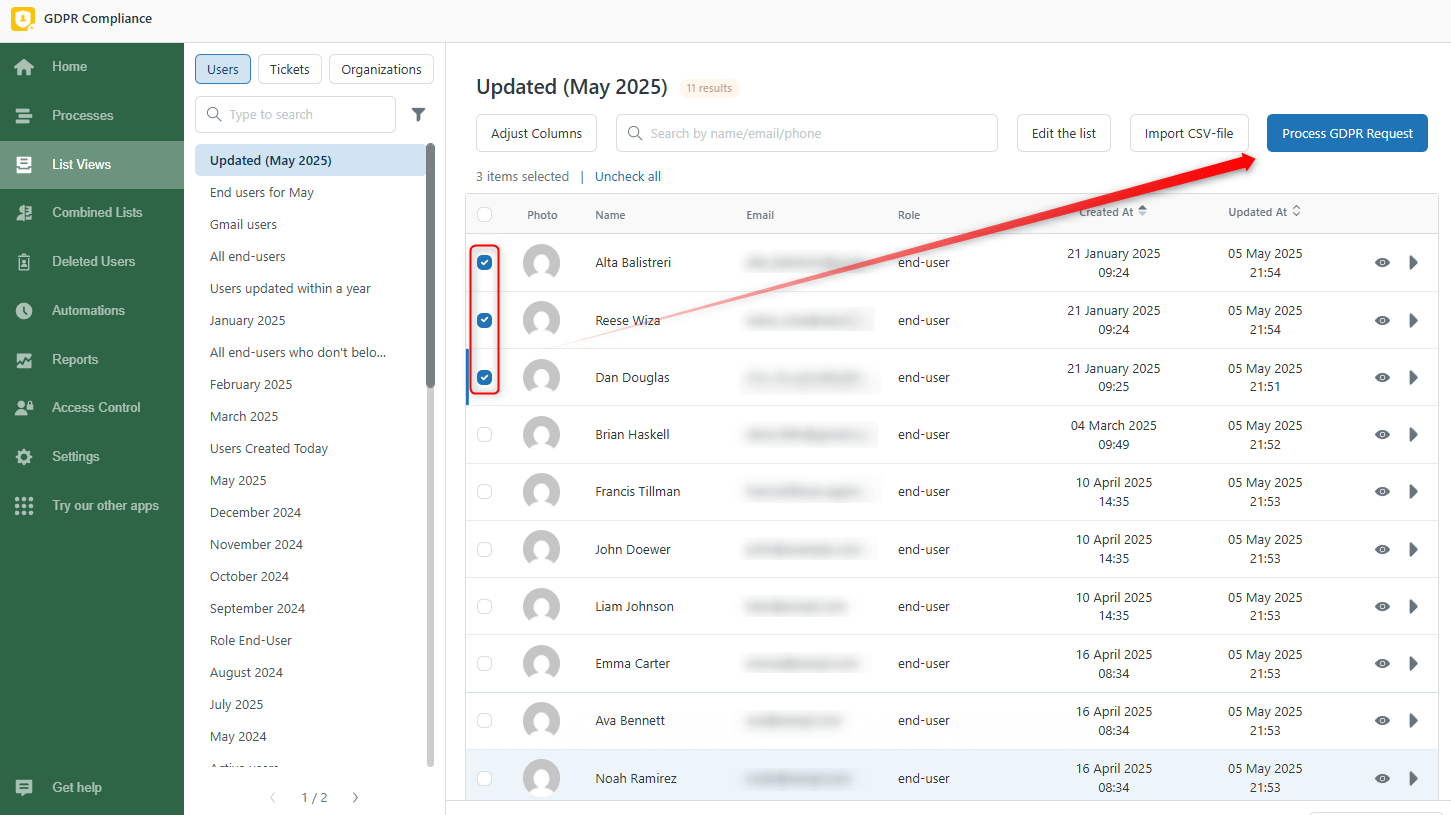
Follow the same stages for Ticket lists for successful data treatment. The following approach allows you to cope with data removal both in mass and for separate users or tickets without clicking through the pages, so try it. Also, use the Play icon to start the process for the exact contact and the Eye icon to open and check the ticket or contact details.
![]()
Besides, you can combine ticket, user, or organizational lists to get more accurate user segmentation and use them for data treatment. Check out our guide on how to create the combined lists. Also, you can start deletion from the Combined Lists tab as shown in the screenshot below.
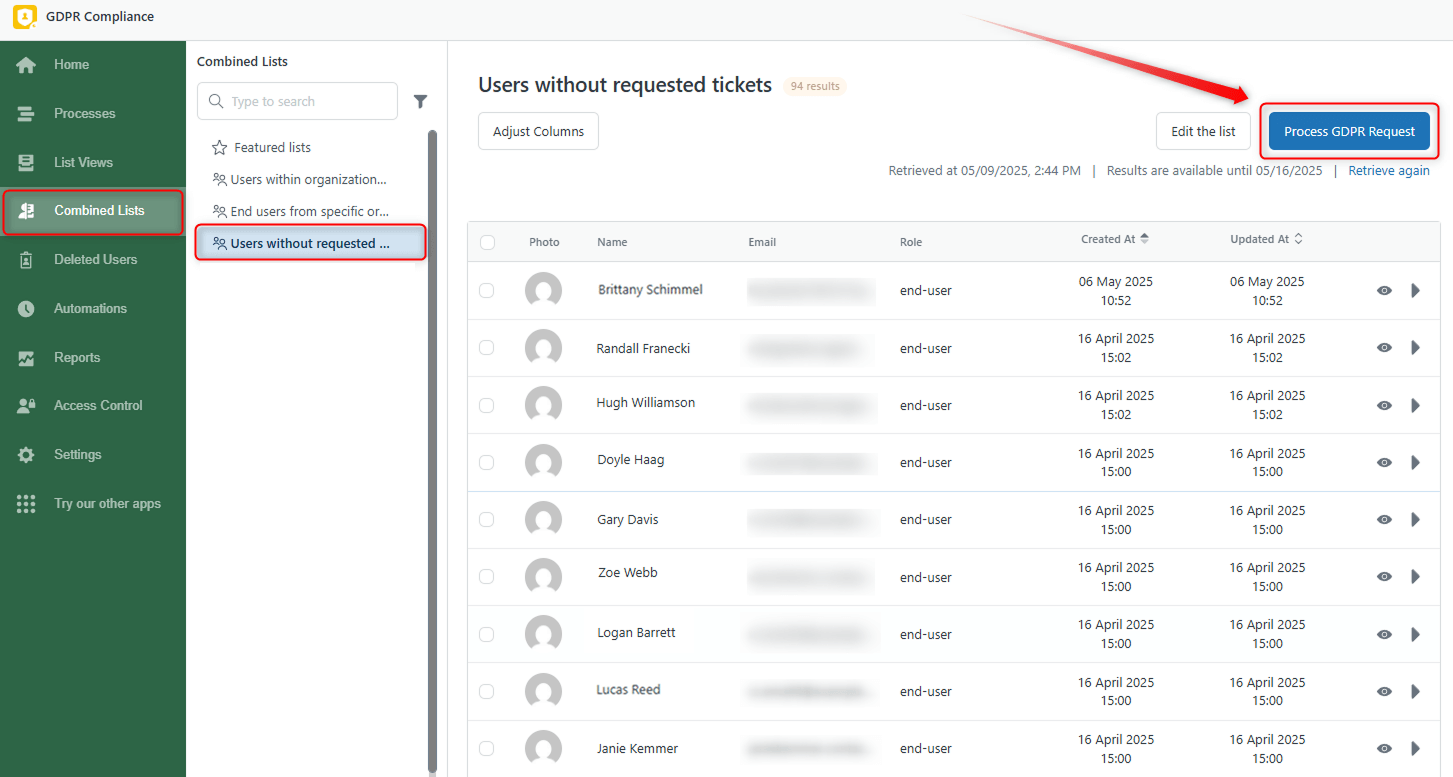
So this is the end of our guide, and we hope it was helpful! Contact us for professional help in case of any questions or problems.
