How to delete data with Purge My Zendesk
-
Purge My Zendesk
The primary function of the Purge My Zendesk app is to permanently delete your Zendesk data. Whether transitioning to a new platform, winding down a project, rebooting your business, or ensuring compliance with data regulations, our app is the solution. In any of these scenarios, Purge My Zendesk guarantees thorough and complete data cleanup.
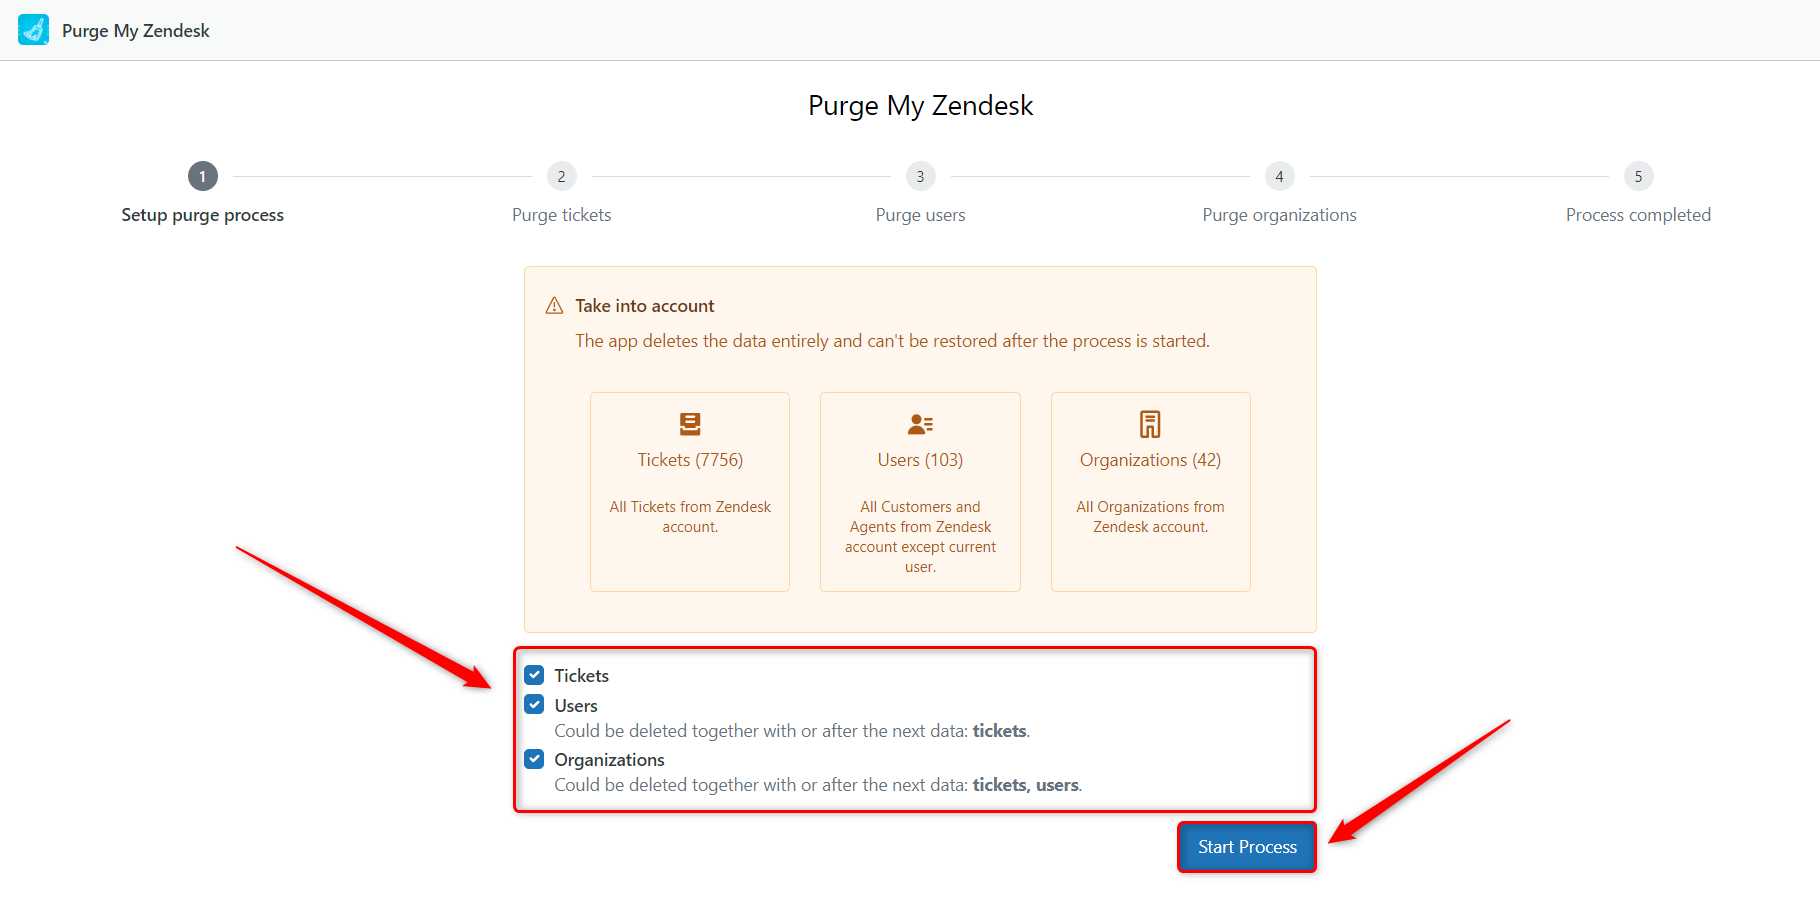
The workflow is as easy as possible. After the installation, app authorization, and successful payment, you should configure the process by choosing to purge:
- Only tickets
- Tickets and Users
- Tickets, Users and Organizations
Then, click Start Process.

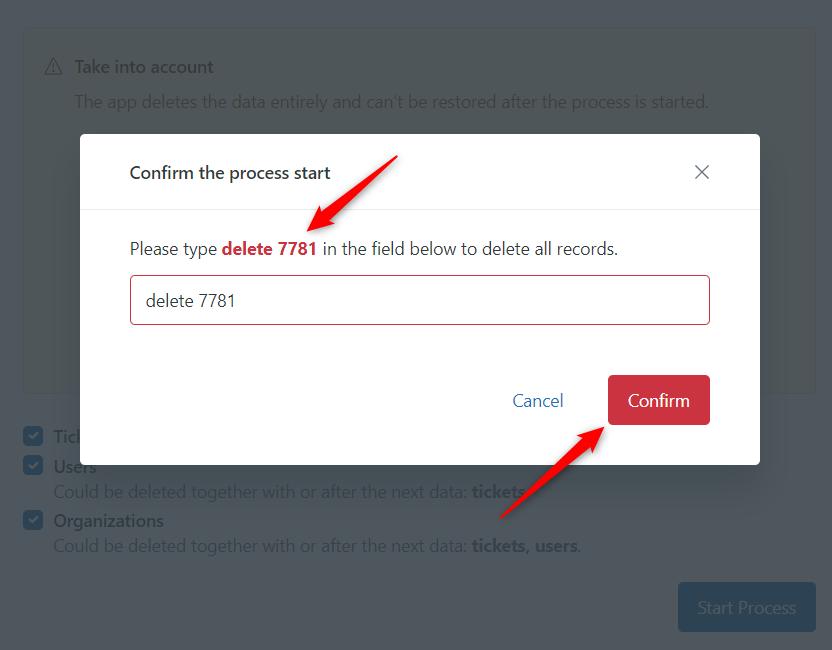
In the modal window, type in the highlighted text to verify your intention to delete all records and click Confirm.

The app then steps through clearing all tickets, users, and organizations. When it’s done, you can see the amount of each deleted data type.

Can I filter the data for deletion?
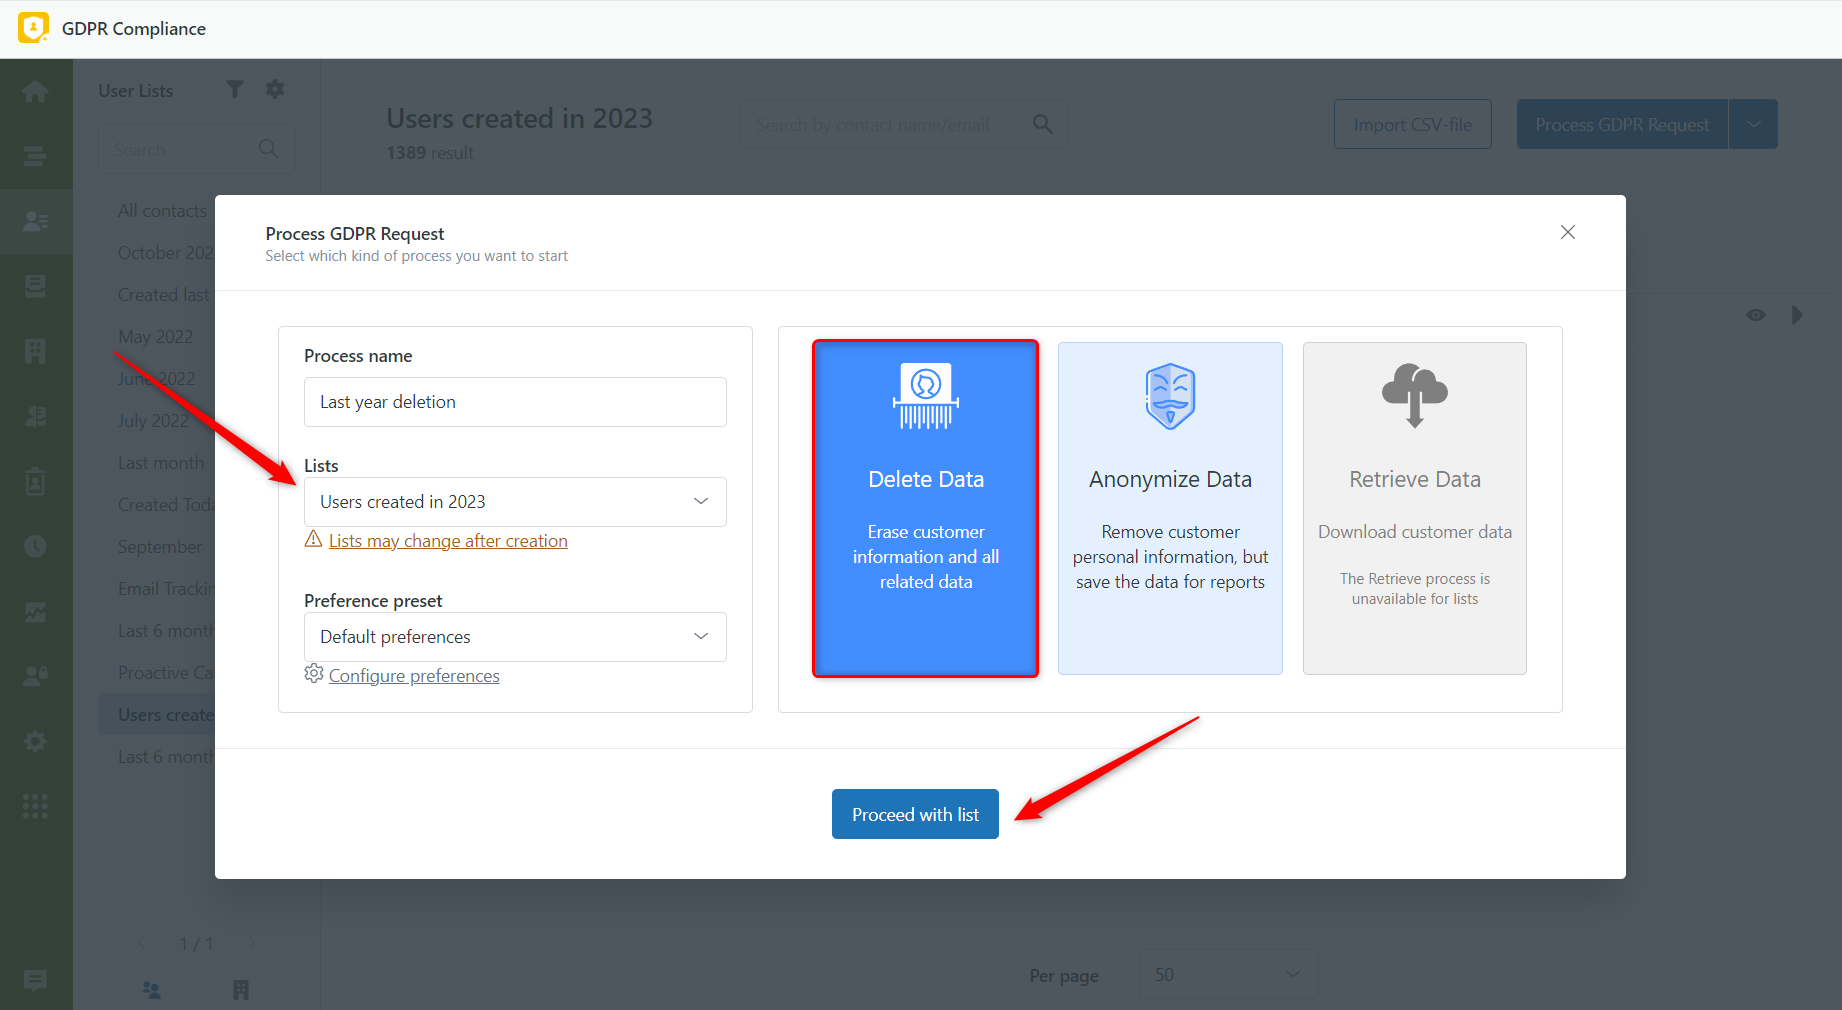
As you’ve understood, Purge My Zendesk doesn’t offer filtering functionality. However, if you need to delete tickets partially based on some criteria, our GDPR Compliance app is the solution. It allows you to create ticket, user, and organization lists with several conditions to erase only the necessary data.

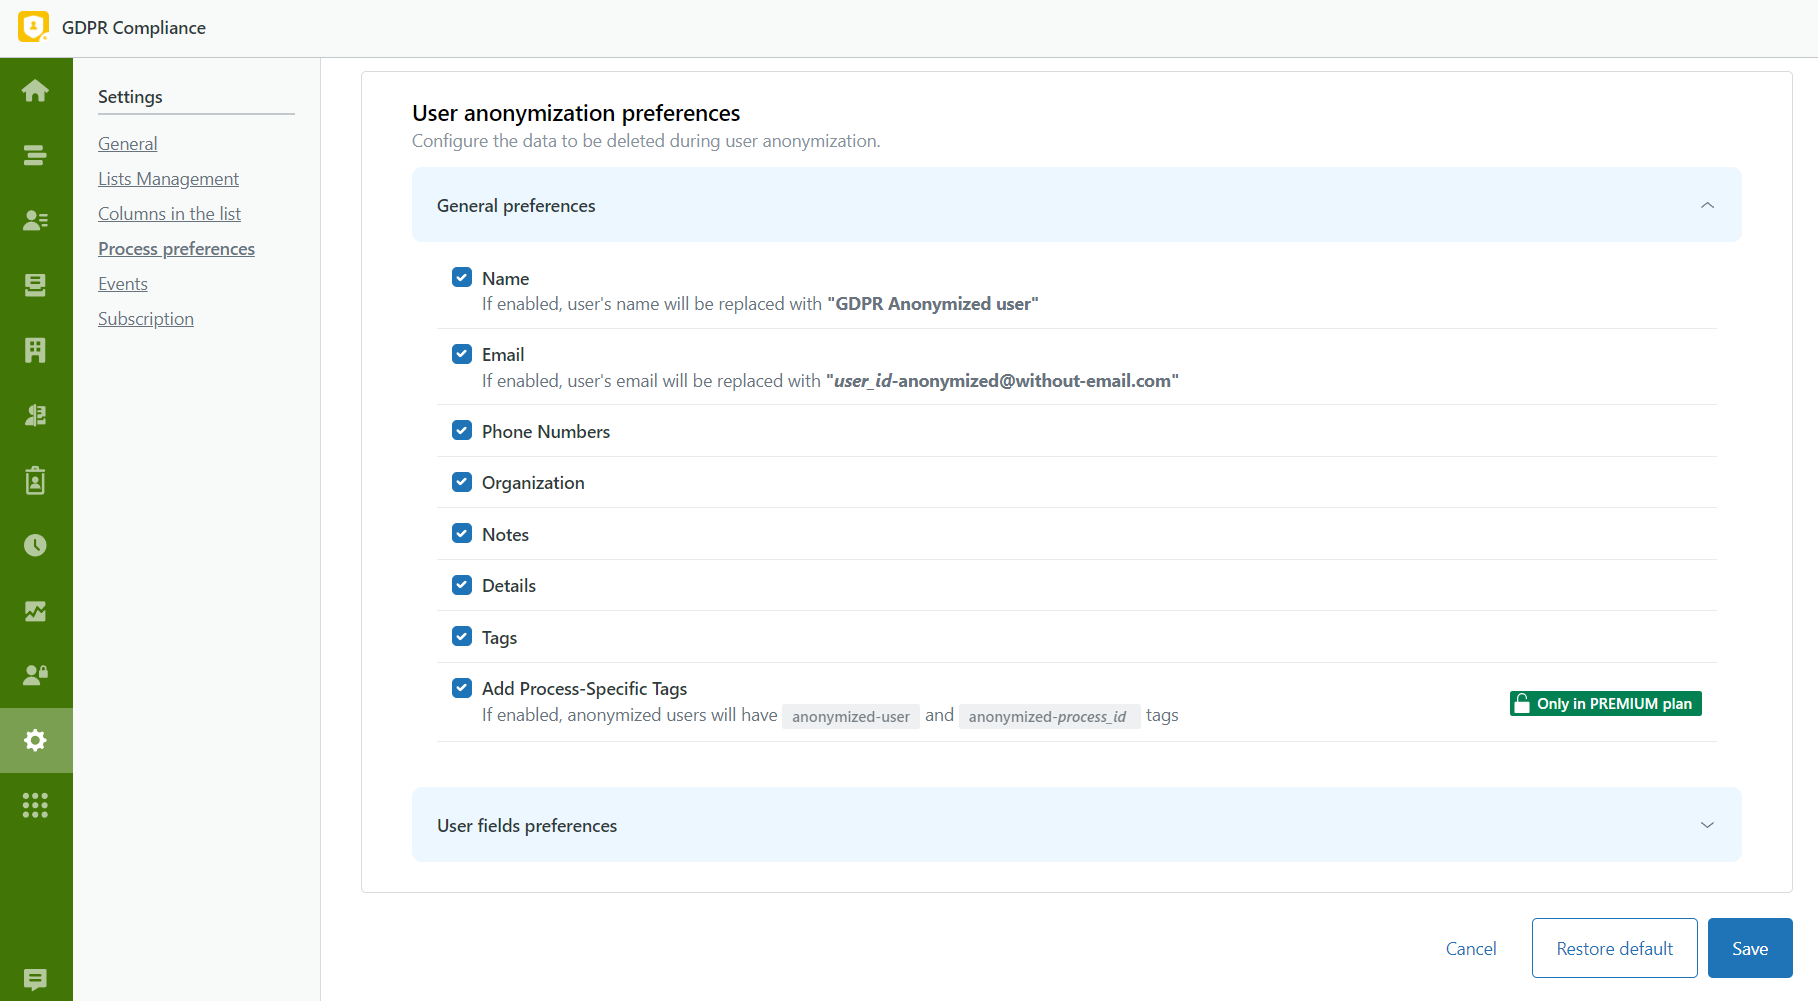
Moreover, the app provides an anonymization option that removes only personal and sensitive information and leaves the rest for your business purposes while complying with GDPR standards.

GrowthDot offers different possibilities for leveraging your Zendesk data. Just choose what best suits your needs. For assistance, contact our support team, which is always happy to answer your questions.


