How to Purchase Email Tracking
-
Email Tracking
We are grateful you decided to make a subscription to the Email Tracking app for Zendesk. It doesn’t matter whether your trial has expired or you decided to purchase the subscription during the probational period. The buying process is similar in both cases.
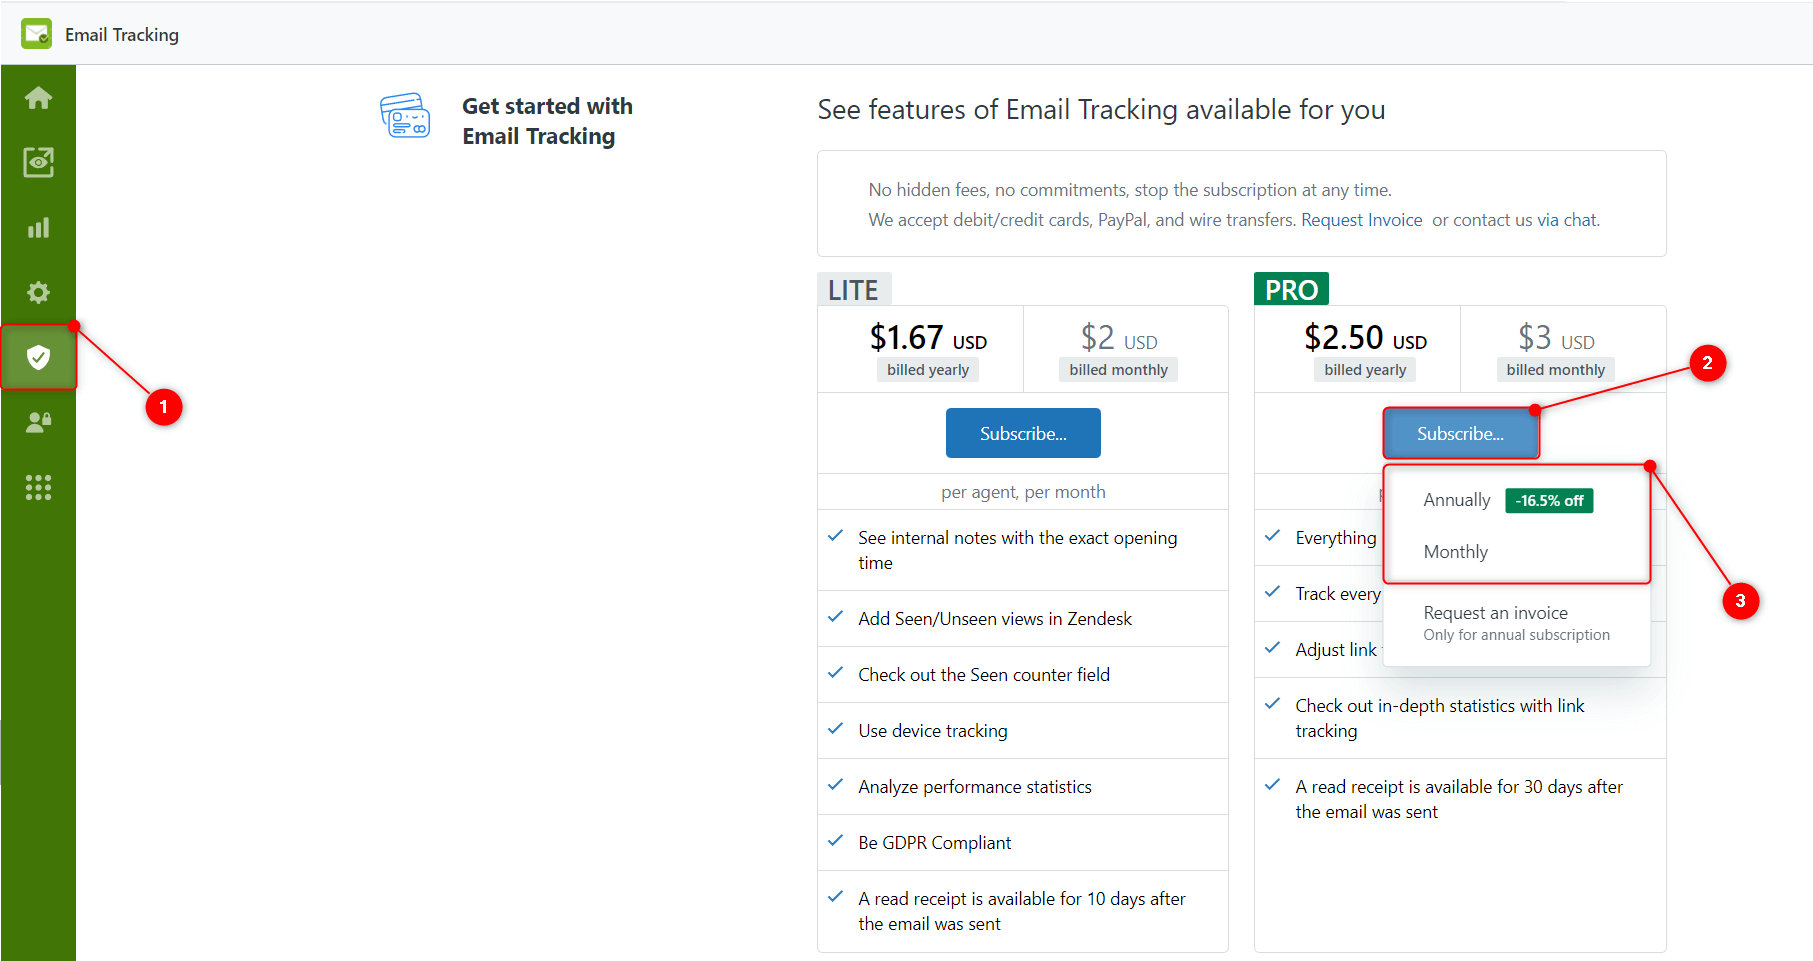
To get started, go to the Subscription page in the application and choose what type of subscription will be applied. There are two Plans available: the LITE Plan and the PRO Plan. So, find out more about each feature they offer and choose the payment frequency. It can either be Monthly or Yearly.

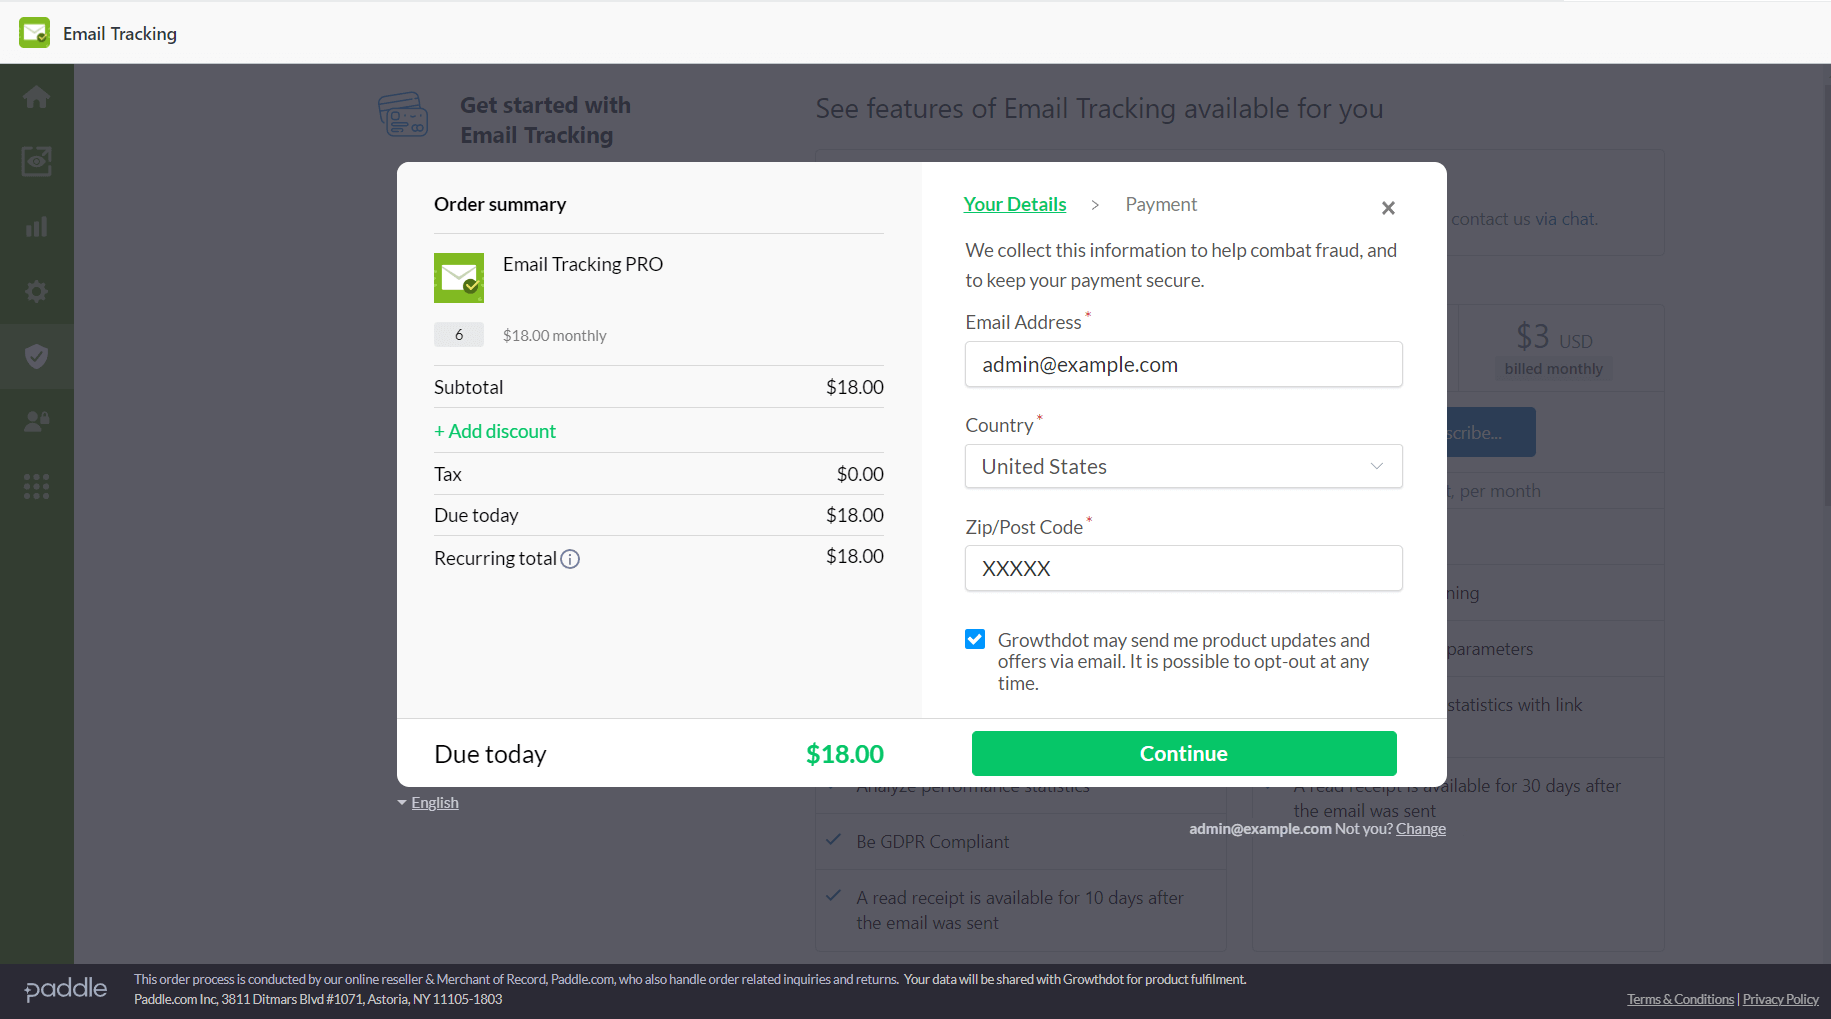
When the modal window is opened, you need to fill in the Email Adress, Country, and Zip/Post Code if it is. Also, put the checkmark if you want to be aware of the application updates and special offers. After, click Continue to select the payment method.

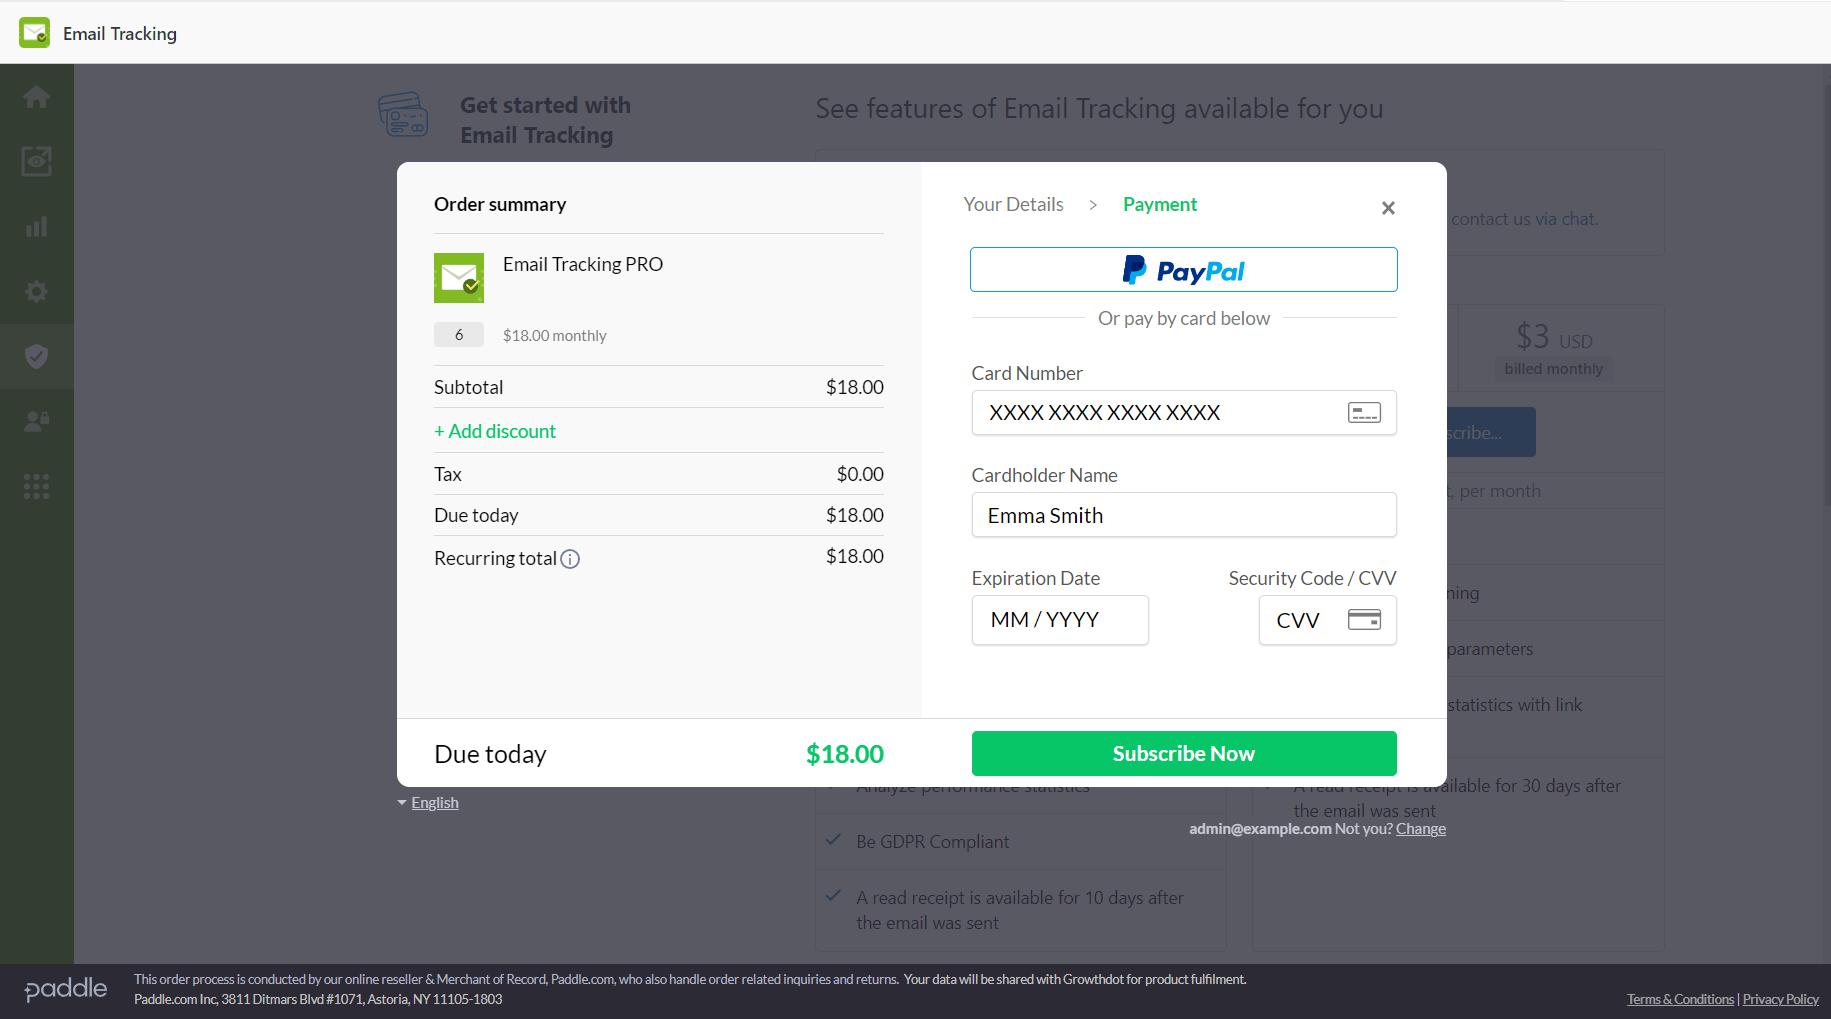
Two payment options are available: to pay by a Credit or Debit Card or to use PayPal. Choose whatever works best for you, but keep in mind that the selected mean of payment will be saved for further processing. Of course, you can always contact our support team to cancel the subscription if needed. So, add your payment details and click Subscribe Now to finish the purchase.

And that's it for purchasing the Email Tracking application. If something is unclear or you have any questions, just contact our support team, and they will be happy to assist you.


