How to start an A/B test campaign in Proactive Campaigns?
-
Proactive Campaigns
Proactive Campaigns enables you to test various elements of your email campaign to optimize its performance. You can analyze the results of each version and make data-driven decisions to improve engagement and conversion rates. With its user-friendly interface, launching an A/B test campaign in Zendesk is a quick and efficient process.
Let’s see how it works.
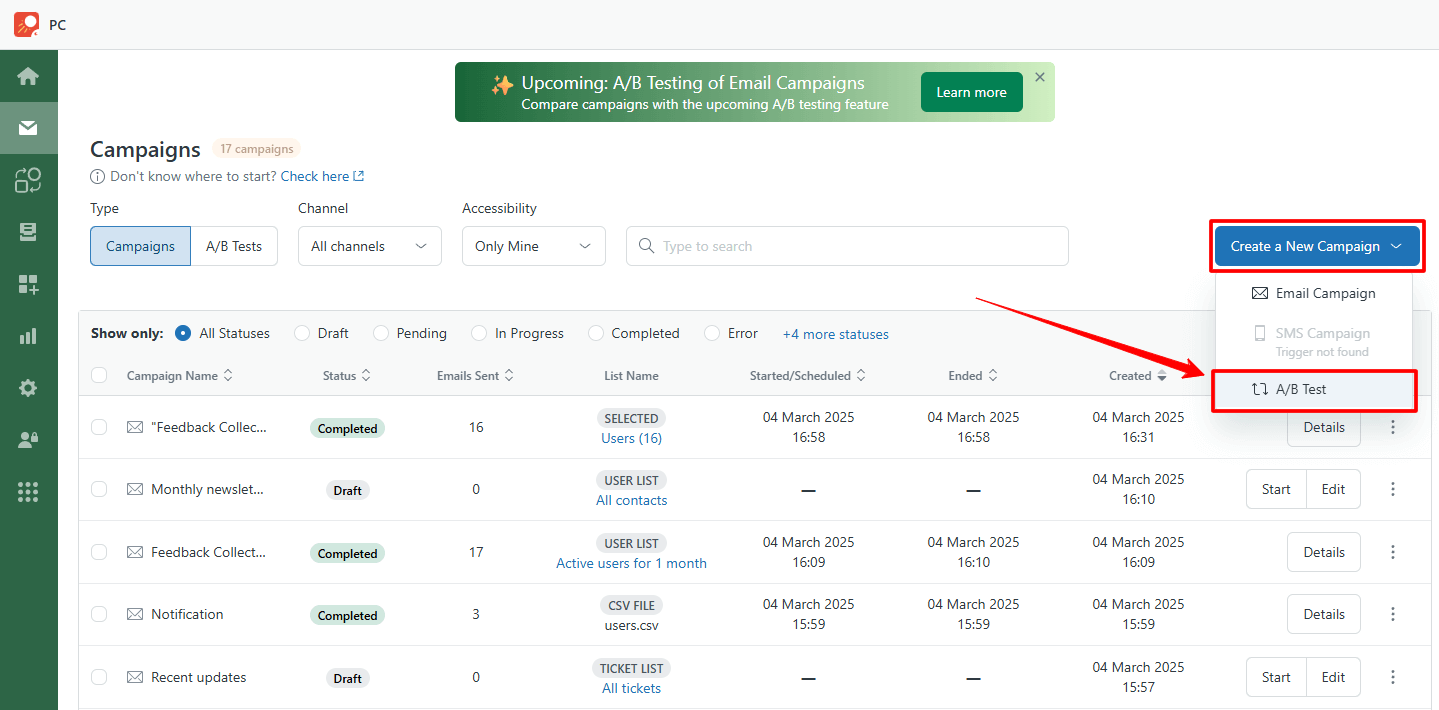
1. Go to the Campaigns tab -> Create a New Campaign -> A/B Test.
2. You will be taken to the General page. Name your Campaign and share it with other agents if needed.
3. Then, select the target user list or upload a CSV file with contacts. The app shows you the number of users in the list and their distribution. Move the toggle to define the percentage of users for each variant.
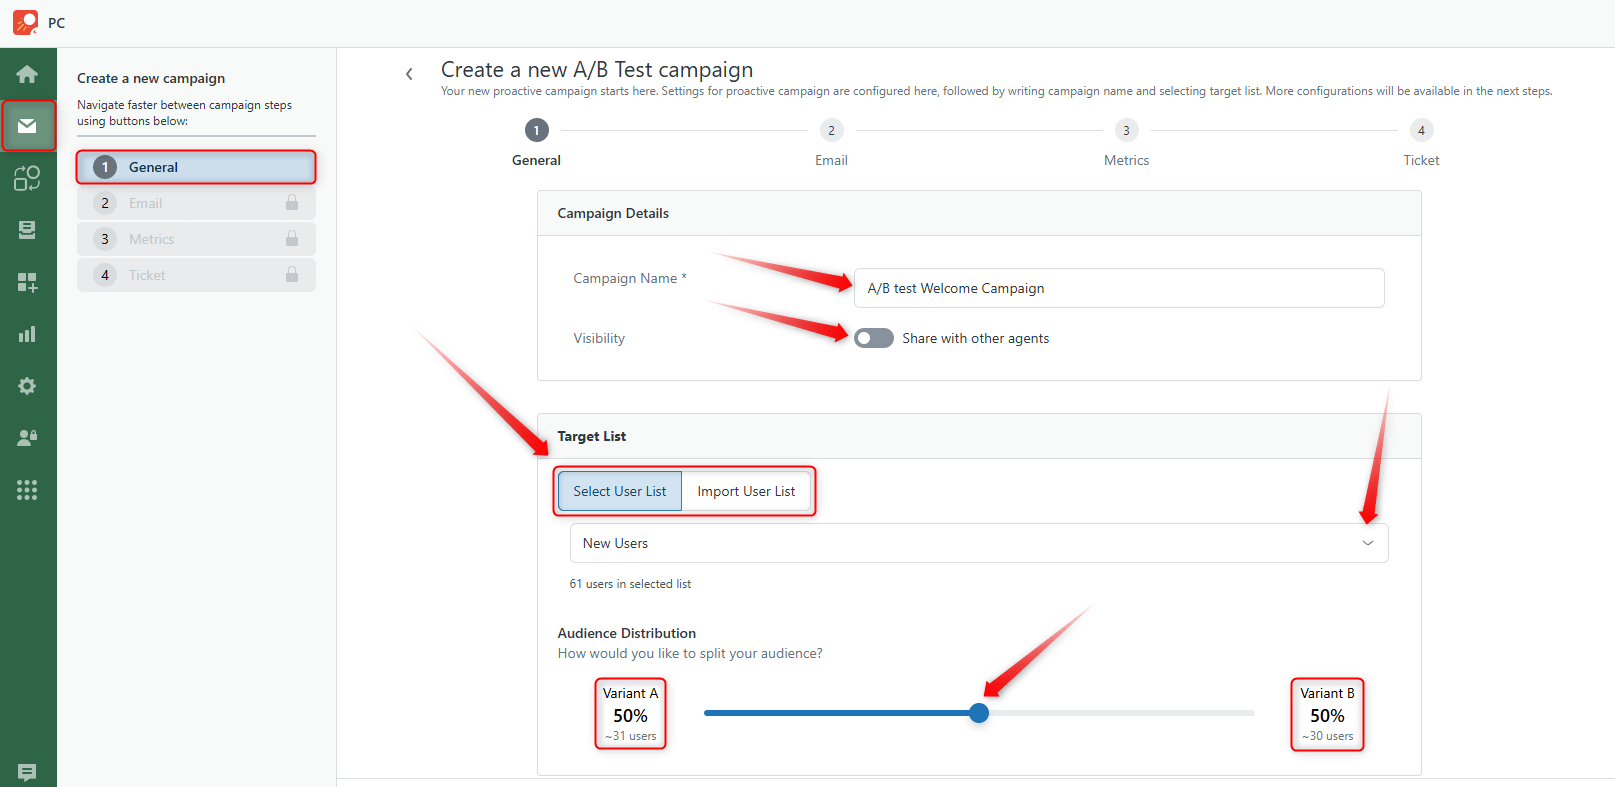
During the launch of an A/B test, users are distributed between variants A and B according to the specified percentage ratio. If the total number of users is odd and the ratio between the variants is equal, the extra user is always assigned to variant A as shown on the screenshot below.
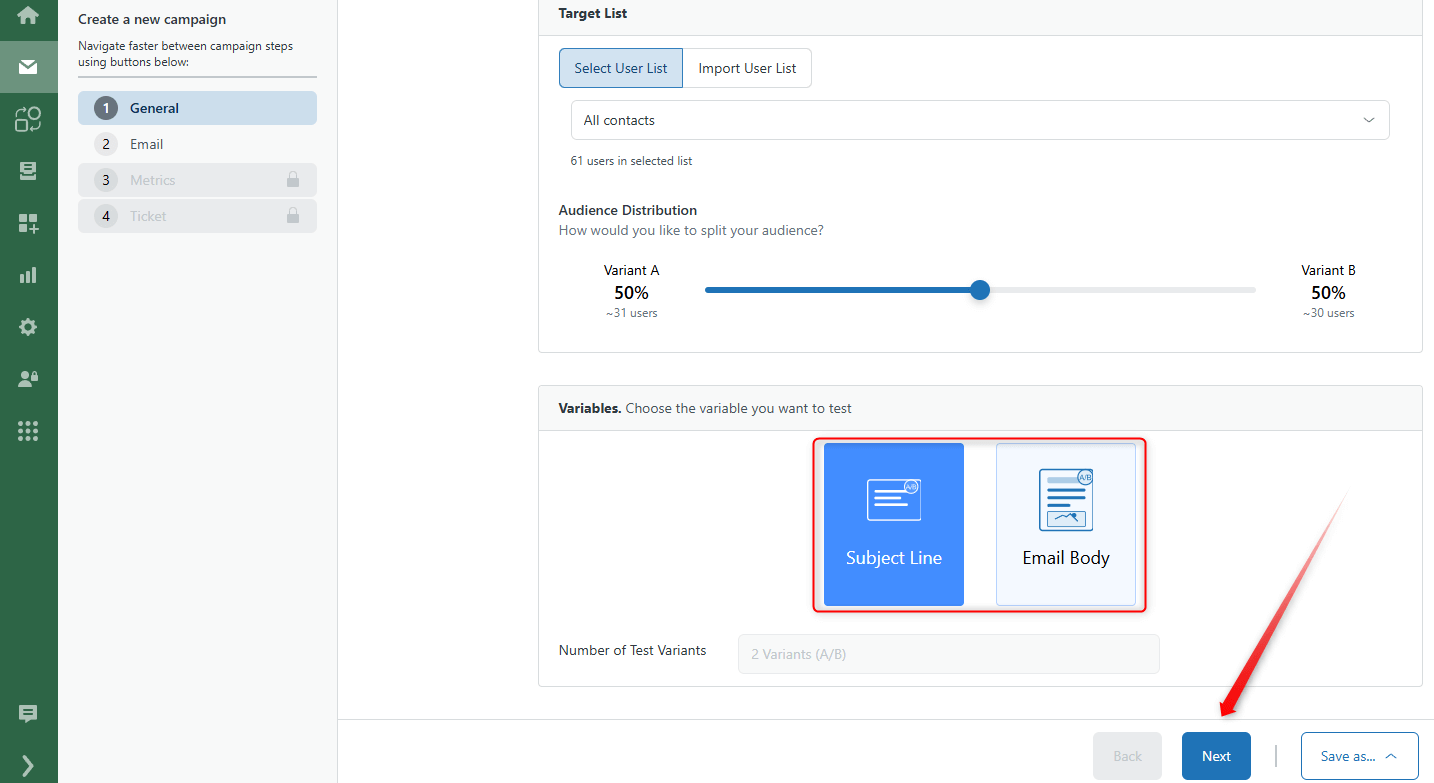
4. Next, scroll the page and choose the Variable you want to test. It can be the Subject Line or the Email Body. Then, click Next.
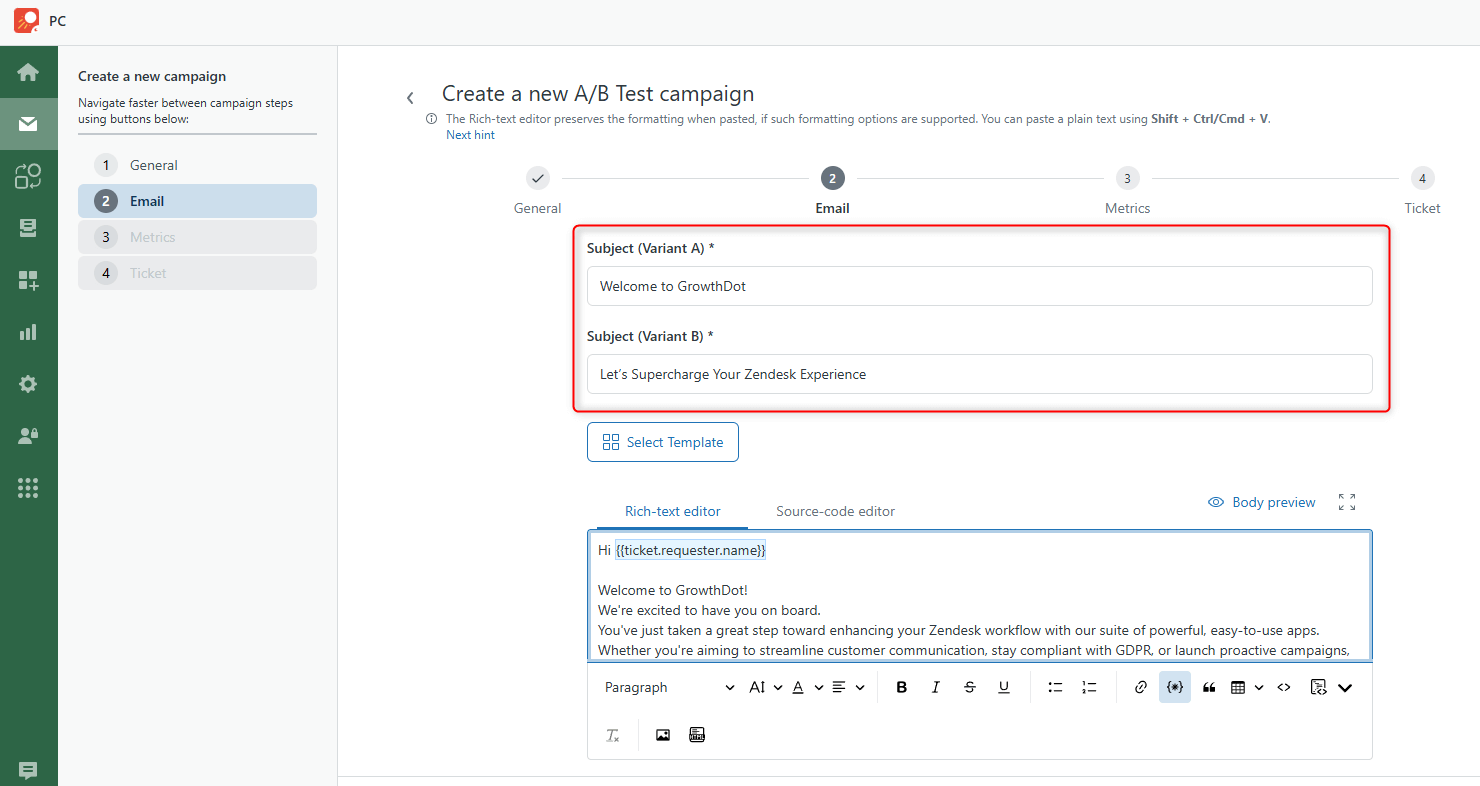
5. Initially, we selected the Subject Line variable and entered two types of subjects for testing.
6. Also, you can select the Email Body variable type and go to the next step.
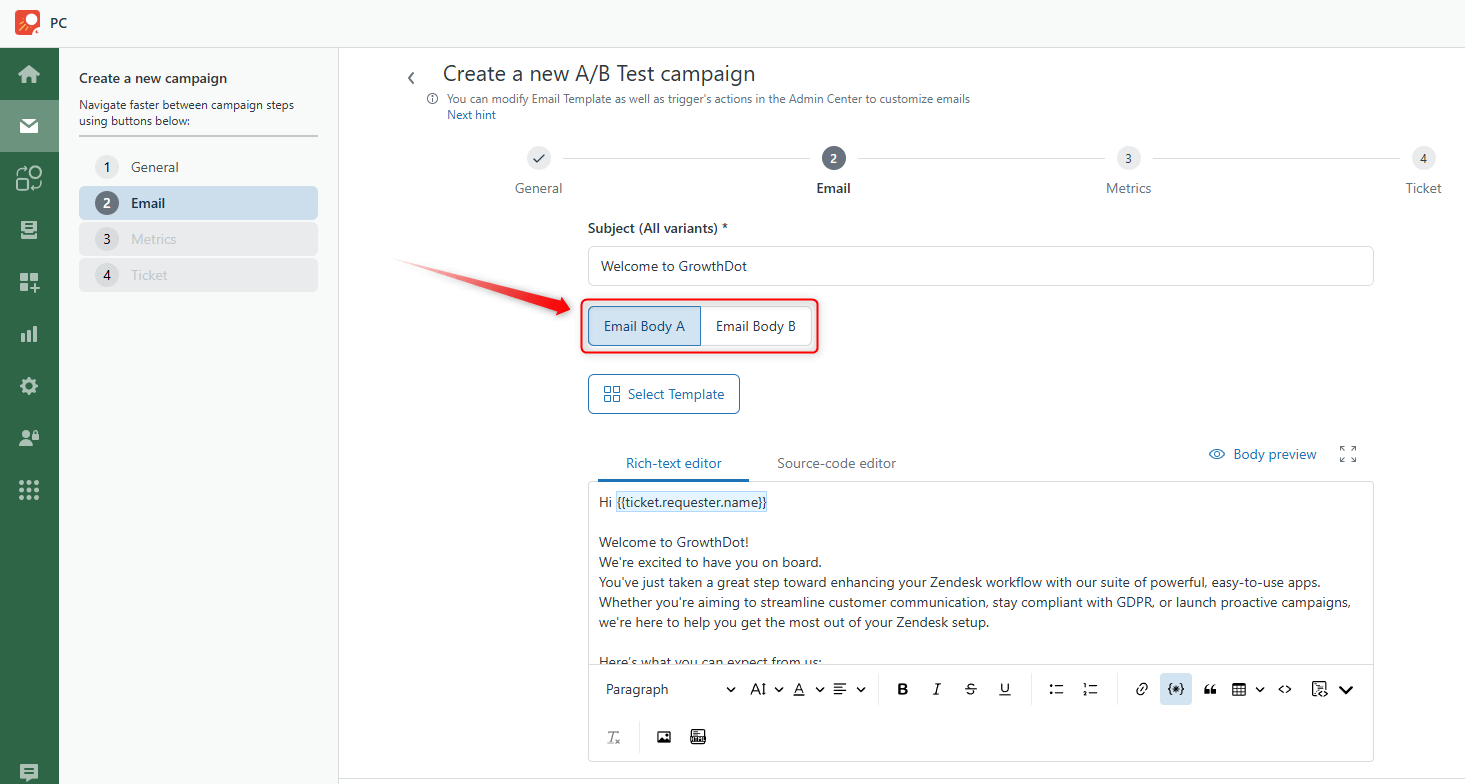
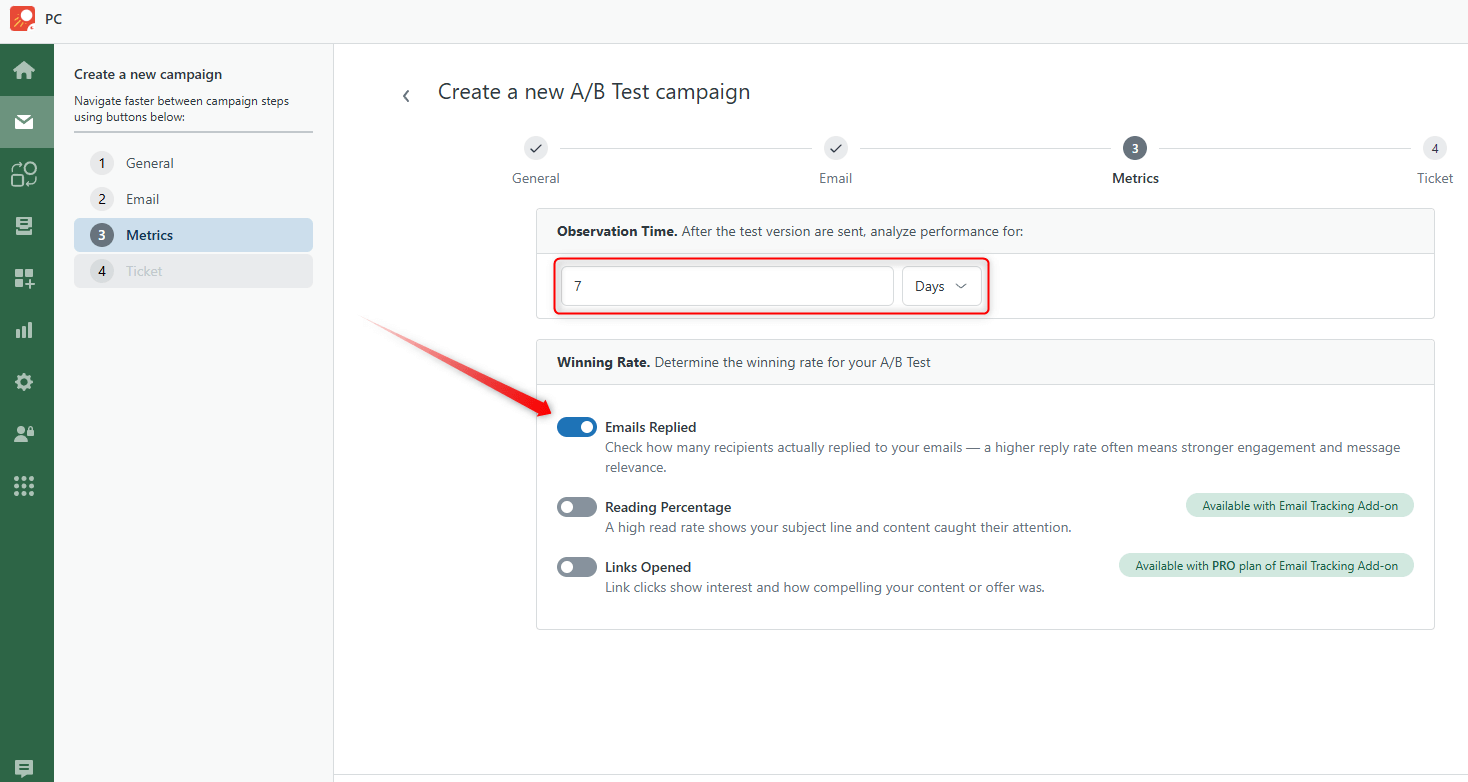
7. In the Metrics tab, select Observation Time. It refers to the period during which data is collected from users after they've been exposed to different test variants (A and B). Also, define the Winning Rate of your A/B test. Decide which of the following indicators will indicate the success of your campaign. Then, click Next.
Take into account that Reading Percentage and Links Opened metrics are available with the Email Tracking Add-on.
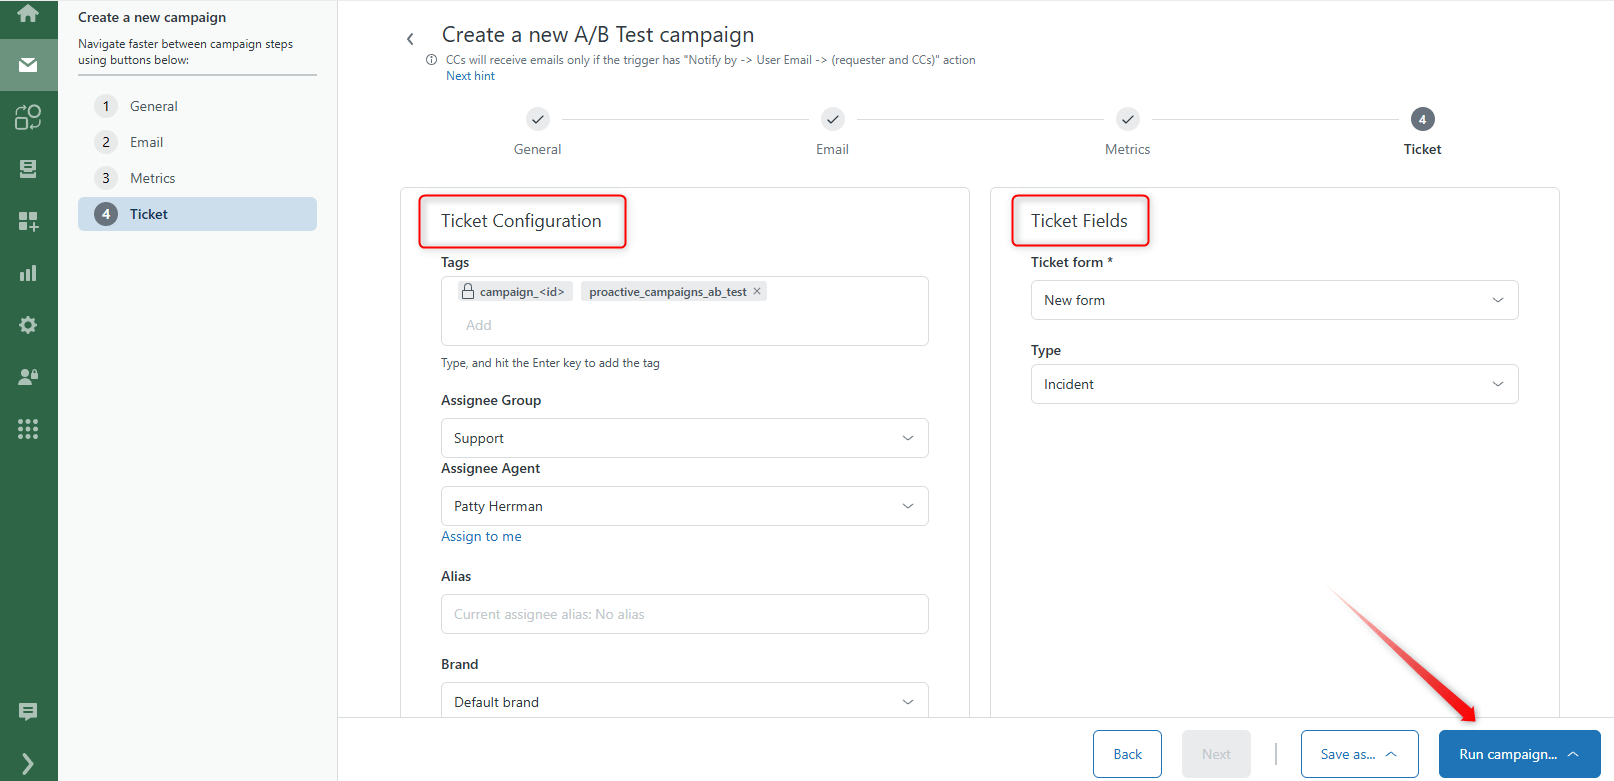
8. Finally, select the standard Ticket Configuration and Ticket Fields, and then click Run Campaign.
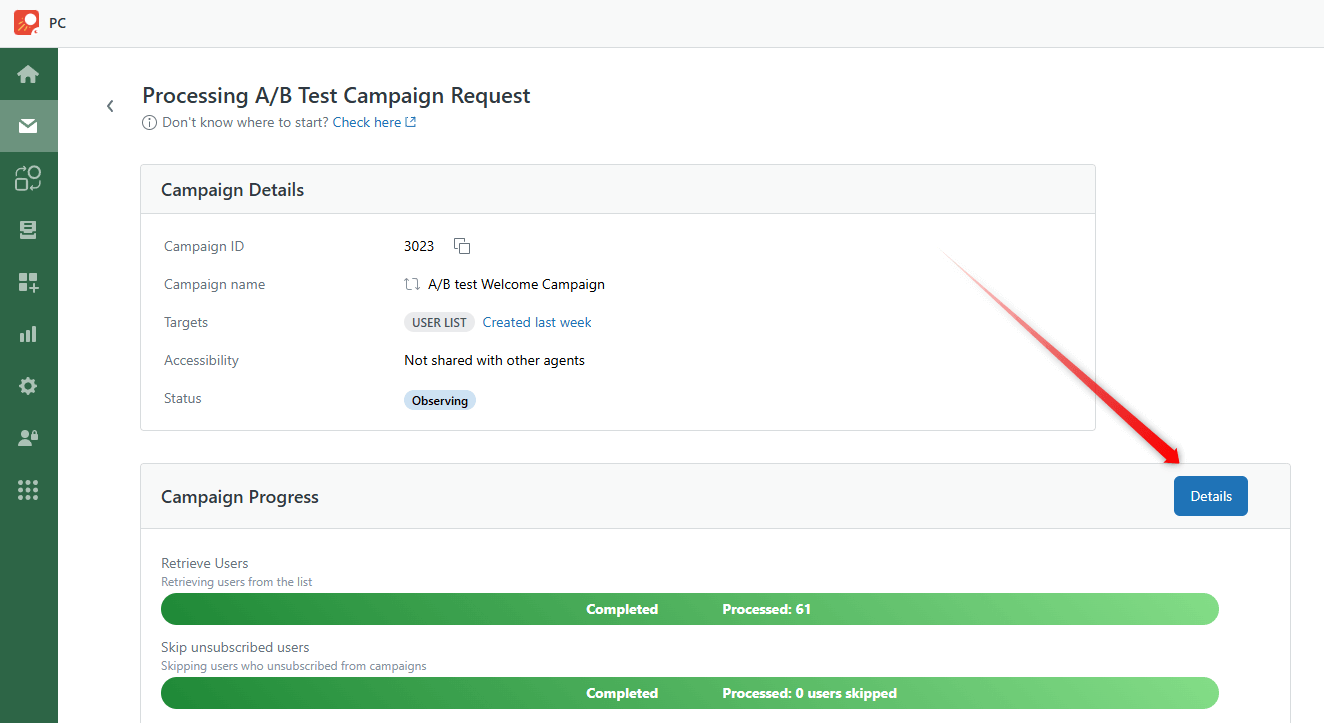
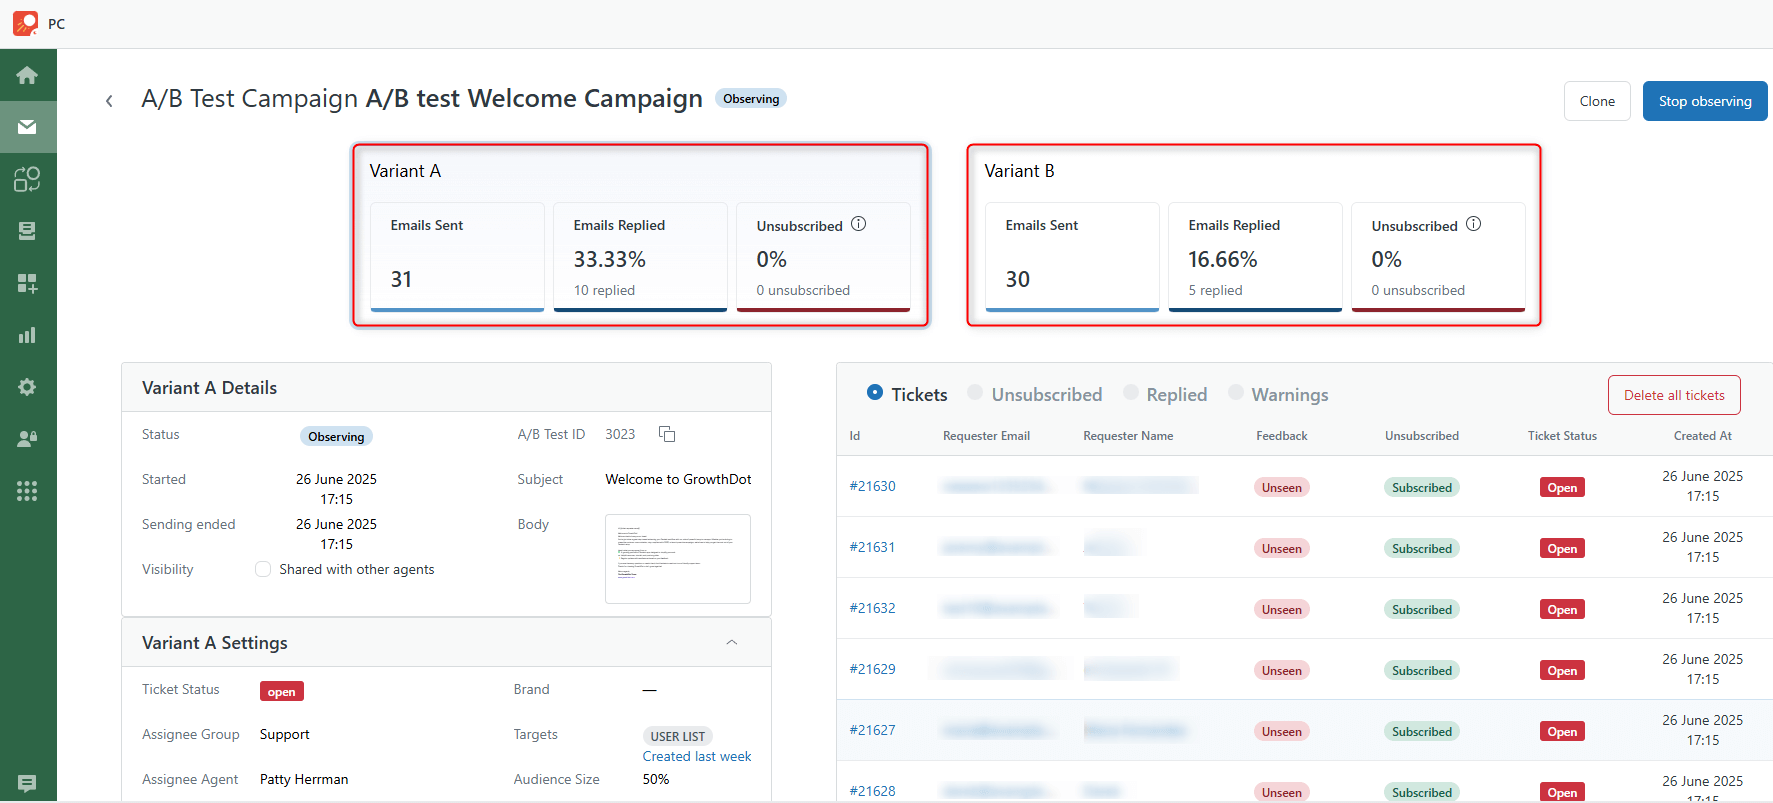
9. On the Campaign Details page, click the Details button once the campaign launch process is complete.
10. You will see the final results of the campaign after a 7-day observation period. Also, you can stop the observation at any time.
The percentage ratio on the details page may not match the one set during test creation if the list includes suspended users. The app finds out whether a user is suspended after the group assignment.
That’s the main thing we wanted to inform you about A/B test campaigns in the Proactive Campaigns app. If anything is unclear, please don't hesitate to contact our friendly support team at any time.


