How to start anonymizing in GDPR Compliance for Zendesk
-
GDPR Compliance
Looking for a proven tool to process data in Zendesk tickets and contacts? In such cases, we suggest GDPR Compliance to anonymize, delete, and retrieve data according to European and Californian privacy protocols.
As you may know, anonymizing means hiding customer information without removing it from Zendesk. By the way, in GDPR Compliance, you can select a type of information to process and include it in presets.
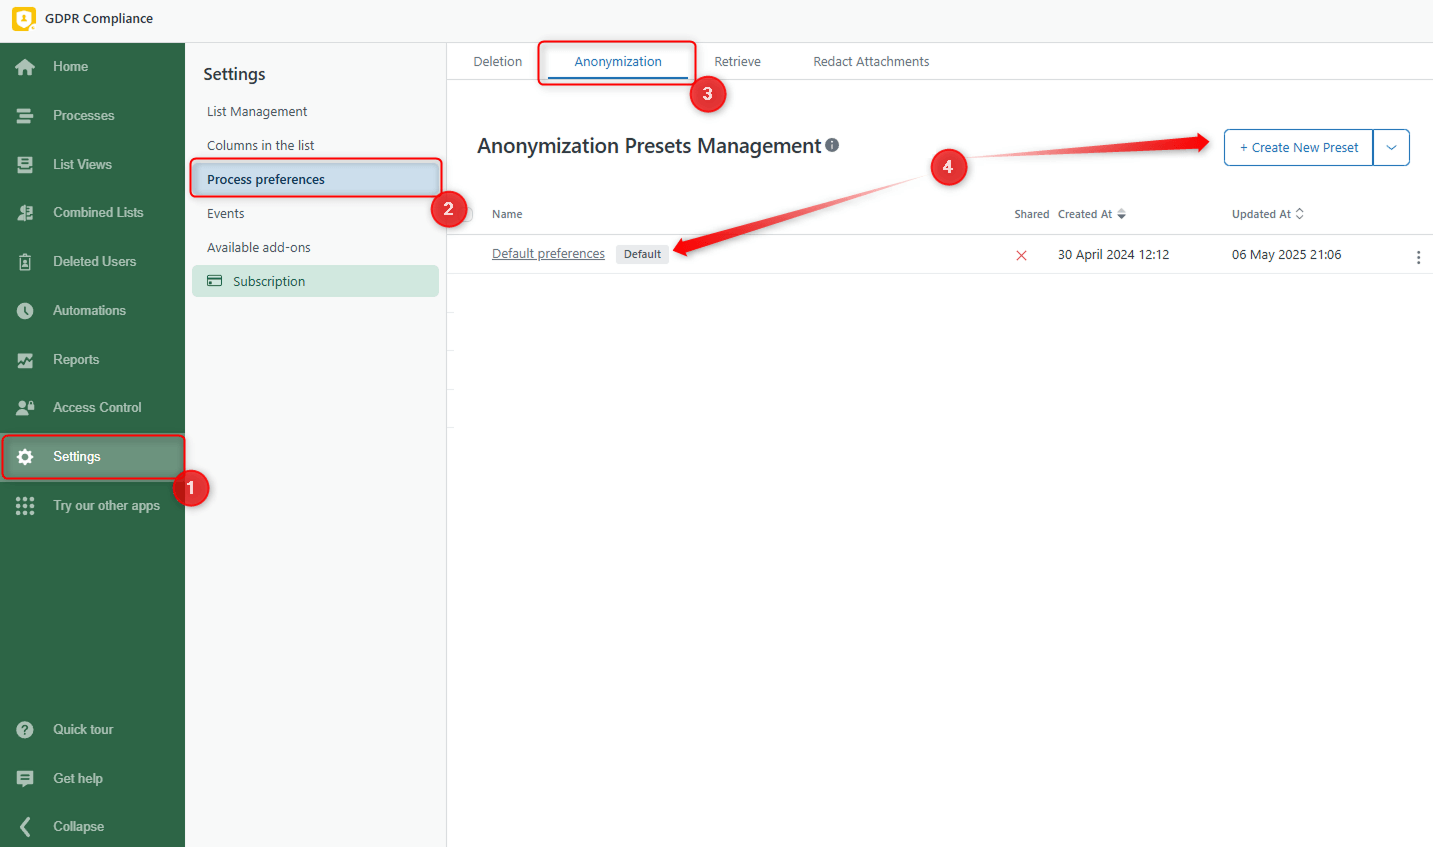
Firstly, go to Settings -> Process Preferences -> Anonymization. Click + Create new preset or choose your default preset.
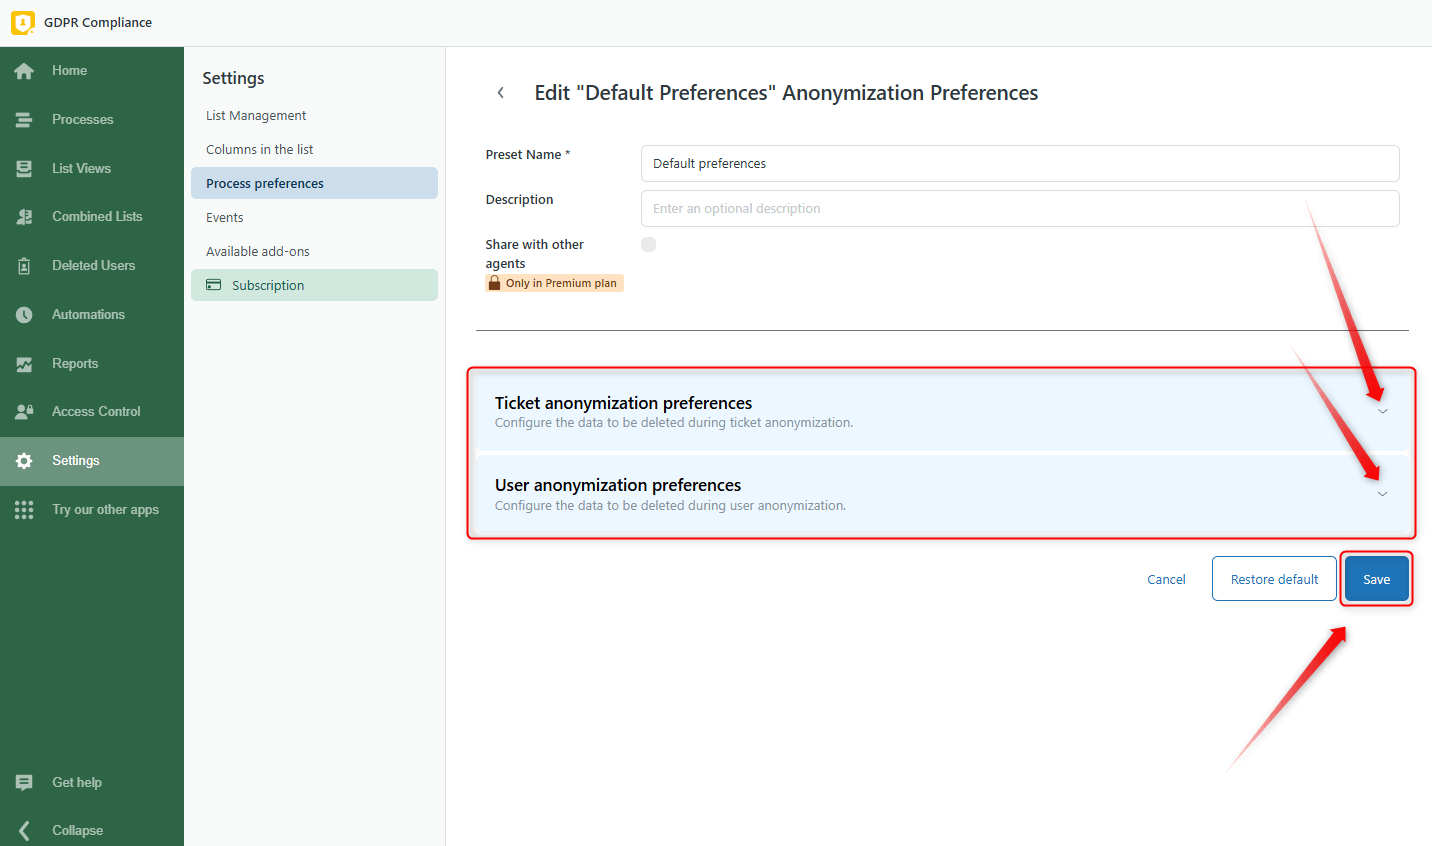
When creating a process preference preset, click on the section you need and select the items you want to anonymize. Then, save the preset.
You can launch the anonymization from several places in Zendesk. So, let’s dive into the explanation of every approach.
Anonymizing the list of all end-users in Zendesk Support
The first approach is anonymizing the list of all end-users in Zendesk Support to process data for every single user. That means you need to:
1. Go to the Customers tab in Zendesk Support.
2. Choose the user from the search results and click on their name to open the profile.

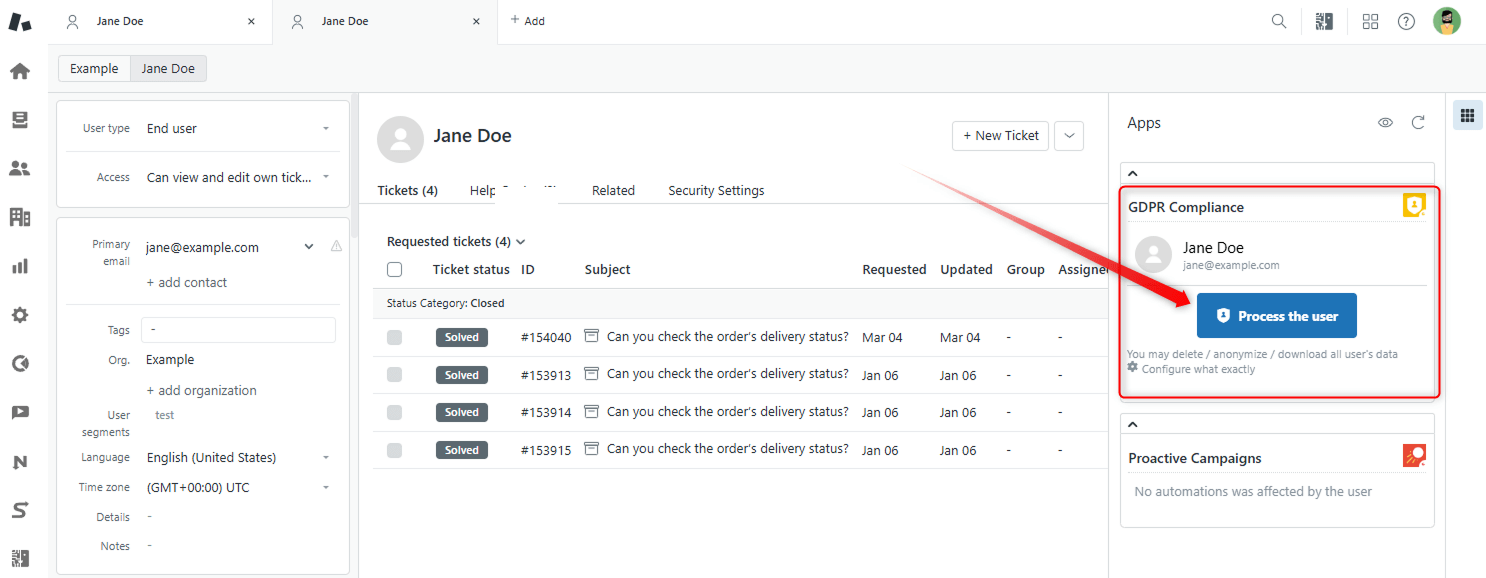
3. On the sidebar, find the GDPR app and click Process the user.
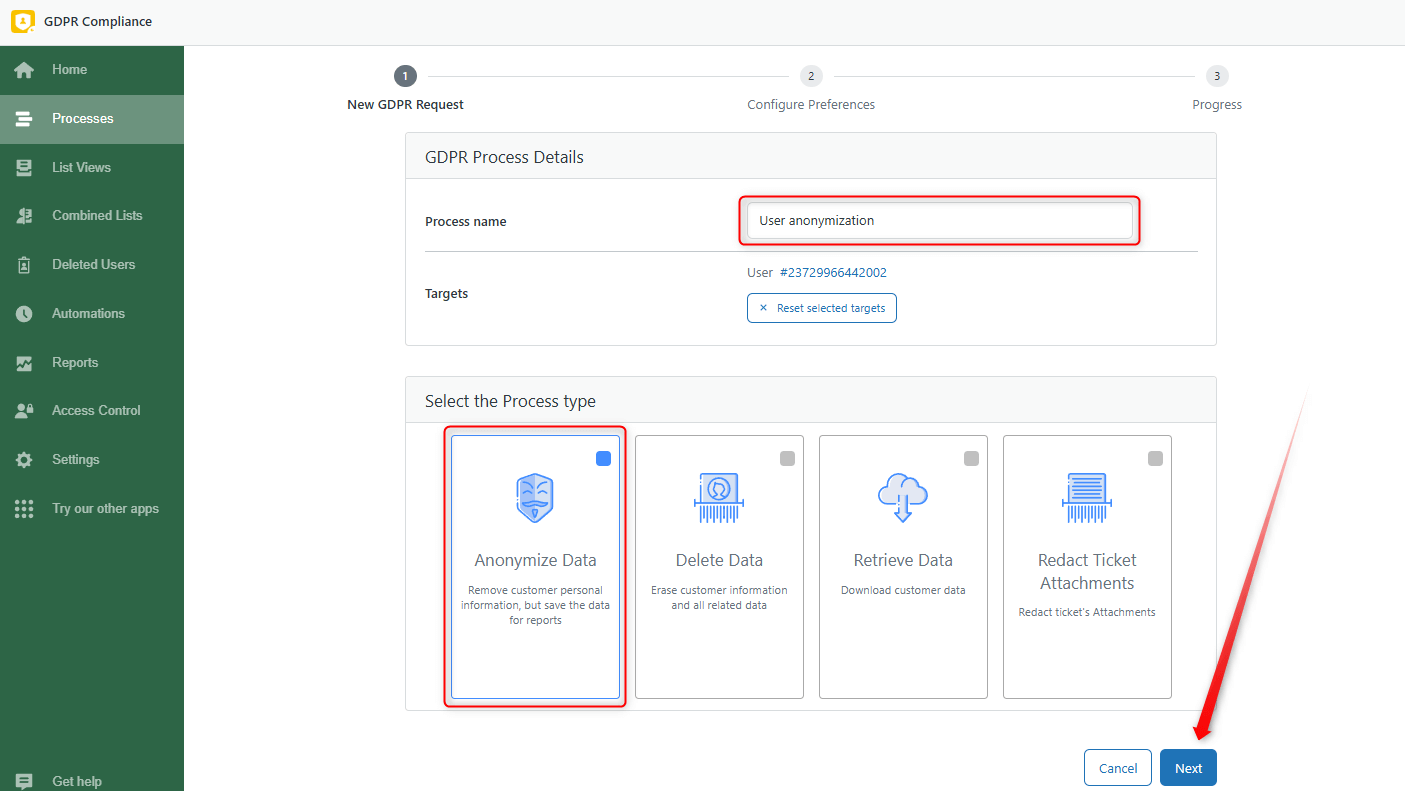
4. Then, select the Anonymize Data type, give the Process name, and click Next.
5. Next, go to the Configure preferences tab and select saved preferences.

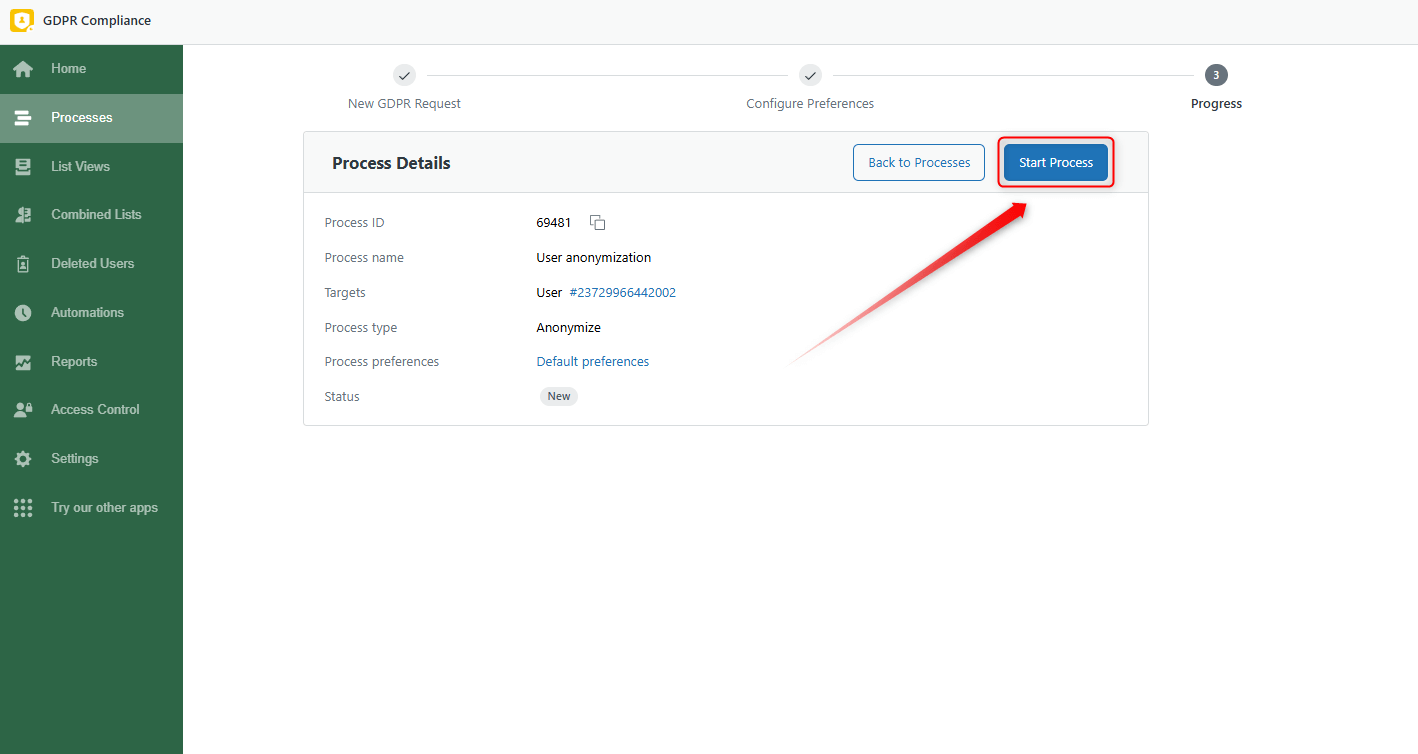
6. Finally, click on Start Process to start data treatment.
Anonymizing directly from a ticket
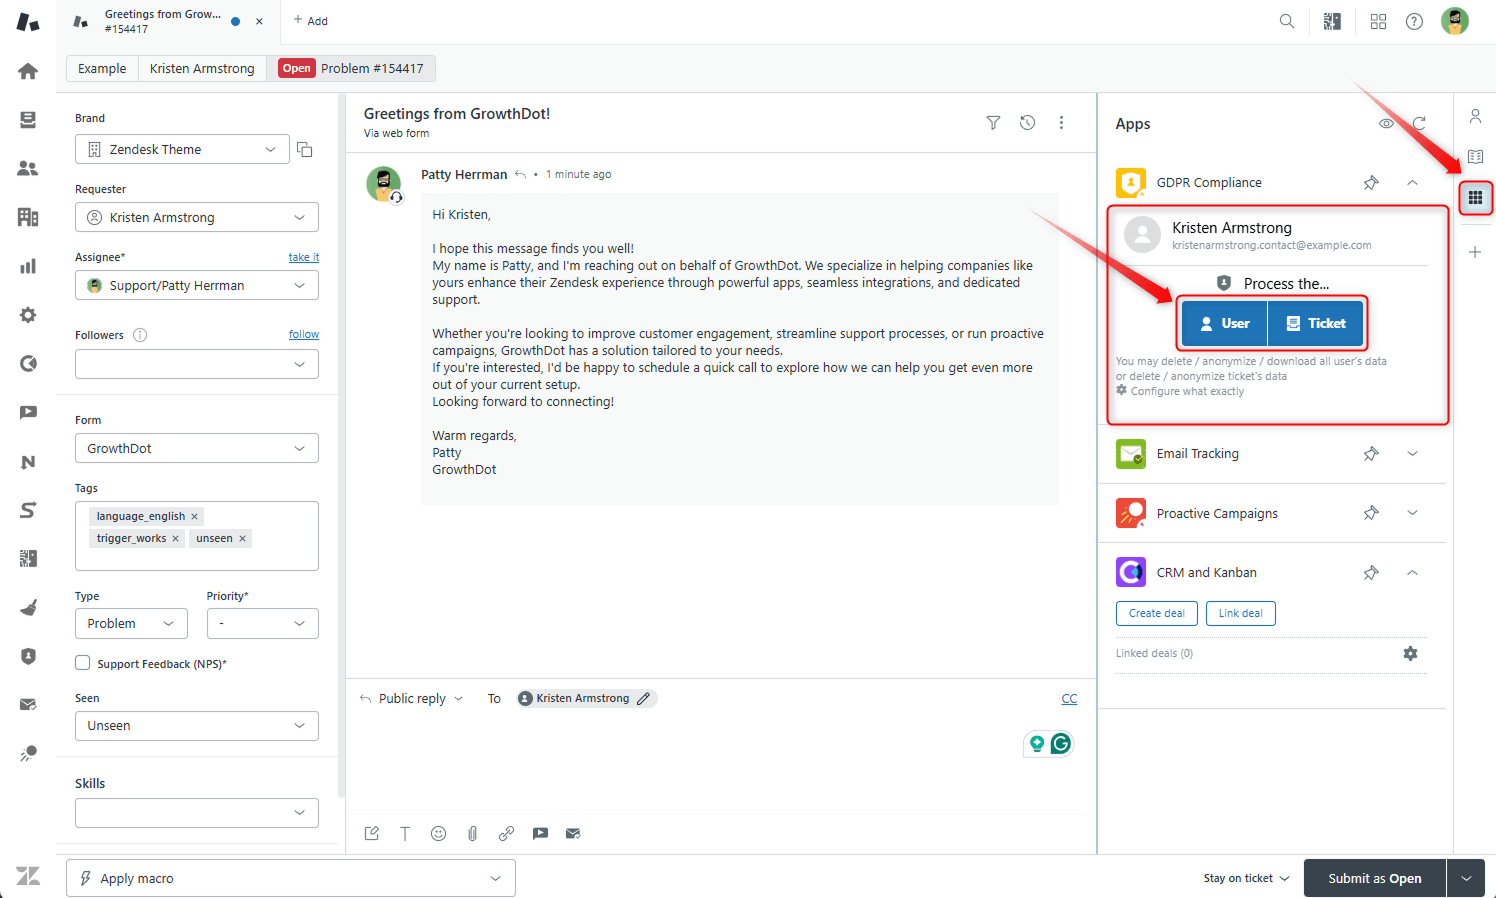
The second method is anonymizing directly from a ticket. Just open the Views tab in Zendesk and select the ticket. Click the Apps icon, and you'll see the GDPR Compliance section, where you can choose to process User or Ticket data. Whatever you choose, click the Anonymize Data option, select the Process preference preset you need, and then click Proceed with selected users/tickets.
Anonymizing data from Ticket or Contact lists inside the app
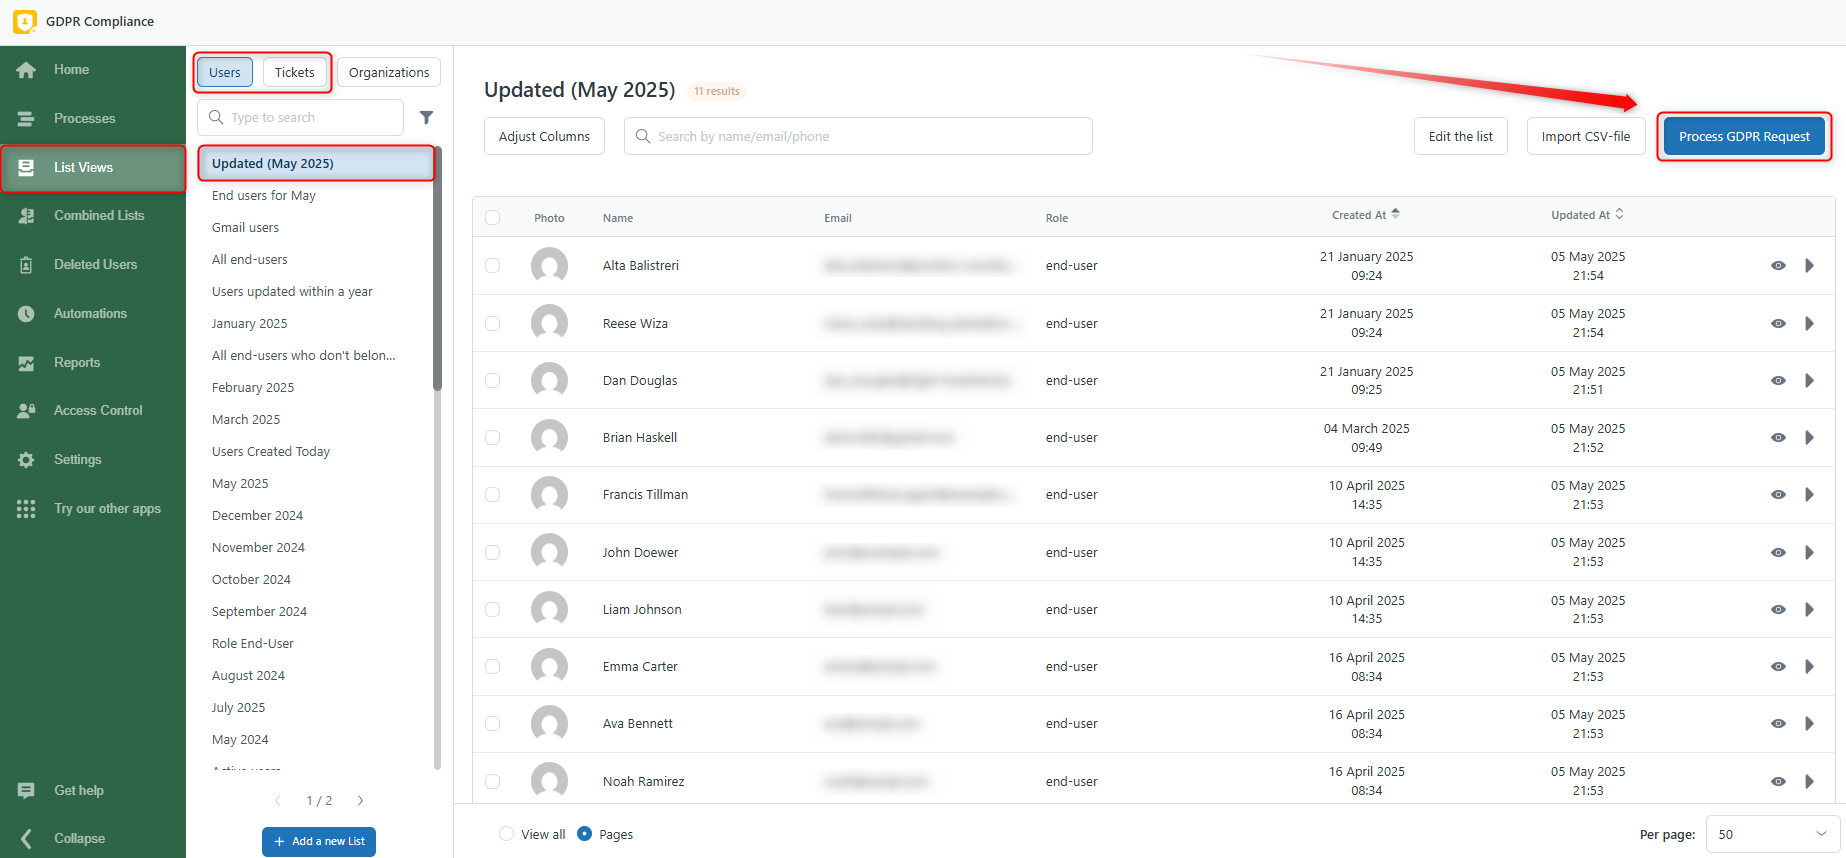
The last method is anonymizing data from the Ticket and Contact lists inside the app. Go to your GDPR, click List Views, and select Users or Tickets. We selected a user list.
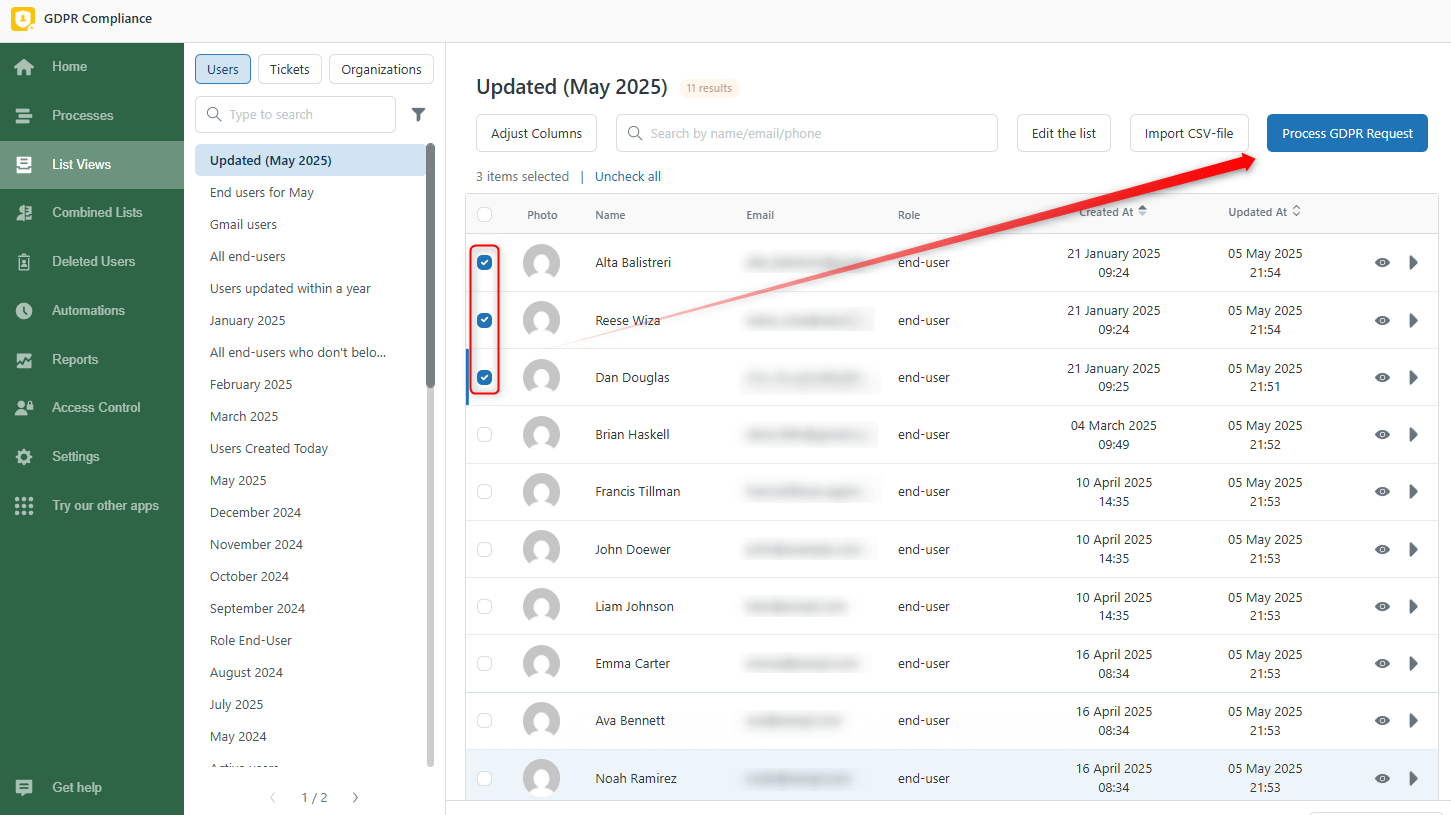
Additionally, you can select a few contacts to process, click on 'Process GDPR Request', and then follow the steps below for the entire list.
In general, the process is similar for Ticket lists, so follow the same steps for successful data treatment. Anonymizing inside the app allows you to deal with data in bulk and for separate users or tickets without skipping through the pages, so we recommend it.
Also, use the Eye icon to open and check the exact contact or ticket details, and the Play icon to launch the process for the exact contact or ticket.
![]()
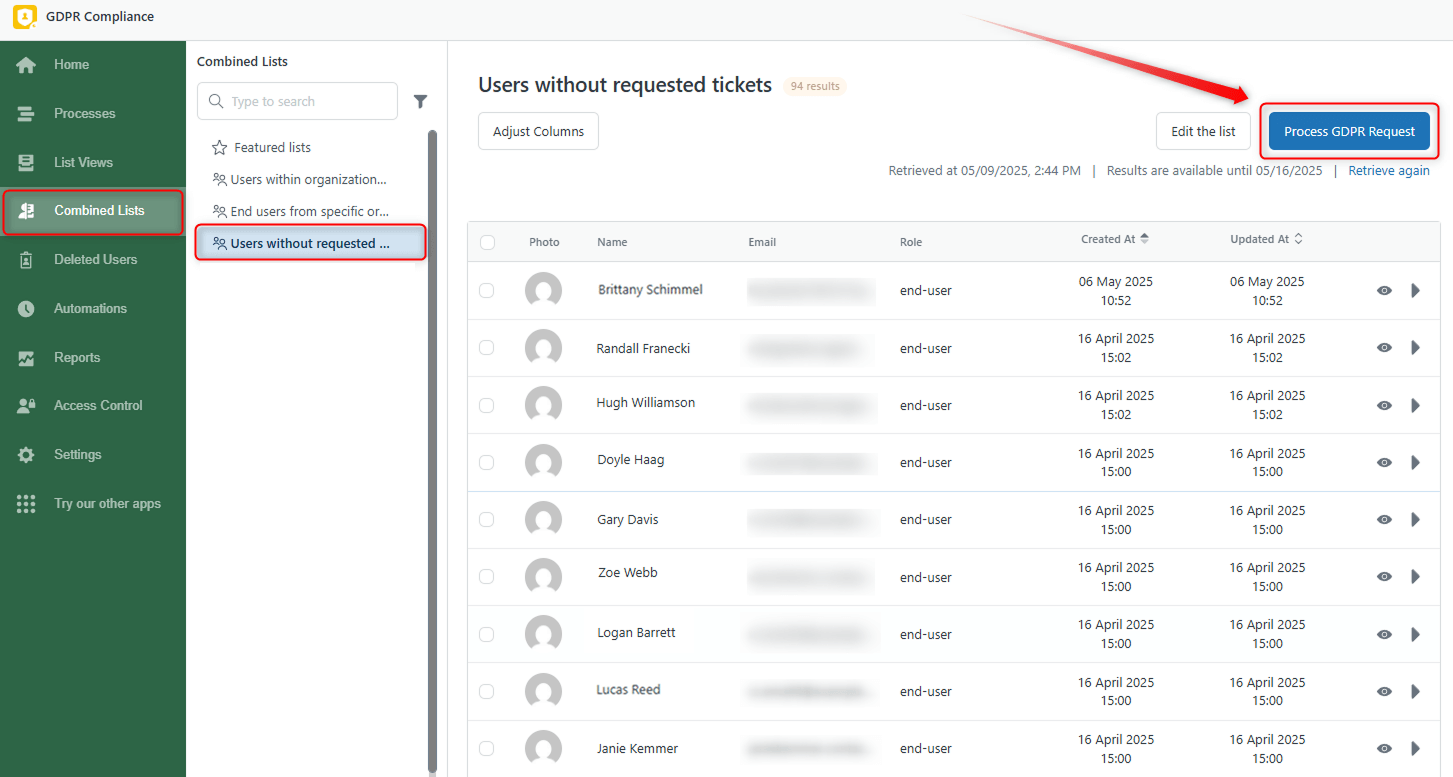
Moreover, you can combine ticket, user, or organizational lists to segment users better and use those lists for data treatment. Read our detailed guide on how to create the combined lists.
Also, you can start deletion from the Combined Lists tab as shown in the screenshot below.
We hope this article was helpful for you! Contact us to get professional help from our super helpful support agents.


