How to Import Users with a CSV File in Proactive Campaigns
-
Proactive Campaigns
Proactive Campaigns allows you to import users via CSV files when creating campaigns. However, there are some important aspects to consider before uploading your CSV file. So, let’s overview the process of importing user files in Proactive Campaigns:
1. Preparing Your CSV File
Before uploading, ensure your file includes the required Name and Email columns. You can also add optional details like Language, Organization Name, Alias, Phone, and Custom User/Ticket Fields.
 CSV file example
Learn how to update custom ticket fields and custom user fields via CSV while running email campaign in the app.
To check if your CSV file has correct formatting, follow these rules:
- Use the correct Language ID format as specified by Zendesk guidelines.
- Follow the standard format for tags to prevent errors and ensure smooth processing.
- Use commas to separate columns and avoid spaces or special symbols in column splits to prevent import failures.
2. Uploading Your CSV File
Once your file is prepared, follow these steps to upload it:
- Open the Proactive Campaigns app and go to the Campaigns tab.
- Click Create a New Campaign and select Email Campaign as the channel.
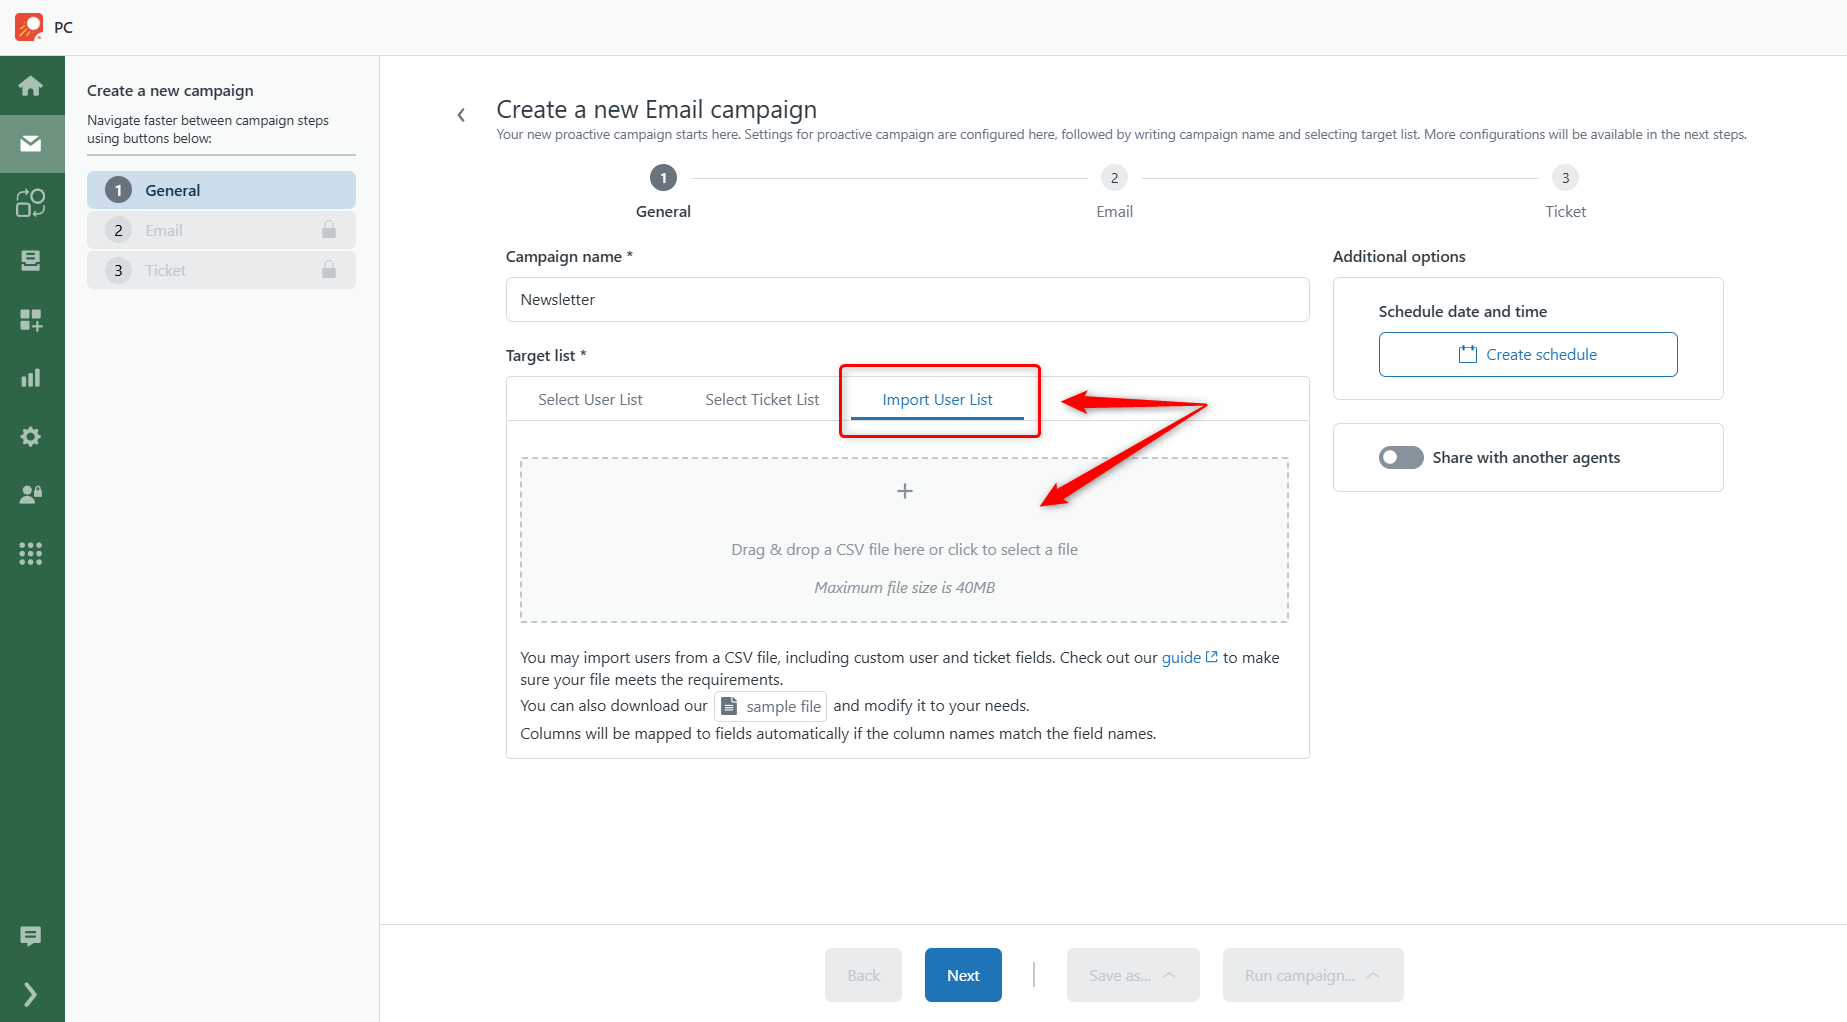
- In the first step of campaign creation, select your target list. You’ll have three options: Select User List, Select Ticket List, or Import User List (we need this option).
- Click the Import User List tab and drag and drop your file, or click the + button to select your CSV file.

You can also download a sample CSV file by clicking on the sample file beneath the import button. This will help you compare your file with the correct format.
3. Mapping Data Fields
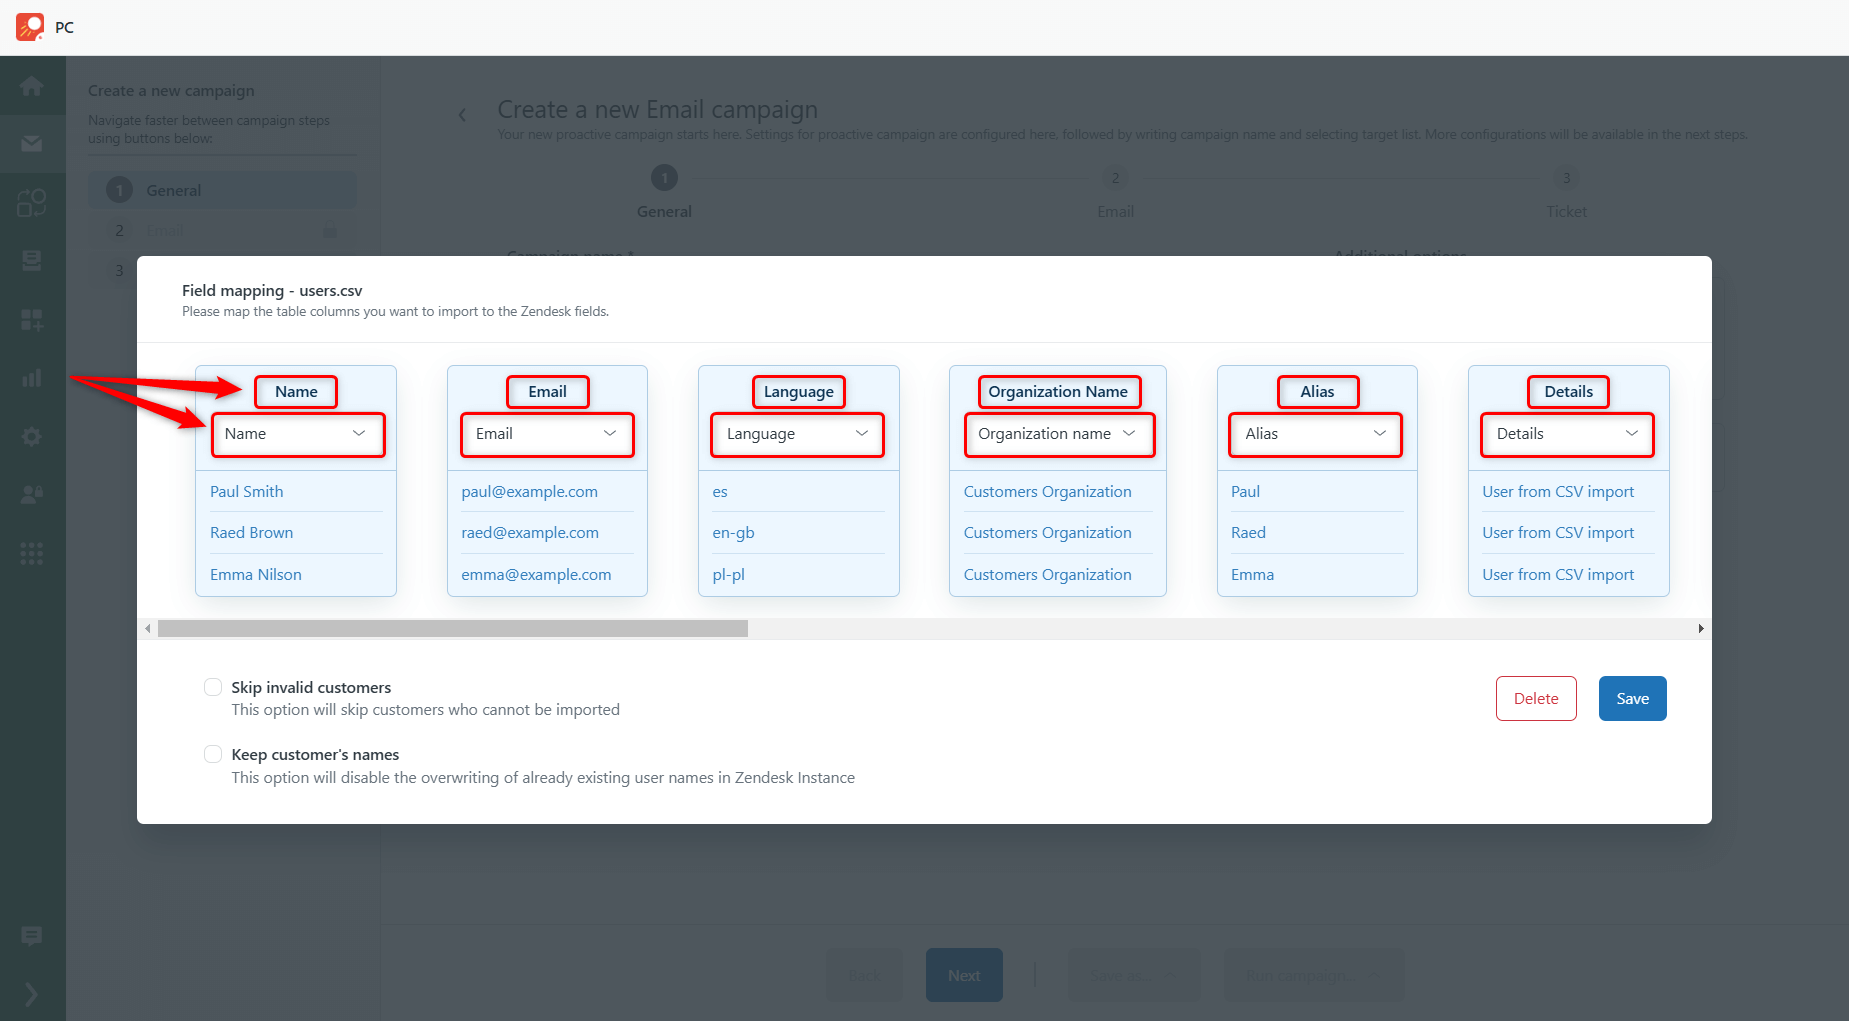
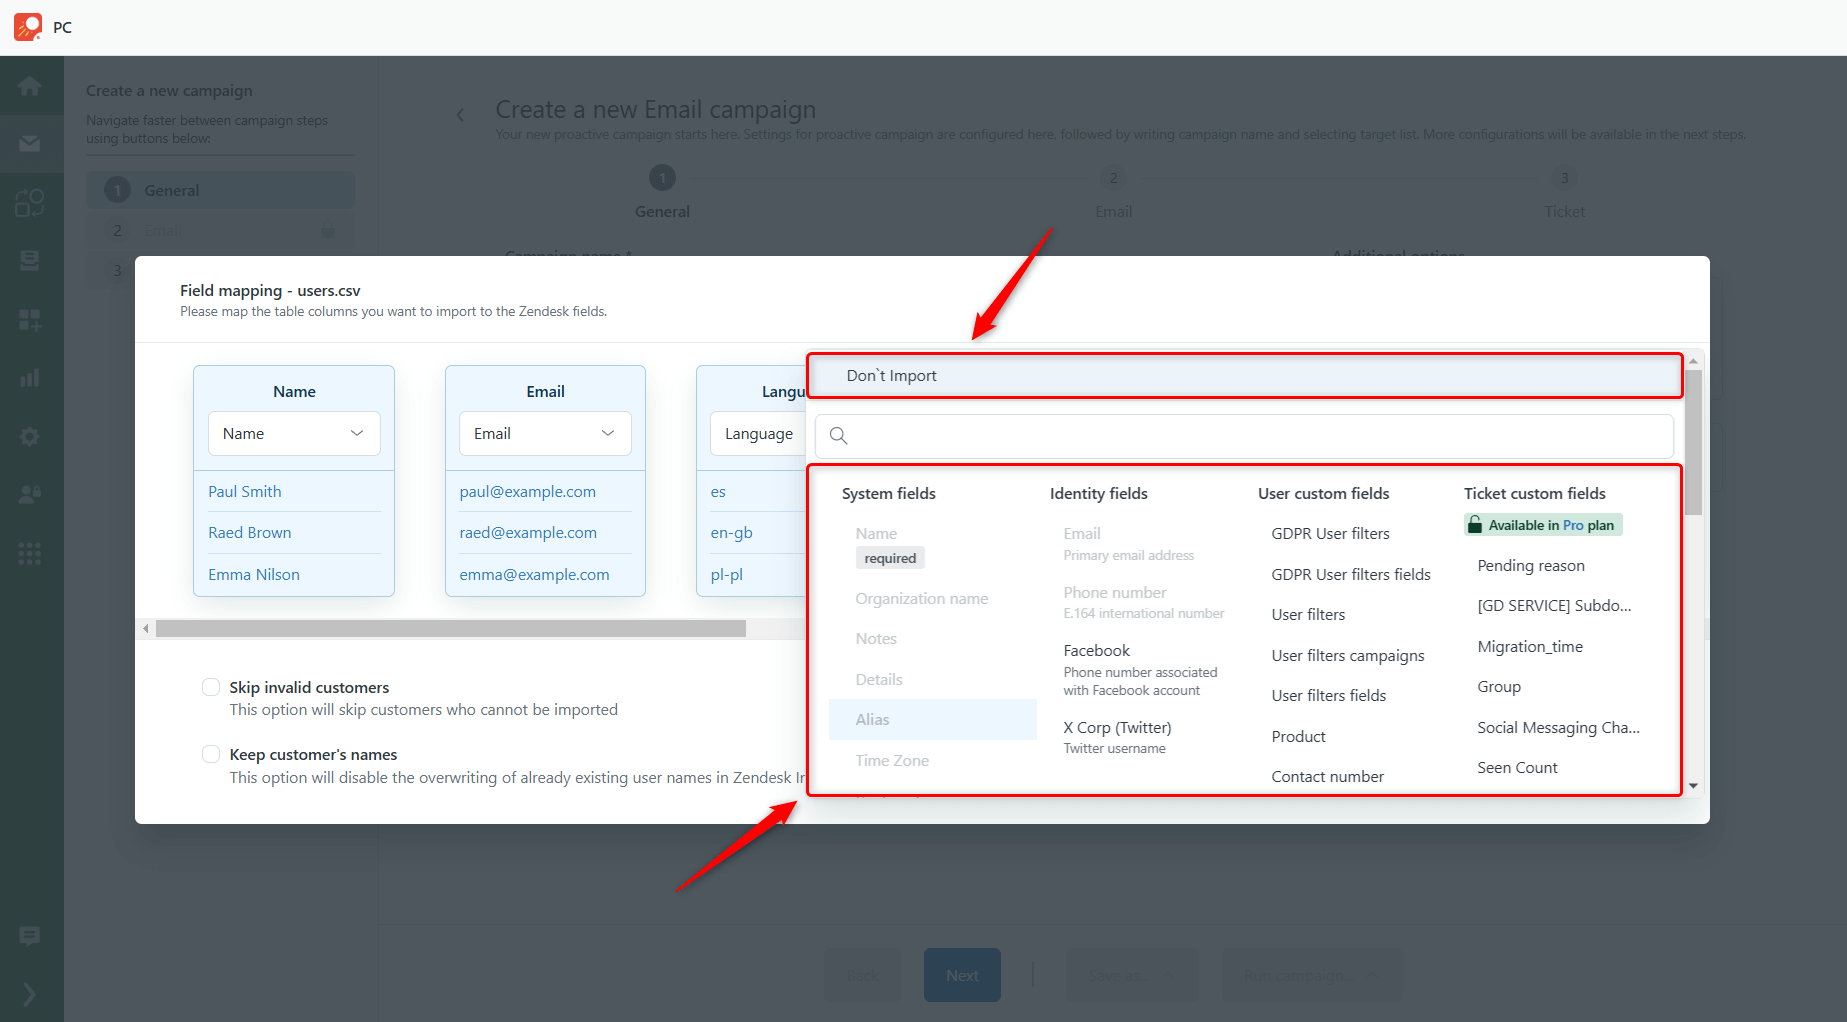
After uploading your CSV file, a modal window will appear, allowing you to map and verify the data fields. If column names match existing fields, the app will match them automatically.

If they don’t, you can manually select the appropriate field for each column from the dropdown menu or exclude specific fields by clicking Don't Import.

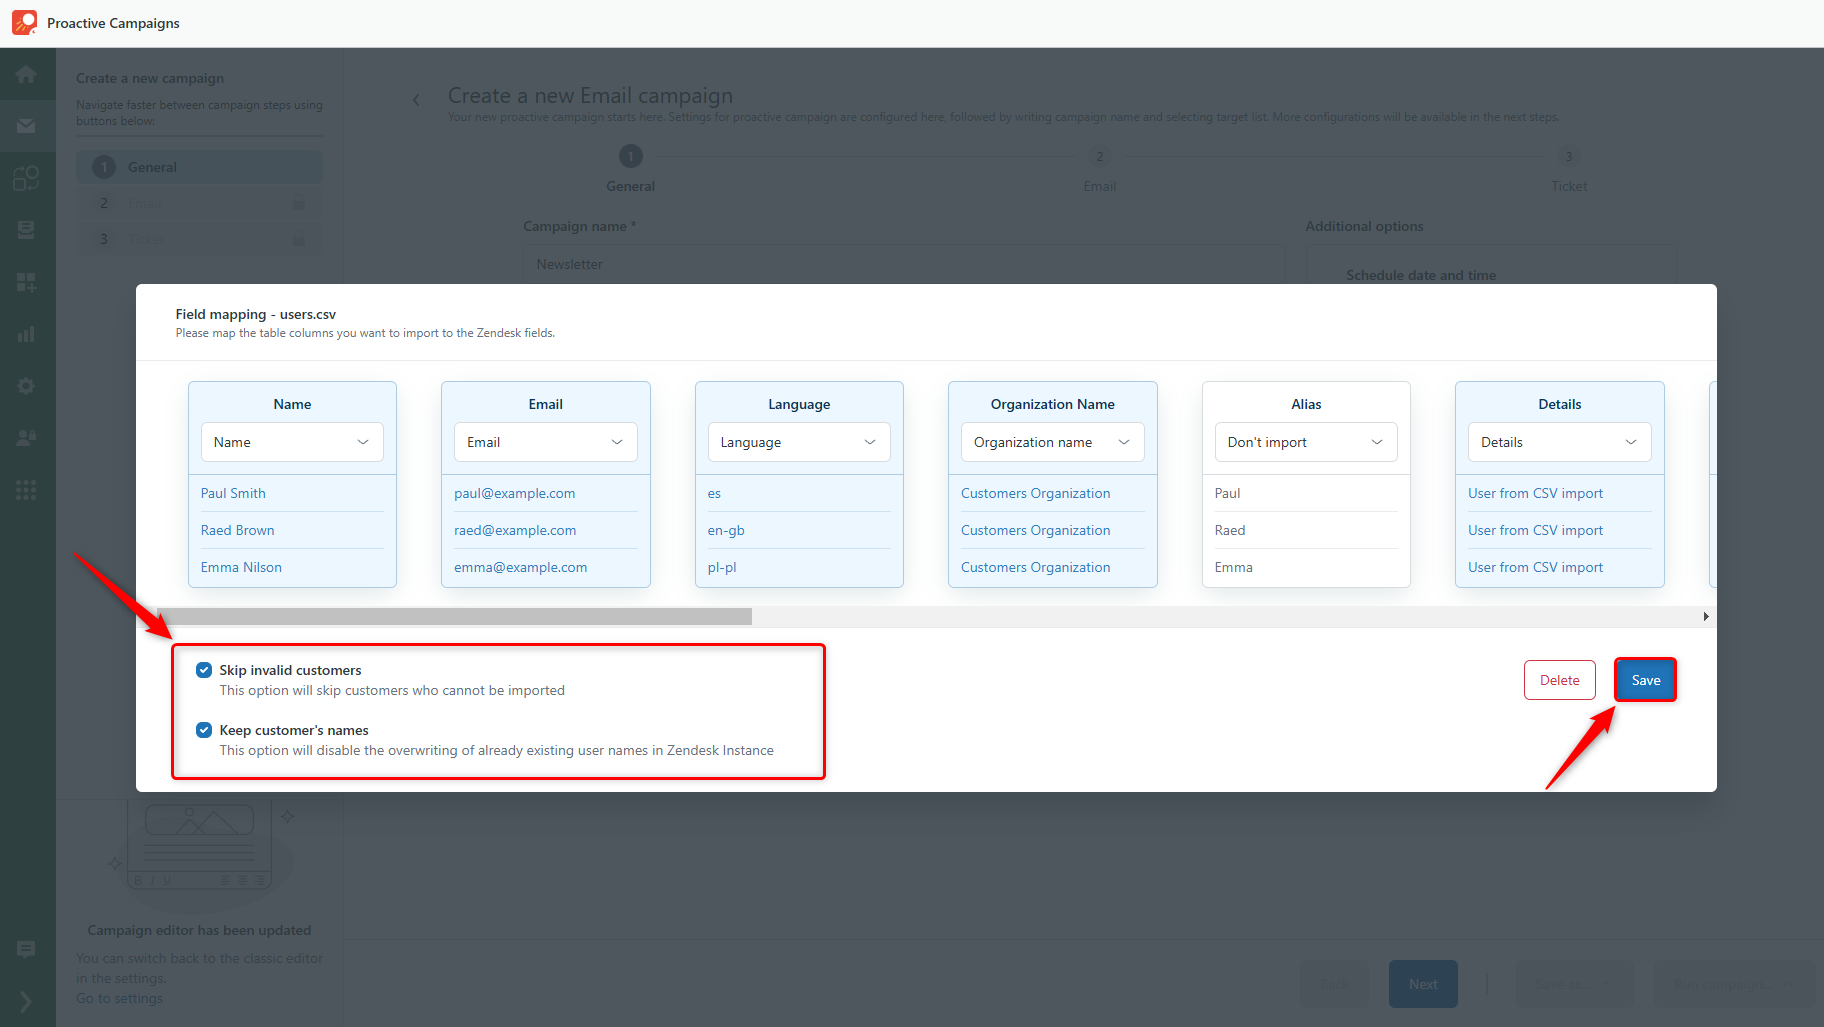
4. Additional Import Options
To refine your import, you have additional settings:
- Skip invalid customers who cannot be imported.
- Keep customers' names in Zendesk to avoid overwriting data.

Once everything is mapped correctly, click Save and continue setting up your campaign.
And that’s it! If you still have some questions, feel free to contact our support team.


