Every ticket, attachment, and user detail consumes storage space in Zendesk. Exceeding the storage limits can lead to performance slowdowns, increased costs, and a cluttered system that's harder to navigate.
So, let's break down Zendesk storage limits and explore practical strategies for cleaning up your space. With these tips, you can optimize your Zendesk data storage, maintain peak performance, and avoid unnecessary expenses.
What’s Using Up Zendesk Storage?
To keep your Zendesk account running smoothly, you should understand how storage works and why it matters. Zendesk has two main types of storage: Data Storage and File Storage. Each type contributes to the total space you're using, and if you're not careful, it can add up quickly.
- Data Storage includes all the information related to tickets, users, and organizations. This encompasses text-based data like messages, comments, internal notes, user profiles, and interaction histories. Data storage grows as you create more tickets and add more details about users and organizations.
- File Storage covers all the files attached to your tickets, such as images, PDFs, documents, and videos. File storage can quickly fill up, especially if your team regularly handles many large files or attachments.
The Zendesk storage limit you need to manage depends on your plan. For instance, the Team Plan offers a smaller storage limit suitable for smaller teams, while the Growth Plan provides more space for expanding teams. The Professional and Enterprise Plans offer even higher storage limits, designed for larger organizations with heavy support needs.
How Storage Management Helps Your Support System?
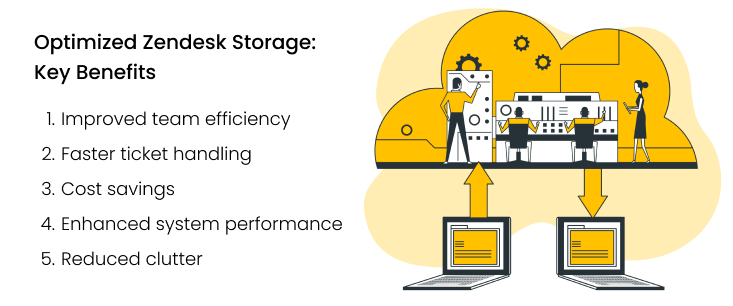
Managing storage in Zendesk isn't just about keeping things tidy—it's a strategic move that enhances your entire support operation. Everything runs more smoothly when your storage is well-managed, from ticket resolution times to overall system performance.
A clean and organized storage system means your team can locate and respond to tickets faster. With less digital clutter, agents spend less time sifting through unnecessary files and more time focused on what really matters—resolving customer issues.
Beyond improving speed and service quality, effective storage management also keeps costs in check. By regularly reviewing and optimizing your data and file storage, you can avoid the extra charges that come with exceeding storage limits.
Moreover, a well-maintained Zendesk environment is a robust one. With fewer files to process, your system experiences faster load times, allowing agents to work seamlessly without the frustration of delays or slowdowns.
But how can you take actionable steps to maintain this level of efficiency? The answer lies in finding one of the biggest contributors to storage bloat.
Clearing Up Zendesk File Storage
When dealing with storage limits in Zendesk, the key is to focus on what's taking up the most space—and that's often attachments. These files, such as images, PDFs, and documents, can quickly add up, consuming a significant portion of your storage.
Why Focus on Attachments?
Attachments are one of the main culprits when it comes to storage consumption in Zendesk. Every time a file is attached to a ticket—whether it's an image, a document, or a video—it uses up space. Over time, as the volume of tickets grows, so does the number of attachments, which can quickly eat into your storage limits.
Here's why attachments should be your primary focus:
- They occupy the most space. Attachments are often the largest files stored in your Zendesk account. Unlike text-based data, which is relatively small, attachments like high-resolution images or lengthy documents can significantly add to your storage use.
- They accumulate quickly. Agents and customers can add multiple attachments to every opened ticket. This accumulation happens fast, and before you know it, these files can occupy a large portion of your allotted storage.
- They're easy to manage and remove. Unlike some data types that are essential for compliance or customer records, many attachments don't need to be stored long-term. Deleting old or unnecessary attachments is a straightforward way to reclaim space without losing critical information.
How to Remove Attachments in Zendesk?
So, the target is found. Now it's time to act. You have two primary ways to delete Zendesk attachments: using the Zendesk API or a dedicated integration tool. Each option offers unique benefits, depending on your specific needs and technical expertise.
1. Use the Zendesk API for Advanced Control
For those with technical skills or access to developer resources, the Zendesk API provides a powerful approach to removing attachments:
- Review the documentation: Start by checking out the Zendesk API documentation. This resource will give you detailed information about the endpoints and methods for handling attachments.
- Create custom scripts: Use the API to write scripts that automatically delete attachments based on specific criteria, such as age or file size. This allows you to tailor the cleanup process to your exact needs.
- Automate deletion: Schedule your scripts to run regularly (e.g., weekly or monthly) to optimize your storage without manual intervention.
As you see, this method provides detailed control over your attachment management and Zendesk storage limits but requires some technical expertise.
2. Use the GDPR Compliance App for Easy Attachment Removal
Suppose you're looking for a straightforward way to manage your Zendesk attachments without diving into technical complexities. In that case, the GDPR Compliance app with its' Attachment Redaction process is your go-to solution. It's designed to simplify removing attachments, offering a user-friendly alternative to more technical methods.
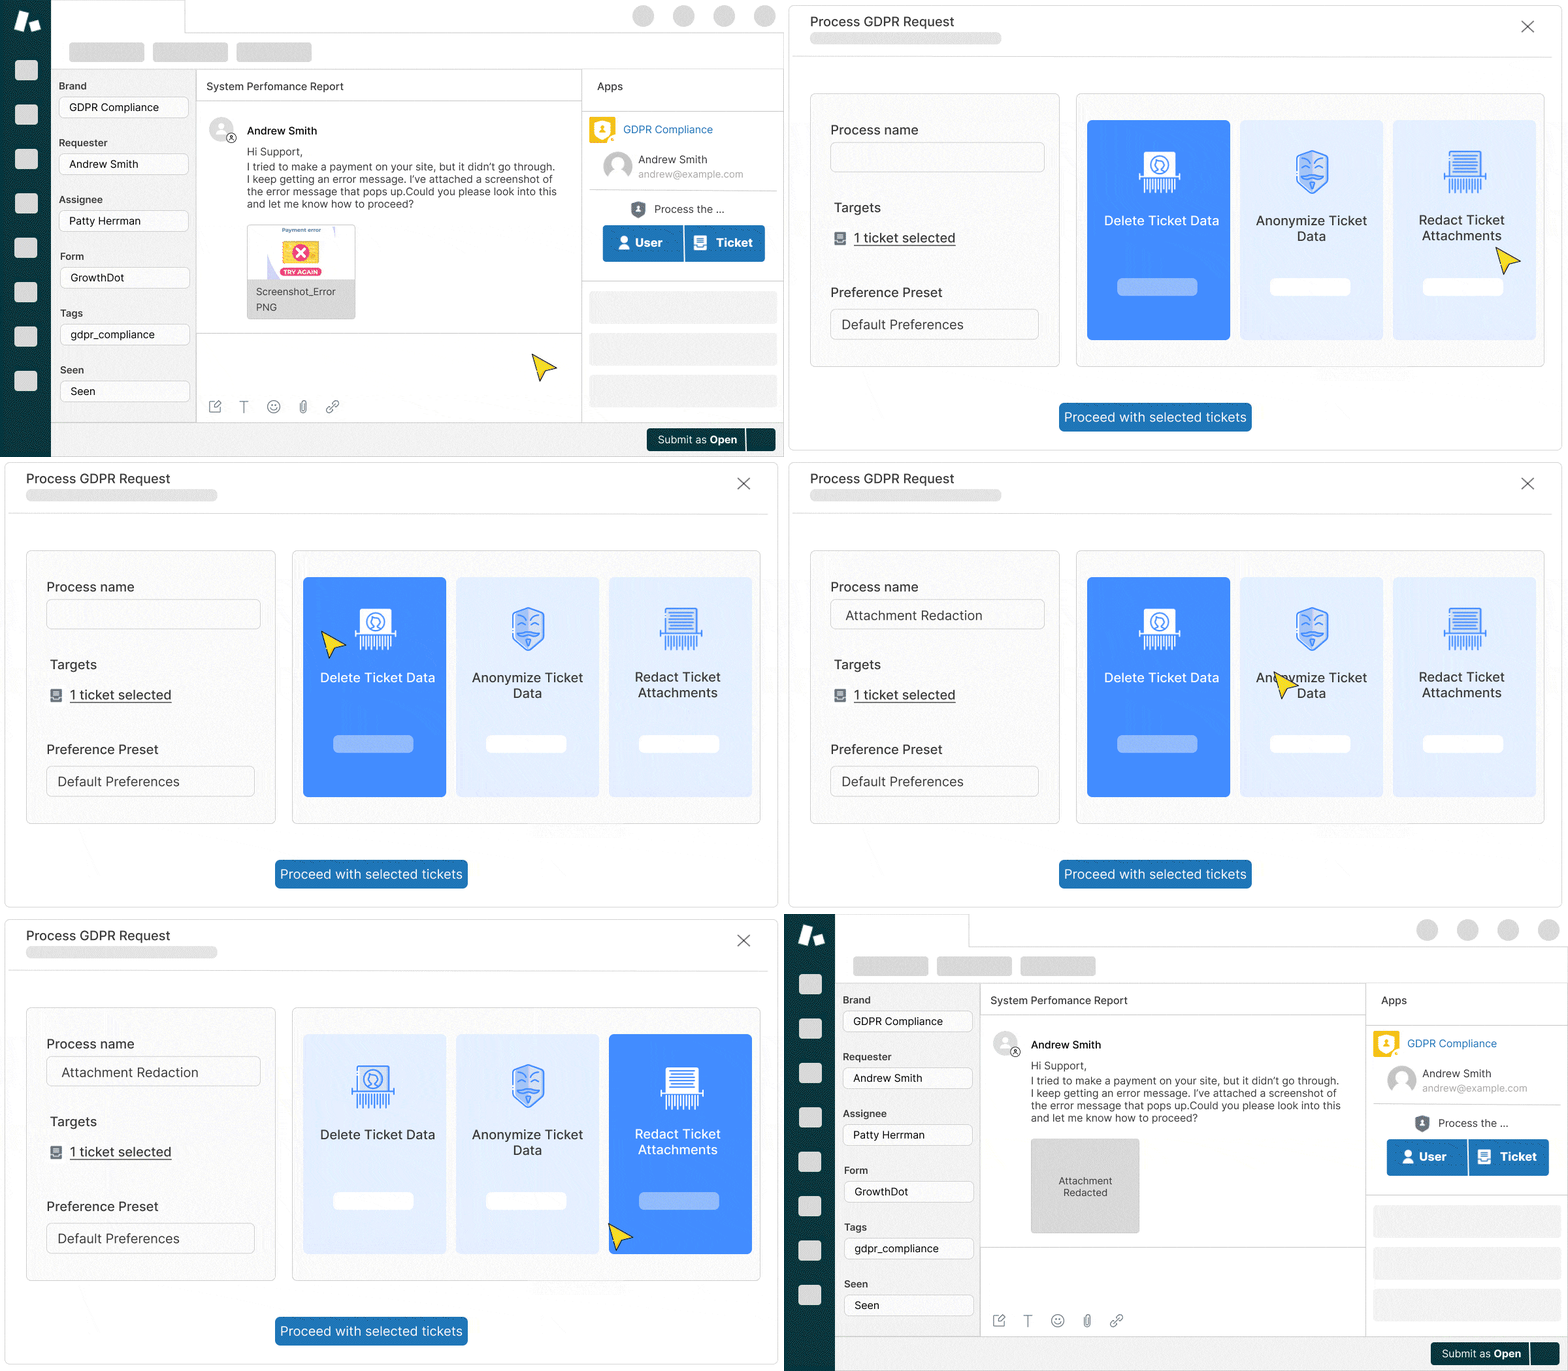
Here's how you can use the app to redact Zendesk attachments:
- Access the app: Open the GDPR Compliance app in your Zendesk account. Make sure the Redaction Attachments add-on is activated—it's essential to access this feature.
- Create target lists: Use the app's intuitive list-building tools to create lists tailored to your needs. You can filter tickets or users to identify which attachments need to be removed. For instance, you might set up a list to target tickets with attachments that are over a year old.
- Start redacting attachments: Once your lists are ready, proceed to the redaction process. Open the created lists and launch the process. If you need to target attachments from a specific ticket or user, simply navigate to the relevant ticket or user profile and start the redaction process from there.
Why Choose the GDPR Compliance App for Attachment Management?
It’s simple. The app offers a straightforward, user-friendly interface, eliminating the need for complex technical setups or custom scripts.
It saves time. Bulk deletion and custom list features allow you to quickly handle large volumes of attachments, saving you significant time and effort.
It’s cost-effective. Upgrading your storage plan can be pricey. That's why the redaction attachments feature, available as an add-on, offers flexible plans—5 GB, 10 GB, or 15 GB—so you only pay for what you need.
It’s an all-in-one cleanup. The app doesn't just handle attachments. It also integrates with other cleanup tasks, like deleting outdated tickets, users, and organizations. It's a one-stop shop for keeping your Zendesk tidy.
Conclusion: Overcoming Zendesk Storage Limits
Zendesk storage limits can be quite a hassle when they start impacting your support system's efficiency and lead to unexpected expenses. Fortunately, you can manage these limits effectively with the right strategies.
Understanding how storage works and implementing regular cleanup practices can keep your Zendesk environment streamlined and cost-effective. Tools like the GDPR Compliance app offer a simple, no-code solution for deleting attachments, while the Zendesk API provides advanced control for those with technical expertise.
Ultimately, maintaining efficient storage prevents performance issues and helps you avoid additional costs, ensuring a smoother and more responsive support experience. Stay proactive with your storage management, and you'll keep your Zendesk system running at its best.

