How To Set Automations In CRM and Deals
-
Kanban Pro
GrowthDot has recently updated CRM and Deals with the Automation element. The main advantage is you can manage deals automatically to prevent them dismissing from your mind and getting lost over a pipeline. Setting Automation up is one thing you need to do manually while controlling deals.
What’s more, an adjusted Automation will help you get rid of active deals. For this, transfer them to the lost field at a fixed period - daily, weekly, monthly, or every year. As a result, you will acquire an excellent output quality while sorting the pipeline out.
Now, let us get you through scheduling Automations.
Find an Automation button
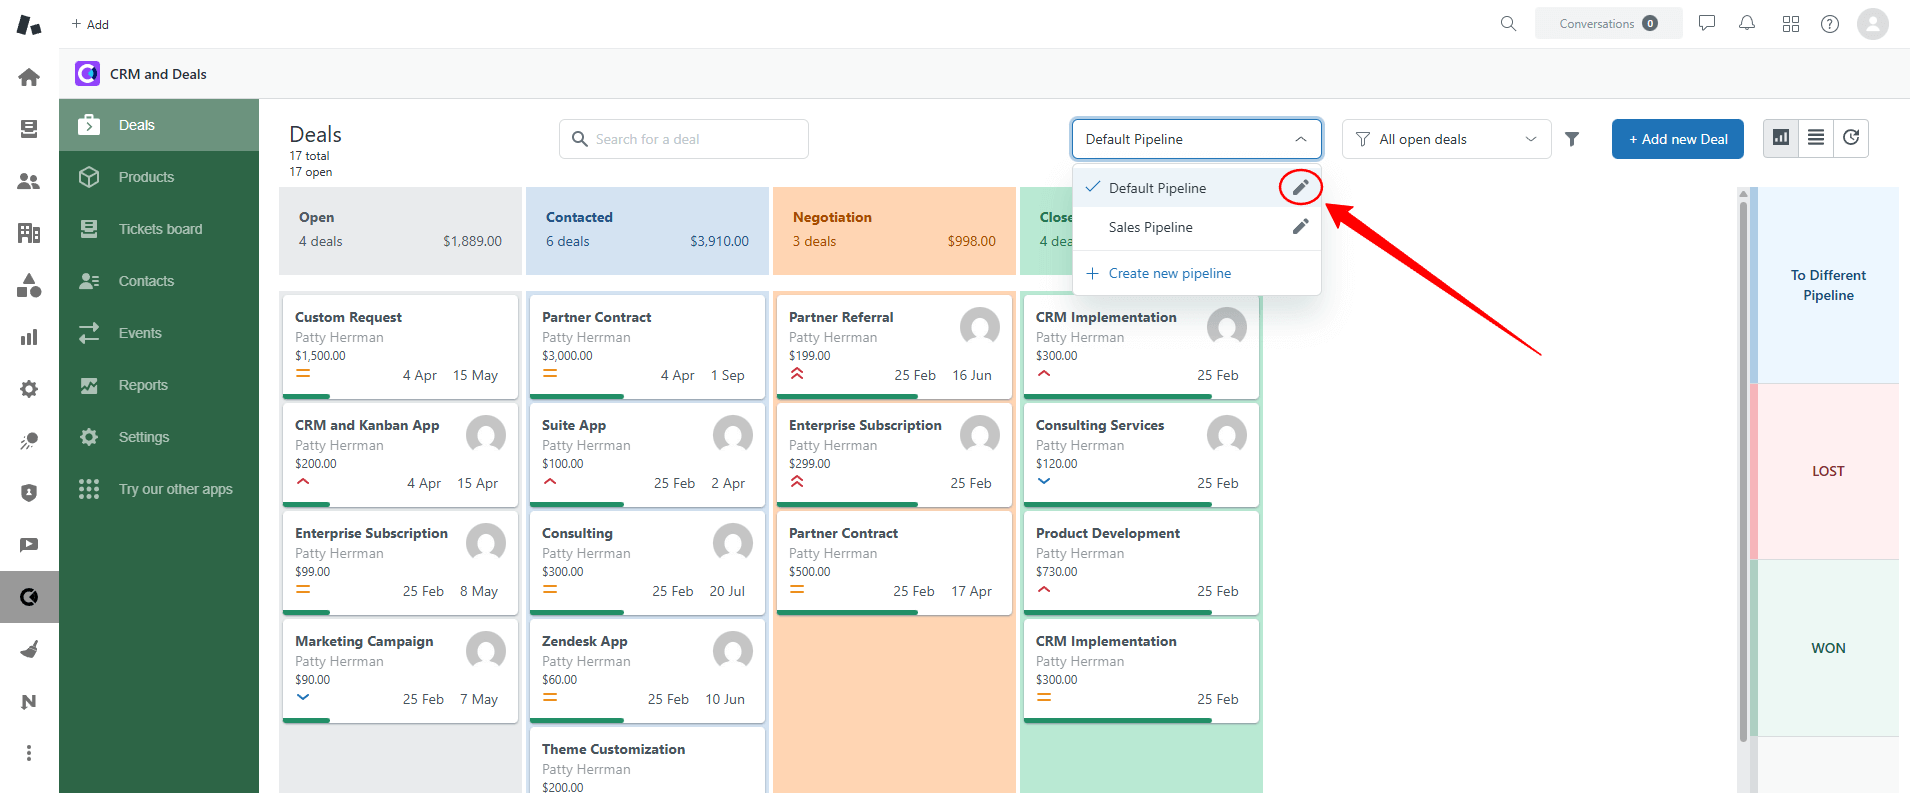
The most former thing you need to do In Zendesk Support is to open CRM and Deals app, then on the page Deals, find and click on the Pipeline dropdown. Next, choose the Edit item near any Pipeline you have.

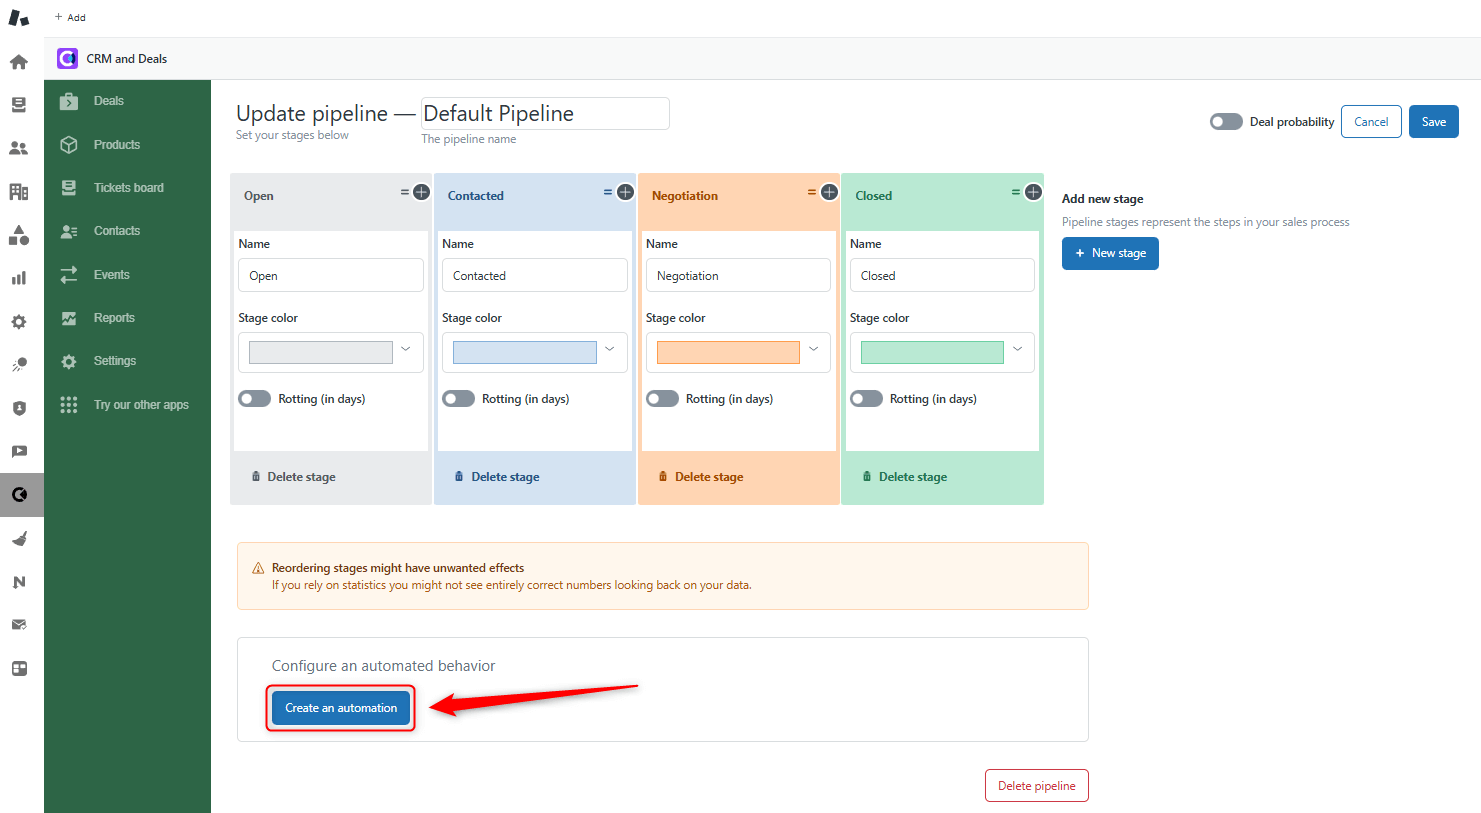
When you are on the Update pipeline, find and press Create an automation in the bottom part of the page.

Fill in fields
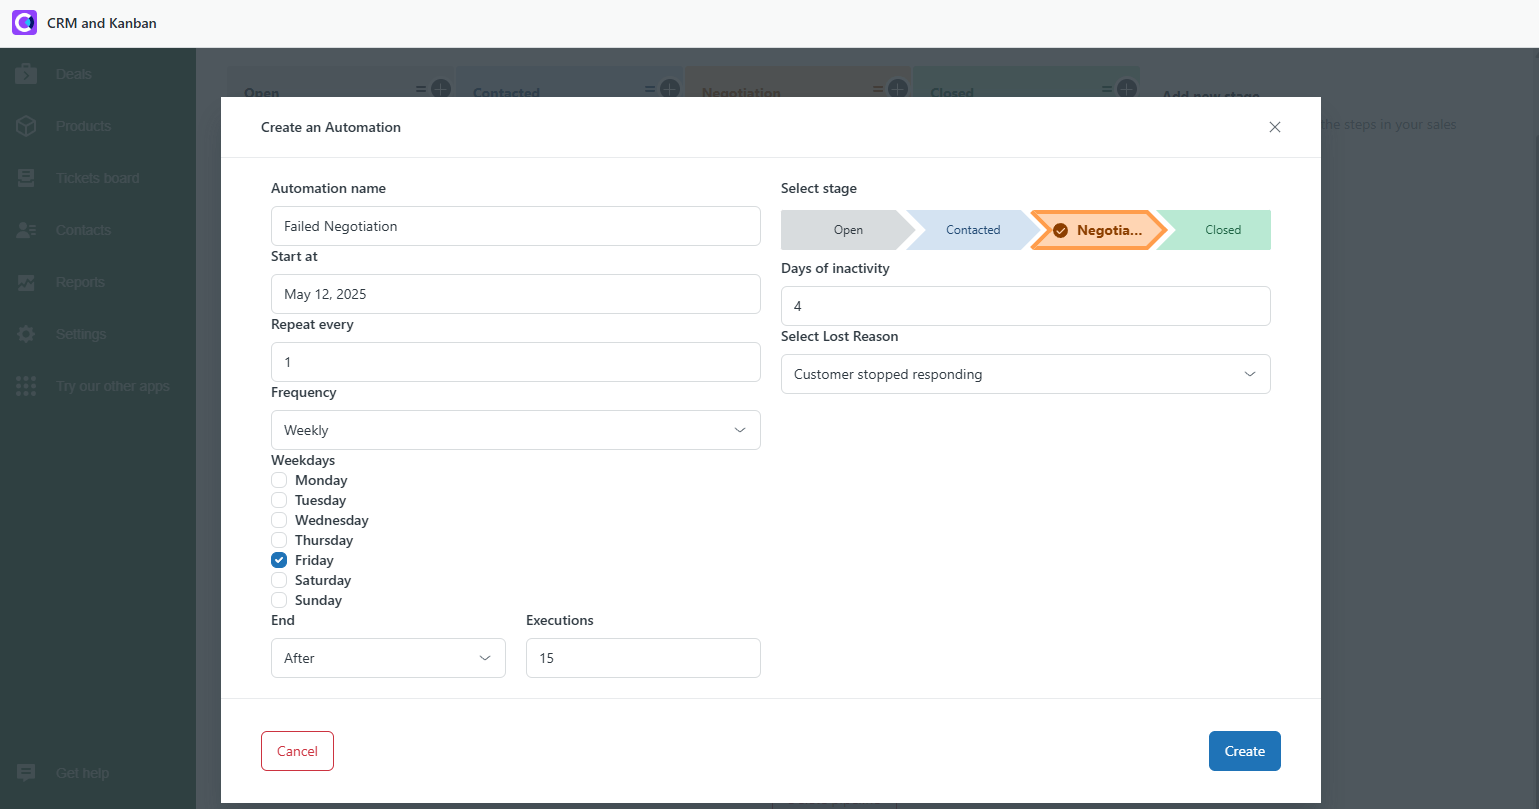
Next, fill in followed fields: Automation name, Start at, Repeat every, Frequency, End, Select stage, Days of inactivity, and Select Lost Reason.
Let’s enter the data together. Firstly, we name Automation as Failed Negotiations. That means deals that face some obstacles while negotiating or unfinished ones during a defined period (we've chosen 4 days) are moved to Lost. To help them move automatically, set some limitations. So, we begin by choosing our Automation starts on May 12, 2025, or another date you want.

We want this process to repeat once a week, so enter 1 in Repeat every section with Frequency - Weekly and select a Weekday.
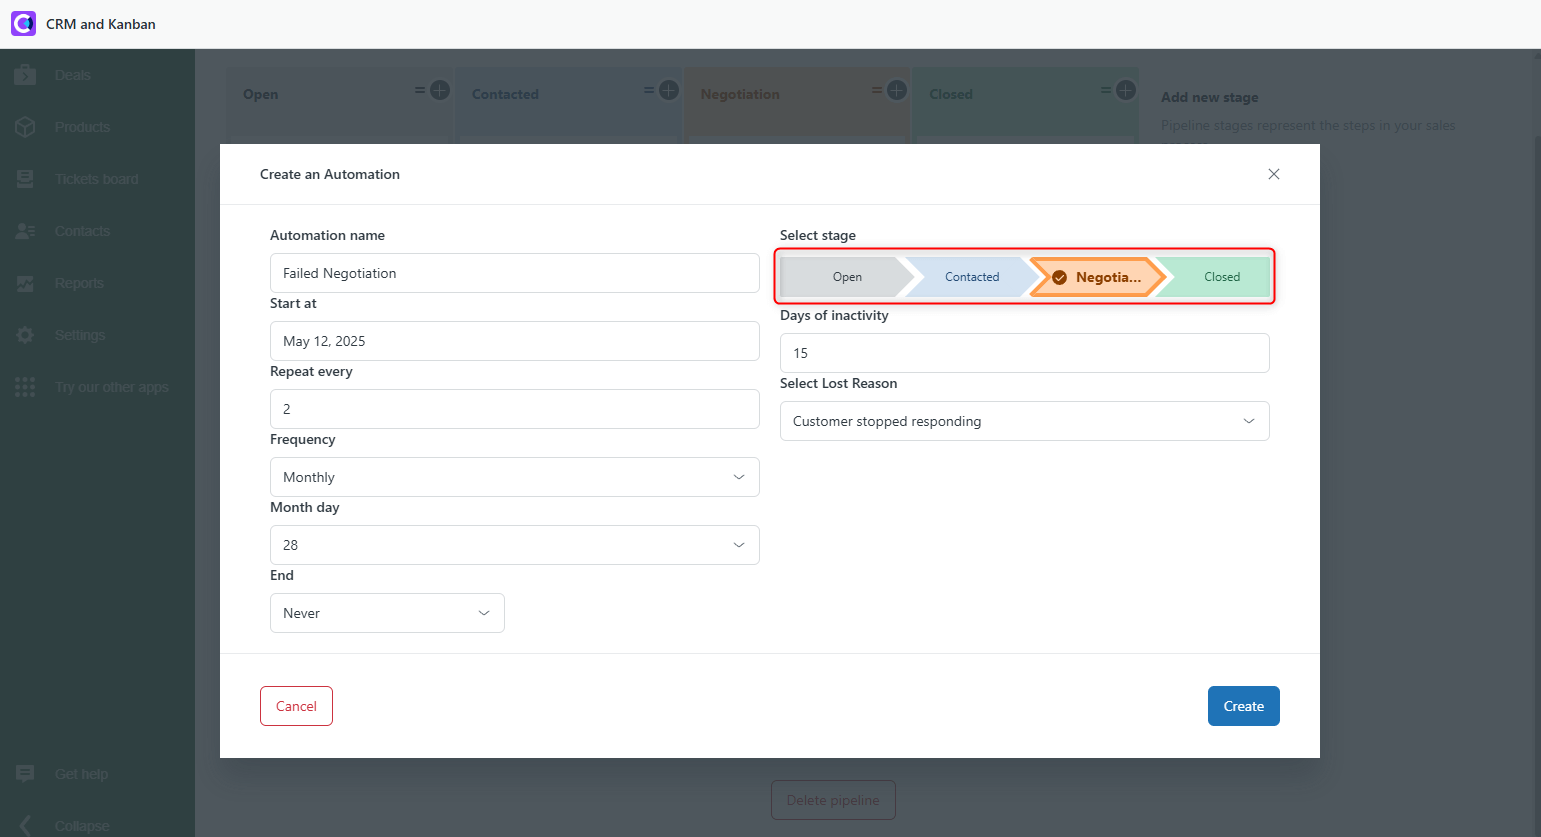
Another example, if you need to define another frequency and repetition, you can try to change Repeat every into, for instance, 2, Frequency – Monthly, Month day - 28. It implies that the automation process is held once every two months, on the 28th day of the month.

End item controls when the automation is off. We can select a particular Date or Never condition from the dropdown list.
The Select Stage is obligatory, so we choose the second deal phase named Negotiation. You also can pick any stage from your Custom Pipeline or add a new one on the Update Pipeline Page.
Then, we enter 15 Days of inactivity (Obligatory) – the idling time of a deal before it gets moved to Lost.
And finally, Select Lost Reason (Obligatory) from the offered dropdown list.
Hope, this detailed guide will be helpful and assist you with all deals. If you still have any questions or suggestions, please feel free to contact us.


