How to Set Up Tag-Based Automation in Proactive Campaigns
-
Proactive Campaigns
Automating workflows based on customer tags can help you better target specific segments, save time, and create more personalized interactions. Follow this step-by-step guide for setting up tag-based automation in the Proactive Campaigns app.
Step 1: Start Using Automations
If this is your first time using the automations feature, start by enabling it in your Proactive Campaigns app.
- In the app, go to the Automations tab.
- Click Connect to enable the automations feature for your account.
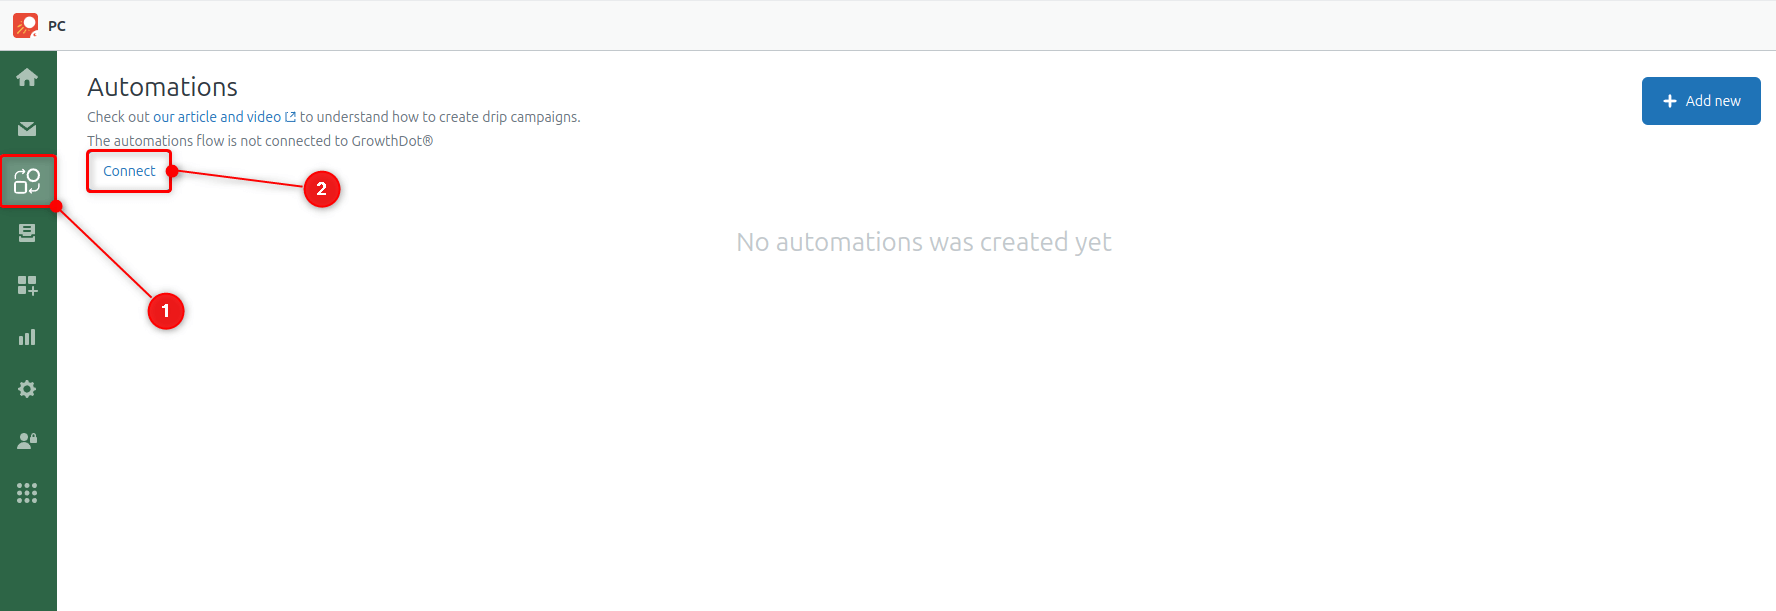
This step ensures your account is set up to create and manage automated workflows within Proactive Campaigns.
Step 2: Configure the Webhook for Tag-Based Automation
To create an automation that responds to changes in user tags, you'll need to configure a webhook within the Zendesk Admin Center. This webhook will allow the automation to trigger whenever specific user tags are updated.
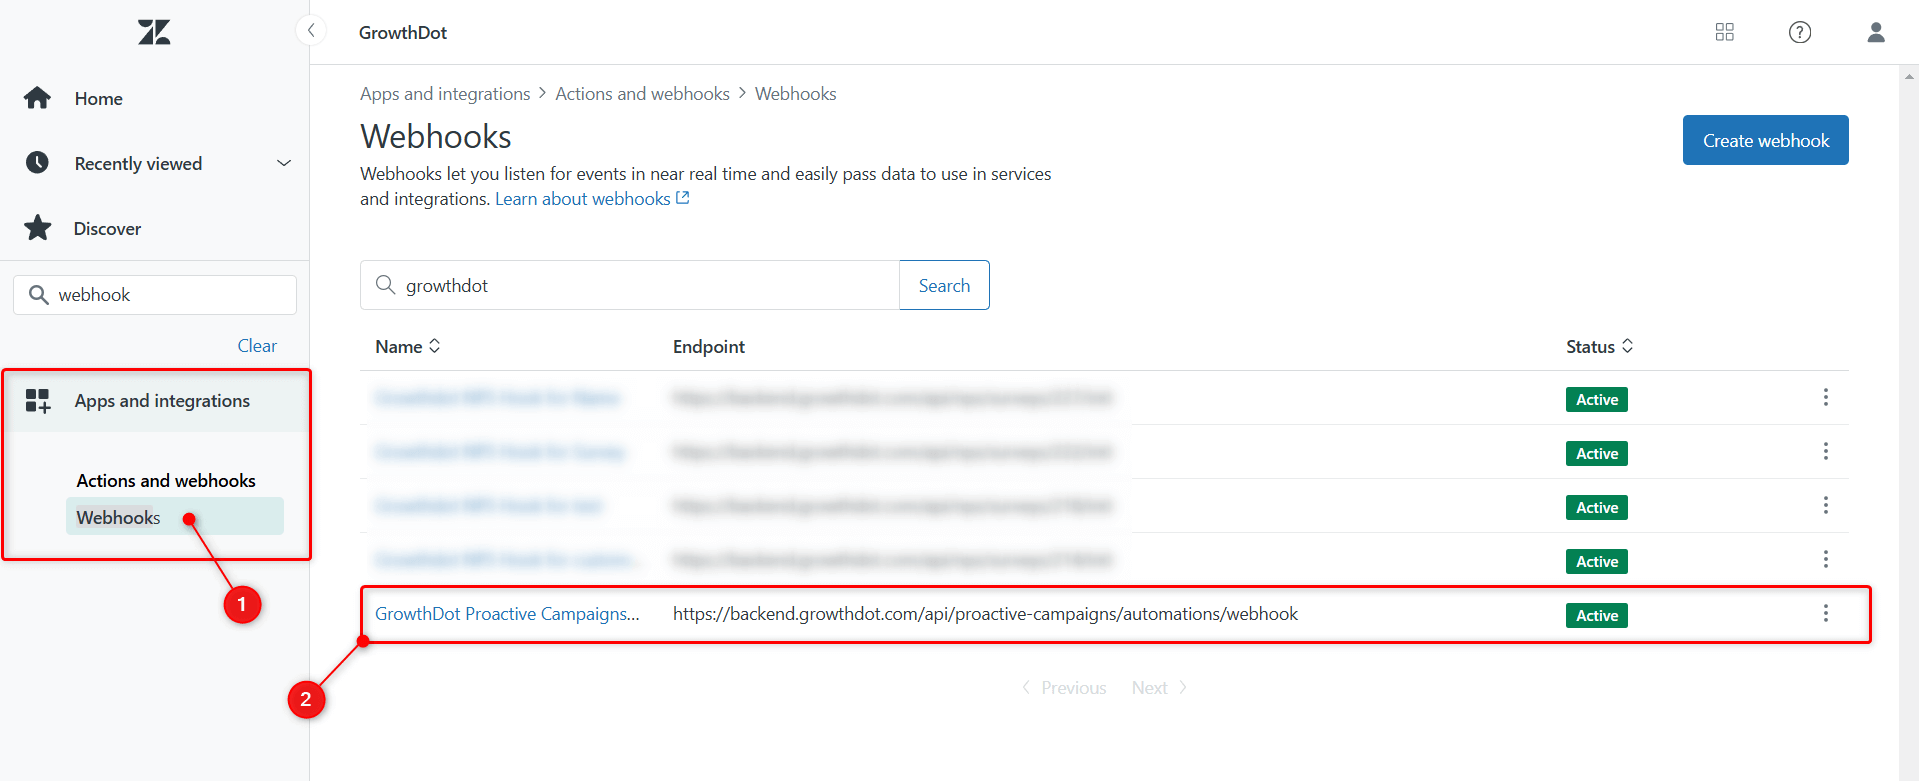
- In Zendesk Admin Center, navigate to Apps and integrations > Actions and webhooks > Webhooks.
- Find the webhook ‘GrowthDot Proactive Campaigns Automations’ and click on it.
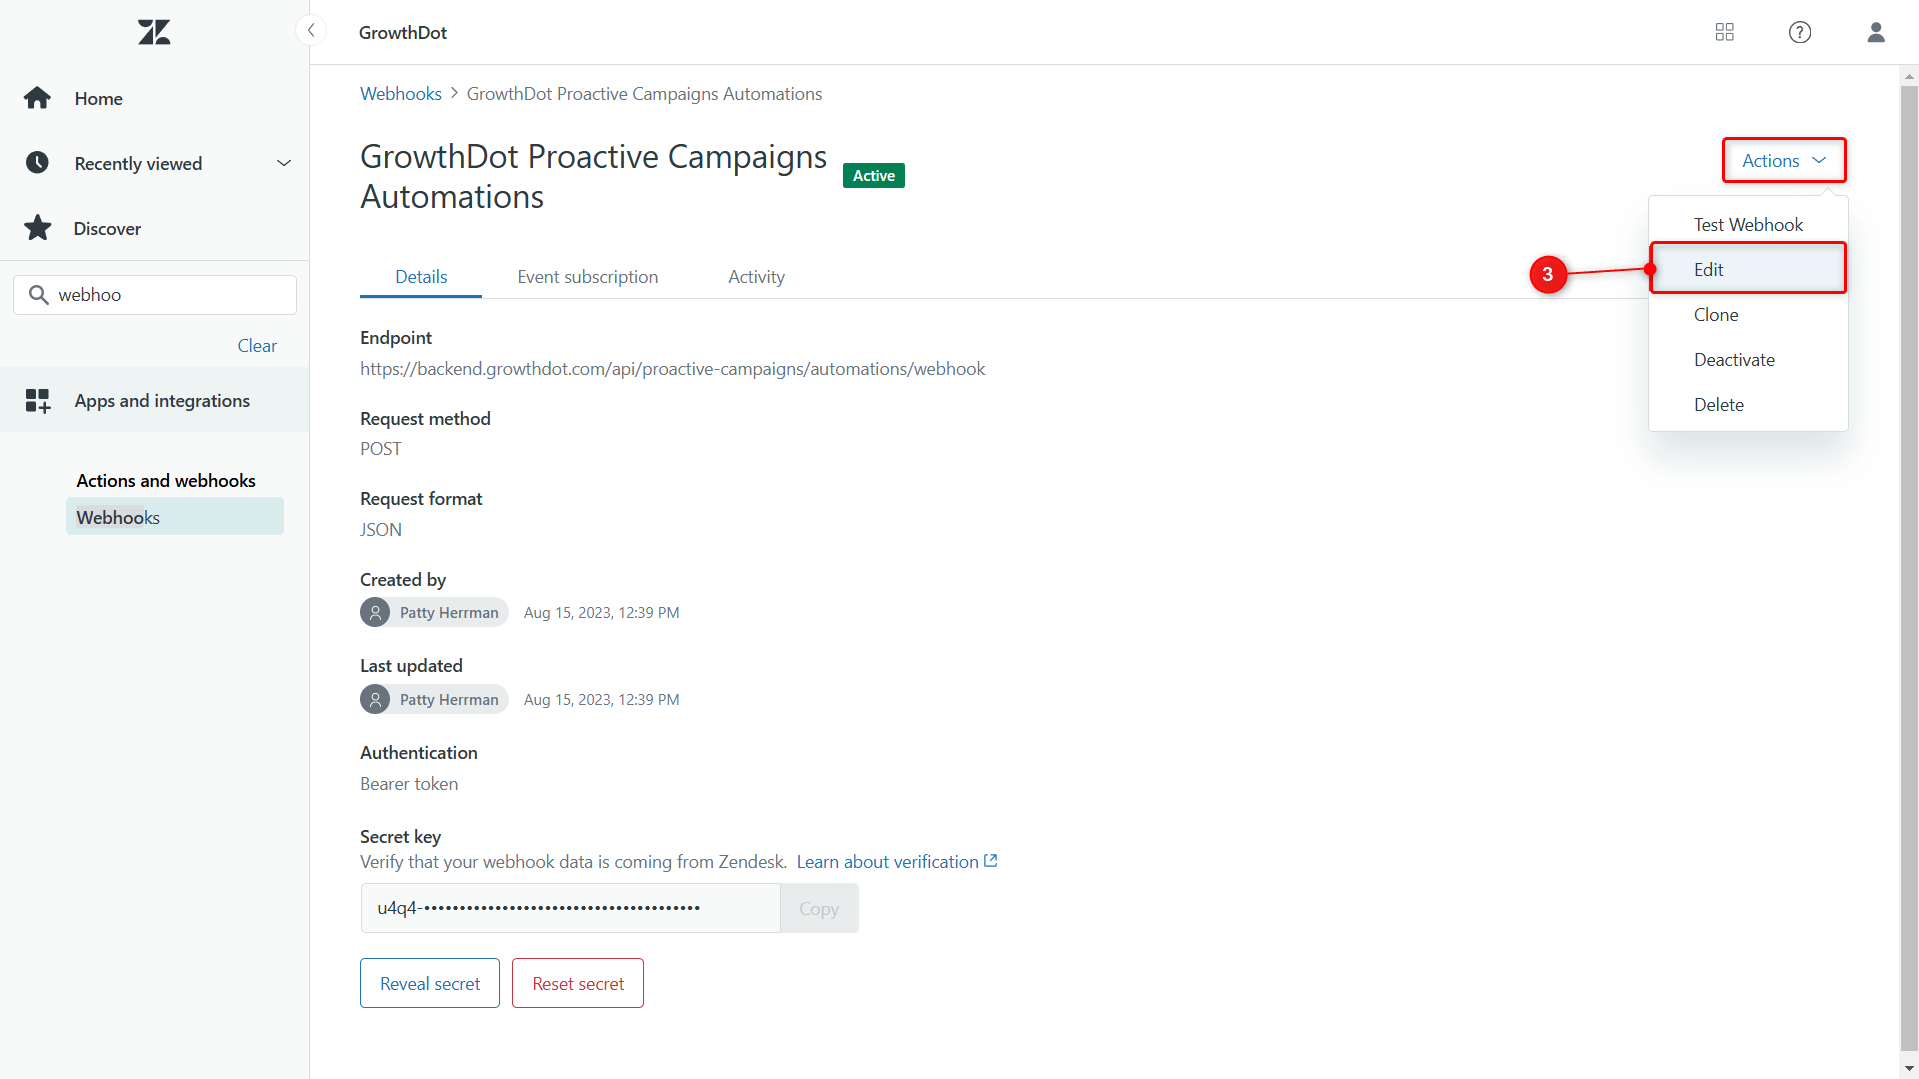
- On the webhook page, click on Actions and choose Edit to modify its settings.
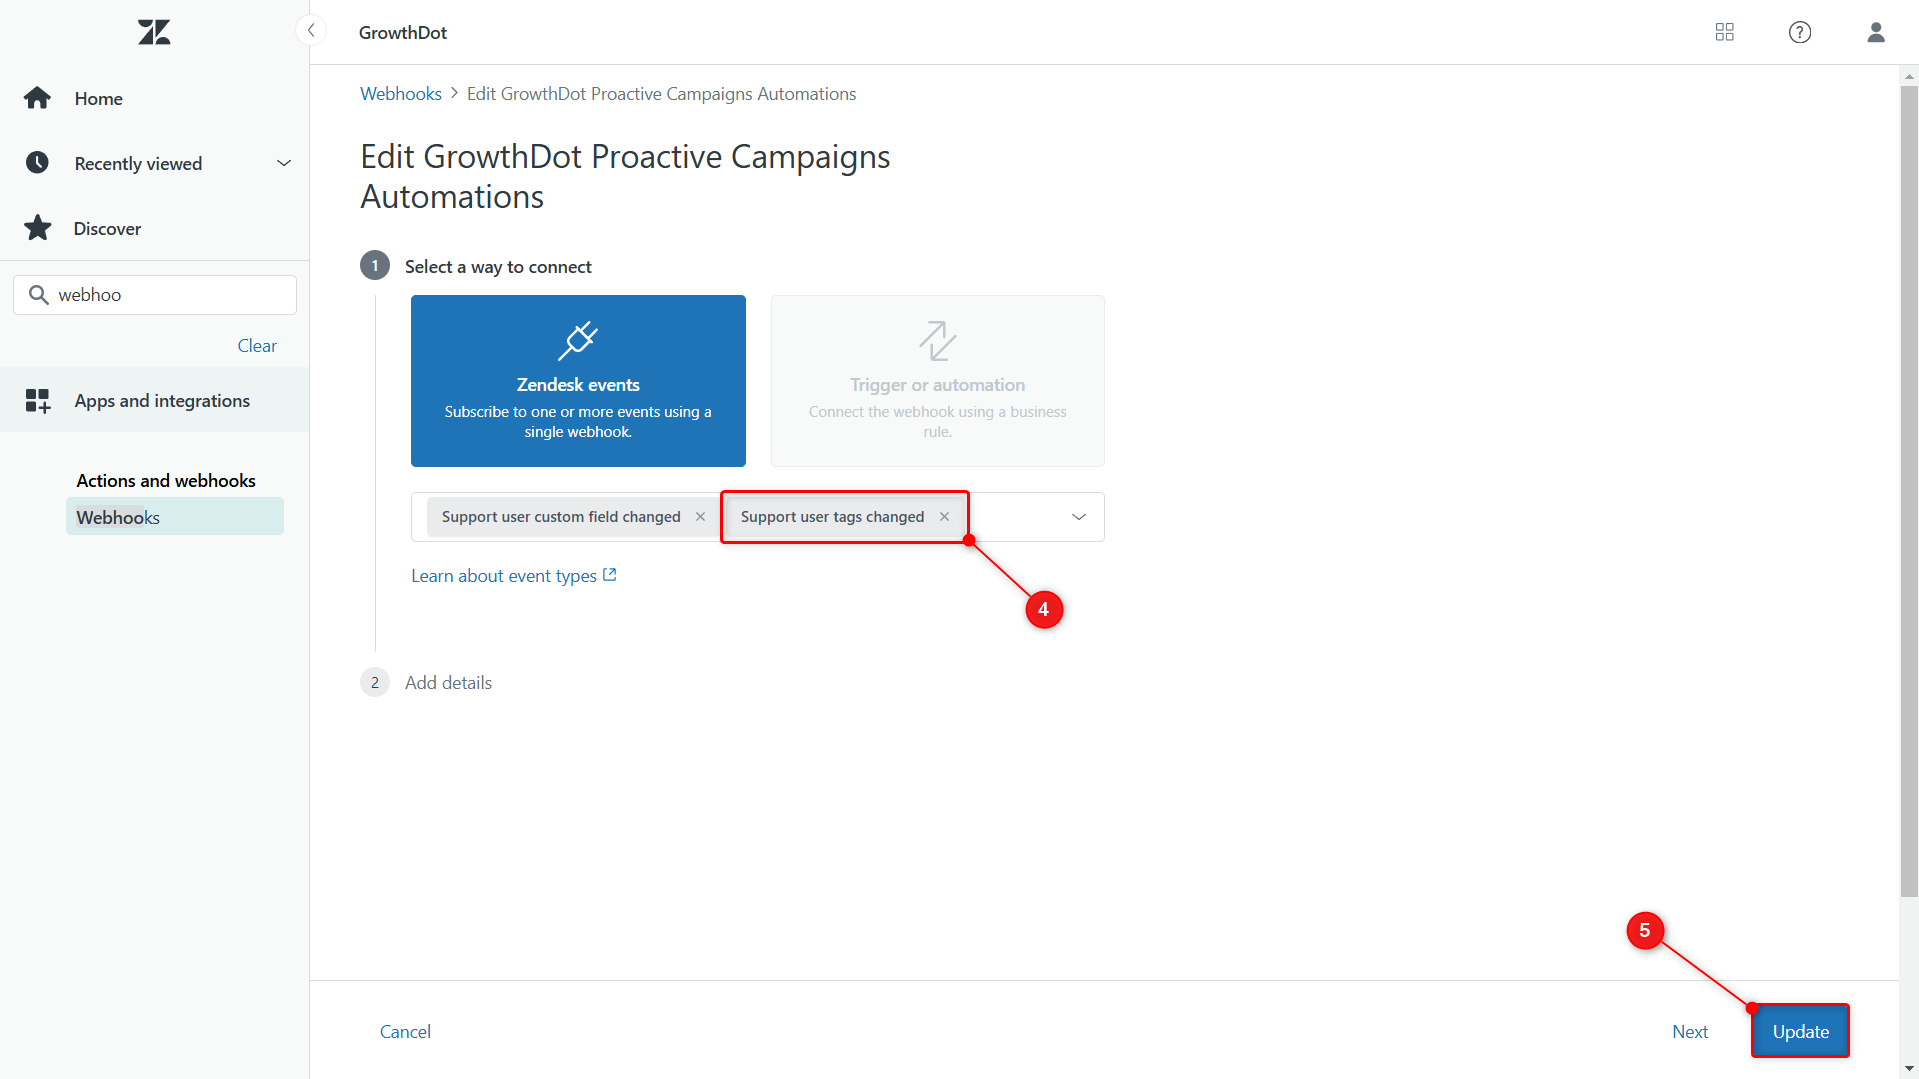
- Within the Select a way to connect section, add the event labeled ‘Support user tags changed.’ This setting enables the webhook to respond to changes in user tags.
- Click Update to save your changes.
Key Point: Automations are triggered only by User tags
You might encounter a situation where your automation doesn’t fire. This often happens if you’ve added tags to the ticket itself, since the app creates automations based only on user tags.
So, you can add tags directly to a user. To do this:
-
Go to the Customers tab.
-
Select the specific User.
-
Add the desired tag in the Tags field (as shown below).
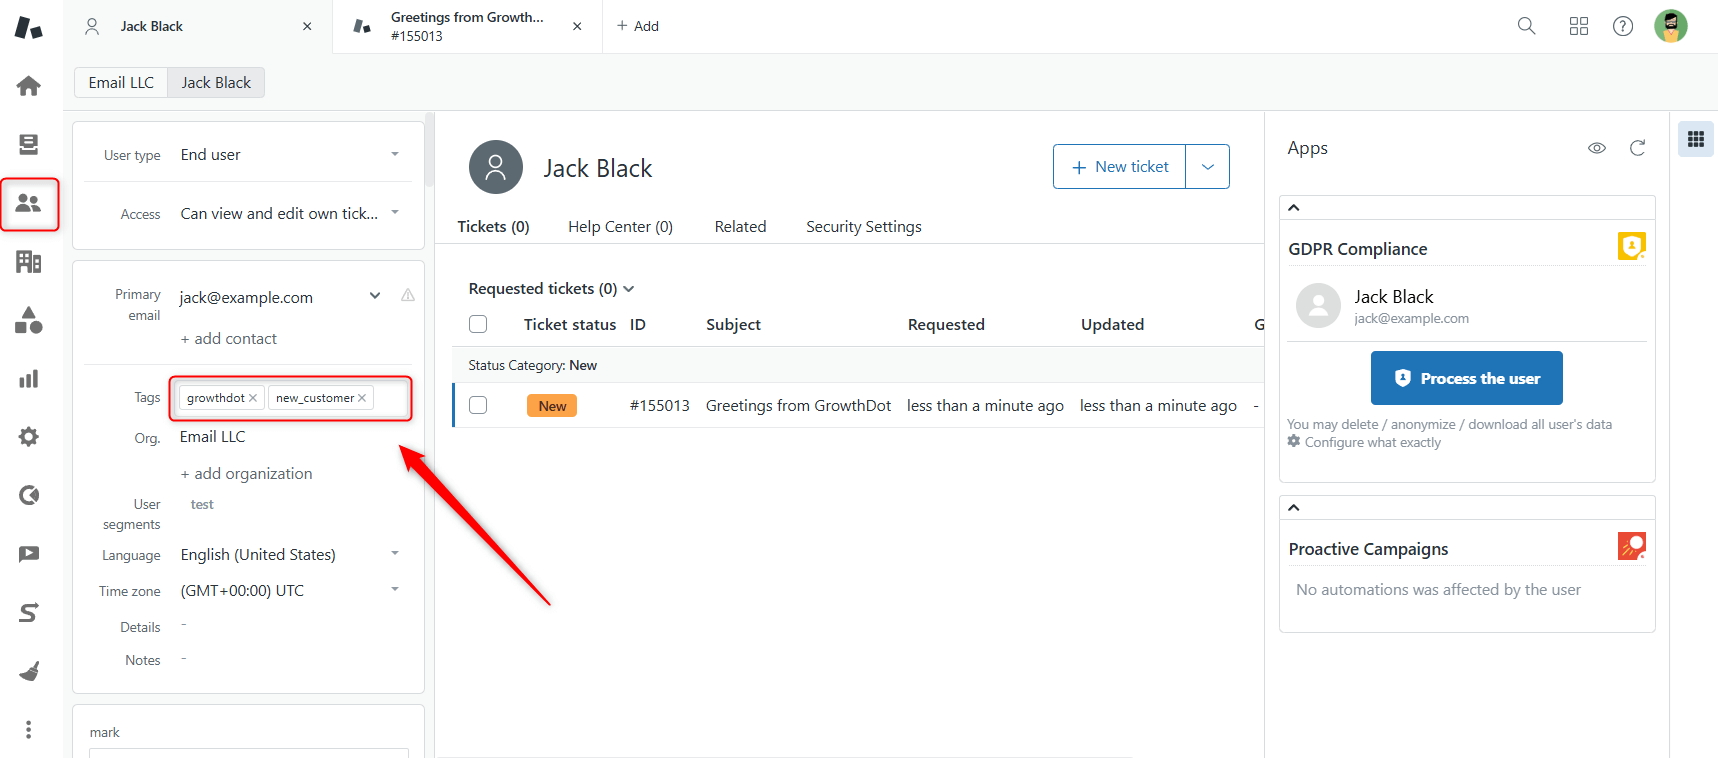
Read Zendesk article if you need to get into advanced tagging settings or bulk tagging.
Step 3: Set Up a Targeted User List with Tags
With the webhook setup complete, you can now create a list of users filtered by specific tags to serve as the target group for your automation.
- Open the Proactive Campaigns app and proceed to Settings.
- In the sidebar, go to List Management > User Lists.
- Click + Add a New List to begin creating a custom user list.
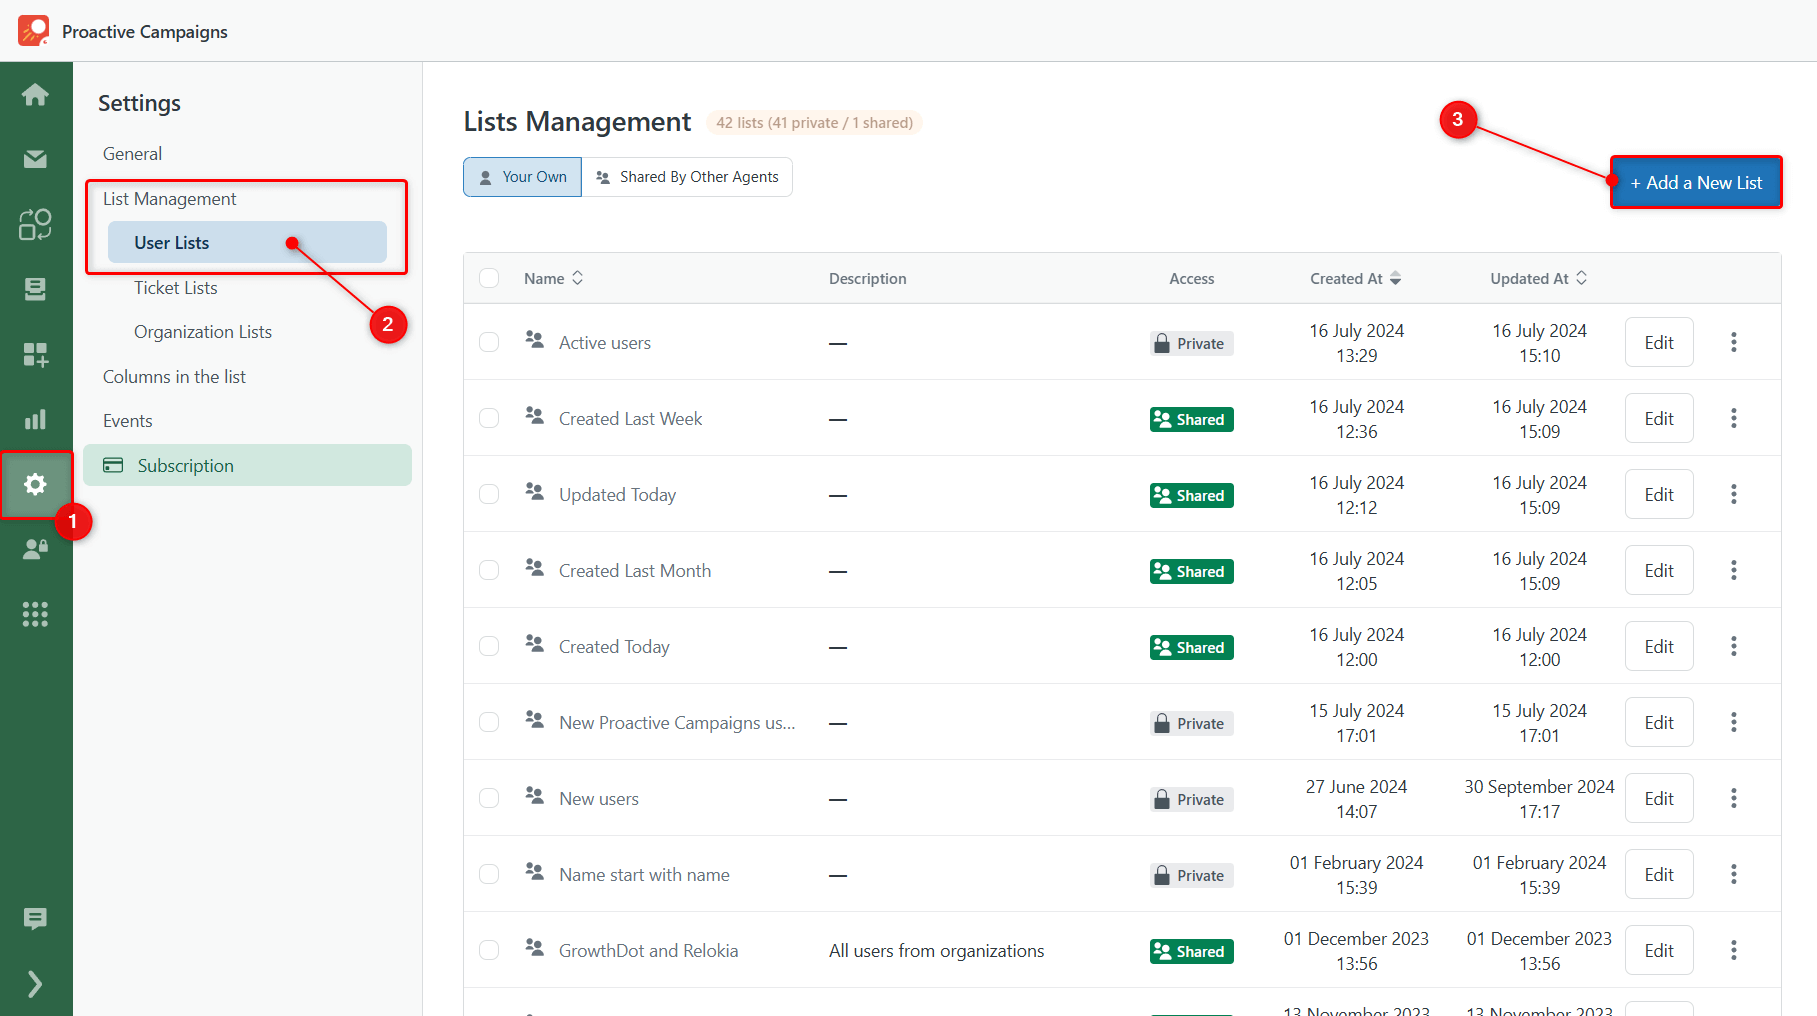
- Provide a name for your list.
- Click Add condition.
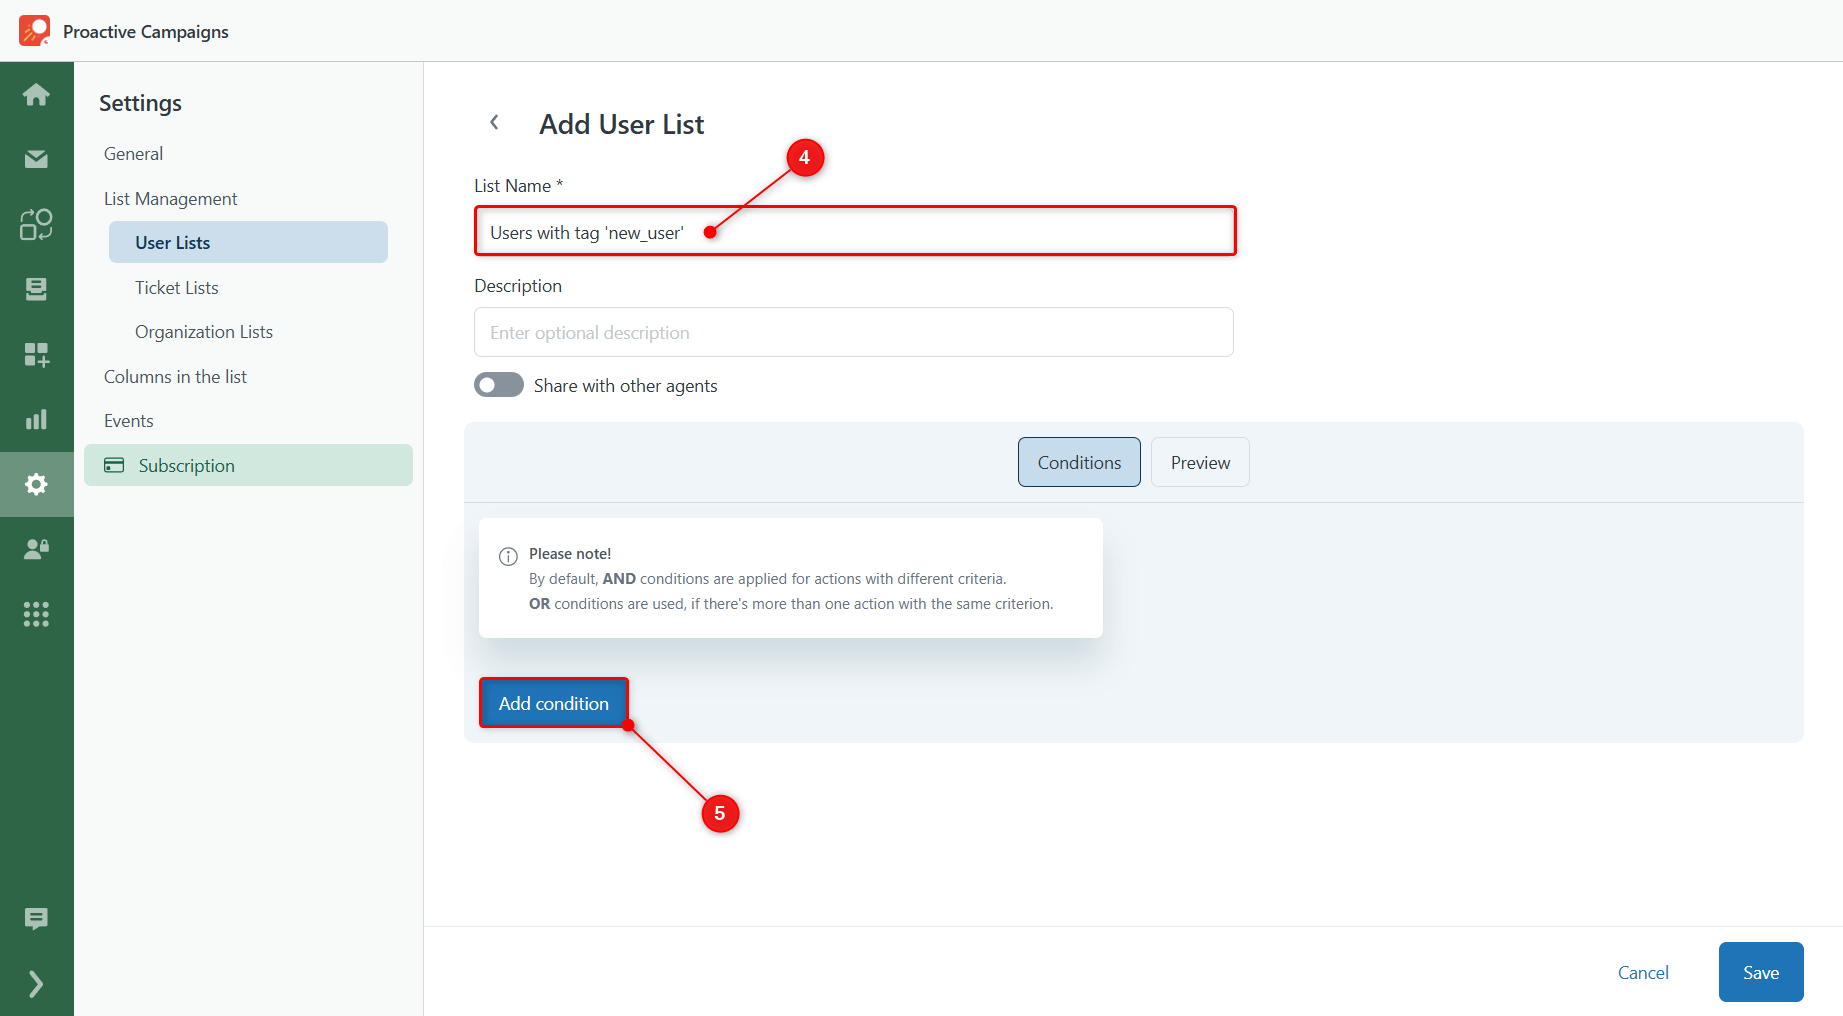
- Choose Tags as the field and set your desired tag conditions.
- Once you’ve configured the conditions, click Save to finalize your list.
Step 4: Create an Automation Using Your User List with Tags
With your tagged user list ready, the final step is to set up an automation that uses this list to trigger specific actions.
- In the Proactive Campaigns app, go back to the Automations tab.
- Click + Add new to create a new automation.
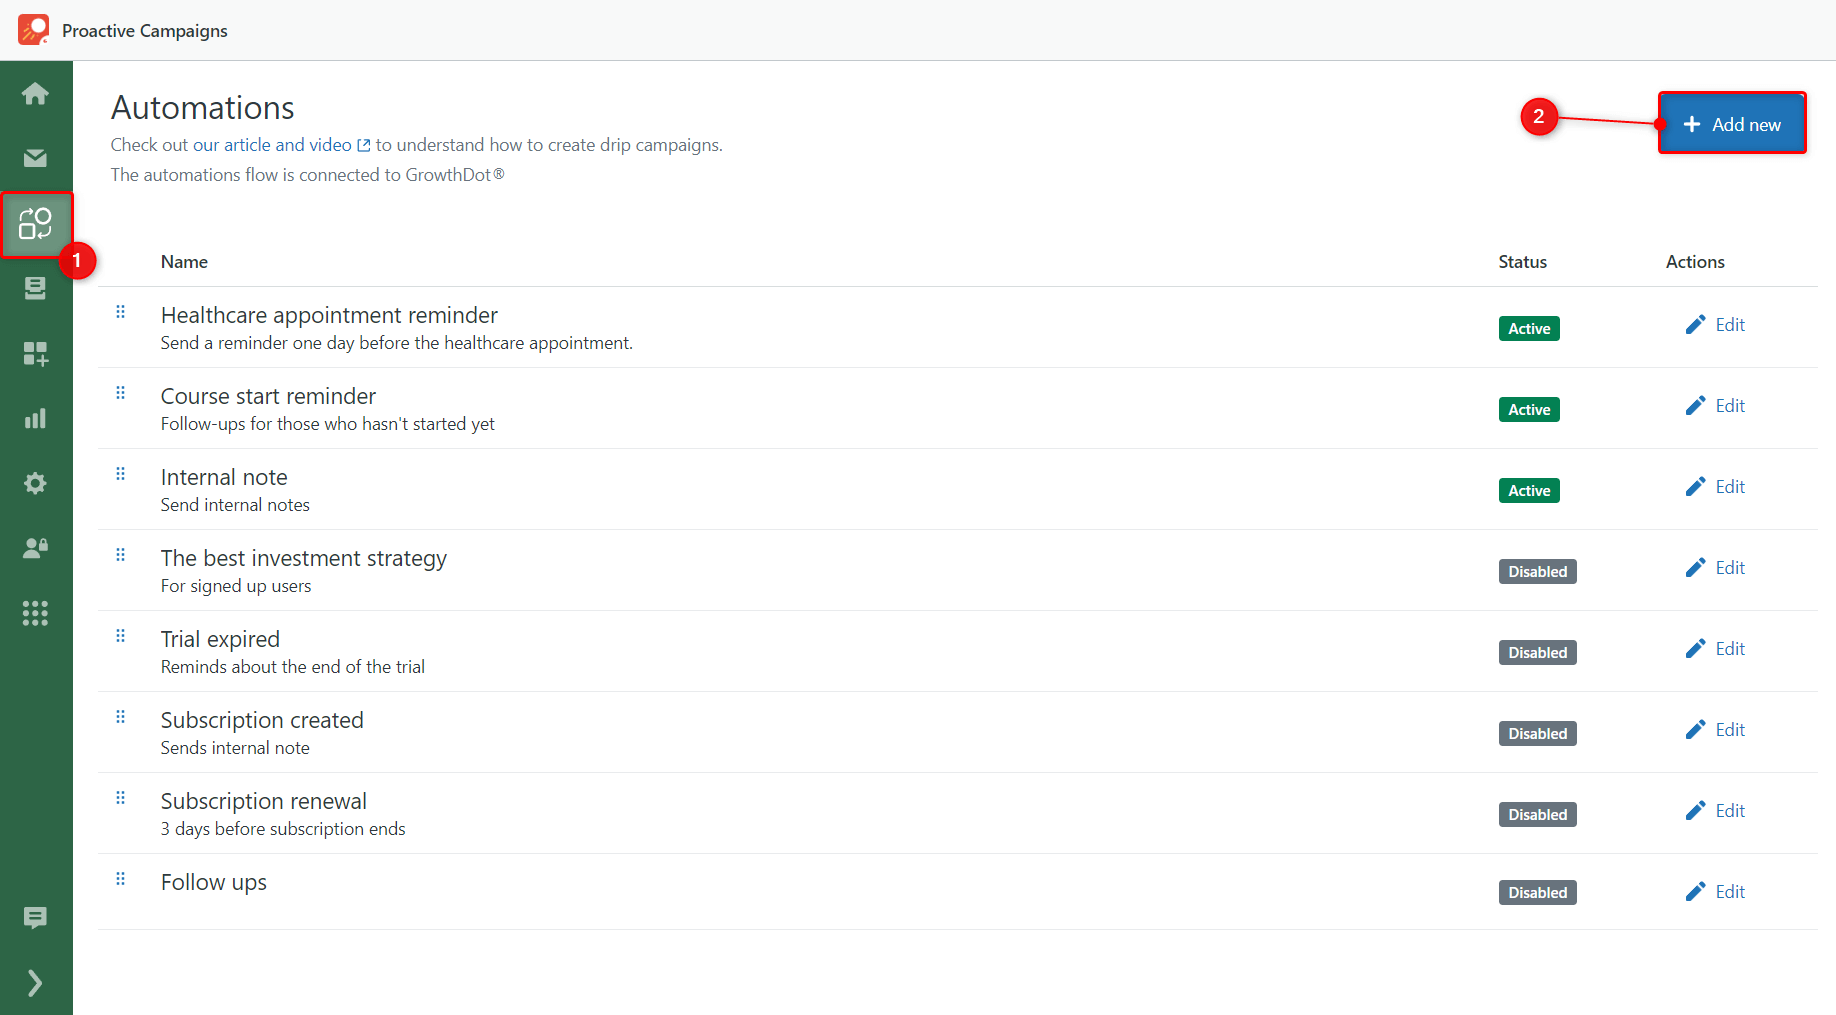
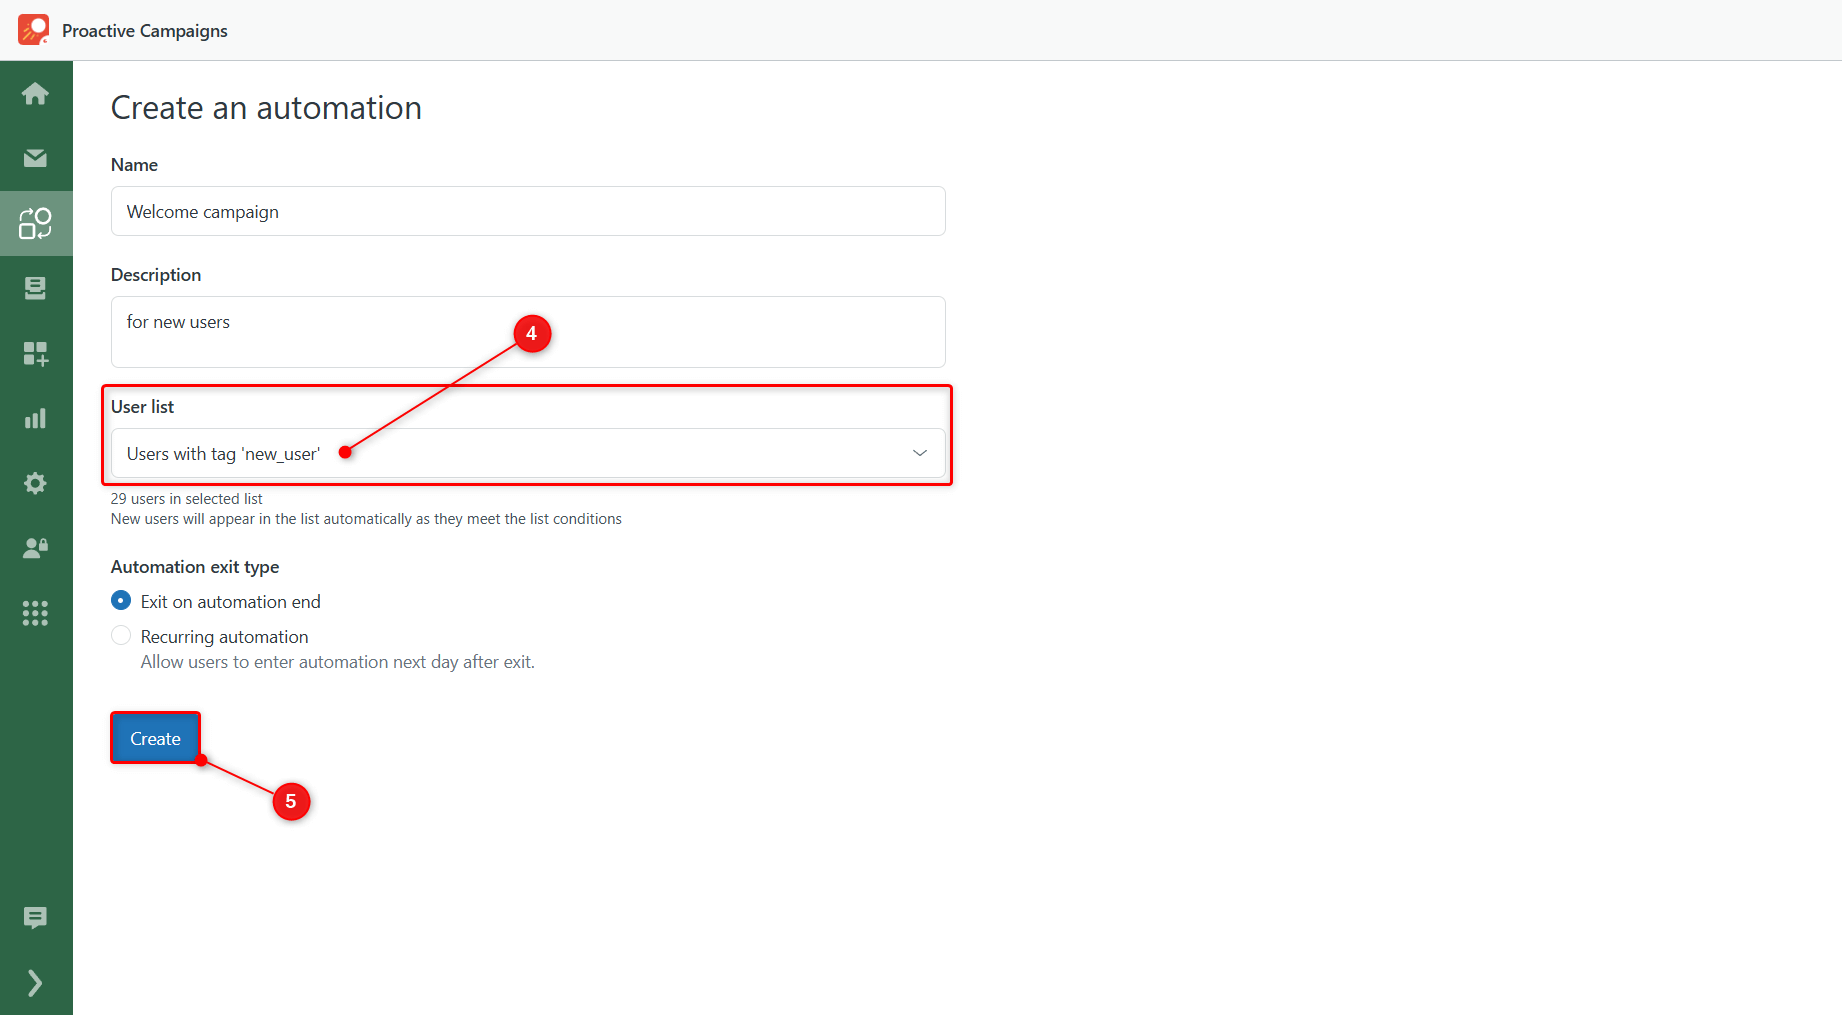
- Fill in all the fields, such as name, description (additional), and automation exit type.
- Under the User list, select the list you created based on tags.
- Click Create to save the automation.
 Next, move on with the regular automation creation:
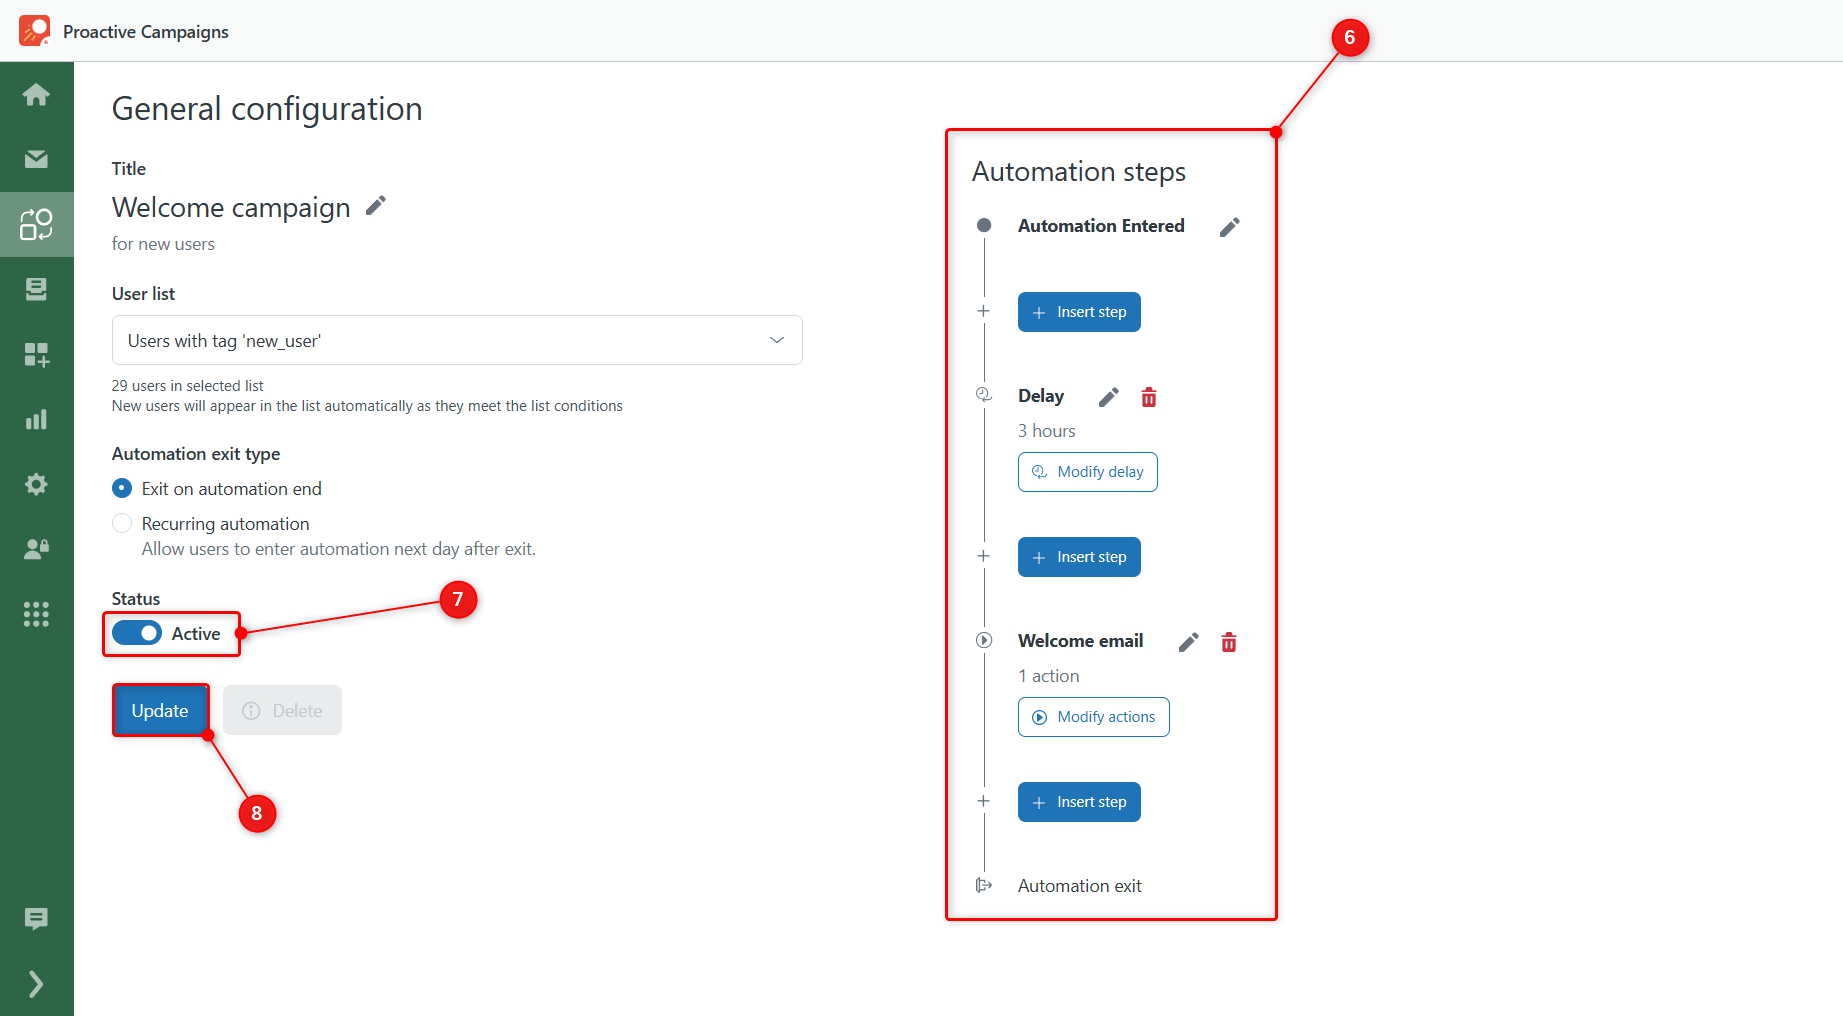
- Add any required steps to define the automation's actions, such as sending a message or updating a user field.
- When you’re done, toggle on the button to activate automation.
- Finally, click Update.
By following these steps, you’ll have a fully functional, tag-based automation ready to go. If you have questions or need additional help, please contact our support team.


