How to Create a New Campaign in Proactive Campaigns
-
Proactive Campaigns
Ready to create a campaign in Proactive Campaigns? This process is the most intuitive than ever. Let's walk you through the steps to help you create engaging campaigns with our improved tools.
Get started by opening the Campaigns page. Then click Create a New Campaign in the top right corner and select Email Campaign channel.
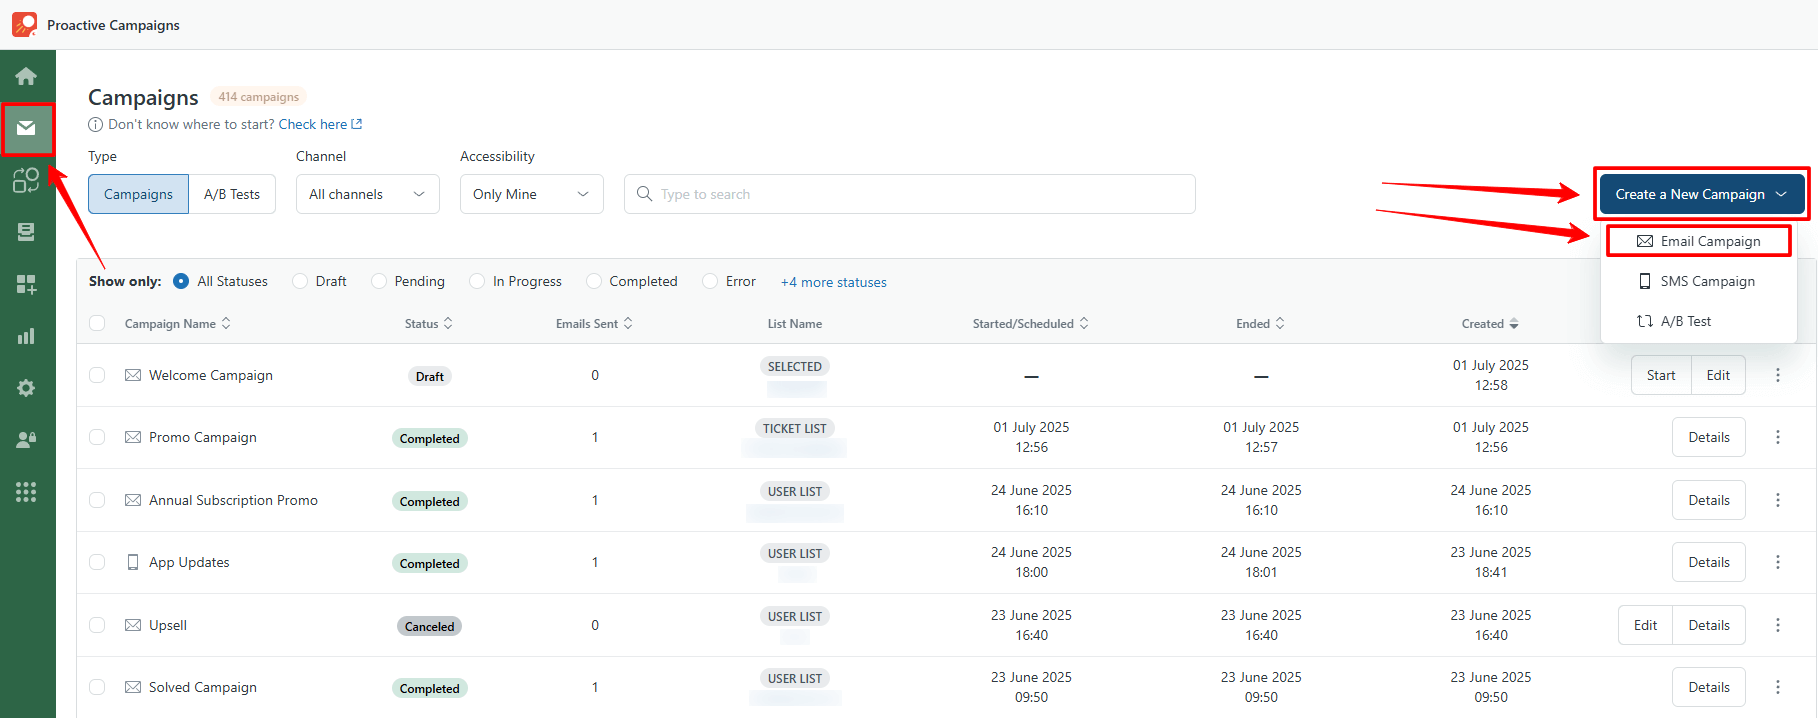
As you can see, we have reconstructed the editor, and instead of four steps, there are now only three. So, let's explore each step in more detail.
With Proactive Campaigns, you can create three types of campaigns. Read our guides on how to create SMS campaigns and A/B test campaigns.
Step 1: General
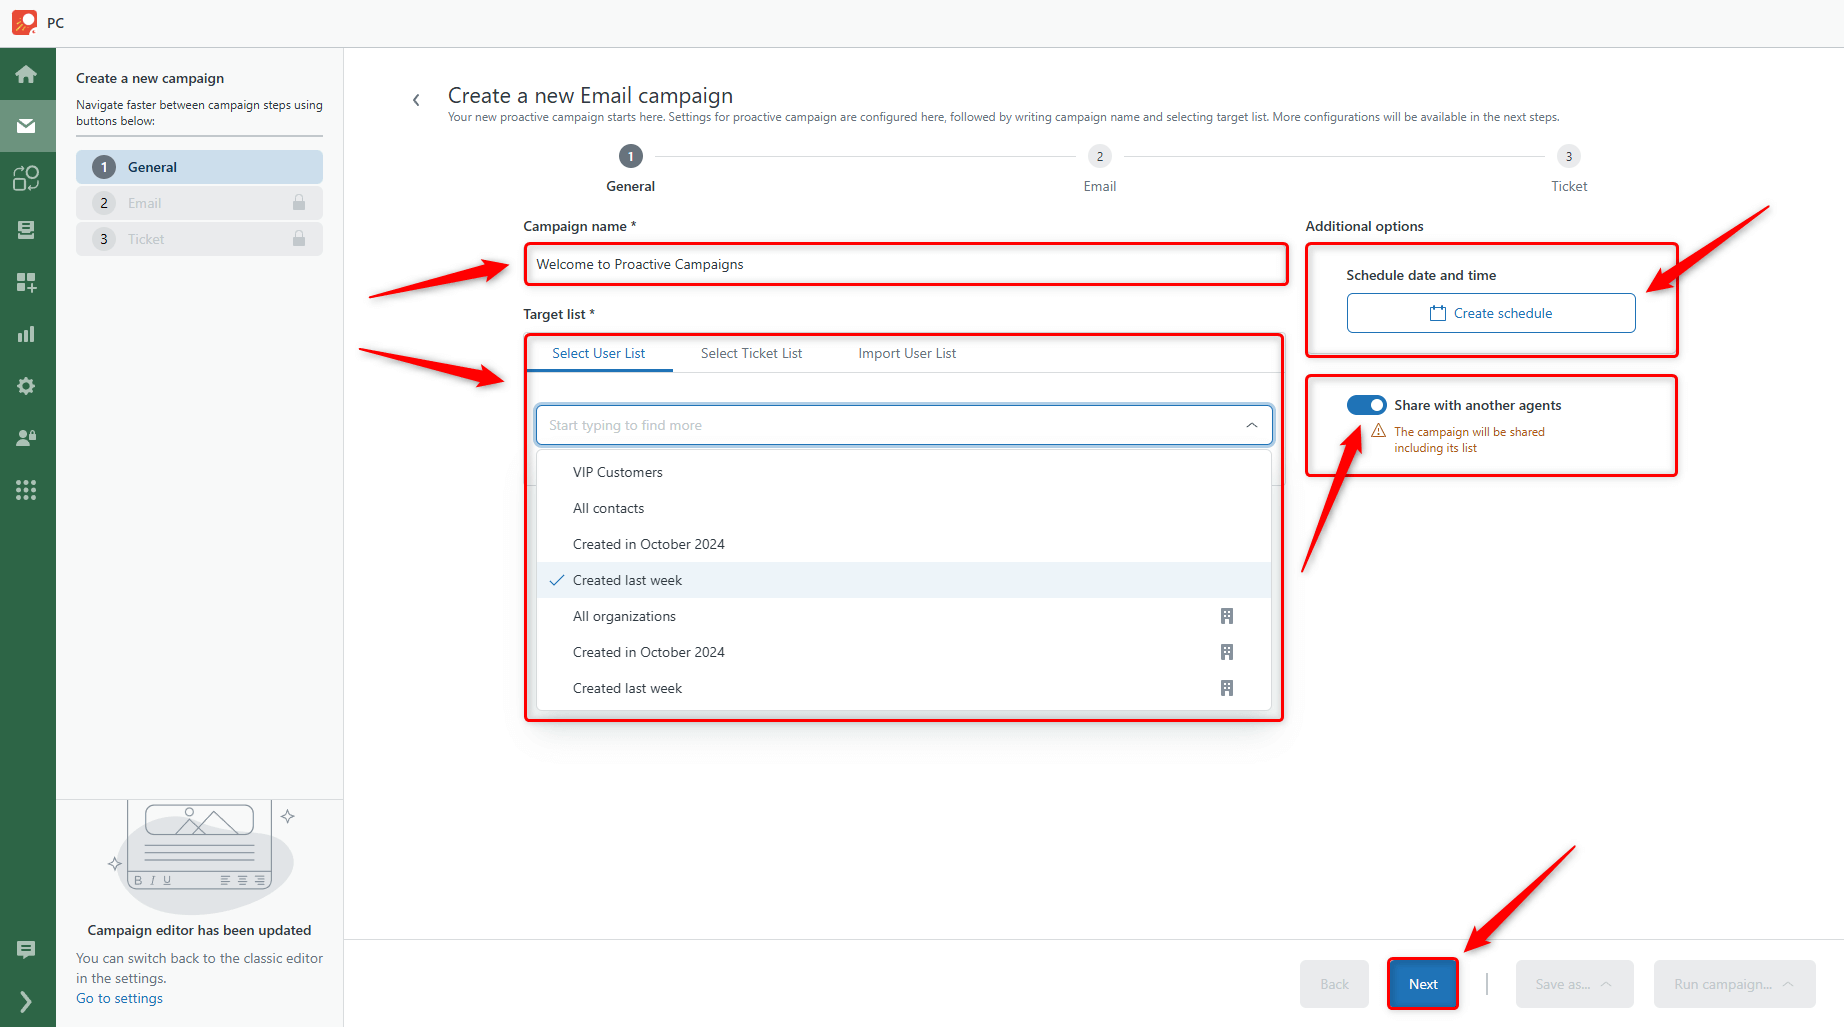
The first stage of campaign creation includes the main configurations:
- Campaign name: Give your campaign a name.
- Target list: To set up the target audience, select the User, Ticket, or Organization list. Organization lists, indicated by a special icon, can be found within the User lists. Alternatively, you can import a CSV file with the necessary contacts.
There are also Additional options:
- To schedule your campaign, click Create schedule to choose the exact date and time to send emails.
- Toggle on Share with another agents to allow other agents to check the campaign details and clone it.
When you're done with these configurations, click Next.
Step 2: Email
In this step, you're creating the visual presentation of your email.
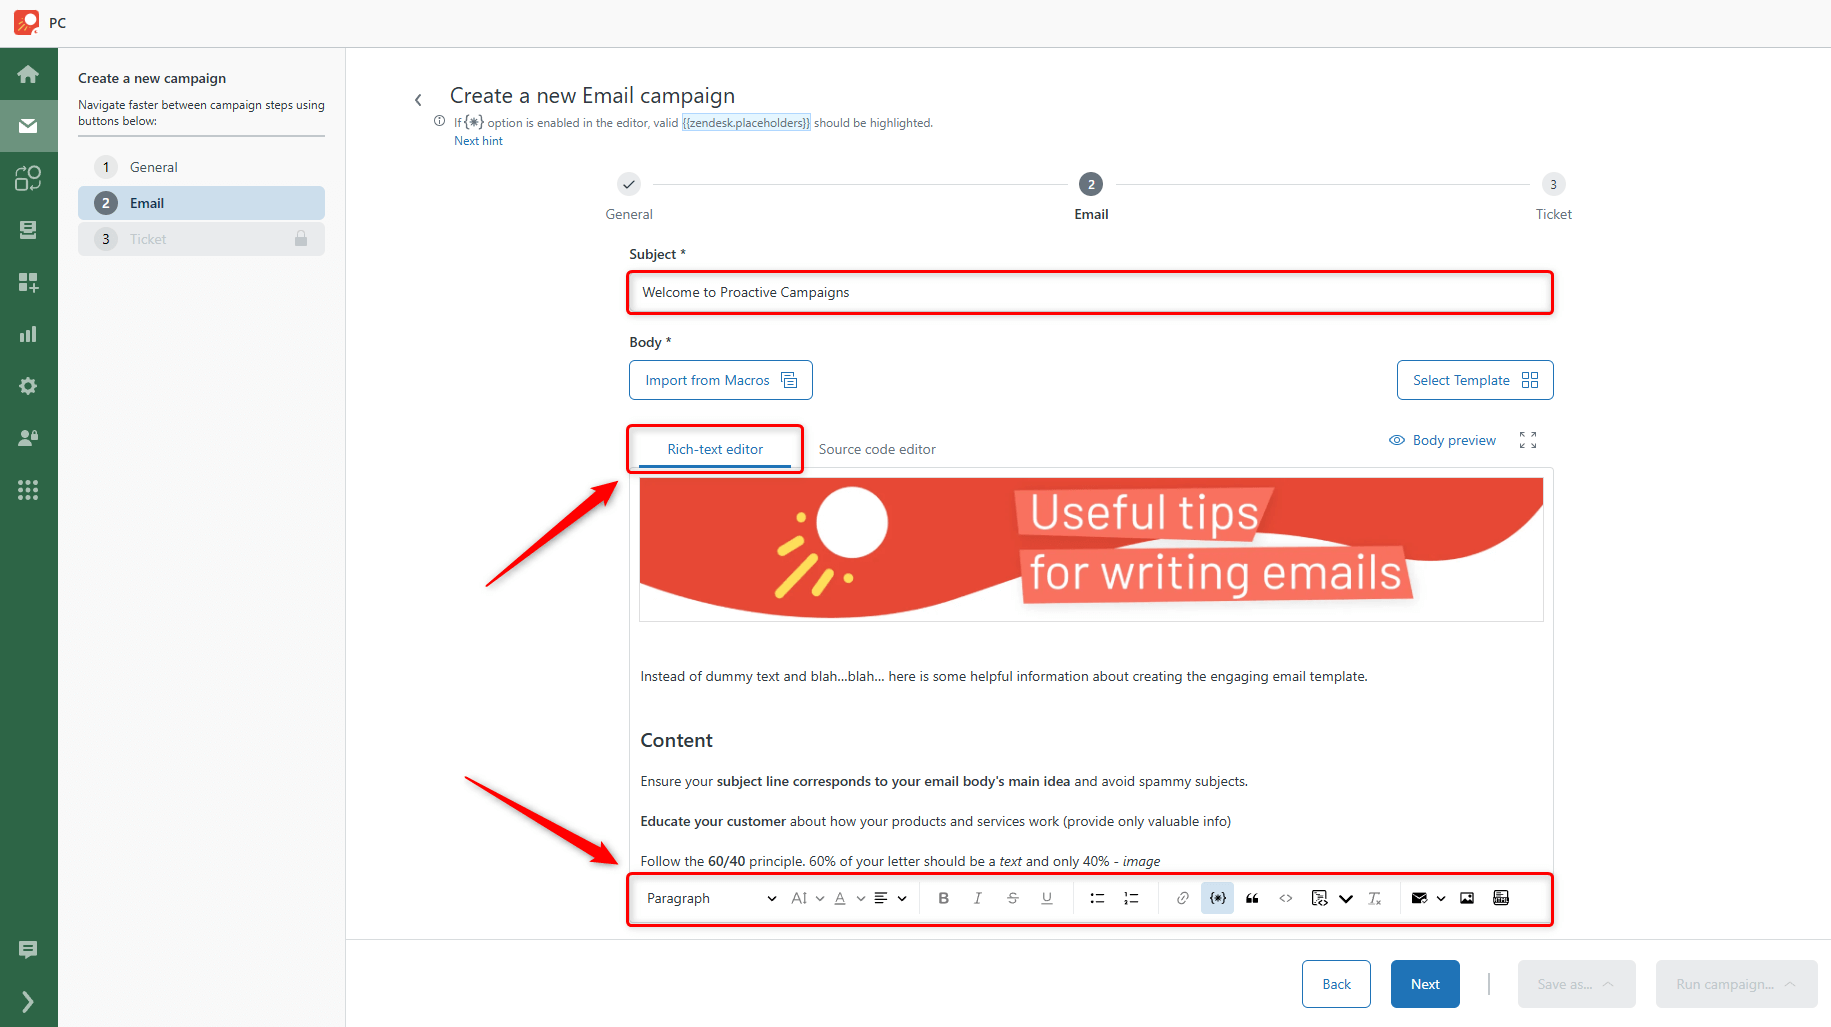
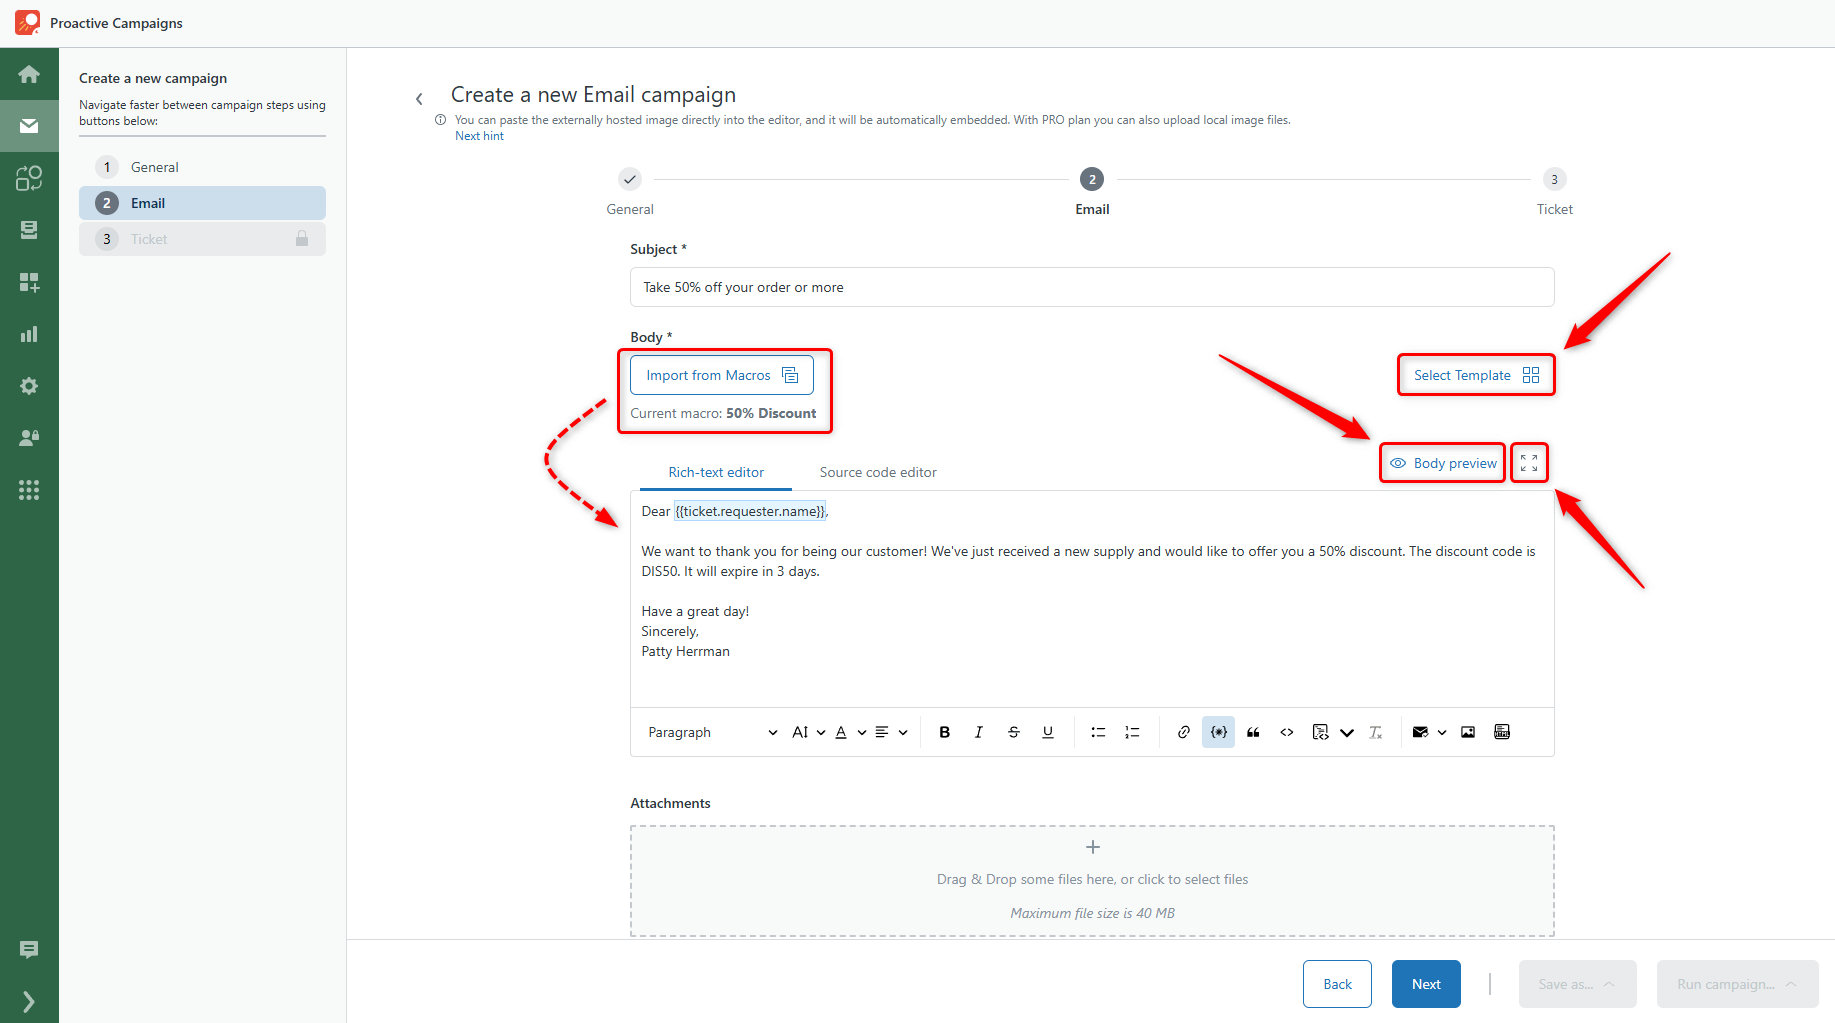
Start by providing the Subject line. Then, you need to craft the email Body. The first option is to do it with the help of the Rich-text editor and the instrument panel below.
The second option is to select the Source code editor and provide the HTML code.
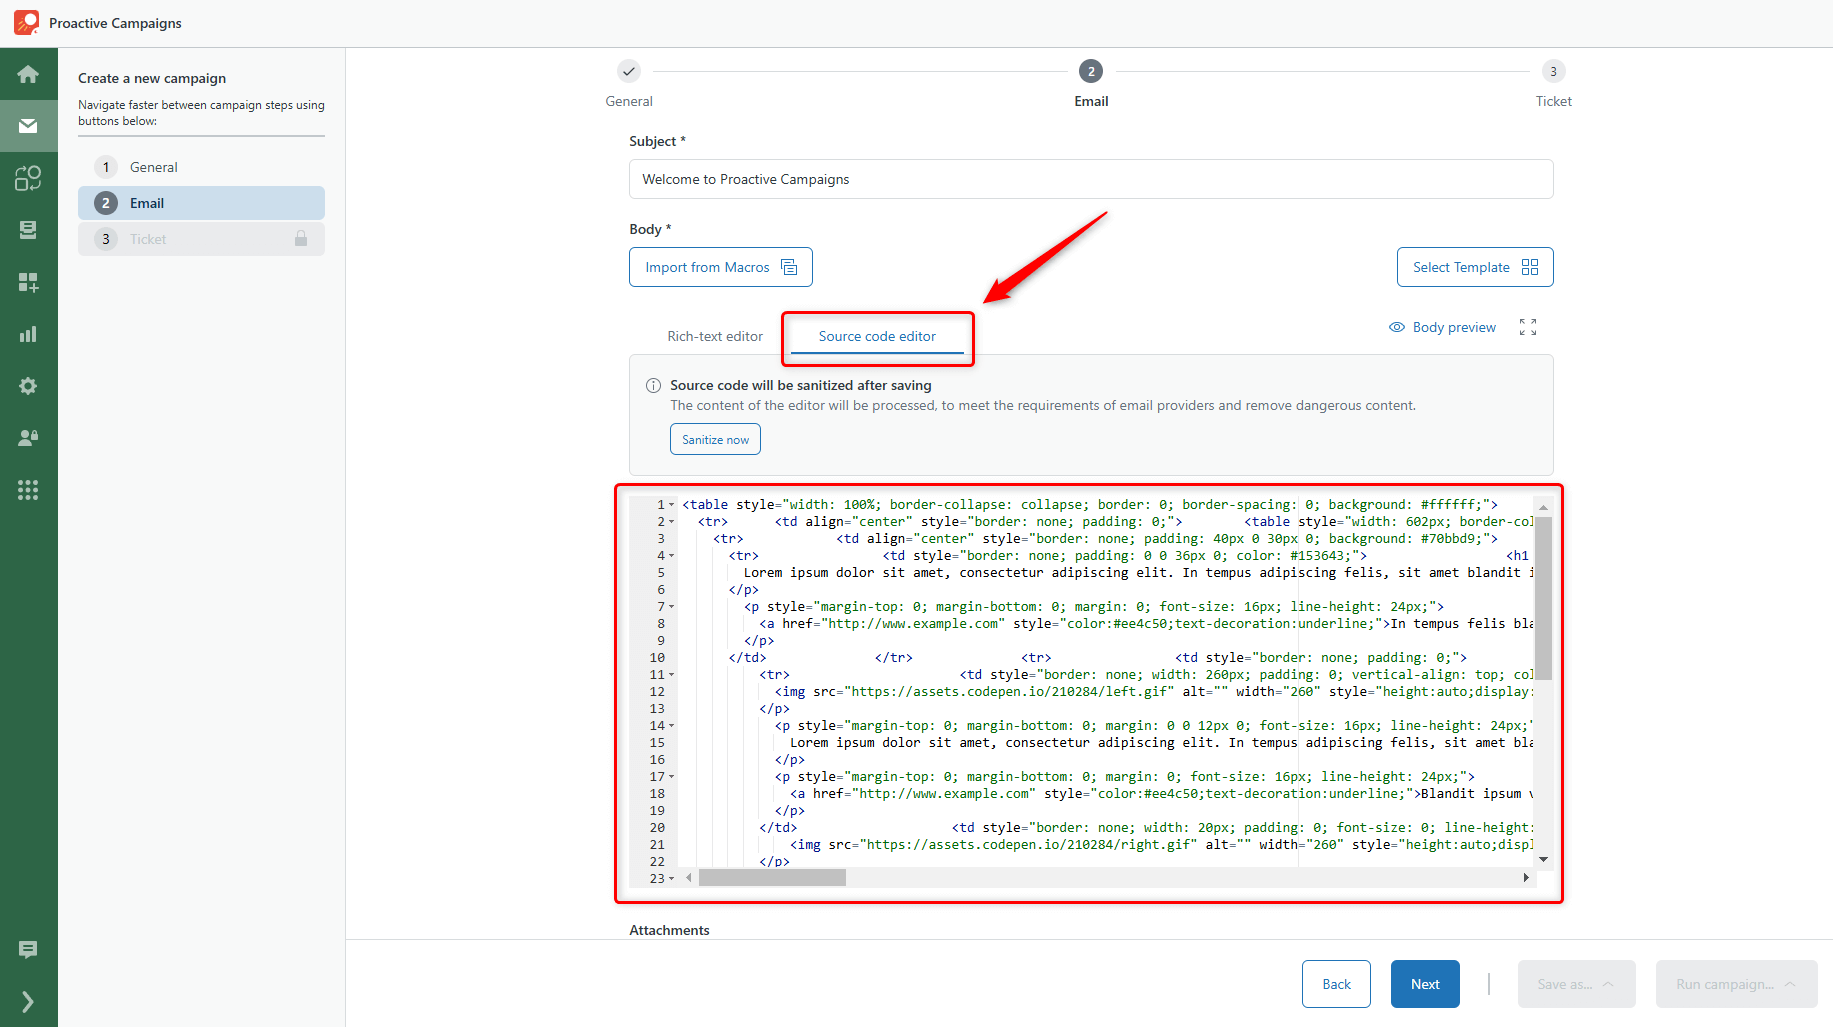
In addition, there are such options above:
- Import from Macros: Incorporates Zendesk macros into your email campaigns.
- Select Template: Accesses stored email templates containing formatted text, images, and links.
- Body preview: Displays a preview of how the email will appear to recipients.
- Expand editor: Enlarges the size of the editor for enhanced editing capabilities.
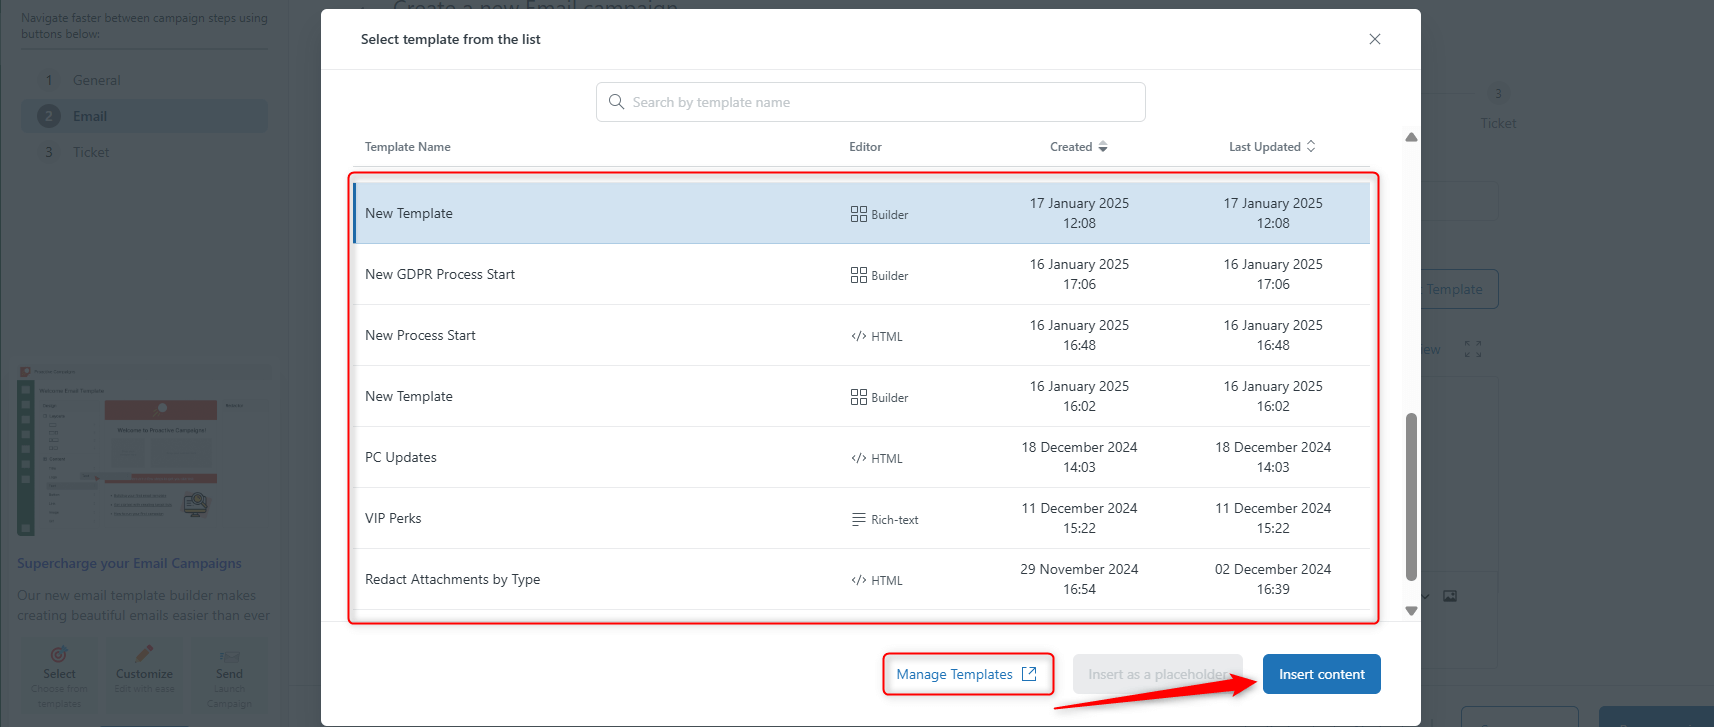
Click Select Template to view the email templates you've already saved. If you have many of them, use the search bar to find the necessary one by name. After selecting the template, click Insert content. Or click the Manage Templates button to proceed to the page where you can edit or create new templates.
Good news! The GrowthDot team created a template builder where you can drag and drop different elements and create templates without HTML knowledge. So from now on, you can select templates from the Builder editor in the Select template from the list section.
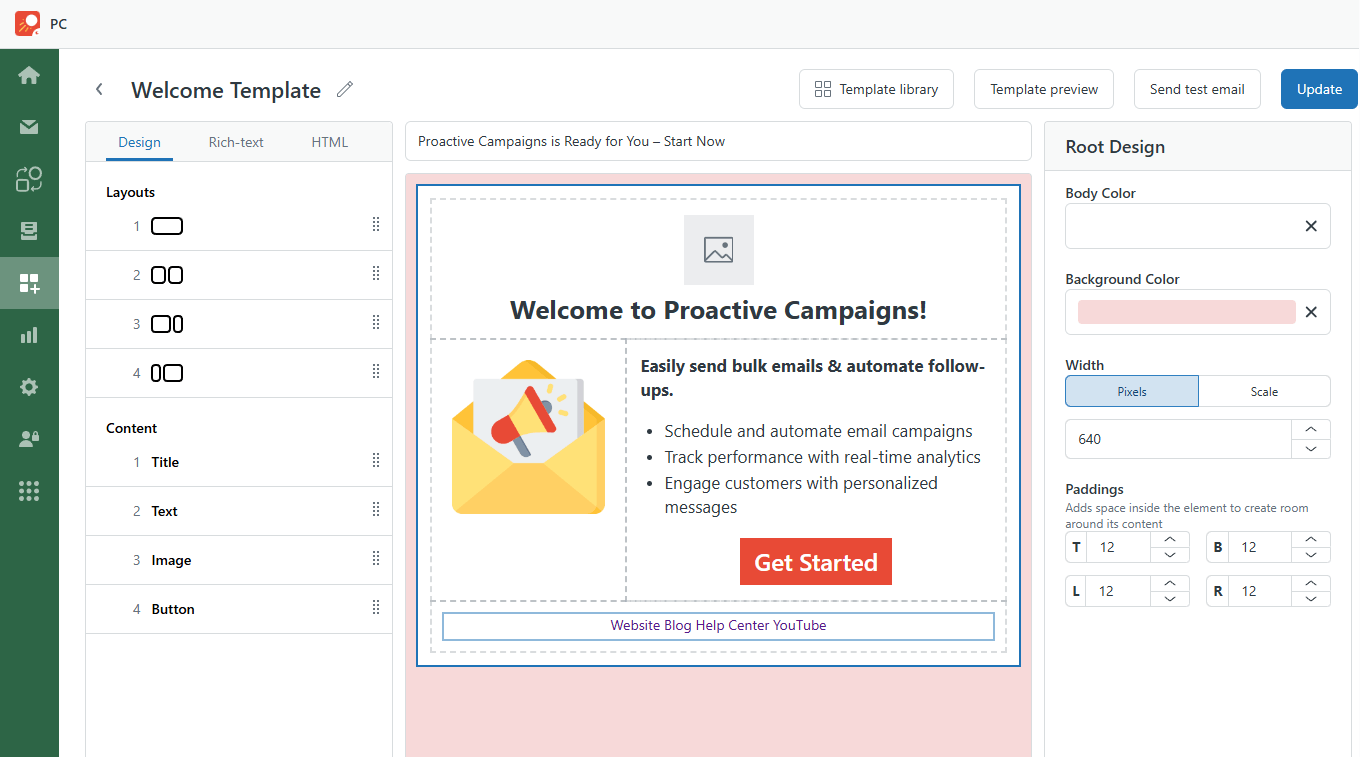
We provided a detailed description of the template builder in the article: How do you use an email template builder?
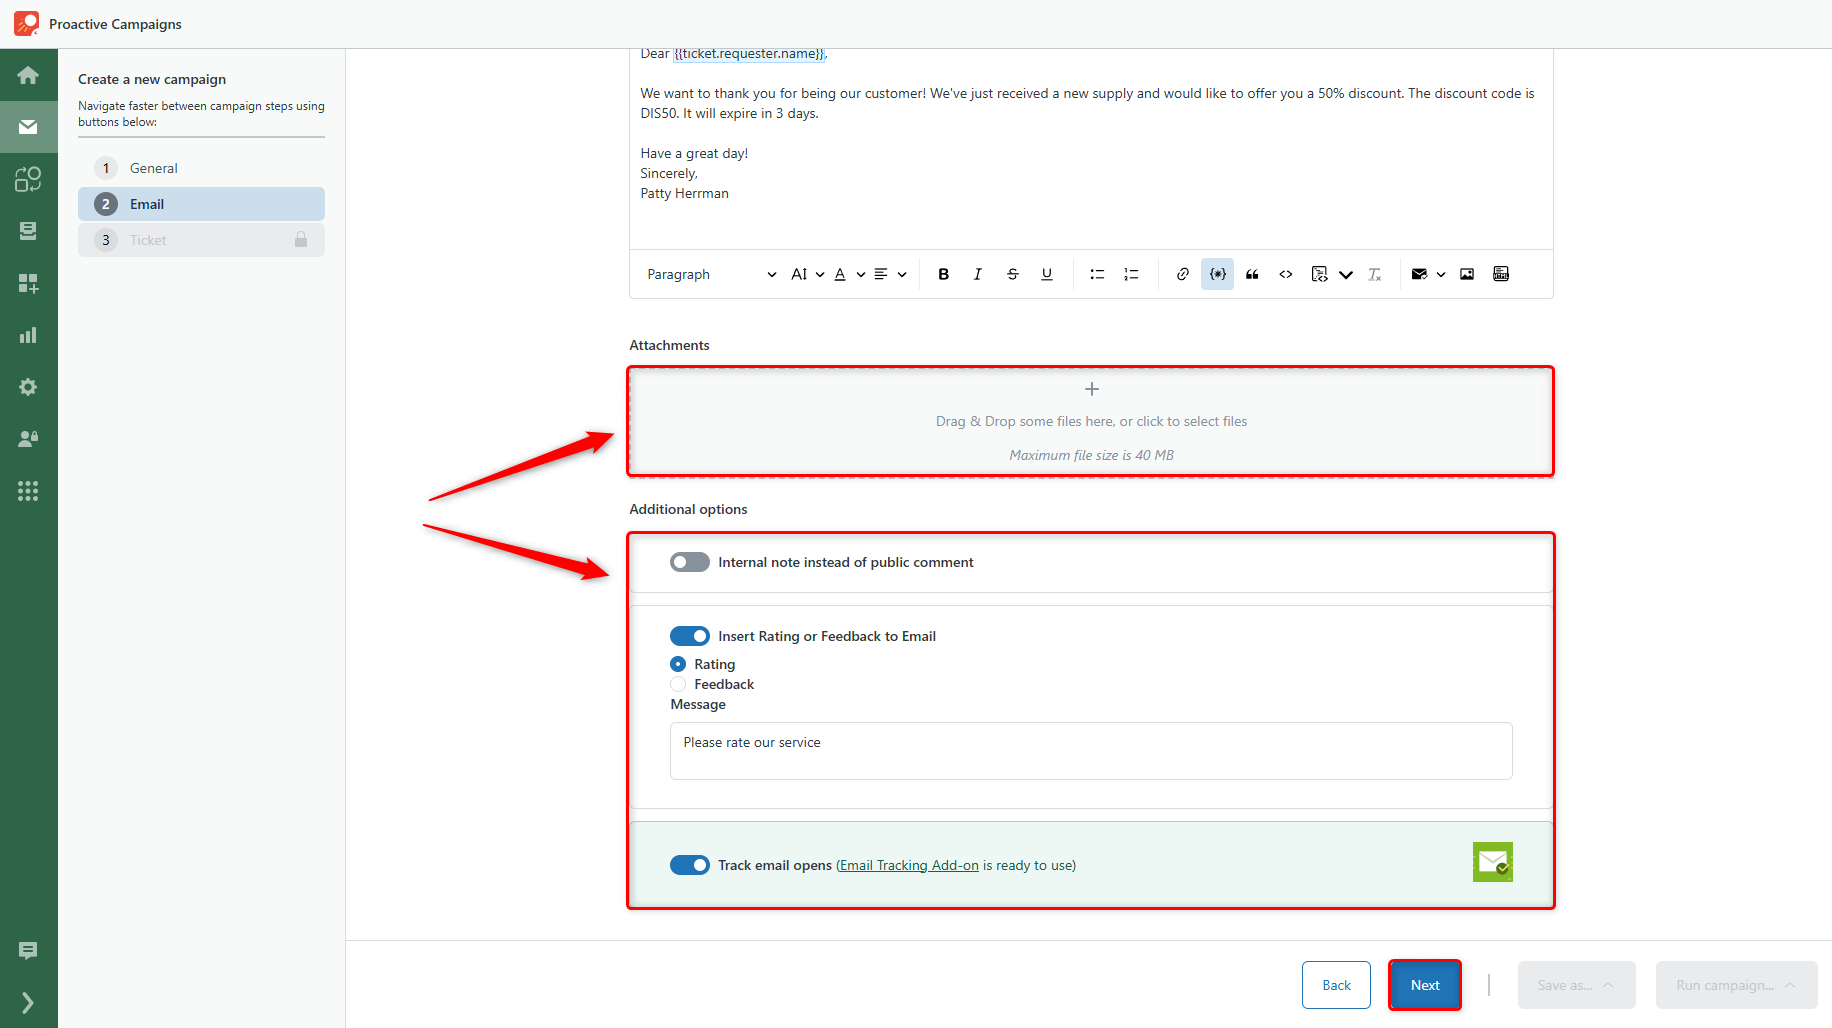
Below the email body, there is an Attachments section (where you can add specific files to your emails) and Additional options to toggle on:
- Internal note instead of public comment: The app will send tickets within a campaign as internal notes, and requesters will not receive an email notification. It works similarly to Zendesk tickets, and it's helpful if you want to inform only your agents.
- Insert Rating or Feedback to Email: This option inserts a rate or feedback form into the email so that customers will evaluate the campaign or service you provide.
- Track email opens: The app will track whether or not the receivers read emails (available with the Email Tracking add-on).
After that, click the Next button.
Step 3: Ticket
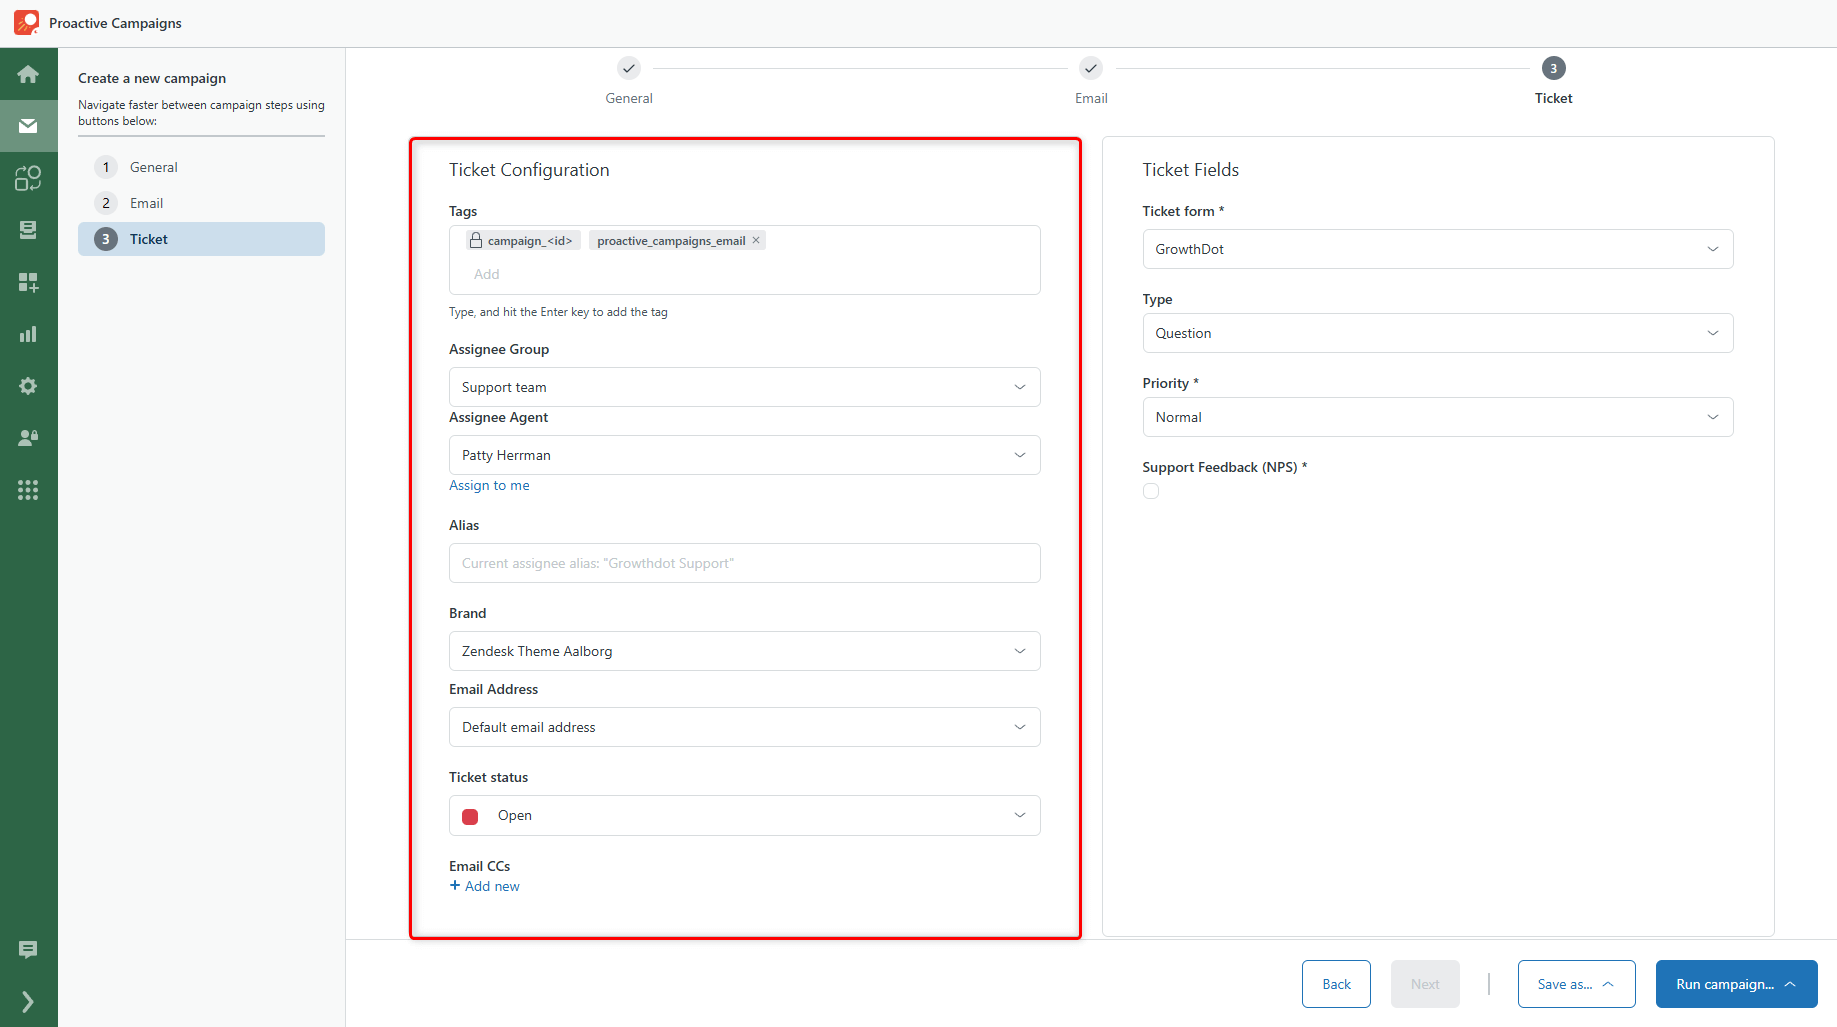
The last step has all the settings related to the ticket that will be created after running the campaign.
In the Ticket Configuration, type in the Tags you want to add when sending the email. Then, select Assignee Group and Agent. Continue by providing the Alias, Brand, Email Address, Ticket Status, and CCs for future tickets.
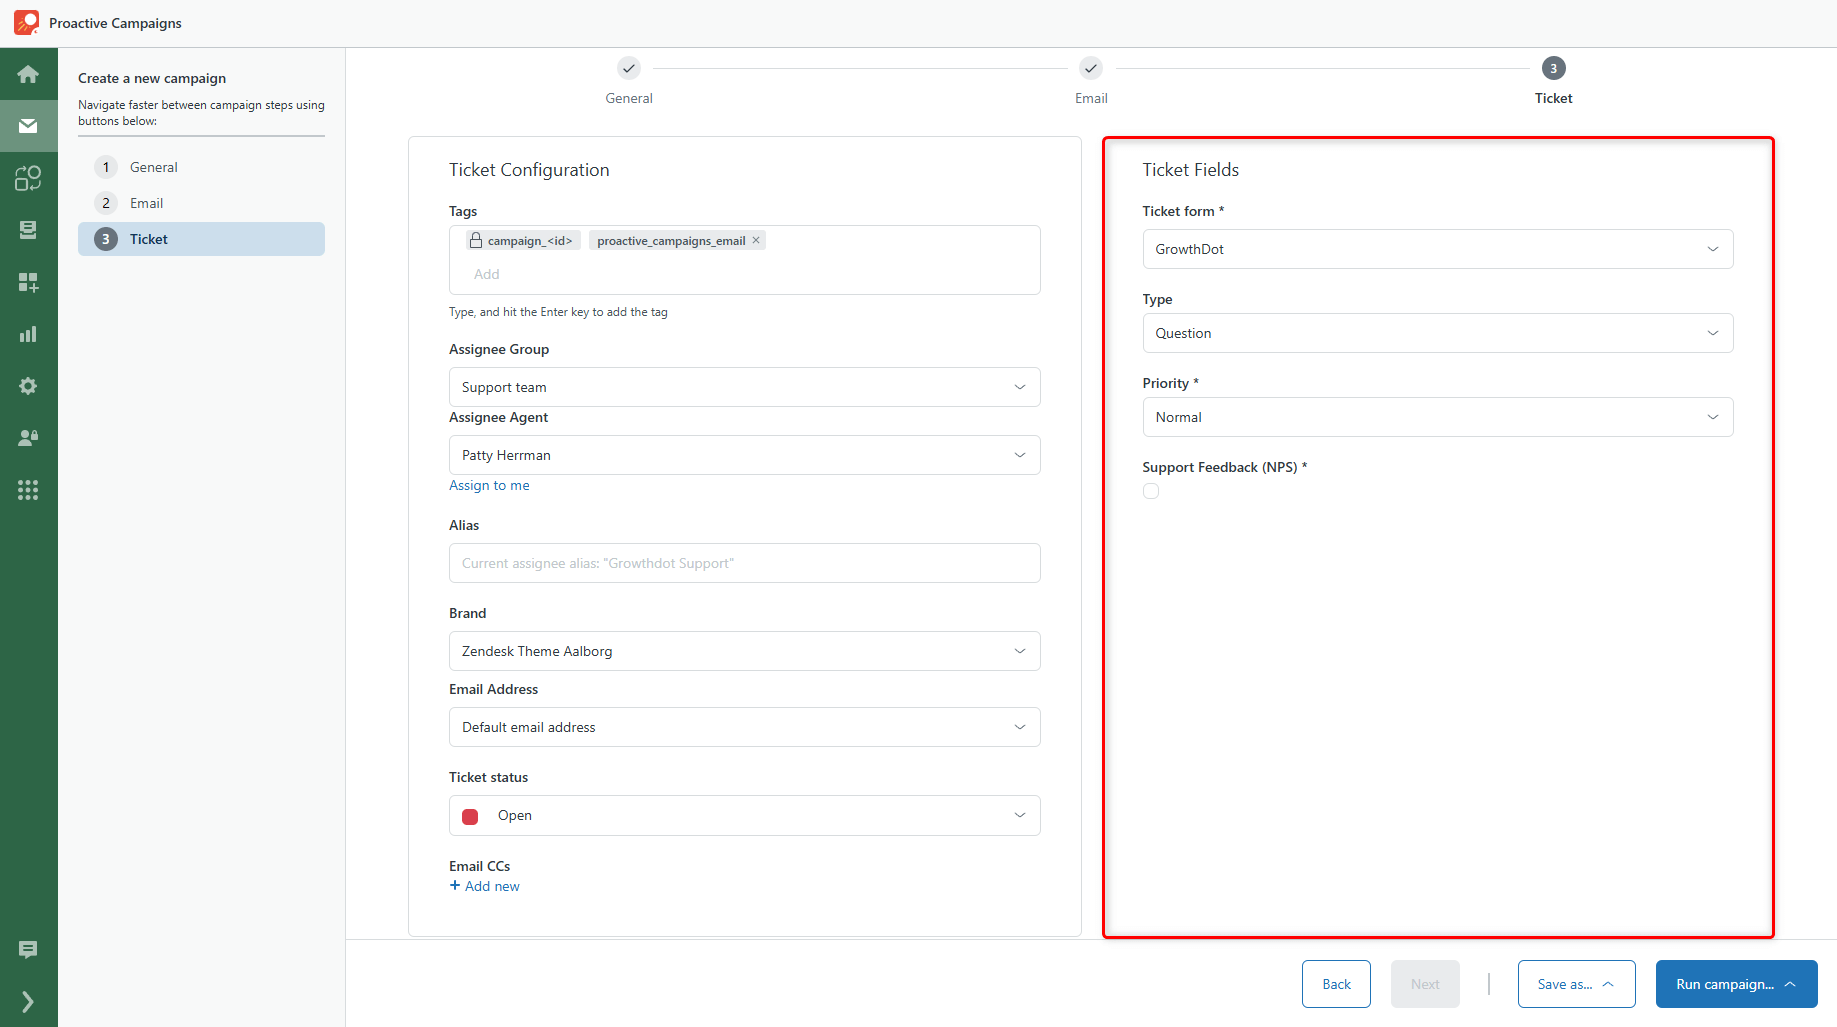
Proceed to the Ticket Fields section and, first of all, specify the Ticket form that has the predefined ticket fields you need to fill in. You can modify or create new forms in the Admin Center > Object and rules > Forms.
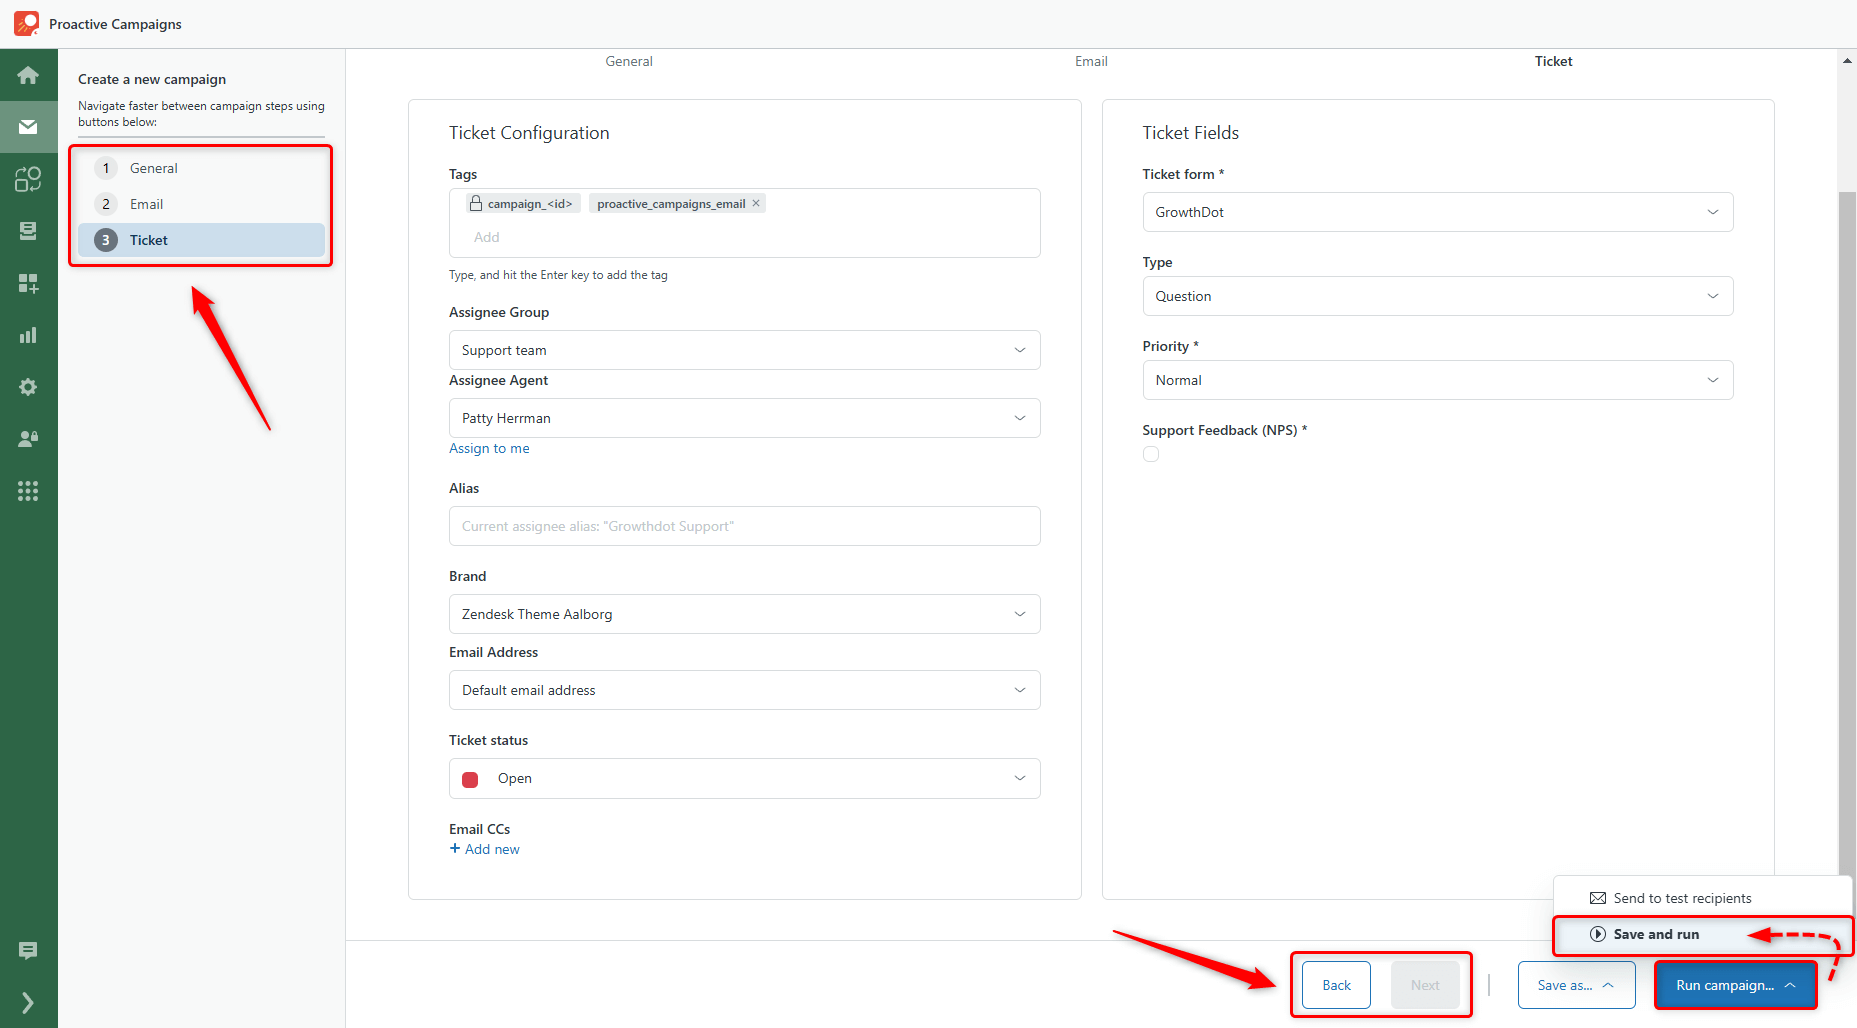
Before launching the campaign, you may want to check the information you provide. To do so, you can use both the Next/Back buttons and, for added convenience, the sidebar buttons to navigate directly to any step.
Finally, click Run campaign, and in the drop-down window, choose Save and run. You can also try it out by sending your campaign to test recipients. If the campaign is scheduled, the Save as scheduled button will appear. One more option is to save your campaign as Draft or Pending.
That's it. Now, you know how to create a campaign using the new editor in the Proactive Campaigns app. If you have any questions, please contact our friendly support team.


