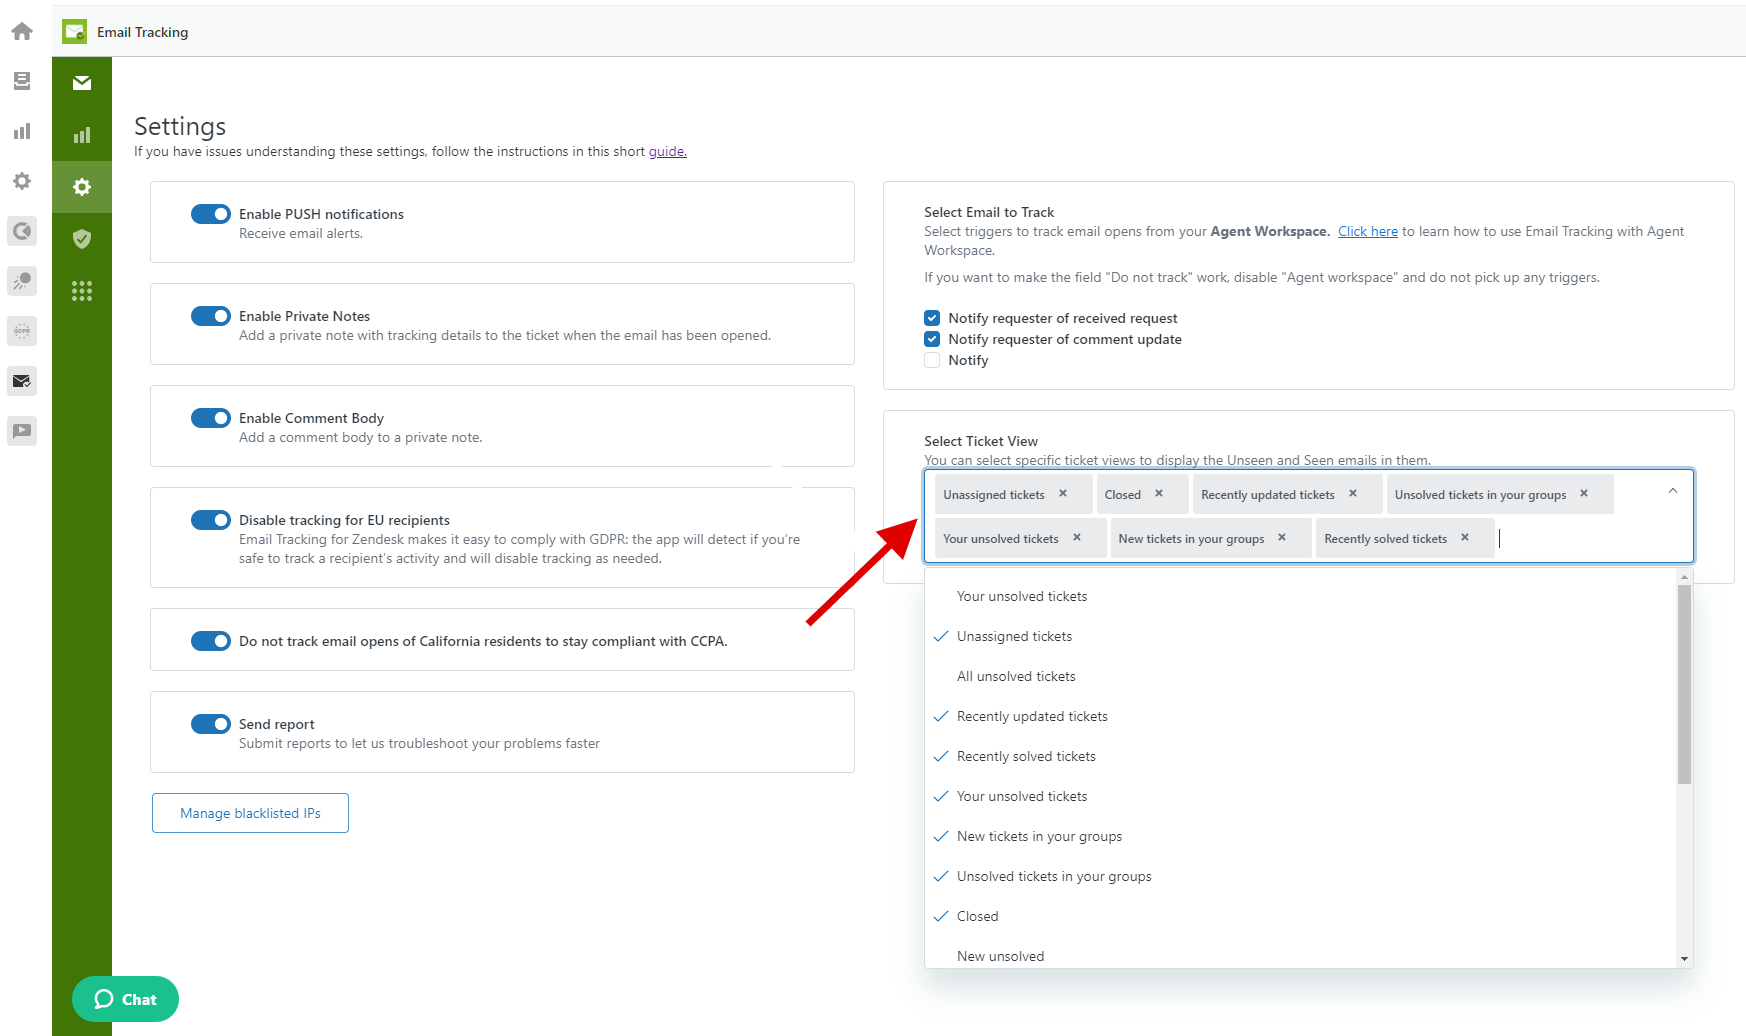
A user-friendly interface and the ability to customize the application at the request of the client is a great feature of any app. That’s why our GrowthDot team improves Email Tracking and other apps regularly. It gives you the ability to set up all the details you need and boost usability. Recently, we updated the settings page, and now you can select a specific ticket view in Email Tracking to display the Unseen and Seen emails in them. Now, let’s take a closer look at it for your better understanding.
How to use a new setting
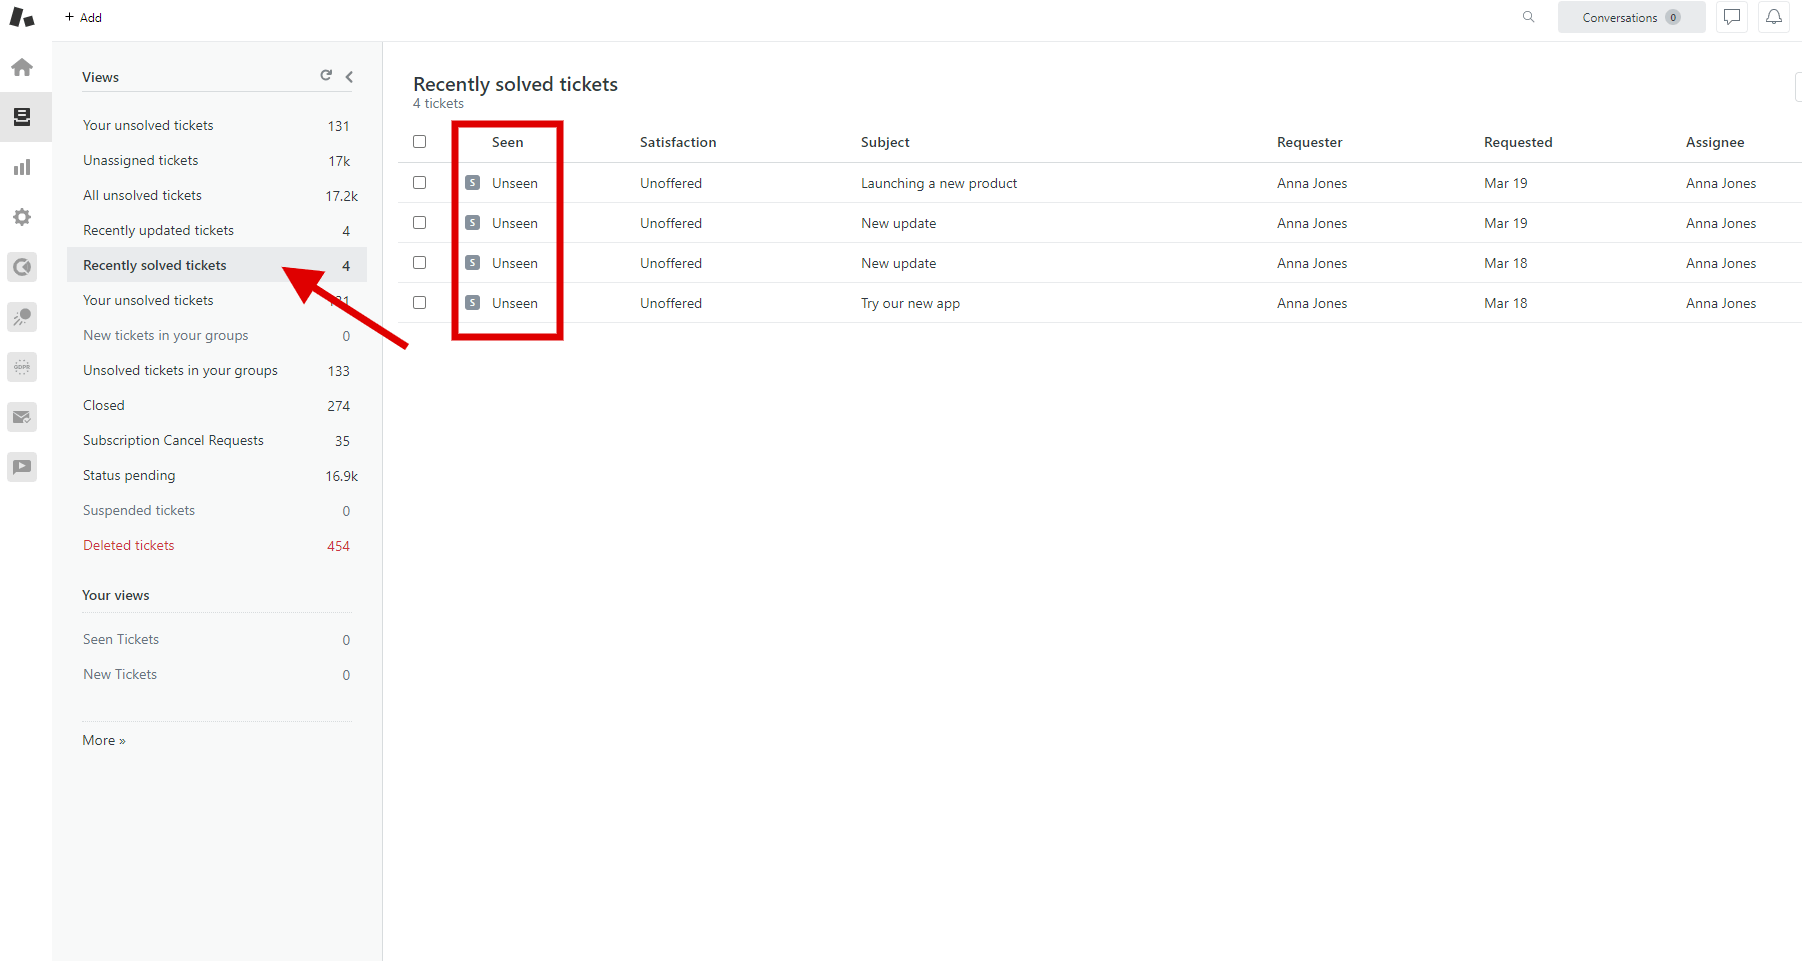
The new setting is available in the lower right corner of the Settings page. As mentioned before, from there, you can just add any Ticket View in Email tracking to the list, and the app will automatically add an extra column to this View. The column will display The Seen/Unseen statuses for all tickets from this very View.
If you don’t see this Setting as a useful one, you can always leave the Select ticket view field blank. However, we believe that checking Seen/Unseen status without having to open the ticket is a huge time-saver.

Settings page in Email Tracking
The Seen/Unseen column will always be displayed on the left side of the Views tab. Keep in mind that you can add the Seen/Unseen column to any existing ticket view in your Zendesk instance - both personalized views which are visible only for the creator, and shared views - visible for other agents.

Ticket View
Try Email Tracking for Zendesk!
You still haven’t tried Email Tracking? We strongly recommend evaluating the new features and advantages of this Zendesk app. Besides, we always update our apps to help you boost your support and sales processes. GrowthDot also offers other custom apps, Zendesk theme customization, and Zendesk consulting services. Make sure to check them out to start using Zendesk to the max!


