We have been waiting for this, and now Proactive Campaigns integrates with Jira Service Management. So don't waste time sending mass emails manually anymore. Instead, level up your email marketing strategy. Just use Proactive Campaigns and quickly reach a target audience via follow-ups and bulk tickets.
Have you ever struggled to choose target receivers manually when sending emails? Usually, emailing customers one by one may take a lot of time and effort. However, you can manage this issue thanks to Proactive Campaigns. Therefore, this opens an excellent opportunity to create a limitless amount of custom filters for each campaign.
Import Contacts in a CSV file
If you got used to working with CSV files, the new feature would be helpful. Now you can upload a document with contacts and send an email campaign to them. For this, on the People tab, click the Import users button.
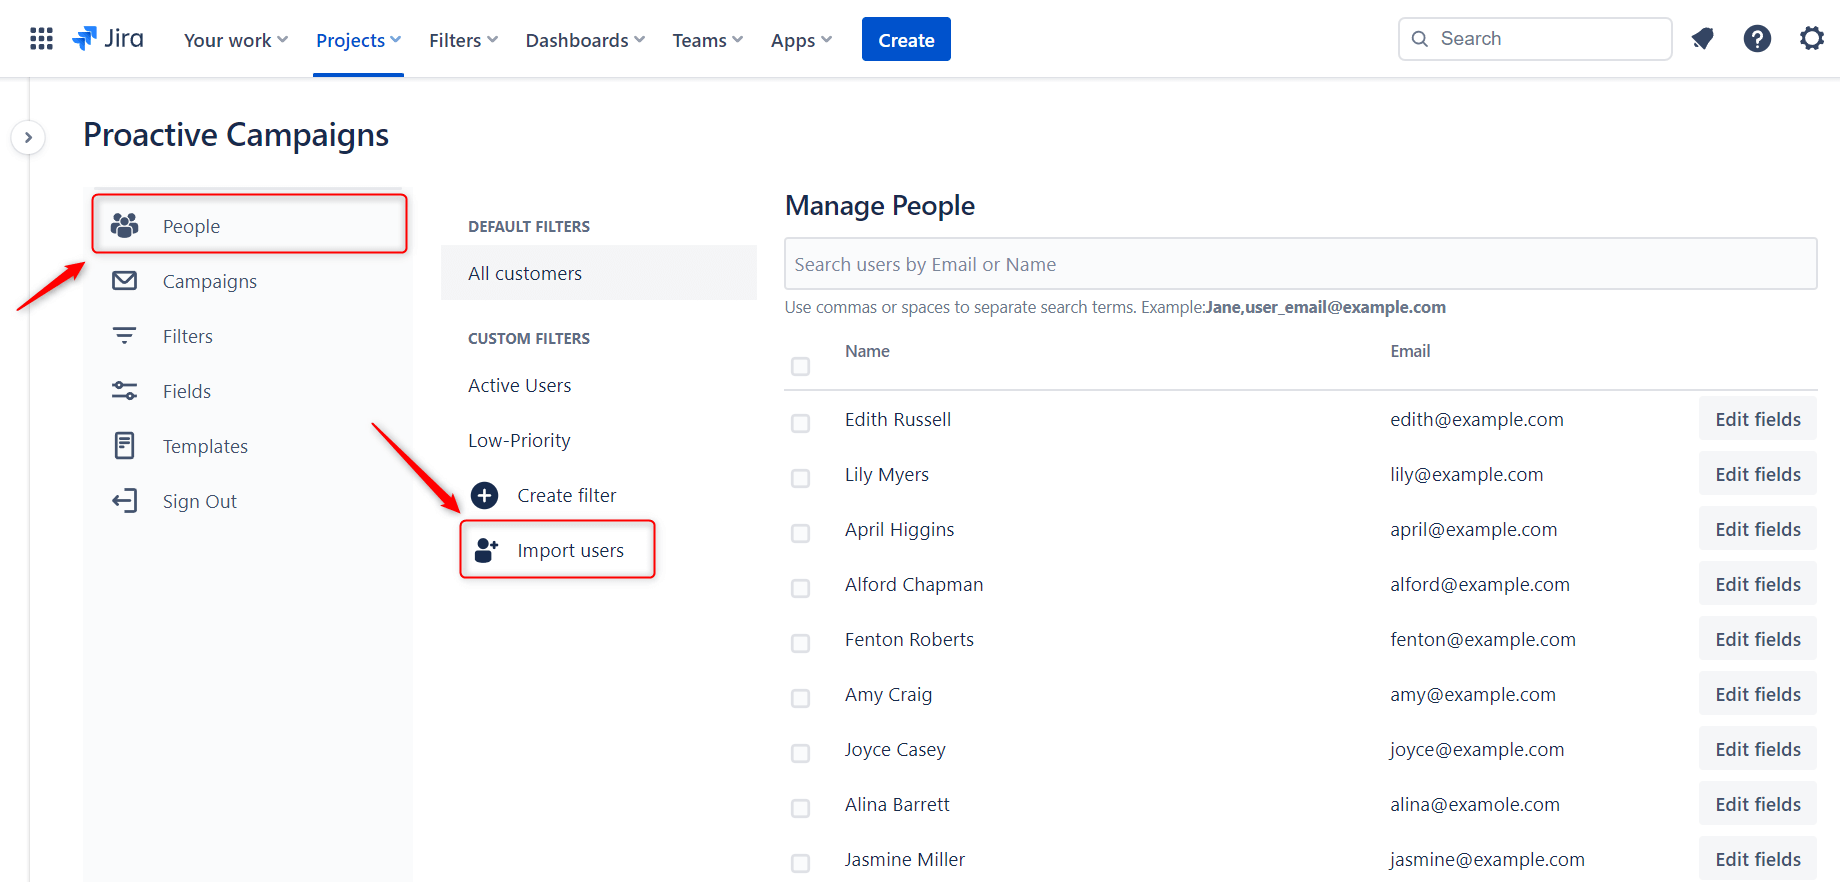
Then, click on the grey area or drag and drop a CSV file with users. In the modal window opened you should map Name and Email Address (requirable) and Proactive Campaigns custom fields if needed. These custom fields you can use later to create a Filter and find imported contacts. Next, click Save.
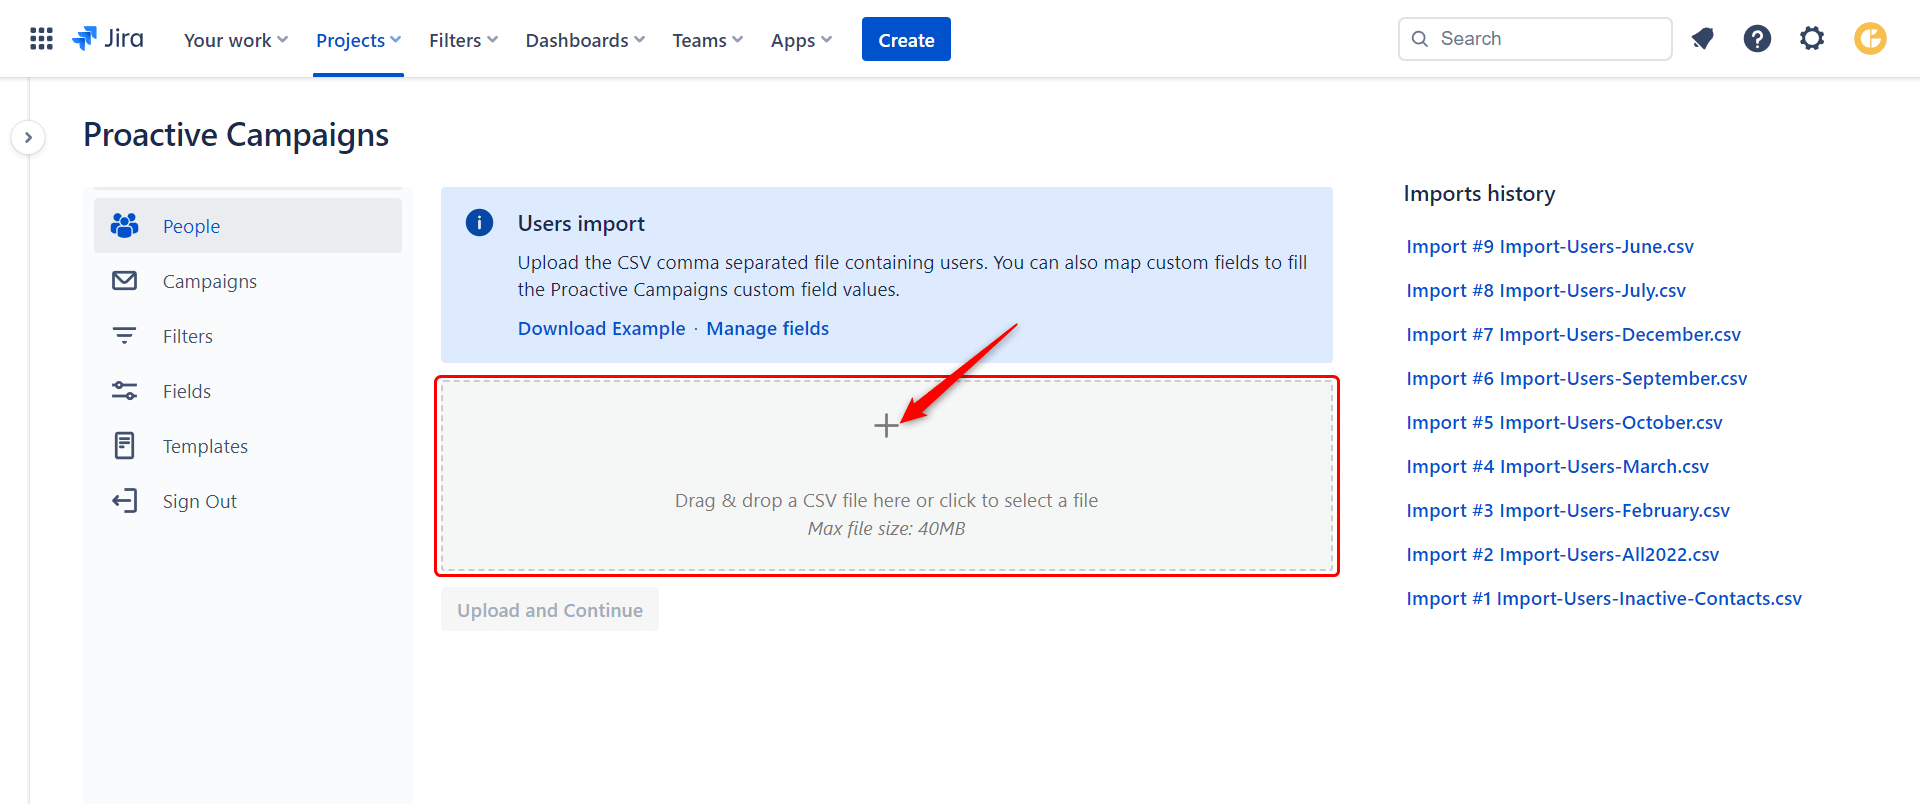
If you don’t have any custom fields or need to update the value to custom fields from a CSV file, scroll down the page and click Add field in the Override fields section. There you can select already existing fields and apply a necessary value. This value will have all imported contacts from the file.
When you are done with the file preparation, click Save > Upload and Continue > Run.
Create and Save Templates
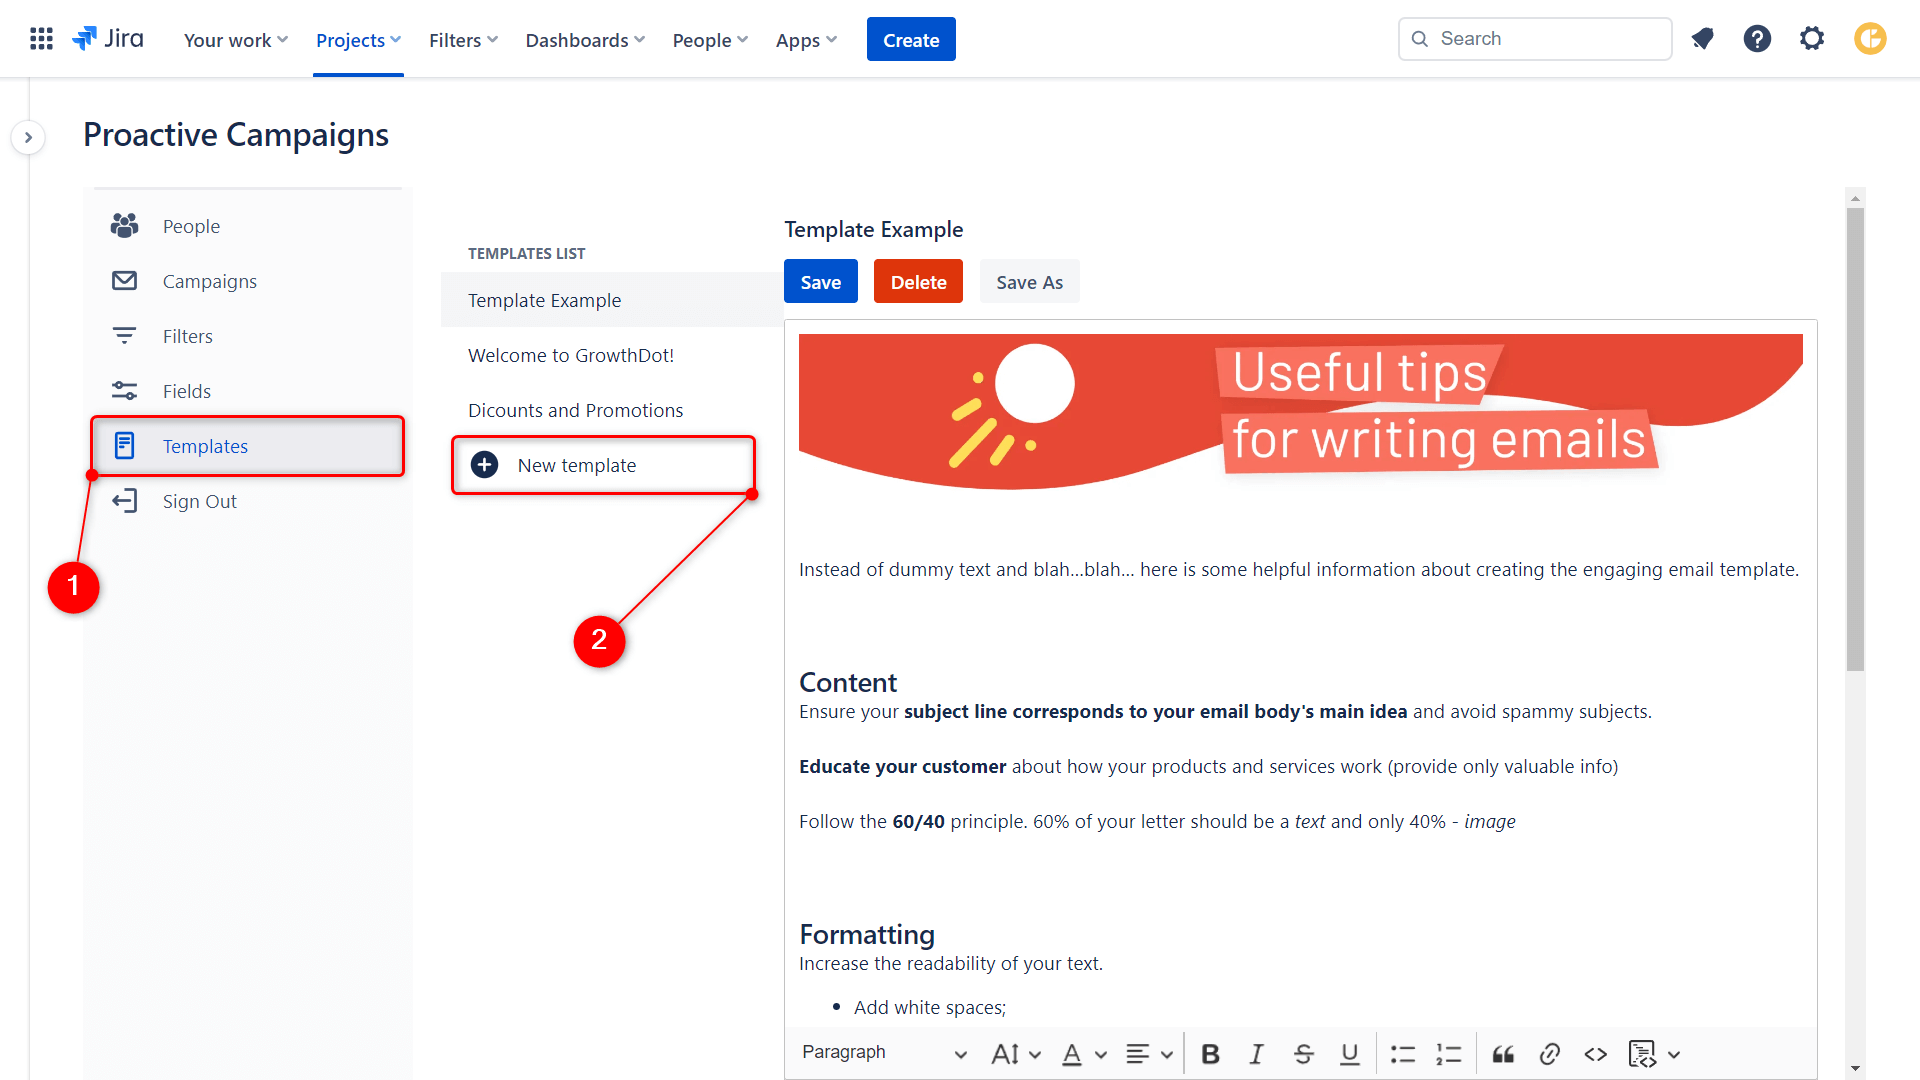
Everyday mailing becomes exhausting if you create each email campaign from scratch. To facilitate this process, our dev team developed a new feature - Templates. If you need to create a template, open the Templates tab and click + New template. Then, fill in the description field and format and stylize the text using the editing toolbar. Finally, click Save and name a template in the modal window opened.
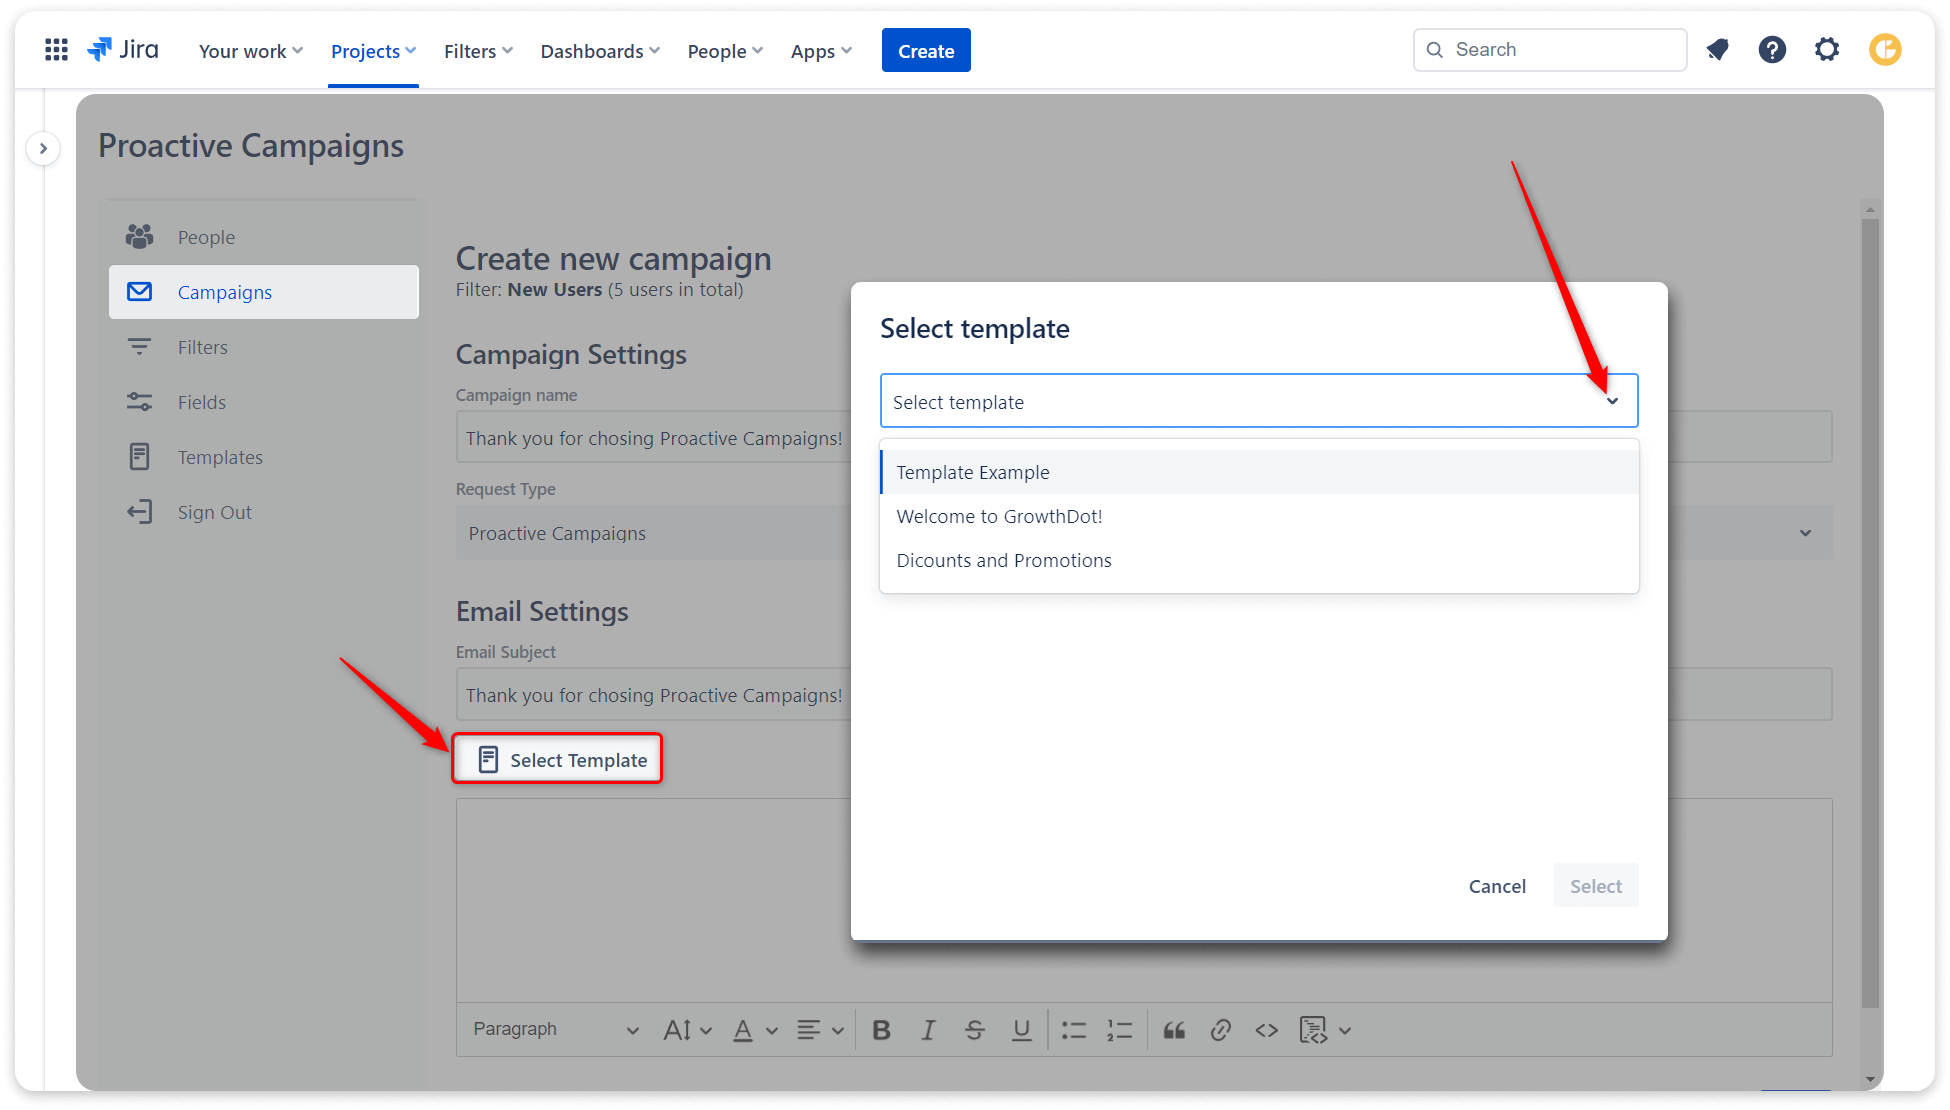
To use one of the created templates, click the Select Template button while creating the campaign. Then, choose the required template from a drop-down list and confirm the selection.
Search for individual contacts
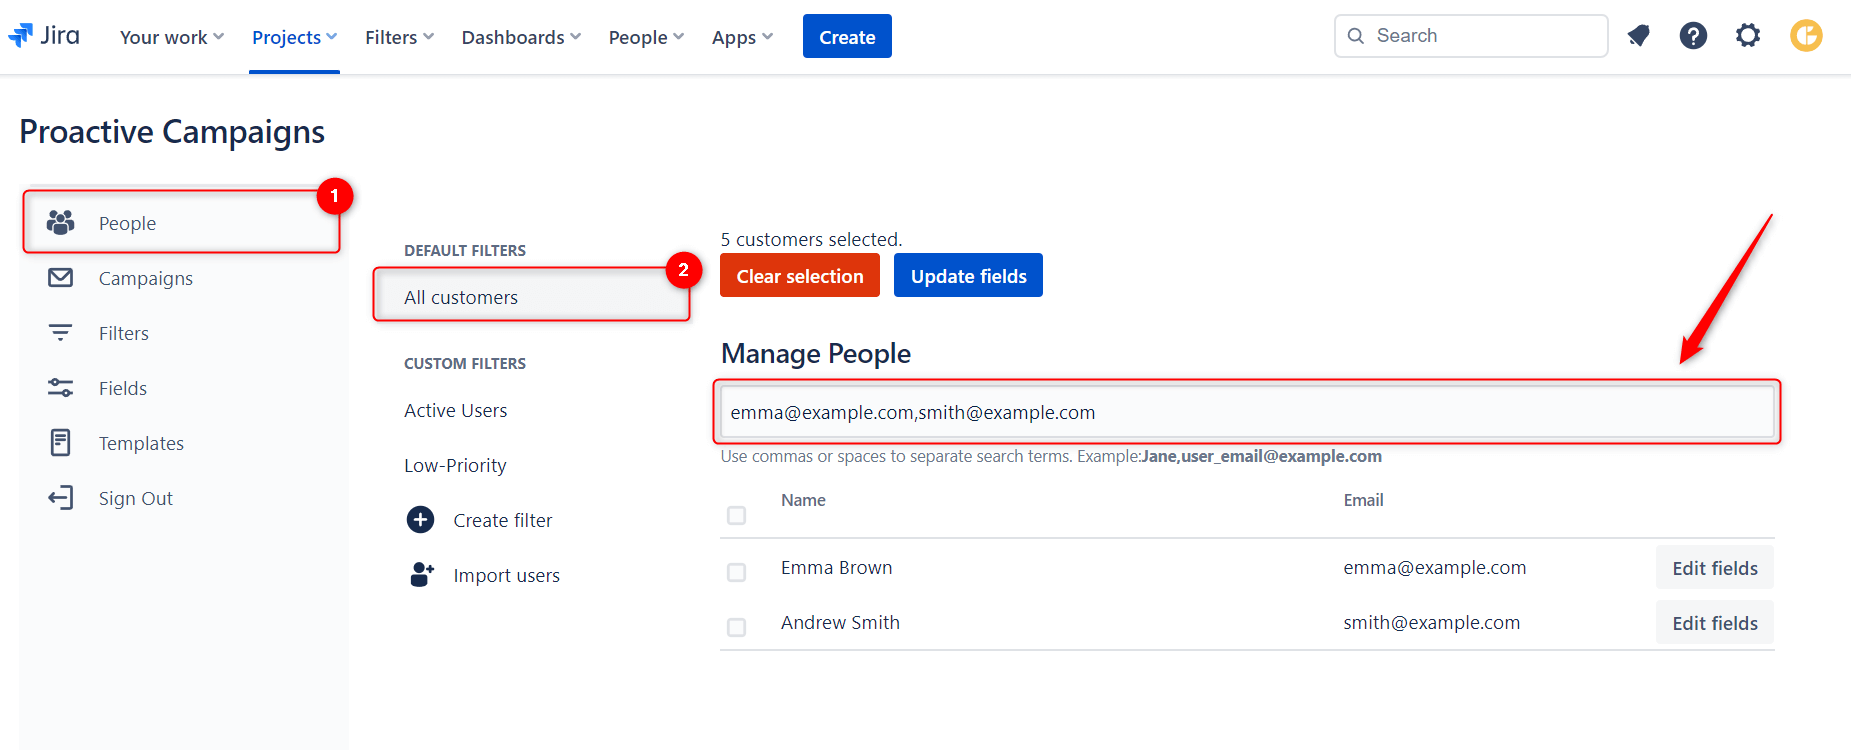
If you have a lot of contacts in JSM, using filters cannot be as convenient as you would like. For example, you need to find only several contacts among 1000 users. Considering this, we added a search bar where you need to type a contact name or email address to find a necessary item. To search several contacts, just use commas or spaces to separate inserted names/email addresses.
Update User Fields in Bulk
Previously, you could only click the Edit Fields button next to a separate user and selectively set values to custom fields. So, if you work with many email addresses, this is undoubtedly inconvenient to do repetitive actions. Therefore, we decided to facilitate this process and added checkboxes so you can update two and more user fields simultaneously.
Then, go to the People tab and select the users you need to assign the field and value. After you mark the necessary items, click the Update fields button. In the modal window poped-up, click the Add field button, choose a specific field from a dropdown list and set the value. To save your choice, hit Update > Ok.
If you need to undo your actions, click Clear selection.
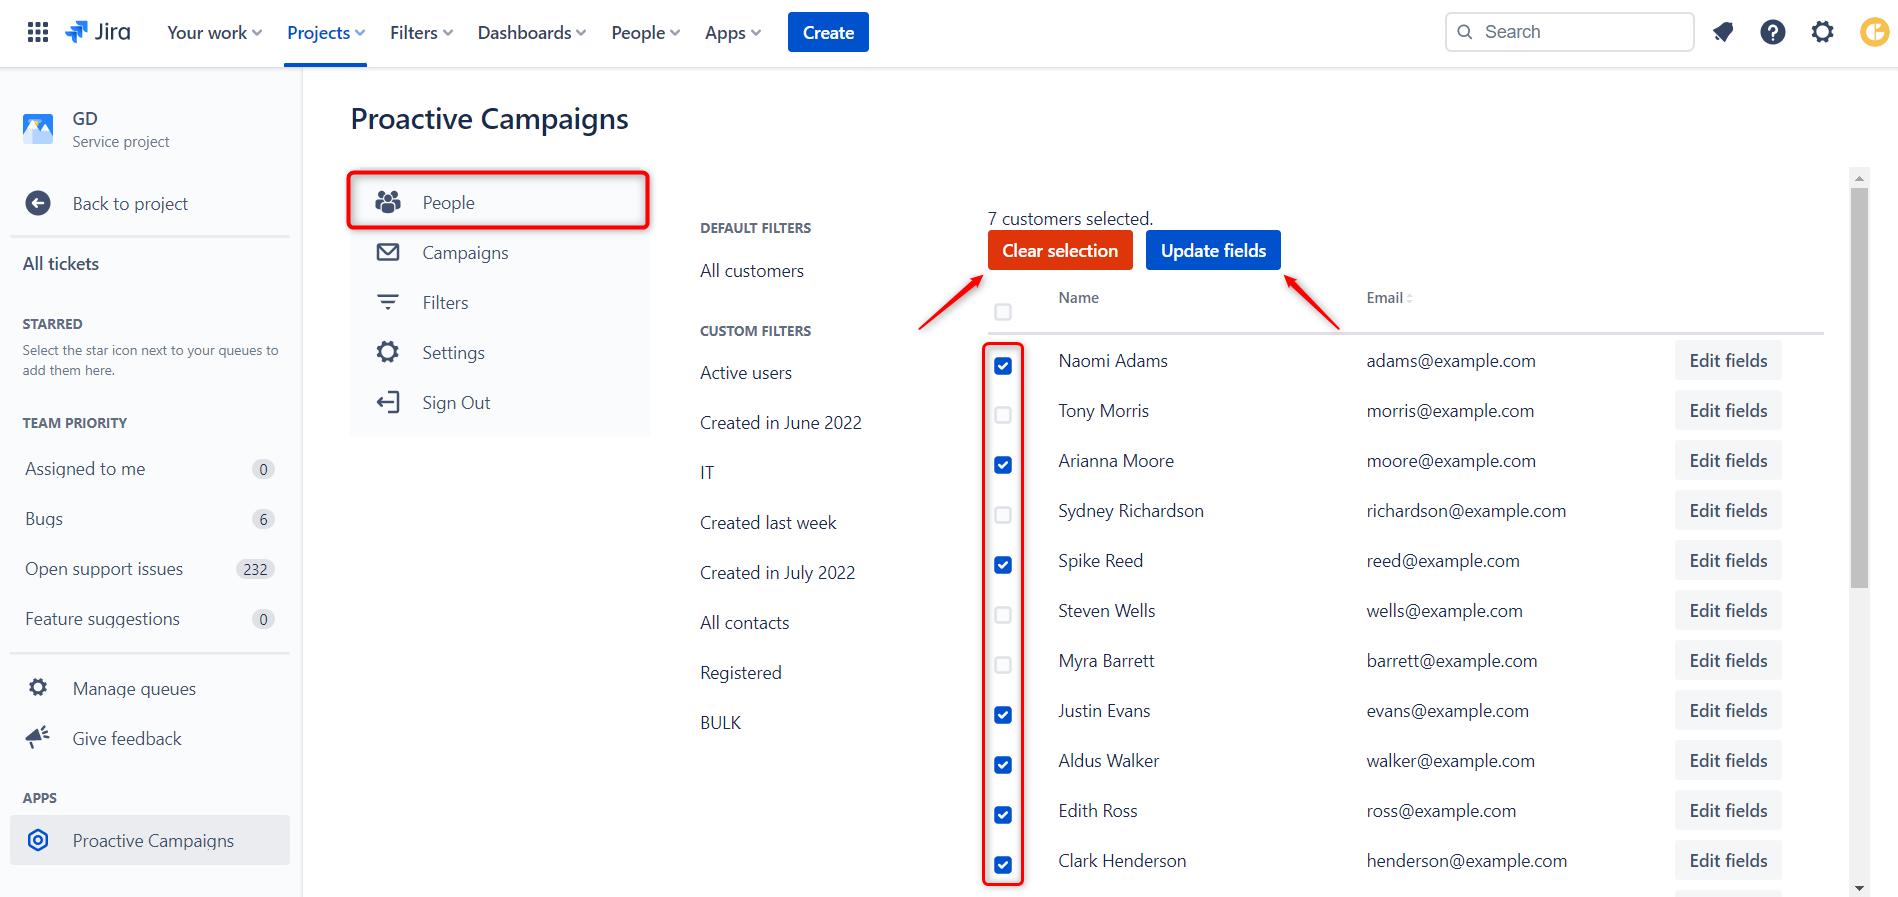
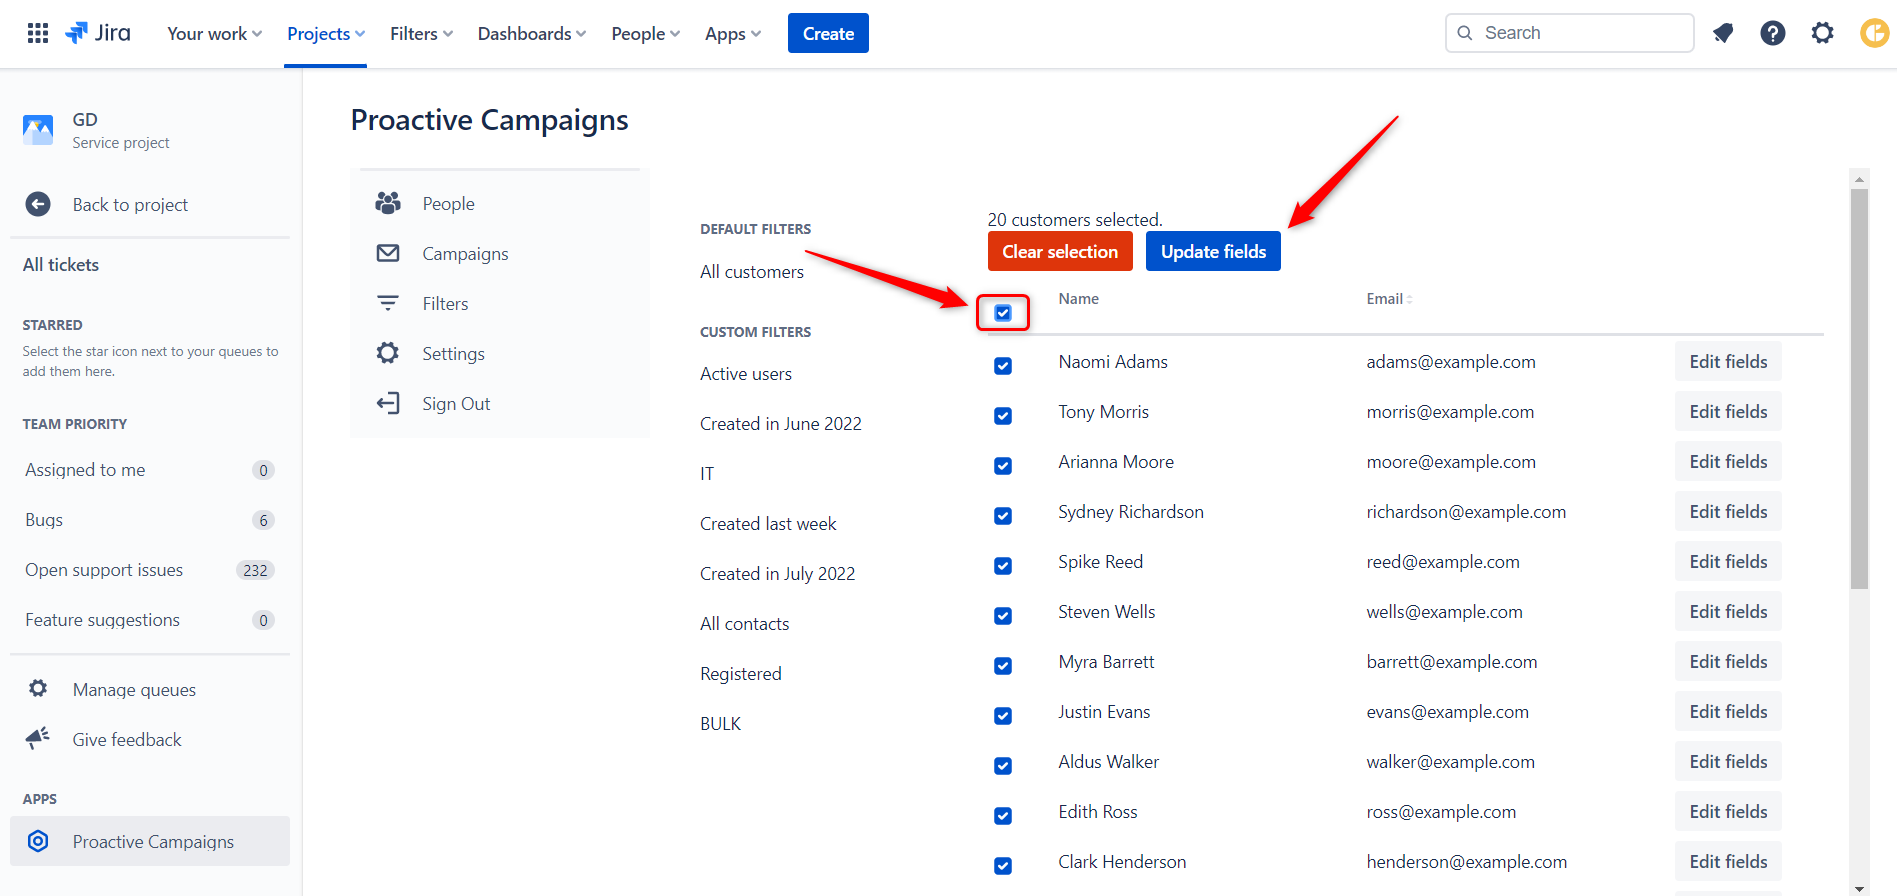
Moreover, click on the checkbox above the line to select all users on the page. For more items included, click Next at the bottom of the page. The app remembers your choice, so there is no worry, as you won’t lose the previous selection. Then, click the Update fields button and continue as described above.
Main Functions of Proactive Campaigns for Jira SM
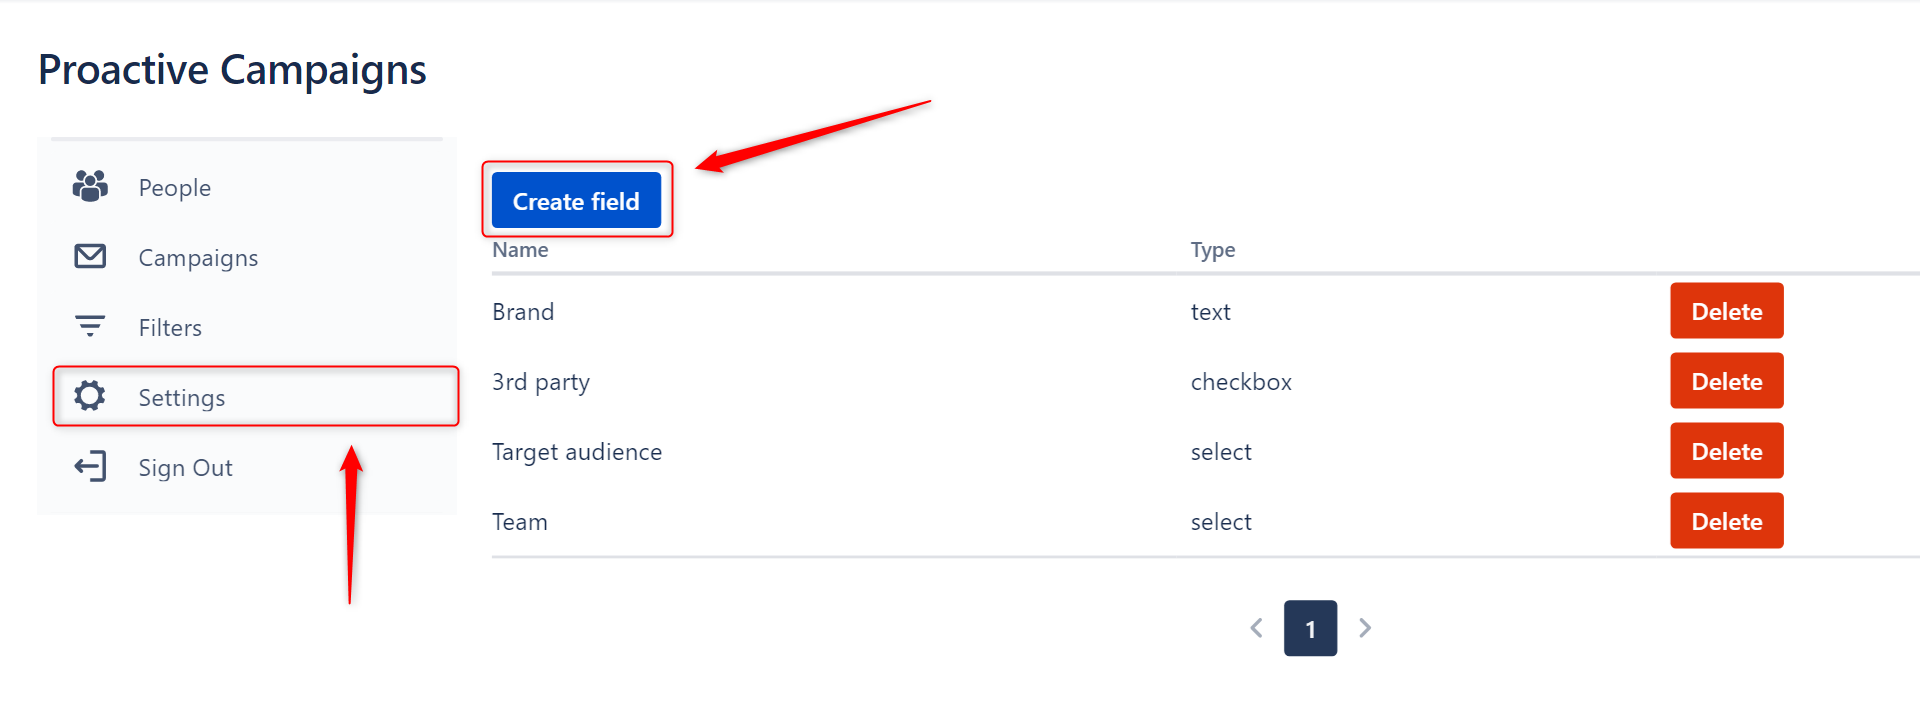
For this, go to the Settings tab on the left-hand side of the Proactive Campaigns page and click Create field.
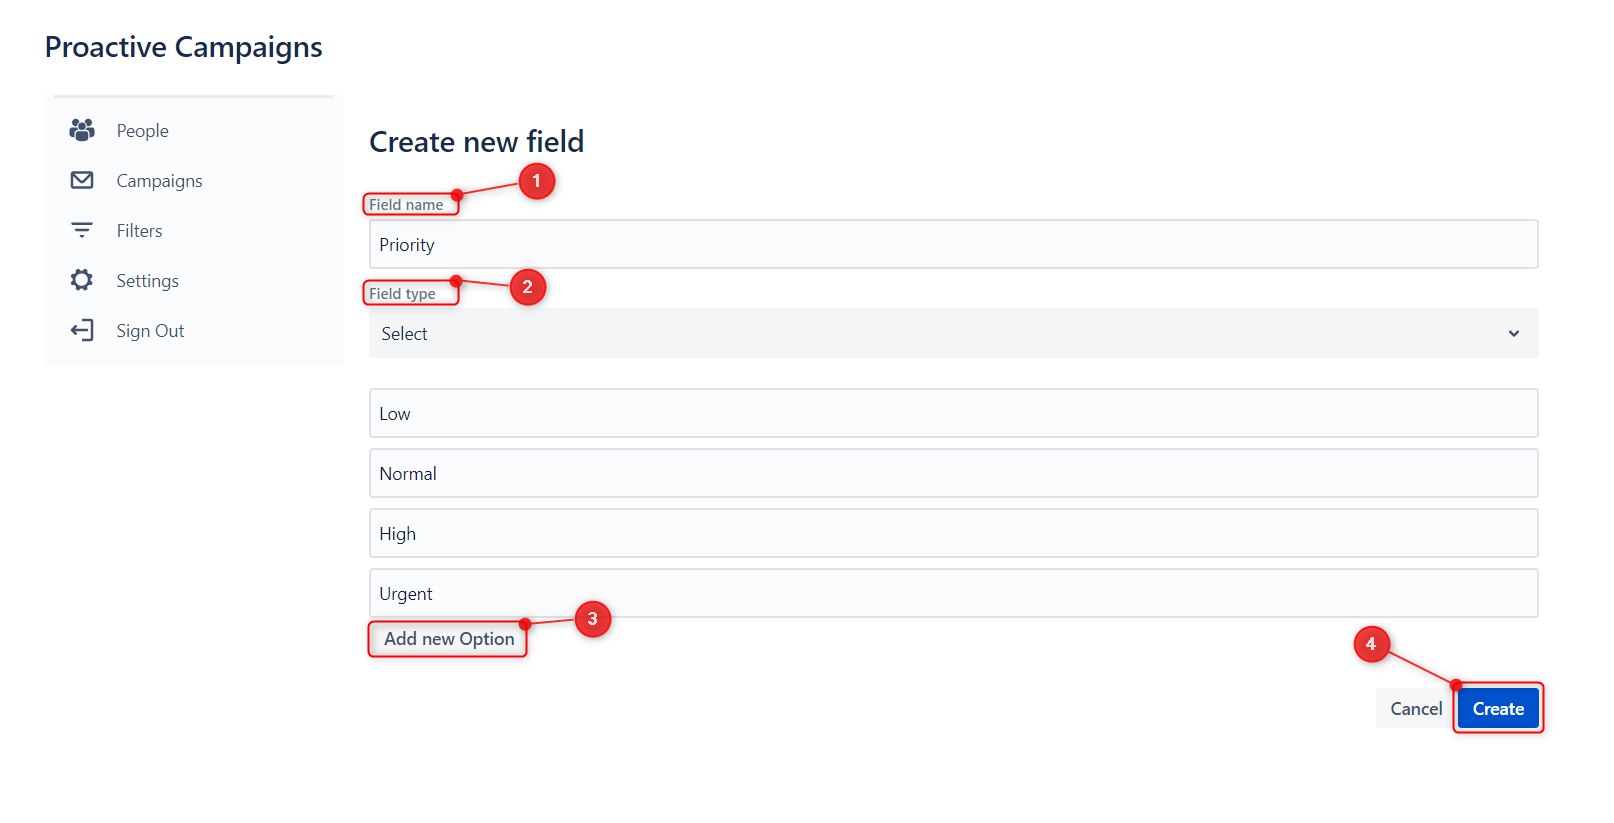
Then, create a new field and select its type. The field type can be a text, checkbox, select (drop-down list), or multiline text. Next, hit the Create button to save changes.
After, open the People tab and click the Edit fields button next to the contacts so you can set a value to the created field.
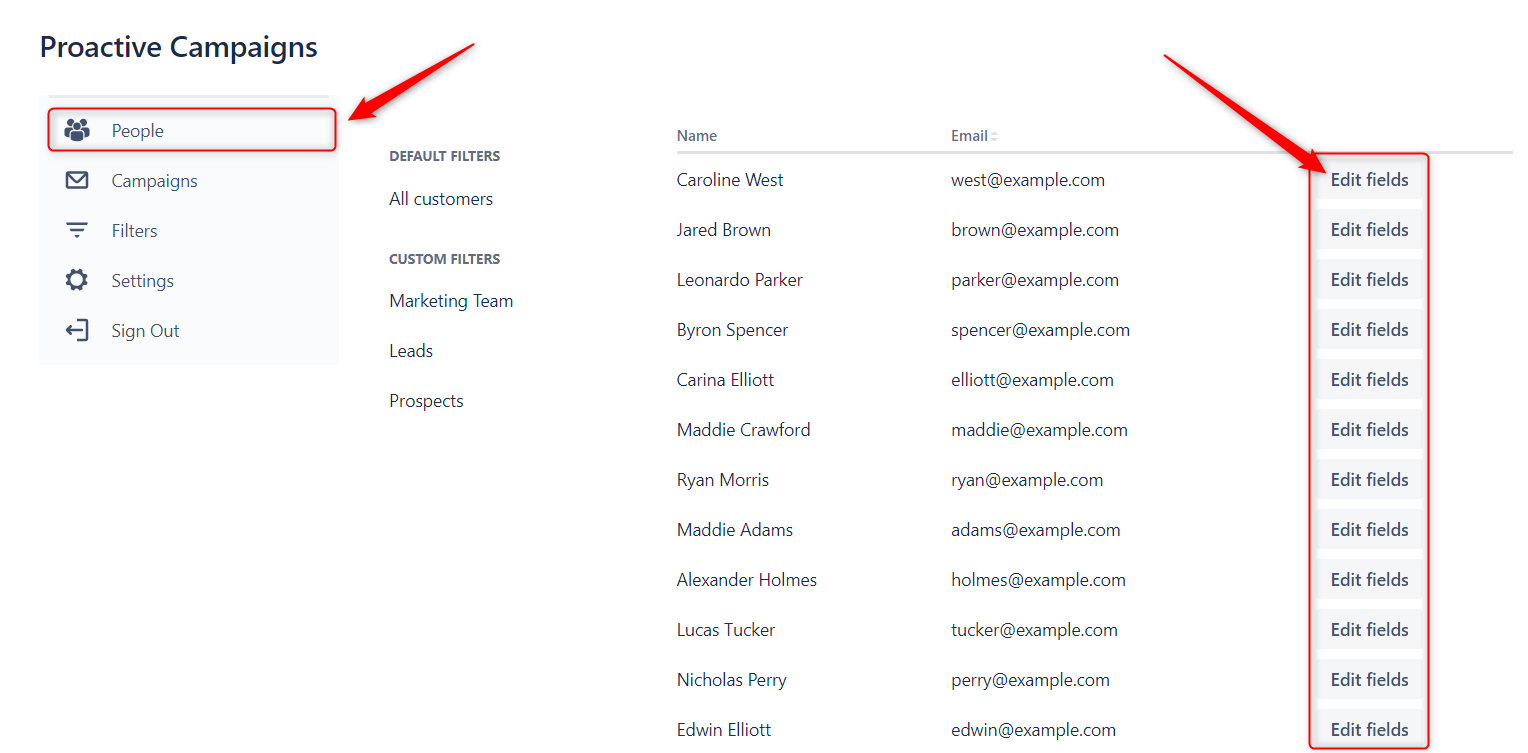
So, in this case, we selected a 'Normal' priority from a drop-down list.
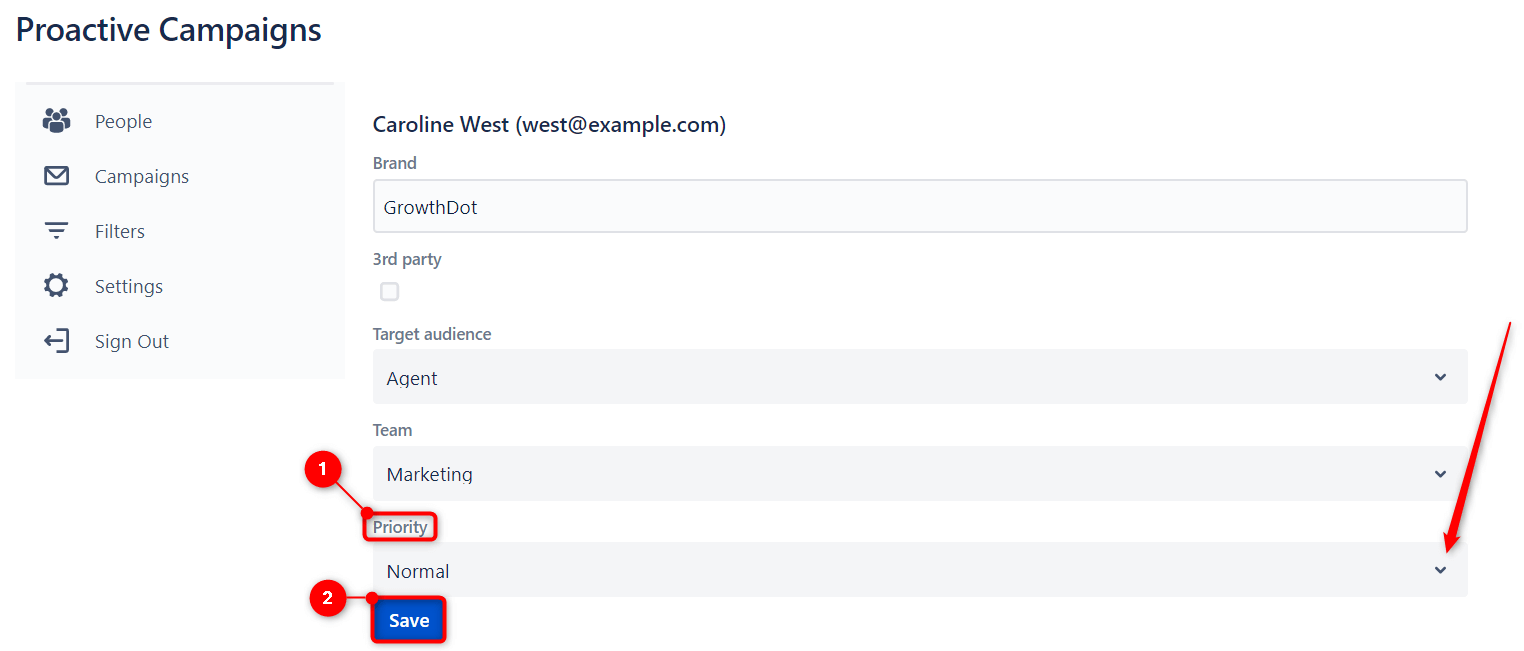
Now, we are ready to create a filter that will be based on values we have already assigned to users. For this, go to the Filters tab and click Create filter.
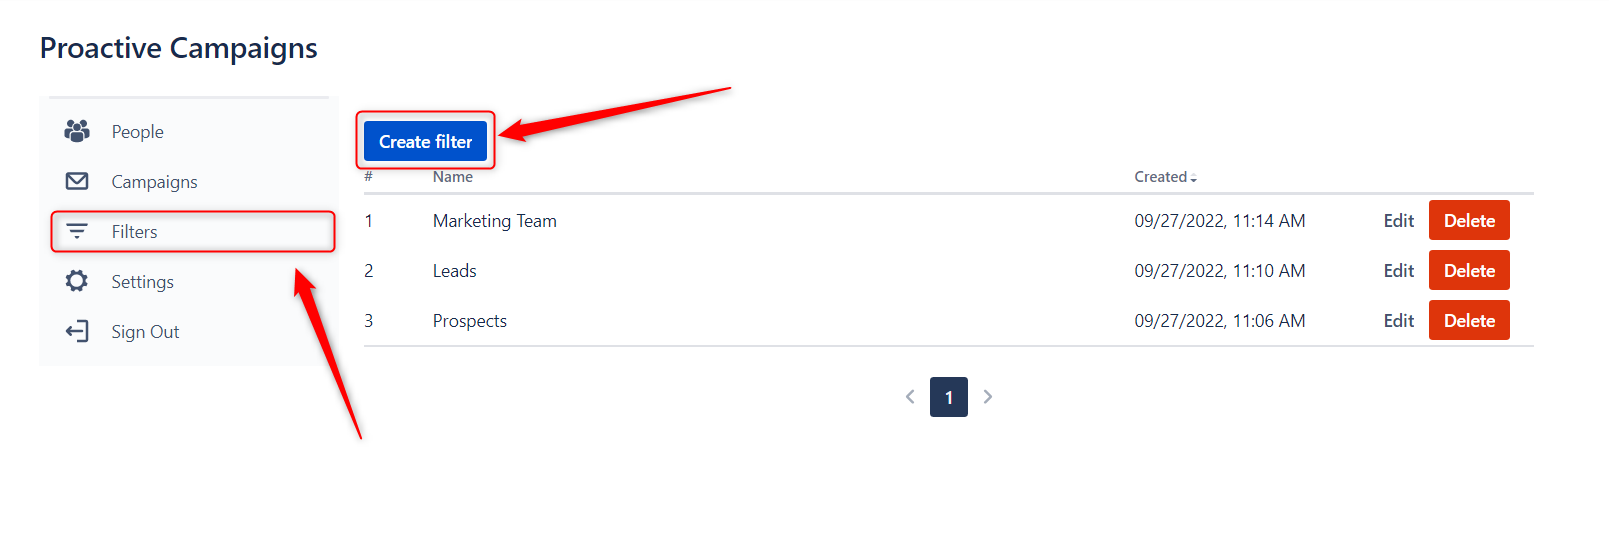
After, name the filter and choose the field with a necessary value. This filter will select contacts who have our new field with a 'Normal' value. If the contacts field doesn't have any value set or has another value (in our case, it could be 'Low,' 'High,' or 'Urgent'), these users won't be selected by this filter.
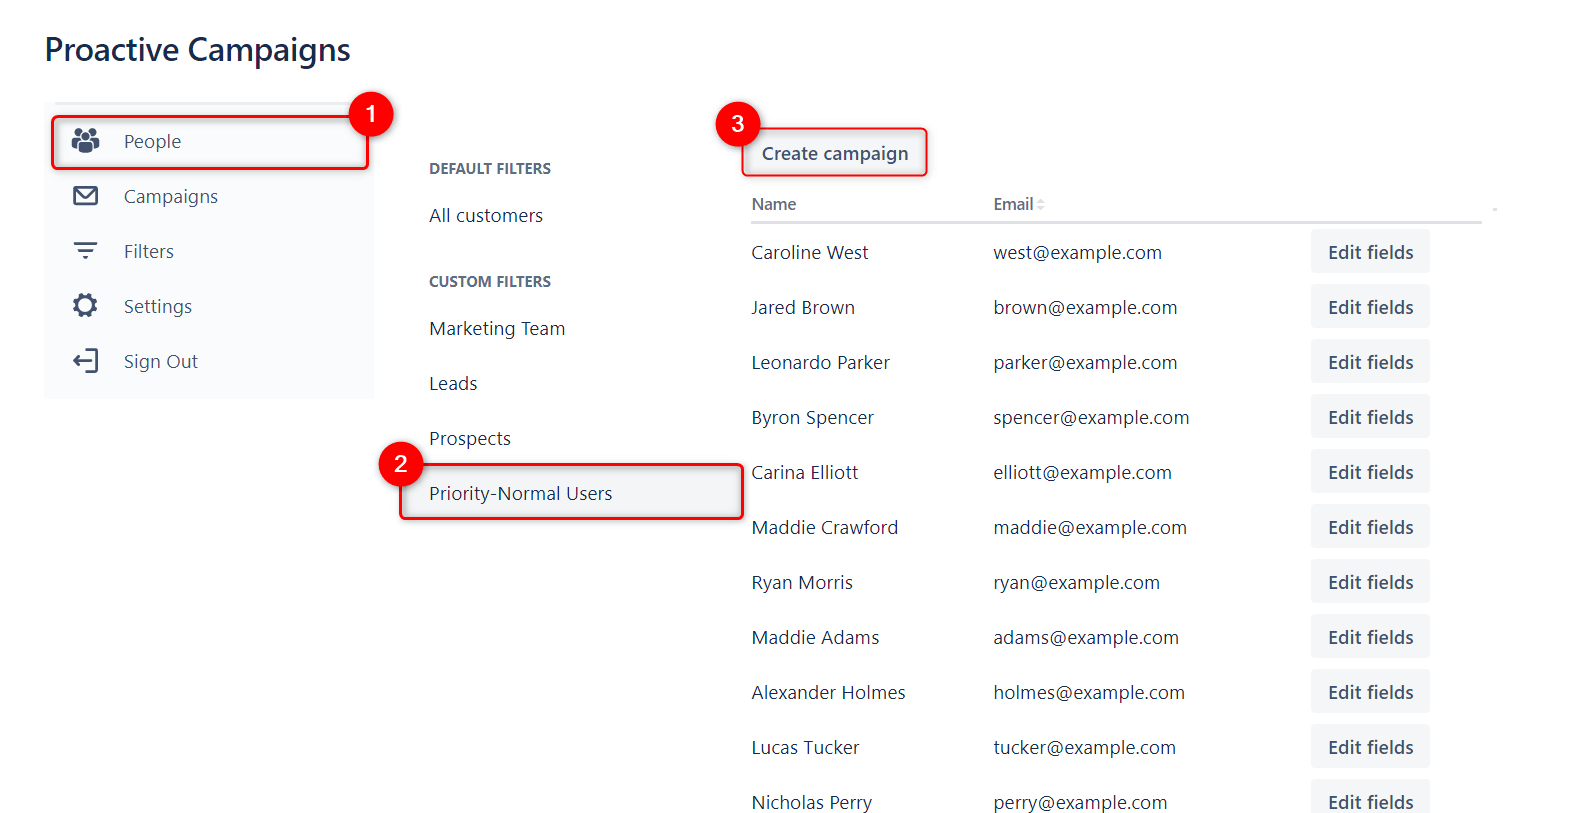
Then, create and run a mass email campaign in a few clicks. First, open the Campaigns tab and click the Create campaign button. Next, you see the modal window poped-up, where you need to select the prepared filter.

Another way to start creating a campaign is to go to People > select a necessary filter list from the CUSTOM FILTERS section > click the Create campaign button.
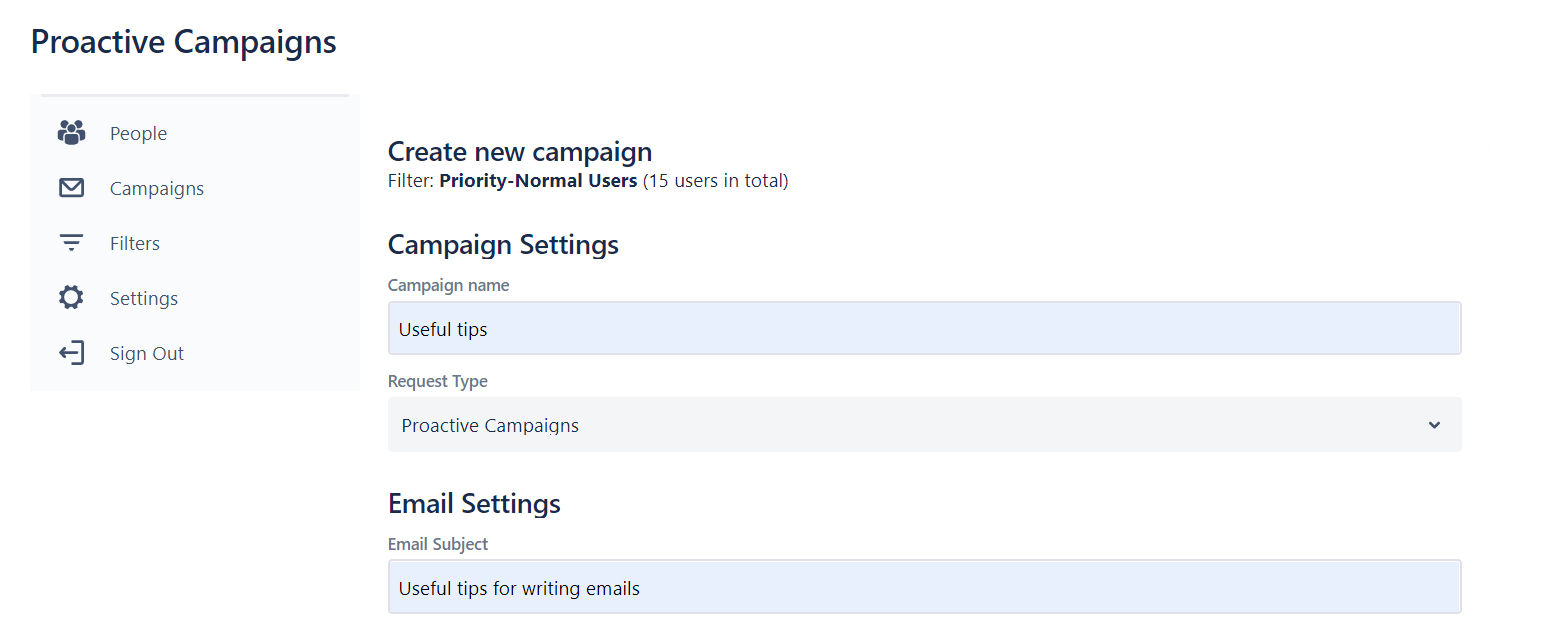
No matter what way you choose, in both cases, you will be taken to the Create new campaign page. There you can check out what filter you use and how many users are in this list. So next, fill in the Campaign name, Request Type, Email Subject, and Body.
By the way, text editing options are available in the email body (description) field. The edit panel offers the most in-use formatting features such as Bold, Italic, Underline, Strikethrough, Heading, Bulleted and Numbered lists, Text alignment, Font Size and Font Color, Code, Blockquote, apply Link functions, and Code Blocks. Besides, you also can insert images and pictures if needed into the email’s body.
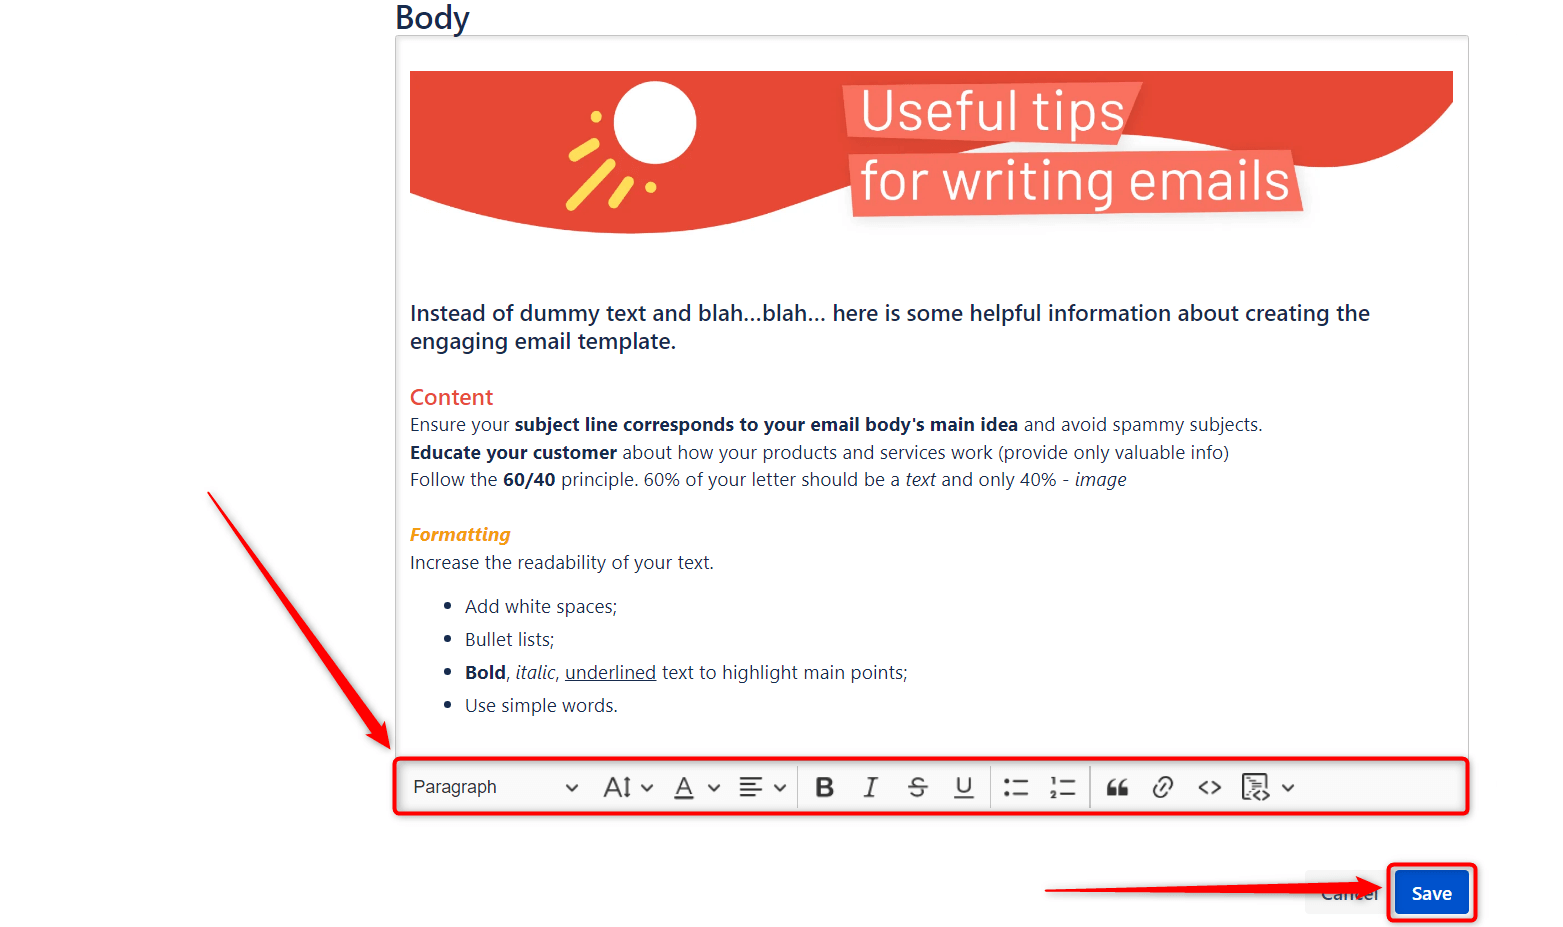
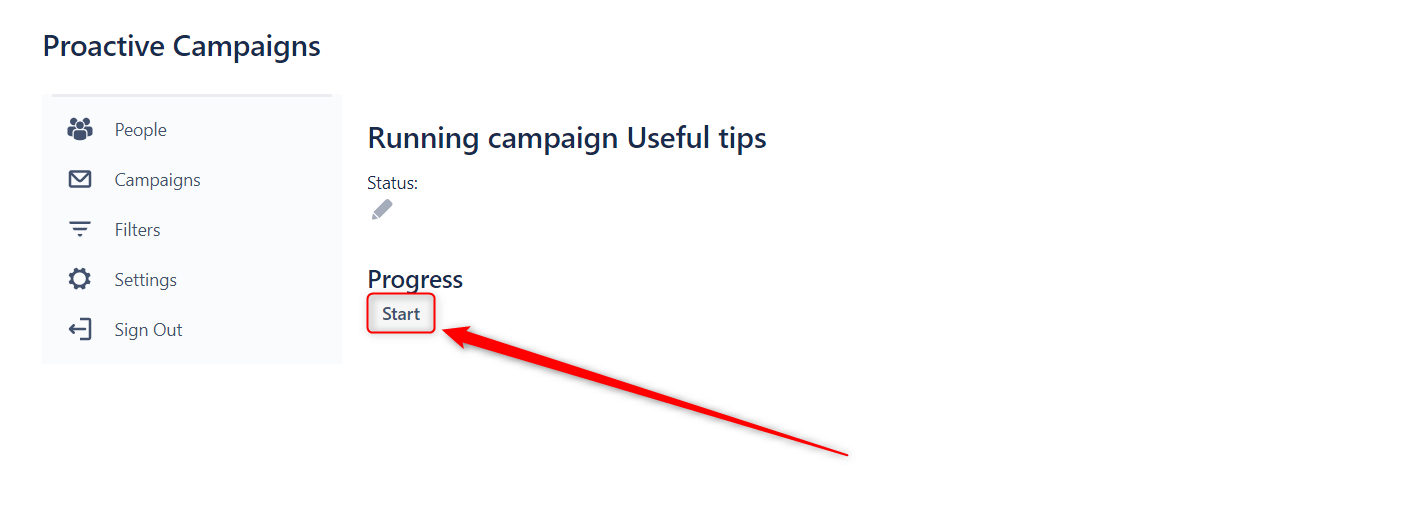
When an email is ready for sending, just Save it and then click the Start button to launch the process. Worth to notice that several campaigns can be run simultaneously and even in the backend. Thus, you don’t need to wait until the campaign processing is finished. Close the tab and continue working on other things.
Use Cases
You might be curious for what purposes the Proactive Campaigns app should be used. So, you can conduct some tasks withing using the app:
- Notice customers about expiring subscriptions, recent company updates, upcoming promotions, and events.
- Inform customers or your co-workers about technical issues, server outages, and so on.
- Educate customers on new products and services.
- Promote special offers, discount systems, and other loyalty programs.
- Send off mass follow-ups to increase customer activity.
The list is supposed to be extended with other cases that match your company’s aims.
Wrap Up
Here we go. Make your work easier with Proactive Campaigns for Jira!
Apropos, Jira also integrates with the extension Dark Mode, which turns the app’s display color into the dark. The app's main features are switching between Light and Dark regimes, applying the Night Shift to reduce the PC’s light intensity, and adjusting its Brightness and Contrast. So, don’t miss the chance to try it along with Proactive Campaigns and take the strain off your eyes. Thus, be productive and stay healthy!

