“Less is often more”. Seems to be a nice quote and many people usually agree with it. However, it doesn’t relate to our products and services. We think the more possibilities you have with our products, the more updates we need to produce for an ideal tool for you and to raise your efficiency. That’s why we are going to talk about the three new features in Email Tracking for Zenbrdesk which are:
- possibility to check the statistics by groups;
- ability to review the statistics by tags;
- option of giving the admin role to the agent.
Now, let us give you a short overview of recent benefits.
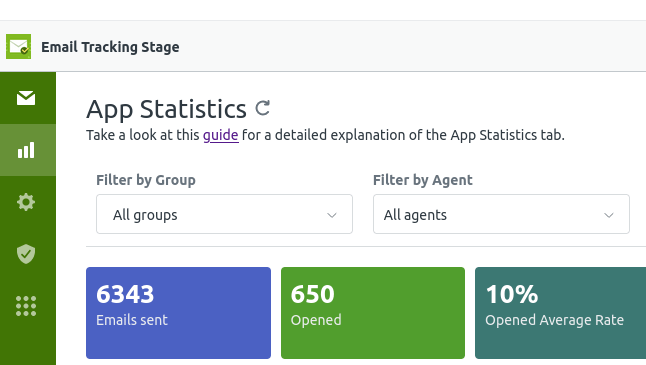
Possibility to check the statistics by groups in Email Tracking for Zendesk
Previously, you could have the statistics checked only by separate agents, but from now on you can choose a group of agents to show the statistics for. Select a particular group in the left upper dropdown “Filter by Group” or start typing the name in the same field and get ready to check!
![]()
Filter by group
Interesting tip! The next field “Filter by Agent”, shows the details of a chosen group such as agent names and their quantity. This means, you can chose the specific group or exclude some agents from the list and show statistics for agents from different groups simultaneously. Moreover, you can select agents from the whole amount if you didn't select any group.
![]()
Filter by agent
Ability to review the statistics by tags
If you use tags to mark your tickets, you may know that it is another useful tool to find the needed tickets, except the search bar or views tab. If you haven’t used them yet, try and include them in your statistics to create charts by marked emails, since we have added such an option. To do it, choose the tag from the dropdown from the upper right corner or start typing it as shown in the screenshot below.
![]()
Data for tags
Giving the admin role to the agent
As you know, the admin has much more possibilities than the agent in a Zendesk instance. Sometimes, the agent needs enhanced options to perform the actions available only for admins. In such a case, they can see the statistics for exact agents due to the new feature. Previously they couldn’t do it, however now it is real with the admin’s permission. If you are an admin, open the Settings tab in the Email Tracking tab and choose required agents in the “Select users” bar.
![]()
Settings page
This is the first and at the same time the last step in giving admin rights to the agent. After this action, they will be able to see the statistics filtered by a separate agent.

"Show data for" drop-down list
We know that these features will be useful for you and added them to make your statistics more precise.
Try upgraded Email Tracking for Zendesk!
It is worth becoming an Email Tracking user as it has various advantages. First, of all you can:
- track the delivery of the sent emails;
- see the exact time the emails were opened and get the notifications;
- send replies at the best times and add seen/unseen tags automatically.
Also, check the statistics and get exact filtered information by choosing the needed parameters in the dropdown. The new features in Email Tracking make your statistics work better.
Take all benefits from your Zendesk! Test our other custom apps, Zendesk theme customization, and Zendesk consulting services.


