How Not to Track Users or/and Organizations
-
Email Tracking
Because of some reason, you might need to apply a ‘do not track’ option to specific contact or organization. So, we will cover how to do this in this instruction.
Make the Trigger Copy
You need to disable triggers in the Email Tracking app to get started. When done, visit the Zendesk Admin Center and open Objects and rules > Business rules > Triggers. Then, on the Triggers page, find active triggers used in the app. Next, we need to select and clone them.
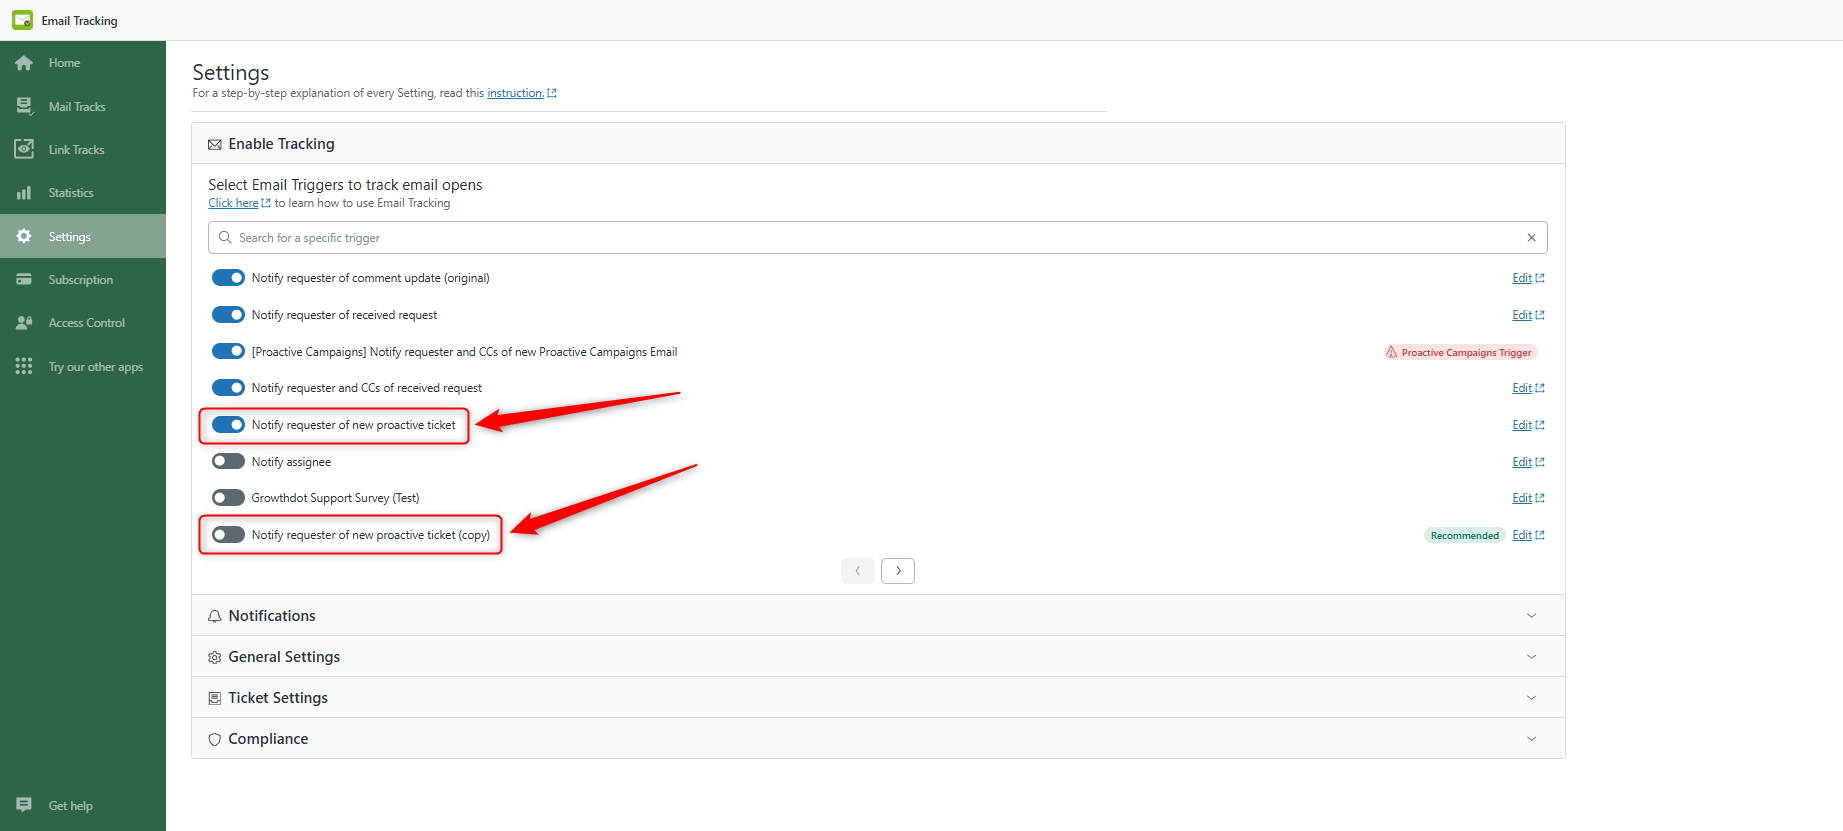
For example, we take the trigger ‘Notify requester of new proactive ticket.’ This trigger activates when you create a new ticket and send an email to a requester. Then, you will get an internal note if a recipient has opened an email.
We need to clone this trigger and add a specific condition to the original and its duplicate. This is a necessary step as we must make these triggers opposite each other. So, click the kebab menu (three vertical dots) next to the trigger and select Clone.

After, you will see the analogical trigger with predefined settings. We suggest you leave a remark ‘(copy)’ in the name of a copied trigger as it is and add a description to differentiate it later easily. Surely, you can change the Trigger name to your desire, but be careful not to lose it.

Add New Conditions
After you name a duplicate and type a description of it, it's time to create a new condition. Under the existing ones, click the Add condition button and set: ‘Tag’ ‘Contains at least one of the following’ ‘do_not_track.’ Then, click Create at the bottom of the page to save changes.

Besides, we also need to do the same actions with the original trigger (that we used to make a copy). However, instead of the ‘Contains at least one of the following’ condition, we will set ‘Contains none of the following.’ So, our condition is: ‘Tag’ ‘Contains none of the following’ ‘do_not_track.’

Turn on the Original Trigger
This step is tiny but essential, as you should make a check-up of triggers. The point is that the original trigger must be turned on. So, open Zendesk Support and go to the Settings tab of the Email Tracking app. Then, ensure that the original trigger is enabled and the copied one is not. For instance, we have our 'Notify requester of new proactive ticket' checked while the 'Notify requester of new proactive ticket (copy)' trigger is disabled.
Be extremely careful about this, and do not mix up.
Add tags to a Customer/Organization profile
Finally, we need to add the 'do_not_track' tag to those we do not want to track. Just go to the Organizations or Customers page in Zendesk Support and select a necessary item.

When you see the profile opened, add the 'do_not_track' tag to a system field. Therefore, if the customer or organization has the 'do_not_track' tag, they won’t be tracked. On the contrary, if there is no 'do_not_track' tag, the app will track users and organizations as usual.

If you have no Tag field in the profile, go to the Admin Center > People > Configuration > End users. Then, scroll down and enable Tags on users and organizations and click Save tab.

We are happy to talk with you if you have any questions or suggestions. So, click here to contact our support team.


