Theme settings
Adjusting the theme to meet your Branding
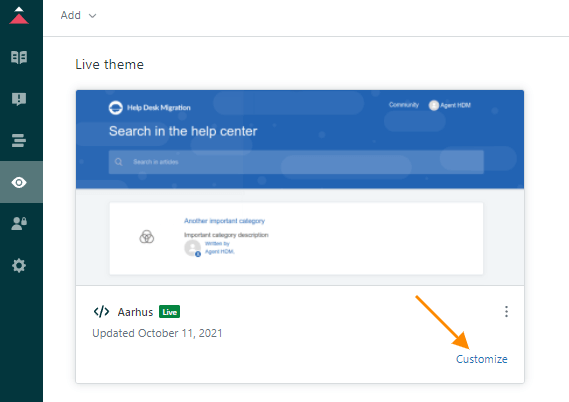
If there's something to be changed in the theme to meet your brand requirements, go to Guide admin > Customize design. Select the theme you want to customize and click Customize. You will then be taken to the editing section.
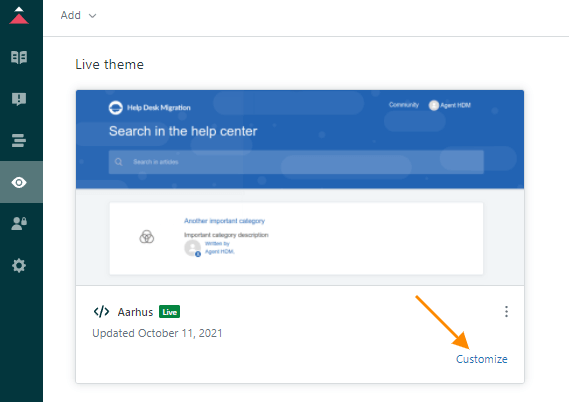
How to change theme colors
To adjust the color scheme expand the Colors section and change the colors according to your needs.
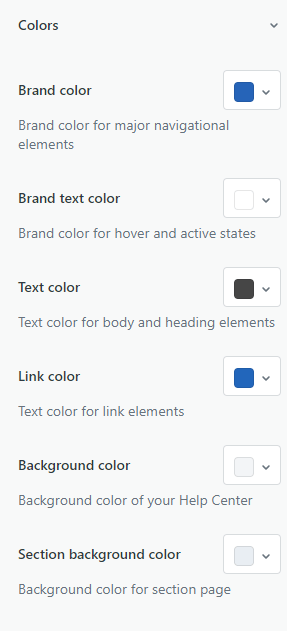
How to upload the Logo and Favicon image files
Expand the Brand section and click Replace and upload your logo/favicon.
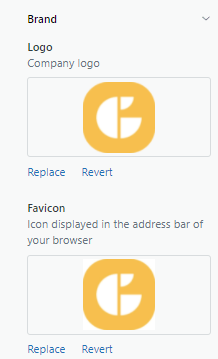
Allowed file formats: gif, png, jpg, svg.
If anything, you can hit Revert to cancel the changes.
How to change Images in the theme
To change images, click on Replace below each image, in the Images section.
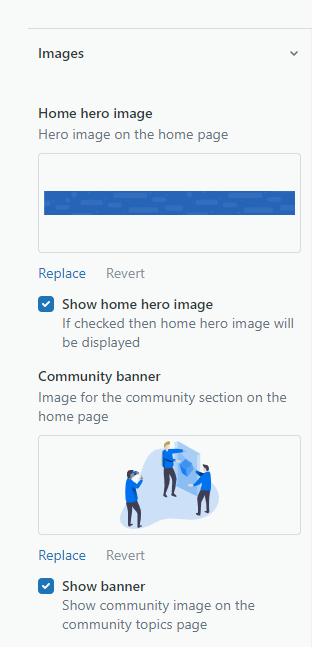
If anything, you can always hit Revert to cancel the changes.
You can also choose to show or hide images. Check or uncheck the Show ... option under each necessary element. Note that if you choose to not show the home hero image the space will be filled with the set header background color.
Allowed file formats: gif, png, jpg, svg.
How to change the text font
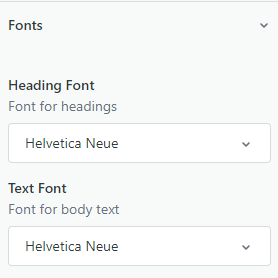
To change the heading and text fonts, select the desired font from the drop-down in the Fonts tab.
Configuring the default category icon
The icon below is the default icon used for categories. However, you can change it just like other images. Just click on Replace and upload the icon in the .svg format of your preference.
![]()
You can also choose to show or hide the icon. Check or uncheck the Show category icon option.
And if anything, you can always hit Revert to cancel the changes.
How to set individual icons for categories
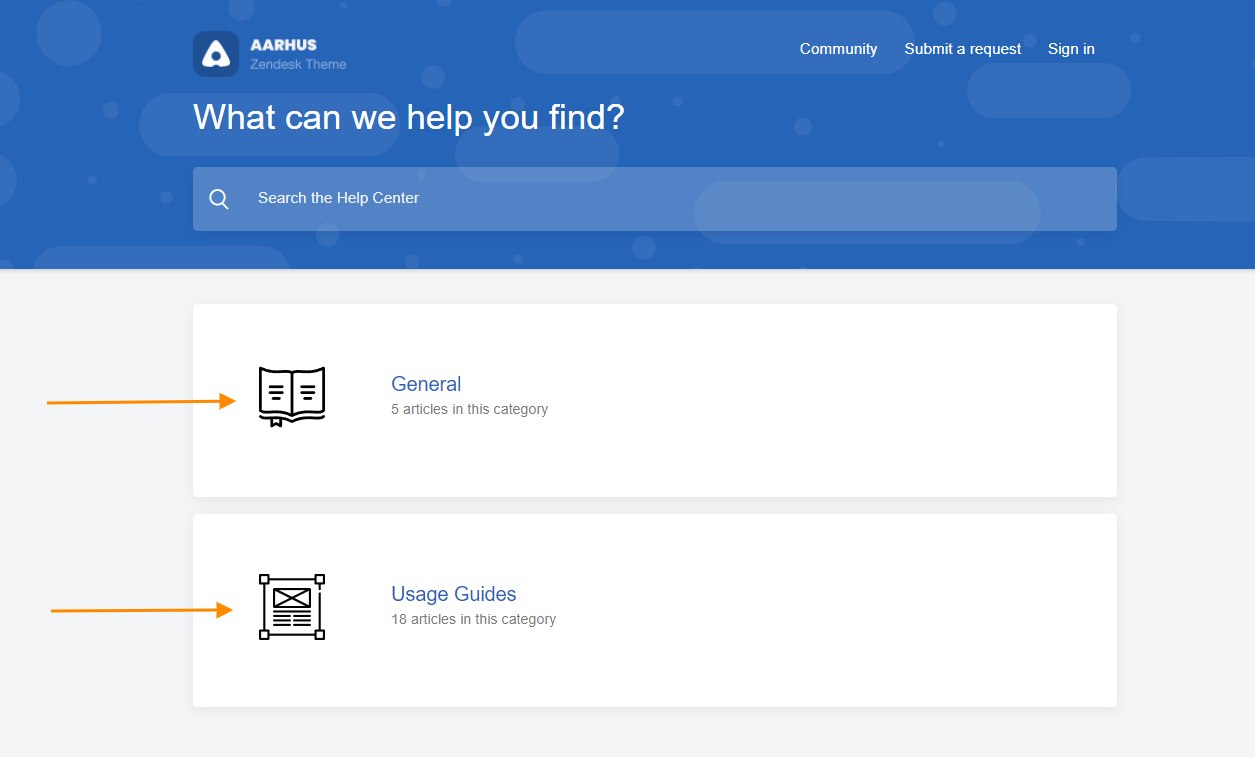
If you would like to set a custom icon for each category, you need to:
1. Find the ID of the category. The simplest way to do this is to go to each category and find its ID in your address bar:
![]()
2. Prepare the icons in .svg format. Name each file according to the ID of the category.
![]()
3. Go to Guide admin>Customize design. Then select the theme.
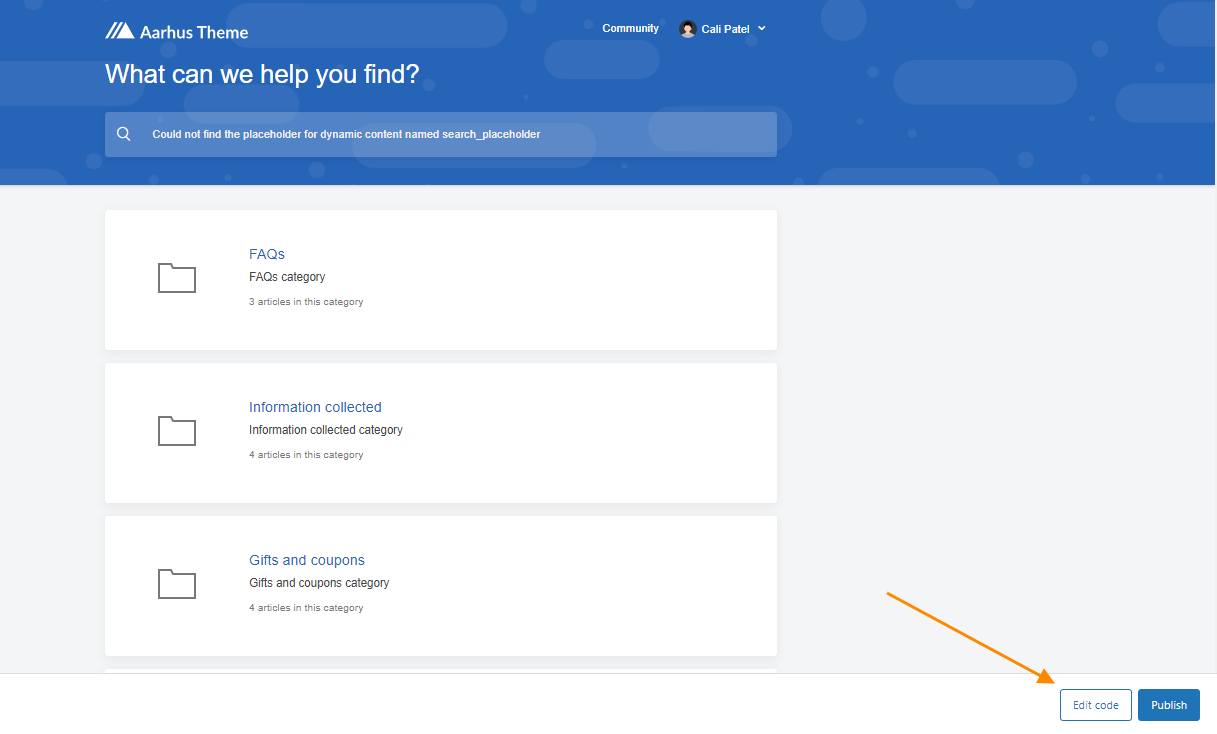
4. Click on "Edit code".
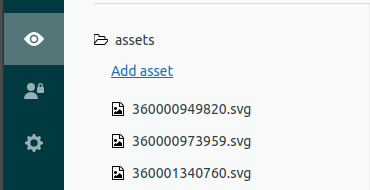
5. Click on the assets menu option and then Add asset.
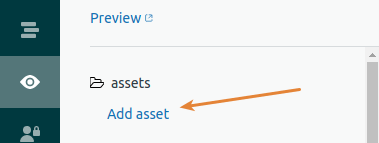
6. Upload the icons.
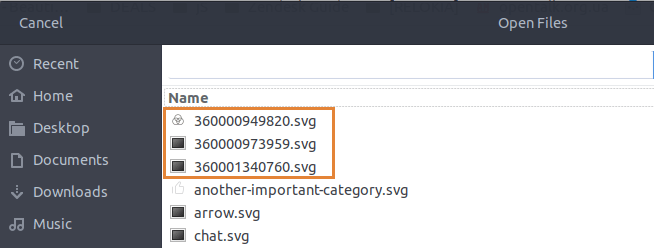
7. If successful, icons will appear in the assets folder.
8. To view the result, go to the Home page of the help center.
 Search Settings
Configuring Search Placeholder settings
To update search options for your theme:
1. Click Search Settings.
2. Input the title of the placeholder in the Search placeholder field. This is the text users will see in the search bar.
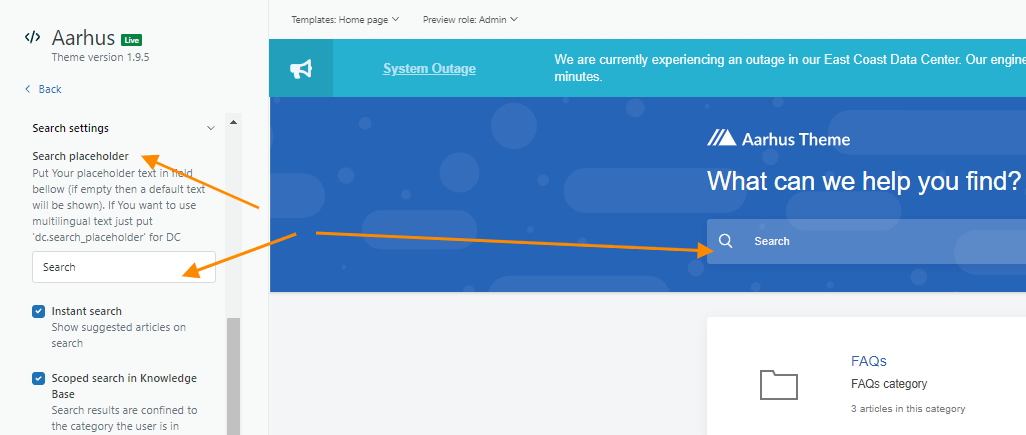
If you run a multilingual help center, you will need to localize the content.
Configuring Search settings
You can manage how users search the content in the Knowledge base and Community. To do so, check or uncheck any of the following options:
- Instant search allows suggesting articles as users enter their search request; select relevant articles without visiting the search results page first. Instant search scans the article titles only as well as uses partial word search.
- Scoped search in Knowledge base enables users to search only the articles in the current category and through the whole Community.
- Scoped search in Community enables users to search only the posts in the current topic and through the whole Knowledge base.
Configuring Footer Custom links
The theme allows adding up to 4 hyperlinks in the page footer. To add one you should:
1. Go to Footer links section.
2. In the “Custom link #1 text” field specify the hyperlink text. The hyperlink text is possible to add in multiple languages.
3. In the “Custom link #1 URL” field replace the # with the necessary link.
4. Check or uncheck the Open in new tab box. If checked, the link will be opened in new tab.
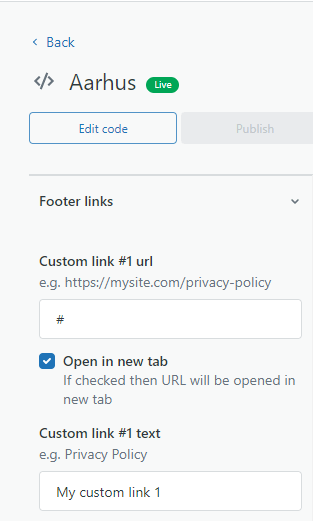
Leave the fields empty if you don't want to add any links.
Configuring Social links in the Footer
You can add the links to your social profiles in:
- Facebook;
- Twitter;
- LinkedIn;
- Instagram;
- YouTube.
To do this you should:
1. Click on Social pages URL’s to expand social icons settings.
2. Paste the social links into corresponding fields.
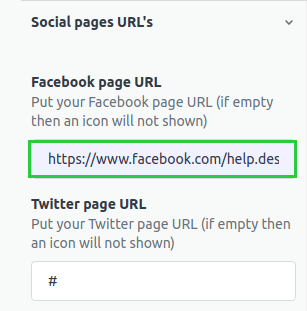
Leave the field empty if you don't want to add a link.
Configuring home page and knowledge base elements
Headline
To update search options for your theme:
1. In theme settings click Home page elements.
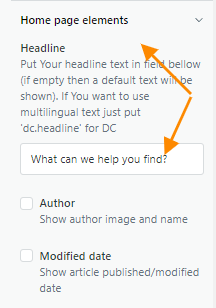
2. Input the text of the help center headline in the corresponding field. This is the text that users will see in the header.

If you run a multilingual help center, you will need to localize the content.
Recent activity shows a list of the five most recent articles, article comments, new community posts, and community comments on your Help Center home page.
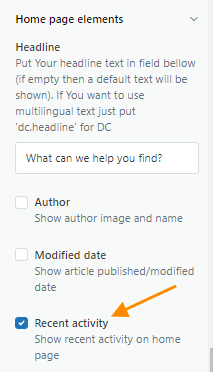
To show or hide the recent activity element, go to Home page elements, then check or uncheck Recent activity box.
Article page elements
You can select or deselect any of the following options:
- Articles in section display a list of all articles in the current section at the bottom of the article.
- Author displays the avatar and name of the author on each article.
- Modified date shows the date when the article was published/modified.
- Comments show all comments at the bottom of the article from the oldest to newest.
- Follow displays a button on the article so that users can subscribe to receive notifications when new comments are added to the article. Followers don't receive notifications when article content is updated.
- Recently viewed displays a list of articles recently viewed by the user at the bottom of the article.
- Related articles display a list of related articles, on a relevancy score, at the bottom of the article.
- Social sharing adds elements for sharing content on social media to the article.
Section page elements
Click Section page elements, then select or deselect Follow, if you want to enable users to follow sections.
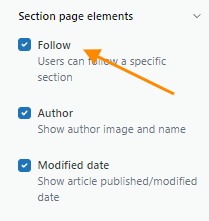
Follow displays a button on the section so that users can subscribe to receive notifications when new articles are added to the section and when new comments are added to articles in the section.
Configuring community elements
Community post elements
In the Settings panel, click Community post elements, then check or uncheck any of the following options:
- Follow displays a button on the community post so that users can subscribe to receive notifications when new comments are added to the post.
- Social sharing adds elements for sharing content on social media to the post.
Community topic elements
Click Community topic elements, then check or uncheck Follow, if you want to enable users to follow community topics.
Follow displays a button on the community topic so that users can subscribe to receive notifications when new posts are added to the topic and when new comments are added to posts in the topic.
